Introduction
Moves List
Special Moves
Setsuna raises his sword and makes a forward strike down.
Setsuna's uppercut.
Setsuna reaches for airborne opponent. Will slam opponent into ground if it connects. Setsuna's opponent must be airborne to perform.
Setsuna charges himself with electricity, giving him a temporary armor.
Desperation Moves
Setsuna performs an Anonymity - One that deals more damage and has more range.
Super Desperation Moves
Setsuna calls down lighting to empower him with an Anonymity - Five that lasts 10 seconds.
Speed Combo Special
- d d + A/B (overhead/low) >
- A > B > C >
- A > B > C >
- A > B > qcf + C
- C > qcf + B (unblockable)
- d + C (low) >
- BC (overhead) > qcf + B
- d + C (low) > f + BC (unblockable + jungle + cancelable)
- A > B > C >
- A > B > C >
The Basics
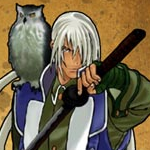
Setsuna is a tall character focused in orthodox rush and grappling tactics, he had a lot of good long pokes but with bad recovery in specials
Your main meta will be to charge an Anonimity Power Up after a knock down and then grab him
Combos
Any Mode
Power
Speed
EX
Advanced Strategy
Gameplay
He's best in Power, but he's also surprisingly good in EX.
First off, never ever use his ![]()
![]() on a downed opponent no matter how far away you are. It gives your opponent frame advantage. Hell, the recovery on it is so bad that they can actually
on a downed opponent no matter how far away you are. It gives your opponent frame advantage. Hell, the recovery on it is so bad that they can actually ![]() you when they get up.
you when they get up.
Because he's pretty basic combo-wise on power (most of the corner stuff is just for show), you're basically relying on damage. His ![]()
![]() is very very quick and long range however, so it's great for throw mix-ups. Keep in mind that his jump
is very very quick and long range however, so it's great for throw mix-ups. Keep in mind that his jump ![]() can be red parried on the second hit, but it's hard, so unless you're being exceedingly predictable with it, you should be ok, and repeated low jump
can be red parried on the second hit, but it's hard, so unless you're being exceedingly predictable with it, you should be ok, and repeated low jump ![]() 's mixed with
's mixed with ![]()
![]() 's and throws can be great for pressuring an opponent.
's and throws can be great for pressuring an opponent.
Learn to gauge distance properly with him, if you start a combo from further back, combo off the first hit of his ![]()
![]() because the second will likely miss.
because the second will likely miss.
As far cancelling his ![]()
![]() , you want it to hit the full 2 times before you cancel. Too early or too late and it'll get blocked.
, you want it to hit the full 2 times before you cancel. Too early or too late and it'll get blocked.
Use short dash ![]() >
> ![]()
![]() and
and ![]() >
> ![]()
![]() >
> ![]()
![]()
![]()
![]() to punish ground recoveries after
to punish ground recoveries after ![]()
![]() combos or overhead launches.
combos or overhead launches.
![]()
![]() or
or ![]()
![]() to punish air recoveries.
Also, after any successful super hit, activate your armor/super armor (this is the only time it's safe to do this), or if they're almost dead, dash in and
to punish air recoveries.
Also, after any successful super hit, activate your armor/super armor (this is the only time it's safe to do this), or if they're almost dead, dash in and
![]() . The armor's good for one hit, and can be good for getting a throw or something in.
. The armor's good for one hit, and can be good for getting a throw or something in.
Jump ![]() is his best air to air, and jump
is his best air to air, and jump ![]() can be good for long distance poking or air to air from certain angles on occasion.
can be good for long distance poking or air to air from certain angles on occasion.
Setsuna's main problem on speed is that he has the worst goddamn overhead in the game next to Mukuro and Amano. It has a ton of range, but it's so goddamn slow and it has terrible recovery. You can't even get a reset off it to start his speed combo special in the corner.
However, because he gets to combo from ![]()
![]() /
/![]()
![]() in speed, and because it's got such great range, he's much more versatile in that mode, if a lot more strapped for damage.
This means that Setsuna is one of the few characters who actually benefits from using EX mode, since he can combo into his DM that way.
in speed, and because it's got such great range, he's much more versatile in that mode, if a lot more strapped for damage.
This means that Setsuna is one of the few characters who actually benefits from using EX mode, since he can combo into his DM that way.
The advantage with EX is that you'll have his super armor, plus his long range ![]()
![]() /
/![]()
![]() combos and throw mix-ups which puts the opponent in a nasty spot once your health gets low. Remember you take more damage in EX though, so use the armor to avoid resets rather than big damage. Plus,
combos and throw mix-ups which puts the opponent in a nasty spot once your health gets low. Remember you take more damage in EX though, so use the armor to avoid resets rather than big damage. Plus, ![]()
![]() comes out quick, and if someone sees it, their first instinct is to block low. If you cancel into
comes out quick, and if someone sees it, their first instinct is to block low. If you cancel into ![]()
![]() (which is an overhead), you can catch people offguard quite often.
(which is an overhead), you can catch people offguard quite often.
The downside is that you don't gain meter half as fast, so your damage potential still drops by quite a bit.

