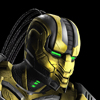
Mortal Kombat 9/Cyrax

From SuperCombo Wiki

MK9Logo.png

Cyrax

MK9-Cyrax Face.jpg

A skilled Motswana warrior, Cyrax relies on his natural fighting ability, his chi, to carry out Lin Kuei missions. He is proud to serve, but when the Grand Master initiates a program to convert the clan into cyborgs, Cyrax resists. He is reluctant to lose his humanity, which he believes is more effective than any mechanical augmentation. He has contemplated leaving the clan, fearing that it is no longer an organization of honorable assassins. Cyrax knows, however, that such a decision means death at the hands of his former comrades. No one leaves the Lin Kuei.


Moves

Basic Attacks

Name
Command
Damage
Notes
Front Punch
Fp.png
3%
High.png Bufferable.png
Back Punch
Bp.png
5%
High.png Bufferable.png
Front Kick
Fk.png
5%
High.png Bufferable.png
Back Kick
Bk.png
7%
High.png Bufferable.png
Crouching Front Punch
D.png + Fp.png
2%
High.png Bufferable.png
Crouching Back Punch
D.png + Bp.png
12%
High.png uprcut
Crouching Front Kick
D.png + Fk.png
1%
Low.png Bufferable.png
Crouching Back Kick
D.png + Bk.png
3%
Low.png Bufferable.png
Angled Jumping Punch
during angled jump, Fp.png or Bp.png
4%
Med.png
Angled Jumping Kick
during angled jump, Fk.png or Bk.png
7%
High.png Knockdown.png
Straight Up Jumping Punch
during straight up jump, Fp.png or Bp.png
5%
Med.png Groundbounce.png
Straight Up Jumping Kick
during straight up jump, Fk.png or Bk.png
5%
Med.png Knockdown.png

Command Normals

Name
Command
Damage
Notes
Yank
B.png + Fp.png
0%
Throw.png
Blast Overhead
B.png + Bp.png
2% + 9%
Med.png + High.png ; 2nd hit: Groundbounce.png
Tooth And Nail
F.png + Bp.png
5% + 7%
High.png + High.png ; 1st hit: Bufferable.png ; 2nd hit: Knockdown.png
Side Kick
B.png + Fk.png
11%
High.png Knockdown.png
Hop Kick
U.png + Bk.png
7%
Med.png Flatten.png
Sweep
B.png + Bk.png
7%
Low.png Sweep.png

Throws

Name
Command
Damage
Notes
Throw (Away)
B.png or N.png + Fp.png + Fk.png
1% + 3% + 4% + 4%
Throw.png
Throw (Towards)
F.png + Fp.png + Fk.png
1% + 3% + 4% + 4%
Throw.png

Kombo Attacks

Name
Command
Damage
Notes
See Saw
Fp.png ---.png Fp.png ---.png Fp.png
3% ---.png 3% ---.png 6%
High.png ---.png High.png ---.png Med.png ; 1st and 2nd hit: Bufferable.png ; 3rd hit: Knockdown.png
Steel Fists
Fp.png ---.png Bp.png ---.png Fp.png
3% ---.png 5% ---.png 8%
High.png ---.png High.png ---.png High.png ; 1st and 2nd and 3rd hit: Bufferable.png ; 3rd hit: Knockdown.png
Power Plant
Fp.png ---.png Bp.png ---.png Fk.png
3% ---.png 5% ---.png 6%
High.png ---.png High.png ---.png High.png ; 1st and 2nd and 3rd hit: Bufferable.png ; 3rd hit: Knockdown.png
Mustard
Bp.png ---.png Fp.png ---.png Bp.png
5% ---.png 3% ---.png 10%
High.png ---.png High.png ---.png Med.png ; 1st & 2nd hit: Bufferable.png ; 3rd hit: Flatten.png
Saw Enough
Bp.png ---.png Bp.png ---.png F.png + Fp.png
5% ---.png 5% ---.png 6%
High.png ---.png High.png ---.png High.png ; 1st hit: Bufferable.png ; 3rd hit: Knockdown.png
Kombat Boots
Fk.png ---.png Fk.png ---.png Bk.png
5% ---.png 3% ---.png 6%
all hits: High.png , 1st and 2nd hit: Bufferable.png ; 3rd hit: Knockdown.png
Cyber Beatdown
B.png + Fp.png ---.png Bp.png ---.png Fp.png ---.png Bp.png
0% ---.png 3% + 3% + 7%
Throw.png ---.png Throw.png + Throw.png + Throw.png ; Must input 2nd through 4th input before Cyrax lets go from initial Throw.png for hits 2 through 4

Fast Tags

Name
Command
Damage
Notes
Automation
Blast Overhead ---.png Tg.png
N/A
Sets up combo for partner

Tag Kombos

Name
Command
Damage
Notes
Number Cruncher
B.png + Fp.png ---.png Tg.png
Based on Teammate
High Tech
Fp.png ---.png Bp.png ---.png Tg.png
Based on Teammate
Short Circuit
Bp.png ---.png Fp.png ---.png Tg.png
Based on Teammate
Tag Kombo Attack
Attack from Teammate's Tag Kombo
10%
Med.png Flatten.png

Tag Specials

Name
Command
Damage
Notes
Tag Assist
D.png , B.png + Tg.png
8%
Performs Sitcky Bomb ; High.png Launch.png
Tag Attack
D.png , F.png + Tg.png
4% + 8%
Performs Donkey Kick ; Low.png + High.png ; 2nd hit: Knockdown.png ; Can be followed up by Ragdoll or Ragdolls

Special Attacks

Name
Command
Damage
Notes
Bomb (Close)
B.png , B.png + Bk.png
8%
Unblockable.png Launch.png
Bomb (Medium)
F.png , F.png + Bk.png
8%
Unblockable.png Launch.png
Bomb (Far)
B.png , B.png , F.png + Bk.png
8%
Unblockable.png Launch.png
Net
B.png , B.png + Fk.png
0%
High.png captr ; 2nd time used in combo, net will not hold
Teleport
D.png , B.png + Fp.png
N/A
Airok.png wkup
Buzzsaw
B.png , F.png + Bp.png
8%
Med.png *Patch* , Flatten.png wkup
Reverse Kick
D.png , F.png + Fk.png
7%
High.png Knockdown.png wkup
Ragdoll
Reverse Kick ---.png Fp.png + Fk.png
4%
High.png ; Can only be performed if Reverse Kick hits
Anti-air
D.png , F.png + Fp.png
0% + 8%
Airthrow.png + Unblockable.png ; wkup

Enhanced Special Attacks

Name
Command
Damage
Notes
Sticky Bomb
B.png , B.png + Bk.png + Bl.png /
F.png , F.png + Bk.png + Bl.png /
B.png , B.png , F.png + Bk.png + Bl.png
8%
High.png Launch.png ; cannot be crouched
Electro Net
B.png , B.png + Fk.png + Bl.png
1% + 1%
High.png + Unblockable.png ; captr ; 2nd hit only occurs when enemy breaks out of net ; Opponent loses X-Ray Meter gradually while in net
Bangport
D.png , B.png + Fp.png + Bl.png
8%
High.png Knockdown.png wkup
Saw Blade
B.png , F.png + Bp.png + Bl.png
8%
High.png wkup ; becomes Projectile
Donkey Kick
D.png , F.png + Fk.png + Bl.png
4% + 8%
Low.png + High.png ; 2nd hit: Knockdown.png ; wkup
Ragdolls
Donkey Kick ---.png Fp.png + Fk.png
4%
High.png ; Can only be performed if Donkey Kick hits ; Costs no meter and has no functional or damage differences than Ragdoll
Power Anti-Air
D.png , F.png + Fp.png + Bl.png
2% + 8%
Airthrow.png + Unblockable.png ; wkup

X-Ray Attack

Name
Command
Damage
Notes
Cyberdriver
Fk.png + Bk.png + Bl.png
10% + 10% + 11%
1st hit: High.png ; Knockdown.png

Finishing Moves

Fatality
Kode
Distance From Opponent
Fatality 1
F.png D.png F.png B.png + Bp.png
Close
Fatality 2
B.png D.png B.png F.png + Fp.png
Jump
Stage Fatality
D.png U.png + Bl.png
Varies
Babality
D.png F.png B.png + Bp.png
Jump


Costume Gameplay Changes

While Human and Robot Cyrax are simply a costume change, they have different properties.

1. Human Cyrax has a safe teleport, Robot Cyrax does not.

2. Human Cryax has slower bombs and a slower net throw.

3. Human Cyrax cannot do the guaranteed bomb trap after his command throw, Robot Cyrax can.


Move Analysis

Bread and Butters

  • N/A

Command Normals

Tooth + Nail Reset

(not sure if this was fixed after patch)

from forums:

Cyrax's F + bp, like his command grab, causes a long stagger on hit. Cancel F + bp into Short Bomb on hit, then follow up with (dash, bp, fp ~ Net). The timing is fairly strict. Hitting with the tip of F + bp makes it easier to follow up. If the opponent stops blocking at any point, the net pushes them away from the bomb and resets the situation. When the finally decide to block the net, it doesn't push them back so the bomb gets them instead. This does less damage than the command grab set-up if they block it the first time, so use it only against people who like to press buttons.


Kombo Attacks

Fp.png , Fp.png , Fp.png

Safe on block string. Last hit overheads and knocks down. Use for mixup setups.


B.png + Bp.png

Overhead launcher. Safe on block.


Fk.png , Fk.png

Safe on block, bufferable string into net. This string gives a safe jump on hit if you're going for mixups.


Cyber Beatdown:

After patch you can no longer do the bomb trap. Now when you land the command grab the opponent recovers much faster. You still can jump in after a grab and do a mixup. Sadly the time to break the command grab is also increased, making it easier to break. Break it with FP like before.


Special Attacks

Net

The net damage scaling reset is also patched. Teleporting after the net will not affect damage. Use nets to zone, anti air or to catch them jumping over bomb setups. Not safe up close.


Bombs

Use bombs for setups and mind games. You have to read the opponent and see how they react to situations. Use nets to catch them jumping over bombs. Learning bomb distances is also crucial. Bombs are used best when you have them near the corner, it limits their options.


Buzzsaw

After patch it is now a overhead.


Enhanced Special Attacks

Bangport

Completely safe teleport. If they are near you can even get a hit in during the juggle.


Donkey Kick + Ragdoll

Cyrax's only low move besides sweeps and crouching punches and kicks. Comes out very fast. Use it during high-low mixups.


X-Ray Attack

VERY good anti-air.


Basic Strategy

N/A


Advanced Strategy

N/A


Combos

Bread and Butters

4-Hits: Fk.png Fk.png ---.png Net ---.png Uppercut

5-Hits: B.png + Bp.png ---.png Dash ---.png Fp.png Bp.png ---.png Anti-air

9-Hits: Fk.png Fk.png ---.png Net ---.png Dash ---.png B.png + Bp.png ---.png Dash ---.png Fp.png Bp.png ---.png Ragdoll

Jump-in Combos

9-Hits: Jump in punch ---.png Bp.png ---.png Net ---.pngDash ---.png Cyber Beatdown

Combos With Enhanced Specials

Unbreakable: Net , Sticky Bomb , Anti-Air (you can use more then 1 sticky bomb)

13-Hits: Jump in punch ---.png Bp.png Fp.png ---.png Sticky Bomb ---.png Dash ---.png Fk.png Fk.png ---.png Net ---.png Jump in punch ---.png Dash ---.png Fp.png Bp.png ---.png Anti-air

13-Hits: Jump in punch ---.png Fk.png Fk.png ---.png Net ---.png Jump in Punch ---.png Fp.png Bp.png Fp.png ---.png Reverse Kick ---.png crouching Fk.png ---.png Donkey Kick + Ragdolls


56%: Jump in punch ---.png Fp.png , Bp.png into Net ---.png Dash back, Jump in punch ---.png Fp.png , Bp.png into Sticky Bomb ---.png Medium Bomb (1) ---.png Uppercut ---.png Dash Back, B.png + Bp.png (2) ---.png Dash ---.png Fp.png , Bp.png , Fp.png into Anti-Air

1. Hold block so you won't dash, otherwise the bomb timing will miss. Release block right before you input the key so you won't get the ex version.

2. This is the tricky part, as you only need to connect the second hit. If you don't it won't bounce him high enough to do the full end combo.


Combos With X-Ray Attacks

  • N/A

Corner-Only Combos

  • N/A


Style

Bomb trapper, command grabber. That rhymes!

Matchups

N/A