Introduction
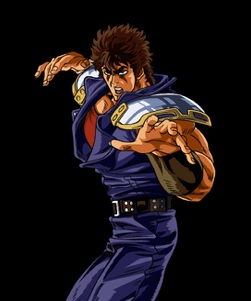
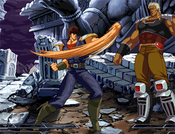
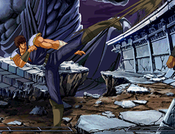
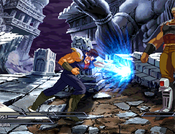
Kenshiro's play-style is quite standard, as one might expect from the main character of a fighting game. He has good normals, well-balanced specials, and his bread and butter combos are very easy to master. His mixup abilities are very good as well thanks to his extremely fast instant air dash B, and he is capable of applying a lot of pressure in the corner. On the defense he is not lacking either, having both an invincible uppercut and Musou Tensei that he can use to get out of bad spots. Overall Kenshiro is a very solid character, and great choice for players of any level.
| Pros | Cons |
|
|
Before diving right into the combos be sure to familiarize yourself with Kenshiro's special/super moves and important normals.
Normal Moves
Close
cl.A
| Damage | Guard | Startup | Active | Recovery | Hit Adv | Block Adv | |||||
|---|---|---|---|---|---|---|---|---|---|---|---|
| - | Mid | 5 | 4 | - | - | -4 | |||||
|
A quick jab. Not very useful for pressure or zoning, but used in some combos. | |||||||||||
cl.B
| Damage | Guard | Startup | Active | Recovery | Hit Adv | Block Adv | |||||
|---|---|---|---|---|---|---|---|---|---|---|---|
| - | Mid | 8 | 4 | - | - | +2 | |||||
|
A low kick. Decent but lacking in comparison to 2B. | |||||||||||
cl.C
| Damage | Guard | Startup | Active | Recovery | Hit Adv | Block Adv | |||||
|---|---|---|---|---|---|---|---|---|---|---|---|
| - | Mid | 9 | 4 | - | - | -1 | |||||
|
Two quick punches. No real use, seen mostly when missing a throw attempt. | |||||||||||
cl.D
| Damage | Guard | Startup | Active | Recovery | Hit Adv | Block Adv | |||||
|---|---|---|---|---|---|---|---|---|---|---|---|
| - | Mid | 7 | 4 | - | - | -17 | |||||
|
An upward kick. Its quick startup and big hitbox make it a very good anti-air. Also useful in combos. | |||||||||||
Far
f.A
| Damage | Guard | Startup | Active | Recovery | Hit Adv | Block Adv | |||||
|---|---|---|---|---|---|---|---|---|---|---|---|
| - | Mid | 5 | 4 | - | - | -4 | |||||
|
A straight punch. Mostly the same as close A but perhaps slightly more useful as an anti-air. | |||||||||||
f.B
| Damage | Guard | Startup | Active | Recovery | Hit Adv | Block Adv | |||||
|---|---|---|---|---|---|---|---|---|---|---|---|
| - | Mid | 7 | 4 | - | - | +2 | |||||
|
A straight kick. Gives advantage on guard and cancelable into itself. Very useful for mid-range zoning. | |||||||||||
f.C
| Damage | Guard | Startup | Active | Recovery | Hit Adv | Block Adv | |||||
|---|---|---|---|---|---|---|---|---|---|---|---|
| - | Mid | 11 | 4 | - | - | -5 | |||||
|
A two-handed punch. Long active frames and good range. Very useful for zoning, can hit confirm Boost into a combo. Against Rei only, far C combos into 236D when you hit him crouching - this is very useful as far D does not hit crouching opponents. | |||||||||||
f.D
| Damage | Guard | Startup | Active | Recovery | Hit Adv | Block Adv | |||||
|---|---|---|---|---|---|---|---|---|---|---|---|
| - | Mid | 7 | 4 | - | - | -14 | |||||
|
A strong kick. With 7 frame startup, great range, and good comboability, this is without a doubt one of Kenshiro's best normals. | |||||||||||
Crouching
2A
| Damage | Guard | Startup | Active | Recovery | Hit Adv | Block Adv | |||||
|---|---|---|---|---|---|---|---|---|---|---|---|
| - | Mid | 5 | 4 | - | - | -4 | |||||
|
A crouching jab. Fast startup, used at close range and in combos. | |||||||||||
2B
| Damage | Guard | Startup | Active | Recovery | Hit Adv | Block Adv | |||||
|---|---|---|---|---|---|---|---|---|---|---|---|
| - | Low | 7 | 2 | - | - | +6 | |||||
|
A low crouching kick. 6 frame advantage on block, allowing for mixup with another 2B or air dash B. Very useful. | |||||||||||
2C
| Damage | Guard | Startup | Active | Recovery | Hit Adv | Block Adv | |||||
|---|---|---|---|---|---|---|---|---|---|---|---|
| - | Mid | 11 | 4 | - | - | -5 | |||||
|
A crouching straight punch. Cancelable into itself, but it's slow startup and short range makes it not very useful. | |||||||||||
2D
| Damage | Guard | Startup | Active | Recovery | Hit Adv | Block Adv | |||||
|---|---|---|---|---|---|---|---|---|---|---|---|
| - | Low | 13 | 4 | - | Launch | -6 | |||||
|
A sweep kick. Fairly long range but slow startup. | |||||||||||
Air
j.A
| Damage | Guard | Startup | Active | Recovery | Hit Adv | Block Adv | |||||
|---|---|---|---|---|---|---|---|---|---|---|---|
| - | High | 3 | 6 | - | - | - | |||||
|
A quick air jab. Used mostly for getting out of pressure and as a mixup option after an air dash B. | |||||||||||
j.B
| Damage | Guard | Startup | Active | Recovery | Hit Adv | Block Adv | |||||
|---|---|---|---|---|---|---|---|---|---|---|---|
| - | High | 10 | 3 | - | - | - | |||||
|
An air kick. Its long range and quick execution make this move Kenshiro's main overhead. | |||||||||||
j.C
| Damage | Guard | Startup | Active | Recovery | Hit Adv | Block Adv | |||||
|---|---|---|---|---|---|---|---|---|---|---|---|
| - | High | 10 | 6 | - | - | - | |||||
|
A strong air punch. Fairly slow startup, works alright as an air-to-ground. Used mostly in combos. | |||||||||||
j.D
| Damage | Guard | Startup | Active | Recovery | Hit Adv | Block Adv | |||||
|---|---|---|---|---|---|---|---|---|---|---|---|
| - | High | 9 | 2 () 2 () 2 | - | - | - | |||||
|
A 3-hit air kick. Good range to the side but not very effective against opponents below you. Use mostly in combos or for long range zoning. | |||||||||||
Command Normals
6A
| Damage | Guard | Startup | Active | Recovery | Hit Adv | Block Adv | |||||
|---|---|---|---|---|---|---|---|---|---|---|---|
| - | High | 27 | 4 | - | - | -1 | |||||
|
An overhead chop. Aside from being quite slow with a 27 frame startup, Kenshiro screaming 'GANZANRYOUZANHA!' at the top of his lungs doesn't help make this move any less telegraphed either. Still, using Boost it is possible follow up with a combo on a successful hit or a quick low on guard, making this move worth using every once in a while. | |||||||||||
6B
| Damage | Guard | Startup | Active | Recovery | Hit Adv | Block Adv | |||||
|---|---|---|---|---|---|---|---|---|---|---|---|
| - | Mid | 23 | 4 | - | - | -1 | |||||
|
A backhand punch. Jump cancelable and possesses Super Armor. Knocks opponent into the air on normal hit and causes wall bounce on counter. Very useful for dealing with Guard Cancels. | |||||||||||
Universal Mechanics
Throw
| Damage | Guard | Startup | Active | Recovery | Hit Adv | Block Adv | |||||
|---|---|---|---|---|---|---|---|---|---|---|---|
| - | Throw | 4 | 4 | - | Launch | N/A | |||||
|
Kenshiro picks up his opponent, slaps them around a bit, then tosses them to the ground. Follow up possible in the corner. Can also follow up mid-screen with the use of Boost. Very useful and an important part of Kenshiro's mixup game. | |||||||||||
BD Throw
| Damage | Guard | Startup | Active | Recovery | Hit Adv | Block Adv | |||||
|---|---|---|---|---|---|---|---|---|---|---|---|
| - | Throw (whiffs vs. crouch) | 9 | 4 | - | Launch | N/A | |||||
|
Kenshiro throws his opponent into the air then hits them with his nunchaku. Follow up possible in the corner. Can also follow up mid-screen with the use of Boost. As it hits multiple times it is great for building meter. Like all BD throws its use is pretty much limited to dizzied opponents. | |||||||||||
Grave Shoot
| Damage | Guard | Startup | Active | Recovery | Hit Adv | Block Adv | |||||
|---|---|---|---|---|---|---|---|---|---|---|---|
| - | Mid | 17 | 4 | - | Grave Launch | +2 | |||||
|
A really, really high kick that launches the opponent into the air. Great range both above and to the sides, but will not hit crouching opponents. Extremely powerful as an early anti-air, and has a fairly short recovery. Also an important combo part. | |||||||||||
Heavy Strike
| Damage | Guard | Startup | Active | Recovery | Hit Adv | Block Adv | |||||
|---|---|---|---|---|---|---|---|---|---|---|---|
| - | Unblockable | 39 | 4 | - | - | N/A | |||||
|
A body shot. Its really short range makes it one of the least useful Heavy Strikes in the game. | |||||||||||
Banishing Strike
| Damage | Guard | Startup | Active | Recovery | Hit Adv | Block Adv | |||||
|---|---|---|---|---|---|---|---|---|---|---|---|
| - | Mid | 19-39 | 4 | - | Banish Launch | -9 | |||||
|
A left-hook. Important combo part. | |||||||||||
Special Moves
Touki
| Damage | Guard | Startup | Active | Recovery | Hit Adv | Block Adv | |||||
|---|---|---|---|---|---|---|---|---|---|---|---|
| - | Mid | 5 | 4 | - | - | -4 | |||||
|
A small fireball that travels roughly half-screen. Used mostly for putting out other fireball moves and applying pressure. Takes off one star on counter hit. | |||||||||||
Hokuto Ujou Moushouha
| Version | Damage | Guard | Startup | Active | Recovery | Hit Adv | Block Adv | |||||
|---|---|---|---|---|---|---|---|---|---|---|---|---|
| Ground 623A | - | Mid | - | - | - | Launch | - | |||||
|
A dragon punch move with two versions - the A version(left picture) does a quick uppercut and Kenshiro remains grounded, while the C version(right picture) rises into the air. The ground A version has upper-body invulnerability and takes off a star on hit. On counterhit it takes off 2 stars, and the opponent is launched high into the air. It cannot be air guarded, even with the use of Aura Guard. | ||||||||||||
| Version | Damage | Guard | Startup | Active | Recovery | Hit Adv | Block Adv | |||||
| Ground 623C | - | Mid | - | - | - | Launch | - | |||||
|
The ground C version of the uppercut is your classic invulnerable dragon punch, and takes one star on counter hit. An interesting bug exists in which it is possible to cancel the uppercut into ground moves, even though you are in the air. This makes Kenshiro's reversals particularly deadly when he has meter. While very unpractical, it is also possible to perform some extremely confusing mixups using this bug. See this video for some examples. For the most part it is best to forget that the air versions of the uppercut exist as they have absolutely no use whatsoever. | ||||||||||||
Hokuto Hieiken
| Damage | Guard | Startup | Active | Recovery | Hit Adv | Block Adv | |||||
|---|---|---|---|---|---|---|---|---|---|---|---|
| - | Mid | - | - | - | Launch | - | |||||
|
A diagonal rising kick move similar in appearance to Shin's Gokutoken, but lacking any invulnerability. Used mostly as a combo ender when it isn't possible to continue into anything else and as a very situational anti-air. Connecting with an airborne opponent causes wall bounce and can lead to some very big combos. Removes one star on counter hit. | |||||||||||
Hokuto Seieikou
| Damage | Guard | Startup | Active | Recovery | Hit Adv | Block Adv | |||||
|---|---|---|---|---|---|---|---|---|---|---|---|
| - | Mid | - | - | - | - | - | |||||
|
A short-ranged move in which Kenshiro strikes his opponent's pressure point, stunning them and taking off one star on normal hit and two on counter hit. Connecting with Seieikou also causes the victim to take chip damage from normal moves for a short duration. Due to its short range it is considered a combo-only move. | |||||||||||
Tenha no Kamae
| Damage | Guard | Startup | Active | Recovery | Hit Adv | Block Adv | |||||
|---|---|---|---|---|---|---|---|---|---|---|---|
| - | - | - | - | - | - | - | |||||
|
A charge type move that when executed causes the next attack to take off one extra star than it usually would if it connects. However, the charge is used up when you perform any attack, including normal moves, making it rather hard to use effectively. Even Guard Cancels will take off a star, and interestingly do not use up the charge, even after a successful hit. For some reason the C version Moushouha only will take off two stars(three on counterhit) when connecting. A small amount of Boost and Aura is gained when executing this move so it is also possible to build up meter when at a distance, provided your opponent doesn't have any Boost. The most common spot to use Tenha no Kamae is after dizzying an opponent in the corner, when coupled with a BD throw one can easily pull off a 5-star combo. | |||||||||||
Hokuto Jaraikou
| Damage | Guard | Startup | Active | Recovery | Hit Adv | Block Adv | |||||
|---|---|---|---|---|---|---|---|---|---|---|---|
| - | Mid | - | - | - | - | - | |||||
|
A strong rushing punch, with Super Armor at the very beginning of the animation. It combos only from far D, and is jump cancelable on hit. Despite the Super Armor this move should generally only be used in combos. Takes off one star on counter hit. | |||||||||||
Hokuto Shichishiki Heizan
| Damage | Guard | Startup | Active | Recovery | Hit Adv | Block Adv | |||||
|---|---|---|---|---|---|---|---|---|---|---|---|
| - | High | - | - | - | - | - | |||||
|
A rushing air punch that travels diagonally downward towards the ground. Used mostly as a tricky mixup option after a blocked air dash string such as j.B > j.A in the corner. While this can very hard to see it is important to use it only sparingly, as having this move blocked will usually result in your death. Generally there is not much merit in tiger kneeing Shichishiki Heizan as Kenshiro's air dash B is faster and risk free for the most part. Takes off one star on counter hit. | |||||||||||
Hokuto Ryugekiko
| Damage | Guard | Startup | Active | Recovery | Hit Adv | Block Adv | |||||
|---|---|---|---|---|---|---|---|---|---|---|---|
| - | - | 4 | - | - | - | - | |||||
|
A 'catch' move for mid and high attacks that causes wall bounce upon successfully connecting. 4F startup. Can also reflect projectiles. Removes one star on counter hit. | |||||||||||
Super Moves
Musou Tensei
| Damage | Guard | Startup | Active | Recovery | Hit Adv | Block Adv | |||||
|---|---|---|---|---|---|---|---|---|---|---|---|
| - | - | - | - | - | - | - | |||||
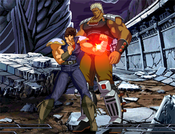
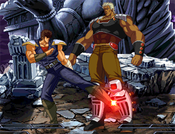
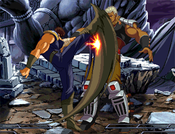
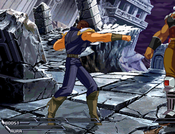
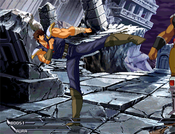
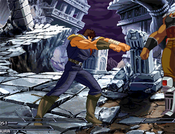
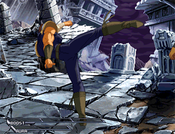
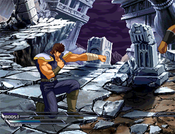
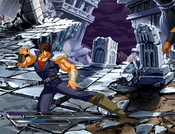
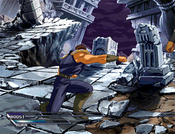
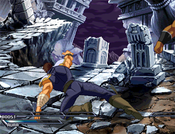
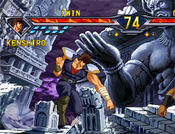
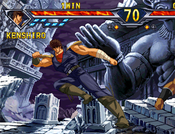
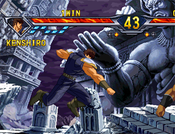
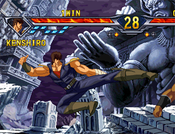
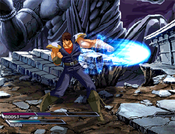
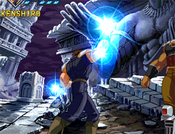
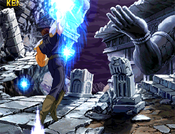
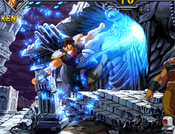
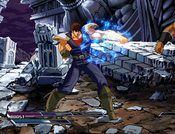
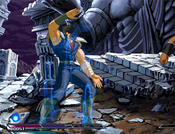
A 'charge' super, that after executing(left picture) grants the ability to use the special defensive maneuver Musou Tensei(middle and right pictures) up to 7 times. While active pressing 6(for mid/high attacks) or 2(for low attacks) in time with his opponent's attack hitting will cause Kenshiro to teleport behind the opponent. Specifically, the time frame for Musou activating is 5 frames within inputing the forward or downward direction. However, if the lever is returned to neutral within 5 frames of the input, the total time is extended to 11 frames. There is a roughly 15 frame window after attempting to Musou in which it is not possible to try again, which prevents continuous Musou attempts. Musou charges carry over rounds so it is advantageous to try to get off the super as soon as possible. | |||||||||||
Tenha Kassatsu
| Damage | Guard | Startup | Active | Recovery | Hit Adv | Block Adv | |||||
|---|---|---|---|---|---|---|---|---|---|---|---|
| - | All | 11+6 | - | - | Launch | - | |||||
A laser beam super used mostly as a combo ender. While it does have some invulnerability it wears out before the super executes and except for some very rare cases(chip damage finishes, punishing fireballs), should never be used outside a combo. The opponent bounces slightly after being hit by the beam, and it is possible to follow up with some moves when in the corner. Takes off one star normally, and two as a counter hit. | |||||||||||
Hokuto Zankaiken
| Damage | Guard | Startup | Active | Recovery | Hit Adv | Block Adv | |||||
|---|---|---|---|---|---|---|---|---|---|---|---|
| - | Throw (whiffs vs. crouch) | 8+9 | - | - | Launch | N/A | |||||
When executed, Kenshiro jumps into the air and attacks the opponent from above. If the attack is successful, a timer reading '3.00' will appear above the victim's head that will slowly begin to count down - although Kenshiro says 'you will die in 3 seconds,' it actually takes about 20 or so. Once the count reaches 0, the player dies and the round ends. As it is extremely slow, cannot be comboed into, and uses up two full bars of Aura, Zankaiken should be considered a gimmick move only. In addition to being very easy to guard, it misses completely versus all crouching characters except Mr. Heart, and doesn't affect Thouther at all. Also, even if it does somehow connect, you still have to stay alive for 20 seconds. If you really want to use this move the only realistic spot where you can hope to get a guaranteed hit in is by using it after a missed reversal dragon punch against an opponent without any Boost. | |||||||||||
Fatal KO
Fatal KO
| Damage | Guard | Startup | Active | Recovery | Hit Adv | Block Adv | |||||
|---|---|---|---|---|---|---|---|---|---|---|---|
| FATAL KO | Mid | 8+3 | - | - | - | - | |||||
Kenshiro's most famous move, in which he strikes his opponent quickly 100 times, killing them horribly. As far as Fatal KO's go, this is one of the better ones, able to hit OTG and having a quick startup. | |||||||||||
