Introduction
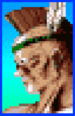
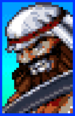
Condor Heads is a Native American who wears chaps. Typically peaceful, he has been riled up recently and only fights to save his homeland from the evil Bai-Hu.
Overview
Condor is the big, slow grappler. Instead of green hand like Zangief, he has a green foot. He also has his deadly Tamahoo attack. He has a huge arsenal of command grabs and throws.
Winning with Condor against higher level opponents will require a lot of patience and a healthy understanding of when to take a risk.

| Strengths | Weaknesses |
|---|---|
|
|
| Condor | |
|---|---|
 | |
| Defense | 132 |
| Stun | 3216 |
Move List
Normals
Standing
| Damage | Guard | Stun | Properties | |
|---|---|---|---|---|
| - | - | |||
| Startup | Active | Recovery | Adv. Hit | Adv. Guard |
| - | - | - | - | - |
| Damage | Guard | Stun | Properties | |
|---|---|---|---|---|
| - | - | |||
| Startup | Active | Recovery | Adv. Hit | Adv. Guard |
| - | - | - | - | - |
| Damage | Guard | Stun | Properties | |
|---|---|---|---|---|
| - | - | - | ||
| Startup | Active | Recovery | Adv. Hit | Adv. Guard |
| - | - | - | - | - |
| Damage | Guard | Stun | Properties | |
|---|---|---|---|---|
| - | - | |||
| Startup | Active | Recovery | Adv. Hit | Adv. Guard |
| - | - | - | - | - |
Crouching
| Damage | Guard | Stun | Properties | |
|---|---|---|---|---|
| - | - | |||
| Startup | Active | Recovery | Adv. Hit | Adv. Guard |
| - | - | - | - | - |
| Damage | Guard | Stun | Properties | |
|---|---|---|---|---|
| - | - | |||
| Startup | Active | Recovery | Adv. Hit | Adv. Guard |
| - | - | - | - | - |
| Damage | Guard | Stun | Properties | |
|---|---|---|---|---|
| - | - | - | ||
| Startup | Active | Recovery | Adv. Hit | Adv. Guard |
| - | - | - | - | - |
| Damage | Guard | Stun | Properties | |
|---|---|---|---|---|
| - | - | |||
| Startup | Active | Recovery | Adv. Hit | Adv. Guard |
| - | - | - | - | - |
Close
| Damage | Guard | Stun | Properties | |
|---|---|---|---|---|
| - | - | |||
| Startup | Active | Recovery | Adv. Hit | Adv. Guard |
| - | - | - | - | - |
| Damage | Guard | Stun | Properties | |
|---|---|---|---|---|
| - | - | |||
| Startup | Active | Recovery | Adv. Hit | Adv. Guard |
| - | - | - | - | - |
| Damage | Guard | Stun | Properties | |
|---|---|---|---|---|
| - | - | |||
| Startup | Active | Recovery | Adv. Hit | Adv. Guard |
| - | - | - | - | - |
| Damage | Guard | Stun | Properties | ||
|---|---|---|---|---|---|
| - | - | ||||
| Startup | Active | Recovery | Adv. Hit | Adv. Guard | |
| - | - | - | - | - | |
|
2 hits. Second hit is not cancellable. | |||||
Neutral Jumping
| Damage | Guard | Stun | Properties | |
|---|---|---|---|---|
| - | - | - | ||
| Startup | Active | Recovery | Adv. Hit | Adv. Guard |
| - | - | - | - | - |
| Damage | Guard | Stun | Properties | |
|---|---|---|---|---|
| - | - | - | ||
| Startup | Active | Recovery | Adv. Hit | Adv. Guard |
| - | - | - | - | - |
| Damage | Guard | Stun | Properties | |
|---|---|---|---|---|
| - | - | - | ||
| Startup | Active | Recovery | Adv. Hit | Adv. Guard |
| - | - | - | - | - |
| Damage | Guard | Stun | Properties | |
|---|---|---|---|---|
| - | - | - | ||
| Startup | Active | Recovery | Adv. Hit | Adv. Guard |
| - | - | - | - | - |
Diagonal Jumping
| Damage | Guard | Stun | Properties | |
|---|---|---|---|---|
| - | - | - | ||
| Startup | Active | Recovery | Adv. Hit | Adv. Guard |
| - | - | - | - | - |
| Damage | Guard | Stun | Properties | |
|---|---|---|---|---|
| - | - | - | ||
| Startup | Active | Recovery | Adv. Hit | Adv. Guard |
| - | - | - | - | - |
| Damage | Guard | Stun | Properties | |
|---|---|---|---|---|
| - | - | - | ||
| Startup | Active | Recovery | Adv. Hit | Adv. Guard |
| - | - | - | - | - |
| Damage | Guard | Stun | Properties | |
|---|---|---|---|---|
| - | - | - | ||
| Startup | Active | Recovery | Adv. Hit | Adv. Guard |
| - | - | - | - | - |
Command Normals
| Damage | Guard | Stun | Properties | |
|---|---|---|---|---|
| - | - | - | ||
| Startup | Active | Recovery | Adv. Hit | Adv. Guard |
| - | - | - | - | - |
| Damage | Guard | Stun | Properties | |
|---|---|---|---|---|
| - | - | - | ||
| Startup | Active | Recovery | Adv. Hit | Adv. Guard |
| - | - | - | - | - |
| Damage | Guard | Stun | Properties | |
|---|---|---|---|---|
| - | - | - | ||
| Startup | Active | Recovery | Adv. Hit | Adv. Guard |
| - | - | - | - | - |
Throws
| Damage | Guard | Stun | Properties | ||
|---|---|---|---|---|---|
| - | - | ||||
| Startup | Active | Recovery | Adv. Hit | Adv. Guard | |
| - | - | - | - | - | |
|
Direction of throw input affects screen position. Generally you want the forward throw for corner carry and keeping Condor close in the corner. | |||||
| Damage | Guard | Stun | Properties | ||
|---|---|---|---|---|---|
| - | - | ||||
| Startup | Active | Recovery | Adv. Hit | Adv. Guard | |
| - | - | - | - | - | |
|
Direction of throw input affects which side the opponent is thrown towards. Leaves Condor close to his opponent. | |||||
| Damage | Guard | Stun | Properties | ||
|---|---|---|---|---|---|
| - | - | ||||
| Startup | Active | Recovery | Adv. Hit | Adv. Guard | |
| - | - | - | - | - | |
|
Sideswitches. Does low amount of damage | |||||
| Damage | Guard | Stun | Properties | ||
|---|---|---|---|---|---|
| - | - | ||||
| Startup | Active | Recovery | Adv. Hit | Adv. Guard | |
| - | - | - | - | - | |
|
Mash throw with 6 hits. Opponent can counter mash to reduce hits. | |||||
| Damage | Guard | Stun | Properties | ||
|---|---|---|---|---|---|
| - | - | ||||
| Startup | Active | Recovery | Adv. Hit | Adv. Guard | |
| - | - | - | - | - | |
|
Mash throw with 10 hits. Opponent can counter mash to reduce hits. You can link your Super Tamahoo afterwards making this Condor's most damaging grab. When this throw ends, the opponent is reset standing. | |||||
| Damage | Guard | Stun | Properties | ||
|---|---|---|---|---|---|
| - | - | ||||
| Startup | Active | Recovery | Adv. Hit | Adv. Guard | |
| - | - | - | - | - | |
|
Mash throw with 4 hits. Opponent can counter mash to reduce hits. | |||||
Specials
236K

| B | Damage | Guard | Stun | Properties | ||
|---|---|---|---|---|---|---|
| - | - | - | ||||
| Startup | Active | Recovery | Adv. Hit | Adv. Guard | ||
| - | - | - | - | - | ||
|
Kick opponent into the air and catch them, sideswitches. | ||||||
| D | Damage | Guard | Stun | Properties | ||
| - | - | - | ||||
| Startup | Active | Recovery | Adv. Hit | Adv. Guard | ||
| - | - | - | - | - | ||
|
Slower version. | ||||||
360+P

| Damage | Guard | Stun | Properties | ||
|---|---|---|---|---|---|
| - | - | ||||
| Startup | Active | Recovery | Adv. Hit | Adv. Guard | |
| - | - | - | - | - | |
|
Classic 360 command grab with a whiff animation. Condor does a spinning piledriver on his opponent hurting them badly! An excellent move to breaker with, does a lot of damage and has awesome range. | |||||
66K

| B | Damage | Guard | Stun | Properties | ||
|---|---|---|---|---|---|---|
| - | - | - | ||||
| Startup | Active | Recovery | Adv. Hit | Adv. Guard | ||
| - | - | - | - | - | ||
|
Strength of kick determines range of slide kick. Normally knocks down unless opponent is hit from the very last part of the slide kick. Goes under projectiles and hits low. | ||||||
| D | Damage | Guard | Stun | Properties | ||
| - | - | - | ||||
| Startup | Active | Recovery | Adv. Hit | Adv. Guard | ||
| - | - | - | - | - | ||
|
Strength of kick determines range of slide kick. Normally knocks down unless opponent is hit from the very last part of the slide kick. Goes under projectiles and hits low. | ||||||
Any 3 buttons

| Damage | Guard | Stun | Properties | ||
|---|---|---|---|---|---|
| - | - | - | |||
| Startup | Active | Recovery | Adv. Hit | Adv. Guard | |
| - | - | - | - | - | |
|
An amazing move that negates projectiles ala Zangief's green hand, that has awesome priority especially versus air attacks, and seems to have some sort of invulnerability. Not that great versus grounded opponents but can catch them off guard occasionally. When used as an Anti Air can be followed with Super for massive damage and a favorable knockdown. Tamahoo in moves Condor forward slightly on whiff, hit, and when it negates projectiles. | |||||
Supers
236236P

| Damage | Guard | Stun | Properties | ||
|---|---|---|---|---|---|
| - | - | ||||
| Startup | Active | Recovery | Adv. Hit | Adv. Guard | |
| - | - | - | - | - | |
|
Awesome super, connects after an anti-air Tamahoo or Good Throw. Has small invulnerability window. The full super will connect against aerial opponents. The first hit has a giant reach and if it connects, the full super will. | |||||
720+P

| Damage | Guard | Stun | Properties | ||
|---|---|---|---|---|---|
| - | - | ||||
| Startup | Active | Recovery | Adv. Hit | Adv. Guard | |
| - | - | - | - | - | |
|
A super grab. It is a good breaker move. It does not seem to have a whiff animation so you can't waste meter spamming for it. If it connects, it will do a bunch of damage and take a super meter from you. Good Throw into Tamahoo Super does as much or more damage than this, but this move is still good. Good Throw has significantly less range than Grab Super. | |||||
Combos
- Meterless Combos
- 2A, 2A xx 236B - low hit main 2-in-1
- 2A, cl. 5B, 2D - sweep ender BnB combo
- Combos with meter
- 2A, 2A, 2B xx 236236P - low hit super ender
- 3A/B (Throw), 236236P - a great throw setup with super ender, but it must be too early to connect
- Anti-air 5C xx Tomahawk, 236236P - Tomahawk use is limited but this is the best combo for use it.
- Air to Air, 236236P - It is sometimes possible to add a Tomahawk between the juggle and the super but the juggle is much harder to connect.
Advanced Strategy
Condor can be played as a throw character but that sort of play style doesn't work well in Breakers. He has a decent rushdown game based around priority, with his only real mixups being crossups. Mixing up with grabs is so incredibly risky that it usually isn't worth it unless your opponent is terrified. If you advance extremely carefully with Condor and make sure to take full advantage of every opportunity, he is extremely possible to win with.
- Having no dash makes it difficult to approach your opponent faster than they can run away. Using Buffalo Slide Kick after a knockdown can allow you to catch up to your opponent.
- cr. HK is nuts: Incredible range, big damage, a knockdown, it does it all. If your opponent isn't respecting your wakeup games, meaty with this a few times and straight up kill them.
- If you jump over a fireball and are expecting another fireball, you can Buffalo Slide Kick under the second fireball, or even land and just Tamahoo Super your opponent out of their second fireball. Of course, both of these actions are risky, but the risk is worth it if you are sure you're reading your opponent properly.
- By inputting forward+A/B/D, forward+B/D, you can whiff cancel a normal into his Buffalo Slide Kick. This is especially good with his st.B/st.D attacks, as they both might entice an opponent to attack you if they think you have whiffed them. This fake-out is an excellent mindgame for Condor!
Breakering
Condor can breaker with Tamahoo but it will lose to any low attacks. He can breaker with any normal throw of course, he can also breaker with his SPD (360+P) which is amazing. It is fast and has a big range. His supers are also great breaker attacks, each doing massive damage. Breakering is kind of important for Condor, he can get a lot of damage this way whereas it can be hard for him to land a combo.
Mixup and Oki guide
Matchups
Matchup Table
| Great | |
| Good | Alsion III, Maherl |
| Even | |
| Weak | Rila, Pielle |
| Bad | Saizo, Sho, Tia, Dao-Long |
Character Specific Tips
Alsion III
Condor
Dao-Long
Maherl
Pielle
Rila
Saizo
Pray.
Saizo plays an excellent keep away game. Landing Tamahoo and starting your scariest offense is nigh impossible: Saizo has zero reason to ever jump at you. Bulldog your way in however you can and get to a range where 2D can connect or trade, and make the most of those knockdowns.
Saizo has a weak breaker game without meter. His meterless invincible reversal (214P, "Hair") needs to be super canceled or it's unsafe. In an Oki situation, bait reversals to either drain Saizo's resources or get them to overextend for a big punish.
Sho
Tia


