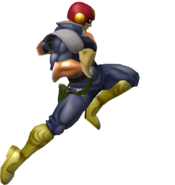
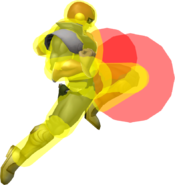
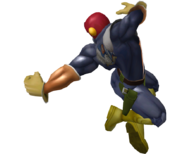
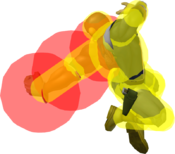
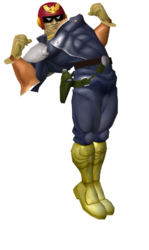
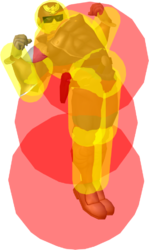
Introduction
Mario appears on rank 13 in the D tier on the current tier list, placing him in the center, along with his brother Luigi and two places below his clone of Dr. Mario. Mario acts as a well-rounded character, with average weight, falling speed and other such attributes. Mario has some good comboing ability, and he has a very versatile grab game, with a powerful back throw that can lead to gimps and an up and down throw that can chaingrab. Mario is also a decent edgeguarder, with Fireball (a solid projectile), and his cape which can easily and efficiently gimp almost every other character's recovery. While edgeguarding he can propel himself deep offstage as well as occupy/threaten a space through his pseudo-float side b. Unless you are creative, Mario lacks a reliable finisher, and his recovery is decidedly average (though slept-on), he can extend it with his cape, wall jumps (up-b and regular) and extended up-b. Mario can still be easily gimped however when using fireballs to protect the descent, reversals and coin spikes can occur instead.
| Strengths | Weaknesses |
|---|---|
|
|
| Physics | |
|---|---|
| Weight | 100 (10th) |
| Fall Speed | 1.7/Fast 2.7 (15th) |
| Gravity | 0.095 (15th) |
| Ground Movement | |
| Walk Speed | 1.1 (12st) |
| Initial Dash Speed | 1.5 (15th) |
| Initial Dash Length | 10f (5th) |
| Run Speed | 1.5 (13th) |
| Traction | 0.06 (17th) |
| Jumping | |
| Jumpsquat | 4f (11th) |
| Jump Height | Full 29/Short 11.025/Air 26.7 (22th/18th/12th) |
| Air Speed | 0.86 (16th) |
| Air Acceleration | 0.045 (22th) |
Ground Moves
Jab
| Jab 1 | First Active | Active | Recovery | IASA | Landing Lag | Autocancel | |
|---|---|---|---|---|---|---|---|
| 2 | 2-3 | 15 | 15 | - | - | ||
| Damage | Base Knockback | Knockback Growth | Angle | Effect | On Shield | ||
| 3% | 0 | 100 | 83 | Normal | -9 | ||
|
| |||||||
| Jab 2 | First Active | Active | Recovery | IASA | Landing Lag | Autocancel | |
| 2 | 2-3 | 17 | 17 | - | - | ||
| Damage | Base Knockback | Knockback Growth | Angle | Effect | On Shield | ||
| 3% | 0 | 100 | 83 | Normal | -12 | ||
|
| |||||||
| Jab 3 | First Active | Active | Recovery | IASA | Landing Lag | Autocancel | |
| 4 | 4-8 | 21 | 21 | - | - | ||
| Damage | Base Knockback | Knockback Growth | Angle | Effect | On Shield | ||
| 3% | 0 | 100 | 85 | Normal | -12 | ||
|
| |||||||
Dash Attack
| First Active | Active | Recovery | IASA | Landing Lag | Autocancel | |
|---|---|---|---|---|---|---|
| 6 | 6-25 | 12 | 38 | - | - | |
| Damage | Base Knockback | Knockback Growth | Angle | Effect | On Shield | |
| Clean: 7% / Late: 9% | Clean: 45 / Late: 70 | Clean: 30 / Late: 50 | Clean: 120 / Late: 110 | Normal | Clean: -26/ Late: -25 | |
|
| ||||||
fTilt
| Side Angle | First Active | Active | Recovery | IASA | Landing Lag | Autocancel | |
|---|---|---|---|---|---|---|---|
| 5 | 5-7 | 26 | 32 | - | - | ||
| Damage | Base Knockback | Knockback Growth | Angle | Effect | On Shield | ||
| 11% | 10 | 100 | 361 | Normal | -14 | ||
|
Forward tilt gives Falcon a reasonable balance of range and frame data among otherwise middling grounded tools. A regular forward tilt provides a passable poke tool, but the move can also be angled upward and downward. | |||||||
| Up Angle | First Active | Active | Recovery | IASA | Landing Lag | Autocancel | |
| 9 | 3 | 18 | - | - | - | ||
| Damage | Base Knockback | Knockback Growth | Angle | Effect | On Shield | ||
| 12%, 12%, 11% | 10 | 100 | 361 | Normal | -13 | ||
|
Good to combo because it hits high. | |||||||
| Down Angle | First Active | Active | Recovery | IASA | Landing Lag | Autocancel | |
| 9 | 3 | 18 | - | - | - | ||
| Damage | Base Knockback | Knockback Growth | Angle | Effect | On Shield | ||
| 10%, 10%, 11% | 0, 0, 10 | 100 | 361 | Normal | -14 | ||
|
Good at the ledge because it hits low. | |||||||
uTilt
| First Active | Active | Recovery | IASA | Landing Lag | Autocancel | |
|---|---|---|---|---|---|---|
| 17 | 5 | 18 | 38 | - | - | |
| Damage | Base Knockback | Knockback Growth | Angle | Effect | On Shield | |
| 13% | 50 | 80 | 361 | Normal | -13 | |
|
Up tilt is generally useless in neutral due to its abhorrent startup. However, it can be a powerful edgeguarding tool, covering a swath in front of Falcon, even covering poor recoveries to ledge. | ||||||
dTilt
| First Active | Active | Recovery | IASA | Landing Lag | Autocancel | |
|---|---|---|---|---|---|---|
| 10 | 6 | 20 | 34 | - | - | |
| Damage | Base Knockback | Knockback Growth | Angle | Effect | On Shield | |
| 12% | 25 | 75 | 80, 70, 60 | Normal | -17 | |
|
As with most of Falcon's grounded moves, down tilt is niche at best in neutral. Can be used after an empty jump as a timing mixup. | ||||||
fSmash
| Side Angle | First Active | Active | Recovery | IASA | Landing Lag | Autocancel | |
|---|---|---|---|---|---|---|---|
| 18 | 4 | 43 | 60 | - | - | ||
| Damage | Base Knockback | Knockback Growth | Angle | Effect | On Shield | ||
| 20% | 24 | 100 | 361 | Flame |
-31 | ||
|
Falcon's strongest move by pure knockback. Falcon pulls backward during the startup, potentially dodging an opponent's move. However, the move has significant startup and end lag, making it impractical without a setup. The move can be angled upward and downward. | |||||||
| Up Angle | First Active | Active | Recovery | IASA | Landing Lag | Autocancel | |
| 18 | 4 | 43 | 60 | - | - | ||
| Damage | Base Knockback | Knockback Growth | Angle | Effect | On Shield | ||
| 21% | 24 | 100 | 361 | Flame |
-30 | ||
|
A fully charged up angled forward smash transcends even Falcon Punch. | |||||||
| Down Angle | First Active | Active | Recovery | IASA | Landing Lag | Autocancel | |
| 18 | 4 | 43 | 60 | - | - | ||
| Damage | Base Knockback | Knockback Growth | Angle | Effect | On Shield | ||
| 19% | 24 | 100 | 361 | Flame |
-31 | ||
uSmash
| First Active | Active | Recovery | IASA | Landing Lag | Autocancel | |
|---|---|---|---|---|---|---|
| 21 | 2, 2 | 26 | 40 | - | - | |
| Damage | Base Knockback | Knockback Growth | Angle | Effect | On Shield | |
| Hit1: 8%, 8%, 14%, 14% Hit2: 13%, 13%, 12% |
Hit1: 80, 100, 30, 30 Hit2: 30 |
Hit1: 0, 0, 105, 105 Hit2: 128, 126, 110 |
Hit1: 90, 100, 80, 90 Hit2: 90, 90, 80 |
Normal | -5 | |
|
Surprisingly difficult to punish due to the relatively quick IASA frame, but with so much start up it is generally not a great neutral tool. | ||||||
dSmash
| First Active | Active | Recovery | IASA | Landing Lag | Autocancel | |
|---|---|---|---|---|---|---|
| 19 | 4, 4 | 17 | 45 | - | - | |
| Damage | Base Knockback | Knockback Growth | Angle | Effect | On Shield | |
| Hit1: 18% Hit2: 16% |
Hit1: 30 Hit2: 20 |
100 | 361 | Normal | -15/-6 | |
|
Useful for covering multiple tech options in the corner when the opponent's tech away is stopped by the ledge. | ||||||
Aerial Moves
nAir
| First Active | Active | Recovery | IASA | Landing Lag | Autocancel | |
|---|---|---|---|---|---|---|
| 7 | Hit1: 6 Hit2: 10 |
16 | 44 | 7 | <3, >34 | |
| Damage | Base Knockback | Knockback Growth | Angle | Effect | On Shield | |
| Hit1: 6%, 5%, 6% Hit2: 7% |
Hit1: 40 Hit2: 40 |
Hit1: 0 Hit2: 100 |
Hit1: 82, 78, 74 Hit 2: 361 |
Normal | -2 | |
|
Falcon's god button. It is a swiss army knife of a move and helps form the foundation of his neutral and combo game. Generally, a character's ability to make Falcon hesitate when using this move is what makes them win or lose the match up and is a defining interaction for the characters. This is a solid, go-to option in neutral in many matchups as it's often low risk, medium reward.
| ||||||
fAir
| First Active | Active | Recovery | IASA | Landing Lag | Autocancel | |
|---|---|---|---|---|---|---|
| 14 | 17 | 9 | 36 | 9 | <6, >35 | |
| Damage | Base Knockback | Knockback Growth | Angle | Effect | On Shield | |
| Clean: 18% / Late: 6% | Clean: 24 / Late: 35 | Clean: 100 / Late: 80 | Clean: 32 / Late: 361 | Clean: Electric / Late: Normal | +1 | |
|
One of the best moves in the entire game, this is Falcon's defining move as a character. A combo starter that combos into itself to death while still being a devastating combo ender, being plus on block, and massive active frames to be used for edge guarding. This move is a problem for Falcon's opponents and is only limited by its start up and limited active frames of its strongest hitbox
| ||||||
bAir
| First Active | Active | Recovery | IASA | Landing Lag | Autocancel | |
|---|---|---|---|---|---|---|
| 10 | 8 | 23 | 29 | 9 | <7, >20 | |
| Damage | Base Knockback | Knockback Growth | Angle | Effect | On Shield | |
| Clean: 14% / Late: 8% | Clean: 20, 0, 0 / Late: 20, 0, 0 | Clean: 100 / Late: 100 | 361 | Normal | -1 | |
|
Falcon's back air has rather slow startup but is otherwise an oppressive move that is extremely hard to deal with once the opponent is past knockdown %. Its massive range means that very few characters can directly challenge the move if it is not preemptively challenged.
| ||||||
uAir
| First Active | Active | Recovery | IASA | Landing Lag | Autocancel | |
|---|---|---|---|---|---|---|
| 6 | 8 | 21 | 30 | 7 | >21 | |
| Damage | Base Knockback | Knockback Growth | Angle | Effect | On Shield | |
| Clean: 13%, 12% / Mid: 12%, 10% | Clean: 10 / Mid: 8 | Clean: 100 / Mid: 80 | 361 | Normal | +0 | |
|
The size of this move along with Falcon's impressive dash jump means that situations that are challenging to deal with for other characters, such as a character being above and in front of you, are trivial to deal with for Falcon. This combined with it often being a guaranteed follow up after a throw in many situations, and being among the best combo extensions in the game, make it the move you are likely to use most often in Falcon combos as well as vs opponents who are a bit too jump happy.
| ||||||
dAir
| First Active | Active | Recovery | IASA | Landing Lag | Autocancel | |
|---|---|---|---|---|---|---|
| 16 | 5 | 25 | 38 | 12 | <4, >35 | |
| Damage | Base Knockback | Knockback Growth | Angle | Effect | On Shield | |
| 16%, | 40 | 100 | 270, 270, 290 | Normal | -3 | |
|
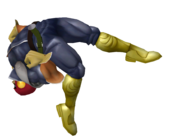
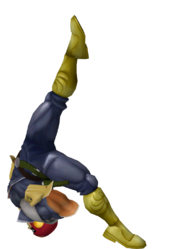
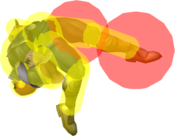
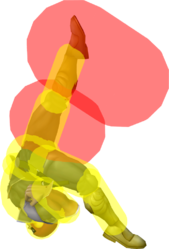
An infamously ignorant move. Getting hit by this move, even at 0%, can lead into touch of death combos in as little as 1-2 combo resets or mix ups for much of the cast. As one of the strongest meteor smashes in the game, this is truly Doug's party starter
| ||||||
Special Moves
Fireball
| First Active | Active | Recovery | IASA | Landing Lag | Autocancel | |
|---|---|---|---|---|---|---|
| 52 | 5 | 43 | - | - | - | |
| Damage | Base Knockback | Knockback Growth | Angle | Effect | On Shield | |
| 27%, 25%, 23% | Ground: 30 / Air: 40 | 102 | 361 | Flame | -33 | |
|
| ||||||
Cape
| First Active | Active | Recovery | IASA | Landing Lag | Autocancel | |
|---|---|---|---|---|---|---|
| 0 | 0 | 0 | 0 | 0 | <0 0> | |
| Damage | Base Knockback | Knockback Growth | Angle | Effect | On Shield | |
| Clean: 0 / Late: 0 | Clean: 0 / Late: 0 | 0 | 0 | Normal | 0 | |
|
Please use this move less in neutral | ||||||
Super Jump Punch
| First Active | Active | Recovery | IASA | Landing Lag | Autocancel | |
|---|---|---|---|---|---|---|
| 13 | 21 | 31 | - | 30 | - | |
| Damage | Base Knockback | Knockback Growth | Angle | Effect | On Shield | |
| 15% | Clean: 0 / Late: 0 | 0 | 0 | Normal | - | |
|
"If only it turned them around before throwing them, now that'd be a recovery" This is Falcon's primary recovery tool when double jump won't get you far enough. While not a great recovery, it has quite a high skill cap and room for creativity. Using it well is often the difference between dying at 80% or living to 160% and mastery of it is a major difference maker between good and great Falcons.
| ||||||
Mario Tornado
| First Active | Active | Recovery | IASA | Landing Lag | Autocancel | |
|---|---|---|---|---|---|---|
| 0 | 0 | 0 | 0 | 0 | <0 0> | |
| Damage | Base Knockback | Knockback Growth | Angle | Effect | On Shield | |
| Clean: 0 / Late: 0 | Clean: 0 / Late: 0 | 0 | 0 | Normal | 0 | |
|
Falcon's down-b, or 2b, is a relatively niche move besides on recovery. When hit high and far enough offstage, DJ falcon kick will give Douglas his DJ back, allowing for more recovery mix ups than would otherwise be possible. Just be careful not to use it too close to stage as the recovery can be easily punished!
| ||||||
Grabs & Throws
Put a character's grab, zair, and throws here.
Grab
| First Active | Active | Recovery | IASA | Landing Lag | Autocancel |
|---|---|---|---|---|---|
| 6 | 2 | 22 | 0 | 0 | <0 0> |
| Damage | Base Knockback | Knockback Growth | Angle | Effect | On Shield |
| Clean: 0 / Late: 0 | Clean: 0 / Late: 0 | 0 | 0 | Normal | 0 |
Dash Grab
| First Active | Active | Recovery | IASA | Landing Lag | Autocancel |
|---|---|---|---|---|---|
| 10 | 2 | 29 | 0 | 0 | <0 0> |
| Damage | Base Knockback | Knockback Growth | Angle | Effect | On Shield |
| Clean: 0 / Late: 0 | Clean: 0 / Late: 0 | 0 | 0 | Normal | 0 |
Pummel
| First Active | Active | Recovery | IASA | Landing Lag | Autocancel |
|---|---|---|---|---|---|
| 4 | 4 | 17 | 0 | 0 | <0 0> |
| Damage | Base Knockback | Knockback Growth | Angle | Effect | On Shield |
| Clean: 3 / Late: 0 | Clean: 0 / Late: 0 | 0 | 0 | Normal | 0 |
fThrow
| First Active | Active | Recovery | IASA | Landing Lag | Autocancel |
|---|---|---|---|---|---|
| 0 | 0 | 0 | 0 | 0 | <0 0> |
| Damage | Base Knockback | Knockback Growth | Angle | Effect | On Shield |
| Clean: 0 / Late: 0 | Clean: 0 / Late: 0 | 0 | 0 | Normal | 0 |
bThrow
| First Active | Active | Recovery | IASA | Landing Lag | Autocancel |
|---|---|---|---|---|---|
| 0 | 0 | 0 | 0 | 0 | <0 0> |
| Damage | Base Knockback | Knockback Growth | Angle | Effect | On Shield |
| Clean: 0 / Late: 0 | Clean: 0 / Late: 0 | 0 | 0 | Normal | 0 |
uThrow
| First Active | Active | Recovery | IASA | Landing Lag | Autocancel |
|---|---|---|---|---|---|
| 0 | 0 | 0 | 0 | 0 | <0 0> |
| Damage | Base Knockback | Knockback Growth | Angle | Effect | On Shield |
| Clean: 0 / Late: 0 | Clean: 0 / Late: 0 | 0 | 0 | Normal | 0 |
dThrow
| First Active | Active | Recovery | IASA | Landing Lag | Autocancel | |
|---|---|---|---|---|---|---|
| 0 | 0 | 40* | 0 | 0 | <0 0> | |
| Damage | Base Knockback | Knockback Growth | Angle | Effect | On Shield | |
| Clean: 7 / Late: 0 | Clean: 0 / Late: 0 | 0 | 0 | Normal | 0 | |
|
NOTE: This throw's animation length varies by thrown character's weight. Very light characters will incur a faster animation than very heavy ones. | ||||||
Aerial Moves
Special Moves
Side B - Cape is like shine in two ways. Firstly, at base level it is a reflector, cape returns projectiles back at their sender with added damage and knockback. Secondly, it has applications in neutral, recovery, combo extending, platform movement and edge guarding. On select stages such as yoshi's story and fod Mario can short hop cape no impact land onto platforms allowing for some unique follow ups. Cape can alter the timing that one hits the ground, so one can use cape mid combo as a tech trap. For example after fairing and popping up the opponent, Mario can cape while they are in hit stun to force a missed tech. Cape also has a unique property where it causes the opponent to sometimes enter tumble and spiral to the ground. Some of the situations where this can happen include caping a whiffed grab, the rising portion of peach parasol, spacie's phantasm, various ledge get up options and more. While Doc's cape is better at reflecting other characters recoveries, Mario's can be better utilized in neutral. After caping, Mario players can choose to descend with an aerial as to prevent the landing animation which recharges the lift in the cape. One can be cognizant of the charge and use both lift and no-lift cape accordingly. With its charge, cape can help Mario perform a ledge stall. Mario can also shield drop cape to reflect projectiles such as Falco's lasers, this also puts Mario in a place where there are multiple movement options and mix ups available to him. Lastly it needs to be stated that cape turns other characters around even if they are in shield. Having an unblockable anti shield grab option definitely has its perks.
Grabs & Throws
Universal Mechanics
Advanced Frame Data
This table shows the frame data for all of Mario's non-special moves. Including shield advantage at different timings and cancels.
| move | start | end | lcancelledLandingLag | autoCancelAfter | iasa | missedLcancelLandingLag | totalFrames | damage | shieldstun | bestShieldAdvantage | lcancelledShieldAdvantage | missedLcancelShieldAdvantage | earlyHitAutoCancelledShieldAdvantage | lateHitAutoCancelledShieldAdvantage | earlyHitIASACancelledShieldAdvantage | lateHitIASACancelledShieldAdvantage | earlyHitTotalFramesShieldAdvantage | lateHitTotalFramesShieldAdvantage |
|---|---|---|---|---|---|---|---|---|---|---|---|---|---|---|---|---|---|---|
| dtilt | 5 | 8 | N\A | N\A | N\A | N\A | 34 | 8 | 5 | -21 | N\A | N\A | N\A | N\A | N\A | N\A | -24 | -21 |
| dtilt | 5 | 8 | N\A | N\A | N\A | N\A | 34 | 9 | 6 | -20 | N\A | N\A | N\A | N\A | N\A | N\A | -23 | -20 |
| dtilt | 5 | 8 | N\A | N\A | N\A | N\A | 34 | 9 | 6 | -20 | N\A | N\A | N\A | N\A | N\A | N\A | -23 | -20 |
| uair | 4 | 9 | 7 | 15 | 30 | 15 | 33 | 11 | 6 | -1 | -1 | -9 | -9 | -4 | -19 | -14 | -23 | -18 |
| uair | 4 | 9 | 7 | 15 | 30 | 15 | 33 | 11 | 6 | -1 | -1 | -9 | -9 | -4 | -19 | -14 | -23 | -18 |
| fsmash_h | 12 | 16 | N\A | N\A | N\A | N\A | 41 | 19 | 10 | -15 | N\A | N\A | N\A | N\A | N\A | N\A | -19 | -15 |
| fsmash_h | 12 | 16 | N\A | N\A | N\A | N\A | 41 | 15 | 8 | -17 | N\A | N\A | N\A | N\A | N\A | N\A | -21 | -17 |
| fsmash_h | 12 | 16 | N\A | N\A | N\A | N\A | 41 | 15 | 8 | -17 | N\A | N\A | N\A | N\A | N\A | N\A | -21 | -17 |
| fsmash_l | 12 | 16 | N\A | N\A | N\A | N\A | 41 | 17 | 9 | -16 | N\A | N\A | N\A | N\A | N\A | N\A | -20 | -16 |
| fsmash_l | 12 | 16 | N\A | N\A | N\A | N\A | 41 | 13 | 7 | -18 | N\A | N\A | N\A | N\A | N\A | N\A | -22 | -18 |
| fsmash_l | 12 | 16 | N\A | N\A | N\A | N\A | 41 | 13 | 7 | -18 | N\A | N\A | N\A | N\A | N\A | N\A | -22 | -18 |
| jab3 | 4 | 8 | N\A | N\A | N\A | N\A | 21 | 5 | 4 | -9 | N\A | N\A | N\A | N\A | N\A | N\A | -13 | -9 |
| jab3 | 4 | 8 | N\A | N\A | N\A | N\A | 21 | 5 | 4 | -9 | N\A | N\A | N\A | N\A | N\A | N\A | -13 | -9 |
| ftilt_l | 5 | 7 | N\A | N\A | N\A | N\A | 32 | 8 | 5 | -20 | N\A | N\A | N\A | N\A | N\A | N\A | -22 | -20 |
| ftilt_l | 5 | 7 | N\A | N\A | N\A | N\A | 32 | 8 | 5 | -20 | N\A | N\A | N\A | N\A | N\A | N\A | -22 | -20 |
| ftilt_l | 5 | 7 | N\A | N\A | N\A | N\A | 32 | 8 | 5 | -20 | N\A | N\A | N\A | N\A | N\A | N\A | -22 | -20 |
| ftilt_h | 5 | 7 | N\A | N\A | N\A | N\A | 32 | 10 | 6 | -19 | N\A | N\A | N\A | N\A | N\A | N\A | -21 | -19 |
| ftilt_h | 5 | 7 | N\A | N\A | N\A | N\A | 32 | 10 | 6 | -19 | N\A | N\A | N\A | N\A | N\A | N\A | -21 | -19 |
| ftilt_h | 5 | 7 | N\A | N\A | N\A | N\A | 32 | 10 | 6 | -19 | N\A | N\A | N\A | N\A | N\A | N\A | -21 | -19 |
| dashattack | 6 | 9 | N\A | N\A | 38 | N\A | 48 | 9 | 6 | -22 | N\A | N\A | N\A | N\A | -25 | -22 | -36 | -33 |
| dashattack | 6 | 9 | N\A | N\A | 38 | N\A | 48 | 9 | 6 | -22 | N\A | N\A | N\A | N\A | -25 | -22 | -36 | -33 |
| dashattack | 10 | 25 | N\A | N\A | 38 | N\A | 48 | 7 | 5 | -7 | N\A | N\A | N\A | N\A | -22 | -7 | -33 | -18 |
| dashattack | 10 | 25 | N\A | N\A | 38 | N\A | 48 | 7 | 5 | -7 | N\A | N\A | N\A | N\A | -22 | -7 | -33 | -18 |
| dair | 10 | 11 | 11 | 35 | 38 | 23 | 38 | 2 | 2 | -9 | -9 | -21 | -27 | -26 | -25 | -24 | -26 | -25 |
| dair | 10 | 11 | 11 | 35 | 38 | 23 | 38 | 2 | 2 | -9 | -9 | -21 | -27 | -26 | -25 | -24 | -26 | -25 |
| dair | 10 | 11 | 11 | 35 | 38 | 23 | 38 | 2 | 2 | -9 | -9 | -21 | -27 | -26 | -25 | -24 | -26 | -25 |
| dair | 13 | 14 | 11 | 35 | 38 | 23 | 38 | 2 | 2 | -9 | -9 | -21 | -24 | -23 | -22 | -21 | -23 | -22 |
| dair | 13 | 14 | 11 | 35 | 38 | 23 | 38 | 2 | 2 | -9 | -9 | -21 | -24 | -23 | -22 | -21 | -23 | -22 |
| dair | 13 | 14 | 11 | 35 | 38 | 23 | 38 | 2 | 2 | -9 | -9 | -21 | -24 | -23 | -22 | -21 | -23 | -22 |
| dair | 16 | 17 | 11 | 35 | 38 | 23 | 38 | 2 | 2 | -9 | -9 | -21 | -21 | -20 | -19 | -18 | -20 | -19 |
| dair | 16 | 17 | 11 | 35 | 38 | 23 | 38 | 2 | 2 | -9 | -9 | -21 | -21 | -20 | -19 | -18 | -20 | -19 |
| dair | 16 | 17 | 11 | 35 | 38 | 23 | 38 | 2 | 2 | -9 | -9 | -21 | -21 | -20 | -19 | -18 | -20 | -19 |
| dair | 19 | 20 | 11 | 35 | 38 | 23 | 38 | 2 | 2 | -9 | -9 | -21 | -18 | -17 | -16 | -15 | -17 | -16 |
| dair | 19 | 20 | 11 | 35 | 38 | 23 | 38 | 2 | 2 | -9 | -9 | -21 | -18 | -17 | -16 | -15 | -17 | -16 |
| dair | 19 | 20 | 11 | 35 | 38 | 23 | 38 | 2 | 2 | -9 | -9 | -21 | -18 | -17 | -16 | -15 | -17 | -16 |
| dair | 22 | 23 | 11 | 35 | 38 | 23 | 38 | 2 | 2 | -9 | -9 | -21 | -15 | -14 | -13 | -12 | -14 | -13 |
| dair | 22 | 23 | 11 | 35 | 38 | 23 | 38 | 2 | 2 | -9 | -9 | -21 | -15 | -14 | -13 | -12 | -14 | -13 |
| dair | 22 | 23 | 11 | 35 | 38 | 23 | 38 | 2 | 2 | -9 | -9 | -21 | -15 | -14 | -13 | -12 | -14 | -13 |
| dair | 25 | 26 | 11 | 35 | 38 | 23 | 38 | 2 | 2 | -9 | -9 | -21 | -12 | -11 | -10 | -9 | -11 | -10 |
| dair | 25 | 26 | 11 | 35 | 38 | 23 | 38 | 2 | 2 | -9 | -9 | -21 | -12 | -11 | -10 | -9 | -11 | -10 |
| dair | 25 | 26 | 11 | 35 | 38 | 23 | 38 | 2 | 2 | -9 | -9 | -21 | -12 | -11 | -10 | -9 | -11 | -10 |
| dair | 28 | 29 | 11 | 35 | 38 | 23 | 38 | 2 | 2 | -6 | -9 | -21 | -9 | -8 | -7 | -6 | -8 | -7 |
| dair | 28 | 29 | 11 | 35 | 38 | 23 | 38 | 2 | 2 | -6 | -9 | -21 | -9 | -8 | -7 | -6 | -8 | -7 |
| dair | 28 | 29 | 11 | 35 | 38 | 23 | 38 | 2 | 2 | -6 | -9 | -21 | -9 | -8 | -7 | -6 | -8 | -7 |
| dair | 31 | 32 | 11 | 35 | 38 | 23 | 38 | 2 | 2 | -3 | -9 | -21 | -6 | -5 | -4 | -3 | -5 | -4 |
| dair | 31 | 32 | 11 | 35 | 38 | 23 | 38 | 2 | 2 | -3 | -9 | -21 | -6 | -5 | -4 | -3 | -5 | -4 |
| dair | 31 | 32 | 11 | 35 | 38 | 23 | 38 | 2 | 2 | -3 | -9 | -21 | -6 | -5 | -4 | -3 | -5 | -4 |
| bair | 6 | 8 | 7 | 18 | N\A | 15 | 28 | 11 | 6 | -1 | -1 | -9 | -10 | -8 | N\A | N\A | -16 | -14 |
| bair | 6 | 8 | 7 | 18 | N\A | 15 | 28 | 11 | 6 | -1 | -1 | -9 | -10 | -8 | N\A | N\A | -16 | -14 |
| bair | 9 | 17 | 7 | 18 | N\A | 15 | 28 | 9 | 6 | 1 | -1 | -9 | -7 | 1 | N\A | N\A | -13 | -5 |
| bair | 9 | 17 | 7 | 18 | N\A | 15 | 28 | 9 | 6 | 1 | -1 | -9 | -7 | 1 | N\A | N\A | -13 | -5 |
| usmash | 9 | 11 | N\A | N\A | N\A | N\A | 39 | 15 | 8 | -20 | N\A | N\A | N\A | N\A | N\A | N\A | -22 | -20 |
| jab2 | 2 | 3 | N\A | N\A | N\A | N\A | 17 | 2 | 2 | -12 | N\A | N\A | N\A | N\A | N\A | N\A | -13 | -12 |
| jab2 | 2 | 3 | N\A | N\A | N\A | N\A | 17 | 2 | 2 | -12 | N\A | N\A | N\A | N\A | N\A | N\A | -13 | -12 |
| jab2 | 2 | 3 | N\A | N\A | N\A | N\A | 17 | 2 | 2 | -12 | N\A | N\A | N\A | N\A | N\A | N\A | -13 | -12 |
| jab1 | 2 | 3 | N\A | N\A | N\A | N\A | 15 | 3 | 3 | -9 | N\A | N\A | N\A | N\A | N\A | N\A | -10 | -9 |
| jab1 | 2 | 3 | N\A | N\A | N\A | N\A | 15 | 3 | 3 | -9 | N\A | N\A | N\A | N\A | N\A | N\A | -10 | -9 |
| jab1 | 2 | 3 | N\A | N\A | N\A | N\A | 15 | 3 | 3 | -9 | N\A | N\A | N\A | N\A | N\A | N\A | -10 | -9 |
| ftilt_m | 5 | 7 | N\A | N\A | N\A | N\A | 32 | 9 | 6 | -19 | N\A | N\A | N\A | N\A | N\A | N\A | -21 | -19 |
| ftilt_m | 5 | 7 | N\A | N\A | N\A | N\A | 32 | 9 | 6 | -19 | N\A | N\A | N\A | N\A | N\A | N\A | -21 | -19 |
| ftilt_m | 5 | 7 | N\A | N\A | N\A | N\A | 32 | 9 | 6 | -19 | N\A | N\A | N\A | N\A | N\A | N\A | -21 | -19 |
| nair | 3 | 6 | 8 | 35 | N\A | 16 | 45 | 12 | 7 | -1 | -1 | -9 | -29 | -26 | N\A | N\A | -35 | -32 |
| nair | 3 | 6 | 8 | 35 | N\A | 16 | 45 | 12 | 7 | -1 | -1 | -9 | -29 | -26 | N\A | N\A | -35 | -32 |
| nair | 7 | 32 | 8 | 35 | N\A | 16 | 45 | 8 | 5 | -2 | -3 | -11 | -27 | -2 | N\A | N\A | -33 | -8 |
| nair | 7 | 32 | 8 | 35 | N\A | 16 | 45 | 8 | 5 | -2 | -3 | -11 | -27 | -2 | N\A | N\A | -33 | -8 |
| dsmash | 5 | 6 | N\A | N\A | N\A | N\A | 37 | 16 | 9 | -22 | N\A | N\A | N\A | N\A | N\A | N\A | -23 | -22 |
| dsmash | 5 | 6 | N\A | N\A | N\A | N\A | 37 | 16 | 9 | -22 | N\A | N\A | N\A | N\A | N\A | N\A | -23 | -22 |
| dsmash | 14 | 14 | N\A | N\A | N\A | N\A | 37 | 10 | 6 | -17 | N\A | N\A | N\A | N\A | N\A | N\A | -17 | -17 |
| dsmash | 14 | 14 | N\A | N\A | N\A | N\A | 37 | 12 | 7 | -16 | N\A | N\A | N\A | N\A | N\A | N\A | -16 | -16 |
| fsmash_m | 12 | 16 | N\A | N\A | N\A | N\A | 41 | 18 | 10 | -15 | N\A | N\A | N\A | N\A | N\A | N\A | -19 | -15 |
| fsmash_m | 12 | 16 | N\A | N\A | N\A | N\A | 41 | 11 | 6 | -19 | N\A | N\A | N\A | N\A | N\A | N\A | -23 | -19 |
| fsmash_m | 12 | 16 | N\A | N\A | N\A | N\A | 41 | 10 | 6 | -19 | N\A | N\A | N\A | N\A | N\A | N\A | -23 | -19 |
| utilt | 4 | 12 | N\A | N\A | 30 | N\A | 30 | 8 | 5 | -12 | N\A | N\A | N\A | N\A | -20 | -12 | -21 | -13 |
| utilt | 4 | 12 | N\A | N\A | 30 | N\A | 30 | 8 | 5 | -12 | N\A | N\A | N\A | N\A | -20 | -12 | -21 | -13 |
| utilt | 4 | 12 | N\A | N\A | 30 | N\A | 30 | 8 | 5 | -12 | N\A | N\A | N\A | N\A | -20 | -12 | -21 | -13 |
| fair | 18 | 22 | 10 | 42 | 60 | 21 | 74 | 15 | 8 | -2 | -2 | -13 | -20 | -16 | -33 | -29 | -48 | -44 |
