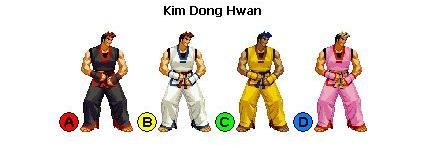
Introduction
To come.
== Character Colors ==
Gameplay Overview
Coming soon.
Move List
Normal Moves
Command Normal Moves
Super Jump: Press ![]() , then
, then ![]() /
/![]() /
/![]()
Wall Jump: Jump towards a wall and then press the opposite direction to it
Ushiro-geri (BacKick): ![]() +
+![]() in the air
in the air
Special Command Moves
Frame Data
Source : http://www13.atwiki.jp/garoumow/pages/21.html
| Move | Startup | Guard Adv. | Hit Adv. | GC Value | Cancellation | Remarks |
| Near Standing A | Three | +6 | +6 | Four | Chain / ◯ | |
| Near Standing B | Four | +4 | +4 | Four | ◯ | |
| Near Standing C | Five | -Five | -Five | 3,3 | ※ ◯ | |
| Near Standing D | Four | -6 | -6 | 3,3 | ※ ◯ | |
| Far Standing A | Three | +6 | +6 | Four | ◯ | |
| Far Standing B | Four | 0 | 0 | Four | ◯ | |
| Far Standing C | Twelve | -10 | -10 | Five | △ | |
| Far Standing D | 13 | -1 | -1 | Five | × Note | |
| Crouched A | Five | +2 | +2 | Four | Chain / × | |
| Crouched B | Four | +6 | +6 | Four | Chain / ◯ | |
| Crouched C | Five | +4 | +4 | Five | ◯ | |
| Crouched D | Seven | -8 | down | Five | × | |
| Jump A | Five | Four | ◯ | |||
| Jump B | Six | Four | ◯ | |||
| Jump C | Six | Five | ◯ | |||
| Jump D | Eight | Five | ◯ | |||
| Upper avoid attack | Ten | +4 | -2 | Six | ▽ | 1 ~ 5F upper body invincible |
| Lower avoid attack | twenty five | +5 | -1 | Six | × | |
| Kick back | Four | Nine | ◯ |
| Move | Startup | Guard Adv. | Hit Adv. | GC Value | Remarks |
| Zan weak-thunder | 19 | -1 | -1 | 3,3 | |
| Strength-thunder Zan | twenty five | -2 | -2 | 4,4 | |
| Weak-empty dust | Four | -30 (-6) | down | 3,2 × 3 | 1 ~ 5F invincible |
| Strength-empty dust | Four | -29 (-6) | down | 3,2 × 4,5 | 1 ~ 5F invincible |
| Weak-flying leg | Seven | 0 or more | 0 or more | 2 × 4 | |
| Strength-flying leg | Nine | 0 or more | 0 or more | 2 × 4 | |
| Weak-Shiden'ashi | twenty two | +13 | +13 | Seven | |
| Strength-Shiden'ashi | twenty five | +9 | down | Eight | |
| Foot Face Slapping | Seven | -9 | down | 1 × 7 | |
| Rotation Don Juan | Eight | -9 | down | 2,3 × 4 | |
| Super Don Juan leg A | 0 | -39 | down | 5 × 6 | |
| Super Don Juan legs C | 0 | -69 | down | 10,7 × 7 | |
| Thunder bullet B | 19 | -Five | down | Twenty | 1 ~ 13F invincible, missile decision |
| Thunder bullet D | 17 | +5 | down | 10,10,20,30 | 1 ~ 15F invincible, the final stage missile decision |
| I like Phoenix leg | 0 | -10 | down | Twenty | 1F invincible |
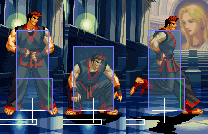
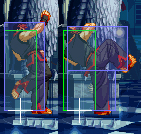
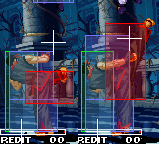
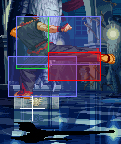
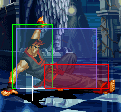
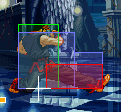
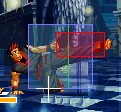
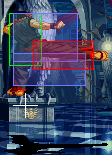
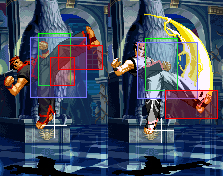
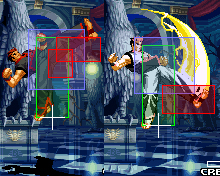
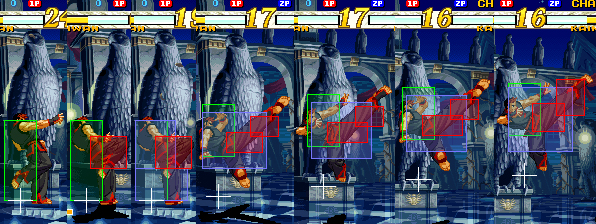
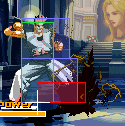
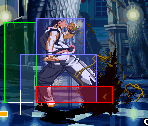
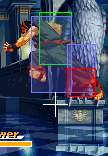
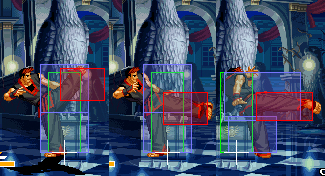
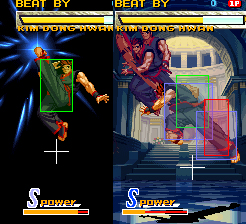
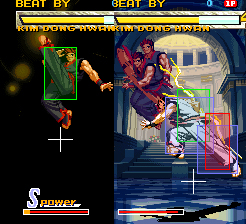
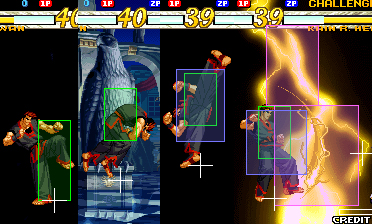
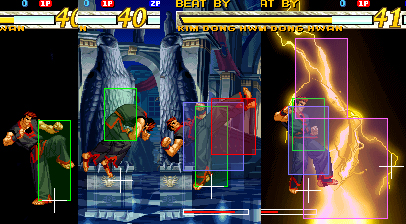
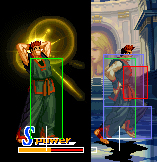
Hit Boxes and Frame Data
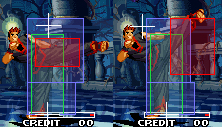
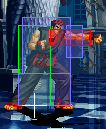
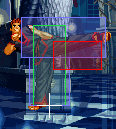
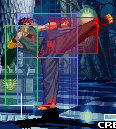
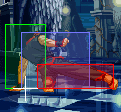
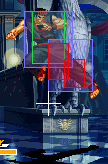
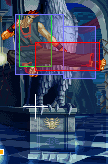
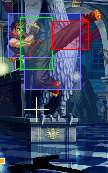
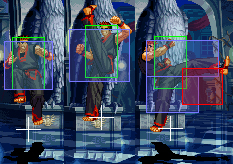
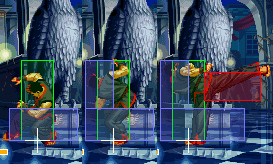
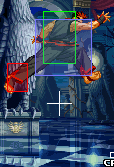
Legend:
Hit Box: Area that will hit the opponent
Hurt Box: Area where you can get hit. A move is invincible if the Hurt Box is absent.
Throw Box/Range: Active throw frames and range. Your opponent will be thrown in this field if not in block or hit stun.
Projectile Box: Hit box on a projectile attack
Guard/Counter Box: The Guard Box or Counter Box. This appears when blocking or using a counter move.
Push Box: Has no bearing on hurt/hit boxes. Just allows characters to not pass through each other.
Command = the input for the attack.
Start Up = How many start up frames a move/attack has.
Hit = When the attack hits.
Block = When the attack is blocked.
+ signifies how many advantage frames the attacker has.
- signifies how many disadvantage frames the attacker has.
KD means the attack will knock the opponent down.
Standing, Crouching and Running
Taunt
Wall jump
Super Jump
| Command | Total Frames |
| Normal |
35 |
| Command | Total Frames |
| Close |
9 |
| Command | Total Frames |
| 10 |
| Command | Total Frames |
| 10 |
| Command | Start Up | Hit | Guard |
| Close |
3 | +6 | +6 |
| Command | Start Up | Hit | Guard |
| Close |
4 | +4 | +4 |
| Command | Start Up | Hit | Guard |
| Close |
5 | -5 | -5 |
| Command | Start Up | Hit | Guard |
| Close |
4 | -6 | -6 |
| Command | Start Up | Hit | Guard |
| Far |
3 | +6 | +6 |
| Command | Start Up | Hit | Guard |
| Far |
4 | 0 | 0 |
| Command | Start Up | Hit | Guard |
| Far |
12 | -10 | -10 |
| Command | Start Up | Hit | Guard |
| Far |
13 | -1 | -1 |
| Command | Start Up | Hit | Guard |
| 5 | +2 | +2 |
| Command | Start Up | Hit | Guard |
| 4 | +6 | +6 |
| Command | Start Up | Hit | Guard |
| 5 | -4 | -4 |
| Command | Start Up | Hit | Guard |
| 7 | KD | -8 |
| Command |
| Command |
| Command |
| Command |
| Command | Start Up | Hit | Guard |
| 25 | -1 | +5 |
| Command | Start Up | Hit | Guard |
| 10 | -2 | +4 |
| Command | Start Up | Hit | Guard |
| Air |
29 | KD | -16 |
| Command | Start Up | Hit | Guard |
| 8 | KD | -9 |
| Command | Start Up | Hit | Guard |
| 19 | -1 | -1 |
| Command | Start Up | Hit | Guard |
| 27 | -2 | -2 |
| Command | Start Up | Hit | Guard |
| 4 | KD | -30 | |
| 4 | KD | -6 | |
| 4 | KD | -29 | |
| 4 | KD | -6 |
| Command | Start Up | Hit | Guard |
| 22 | +13 | +13 |
| Command | Start Up | Hit | Guard |
| 25 | KD | +9 |
| Command | Start Up | Hit | Guard |
| air |
6 | 0, -5 | 0, -5 |
| air |
9 | 0, -5 | 0, -5 |
| Command | Start Up | Hit | Guard |
| 7 | KD | -9 |
| Command | Start Up | Hit | Guard |
| air |
0 | KD | -39 |
| Command | Start Up | Hit | Guard |
| air |
0 | KD | -69 |
| Command | Start Up | Hit | Guard |
| 19 | KD | -5 |
| Command | Start Up | Hit | Guard |
| 17 | KD | +5 |
| Command | Start Up | Hit | Guard |
| 0 | KD | -10 |
Attack Notes
Ushiro-geri (BacKick): This move is best used when you're jumping and attempting to switch sides with your opponent, or to punish a cross-down attempt. When performed Dong will move his foot back in an attempt to kick his opponent. It is possible to combo from this move.
Raimei Zan (Thunder Slice): Dong performs his own version of Kim's Crescent Moon Slice. This move is very slow & can be EASILY hit out of by a Standing A, for example. This move is an overhead though. D version travels farther than the B and is slower. The player should try not to use this move a lot.
Kuusa-jin (Sand Blaster): Dong's break-able shoryuken. Break this move to combo into his Dong Hwan Flattener, or get a counter-hit combo. It is negative and punishable on block after break, but can be spaced to minimize the punition. This move can be used as an anti-air, but at times not all hits will connect.
Hishou-kyaku (Flying Kick): Dong does a dive kick at an angle. The D version has him dive farther than the B version. This move is very fast & can snuff a few attacks. However it is almost always negative on hit/block.
Shiden-kyaku (Thunder Stamp): One may consider this Dong's version of his father's 'Spirit of Conquest' Kick from KoF 98+. Dong kicks the ground & will either stun the opponent for a short period of time (B version), or juggle them (D version). This move is GREAT for starting combos & must be blocked low. The only major downside to this move is that it's slow (D version being more slower than the B version). If cancelled from a normal, you can still anti-air a jump above the stomp (be ready to anti-air).
Ashi Binta (Scolding Kick): Dong does a flurry of kicks infront of him. This move lacks range & if it misses you'll be open for attack. This moves does a good deal of damage & is best used in close range combos/punitions.
Combos
The design of Dong Hwan makes him shy away from the run of the mill 'normal cancelled into special' combos. However he has some that could be called bread'n'butter but he needs at least one full meter to execute them. As this is a detailed breakdown, scroll down to the bottom of this section if you just want full fledged examples.
Bread'n'Butter
- Close range :
![]() xx
xx ![]()
![]()
![]() xx
xx ![]()
![]() (less damage but safer if unsure about hit or guard)
(less damage but safer if unsure about hit or guard)
- Far range :
- 1 meter :
Other Combos
Anywhere:
1) qcf + B, hcb + C
2) qcf + B, stand B, TOP attack
3) qcf + K, qcfx2 + A/C in the air/qcfx3 + C
4) qcf + D, qcfx2 + B
5) Jump in D, d + C, qcfx2 + B/qcfx3 + C
Corner only:
6) Jumping D/qcf + B, d + B, d + C, qcfx2 + B
7) Jumping D/qcf + B, stand B, dp + C, Break, qcfx3 + C
8) qcf + D,jump up, qcfx2 + A in the air, land, jump again qcfx2 + A in the air, land, dp + C only if you are already next to the corner.
9) Jump in D/qcf + B, stand D(1st hit), qcb + B
Chains and Links
The following are Dong's links & chains which you can use for pressure and snuffing out attacks. (Note that Standing means performing the move close to your opponent).
- Jumping A or B-->Jumping C (C links in the air)
- Far A
- Far A or B
- Crouching A or B
- Close 'A
- Standing P or K
- Crouching P or B
- Far A or B
- Standing B-->Far A
- Crouching B
- Standing/Crouching P or B
- Far A or B
- Crouching A-->Crouching A
- Crouching B-->Crouching C
The Good Stuff
Here's where the juicy combos lie.
Main Jump Ins
Best way to jump in and start a combo. All of his jump in can cancel into j.d+K or j.qcfx2+P and will combo if they hit.
- j.B
- j.D
- j.AC air chain
Normal Cancels
Special cancelled normals that combo.
- A c.C qcfx2+B bread 'n' butter
- close D qcb+B only way to combo qcb+B on normal hit
- close D hcb+C good punisher
- c.B hcb+C risky low combo
- c.B c.B C+D easier to land low combo, no need for meter
- close C dp+P obvious
Others
- qcf+B
- c.C
- close D
- qcfx3+C
- qcf+D
- dp+C if you dont have any meter
- hcb+C silly
- C+D more silliness
- qcfx2+B use the most, big damage
- j.qcfx2+P stylin' use it instead of qcfx2+B if you have two meters or are near a wall.
- Basically all supers and specials
- j.qcfx2+A
- j.qcfx2+A
- dp+C near a wall
- j.qcrx2+A dp+C Dong's Signature Combo
Counterhit
Combos and juggles that need to start with a counterhit.
Grounded
- CH c.A+B best way to land a grounded CH
- canceled into qcf+D
- canceled into qcb+D
Air
- CH dp+P (braked) launches even if it hits a grounded opponent
- dp+P
- qcfx3+C
- j.qcfx2+P
Other launchers on air counter hit. The above work for these starters too
- qcb+K one hit only
- j.d+K one hit only
- hcb+C last hit only
A Braked dp+P can be added after any will combo in to the above as well.Thus the famous...
- 'CH dp+P (braked) dp+P (braked) j.qcfx2+A j.qcfx2+A dp+C
Basically if you land an air counter, if the move has time to hit, it will.
Special
qcf+D and j.A have some interesting combos.
- CH qcf+D
- Any low air CH combo
- qcf+D Relaunch, baby!
- close D d+A+C c.C d+A+C j.A qcfx2+P Ground to air combo, semi famous. Very flashy.
Examples
j.D c.B c.C qcfx2+B bread 'n' butter, yo
j.B c.B hcb+C good damge for no meter
j.A j.C close D d+A+C j.A j.d+K up and down
c.B C+D great for cross ups
close D d+A+C close D d+A+C c.C qcfx2+B
dp+P (braked) qcfx3+P no need for a ch!
CH c.A+B qcf+D dp+C
CH qcf+D qcf+D qcfx2+B QCF!
CH dp+P (braked) dp+P (braked) j.qcfx2+A j.qcfx2+A dp+C The For Real Deal
Tips
Help for executing these.
j.qcfx2+P
Sometimes referred to as 'tiger knee-ing' from the execution of Sagat's move. Instead of jumping then inputting, buffer the qcf with the jump. Thus-d,d/f,f,uf.
Specifically d,d/f,f,uf,d,d/f,f+P. Or if you need to cancel off of j.A. Do-d,d/f,f,u/f+A,d,d/f,f+A.
Another method is to rotate 1 and 1/4 circle starting with down. This method is much slower, but may help. However it can be more quick if done on a joystick.
dp+P
The input to brake this move is immediate. So do dp+P A+B in quick succession. For using this in juggles, the first hit (his knee) needs to connect. Waiting until the last moment is key for combos like-CH dp+P (braked) dp+p (braked) j.qcfx2+A j.qcfx2+A dp+C. Especially if you want all the hits to connect and maximize damage.
When feinting generally stick to d+A+C instead of f+A+C as the pushback is much less. However, as his super jump is inputed by presss d,N,u, it can be advantageous to use f+A+C if you intend on doing a jump or short jump after your feint. Often players will go for closeD d+A+C u/f, but a super jump will come out when they wanted a short jump.
T.O.P. Notes
8 frame startup. KDN on hit (last hit only i believe). -9 on block. 5 hits-21 damage total with TOP 1/3.
Normally Dong needs meter to do any decent combo easily as hcb+C and qcb+B only combo when cancelled off of a close move or on CH. His TOP move lets him combo more easily as it has decent range and speed. It's not too safe, but it's easy to use when you know it'll hit.
Combos off all cancelable moves except far C (only cancels on block anyway).
Example Combos...
j.b+C C+D Easy combo for cross up kick
j.D c.C C+D Big damage.
c.A+B C+D Increase evade move damage.
c.B c.B C+D Low and hit confirmable.
short jump+C c.B C+D Quick mixups.
You still have to be fairly close for these to land. Max range c.C and c.A+B canceled into C+D will not work.
Its range allows you to catch back dashers and cross up techrollers. It's meatiness, input (C and D), and air properties help it beat throws.
Example setups...
c.D or Throw-run up, opponent techs, run past C+D. This works well as you can stay close while they tech to make in ambiguous plus it works nice against throws. Or you can run kinda far and make them think it's safe.
uf+A C (air chain while ascending), then C+D as you land.
One of the most powerful TOP attacks in the game, but not on paper. One of it's strongest point's is that it's a deadly GCL.
Overall Strategy
Kim Dong Hwan is a hit and run character. The advantage he has over other characters is his ability to easily attack his opponent no matter where he is or what he is doing. He has a special low and a special overhead allowing him to create some interesting mixups. Big damage comes when Dong has meter, but it is difficult for him to build meter. Be patient and find the time to throw in a safe special to build meter while playing keep away and run or jump in when you need to create an opening. Dong has a lot of weaknesses but he can be the most unpredictable character in the game and can train his opponents many ways as well. Mix it up and kick your way to victory!
Advanced Tactics
Specific strategies for methods of attack and defense.
Dealing Damage
Rushdown
Getting In
An easy way to get in is obviously to jump in. Know that he can super jump as well but the lack of ability to JD makes you vulnerable to antiairs. His dive kick (Air d+K) is another important tool. It allows him to attack any spot that is in front of his jumping arc.
The other, slightly less obvious, way of getting in is to run in. It is imortant to use standing/Low Punch often when doing this. It is safe, fast, and allows you to judge your distance from the opponent. Additionally you can cancel into a special or feint if need be.
Don't forget you can wait for your opponent to come to you.
Rushing
- st A It is quite positive on block/hit, allowing you to run back in after one and reapply pressure.
- tick throws are viable with Dong, his clC goes up and option-selects against escape jumps. Don't forget to feint cancel your throws, just in case they didn't throw.
- hops Can be confirmed into DP. Take advantage of his good are normals.
- QCB+K Whether this hits or is guarded, you're at -1 frame. The safest thing to do is usually to JD or backdash. The double hit makes it annoying to jd + guard cancel, and when cancelled from a normal it is an annoying tool that prevents jump outs.
- QCF+B This stomp is a strong rushdown tool, but you must be close for it to land. Try do cancel it from clD. You have a massive +13 frames on hit or block. If it's guarded, you can run in a bit and remain in blockstring. If they hold up, Dong will recover in time from the stomp to anti-air.
- QCF+D This has more range than the lk version, however it is slower and only gives +9 frames on block. use from time to time to catch people off guard.
- Feint Feinting will take away the recovery of your normal and allow you more options. Generally it's used to allow you to get in closer again.
- j b+C to cross up your opponent, when they roll toward you on their wakeup it can be very tricky. Use it on reaction, for example jump to chase a backdash, if they didn't backdash you will crossup and react with this, otherwise use another air move to land on the backdash recovery.
- Corner Dong has an infinite with D feint run D. He can use it to guard crush, however mashing A will likely crush fast enough without risking execution failure.
- j.A>C target combo the prefered jumpin as it is double hit, preventing many guard cancels.
- Lock Down Strings
- closeHK f+A+C closeHK f+A+C closeHK qcf+LK... -Serious lockdown, but is difficult to guard crush with.
- ff+closeHK qcf+K ff+closeHK qcf+K... -More openings, but can be easy to perform and has decent guard crush potential. Either HK or LK version works or change them up depending on your distance.
Keep Away
You can probably forget about rushing, Dong is all about running away. He is notorious for his ability to run away. It is extra frustrating for the opponent as, at any moment, he can change his mind and attack. Here is a list of his most notable tools :
- backdash very good, allows Dong to run away for free unless hard predicted.
- walljump Dong retain his air JD ability when walljumping, a simple but efficient gameplan is to slowly run from a corner to another using this tool, letting the clock run down.
- iori kick j b+C (hits behind him), allows you to punish people trying to cross you down.
- air throw when someone jumps at Dong, simply do 874+C, it will either air JD or airthrow, giving Dong good control over the air.
- DP another anti-air... Also a "get off me" tool, but keep in mind it is unsafe even after break. The lp version of dp+p is faster and has more pushback than the hp version. This makes it almost always the version of choice.
- far A extremely fast and good range, to prevent ground approaches, or run in and poke with it.
- 0f air super Dong can whiff punish anything when in the air with his air 0F, it is a very scary tool that will make the opponent think twice before chasing after an airborne Dong. Remember to build meter when possible with his qcfB stomp to get this ready.
- 0f hidden super Have fun with the execution (qcf x3 + C) but it's still a 0F super, allowing many punishes.
Weaknesses
His most notable weakness would probably be his lack of damage output and his meter building ability is quite slow.
Unsafe Moves
While Dong has his dp+p to discourage interruption, many of his moves are still punishable even on hit.
- Dp+p Even if you brake this, you are at -6 frames
- Qcb+k Whether it's on hit or block you're at -1 frame, technically punishable by 0F supers => there is a way to escape this : Buffer an invincible move before the freeze, then press B+D so it doesn't come out. If you see a freeze, press your button for the invincible special to come out. (showcase : https://www.youtube.com/watch?v=YGg-PWL7gwc)
- j.d+k Depending on where his last kick lands, you'll be at a greater or lesser disadvantage, +0 at best.
- Others His TOP, qcf,qcf+lk, j.qcf,qcf+p, and hcb+hp are all unsafe on block.
Matchup Strategies
To come.
