Introduction
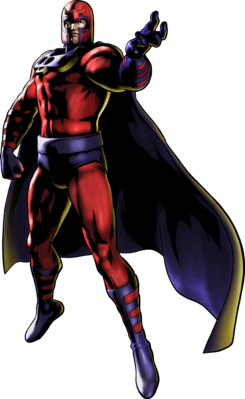
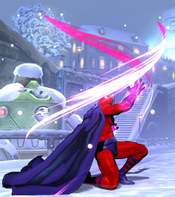
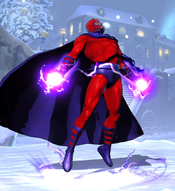
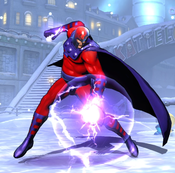
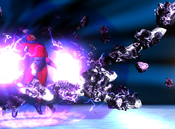
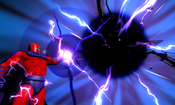
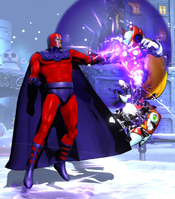
As a long-time friend of X-Men leader Professor Xavier, Magneto's early life led him to believe that humans and mutants could never reconcile their differences to live in harmony. Splitting with Xavier over this difference in beliefs, Magneto formed the Brotherhood, an organization of mutants that seek to establish their place in the world through force. Magneto's mutant ability gives him the power to manipulate and generate electromagnetic fields.
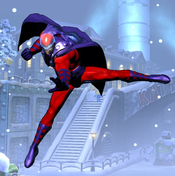
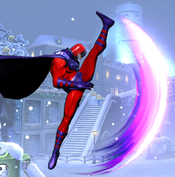
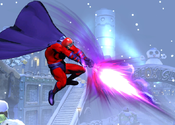
In UMvC3, Magneto retains his long-standing identity in Marvel vs Capcom games as a highly mobile character with a ton of tools for dangerous mixups and resets. He is the iconic face of the "Pixie" archtype of characters; one who does not necessarily hit hard, but can dance around opponent's attacks with fast airdashes and flight. Magneto also has a set of fast projectiles which he can use to harass opponents from a distance.
| Strengths | Weaknesses |
|---|---|
|
|
Move List
Assists
| Damage | Startup | Active | Recovery |
|---|---|---|---|
| 90,000 | 35 | 11 | 120, 90 |
| On Hit | On Block | Guard | Properties |
| - | - | Mid | |
|
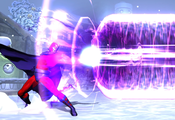
THC Hyper: Magnetic Shockwave. Recommended Assist. Magneto fires a large but short-lived horizontal beam that reaches across the entire screen. Disruptor's main strength is its exceptionally fast startup. It becomes active much faster than other long-range assists like Doom's Plasma Beam or Sentinel's Sentinel Force, and it reaches fullscreen in only additional 9 frames. It works very well as a counter-call to these kinds of assists, shutting them down before they can become a threat on the screen. As a downside, Disruptor has limited active frames and hits only once, so its lockdown potential is limited. | |||
| Damage | Startup | Active | Recovery |
|---|---|---|---|
| 50,000 x2 | 50 | - | 127, 97 |
| On Hit | On Block | Guard | Properties |
| - | - | Mid | |
|
THC Hyper: Magnetic Tempest. Magneto channels, and then shoots out a very short-range orb which lasts for 15 frames. If the orb hits, the opponent is placed in a Capture (airborne) state and instantly pulled to the space immediately in front of your point character, no matter where they are on the screen. The point character can use this opportunity to start - or continue - a combo. If they do not, the captured opponent is dealt one more hit of damage and falls out. | |||
| Damage | Startup | Active | Recovery |
|---|---|---|---|
| 100,000 | 28 | 20 | 119, 89 |
| On Hit | On Block | Guard | Properties |
| - | - | Counter | Counters physical hits, |
|
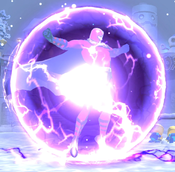
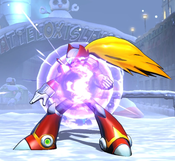
THC Hyper: Magnetic Shockwave. Magneto appears and then creates a purple barrier around himself. There is a 3 frame window between when Magneto arrives on stage and when the counter becomes active, where he is vulnerable to being hit. If Magneto is struck by a physical attack while the Force Field is active, he will strike the ground, causing a pillar of energy to spike upwards in front of himself. Ideally, this will hit the opponent that triggered the counter, but no guarantees. | |||
Ground Normals
| Damage | Startup | Active | Recovery |
|---|---|---|---|
| 50,000 | 5 | 3 | 10 |
| On Hit | On Block | Guard | Properties |
| +1 | 0 | High | |
|
High-angled jab. The hitbox on Magneto's 5L makes it a great anti-air. It can either be used raw as a neutral tool, or as a conversion tool against opponents who are being juggled by assist hits, random air-to-airs, etc. You can mash this attack several times to confirm the hit before chaining directly into 5S to start a combo. 5L will whiff against most characters if they are crouching. Magneto can take advantage of this by chaining 2L into an intentionally whiffed 5L, and then throwing the opponent before they recognize what has happened. | |||
| Damage | Startup | Active | Recovery |
|---|---|---|---|
| 65,000 | 10 | 4 | 17 |
| On Hit | On Block | Guard | Properties |
| -2 | -3 | Mid | - |
|
Fairly niche button. It is both slower and shorter range than 5H. It's primary advantage is that it can be chained into 2H, which advances Magneto forward to make follow-ups more consistent. | |||
| Damage | Startup | Active | Recovery |
|---|---|---|---|
| 83,000 | 8 | 7 | 26 |
| On Hit | On Block | Guard | Properties |
| - | 9 | Mid | |
|
One of Magneto's most important buttons, alongside its aerial counterpart. Magneto performs a large swiping attack. It has great range, is very fast, and has much better damage than Magneto's other normals. On hit, it pops the enemy into the air with a very lengthy untech time. | |||
| Damage | Startup | Active | Recovery |
|---|---|---|---|
| 43,000 | 6 | 3 | 9 |
| On Hit | On Block | Guard | Properties |
| +2 | +1 | Low | |
|
Standard fast low attack. 2L is an important part of Magneto's High/Low/Throw mixup game, when paired with j.5L. Whenever possible, try to confirm with rapid fire 2Ls, rather than chaining it into Magneto's other crouching normals, as they are significantly worse on block. | |||
| Damage | Startup | Active | Recovery |
|---|---|---|---|
| 70,000 | 9 | 4 | 19 |
| On Hit | On Block | Guard | Properties |
| -4 | -6 | Low | |
|
Magneto channels a small burst of electromagnetic energy on the ground in front of himself. Despite being a normal, this attack actually does produce a small projectile that deals minor chip damage when blocked. Outside of this novelty, it has little notable use. | |||
| Damage | Startup | Active | Recovery |
|---|---|---|---|
| 75,000 | 10 | 9 | 27 |
| On Hit | On Block | Guard | Properties |
| - | -12 | Low | |
|
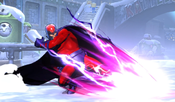
Magneto slides across the ground, covering roughly 1/3 of fullscreen distance in total. 2H is useful for ensuring that Magneto is brought into range of his 5S during a hit confirm. 2H can also be useful for side-switch setups. Since it pops opponents into the air while moving Magneto forwards, he can actually slide underneath the airborne opponent, then chain into 5S from the opposite side. | |||
| Damage | Startup | Active | Recovery |
|---|---|---|---|
| 90,000 | 8 | 5 | 23 |
| On Hit | On Block | Guard | Properties |
| Launch | -4 | Mid | |
|
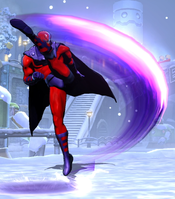
Standard launcher. Magneto surrounds himself in a rising magnetic field. The field hits on all sides of Magneto, and can be used as a cross-under tool if set up properly. The hitbox for this move rises quite high above Magneto, and so it makes a very useful anti-air. It is notable for being a consistent way to punish Strider's Vajra assist, as it will stuff him out of the air (alternatively, block Vajra in the air and then land and press this button to punish Strider's recovery). | |||
Aerial Normals
| Damage | Startup | Active | Recovery |
|---|---|---|---|
| 48,000 | 6 | 3 | 18 |
| On Hit | On Block | Guard | Properties |
| +12 | +11 | OH | |
|
Fast normal and a core part of Magneto's High/Low/Throw game. Although it does not work as an instant overhead against normal sized characters, it can still be used for very fast overheads as part of a tri-dash setup. Tri-dash lights are usually performed by jumping over the opponent, airdash straight down and then immediately plinking a L input as Magneto falls. In terms of mandatory inputs, this could be written as simply 92M+H~L, but some players have more success inputting it as a "Candy Cane" motion: 987412M+H~L. Dashing with M and H inputs is important as it allows the player to plink their L input as fast as possible, rather than having to first release and then re-press the button. By altering the timing on this input, it is possible for Magneto to perform a falling j.5L on either side of the opponent, or to make the attack whiff for a fast Low/Throw mixup instead. | |||
| Damage | Startup | Active | Recovery |
|---|---|---|---|
| 68,000 | 10 | 5 | 20 |
| On Hit | On Block | Guard | Properties |
| +17 | +15 | OH | |
|
Magneto kicks upwards in an arcing swing. It's notable because it does not push opponents as far away on hit as j.5H. There are situations where j.5H xx Fly, j.5L will not combo, but j.5M xx Fly, j.5L will work. | |||
| Damage | Startup | Active | Recovery |
|---|---|---|---|
| 83,000 | 10 | 7 | 19 |
| On Hit | On Block | Guard | Properties |
| +21 | +19 | OH | |
|
One of Magneto's most important tools, along with its standing version. Its very fast, has a fantastic hitbox, option-selects a throw, and deals significantly more damage than most of his other normals. Its recovery can be mitigated by canceling into an airdash or flight. | |||
| Damage | Startup | Active | Recovery |
|---|---|---|---|
| 90,000 | 11 | 6 | 19 |
| On Hit | On Block | Guard | Properties |
| +18 | +16 | OH | |
|
Downward swinging attack that works as a jump-in. It can be canceled into specials even on whiff, which is primarily useful for canceling into Magnetic Blast in order to cover Magneto's descent. | |||
Command Normals
Magneto has no need for command normals.
Special Moves
| L |
Damage | Startup | Active | Recovery |
|---|---|---|---|---|
| 90,000 | 7 | 14 | 29 | |
| On Hit | On Block | Guard | Properties | |
| -2 | -24 | Mid | ||
| M |
Damage | Startup | Active | Recovery |
| 55,000 x2 | 12 | 13 | 29 | |
| On Hit | On Block | Guard | Properties | |
| +2 | -21 | Mid | ||
| H |
Damage | Startup | Active | Recovery |
| 45,000 x3 | 17 | 15 | 24 | |
| On Hit | On Block | Guard | Properties | |
| +5 | -19 | Mid | ||
|
Magneto's beam special. Disruptor takes 9 frames to travel from Magneto's hand to fullscreen distance once active. Disruptor is extremely fast, especially the L version. Magneto can use his beam to stuff opponents out of the startup of their own long-range options, or to snipe opposing assist calls on reaction. The threat of a sudden Disruptor blast allows Magneto to play an effective long-range game even against dedicated zoning characters. Magneto can cancel a grounded Disruptor directly into Gravity Squeeze (623XX) from any screen distance, which makes it a much more serious threat if Magneto has meter stocked. | ||||
| L (in air) |
Damage | Startup | Active | Recovery |
|---|---|---|---|---|
| 90,000 | 9 | 14 | Until Landing | |
| On Hit | On Block | Guard | Properties | |
| - | - | Mid | ||
| M (in air) |
Damage | Startup | Active | Recovery |
| 55,000 x2 | 14 | 13 | Until Landing | |
| On Hit | On Block | Guard | Properties | |
| - | - | Mid | ||
| H (in air) |
Damage | Startup | Active | Recovery |
| 45,000 x3 | 21 | 15 | Until Landing | |
| On Hit | On Block | Guard | Properties | |
| - | - | Mid | ||
|
Air version of Disruptor. It functions almost exactly the same, but has slightly slower startup and notably worse recovery, making it riskier to use. If Magneto uses Air Disruptor normally, he will fall helplessly to the ground and be unable to guard or attack - except by canceling into a hyper. This weakness can be circumvented by using Flight. If Magneto is in Flight mode, he will recover from Disruptor roughly as fast as he does from the grounded version, and will still be able to act - including by firing another Disruptor. It is recommended to avoid using this move unless you are in Flight, or are using it to end a combo (j.236M or j.236H canceled into j.214XX in the corner). | ||||
| L |
Damage | Startup | Active | Recovery |
|---|---|---|---|---|
| 50,000 x2 | 26 (30 in air) | 15 | 35 (36 in air) | |
| On Hit | On Block | Guard | Properties | |
| +25 | -22 | Mid | ||
| M |
Damage | Startup | Active | Recovery |
| 50,000 x2 | 31 (35 in air) | 15 | 30 (31 in air) | |
| On Hit | On Block | Guard | Properties | |
| +31 | -17 | Mid | ||
| H |
Damage | Startup | Active | Recovery |
| 50,000 x2 | 36 (40 in air) | 15 | 25 (26 in air) | |
| On Hit | On Block | Guard | Properties | |
| +31 | -12 | Mid | ||
|
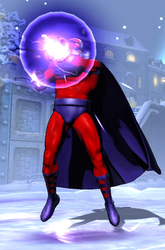
Magneto channels, and then produces an orb that chases the opponent's point character. Regardless of button strength, the orb remains active for 15 frames, but heavier button strengths travel faster and thus have a longer effective range. L version barely leaves the space directly in front of Magneto, but is the only version fast enough to combo into without the aid of assists. If the orb hits an opponent, they are placed into an airborne Capture state, and quickly pulled the the space directly in front of Magneto. Hyper Grav is primarily useful as a combo extender when in the corner. If 5H or j.5H juggle an opponent high enough into the air, Magneto has time to cancel into L Hyper Grav. This can be used to stabilize an opponent's height before finishing the combo. It is also possible to loop the sequence of j.5H > 5H xx 214L into itself several times, called a Hyper Grav Loop, to add additional damage to most combos. If the orb hits and then you hit the opponent with another attack during the capture, the second hit will be cancelled. All versions of Hyper Gravitation are not subject to hitstun deterioration. | ||||
| Fatal Attraction |
Damage | Startup | Active | Recovery |
|---|---|---|---|---|
| - | 7 | 23 | 11 | |
| On Hit | On Block | Guard | Properties | |
| - | - | No | Pulls opponent in Magneto's direction horizontally | |
| Repulsion |
Damage | Startup | Active | Recovery |
| - | 12 | 20 | 14 | |
| On Hit | On Block | Guard | Properties | |
| - | - | No | Pushes opponent away from Magneto horizontally. | |
| Reverse Polarity |
Damage | Startup | Active | Recovery |
| - | 16 | 10 | 19 | |
| On Hit | On Block | Guard | Properties | |
| - | - | No | Pulls opponent straight down from the air. | |
|
Magneto uses his magnetic powers to forcibly move the opponent around the screen. These are not attacks in the traditional sense. They can not be blocked or evaded, but do not cause any damage, hitstun, or blockstun - the opponent is free to act while being moved around by Magneto.
Glitch: Magneto can cancel blockstun into any of these three gravitation moves. Since they do not have invincibility, armor, or even an active hitbox, this is rarely useful. However, it is possible to punish certain attacks that would otherwise be safe by guard-canceling into Attraction or Gravitation, then hyper-canceling into Shockwave or Gravity Squeeze. | ||||
| L |
Damage | Startup | Active | Recovery |
|---|---|---|---|---|
| 100,000 | 3 | 19 | 28 | |
| On Hit | On Block | Guard | Properties | |
| - | - | Counter | ||
| M |
Damage | Startup | Active | Recovery |
| 100,000 | 8 | 19 | 29 | |
| On Hit | On Block | Guard | Properties | |
| - | - | Counter | ||
| H |
Damage | Startup | Active | Recovery |
| 100,000 | 12 | 19 | 30 | |
| On Hit | On Block | Guard | Properties | |
| - | - | Counter | ||
|
Counter special. Magneto surrounds himself in a purple Force Field for a short duration. While this counter is active, Magneto nullifies Low and Medium priority projectiles that come into contact with him. Additionally, if Magneto is struck by any physical attack, he will activate his counterattack. When triggered, Magneto produces an infinite-height pillar immediately in front of him, similar to the ones produced by his Magnetic Shockwave hyper. The counterattack has 15 frames of startup, is invincible for 75 frames, and is -37 on block. Force Field is risky to use and has little payoff, since Magneto's only combo options after a successful counter are to Hyper cancel or activate X-Factor. | ||||
| Damage | Startup | Active | Recovery |
|---|---|---|---|
| - | 15 | 106 | 1 |
| On Hit | On Block | Guard | Properties |
| - | - | - | |
|
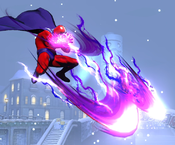
Standard flight mode. While flying, Magneto floats in the air and gains the ability to perform airdashes and air specials an unlimited number of times. Magneto can naturally cancel an airdash into another airdash in any of the 7 other directions. He can also use Plink Dashing to cancel an airdash into another in the same direction. Flight is a critical tool for Magneto. It allows him to maneuver around superjump height without using his superjump, and thus retain access to assist calls. It also drastically improves is mobility and allows him to stay non-committal by canceling blocked or whiffed normals into flight and dashing to safety. Magneto can combo into Flight mode by canceling j.5M or j.5H into Flight, then linking another air normal afterwards. Due to the large amount of pushback caused by j.5H on hit, it can only be used for this purpose if Magneto is very close to the opponent. Once in Flight mode, Magneto can repeatedly loop j.5H xx Airdash xx j.5H xx Airdash xx etc. It is also possible for Magneto to cancel his normals into Unfly, which is another useful combo tool. However, Magneto faces the issue that j5H xx Unfly (214S) ~ j.5H overlaps with the Hyper Gravitation input (214X). If Magneto performs a normal attack too quickly after Unfly, he will get Hyper Grav instead, which is usually disastrous. To circumvent this, Magneto players should Unfly using the Input Nullification Glitch. Essentially, perform the Unfly input and also press the button for the desired normal on the same frame - 214S+H. | |||
Hyper Combos
| Damage | Startup | Active | Recovery |
|---|---|---|---|
| 70,000 x6 | 14+1 | 44 | 56 |
| On Hit | On Block | Guard | Properties |
| - | -68 | Mid | |
|
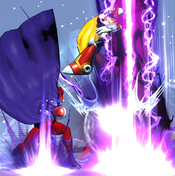
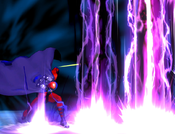
Magneto punches the ground, and a series of infinite-height pillars of energy erupt from the ground in front of him. The pillars appear in sequence, carrying any opponents hit by the attack away from Magneto. Although the total damage is high, this hyper will deal significantly less damage if done from far away, or if done too close to the corner, since most of the pillars will miss. Considering that Magneto has excellent corner carry, this is a fairly severe detriment. It is possible to use Fatal Attraction (421L) to pull an opponent out of the corner in order to increase the damage done by this hyper. Magneto players may try to cancel whiffed attacks into Shockwave in an attempt to protect themselves. Despite being largely negative on block, it pushes opponents far enough away to make punishes difficult. However, it is possible to defeat this strategy by mashing pushblock. Pushblocking at a certain timing - easily achieved by mashing - will prevent the shockwave from dragging the opponent away, allowing them to recover much faster and closer for an easy punish. The shockwaves continue to appear once the first one has started, even if Magneto cancels the hyper with X-Factor, a DHC, or being hit. Magneto can perform a costly conversion off a Hard Knockdown by X-Factor canceling this hyper and then dashing up behind it. Shockwave does have 10 frames of invincibility, but this is largely useless as it does not last long enough to cover the move's startup. | |||
| Damage | Startup | Active | Recovery |
|---|---|---|---|
| 10,000 x40 ~ x80 | 4+23 | 77 | 29 |
| On Hit | On Block | Guard | Properties |
| - | -4 | Mid | |
|
Magneto unleashes a barrage of magnetically charged rocks. This hyper has extremely lengthy post-flash startup, which makes it difficult to combo into. It is still possible, by using canceling from Hyper Gravitation or M and H versions of EM Disruptor. Its primary advantage over Shockwave is that it deals full damage in the corner. Conversely, it deals less damage midscreen as more rocks will miss, but Magneto's excellent corner carry usually makes this a non-issue. | |||
| Damage | Startup | Active | Recovery |
|---|---|---|---|
| 20,000 + 1,000 x0 ~ x59* + 380,000 | 20+1 | 2 | 43 |
| On Hit | On Block | Guard | Properties |
| - | -30 | Mid | Invuln until frame 10, |
|
Cinematic level 3 hyper. This hyper tracks the opponent anywhere on the screen, and can even hit as an OTG. Magneto can almost universally end combos with an Air Combo Finisher, then land and perform this attack to easily secure a kill. As a level 3 hyper, it ignores damage scaling. Magneto can snipe opponents from fullscreen by canceling EM Disruptor directly into this hyper, or even simply perform it raw. Although it does have 10 frames of invincibility, this does not cover the entire startup, so it does not function as a reversal. At the end of the cinematic, the opponent is falling into a Hard Knockdown state. Magneto can actually tag the opponent with an EM Disruptor before they land, and even cancel that into Magnetic Shockwave if more damage is needed.
| |||
Universal Mechanics
| Damage | Startup | Active | Recovery |
|---|---|---|---|
| 10,000 x3 + 50,000 | 1 | 1 | - |
| On Hit | On Block | Guard | Properties |
| - | - | Throw | |
|
Unlike most normal throws, Magneto's throws do not cause a Hard Knockdown. Instead, the opponent is placed into a Capture (grounded) state, encased in magnetic rock, a good distance away from Magneto. The capture state for a forward throw lasts 134 frames, and it lasts 144 frames or a back throw. This is enough for Magneto to dash up to the opponent and begin a combo before they recover. | |||
| Damage | Startup | Active | Recovery |
|---|---|---|---|
| 10,000 x3 + 50,000 | 1 | 1 | - |
| On Hit | On Block | Guard | Properties |
| - | - | Airthrow | |
|
Like with the grounded version, Magneto's airthrow does not cause a Hard Knockdown, but instead puts the opponent in a grounded Capture state some distance away. Forward Airthrow causes a 152 frame capture state, and Back Airthrow causes a 163 frame capture state. To confirm into a combo, Magneto should airdash down-forward immediately upon recovering, and then cancel his airdash into a whiffed normal in order to close the distance as fast as possible. | |||
| Damage | Startup | Active | Recovery |
|---|---|---|---|
| 50,000 | 2 | 4 | 20 |
| On Hit | On Block | Guard | Properties |
| - | 0 | Mid | Snapback |
|
Animation and hitbox based on 5H. | |||
| Damage | Startup | Active | Recovery |
|---|---|---|---|
| 30,000 | - | 20 | 34 |
| On Hit | On Block | Guard | Properties |
| - | -14 | OH | |
|
- | |||
Team Position
Magneto is almost chosen as a Point character. His extremely high mobility (especially in the air), useful projectiles, and strong normals make him one of the best characters in the game at playing neutral. Especially when supported by assists, Magneto can quickly secure a hit, and using a TAC or DHCs, he can convert that into a kill. Magneto also has some strong tools for Oncoming Mixups, which further cements his role as a great point character.
Since EMP Disruptor is a solid assist, there is some merit to running Magneto Second or Anchor instead. However, his level 1 hypers are notoriously difficult to DHC into efficiently.
Notable Synergies
Sentinel: Sentinel Force (Charge) is a very powerful assist with a long total duration. It can be used to lock opponents down while the point character performs mixups, to extend combos, or to assist in zoning. Sentinel Force's main weakness as an assist is Sentinel himself - he is very large and prone to getting hit on assist call, which causes the drones to disappear. Magneto is a very fast, oppressive character who can effectively protect Sentinel from the opponent's attempts to hit him, and then reap the benefits of a great assist afterwards.
Players to Watch: RayRay (Magneto/Doom/Sentinel)
Dormammu: Magneto often relies on DHCs to secure kills, since his own Level 1 Hypers do poor damage. Dormammu offers some fantastic DHC options to secure a kill - Chaotic Flame (236XX) deals great damage and is easy to DHC into, while Stalking Flare (214XX) lasts an extremely long time, giving Magneto time to tag back in and prepare a mixup for the next character. In general, Dorm provides lots of tools to lock down opponents for Magneto via Stalking Flare, Flame Carpet (3H) and Dark Hole assist. Since both Dorm and Magneto have practical TAC infinites, they can also always score a kill by TACing to each other.
Players to Watch: Wentinel (Wesker/Dorm/Magneto), Ranmasama (Magneto/Dorm/Haggar), Jasonkiddo
Doctor Doom: Doom is a generically strong assist character who can support Magneto with either Hidden Missiles or Plasma Beam assists, depending on player preference. Both of these assists can be used to cover Magneto's approach or extend his combos. Since Magneto combos tend to end in the corner and near to the ground, a DHC to Sphere Flame gets maximum efficiency and deals great damage. Like with Dormammu above, Doom also has very practical TAC combos, so Magneto can secure kills by TACing to Doom as well.
Players to Watch: FChamp (Magneto/Doom/Phoenix), RayRay (Magneto/Doom/Sentinel), GoldenBoyNeo (Magneto/Doom/Phoenix), Escalante (Magneto/Morrigan/Doom), Milky (Magneto/Doom/Dante), Priest (Magneto/MODOK/Doom), CJ Showtopper (Magneto/Doom/Vergil), RemyMartin (Magneto/Doom/Vergil), Frankie G (Magneto/Doom/Vergil), Hazy (Magneto/Doom/Vergil), RemyMartin (Magneto/Doom/Vergil), Takumi (Magneto/Doom/Vergil), UchimaBR (Magneto/Doom/Sentinel)
Other Players to Watch: KBeast (Viper/Magneto/Dante), Mundank (Nova/Spencer/Magneto)
Alternate Colors
| Color 1 | Color 2 | Color 3 | Color 4 | Color 5 | Color 6 |
|---|---|---|---|---|---|

|

|

|

|

|

|

