The Life Meter
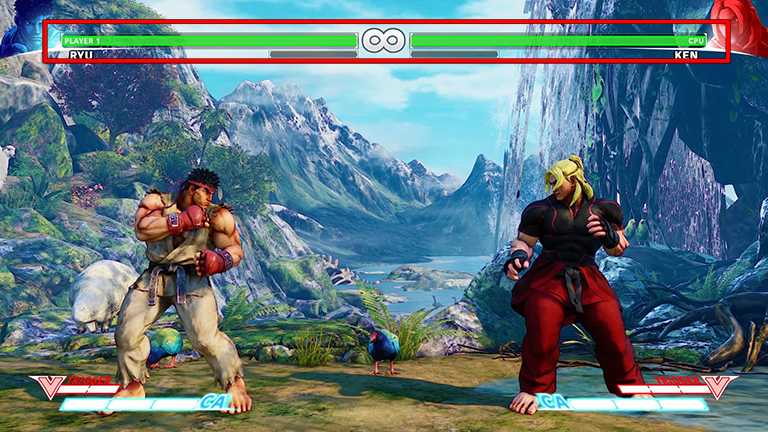
The goal of Street Fighter is to defeat your opponent, and the way to do that is to drain their energy before they drain yours. Each character's energy is represented in the green bar at the top of the screen, known as the Life Meter. It starts out purely green when the character has full health, but when hit, the Life Meter gradients to a shade of yellow towards the center of the screen. Each hit drains your Life Meter from outside towards the yellow portion of the Life Meter. Once the meter is fully drained, that character is K.O.ed, defeated for that round.
Life bars shown below in the red box.
Hit Points
The main thing to note is that every character has a set amount of "Hit Points" and it's varies from character to character. Even though the Life Meter always has the same length on screen, the amount of Hit Points represented by the bar is actually different depending on the character. So while it's easy to say things like "Cammy takes more damage than Zangief", it's worth noting that this isn't actually true: every character takes the same amount of damage. The only difference is how many Hit Points they have total, and those with lesser amount of Hit Points just visually look like they take more damage. Dealing 500 points of damage to Ryu means he's lost 50% of his life. Draining 500 points from Cammy means she's lost 56% of her life. So even though it's the same amount of total damage, it will look like more life lost on Cammy's Life Meter.
The average character has 1000 Hit Points. Characters with 1050 Hit Points are considered characters with high health and characters with 900 Hit Points are considered characters with low health.
Hit Point Charts
Here are the Hit Point counts for every character in Street Fighter V:
Health Damage Reduction Stages
The Life Meter in Street Fighter V is actually broken down into 4 segments. The segments are based on the percentage of Hit Points left. The segments of the bar are as such: stage 1 is when you're Life Meter is 100% full to 50% full. Second segment is 50% to 30%. Third segment is 30% to 15%. Final segment is 15% to 0%. The significance of the segments are the amount of damage you take. In the first segment, you take normal damage. In the second segment, all damage is scaled down to only 95% of its normal damage. In the third segment, all damage is scaled down to 90%. And in the final segment, all damage is scaled all the way down to 75%. So the closer to being defeated you are, the more resilient you become.

You can see all these numbers easily in Training Mode, which presents to you the percentage of damage the move is doing if you turn on Attack Data. Keep hitting the Training Mode dummy with one move at a time (no combos) and you'll eventually see the "Damage Scaling" value change to 95%, then 90%, and finally 75%. These values are also rounded up, however, in case anyone is wondering why sometimes in Training Mode you'll see some odd percentages like "76%" instead of "75%".
Obviously, these percentages are the percentage of total Hit Points you have. So for Ryu, who has 1000 Hit Points, his first damage reduction kicks in at 500 Hit Points. For Dhalsim, who has 900 Hit Points, his damage reduction kicks in when he has 450 Hit Points.
Also, keep in mind that damage reduction doesn't kick in until the meter drops below those percentages. In other words, let's just look at Zangief's Super Combo, the Bolshoi Russian Suplex. The move does three hits of 50, 100 and 400 damage. Ryu has 1025 Hit Points. It's only once he drops below 500 Hit Points that he'll start taking only 95%. So if Ryu is at 700 health, the first two hits of Zangief's Super will drain Ryu down to 550 health, still in the first segment. So the final hit will still do 400 damage. However, if Ryu is at 600, the first hit drains him to 550 so the second hit will still do 100 damage and drain Ryu to 450. However, since Ryu's life is now in the second segment, the last hit will be scaled by 95% and do 385 damage. Also, if Ryu is at exactly 512 health (50%), that will already kick in the 95% scaling.
Last but not least, this Life Meter damage reduction ignores any Grey Life(see Grey Life section in Game Systems). So if your Life Meter is at 49% but have a huge block of Grey Life that extends passed the 50% mark, you'll still take 95% damage.
The Critical Art Meter
Every character in Street Fighter V has a blue Critical Art Meter at the bottom of the screen. As a match continues forth, certain actions performed by the characters will start filling up the Critical Art Meter. At the start of every fight, the Critical Art Meter is empty. However, between Rounds, you retain whatever amount of Critical Art Meter you had at the end of the previous Round. So if you have a full Critical Art Meter at the end of Round 1, you will start Round 2 still with a full meter.
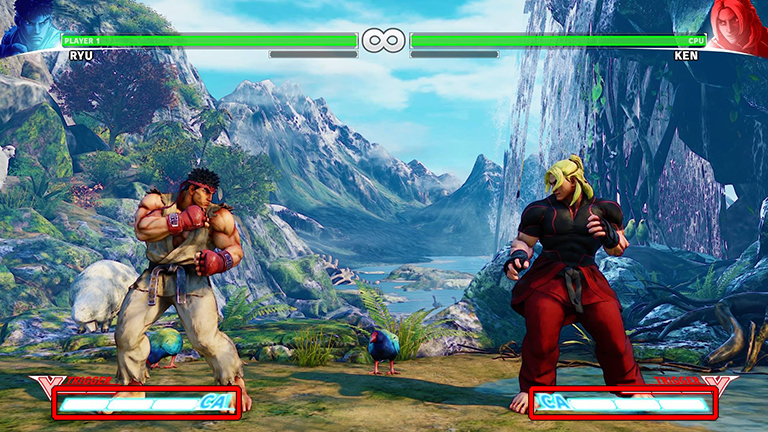
Critical Art Meters shown below in the red boxes.
Critical Art Blocks
The Critical Art Meter is divided into three equal blocks. As you perform actions, the meter starts filling up with a blue bar. As soon as one block fills up, it begins glowing a brighter blue, which mean the block is ready for use. If at least one block is full, the meter reads "EX" on the inside edge of the meter, letting you know you can perform an EX Special Move. Once it fills up completely, the "EX" changes to a large, brightly glowing "CA", letting you know you can perform your Critical Art now. These two actions cost meter to use, and whenever you perform one, they will drain the amount of meter needed to use them and you have to begin filling up those blocks again.
Each block in the Super Meter requires 300 "points" to fill. And unlike Life Meter, this is the same for every character in the game. So every character requires 900 points to fill it completely up. Also, the segments of the Life Meter are ignored. Regardless of how much life the opponent has, the amount of Critical Art Meter gained is the same.
Building Up the Critical Art Meter
Below are a list of actions that actually build Critical Art Meter, and the amount they build up:
(*) - For Throws, there only seems to be two base values that Throws give you for landing them: 80 or 100. It's not consistent between characters. For example, Ryu's Forward Throw is 80 but Back Throw is 100. F.A.N.G.'s Forward Throw is 100, but Back Throw is 80. Both of Zangief's Throws are 80. Getting thrown will always net you 60% of that value. So if the Throw builds 100 meter for the thrower, the person thrown gains 60 meter. If the thrower gains 80, the person thrown gains 48.
(**) - When you perform a Special Move, you actually gain meter for performing the move, regardless if it hits or not. The amount gained is completely arbitrary for each move. For example, Ryu's Hurricane Kick gains more meter than his Dragon Punch when you perform it. And Fireballs barely give you any meter. And in some cases, like Zangief's Lariat, he gains no meter at all, whatsoever for doing the move! So if it whiffs, you don't get any Critical Art Meter at all!
(***) - For Special Moves and V-Skills, the amount of Critical Art Meter, each move is assigned an arbitrary base amount that it builds up when you connect with the move. From there, all other values are calculated off of the base value (see chart above). Performing Critical Arts obviously only consume meter, but getting hit by a Critical Art seems to always net the character getting hit 100 points. Blocking a Critical Art, however, gives you nothing.
Also, it seems like they tried to keep this pretty consistent. Even with Normal Moves that hit more than once, each hit adds a smaller chunk of meter, but the total always seems to come out to the base values given above. Even when landing a Critical Art on someone, the various hits all give different amounts of meter, but the total always seems to add up to 100.
Using the Critical Art Meter
There are really only two ways to use Critical Art meter in Street Fighter V:
- Performing an EX Special Move (1 Block)
- Performing a Super Combo (3 Blocks)
V System
Every mainline Street Fighter has introduced new universal mechanics. Street Fighter 3 introduced parries, Street Fighter Alpha the custom combos, Street Fighter IV the focus system, and in Street Fighter V the V-System.
Unlike EX meter, V-Gauge does not carry over between rounds. Never be afraid to use your V-Gauge!
The V-System is based around the V-Meter. The number of blocks it is varies based on the V-Trigger selected. It's usually 2 or 3 blocks, Dan is the only character with 1 block when using V-Trigger 1.
Like the Critical Art gauge, each block requires 300 "points" to fill.
The V-System is composed of 4 parts: V-Reversals, V-Shift, V-Skills, and V-Triggers.
V Reversal
V Reversals are most similar to an Alpha Counter. By pressing f+PPP/KKK (depending on the character) during blockstun, the character will perform a defensive action used to get out of the situation. When a V-Reversal is performed, the screen slows down slightly and a spark appears above the character, followed by the character performing their move. The two most common are a single hit strike attack which knocks the opponent away causing a small amount of grey life, or an evasive roll to roll past the opponent. These moves take 1 bar of V-Gauge to perform. Some characters have unique ones, such as Cammy's which attacks and side switches though is punishable on block, Vega's where he does a backflip instead of side switching, and Falke's which does 2 hits instead of only one. V-Reversals are invincible to regular attacks during them and can be canceled immediately into blocking, however they are not throw invincible. The startup on many of them are also quite longer, meaning if they are used against moves with quick recovery such as Ryu's MP the opponent can recover in time blocking the V-Reversal if it is a strike or punish if it was an escape type. V-Reversals can also be activated anytime during blockstun, meaning it's possible to cancel too late allowing the opponent to block what should be reversed or interrupt their next attack when they should've blocked it.
V Skill
V-Skills are performed by pressing MP+MK together. These are usually unique special moves that vary by every character and do many different things; Ryu's is a 3f parry, Nash's absorbs a single hit projectile or can be used as an attack, Alex makes his next attack a counter hit, Birdie throws a variety of items on the stage, Dhalsim causes him to float in the air, and so on. By successfully landing a V-Skill, a character will build up their V-Gauge. Most only build V-Gauge one successful activate, however a few like Cody's build a tiny amount when used and more when they successfully land.
V Shift
Perform by pressing MK+HP with no directional input. V-Shift is a defensive mechanic that consumes one stock of V-Gauge to parry an attack and distance yourself from the opponent. By pressing MK+HP again (or continue to hold the input) during the action after a successful parry, you can perform a counterattack known as a V-Shift Break. A V-Shift can be performed at any time as long as the character is on the ground and able to move freely. This is one way in which the mechanics differs greatly from V-Reversals. Additionally, V-Reversals always restore stun on activation, whether on hit or block. However, V-Shifts do not guarantee a set effect. Whether or not the parry is successful and the effect is triggered depends on the opponent's move the timing of the V-Shift, etc., meaning player judgment is needed to maximize its utility. Though it's a somewhat difficult system to master, it provides players with a defensive option against attacks/combos that are hard to counter.
Description per Capcom's CE202102 Version notes.
A "successful parry" V-Shift is when a slow motion effect occurs. Immediately restores 50% of the V-Gauge stock used to perform the V-Shift and allows use of V-Shift Break although any other action can be performed.
V Shift Break
Press MK+HP again after successfully triggering the "successful parry" slow-motion V-Shift to perform a character-specific reversal action known as V-Shift Break. Invincible and safe on block.
V Triggers
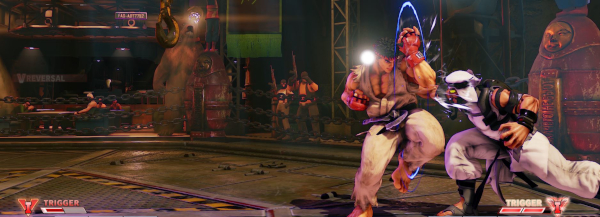
Replacing Ultra's as Street Fighter V's main comeback mechanic, V-Triggers drastically change a character. As of Season 3 each character has 2 V-Triggers to choose from, which can be 2 bar or 3. Some characters have a 2 bar and 3 bar, for some both are 2 bars. Once activated the freezes and fades to black slightly, and the character performs a quick pose before returning to the game. Of note is most V-Trigger's have 1 frame of full invulnerability on their activation. V-Triggers can also be canceled (VTC) into from a variety of normals, specials, or EX specials to make unsafe moves such as sweeps safe or even advantageous, in combos to extend them (though this increases the damage scaling), or to simply pause the screen to quickly evaluate the situation and react accordingly.
V-Triggers do wildly different things. Some are single use, such as Nash's Sonic Move which causes him to teleport near the opponent or Ed's Psycho Cannon which creates a large slow moving projectile. Some are multi-use such as Urien's Aegis Reflector which summons a mirror on screen immediately and can be summoned one more time. Some add new specials moves to the character such as Karin's Guren Ken strings or Ryu's Isshin parry. And some greatly modify a character while they are in it such as Birdie's Enjoy Time which increases his walk speed and changes the properties on all his specials and Kolin's Absolute Zero which gives her a new dash and extends the range on all her normals among other things. Necali's in particular is unique as once it's activated he is permanently in his V-Trigger state, modifying many of his specials, normals, dash speed, and CA in addition to giving him a new special.
These are often game changing adjustments to characters, and can lead a certain defeat into a narrow victory. Learning what yours and your opponent's does is incredibly important. In general 3 bar V-Triggers are more powerful but harder to get until near death, while 2 bar are slightly less powerful or have as many uses but it can be possible to get 2 in a single round.
One special note is if the V-Trigger is not just a single move and instead is a powered up state where the V-Gauge will tick down, you will not be able to perform V-Reversals.
Gaining V Meter
V-Meter can be gained in three ways: using your character's V-Skill, Crush Counters, or by taking damage.
Gaining V-Meter from damage is based on percentage, not total HP. This means that a low health character such as Ibuki will build the same amount of V-Gauge as a higher health character such as Abigail after taking 20% damage. You also build V-Meter off taking grey damage.
The Stun Meter
The concept of Stun, or "falling dizzy" as it is commonly referred to as, has existed since Street Fighter II: World Warrior. If your character is struck too many times in a row, your character will fall dizzy. As soon as this occurs, even in the middle of a combo, your character will be knocked over and fall down onto the ground. While they are falling, stars, chicks, or grim reapers will appear and rotate around their head. When you get up, your character will be in Stun and you cannot perform ANY actions until the Stun ends. Your character is thus susceptible to anything the opponent chooses. To put it more bluntly, the instant you become Stunned, the enemy gets a free combo.
Once your character falls dizzy, he/she won't stay dizzy forever. After a certain amount of time your character will recover and return back to a normal condition, but it takes a while. While you are dizzy, however, you can try to "shake" out of dizzy faster by shaking your controller and mashing on the buttons as fast as you can. Doing this will make your character recover quicker than normal, but be careful not to go overboard with the shaking: if your character does shake out and you are still wiggling the joystick, you may eat the combo your opponent is going for anyhow and end up taking more damage than if they had hit you while you were still dizzy (since the combo Damage Scaling resets). So shake as much as possible, but right before your enemy strikes you, just start to block. If you shook out, you'll Block their attack and be safe. If you didn't shake out, wiggling the controller right before the enemy hits you would't have made a difference anyhow. It should also be noted that unlike previous Street Fighter games, the different objects that appear around your character's head as they fall to the ground do not make an impact on how long you are stunned for or an impact on how hard it is to shake out. Be it reapers, chicks, or stars, they are just a cosmetic effect at the end of the day.
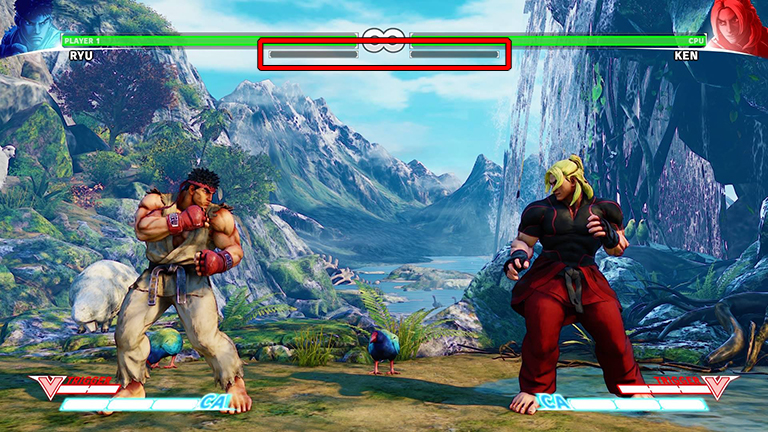
Stun Meters shown below in the red box.
Stun Meter Lengths
Again, every character has a different sized Stun Meter, just like they different sized Life Meters. 1000 Stun Points is the average for the characters. If you have 1050 Stun Points, you are considered hard to knock dizzy. If you have 900 Stun Points, you are considered a character that gets stunned quickly.
Here are the Stun Point counts for every character in Street Fighter V:
The Timer
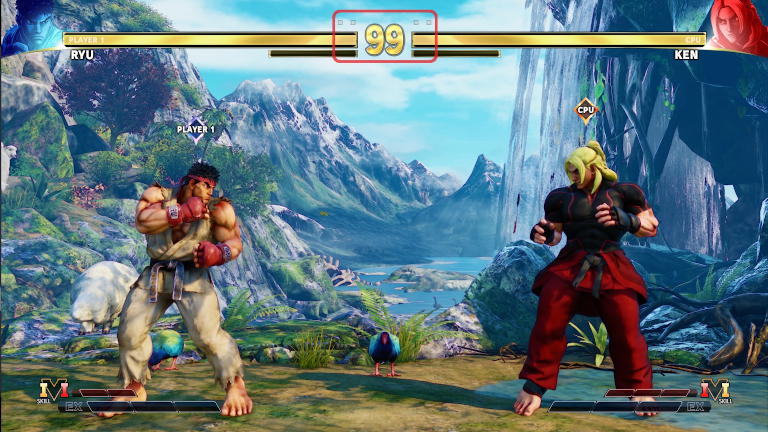
The clock at the top of the screen, starting at 99 seconds per round. Whoever has the highest percentage of health left when it hits 0 wins.
NOTE: For a timeout, grey life DOES NOT count for remaining life, meaning if character 1 has 40% HP left and character 2 has 35% HP and 6% white life (41% total), character 1 will win.
