Why play Old Chun when New Chun has a fantastic super and a decent reversal/situational Anti Air in Upkicks? Certainly there are a few things that OG Chun doesn't have, but what she does have can change her play style quite a bit.
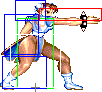
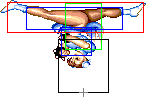
The Spinning Bird kick has a longer invincibility window, and can be used similar to and E Honda headbutt. (with good timing) It gives Old Chun a powerful weapon against jump-ins besides her (already fantastic) normals. This allows an OG Chun player a better ability to turtle than N. Chun.
That being said... a lot of what NKI has in the N. Chun section will be applicable to OG Chun.
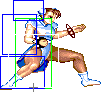
Picking Old Chun Li
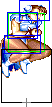
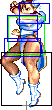
To select O.Chun Li, choose Chun Li and then press ↓ ↓ ↓ ↑ Jab/Fierce, pressing Short simultaneously with the punch button for the alternate color.
| Normal |
Secondary
|
 |

|
--Born2SPD
Competitive Overview
O.Chun is ranked high mid-tier, together with Ryu, O.Ryu, O.Ken, and Guile. She has solid ground and aerial attacks, but her anti-air moves either require a charge, pressing buttons in a row or early input. As she is a charge character, she has trouble keeping projectiles coming against motion characters.
--NKI
Strengths & Weaknesses
Based on NKI's list for N.Chun.
Strengths
- st.Strong is an extremely good poke.
- j.Forward and j.Short are the best diagonal jumping attacks in the game.
- Lightning Legs will cleanly beat nearly every ground move in the game.
- Good throw range.
- Throw does a lot more damage than it probably should.
- Good dizzy combos.
- Fast walking speed.
- Very agile (can jump off walls, do attacks after head stomp).
- Is good at both turtling and rushing down.
- Has normal moves that can cause full knockdowns.
Weaknesses
- Cannot soften throws.
- Has no super.
- Can be safe-jumped.
- Has a hard time with fireball traps.
Normal Moves
Ground Normals
Disclaimer: Ground normals take one extra frame to enter their start-up, which is the reason for the additional frame on the 'Simplified' row.
| Damage |
16 |
 |
 |
 |
|
|
| Stun |
0~5
|
| Stun Timer |
40
|
| Chain Cancel |
Yes
|
| Special Cancel |
Yes*
|
| Frame Advantage |
?
|
| Frame Count |
2 |
2 |
4 |
4 |
1
|
| Simplified |
1 + 4 |
4 |
5
|
| Damage |
4 |
 |
 |
 |
 |
|
| Stun |
0~5
|
| Stun Timer |
40
|
| Chain Cancel |
Yes
|
| Special Cancel |
Yes
|
| Frame Advantage |
?
|
| Frame Count |
2 |
2 |
4 |
3 |
1
|
| Simplified |
1 + 2 |
2 |
8
|
| Damage |
4 |
 |
 |
 |
|
|
| Stun |
0~5
|
| Stun Timer |
40
|
| Chain Cancel |
No
|
| Special Cancel |
Yes*
|
| Frame Advantage |
?
|
| Frame Count |
2 |
2 |
4 |
4 |
1
|
| Simplified |
1 + 4 |
4 |
5
|
| Damage |
19 |
 |
 |
 |
|
|
| Stun |
5~11
|
| Stun Timer |
60
|
| Chain Cancel |
No
|
| Special Cancel |
Yes*
|
| Frame Advantage |
?
|
| Frame Count |
2 |
2 |
4 |
3 |
1
|
| Simplified |
1 + 4 |
4 |
4
|
| Damage |
19 |
 |
 |
 |
|
|
| Stun |
5~11
|
| Stun Timer |
60
|
| Chain Cancel |
No
|
| Special Cancel |
Yes*
|
| Frame Advantage |
?
|
| Frame Count |
2 |
2 |
4 |
3 |
1
|
| Simplified |
1 + 4 |
4 |
4
|
| Damage |
16 |
 |
 |
 |
|
|
| Stun |
5~11
|
| Stun Timer |
60
|
| Chain Cancel |
No
|
| Special Cancel |
Yes*
|
| Frame Advantage |
?
|
| Frame Count |
2 |
2 |
4 |
4 |
1
|
| Simplified |
1 + 4 |
4 |
5
|
| Damage |
21 |
 |
 |
|
| Stun |
10~16
|
| Stun Timer |
80
|
| Chain Cancel |
No
|
| Special Cancel |
Yes
|
| Frame Advantage |
?
|
| Frame Count |
3 |
20 |
11
|
| Simplified |
1 + 3 |
20 |
11
|
| Damage |
21 |
 |
 |
 |
|
 |
|
| Stun |
10~16
|
| Stun Timer |
80
|
| Chain Cancel |
No
|
| Special Cancel |
Yes*
|
| Frame Advantage |
?
|
| Frame Count |
2 |
3 |
6 |
10 |
7 |
1
|
| Simplified |
1 + 5 |
6 |
18
|
| Damage |
19 |
|
 |
 |
|
|
| Stun |
10~16
|
| Stun Timer |
80
|
| Chain Cancel |
No
|
| Special Cancel |
No
|
| Frame Advantage |
?
|
| Frame Count |
3 |
3 |
6 |
8 |
11
|
| Simplified |
1 + 6 |
6 |
19
|
| Damage |
17 |
 |
 |
 |
|
|
| Stun |
0~5
|
| Stun Timer |
40
|
| Chain Cancel |
No
|
| Special Cancel |
No
|
| Frame Advantage |
?
|
| Frame Count |
3 |
3 |
5 |
4 |
1
|
| Simplified |
1 + 6 |
5 |
5
|
| Damage |
17 |
 |
 |
 |
|
|
| Stun |
0~5
|
| Stun Timer |
40
|
| Chain Cancel |
No
|
| Special Cancel |
No
|
| Frame Advantage |
?
|
| Frame Count |
3 |
3 |
5 |
4 |
1
|
| Simplified |
1 + 6 |
5 |
5
|
| Damage |
12 |
 |
 |
 |
|
|
| Stun |
0~5
|
| Stun Timer |
40
|
| Chain Cancel |
No
|
| Special Cancel |
No
|
| Frame Advantage |
?
|
| Frame Count |
3 |
3 |
4 |
4 |
1
|
| Simplified |
1 + 6 |
4 |
5
|
| Damage |
21 |
|
 |
 |
 |
 |
|
|
| Stun |
5~11
|
| Stun Timer |
60
|
| Chain Cancel |
No
|
| Special Cancel |
No
|
| Frame Advantage |
?
|
| Frame Count |
3 |
3 |
3 |
6 |
3 |
4 |
1
|
| Simplified |
1 + 6 |
9 |
8
|
| Damage |
21 |
|
 |
 |
|
|
| Stun |
5~11
|
| Stun Timer |
60
|
| Chain Cancel |
No
|
| Special Cancel |
No
|
| Frame Advantage |
?
|
| Frame Count |
3 |
3 |
5 |
4 |
4
|
| Simplified |
1 + 6 |
5 |
8
|
| Damage |
16 |
 |
 |

|
| Stun |
5~11
|
| Stun Timer |
60
|
| Chain Cancel |
No
|
| Special Cancel |
Yes*
|
| Frame Advantage |
?
|
| Frame Count |
4 |
5 |
4
|
| Simplified |
1 + 4 |
5 |
4
|
- Close Standing Roundhouse:
| Damage |
24 |
 |
 |
 |
 |
 |
 |
 |
 |

|
| Stun |
10~16
|
| Stun Timer |
80
|
| Chain Cancel |
No
|
| Special Cancel |
No
|
| Frame Advantage |
?
|
| Frame Count |
1 |
1 |
6 |
1 |
6 |
4 |
6 |
4 |
7
|
| Simplified |
1 + 9 |
6 |
21
|
| Damage |
24 |
 |
 |
 |
 |
 |

|
| Stun |
10~16
|
| Stun Timer |
80
|
| Chain Cancel |
No
|
| Special Cancel |
No
|
| Frame Advantage |
?
|
| Frame Count |
3 |
3 |
4 |
8 |
7 |
7
|
| Simplified |
1 + 10 |
8 |
14
|
| Damage |
19 |
 |
 |
 |
|
|
| Stun |
5~11
|
| Stun Timer |
130
|
| Chain Cancel |
No
|
| Special Cancel |
No
|
| Frame Advantage |
?
|
| Frame Count |
3 |
3 |
6 |
8 |
11
|
| Simplified |
1 + 6 |
6 |
19
|
Aerial Normals
| Damage |
16 |
 |
 |
 |
|
| Stun |
1~7
|
| Stun Timer |
40
|
|
|
| Frame Count |
3 |
3 |
2 |
∞
|
| Simplified |
8 |
∞
|
| Damage |
14 |
 |
 |
|
| Stun |
1~7
|
| Stun Timer |
40
|
|
|
| Frame Count |
3 |
3 |
∞
|
| Simplified |
6 |
∞
|
| Damage |
19 |
|
|
|
 |
|
|
|

|
| Stun |
5~11
|
| Stun Timer |
50
|
|
|
| Frame Count |
3 |
3 |
2 |
16 |
2 |
3 |
4 |
∞
|
| Simplified |
8 |
16 |
∞
|
| Damage |
17 |
|
|
 |
|
|
|
| Stun |
5~11
|
| Stun Timer |
50
|
|
|
| Frame Count |
3 |
3 |
8 |
3 |
4 |
∞
|
| Simplified |
6 |
8 |
∞
|
| Damage |
22 |
|
|
|
 |
|
|
|
|
| Stun |
11~17
|
| Stun Timer |
60
|
|
|
| Frame Count |
3 |
3 |
2 |
8 |
2 |
3 |
4 |
∞
|
| Simplified |
8 |
8 |
∞
|
| Damage |
21 |
|
|
 |
|
|
|
| Stun |
11~17
|
| Stun Timer |
50
|
|
|
| Frame Count |
3 |
3 |
8 |
3 |
4 |
∞
|
| Simplified |
6 |
8 |
∞
|
| Damage |
16 |
 |
 |
|
| Stun |
1~7
|
| Stun Timer |
40
|
|
|
| Frame Count |
3 |
3 |
∞
|
| Simplified |
6 |
∞
|
| Damage |
14 |
 |
 |
|
| Stun |
1~7
|
| Stun Timer |
40
|
|
|
| Frame Count |
3 |
3 |
∞
|
| Simplified |
6 |
∞
|
This does less damage than N.Chun but has awesome priority.
| Damage |
19 |
|
|
 |
|
|
| Stun |
5~11
|
| Stun Timer |
50
|
|
|
| Frame Count |
3 |
3 |
16 |
3 |
∞
|
| Simplified |
6 |
16 |
∞
|
This stays active a bit longer than N.Chun's version.
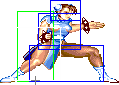
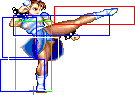
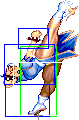
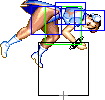
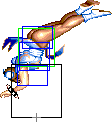
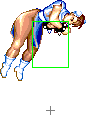
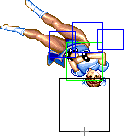
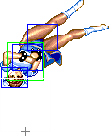
- Diagonal Jumping Forward:
| Damage |
17 |
|
|
 |
|
|
| Stun |
5~11
|
| Stun Timer |
50
|
|
|
| Frame Count |
3 |
3 |
16 |
3 |
∞
|
| Simplified |
6 |
16 |
∞
|
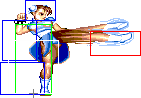
The move has amazing hitboxes, and will beat pretty much any other aerial attack it encounters. It will also beat the new shotos' Shoryukens unless they hit deep, and also beats most anti-air normal moves.
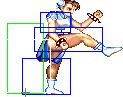
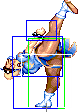
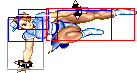
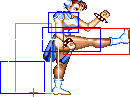
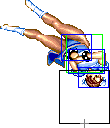
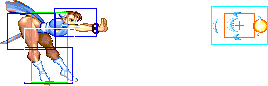
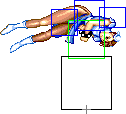
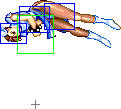
- Neutral Jumping Roundhouse:
| Damage |
22 |
 |
 |
 |
 |
 |
 |
 |

|
| Stun |
10~16
|
| Stun Timer |
80
|
|
|
| Frame Count |
1 |
2 |
5 |
4 |
4 |
4 |
6 |
∞
|
| Simplified |
3 |
9 |
∞
|
This has a good horizontal range, and trades with most attacks if you time it right. It can also be used against grounded opponents on the way up. This is a rare case of normal moves that cause a full knockdown.
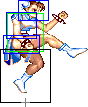
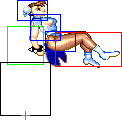
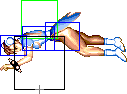
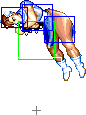
- Diagonal Jumping Roundhouse:
| Damage |
21 |
|
|
 |
 |
 |
 |
|
| Stun |
11~17
|
| Stun Timer |
60
|
|
|
| Frame Count |
3 |
3 |
6 |
4 |
6 |
6 |
∞
|
| Simplified |
6 |
6 |
4 |
6 |
∞
|
Command Normals
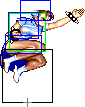
- Flip Kick: (On ground and close, ←/→ + Forward)
| Damage |
19+19 |
 |
 |
 |
 |
 |
 |
 |

|
| Stun |
0~5+0~5
|
| Stun Timer |
40+40
|
| Special Cancel |
Yes*/No/No
|
|
|
| Frame Count |
2 |
2 |
5 |
4 |
4 |
4 |
6 |
29
|
| Simplified |
1 + 4 |
9 |
4 |
39
|
Unlike the N.Chun's version of this move, the second active part combos after the first one, so it knocks down almost every time. It also has faster start-up, so it is a much better move. O.Chun can not do this move from far away like N.Chun can.
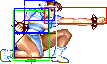
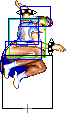
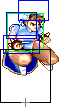
- Neck Breaker: (On ground and close, ←/→ + Roundhouse)
| Damage |
17 |
 |
 |
 |
 |
 |
 |
 |

|
| Stun |
10~16
|
| Stun Timer |
80
|
|
|
| Frame Count |
4 |
4 |
5 |
6 |
7 |
8 |
2 |
14
|
| Simplified |
1 + 36 |
14
|
This move is good for shenannigans, or to simply force the enemy to block on wake-up, as it can avoid many moves in that situation. It does high stun, but the timer bonus is very short, so odds are it will hit and dizzy, or the enemy will recover from any dizzy damage by the time he gets up again. O.Chun can not do this move from far away like N.Chun can.
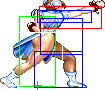
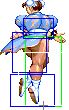
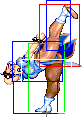
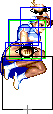
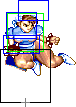
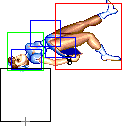
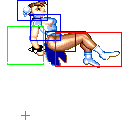
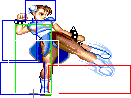
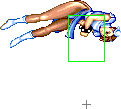
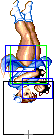
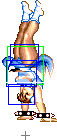
- Head Stomp: (On air, ↙/↓/↘ + Forward)
| Damage |
17 |
 |
 |
 |
|
|
 |

|
| Stun |
2~8
|
| Stun Timer |
60
|
|
|
| Frame Count |
1 |
2 |
16 |
8 |
4 |
5 |
∞
|
| Simplified |
3 |
16 |
∞
|
It is possible to use this move as an instant overhead. Simply jump and immediately do a head stomp, and the enemy will have to block high to avoid getting hit.
Throws
Holding towards or back and pressing Strong or Fierce punch will produce O.Chun Li's throw. She can also air-throw this way. The direction on the joystick determines the direction the enemy gets thrown at.
- Shoulder Throw: (←/→ + Strong/Fierce)
| Damage |
38 / 32 |
 |
 |

|
| Stun |
5~11
|
| Stun Timer |
100
|
| Range (from axis) |
48
|
| (from throwable box) |
23
|
Although both the Strong and Fierce ground throws look identical, they're actually quite different for some weird reason. The Fierce throw deals an ordinary 22% damage, but the Strong throw does 26% damage, which is unusually high. Since the Strong throw has no other drawbacks, use it instead of the Fierce whenever possible.
- Air Shoulder Throw: (ChunLi and opponent in air, ↖/↙/←/→/↘/↗ + Strong/Fierce)
| Damage |
34 |
|
| Stun |
7~13
|
| Stun Timer |
100
|
| Range (from axis) |
58
|
| (from throwable box) |
33
|
The air-throw versions are the same and do approximately 23.5% damage. Very good range for an air throw.
--Raisin (March 12, 2007), some info courtesy T.Akiba
Special Moves
All motions are listed under the assumption that O.ChunLi is facing right.
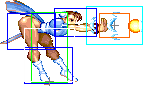
- Hyakuretsu Kyaku a.k.a. Lightning Legs: (Press K repeatedly)
- Startup:
|
 |

|
| Frame Count (Short) |
1 |
3
|
| Simplified (Short) |
4
|
| Frame Count (Forward) |
3 |
4
|
| Simplified (Forward) |
7
|
| Frame Count (Rh) |
4 |
6
|
| Simplified (Rh) |
10
|
| Damage (Short) |
24 |
 |
 |
 |
|
| Damage (Forward) |
26
|
| Damage (Rh) |
27
|
| Stun |
5~11
|
| Stun Timer |
100
|
| Frame Count (Short) |
4 |
4 |
4 |
4
|
| Frame Count (Forward) |
2 |
2 |
2 |
2
|
| Frame Count (Rh) |
1 |
1 |
1 |
1
|
|
 |
 |
 |
|
| Frame Count (Short) |
4 |
4 |
4 |
4
|
| Frame Count (Forward) |
2 |
2 |
2 |
2
|
| Frame Count (Rh) |
1 |
1 |
1 |
1
|
NOTE: What I put there as the active part is a complete cycle but not the minimal duration (if you keep mashing, after the last animation frame it will go back to the first one, and this will be repeated while you keep the mashing). The minimal durations (if you only input the 5 Kick presses needed) are: a full cycle plus the 3 next animation frames for Short Version, 2 full cycles minus the last animation of a cycle for the Forward Version and almost 3 full cycles for the Roundhouse Version, lacking only the last animation like the Forward version.
|
|
|
| Frame Count (Short) |
2 |
2
|
| Simplified (Short) |
4
|
| Frame Count (Forward) |
4 |
4
|
| Simplified (Forward) |
8
|
| Frame Count (Rh) |
6 |
6
|
| Simplified (Rh) |
12
|
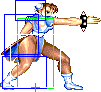
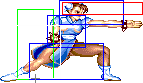
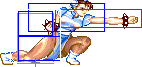
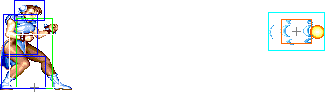
- Kikouken a.k.a. Fireball: (Charge ←, →, P)
Detailed Input: (Charge ← for at least 61f, [0~7f] → [0~10/9/7f] Jab/Strong/Fierce. It is needed to wait at least 1 frame after leaving the charge direction to enter with the P button)
|
 |
 |
 |
 |
|
| Frame Count |
1 |
1 |
1 |
1 |
1
|
| Simplified |
5
|
| Damage |
15 |
 |
 |
 |
 |
 |
|
| Stun |
7~13
|
| Stun Timer |
90
|
|
|
| Frame Count |
1 |
1 |
1 |
1 |
1 |
1...
|
| Simplified |
42
|
| Damage |
16 |
|
 |
 |
 |
 |
|
| Stun |
7~13
|
| Stun Timer |
90
|
|
|
| Frame Count |
1 |
1 |
1 |
1 |
1 |
1...
|
| Simplified |
40
|
| Damage |
17 |
|
 |
 |
 |
 |
|
| Stun |
7~13
|
| Stun Timer |
90
|
|
|
| Frame Count |
1 |
1 |
1 |
1 |
1 |
1...
|
| Simplified |
38
|
| Jab: 222 pixels after 75 frames |
Strong: 176 pixels after 45 frames |
Fierce: 150 pixels after 31 frames
|
 |
 |
|
You can change the recovery of any Kikouken to that of a Jab by kara-canceling a Jab or Short. Similarly to Strong Kikouken with Strong or Forward. The fastest recovery is obtained by kara-canceling a Fierce or Roundhouse.
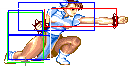
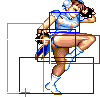
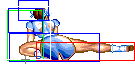
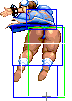
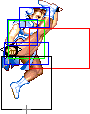
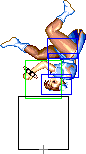
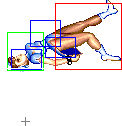
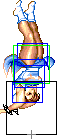
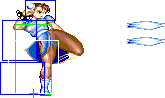
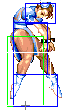
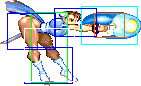
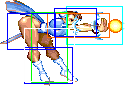
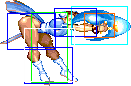
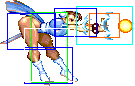
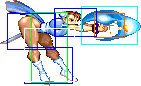
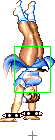
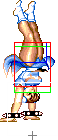
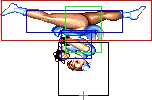
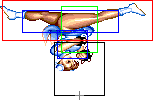
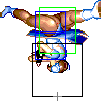
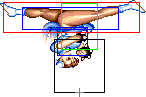
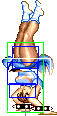
- Spinning Bird Kick: (Charge ↓, ↑, K)
Detailed Input: (Charge ↓ for at least 60f, [0~7f] ↑ [0~10/9/7/2f] Short/Forward/Roundhouse/any K if you are at a jumpable state. It is needed to wait at least 1 frame after leaving the charge direction to enter with the K button)
| Damage (Short) |
24 |
 |
 |
 |
 |
 |
 |
 |
|
| Damage (Forward) |
26
|
| Damage (Rh) |
27
|
| Stun |
7~13
|
| Stun Timer |
90
|
|
|
| Frame Count |
1 |
4 |
3 |
2 |
3 |
4 |
4 |
2
|
| Simplified |
17 |
4 |
2
|
| Damage |
12/11 |
 |
 |
 |
 |
 |
 |
 |
|
| Stun |
7~13
|
| Stun Timer |
90
|
|
|
| Frame Count |
4 |
3 |
2 |
2 |
1 |
1 |
1 |
1
|
| Simplified |
15
|
|
|
|
|
|
|
|
|
|
| Frame Count |
2 |
1 |
2 |
2 |
3 |
4 |
4 |
2
|
| Simplified |
20
|
| Damage |
14/12 |
 |
|
|
|
|
|
|
|
| Stun |
7~13
|
| Stun Timer |
90
|
|
|
| Frame Count |
4 |
4 |
3 |
3 |
2 |
2 |
1 |
1
|
| Simplified |
4 |
16
|
|
|
|
|
|
|
|
|
|
| Frame Count |
1 |
1 |
1 |
1 |
1 |
1 |
1 |
1
|
| Simplified |
1 |
7
|
|
|
|
|
|
|
|
|
|
| Frame Count |
2 |
1 |
1 |
2 |
2 |
3 |
3 |
4
|
| Simplified |
2 |
16
|
|
|
| Frame Count |
2
|
| Damage |
16/14 |
|
|
|
|
|
|
|
|
| Stun |
7~13
|
| Stun Timer |
90
|
|
|
| Frame Count |
5 |
4 |
4 |
3 |
3 |
2 |
2 |
2
|
| Simplified |
25
|
|
|
|
|
|
|
|
|
|
| Frame Count |
1 |
1 |
1 |
1 |
1 |
1 |
1 |
1
|
| Simplified |
8
|
|
|
|
|
|
|
|
|
|
| Frame Count |
1 |
1 |
1 |
1 |
1 |
1 |
1 |
1
|
| Simplified |
8
|
|
|
|
|
|
|
|
|
|
| Frame Count |
1 |
1 |
1 |
1 |
1 |
2 |
1 |
1
|
| Simplified |
9
|
|
|
|
|
|
|
|
| Frame Count |
2 |
2 |
3 |
3 |
3 |
3
|
| Simplified |
16
|
|
 |
 |
|
 |
 |
 |

|
| Frame Count |
2 |
3 |
2 |
2 |
3 |
3 |
6
|
| Simplified |
21
|
|
|
 |
|
|
|
|
|
| Frame Count |
2 |
3 |
2 |
2 |
3 |
3 |
6
|
| Simplified |
21
|
|
|
|
|
|
|
|
 |
|
| Frame Count |
2 |
3 |
2 |
2 |
3 |
3 |
4 |
6
|
| Simplified |
25
|
NOTE: This move has some oddities... First of all: in the active part, you see that little red dot near the center of the pushbox? At fist i thought it was just an imperfection in the sprites but that is actually a 1x1 sized active hitbox. So, in that cyclic(Active) part, the move is active all the time. The only exception is the Forward version, which has some gaps, all in the same animation frame(first one in the tables), so in that case i separated the cells in the Simplified Frame count. There is some oddities as well in the recovery part, like for the Short version it has a different pushbox in the second animation frame, and the Rh version having an extra animation frame before the landing frame. My guess is that this move was probably implemented in the game by a capcom Trainee or the programmer was lazy that day, lol.
The damage is different depending on which way Chun Li is facing. The higher damage values are related to the attack boxes when she is facing backwards during the spinning part.
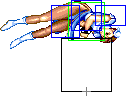
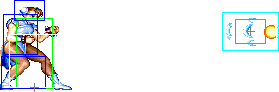
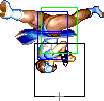
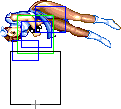
- Aerial Spinning Bird Kick: (Charge ↓, ↑, K, in air)
|
 |
 |
 |
 |
|
| Frame Count |
2 |
4 |
3 |
2 |
4
|
| Simplified |
15
|
| Damage |
11 |
 |
 |
 |
 |
 |
 |
 |
|
| Stun |
7~13
|
| Stun Timer |
90
|
|
|
| Frame Count (Short) |
3 |
3 |
3 |
3 |
3 |
3 |
3 |
2
|
| Simplified (Short) |
3 |
20
|
| Frame Count (Forward) |
3 |
3 |
3 |
3 |
3 |
3 |
3 |
2
|
| Simplified (Forward) |
3 |
20
|
| Frame Count (Rh) |
2 |
2 |
2 |
2 |
2 |
2 |
2 |
2
|
| Simplified (Rh) |
2 |
14
|
|
|
 |
 |
 |
|
| Frame Count |
3 |
2 |
3 |
3 |
∞
|
| Simplified |
∞
|
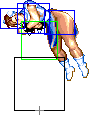
- Landing, partial: (When Chun lands before the last hitting frame)
|
 |
 |
|
 |
 |
 |
 |

|
| Frame Count |
3 |
3 |
2 |
2 |
3 |
3 |
4 |
5
|
| Simplified |
25
|
- Landing, complete: (When Chun lands after the last hitting frame)
|
 |
 |
|
| Frame Count |
2 |
5 |
3
|
| Simplified |
10
|
NOTE: Just like the ground version of the move, it has some active frames with a 1x1 sized hitbox.


