Introduction
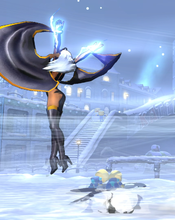
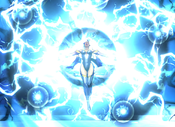
Ororo Munroe, better known by her hero codename Storm, is a mutant with weather-manipulation powers. In addition to being able to conjure most weather or atmospheric effects, she can conjure powerful gusts of wind (which she uses to "fly") or bursts of electricity. Storm is one of the most well-respected and storied members of the X-Men, and has even served as the group's leader at times.
In UMvC3, Storm is a mobile keepaway character. Her goal is typically to run away using her fast aerial mobility tools while keeping the opponent at a distance using her strong, disjointed normals. Although she has several tools to convert and extend combos, her damage is infamously low, and she lacks the ability to kill opponents efficiently. Storm's most iconic attack is her full-screen, OTG-capable "Hail Storm" hyper (214XX), which is fantastic as a source of chip damage. Outside of this, Storm's ability to deal meaningful chip is poor, and she mainly tries to run away and stall with a life lead for as long as possible.
| Strengths | Weaknesses |
|---|---|
|
|
Unique Mechanics
Storm has the ability to "Float", a movement tool unique to herself and Rocket Raccoon. Floating is done by inputting any upward direction (up-back, up, or up-forward), while airborne. However, Storm can not activate flight if she has already taken any action (in this case, "action" means attacking, dashing, or blocking) while in her current airborne state. Activating float causes Storm to immediately lose any momentum she had and begin to slowly descend downwards. She can steer her descent left or right by holding up-back or up-forward instead of straight up (similar to altering the trajectory of a neutral superjump). Float differs from flight in the following ways:
- Float activates immediately, whereas Storm's flight has 22 frames of startup. It also can be maintained indefinitely (at least until she reaches the ground again) while flight has a maximum duration of 99 frames.
- Storm can not cancel attacks into float the way that she can into flight (or unfly).
- Float causes Storm to slowly descend and eventually will cause her to land when she reaches the ground. Flight holds storm in place and prevents her from touching the ground, even if she attempts to descend.
- Floats immediately ends if Storm performs any action, whereas Storm can airdash or perform some attacks while maintaining flight.
- Storm can block during float, but cannot block while in flight (although keep in mind that blocking while in float counts as an action and thus ends float).
Storm can end float at any point by simply letting go of any upward direction. Unlike Rocket Raccoon, Storm can re-enter float after exiting it, so long as she still has not performed an action. Float can be used to assist in her keepaway game by extending the time she can remain in the air. It also has offensive applications, as Storm can use float immediately after jumping to stay low to the ground and perform Instant Overheads. Be careful when doing this, as the input for instant air float (up, neutral, up) is very similar to the input for an upwards airdash. A Storm player must either activate float below the minimum airdash height, or space their inputs far enough apart to not be interpreted as airdash
Storm can perform aerial teabags by repeatedly exiting and entering her float state in a fixed rhythm slightly slower than what is used to airdash. This has no mechanical purpose and is only useful as a way to be rude to the opponent, which is pretty funny.
| Storm | |
|---|---|
| Character Data | |
| Health | 850,000 |
| Ground Magic Series | Zig-Zag |
| Air Chain Combo Limit | None |
| Forward Dash Duration | 19 frames |
| Backdash Duration | 33 frames |
| Jump Duration | 43 frames |
| Superjump Duration | 81 frames |
| Walljump? | No |
| Doublejump? | No |
| Airdash? | 8-Way |
| X-Factor Damage Boost (1/2/3) | 25% / 40% / 55% |
| X-Factor Speed Boost (1/2/3) | 15% / 30% / 45% |
| Minimum Damage Scaling (Normals, Specials) | 10% |
| Minimum Damage Scaling (Hypers) | 38% |
| Minimum Damage Scaling (X-Factor) | 35% |
Move List
Assists
| Damage | Startup | Active | Recovery |
|---|---|---|---|
| 25,000 x5 | 44 | - | 129, 99 |
| On Hit | On Block | Guard | Properties |
| - | - | Mid | Priority: Low, Durability: 5 per projectile |
|
THC Hyper: Hailstorm. Horizontal-coverage assist, but with a few key differences from more common beam assists. First, Whirlwind creates 5 separate projectiles in a staggered sequence rather than one single projectile. Thus, it is very difficult for opponents to stop Whirlwind, as clashing with one tornado will not stop the others from spawning. Second, Whirlwind pushes opponents backwards a significant distance on contact. This is great if your goal is keepaway, but makes this assist difficult to use for offensive pressure or combo extensions. | |||
| Damage | Startup | Active | Recovery |
|---|---|---|---|
| 30,000 x6 | 87 (!!) | - | 107, 77 |
| On Hit | On Block | Guard | Properties |
| - | - | Mid | |
|
THC Hyper: Hailstorm. After charging up, Storm creates a wall of very durable projectiles at the same distance as her 214M special (roughly half of fullscreen distance). This assist has debilitatingly long startup, so it is almost impossible to protect Storm long enough for her to actually activate it. Although this move hits OTG, it carries opponents very high into the air, making it very difficult for most characters to use it in combos. | |||
| Damage | Startup | Active | Recovery |
|---|---|---|---|
| 60,000 | 37 | 13 | 121, 91 |
| On Hit | On Block | Guard | Properties |
| - | - | Mid | |
|
THC Hyper: Lightning Storm. Not a good assist. | |||
Ground Normals
| Damage | Startup | Active | Recovery |
|---|---|---|---|
| 33,000 | 5 | 3 | 8 |
| On Hit | On Block | Guard | Properties |
| +3 | +2 | Mid | |
|
- | |||
| Damage | Startup | Active | Recovery |
|---|---|---|---|
| 55,000 | 9 | 11 | 10 |
| On Hit | On Block | Guard | Properties |
| -2 | -4 | Mid | |
|
Jump-cancelable normal that allows Storm to continue to extend pressure while on the offensive. Using 2H instead is typically preferred for this purpose, as it causes more hitstun and blockstun. | |||
| Damage | Startup | Active | Recovery |
|---|---|---|---|
| 70,000 | 15 | 12 | 5 |
| On Hit | On Block | Guard | Properties |
| +7 | +5 | Mid | - |
|
- | |||
| Damage | Startup | Active | Recovery |
|---|---|---|---|
| 30,000 | 5 | 3 | 8 |
| On Hit | On Block | Guard | Properties |
| +3 | +2 | Low | |
|
- | |||
| Damage | Startup | Active | Recovery |
|---|---|---|---|
| 53,000 | 9 | 10 | 12 |
| On Hit | On Block | Guard | Properties |
| -3 | -5 | Mid | - |
|
- | |||
| Damage | Startup | Active | Recovery |
|---|---|---|---|
| 67,000 | 13 | 11 | 14 |
| On Hit | On Block | Guard | Properties |
| - | -3 | Low | |
|
Very important offensive tool for Storm, due to the Jump Cancel property. Jump cancel 2H into Float to quickly follow up with overhead attacks, or jump cancel then airdash back down to perform another low attack instead. | |||
| Damage | Startup | Active | Recovery |
|---|---|---|---|
| 80,000 | 13 | 12 | 11 |
| On Hit | On Block | Guard | Properties |
| Launch | -1 | Mid | |
|
Standard launcher. Its fairly safe and has a great hitbox, but Storm is better off using 5M or 2H instead, which can be jump-canceled even on block to keep pressure up. | |||
Aerial Normals
| Damage | Startup | Active | Recovery |
|---|---|---|---|
| 35,000 | 4 | 3 | 18 |
| On Hit | On Block | Guard | Properties |
| +10 | +9 | OH | |
|
Quite fast, even by light attack standards. On most characters, it does not hit low enough to work as an instant overhead naturally. However, Storm can use her Float ability to immediately halt her jump, allowing this attack to very quickly hit crouching opponents. Immediately end float and follow up with a falling j.5H to solo confirm this fast overhead into a full combo. | |||
| Damage | Startup | Active | Recovery |
|---|---|---|---|
| 53,000 | 11 | 6 | 19 |
| On Hit | On Block | Guard | Properties |
| +17 | +15 | OH | |
|
Frame data is slightly misleading; the initial active frames for this move only hit directly above Storm. For use against opponents who are in front of Storm, or below her, this attack is actually slower than j.5H. This is most obvious when trying to use j.5M as an overhead off instant Float - it won't work, even though j.5L and j.5H both work. Because Storm is constantly fighting against Hitstun Deterioration in her combos, this move is often omitted from aerial chains in favor of more damaging attacks. | |||
| Damage | Startup | Active | Recovery |
|---|---|---|---|
| 68,000 | 12 | 7 | 19 |
| On Hit | On Block | Guard | Properties |
| +19 | +17 | OH | |
|
Do not be fooled by the large tornado effect. This attack only has a hitbox on its lowest part, around where Storm actually swings her arm. The hitbox also moves with Storm instead of remaining in place like the tornado visual does. Still, this is one of Storm's best normals to support her keepaway game and also one of her most important combo tools due to its (comparatively) good base damage. When attempting airthrows (or throw breaks), consider buffering a dash input. This normal will come out if you are outside throw range, and an airdash cancel can relocate Storm to safety or even allow her to confirm into a combo. | |||
| Damage | Startup | Active | Recovery |
|---|---|---|---|
| 75,000 | 13 | 15 | 11 |
| On Hit | On Block | Guard | Properties |
| +16 | +14 | OH | |
|
- | |||
Special Moves
| L |
Damage | Startup | Active | Recovery |
|---|---|---|---|---|
| 25,000 x3 | 15 | - | 30 (35 in air) | |
| On Hit | On Block | Guard | Properties | |
| 0 | -2 | Mid | ||
| M |
Damage | Startup | Active | Recovery |
| 25,000 x5 | 20 | - | 37 | |
| On Hit | On Block | Guard | Properties | |
| +4 | +7 | Mid | ||
| H |
Damage | Startup | Active | Recovery |
| 25,000 x7 | 25 | - | 40 | |
| On Hit | On Block | Guard | Properties | |
| +13 | +13 | Mid | ||
|
Whirlwind creates several individual projectiles in a staggered, horizontal sequence, rather than a single beam. This makes whirlwind good at blowing past other projectiles, as the remaining tornadoes will continue to spawn even if the opponent destroys one of them. It is quite fast as a projectile, but has a very lengthy recovery which keeps Storm held in place, making it risky to use. All versions of Whirlwind are not subject to hitstun deterioration. | ||||
| Damage | Startup | Active | Recovery |
|---|---|---|---|
| 70,000 + 13,000 x4 | 20 | - | 40 |
| On Hit | On Block | Guard | Properties |
| -1 | -3 | Mid | Priority: Low, Durability (Ball): 5, Beam Durability (Explosion): 5 per frame for 20 frames |
|
Storm floats in place, halting any aerial momentum, while charging and then firing a ball of electricity. Button strength only affects the direction the sphere travels:
Although it is still quite slow, this projectile remains active much longer than Whirlwind does, and is more difficult for the opponent to navigate around. In particular, Storm can use 623L to harass from superjump height and discourage opponents from jumping up in pursuit of her. All versions of Lightning Sphere are not subject to hitstun deterioration. | |||
| Damage | Startup | Active | Recovery |
|---|---|---|---|
| 30,000 x6 | 63 | - | 15* |
| On Hit | On Block | Guard | Properties |
| +40 | +21 | Mid | |
|
Storm charges up and then summons two large tornadoes that reach vertically to not-quite superjump height. Button strength determines the positioning of the tornadoes:
Due to this move's very lengthy startup, it is not useful outside of combos. Even in the context of combo extensions, it is difficult to utilize. It is mainly useful for its OTG property, allowing Storm to pick up after throws or Air Combo Finishers. If this move is performed in the air, Storm will be stuck in recovery until she reaches the ground. However, if Storm performs this move while in flight, the end of her flight duration will automatically cancel this move's recovery, allowing her to act as normal while falling. All versions of Double Typhoon are not subject to hitstun deterioration. | |||
| Damage | Startup | Active | Recovery |
|---|---|---|---|
| 80,000 per attack | 13 | 13 | 25* |
| On Hit | On Block | Guard | Properties |
| - | -16 | Mid | |
|
Physical charge attack that can chain into itself up to three times (cancel window: frames 18-34). Each attack in sequence can be directed in any cardinal or diagonal direction. Although it can be used to alter Storm's aerial momentum and run away, she has so many other tools for this purpose that Lightning Attack is comparatively less useful. Lightning Attack is primarily intended to be used offensively, and on hit can be comboed into Lightning Storm (236XX) for decent damage. On block, use the follow-up attacks to move away from the opponent and avoid punishment. If this move is performed in the air, Storm will be stuck in recovery until she reaches the ground. However, if Storm performs this move while in flight, the end of her flight duration will automatically cancel this move's recovery, allowing her to act as normal while falling. | |||
| Damage | Startup | Active | Recovery |
|---|---|---|---|
| - | 22 | 99 | 0 |
| On Hit | On Block | Guard | Properties |
| - | - | - | Enters flight mode for 99 frames |
|
Standard flight mode. Allows Storm to repeatedly use aerial specials or repeatedly airdash. Storm can cancel normal attacks into flight. Unfortunately, Storm's flight mode activation is very slow, and she has no normals which recover more quickly when flight canceled. j.5H xx 214S, j.5L is possible, and allows Storm to start Magneto-esque flight combos after a launcher, but the timing is very strict. | |||
| Damage | Startup | Active | Recovery |
|---|---|---|---|
| - | 13 | 24 | 19 |
| On Hit | On Block | Guard | Properties |
| - | - | - | Pushes opponent's point character away from Storm |
| Damage | Startup | Active | Recovery |
|---|---|---|---|
| - | 13 | 27 | 1 |
| On Hit | On Block | Guard | Properties |
| - | - | - | Pushes opponent's point character towards Storm |
|
Fair and Foul Wind cause the opponent's point character to be pushed around, either in the direction of Storm or away from her. It has no affect on assists, projectiles, or Storm herself. It does affect the dead body of a recently KO'd character, and can be used to manipulate the incoming direction for the opponent's next character. Fair and Foul Wind are not attacks; they do not have a hitbox, can't hit or be blocked, and do not cause any kind of stun. The effect is similar to the push caused by Advancing Guard, but unlike with pushblock, the movement caused by Fail/Foul Wind can not be negated by changing movement states. Foul Wind pushes opponents in Storm's direction, but it can actually blow opponents all the way behind Storm, causing them to become crossed up. | |||
Hyper Combos
| Damage | Startup | Active | Recovery |
|---|---|---|---|
| 27,000 x15 - x29 | 18+1 | 50 | 53 |
| On Hit | On Block | Guard | Properties |
| - | -42 | Mid | |
|
Storm is completely surrounded by a projectile hitbox. This hyper primarily exists to combo off of Lightning Attack, and is technically her most damaging hyper. However, most of Storm's optimal combo routes will go into Hailstorm instead. | |||
| Damage | Startup | Active | Recovery |
|---|---|---|---|
| 13,000 x35 - x69 | 40+1 | 80 | 1 |
| On Hit | On Block | Guard | Properties |
| - | +7 | Mid | |
|
After a lengthy startup, Storm covers most of the screen in a giant, multi-hitting projectile barrage that deals high damage, hits OTG, and deals significant chip. Note that this super does not actually cover the entire stage, and opponents can use the lengthy startup to superjump to safety. This hyper is Storm's standard combo ender after hard knockdowns, and can also be used to snipe assist calls. Once the startup completes, the hailstorm will continue independent of Storm, even if she cancels with X-Factor or a DHC. Hailstorm has a very long startup, so teams featuring Storm will often have ways to work around this limitation. Performing a fast hyper with another character and then DHCing to Hailstorm, or using it as part of a THC, will allow a team to circumvent the lengthy startup and gain access to this powerful hyper much faster. | |||
| Damage | Startup | Active | Recovery |
|---|---|---|---|
| 30,000 + 15,000 x13 + 120,000 | 8+2 | 23 | 32 |
| On Hit | On Block | Guard | Properties |
| - | -28 | Mid | |
|
During the super flash, hold any normal attack button to manipulate where the Elemental Rage projectile appears. Holding no button causes the hyper to appear immediately in front of Storm. Higher strength buttons cause the hyper to appear farther away, with H causing it to appear at fullscreen distance. This hyper is quite fast and can be used to punish grounded attacks, especially considering it can be aimed almost anywhere along the ground. Because it is a much faster OTG hyper than Hailstorm, it can be used in situations where a Hard Knockdown will not last long enough for Hailstorm to fire. Unfortunately, Elemental Rage deals significantly less damage than Storm's other hypers, and its cinematic property means that it does not work properly against assists. | |||
Universal Mechanics
| Damage | Startup | Active | Recovery |
|---|---|---|---|
| 80,000 | 1 | 1 | - |
| On Hit | On Block | Guard | Properties |
| - | - | Throw | |
|
Can be followed up with either of Storm's OTG hypers: Hailstorm or Elemental Rage. The timing to land Hailstorm is quite tight, however. | |||
| Damage | Startup | Active | Recovery |
|---|---|---|---|
| 80,000 | 1 | 1 | - |
| On Hit | On Block | Guard | Properties |
| - | - | Airthrow | |
|
Can be followed up with either of Storm's OTG hypers, as with ground throw. Airthrow can also be followed with a 214L or 214M Double Typhoon, potentially leading to a longer combo than simply doing raw hyper. | |||
| Damage | Startup | Active | Recovery |
|---|---|---|---|
| 50,000 | 2 | 5 | 12 |
| On Hit | On Block | Guard | Properties |
| - | +5 | Mid | Snapback |
|
Animation and hitbox based on 5H. | |||
| Damage | Startup | Active | Recovery |
|---|---|---|---|
| 30,000 | - | 20 | 32 |
| On Hit | On Block | Guard | Properties |
| - | -19 | OH | |
|
- | |||
Team Position
Storm is typically chosen in the Second position. Her Whirlwind assist, while not top tier, is very serviceable and comparable as a neutral tool to standard beam assists. Placing her in this position allows a team to access her powerful Hail Storm hyper via DHCs and THCs, which circumvent its very poor startup.
Teams that use Storm will often activate X-Factor with her, at either Level 2 or Level 3, using her as a sort of Anchor. The damage boost from X-Factor can help patch up her poor combo potential (much more than most assist extensions would), and also drastically increases the chip damage dealt by Hail Storm, turning it into a very serious threat unless the opponent pops X-Factor themselves.
Notable Synergies
Morrigan: Storm's main weakness is arguably her poor meter build. With the help of Morrigan's dark harmonizer assist, this problem can be remedied extremely effectively, with the meter build over time going extremely well with her runaway style. This forces opponents to approach her, and gives her tons of ammo for hailstorm. In addition, Morrigan offers an excellent DHC out of hailstorm with astral vision, leading to a full combo on hit and an astral vision mixup on block.
Wolverine: Her "Hail Storm" hyper hits OTG, which is uniquely useful when used as in THCs. Rather than bother with picking up using OTG 3M slide, Wolverine can end his combos with a hard knockdown, dash up, and activate a 2-bar THC to combine his own high-damage Fatal Claw with Hail Storm. Even a very basic Wolverine combo into this setup causes close to 900000 damage, enough to kill many popular point characters. This setup was popularized (and almost exclusively used) by Justin Wong, who would use the THC setup to secure a quick kill, then tag in Storm to run away while maintaining a one-character life lead for as long as possible. Wolverine can also utilize his Berserker Charge hyper to quickly enable a Storm DHC, as the pre-flash startup of Charge and the post-flash startup of Hail Storm add up to only 5 total frames. This is an excellent tool to punish assist calls.
Players to Watch: Justin Wong (Wolverine/Storm/Akuma)
Sentinel: Similar to the more popular Magneto/Sentinel shell, Storm can use her mobility and long range to protect Sentinel during the vulnerable startup of his assist call. In exchange, Sentinel Force (Charge) is a very oppressive assist that Storm can use to zone out opponents or run her own version of dangerous 8-way airdash mixups.
Players to Watch: Fanatiq: (Magneto/Storm/Sentinel), DiosX (Doom/Storm/Sentinel)
Other Players to Watch:
Combos
Solo Combos
2L > 2M > 5H jc. j.5H xx airdash down, [2H jc. j.5H xx airdash down] x4, 2H > 5S sjc. j.5H > j.5S, land, 214XX (610,000 damage for 1 bar, builds ~0.8 bars of meter).
Storm's standard jump-cancel combo. It works midscreen, but is much easier in the corner. Feel free to cut one or two jump-cancel loops if you are struggling with them, as they individually do not add much damage. With any Storm combo that ends with raw Hailstorm, you can alternatively activate a THC if you are willing to spend the meter and your teammate's THC Hypers are a worthwhile damage increase.
2L > 2M > 5S sjc. j.5H xx airdash down-forward, j.5H, rejump, j.5H xx airdash forward, j.5H, land, 5M > 2H jc. j.5H xx airdash forward, j.5S, land, 214L xx 214XX (606,000 damage for 1 bar, builds ~0.9 bars of meter.)
Alternate combo route with slightly more meter build and a significant amount of corner carry. Because Storm uses an j.5S Air Combo Finisher so low to the ground, she has time to charge up a Double Typhoon for slightly more damage. Be careful not to use 2H in this route, as it knocks the opponent too high into the air.
j.5S, rejump > float j.5L > j.5H, land, dash 5M > 2H jc. j.5M > j.5M > j.5S, land, 5M jc. j.5S xx airdash down, 5M > 2H jc. j.5H > j.5S xx airdash forward, j.5H, land, 5M > 2H jc. j.5H xx airdash down, 5M > 5S sjc. j.5H > j.5S, land, 214XX (602,000 damage for 1 bar, builds ~1.1 bars of meter.)
Solo combo route optimized for meter gain. It's very difficult for Storm to build a full bar of meter in one combo.
2L > 2M > 2H jc. j.5S xx 3X+S > 6X+S > 2X+S, land, 5M jc. j.5H xx airdash down, 5M > 5S sjc. j.5H > j.5S, land, 214XX(606,000 damage for 1 bar, builds ~0.75 bars of meter.)
If Storm directs Lightning Attack down towards the ground, she can recover fast enough to pick up the combo with 5M.
X-Factor Combos
j.5S, land, 2L > 2M > 2H (Activate X-Factor), 5M jc. j.5H > j.5S xx airdash forward, j.5H, land, 5M jc. j.5H > j.5S xx airdash forward, j.5H, land, 5M jc. j.5H xx airdash forward, j.5H, land, 5M > 5S sjc. j.5H xx 623L, j.5S, land, 214L xx 214XX (~1,014,000 damage, Costs at least 1 bar of meter, builds 1.5 bars.)
Basically a standard Storm combo but with the damage and speed boosts from X-Factor. Storm can link attacks after Lightning Sphere even outside of X-Factor, if hitstun deterioration has not progressed too far.
(X-Factor Level 2 or 3), 5S sjc. j.5H > j.5S, land, 214L, 5S sjc. j.5H > j.5S, land, 214L, 5S sjc. etc.
Storm can relaunch after Double Typhoon multiple times in level 2 or 3 X-Factor, making for an easy, high-damage loop. Unfortunately, this route takes up a lot of time, wasting precious X-Factor duration.
Sample Team Combos
j.5S, land, 2M > 2H jc. 6X+S > 6X+S > 2X+S, land, 5M jc. j.5H > j.5S xx airdash forward j.5H, land, 5M > 5S+A (Akuma - Tatsumaki) xx 214S, j.5H [xx airdash forward j.5H] x3 > j.5S, land, 214L xx 214XX, 623XX (876,000 damage for 2 bar, builds ~1.2 bars of meter.)
Storm struggles to use assists to extend combos because she is already fighting against hitstun deterioration to use all of her solo extensions. This sample shows how a long-duration assist such as Akuma's tatsu assist can allow Storm to activate flight mid-combo and transition into airdash j.5H loops for extra damage. If Hailstorm hits high enough, Storm can link Elemental Rage afterwards for additional damage, as shown here.
TAC Infinites
Alternate Colors
| Color 1 | Color 2 | Color 3 | Color 4 | Color 5 | Color 6 | Alt Color |
|---|---|---|---|---|---|---|

|

|

|

|

|

|

|


