Introduction
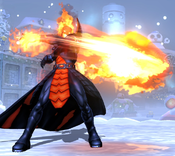
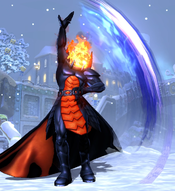
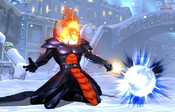
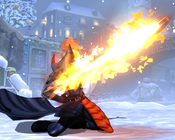
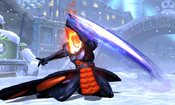
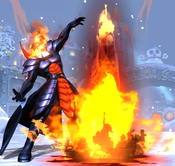
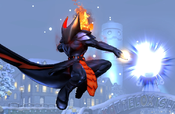
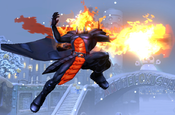
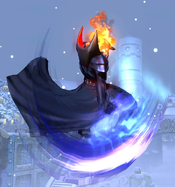
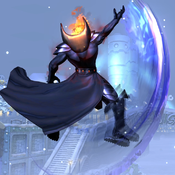
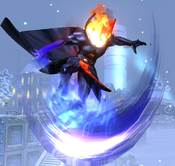
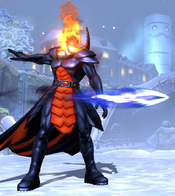
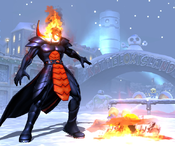
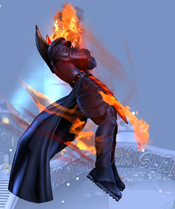
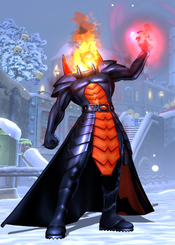
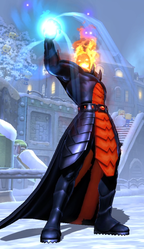
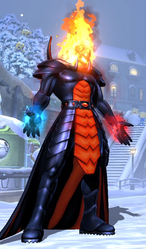
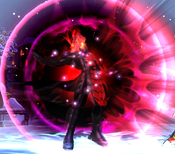
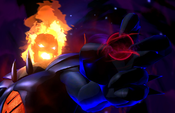
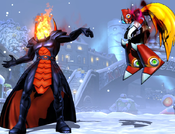
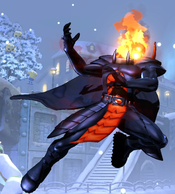
Dormammu hails from another dimension, the Dark Dimension, where he rules and is nearly omnipotent. Although he is made purely of energy, Dorm was able to construct a metal body for himself, allowing him to invade this dimension in some capacity. Although he doesn't have access to his full powers in this world, he still represents a catastrophic threat.
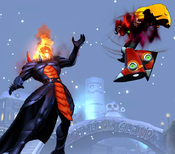
In UMvC3, Dorm is a long-range character with a surprising amount of mobility. He has several tools to help him win projectile wars, harass with chip damage, and even open up opponents to start extremely long combos. He also provides some useful, but often unconventional, support value to his team.
| Strengths | Weaknesses |
|---|---|
|
|
Unique Mechanics
Dormammu's grounded dash is a fixed duration "hop"-style dash. Unlike most characters, Dormammu can not cancel his dash with attacks or by crouching, and thus he can not Plink Dash or Wavedash. He can, however, cancel his dash into a jump, and thus can indirectly cancel his dash into Special Moves with a Tiger Knee motion. Dormammu can circumvent his inability to plinkdash or wavedash by performing Tri-dashing, utilizing his very fast diagonal airdashes. Jump forward and then airdash down-forward - or jump back and then airdash down-back - to quickly travel horizontally across the stage.
| Dormammu | |
|---|---|
| Character Data | |
| Health | 1,000,000 |
| Ground Magic Series | Stronger |
| Air Chain Combo Limit | Three |
| Forward Dash Duration | 19 frames |
| Backdash Duration | 33 frames |
| Jump Duration | 42 frames |
| Superjump Duration | 81 frames |
| Walljump? | No |
| Doublejump? | No |
| Airdash? | 8-Way |
| X-Factor Damage Boost (1/2/3) | 30% / 55% / 80% |
| X-Factor Speed Boost (1/2/3) | 10% / 15% / 20% |
| Minimum Damage Scaling (Normals, Specials) | 20% |
| Minimum Damage Scaling (Hypers) | 40% |
| Minimum Damage Scaling (X-Factor) | 35% |
Move List
Assists
| Damage | Startup | Active | Recovery |
|---|---|---|---|
| 20,000 x8 | 50 | 33 | 98, 68 |
| On Hit | On Block | Guard | Properties |
| - | - | Mid | |
|
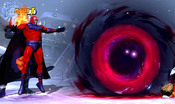
THC Hyper: Chaotic Flame. Recommended assist. Dormammu produces a large, stationary projectile a short distance in front of himself. Dark Hole is active for a fairly long time, producing a sizeable amount of hitstun and blockstun. It is fairly easy to use in combo extensions, although it scales damage heavily by virute of hitting several times. It also has some of the highest total projectile durability of any assist in the game, allowing it to act as a defensive wall against an opponent's projectiles. | |||
| Damage | Startup | Active | Recovery |
|---|---|---|---|
| 35,000 x4 | 56 | 23 | 103, 73 |
| On Hit | On Block | Guard | Properties |
| - | - | Mid | |
|
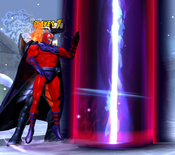
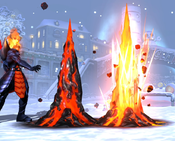
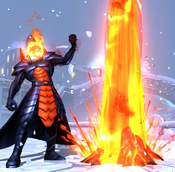
THC Hyper: Chaotic Flame. Dormammu produces a pillar of energy that reaches infinitely high upwards. It is one of very few assists that reach superjump height. However, it is extremely slow to start up, even slower than Dark Hole - which is already on the slower side. It also appears very close to where it was called, giving it very limited horizontal range which makes it difficult to use effectively in neutral. Purification hits OTG, but knocks opponents very high into the air on hit, which can make following up with additional combos difficult. | |||
| Damage | Startup | Active | Recovery |
|---|---|---|---|
| Varies | Varies | Varies | Varies |
| On Hit | On Block | Guard | Properties |
| - | - | - | Its magic |
|
THC Hyper: Stalking Flare. Dormammu appears on stage and casts a spell. The specific spell cast depends on how many stacks of Creator and Destroyer that Dormammu has built up while on point, and consumes those stacks in order to perform the spell. If Dormammu has no spell stacks, he performs Liberation (No Charge) which causes him to create a burst of energy around himself. In theory, this assist could be one of the most powerful in the game when used to cast Dormammu's strong 3-stack Magic, just as the point character version of Liberation is among the game's most powerful specials when stacked properly. In practice, each use of this assist would require bringing Dormammu back in as the point character, rebuilding his stacks manually, and then tagging him back out, which makes it impractical unless you really don't mind having the default Liberation assist most of the time. Could also be notable for having access to Stalking Flare as a fairly unique THC hyper. | |||
Ground Normals
| Damage | Startup | Active | Recovery |
|---|---|---|---|
| 48,000 | 6 | 2 | 12 |
| On Hit | On Block | Guard | Properties |
| 0 | -1 | Mid | - |
|
Dormammu points, creating a small burst of energy. 5L has great range for such a fast normal, and has a disjointed hitbox. | |||
| Damage | Startup | Active | Recovery |
|---|---|---|---|
| 73,000 | 8 | 10 | 16 |
| On Hit | On Block | Guard | Properties |
| -7 | -8 | Mid | |
|
Dormammu swipes, creating a stream of fire. Nullifies Low and Medium Priority projectiles on contact. | |||
| Damage | Startup | Active | Recovery |
|---|---|---|---|
| 90,000 | 13 | 5 | 21 |
| On Hit | On Block | Guard | Properties |
| -2 | -3 | Mid | |
|
Dormammu swipes upwards, protecting his front side with a large hitbox. On hit, it knocks opponents into the air and causes a very high amount of hitstun. This is Dormammu's most reliable way to combo into 6H. Nullifies Low and Medium Priority projectiles on contact. | |||
| Damage | Startup | Active | Recovery |
|---|---|---|---|
| 45,000 | 7 | 2 | 13 |
| On Hit | On Block | Guard | Properties |
| -1 | -2 | Low | - |
|
Similar to 5L. It is slower and has shorter range, but hits Low. | |||
| Damage | Startup | Active | Recovery |
|---|---|---|---|
| 70,000 | 9 | 8 | 17 |
| On Hit | On Block | Guard | Properties |
| +6 | -7 | Mid | |
|
Note: Not a low. Dormammu jabs upwards with a stream of flame. Nullifies Low and Medium Priority projectiles on contact. | |||
| Damage | Startup | Active | Recovery |
|---|---|---|---|
| 90,000 | 13 | 4 | 24 |
| On Hit | On Block | Guard | Properties |
| - | -5 | Low | |
|
Dormammu sweeps the ground with a stream of energy. Nullifies Low and Medium Priority projectiles on contact. It covers a good chunk of the space in front of and above Dormammu, so it can be useful as an anti-air. | |||
| Damage | Startup | Active | Recovery |
|---|---|---|---|
| 95,000 | 9 | 20 | 12 |
| On Hit | On Block | Guard | Properties |
| Launch | -9 | Mid | |
|
Dormammu creates an upwards stream of fire, acting as a standard launcher with a very disjointed hitbox. Nullifies Low and Medium Priority projectiles on contact. | |||
Aerial Normals
| Damage | Startup | Active | Recovery |
|---|---|---|---|
| 50,000 | 7 | 3 | 16 |
| On Hit | On Block | Guard | Properties |
| +14 | +11 | OH | - |
|
Poking attack with similar range to Dormammu's grounded L normals. | |||
| Damage | Startup | Active | Recovery |
|---|---|---|---|
| 70,000 | 10 | 11 | 15 |
| On Hit | On Block | Guard | Properties |
| +15 | +15 | OH | |
|
Dormammu swipes with fire, similar to 5M. Has slightly longer horizontal reach than j.5H and j.5S in exchange for not hitting cross-up. Nullifies Low and Medium Priority projectiles on contact. | |||
| Damage | Startup | Active | Recovery |
|---|---|---|---|
| 85,000 | 10 | 5 | 29 |
| On Hit | On Block | Guard | Properties |
| +19 | +18 | OH | |
|
Dormammu performs a huge upward sweep, covering the area both below and in front of himself. Works great as both a neutral and pressure tool, and can hit as a cross-up quite easily. j.5H is an instant overhead against Big Body characters, and can also work against normal-sized characters when set up via Fuzzy Guard. Nullifies Low and Medium Priority projectiles on contact. | |||
| Damage | Startup | Active | Recovery |
|---|---|---|---|
| 90,000 | 14 | 5 | 27 |
| On Hit | On Block | Guard | Properties |
| +19 | +15 | OH | |
|
Dorm swipes downward, mirroring j.5H. Good jump-in attack that can hit as a very deep cross-up. Nullifies Low and Medium Priority projectiles on contact. | |||
Command Normals
| Damage | Startup | Active | Recovery |
|---|---|---|---|
| 80,000 | 20 | - | 26 |
| On Hit | On Block | Guard | Properties |
| - | -3 | Mid | |
|
Dormammu fires a small projectile, which travels horizontally across the screen. It initially starts moving slowly, but quickly accelerates to full speed. This is Dormammu's only "normal" projectile, and is a core part of his gameplan due to his ability to cancel it into special moves. 6H canceled into 421X Teleport allows Dormammu to perform a simple Left/Right mixup so long as both he and his opponent are on the ground. On hit, 6H causes a large Wall Bounce, which Dormammu can easily follow up by canceling into either Flight or Teleport. | |||
| Damage | Startup | Active | Recovery |
|---|---|---|---|
| 20,000 x5 | 15 | - | 31 |
| On Hit | On Block | Guard | Properties |
| +5 | +4 | Low | |
|
Dormammu places a small "carpet" of fire on the ground a short distance ahead of himself. The fire will remain for 180 frames, or until hit hits 5 times, or until Dormammu is hit by an attack, or until another Flame Carpet is created. Flame Carpet can be awkward for Dormammu to use by himself due to being uncancelable. However, it does create some unique support capabilities where Dormammu places the carpet and then tags out for another character who can utilize the lockdown and Low hit. Dormammu can also place the carpet after killing an opponent to provide some extra coverage while attacking the Oncoming character. Normally if a character is hit by Flame Carpet, all five hits will occur in quick succession. However, it is possible to space the carpet so that the opponent "bounces" on top of it, causing the hits to be more spread out. This causes 3H to have significantly better advantage on hit than listed, turning it into a combo extension tool. | |||
Special Moves
| Damage | Startup | Active | Recovery |
|---|---|---|---|
| 20,000 x8 | 26 | 34 | 6 (in air: until grounded) |
| On Hit | On Block | Guard | Properties |
| - | +7 | Mid | |
|
Dormammu channels, creating a stationary projetile which hits several times. The projectile disappears if Dormammu is hit by an attack. Button strength determines the location of the Dark Hole, and has no other effect:
Dark Hole can be used as a zoning tool, but it is fairly commital due to its long total duration. If performed in the air normally, Dormammu does not recover until he reaches the ground, making him extremely vulnerable. However, if Dark Hole is performed while in Flight Mode, Dormammu recovers normally and can continue to act in the air. It is strongly recommended to avoid using Air Dark Hole outside of Flight. If Dark Hole juggles an opponent high enough, Dormammu can link a normal attack afterwards. This gives Dark Hole some combo potential in specific routes, such as TAC Combos. | |||
| Damage | Startup | Active | Recovery |
|---|---|---|---|
| 35,000 x4 | 32 | 23 | 11 |
| On Hit | On Block | Guard | Properties |
| +11 | +2 | Mid | |
|
Dormammu channels, causing a pillar of energy to erupt upwards, with infinite vertical reach. Button strength determines the location of the pillar, and has no other effect:
Purification is a powerful zoning and neutral tool, as its vertical reach prevents opponents from attempting to maneuver above or below it. The pillar has a tendency to create awkward situations where an airborne opponent blocks Purification and, although they recover from blockstun, have no movement option fast enough to escape the next Purification. This causes them to have to block several beams in sequence, piling on large amounts of chip damage. The beam hits OTG, and is thus an important combo tool for Dormammu. It can easily be used as a combo ender by canceling the OTG hit into either Chaotic Flame (236XX) for direct damage or Stalking Flare (214XX) for further pressure. Be careful when performing this sequence, as it is possible to hyper cancel too early. If Purification is kara-canceled, the beam will not come out, and your hyper will whiff disasterously on the knocked down opponent. | |||
| Damage | Startup | Active | Recovery |
|---|---|---|---|
| - | 13 | - | 17 |
| On Hit | On Block | Guard | Properties |
| - | - | - | |
|
Dormammu's teleport. It causes him to disappear and then reappear at a position based on the opponent's location and the button strength used:
Teleport is a powerful tool for mixups and mobility, and allows him to seamlessly transition from long-range zoning to close-range offense when needed. However, all of Dormammu's teleports place him airborne and fairly close to the opponent, he can not teleport away from them. An opponent can react to the startup of an unprotected teleport by attempting an airthrow, which Dormammu has little defense against. Make sure to cover your teleports with an assist or 6H attack when possible. | |||
| Damage | Startup | Active | Recovery |
|---|---|---|---|
| - | 21 | 100 | 0 |
| On Hit | On Block | Guard | Properties |
| - | - | - | |
|
Dormammu's Flight mode. When activated, causes Dorm to float in the air and gives him unlimited access to his airdashes and air specials for the duration. Repeated airdashes in Flight give Dormammu very strong aerial mobility, and this also allows him to use Air Dark Hole without having to deal with the painful "Until Grounded" recovery. At 21f startup, Dormammu's flight activation is on the slower side. He can cancel some attacks into Flight for better frame advantage, but comboing into flight is only possible off a few attacks. Conversely, his Unfly is instant, allowing him to Unfly-cancel into attacks or blocking with no delay at all. | |||
| Destruction |
Damage | Startup | Active | Recovery |
|---|---|---|---|---|
| - | 15 | - | 20 (in air: until grounded) | |
| On Hit | On Block | Guard | Properties | |
| - | - | - | ||
| Creation |
Damage | Startup | Active | Recovery |
| - | 15 | - | 20 (in air: until grounded) | |
| On Hit | On Block | Guard | Properties | |
| - | - | - | ||
|
Dormammu powered up one of his hands with a spell, adding a charge of either Destruction or Creation, depending on the button used. By itself, Dark Spell has no effect, and only serves to modify and enhance Liberation (214H) based on the charges built. Dormammu can have a combined total of three charges, but he can combine the two types in any way: 3D0C, 2D1C, 1D2C, or 0D3C in addition to any combination of fewer than three charges. If Dormammu attempts to use Dark Spell when he already has three charges, he will automatically cast Liberation instead. Dormammu's fully charged Liberation attacks are detailed further below, and are very powerful. Casting Dark Spell any time Dormammu has a spare half-second is a good use of time, in order to build up to these powerful attacks. Dark Spell can be cast while airborne. Similar to Dark Hole, this normally causes Dormammu to be placed into recovery until he reaches the ground. However, in Flight Mode, Dormammu recovers normally from casting Dark Spell, and can quickly cast two or even three spells while floating in the air with little risk. | ||||
Liberation Spells
Note: All Liberation spells are Air-OK, but not actually performed in the air. If Dormammu inputs a Liberation attack while airborne, he will automatically teleport down to the ground, then cast the spell. This adds an additional 23 frames of startup to any spell, and also adds a window from frames 11-24 where Dormammu is invincible due to teleporting.
| Damage | Startup | Active | Recovery |
|---|---|---|---|
| 80,000 | 15 (38 in air) | 5 | 21 |
| On Hit | On Block | Guard | Properties |
| +5 | -3 | Mid | |
|
Dormammu's default 214H special performed if he has no charges stored. Creates a short-range, short-duration shockwave around Dormammu, that knocks opponents up on hit. Is mostly unremakrable, with no special properties. | |||
| Damage | Startup | Active | Recovery |
|---|---|---|---|
| 35,000 x3 | 15 (38 in air) | 10 | 16 |
| On Hit | On Block | Guard | Properties |
| - | +1 | Mid | |
|
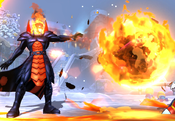
Dormammu points, and an explosion appears in front of him. The explosion has fairly good range and pops opponents high into the air on hit. In the corner, Dormammu can link a normal afterwards to continue the combo. | |||
| Damage | Startup | Active | Recovery |
|---|---|---|---|
| 35,000 x6 | 15 (38 in air) | 10 | 16 |
| On Hit | On Block | Guard | Properties |
| - | +1 | Mid | |
|
Enhanced version of the 1-Destruction spell. The explosion is larger, deals more damage, and knocks opponents further back on hit. | |||
| Damage | Startup | Active | Recovery |
|---|---|---|---|
| 35,000 x10 | 15 (38 in air) | 10 | 16 |
| On Hit | On Block | Guard | Properties |
| - | +1 | Mid | |
|
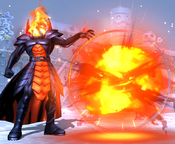
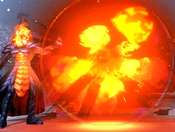
Final version of Dormammu's Destruction magic. Creates an enormous explosion which covers the entire screen. Reaches up to jump height, has full horizontal reach, and can also hit OTG. Pops opponents very high into the air on hit. Dormammu can link Purification or Dark Hole afterwards from any distance, but can also combo after with normals if close enough. | |||
| Damage | Startup | Active | Recovery |
|---|---|---|---|
| 40,000 x3 | 12 (35 in air) | 10 | 24 |
| On Hit | On Block | Guard | Properties |
| - | -10 | Mid | |
|
Dormammu gestures, and a spire erupts from the ground just in front of him. The spire reaches to just under jump height at its point. It has no special properties other than knocking opponents upward on hit. | |||
| Damage | Startup | Active | Recovery |
|---|---|---|---|
| 30,000 x9 | 12 (35 in air) | 10 | 24 |
| On Hit | On Block | Guard | Properties |
| - | -10 | Mid | |
|
Enhanced version of 1-Creation spell. Dormammu causes three spires to erupt in succession, with the final one appearing at roughly 2/3 of fullscreen distance. The individual spires are identical to the 1-Creation version. | |||
| Damage | Startup | Active | Recovery |
|---|---|---|---|
| 0 | 15 (38 in air) | - | 36 |
| On Hit | On Block | Guard | Properties |
| -21 | -23 | Low | |
|
Final version of Dormammu's Creation magic. Has nothing to do with the other pure-Creation spells. Dormammu causes a carpet of dark energy to cover the entire stage. The carpet can be blocked, but must be blocked crouching. It can not connect on airborne opponents at all and does not hit OTG. On hit, this attack deals no damage. Instead, it places a debuff on the opponent for 300 frames (5 seconds), indicated by dark energy covering their legs. While debuffed, the opponent is unable to jump. This would make the opponent extremely vulnerable to command grabs, if Dormammu had any. It does give Dormammu a limited opportunity to mix up the opponent while they can not retreat to the relative safety of the air. | |||
| Damage | Startup | Active | Recovery |
|---|---|---|---|
| 20,000 per hit | 10 (33 in air) | - | 40 |
| On Hit | On Block | Guard | Properties |
| - | - | Mid | |
|
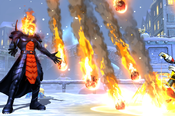
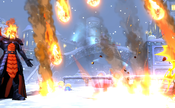
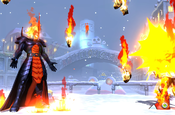
Dormammu calls forth a barrage of roughly 15 meteors, which rain from the sky. The meteors fall randomly across the stage, but are concentrated around halfscreen distance. It is possible for them to spread out enough to land directly in front of Dormammu, or land just short of fullscreen as well. Each meteor can hit OTG, and causes a Hard Knockdown when hitting a not-grounded opponent. Startup is misleading. It takes 10 frames for the meteors to appear, but they take a significant amount of extra time to fall to the ground from there. | |||
| Damage | Startup | Active | Recovery |
|---|---|---|---|
| 20,000 per hit | 26 (39 in air) | - | 40 |
| On Hit | On Block | Guard | Properties |
| - | - | Mid | |
|
Enhanced version of the 1-Destruction and 1-Creation spell. Dormammu calls forth a much larger Meteor Shower. They spread out semi-randomly in a similar vein to the small version, concentrated around halfscreen with a rare chance for some meteors to fall at fullscreen or right next to Dormammu. The shower lasts long enough that Dormammu can start a combo afterwards on hit with little effort. If it is blocked, he can use the blockstun caused to recharge his spells. By combining the lockdown from the meteors with additional lockdown from an assist, Dormammu can recharge all three of his spells after a successful Meteor cast, and repeat the process. Once begun, the Meteors will still fall even if the startup of the attack in interupted. Thus, this spell can act as a pseudo-reversal. If Dormammu gets even one frame of freedom to act, he can call down meteors, which will (hopefully) protect him from punishment. | |||
| Damage | Startup | Active | Recovery |
|---|---|---|---|
| 80,000 (eruption) + 20,000 per rock | 20 (43 in air) | 20 | 21 |
| On Hit | On Block | Guard | Properties |
| - | - | Mid | |
|
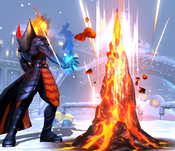
Enhanced version of the 1-Destruction and 1-Creation spell. Dormammu causes the ground to erupt with lava, spraying rocks into the air. After a moment, the rocks rain back down on the ground. Every part of this attack is OTG-capable, and it deals heavy damage. | |||
Hyper Combos
| Damage | Startup | Active | Recovery |
|---|---|---|---|
| 15,000 x30 ~ x60 | 8+3 | 59 | 41 |
| On Hit | On Block | Guard | Properties |
| +8 | -21 | Mid | |
|
Dormammu unleashes a huge stream of flames, acting as a beam hyper. This is Dormammu's standard combo ender. Due to its high speed and damage, it can also be used to snipe assist calls and slower grounded attacks from the opponent, or one reaction to an opponeent's projectile hypers in order to stuff them. Chaotic Flame is advantageous on hit, enough that Dormammu can link normals afterward if done at close range. This is most commonly done as a 5L linked after a combo-ending hyper for slightly better damage and to force an air tech. It's actually possible to link 5M > 5S afterwards if the hyper is done early enough in a combo. | |||
| Damage | Startup | Active | Recovery |
|---|---|---|---|
| 20,000 x20 | 31+4 | - | 62 |
| On Hit | On Block | Guard | Properties |
| +19 | +18 | Mid | Priority: High, Beam Durability: 5 per frame for 20 frames |
|
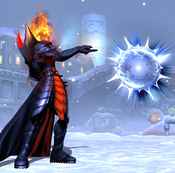
Dormammu unleashes a large, floating ball of fire. The flare slowly tracks the opponent to any screen position. Stalking Flare never expires due to time, and has basically insurmountable durability. The only way for the opponent to avoid having to take the Flare once out is to somehow hit Dormammu, which causes Stalking Flare to immediately disappear. Because Stalking Flare remains active for so long and effectively forces the opponent to stay locked down, it can be used to cover Dormammu while he casts spells or Hard Tags to a teammate. There also is not a limit on having multiple Flares on screen at once, if you have the meter and feel like throwing out several. The chip damage adds up quickly. Stalking Flare will normally quickly go through all 20 of its hits once it actually reaches the opponent. It is possible to set up this hyper so that the opponent "bounces" on top of it. This spaces out the hits, greatly increasing the total hitstun of the hyper, and giving Dormammu or his teammates a massive amount of time to continue the combo afterwards. | |||
| Damage | Startup | Active | Recovery |
|---|---|---|---|
| 400,000 | 8+0 | 20 | 72 |
| On Hit | On Block | Guard | Properties |
| - | -69 | Mid | Invuln until frame 36, |
|
Cinematic level 3 hyper. Dormammu covers the ground in dark energy, which spreads outward from Dormammu's location until it covers the entire ground. The energy can hit OTG and is easy to use as a combo ender. On hit, the opponent is pulled into a cinematic where Dormammu crushes them, dealing heavy unscaled damage and ending with a Hard Knockdown. Dormammu can follow up with an OTG Purification or Flame Carpet, or even a Hard Tag to a character with a fast OTG if he wants. Besides being an easy combo ender to secure a kill, this hyper is very fast and extremely invincible. It has 0 frames of post-flash startup, so if an opponent is close range when the super flash begins and not already blocking, the attack can not be blocked. You have enough time to charge once before and once after your level 3. This means that if you have a combo that you can charge during, you can guarantee a 3D0C after the level 3. | |||
Universal Mechanics
| Damage | Startup | Active | Recovery |
|---|---|---|---|
| 80,000 | 1 | 1 | - |
| On Hit | On Block | Guard | Properties |
| - | - | Throw | |
|
Dormammu levitates the opponent and then tosses them away. Can be followed up with OTG Purification, but the timing is tight. | |||
| Damage | Startup | Active | Recovery |
|---|---|---|---|
| 80,000 | 1 | 1 | - |
| On Hit | On Block | Guard | Properties |
| - | - | Airthrow | |
|
Standard airthrow that results in a hard knockdown. Can follow up with an OTG of Dormammu's choice, including Purification, Flame Carpet, and his various OTG-capable Liberation spells. | |||
| Damage | Startup | Active | Recovery |
|---|---|---|---|
| 50,000 | 2 | 5 | 21 |
| On Hit | On Block | Guard | Properties |
| - | -3 | Mid | Snapback |
|
Animation and hitbox based on 5H. | |||
| Damage | Startup | Active | Recovery |
|---|---|---|---|
| 27,000 | - | 20 | 33 |
| On Hit | On Block | Guard | Properties |
| - | -15 | OH | |
|
- | |||
Team Position
Dormammu is most commonly played in the Second position. He provides good backline support with a strong assist, and has two very useful DHCs in Chaotic Flame and Stalking Flare, which are most easily accessed from the second slot. Dormammu's 8-way airdash and teleport give him an edge in escaping Oncoming mixups. This makes him less of a liability to have brought in from a dead Point character than most other picks. With access to Level 2 or 3 X-Factor, Dormammu's chip damage and sniping game become a very serious threat. Opponents basically can not call assists when Dormammu is on the ground for fear of eating Chaotic Flame -> X-Factor -> Chaotic Flame, which will quickly kill them.
Notable Synergies
Haggar: Dark Hole assist has a huge amount of duration and projectile durability, which can help Haggar get in on keepaway style characters. Additionally, Dorm's Stalking Flare hyper provides a lot of synergy potential. Haggar can DHC to it if a reversal Lariat or 236XX attempt fails in order to avoid punishment. Also, Dorm can call out Stalking Flare and Flame Carpet (3H) then tag in Haggar. The opponent, especially on incoming, will have to block both of Dorm's attacks, giving Haggar time to attack.
Players to Watch: Paradigm (Haggar/Dorm/Doom), Ranmasama (Haggar/Dorm/Magneto), Dragoomba (Skrull/Dorm/Haggar), JasonKido (Magneto/Dorm/Haggar)
Magneto: Magneto often relies on DHCs to secure kills, since his own Level 1 Hypers do poor damage. Dormammu offers some fantastic DHC options to secure a kill - Chaotic Flame (236XX) deals great damage and is easy to DHC into, while Stalking Flare (214XX) lasts an extremely long time, giving Magneto time to tag back in and prepare a mixup for the next character. In general, Dorm provides lots of tools to lock down opponents for Magneto via Stalking Flare, Flame Carpet (3H) and Dark Hole assist. Since both Dorm and Magneto have practical TAC infinites, they can also always score a kill by TACing to each other.
Players to Watch: FChamp (Magneto/Dorm/Doom), Wentinel (Wesker/Dorm/Magneto), Ranmasama (Magneto/Dorm/Haggar), JasonKido (Magneto/Dorm/Haggar), Aces Return (Nova/Dorm/Magneto)
Other Players to Watch: Angelic (Wolverine/Dorm/Shuma), SalutexMO (Shuma/Dorm/Rocket), Spartan Throne (Wolverine/Dorm/Iron Fist), iDom (Dante/Dorm/Strange)
Combos
Solo Combos
No Starting Spell Charges
j.5S, land, 2L > 5M > 5H > 6H xx 421H (switches sides), j.5H > j.5S, rejump, j.5M > j.5H > j.5S, rejump, j.5M > j.5H > j.5S, land, 5M > 5S sjc. j.5M > j.5M > j.5H > j.5S, land, 623X xx 236XX, 5M (815,000 for 1 bar, builds ~1.25 bars of meter)
Video Timestamp. Basic jump loop confirm off a midscreen hit. Switches sides, so it is useful if Dormammu is closer to the corner.
j.5S, land, 2L > 5M > 5H > 6H xx 214S, 9XX > 3XX xx j.5M > j.5H > j.5S (whiff), rejump, j.5M > j.5H > j.5S, rejump, j.5M > j.5H > j.5S, land, 5M > 5S sjc. j.5M > j.5M > j.5H > j.5S, land 623X xx 236XX (785,000 for 1 bar, builds 1.25 bars of meter)
Video Timestamp. Alternate midscreen jump loop BnB. The only difference is you use Flight and airdashes to catch the opponent instead of teleport, so you do not switch sides. Flight does not automatically put you above minimum airdash height, so this requires some manual adjustment and is somewhat difficult.
2L > 2M > 5H > 6H xx 214S, j.5M > j.5H > j.5S, rejump, j.5M > j.5H > j.5S, rejump, j.5M > j.5H > j.5S, land, 5M > 5S sjc. j.5M > j.5M > j.5H > j.5S, land, 623L xx 236XX, 5M (777,000 for 1 bar, builds ~1.3 bars of meter)
Video Timestamp. Corner route. Do not use teleport, because the corner Wall Bounce is shorter and Teleport takes too long.
j.5S, land, 2L > 2M > 2H > 5S sjc. j.5H xx j.214S, j.5L > j.5H xx j.236L, j.5H > j.5S, land, 623X xx 236XX (691,000 for 1 bar, builds 0.9 bars of meter)
Video Timestamp. Basic Flight mode route.
j.5S, land, 5M > 5H > 6H xx 421H, 2XX, j.5H, rejump, j.5M > j.5H > j.5S, rejump, j.5M > j.5H > j.5S, land, 2M > 5S sjc. j.5M > j.5M > j.5H > j.5S, land 623X xx 236XX, 5L (808,000 for 1 bar, builds ~1.25 bars of meter)
j.5H, land, 2L > 5M > 5H > 6H xx 214L, 5M > 5H > 6H xx 214M xx 236XX, 5M > 5S sjc. 2147H, 623L xx 236XX, 5M (1,020,000 for 2 bars, builds ~1.1 bars of meter)
Video Timestamp. Corner only Spell route building and consuming two stacks mid-combo.
5H > 6H xx 214L, 5H > 6H xx 214L xx 236XX, 5M > 5S sjc. j.5M > j.5M > j.5H > j.5S, land, 214L, 214H, 6H xx 236L xx 236XX, 5L (1,008,000 for 2 bar, builds ~1.1 bars of meter)
Video Timestamp. Corner only Spell route buiilds and consuming three stacks mid-combo.
With Starting Spell Charges
TBW
X-Factor Combos
236XX xx X-Factor (Level 1+), 6H xx 421L, j.5H > j.5S, rejump, j.5M > j.5H > j.5S, rejump, j.5M > j.5H > j.5S, land, 2H > 5S sjc. j.5M > j.5M > j.5H > j.5S, land, 623X xx 236XX
Video Guide. X-Factor confirm off sniping an opponent with fullscreen Chaotic Flame.
Sample Team Combos
Deadpool/Dorm/Strider
Deadpool/Dorm/Taskmaster
Dorm synergies with Doom, X-23, Trish, and Strider
