Introduction
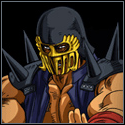
| Despite being hands down the weakest character in Hokuto no Ken, Jagi still remains quite popular - there are probably more Jagi users than there are Mamiya, Mr. Heart, and Thouther users. And why not? Aside from Jagi being awesome in general, nothing makes you looks cooler than beating a Toki user with him! However, the would-be Jagi user must overcome many hurdles to start to be able to win against the stronger characters, and many are not up to the task. A quick look at the matchup chart will give you an idea of just how bad poor Jagi has it.
Overall, Jagi is a character that requires superior player skills or extreme luck to have any chance at all, and for the most part should be considered a gimmick character best used when you want to challenge yourself, embarrass your opponent, or just have a good time. That being said, let us start this section off by listing Jagi's main strengths and weaknesses. |
Strengths:
- His jumping A, crouching C, and Rakangeki super are all top-class moves
- Banishing Strike combos do decent damage
- Has the fastest crouching recovery in the game
- Using Jagi is like the opposite of using Toki: everyone will like you and think you are cool
Weaknesses:
- Has negative matchups against all characters; has two 1:9 matchups
- Holds a statue in front of him when guarding low, which breaks and stuns him if he blocks too much
- 100% combos are extremely difficult
- Terrible FKO
Before diving right into the combos be sure to familiarize yourself with Jagi's special/super moves and important normals.
Normal Moves
Standing
Close A
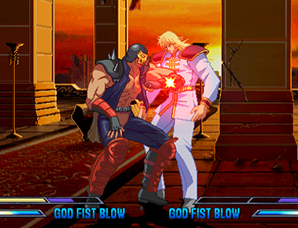
A quick elbow. Fast startup, can be canceled into itself. Effective against against airborne opponents.
Far A
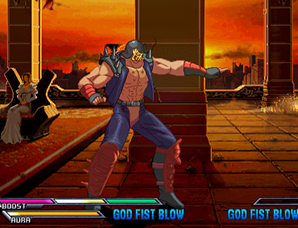
A straight jab. Slower than close A but has better range. Effective against against airborne opponents.
Close B
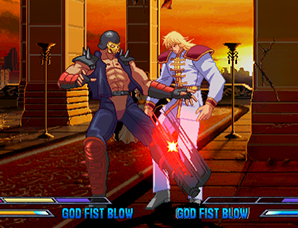
A downward kick. Fast startup but terrible horizontal range. Generally only used in combos.
Far B
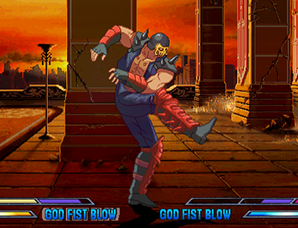
A short kick that looks more like a funky dance move than anything else. Its awful range makes it completely useless outside of combos.
Close C
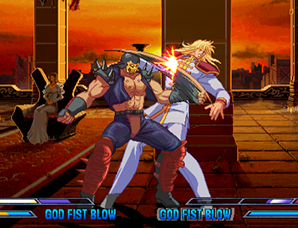
A hard backhand punch. Fairly slow but decent reach. Doesn't get much use outside of combos.
Far C
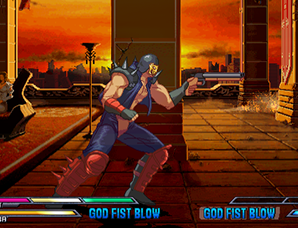
Jagi pistol-whips his opponent with his shotgun. Has good range and fairly long active time, making it alright for beating out air dash attacks. If you throw away your shotgun(done by taunting), this move will not come out at all.
Close D
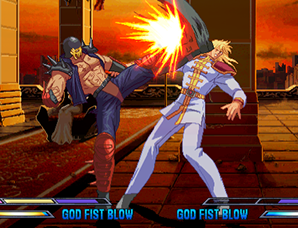
An overhead dropkick. A decent anti-air, but loses to some moves like Rei's j.B. Can combo into a Banishing Strike.
Far D
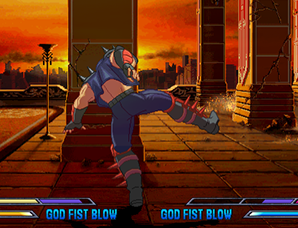
A low kick. Knocks the opponent into the air. Very important move for combos.
Crouching
A
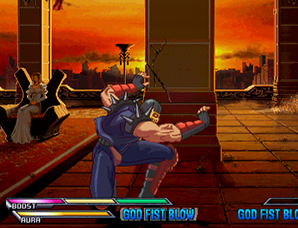
A crouching jab. Fast startup makes it good for getting out of pressure and starting combos.
B
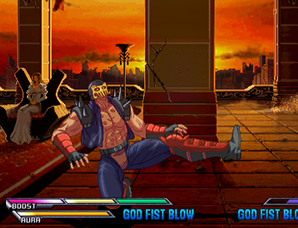
A low crouching kick. Comes out fast, has good range, and hits low. Can cancel into itself. Jagi's main combo starter. Beats out some character's low attacks, but as it's hitbox is fairly high it can't be used to counter Juda's land mines or Toki's teleports.
C
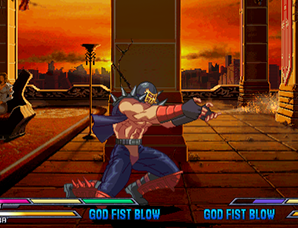
A low, two-handed thrust. Causes stun on Counter Hit, which allows for comboing into a Banishing Strike. Jagi's hitbox becomes quite small when using this move so it can beat out many normals with high hitboxes, like Kenshiro's D and Toki's 2D. Has fairly long recovery, but great return when you do connect. Definitely one of Jagi's best normals.
D
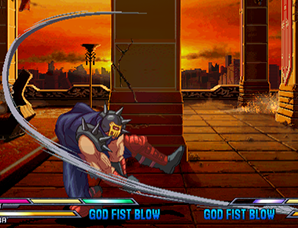
Jagi sweeps his opponents feet out from under them with a long piece of metal. Comes out fairly slow, but has great range and hits low. Often used at the end of an attack string as an alternative to a Grave Shoot.
Air
A
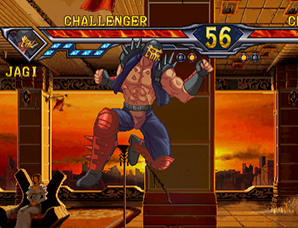
A jumping punch. Quick startup and cancelable into itself. One of the best air-to-air moves in the game.
B
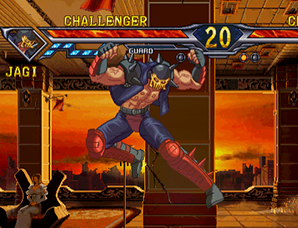
A downward kick while jumping. Mostly used in combos.
C
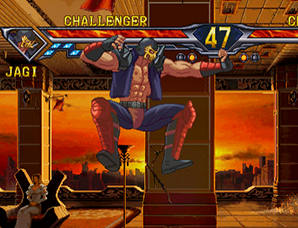
A straight palm while jumping. Knocks the opponent into the air, and causes wall bounce on Counter Hit. It's slow startup makes it inferior to jump A, but it is still useful in some situations.
D
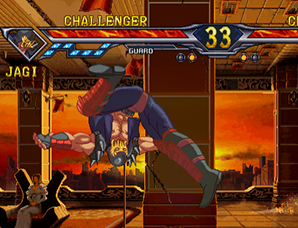
Jagi flips around in the air and kicks downwards. Quite weak and has fairly short range, but still Jagi's main air-to-ground move.
Other
6A
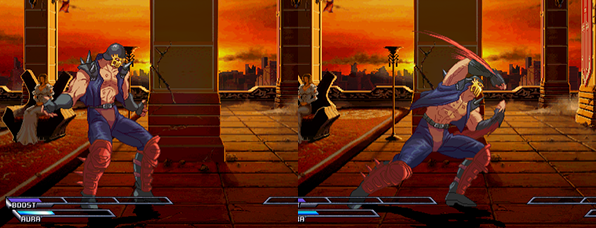
Some sort of crab-punch. Hits overhead and knocks the opponent down upon connecting. Follow up possible with Boost.
6B
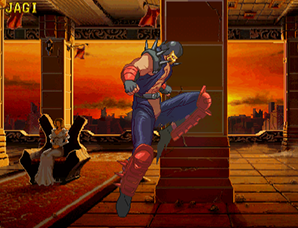
A jumping knee. Probably meant to be used as an anti-air, but even if you do connect with it you can't follow up with anything. Mostly useless.
Throw
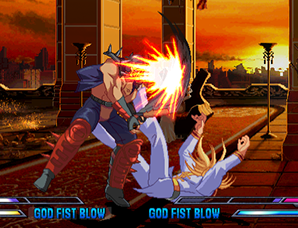
Jagi sits his opponent down in a chair, then bashes them over the head with his shotgun. Follow up possible in the corner. Can also follow up mid-screen with the use of Boost.
BD Throw
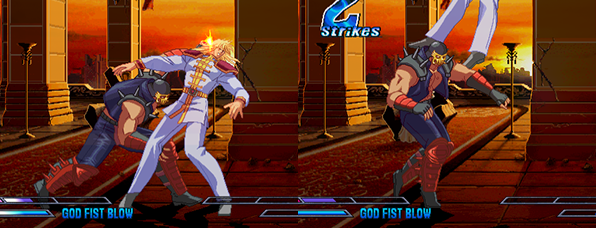
Jagi picks up his opponent and throws them up into the air. Comparatively long reach for a BD throw. Follow up possible.
Grave Shoot
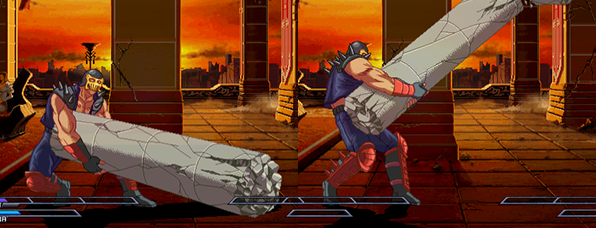
Jagi magically pulls a giant stone pillar out of the ground and launches his opponent up into the air with it. Slow startup, and not usable in most combos. Hits overhead and has very long range. However, Jagi has a hitbox in the pillar so this move will lose to reversals even when done from a distance away.
Heavy Strike
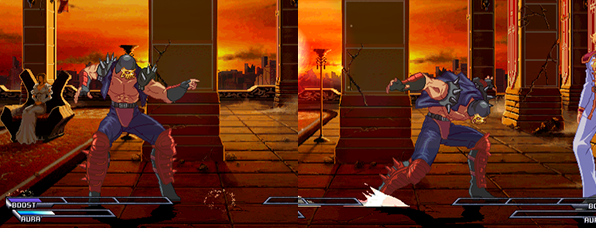
Jagi winds up then lunges forward and headbutts his opponent. It's short range makes it not very useful outside of combos.
Banishing Strike
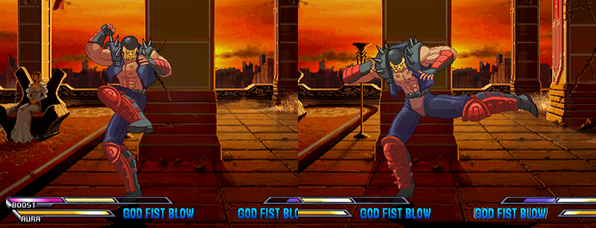
Jagi winds up and lets loose a powerful side kick. Important combo part.
Special Moves
Shotgun
236A
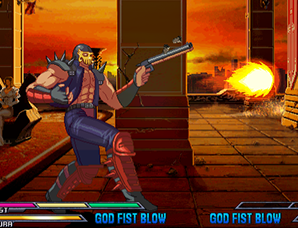
Jagi shoots a slow projectile from his shotgun. Has long recovery, and does about as much damage as a standing A. Can be used to light a drum can or enemy covered in gas on fire. Takes off one star on Counter Hit.
Anti-air Shotgun
623A
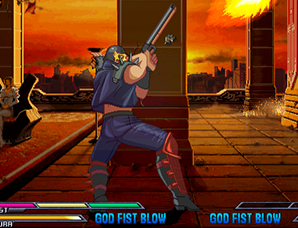
Shoots a projectile up into the air. Does more damage than the ground version. Mostly used to keep an opponent from jumping away when in the corner or as a psychic anti-air. Takes off one star on Counter Hit.
Hokuto Senjusatsu
(Air) 236A
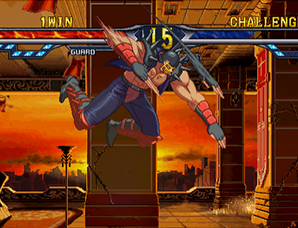
Jagi rapidly punches downward at his opponent. Takes off one star on Counter Hit. Used as a combo finisher or as a mixup option. The timing is quite difficult, but it is possible to link into a D upon landing if you successfully hit a grounded opponent.
Nanto Jarougeki
214C (Hold C to charge, press A to cancel)
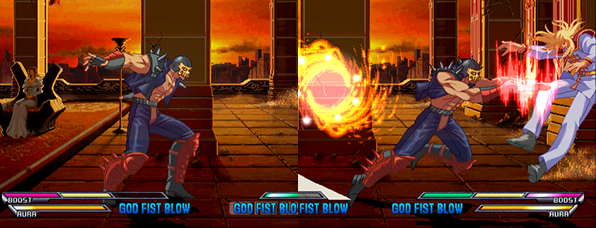
Jagi steps back and winds up, then lunges forward. Max charge has the same effect as a max charged Banishing Strike. Can be canceled while charging by pressing A. Has very short invulnerability when Jagi steps backwards. Causes wall bounce on hit. Takes off one star on Counter Hit.
Drum Can
214B

Jagi places a drum can where he is standing. Can place up to two at once. Makes a pillar of flame that burns for five seconds when hit with a match or shotgun shot. Pillar takes off one star on Counter Hit. Has fairly long recovery and no real effect until you light it on fire, making it less useful than Jagi's gasoline move. Used occasionally as a combo finisher in the corner.
Match
236B
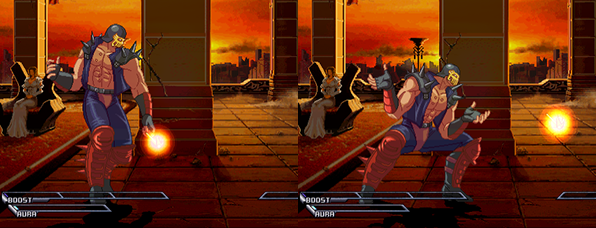
Jagi throws a match about two character-lengths in front of him. Can be used to light a drum can, gasoline, or opponent on fire. Cannot be used to clash with other projectiles. Takes off one star on Counter Hit. Mostly used as a set with a drum can or gasoline.
Gasoline
214D

Jagi dumps some gas on the ground, which stays there for 10 seconds. Opponents move very slowly over gasoline, and will often drop combos if they step over it during one. Can be lit on fire with a match. The pillar of flame it makes is slightly smaller than that of a drum can, and takes off one star on Counter Hit. Very useful for keeping opponents away.
"Y-yametekure!! T-tanomu!!"
214A (Hold A to charge)
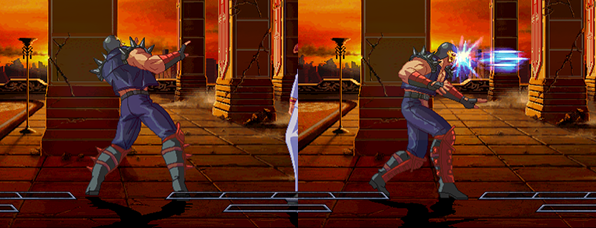
Jagi slowly retreats backwards. Stops when you release A. Invulnerable after startup until just before stopping. If charged to the maximum, Jagi throws an unblockable needle that causes stun, but doesn't hit crouching opponents. The needle takes off one star on normal hit, and two on Counter Hit. Not very useful, but there are some rare spots where you can get a guaranteed hit with the needle, such as when Raoh uses his ground Goushouha.
"Yoku Dekita Otoutou!!"
632146D
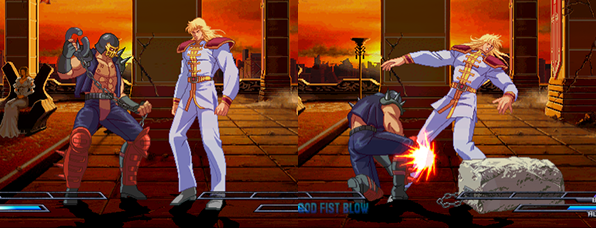
Jagi chains a huge rock to his opponents leg. Hits low but has very slow startup. Invulnerable on startup. The opponents movement is slowed and they are unable to jump for five seconds. Takes off one star on normal hit, and two on Counter Hit. Can hit downed opponents, but the rock will not be attached in this case. Mostly used as a combo finisher or in some cases to bait Guard Cancels.
"Bakame! Kateba Iinda Nani wo Tukaou ga!"
(While knocked down near shotgun) C (Uses 0.5 Bar Aura)
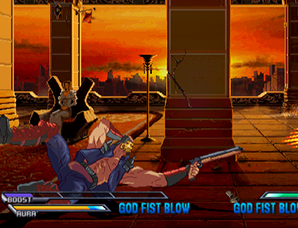
Jagi shoots hit shotgun at his opponent while lying down. Can be done a maximum of four times in a row. Takes off a star on Counter Hit. Does about the same amount of damage as an anti-air shotgun shot. As you need to first taunt to throw your shotgun away, and then miraculously get knocked down right on top of it, this move is pretty much impossible to pull off, let alone use effectively.
"Madamada Yomi ga Amai wa"
236236A (Uses 1 Bar Aura)

Jagi throws a huge amount of gasoline at his opponent. Takes off one star on normal hit and two on Counter Hit. Opponent becomes covered in gas if they block or are hit by it, and can be lit on fire with a match or shotgun shot. If you do not hit the opponent with it the gas will stay on the ground and act like a big version of Jagi's gasoline move.
Hokuto Rakangeki
236236C, Follow-up with A, B, or C up to 3 times in total (Uses 1 Bar Aura)

Jagi rushes forward and strikes his opponent rapidly. Has instant startup as well as startup invulnerability. Takes off one star on normal hit and two on Counter Hit. Pressing A, B, or C during the super causes Jagi to throw a needle diagonally into the air, straight forward, and diagonally down at the ground, respectively. While the needles don't do any damage, they are useful to keep the opponent in the air during certain combos. Recovery is quite long, but by throwing needles at the end of the super your opponent will generally not be able to get a guaranteed hit on you in cases where they were able to guard it. Thanks to the instant startup you can net a guaranteed Counter Hit after blocking many normal and special moves. This is one of the best supers in the game, and one of the few moves Jagi can really rely on.
"Ore no Na wo Ittemiro!"
6321463214C, Follow-up with 236A on success (Uses 2 Bars Aura)

A command grab that takes two full bars of Aura. Jagi grabs his opponent and demands they say his name. The opponent has to successfully choose "ジャギ(Jagi)" from a list of that contains two other similar looking names, such as "シャギ(Shagi)", "シャチ(Shachi)," etc. If they choose correctly, no damage is done and play resumes with both players able to act. If they choose incorrectly, or do not answer at all, Jagi hits them for a good chunk of damage. At this point it is possible to do a follow up with 236A for no extra cost, which forces the opponent to try to pick Jagi's name a second time. If they are unsuccessful again, they lose one star and are dizzied.
In cases where you think the first hit will kill the opponent, it is best not to use the follow up, as doing so will actually reset their health to one. If they guess correctly on the second part they will still be alive and able to come back and win the round.
"Ima ha Akuma ga Hohoemu Jidai nanda!"
(Near Shin) 641236C (Uses 1 Bar Aura)
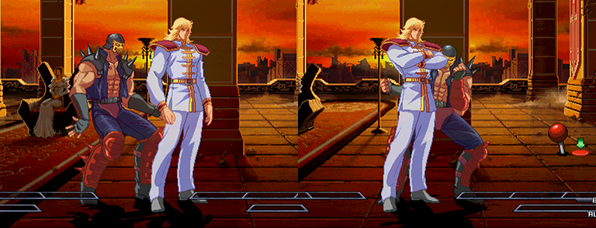
A command grab only usable on Shin. Has a very long animation, which is a reenactment of the scene where Jagi corrupts Shin. Takes a star and drains Shin's Boost and Aura. Shin is able to mash the lever to reduce the amount of gauge he loses. Upon completion both players are able to act at about the same time. Mostly useless except as a gimmick.
"Huhu, Kono Toki wo Matteitanoda!"
236CD (Fatal KO)

Jagi smacks his opponent, then dumps gas all over the place and lights it up, exploding everything. Often misses even after successfully landing the first hit, making this one of the worst FKOs in the game.
Combos
Basic Combos
Non Wall Combos
fD Combos
| 1. ~fD > iad JD > cD > 〆
2. ~fD > A+C > JA*2~3 > air 236A 3. ~fD > HJB*3 > JC > 〆 4. ~fD > HJB*3 > JC > landHJA*5~6 > JB > JC > 〆 |
You should try to go for the combo 3 or 4 every time. They don't work on Thouther and Toki, so stick to the combo 1 on them.
〆 can be C+D, a match for okizeme, or 236236C.
These are the basic combos to use after fD. But to get there, you first need to combo into fD ! It is only possible against Rei without boost.
| 1. ~E > 2B > cD > fD >
2. ~2B > 2C > E~fD > |
These are the two main patterns. The second one is pretty good as it lets you hit confirm the boost gain from 2C.
Grounded Combos with no boost
| 2B > 2C > 236236C |
Better than nothing when you got 1 meter but no boost. Can even stun if the chikuseki is high enough.
Grounded Combos with no boost no aura
| 2B > 2C > 2D or A+C or C+D or 214D or 214C |
Sadly there is no way to get a guaranteed knockdown, so all you can do is mix after 2C.
Grave Combos
| 1. A+C > JC > JD > air 236A
2. A+C > JA*n > air 236A 3. A+C > JA*n (8+) > JB > falling JB (hits otg) > air 236A 4. A+C > JA*n > JB > 236236C |
1 star and okizeme from A+C. Combo 1 is for damage. Combo 2 is for chikuseki. Combo 3 is for more chikuseki but doesn't work on Toki. Combo 4 only when the extra damage kills.
Throw
| 1. Throw > 2A > cD > C+D
2. Throw > 2B > 2C > C+D 3. Throw > cB > cD > C+D 4. Throw > 2A > cD > C+D > E > 5A > cD > 632146D or [236B > 214B] |
Combo 1 is the standard one. Combo 2 is the variant against Thouther. Combo 3 is the variant against Mamiya. They can tech if you don't go for these. Combo 4 is the one to go for if you have 0.2 boost to spend.
Wall Combos
This is Jagi's main way to deal damage which means you need to master these combos. As for fD, you first need to know how to combo into C+D :
| ~2B > cD > C+D~
~2B > 2C > E~C+D~ |
The meter gain from the 214B gets really high thanks to chikuseki, which is why you got to try to increase it as much as you can during these combos.
| 1. ~C+D > E > A+C > air 236A (1 hit) > E > (JD) > land > JB > JB > JA > (JD) > land > rising JB (JA) > falling JB (JD) > land > rising JB > air dash > JB (JD) > 236B > 〆
2. ~C+D > E > A+B > E > fD > JB > JB > JA (JD) > land > rising JB (JA) > falling JB (JD) > land > rising JB > air dash > JB (JD) > 236B > 〆 |
Moves between () are moves that whiff. Combo 1 is used from midscreen to the corner. Combo 2 is used from the corner to midscreen. 〆 can be :
| 1. Dash > 214B > Okizeme
2. 214B > 214B > Okizeme (as fast as possible) 3. 236236A > Okizeme |
Follow-up 1 : when you are a bit far. Follow-up 2 : the first 214B hits otg, the second one will hit on your opponent's wake-up. Doesn't work on Shin. Follow-up 3 : use this one if your opponent as no meter and you have to use.
For Okizeme just mix air dash JD with 2B.
FKO Combos
1 star Combos
| 1. ~C+D > E > C+D > E > 5A > cD > FKO 2. Throw > 5A > cD > C+D > E > 5A > cD > FKO |
These are the main 1 star FKO combos you'll be using. They all require 1 boost.
2 stars combos
| 1. ~C+D > E > A+B or [A+C > air 236A] > E > FKO
2. A+C > JC > air 236A (1 hit) > E > JC > Hitstop cancel air 236A > land > 5A > cD > C+D > E > 5A > cD > FKO |
Combo 1 : use A+B when far from the corner, and A+C > air 236A when close to the corner. Combo 2 doesn't work on Toki.
3 stars Combos
| 1. ~C+D > A+B or 632146D > E > A+C > air 236A > land > FKO 2. 2B > cD > Hitstop cancel 632146D > E > C+D > E > A+C > air 236A > E > cD > FKO |
Combo 1 : A+B when far from the corner, 632146D when close. Not reliable on Heart. Doesn't work against Shin (after air 236A, go for a dash > 5A > C+D > FKO. Air 236A hits number depend on the number of hits before C+D. Everything will be written below. This combo is really interesting since as soon as C+D hits, you can go for it even without boost. Combo 2 requires 1 boost. Combo 3 is very reliable when you get used to it. Doesn't work on Shin and Heart. Requires 1 aura. Basically the idea of this combo is to get 11~12 hits so the opponent gets away from the wall, Then 236236C should hit 2 times, and a third time with a C needle. Then FKO as soon as possible. Combo 4 : variant for Heart.If C+D is the 3~4th hit of the combo, go for A+C > air 236A. If it is the 5~6th then go for 632146D.
Air 236A hits
1. If C+D is the 2nd hit in the combo :
Air 236A hits 3 times : Kenshiro, Raoh, Toki, Jagi, Rei, Thouther, Mamiya
Air 236A hits twice : Shin, Juda
2. If C+D is the 3rd hit in the combo :
Air 236A hits 3 times : Kenshiro, Raoh, Toki, Jagi, Rei
Air 236A hits twice : Thouther, Mamiya, Shin, Juda
3. If C+D is the 4th hit in the combo :
Air 236A hits 3 times : Kenshiro (requires to add a dash > 5A), Raoh, Toki, Jagi
Air 236A hits twice : Rei, Thouther, Mamiya, Shin, Juda
From a 5th hit C+D, air 236A will hit twice against everyone, but FKO will whiff.
4 stars Combos
| 1. Charged 214C on block or Charged C+D on block > E > fD > Instant air dash JD > land > fD > Instant air dash JC > land > A+C > air 236A (1 hit) > 2C > Charged E+C+D > E > 5A > cD > C+D > E > FKO
2. Charged 214C on block or Charged C+D on block > E > [fD > Instant air dash JD > land]*3 > rising JB > falling JB > land > A+C > air 236A+C > fC > Charged E+C+D > E > 5A > cD > C+D > E > FKO |
Combo 1 : works on Kenshiro, Raoh, Toki, Jagi, Rei, Juda, Heart. 2C doesn't hit Juda after air 236A, so use 2D instead. Air 236A needs to hit Heart high, and you have to replace 2C with fC. Combo 2 : variant for Shin, Thouther and Mamiya.
Basket
Rei & Shin
About characters
Rei
Needed air hits
Hyakuretsu : 23
Dribble : 30 (this is where it starts being reliable, possile from 27 hits)
Rei's neutral game, pressure, damage, everything about this character is too good. He doesn't need much to be able to do an infinite, so he's really scary. If you ever hit him, don't miss the chance to kill him. Rei is said to be easy to basket, thanks to the low amount of required hits, his quite big hurtbox.
Shin
Needed air hits
Hyakuretsu : 23
Dribble : 31 (too hard to even care about this)
One of the easiest characters to basket with Rei. The hyakuretsu combos recipe are pretty much the same as the ones for Rei. Rei's hurtbox while juggled is really large while Shin's hurtbox is tall which makes fD > HJA really easy. If you hit him too many times 236236C tends to whiff due to his thin hurtbox. Shin has no reliable way to 100% you so you can always turn the tide in the match.
Hyakuretsu after 236236C
Rei
23 hits : 2A > Dash > 2A > 2B > 2A*n
24 hits : 2A > 2B > 2A*n
Shin
23~24 hits : 2A > Dash > 2A > 2B > 2A*n
25 hits : 2A > 2B > 2A*n
Reference video :
http://www.nicovideo.jp/watch/sm32385046
The combos written here have the same number as in the video
Hyakuretsu
Starting from a Throw / Overhead
n°1.1 Boost 2.5, midscreen~corner (Rei Shin)
| Throw or 6A > E > 5A > cD > fD > JB > JB > JD > air 236A > E > 2A > 5A > E > 5A*2 > E > 5A*3 > 236236C > Hyakuretsu |
27 hits
Possible with 2.2 boost from a throw in the corner
That's a pretty old version, not really useful now but still good to practice
n°1.2 Boost 1.5, midscreen~corner (Rei)
| Throw or 6A > E > 5A > cD > fD > HJA*6 > JB > JC > air 236A > 236236C |
25 hits
236236C needs to be done as soon as you land.
n°1.3 Boost 1.5, midscreen~corner (Rei Shin)
| Throw or 6A > E > 5A > cD > fD > HJA*6 > JB > JB > 2A > 236236C |
23 hits
Possible with 1.2 boost from a throw in the corner
After landing if you are still far from the corner add a 5A after 2A
n°1.4 Boost 1.1, anywhere except near the corner (Rei Shin)
| A+C > JC > JD > HSC air 236A > cD > fD > HJA*6 > JB > JC > 2A > 5A*2 > 236236C |
26 hits
Go straight for the super as you land if you're already in the corner
Possible near the corner with 2.0 boost if you boost your HJA
n°1.5 Boost 1.5, your back a bit away from the corner~corner (Rei Shin)
| A+C > E > 2B > cD > fD > HJA > JB > JC > 2A > 236236C |
23 hits
Really interesting route thanks to the A+C into 2B which is hard to block (overhead > low). If A+C hits, go for this route, if they block A+C but get hit by 2B, go for the route 2.3
n°1.6 Boost 0.7, corner throw (Rei Shin)
| A : Throw > cD or 2C > fD > JB > JB > JD > E > HJA*6 > JB > JC > 236236C
B : Throw > cD or 2C > C+D > E > 5A > cD > fD > HJA*6 > JB > JC > 236236C |
24 hits
After the throw go for cD if you're 1P and 2C if you're 2P
If you're on the side of your health bar, you will cross-up after JD boost, so use the route B
n°1.7 Boost 0.1 corner throw (Rei Shin)
| Throw > JB > JB > JC > land > HJA*6 > JB > JC > 2A > 236236C > 2A > dash > 2A > 2B > 2A*14 > 2B*3 > … |
23 hits
Hard to do but great combo considering the low ressources required
Possible on Rei with 0 boost
n°1.8 Boost 0, corner throw (Rei)
| Throw > cD or 2C > fD > HJA*4 > JB > JB > JC > air 236A > 236236C > 2A > dash > 2A > 2B > 2A*14 > 2B*3 > E > 2A*8 > E > 2A*11 > [2A > 2B]*n |
23 hits
Will give you enough boost if you don't throw in a period where you cannot earn boost
You will need to go for a dribble after. If you start with 0.1 boost, you don't have to go for the dribble
Ground vs Ground starter
n°2.1 Boost 2.2, back to the corner~midscreen (Rei Shin)
| A : ~fD > JB > JD > E > JB > JB > JD > E > HJA*6 > JB > JC > 2A > 5A*2 > 236236C
B : ~fD > JB > JD > E > HJB*3 > JD > E > HJA*6 > JB > JC > 5A*2 > 236236C |
A : 24+x hits
B : 25+x hits
After the first boost, if you're far from the corner go for the A route, if you're close go for the B route
These routes require 2.0 boost, but since you first need your fD to hit, you'll pretty much end up using 2.2 boost everytime
n°2.2 Boost 2.2, midscreen~corner (Rei Shin)
| A : ~C+D > E (crosss-up) > C+D > E > 5A > cD > fD > HJA*6 > JB > JC > 2A > 5A*2 > 236236C
B : ~C+D > E > iad JD (cross-up) > C+D > E > 5A > cD > fD > HJA*6 > JB > JC > 2A > 5A*2 > 236236C |
25 hits
Route B when in the corner, route A for other situations
n°2.3 Boost 1.2, anywhere (Rei Shin)
| ~fD > HJB*3 > JC > land > HJA*6 > JB > JC > 236236C |
23 hits
It's written anywhere from a 4th hit fD against Shin, 236236C will whiff
n°2.4 Boost 0.8, midscreen~near corner (Rei Shin)
| 214C or JC counter > (gain up to 2.0 boost with the wall combo) > C+D > E > cD (cross-up) > fD > JB > JB > JD > E > HJA*6 > JB > JC > 236236C |
24 hits
n°2.5 Boost 0, back to the corner (Rei Shin)
| 2A > 2A > 2B > fD > HJB*3 > JC > land > HJA*6 > JB > JC > 2A > 5A > 236236C |
25 hits Route from abare
n°2.6 Boost 1.4+, back to the corner (Rei Shin)
| 2A > 2A > 2B > fD > HJB*3 > JC > land > HJA*4 > JB > JB > JD > E > JA*4 > JB > JD > E > JA*8 > dash > 5A > dash > Hyakuretsu |
27 hits Route withouth aura. Can be useful considering that Jagi has to use aura guard and guard cancels quite often.
n°2.7 Boost 1.0, midscreen~corner (Rei Shin)
| A : 2B*7+ (carry to the corner) > cD > C+D > E > iad JB (cross-up) (JD) > C+D > 5A > cD > fD > HJA*6 > JB > JC(JD) > 2B > 2A > 5A*3 > 236236C > 2A > dash > 2A > 2B > dash > 2A*14 > 2B*3 > [get 1 boost]
B : 2B*7+ (carry to the corner) > cD > C+D > E > iad JD (cross-up) > C+D > 5A*2 > cD > fD > HJA*6 > JB > JC(JD) > 2B > 2A > 5A*2 > 236236C > 2A > dash > 2A > 2B > dash > 2A*14 > 2B*3 > [get 1 boost] |
You get at least 1 boost if you do 7 or more 2B at the start Route A against Rei, route B against Shin
Anti air
n°3.1 Boost 1.0, anywhere (Rei Shin)
| JA > JB > JC > E > 2A > cD > fD > HJA*6 > JB > JC > 236236C |
24 hits
Route from an air to air JA. JA > JA instead of JA > JB is more likely to be used in game. JA > JC doesn't combo but the window to tech is really small
n°3.2 Boost 1.0, anywhere (Rei Shin)
| HJA*2 > JB > JC > cD > E > fD > HJA*6 > JB > JC > 236236C |
24 hits
n°3.3 Boost 0.7, back to the corner (Rei Shin)
| JA > JB > JC > cD > C+D > E > 5A > cD > fD > JA*3 > JB > JC > 2A > 236236C |
24 hits
You can omit the 2A if you're already in the corner
n°3.4 Boost 1.2, anywhere (Rei Shin)
| JB or JD > land > E > 2A > cD > fD > HJA*6 > JB > JC > 2A > 236236C |
23 hits
n°3.5 Boost 0.7, anywhere (Rei Shin)
| cD or cC anti air > C+D > E > 5A > cD > fD > HJA*6 > JB > JC > 236236C |
23 hits
n°3.6 Boost 0.1, corner (Rei Shin)
| cD anti air > fD > JB > JB > JC > land > HJA*6 > JB > JC > 236236C |
23 hits
Possible with 0 boost against Rei
n°3.7 Boost 1.5, anywhere (Rei Shin)
| Shotgun or Fire pillar > E > 5A > cD > fD > HJA*6 > JB > JC > 2A > 236236C |
23 hits
There is enough time to hit confirm before going for a boost
n°3.8 Boost 1.2, back to the corner~near corner (Rei)
| 623A > E > HJB*2 > air dash > JB > JC > land > HJA*6 > JB > JC > 2A > 236236C |
24 hits
Go for a boost HJB as soon as you recover from 623A
Raoh & Thouther
About characters
Raoh
Needed air hits
Hyakuretsu : 22
Dribble : 30 (this is where it starts being reliable, possile from 27 hits)
Raoh won't let you survive if he hits you, so don't let him survive if you hit him ! It doesn't require a high number of hits to go for a hyakuretsu, so you'll pretty much never go for dribbles.
Thouther
Needed air hits
Hyakuretsu : 22
Dribble : 31
The okizeme monster. He has a really low defense, and a guard bar against jagi, so you'll sometimes be able to kill him without going for some basketball. His hurtbox is so small that it's hard to do fD > HJA on him, which is quite annoying. But at least, you only need 22 hits for a hyakuretsu.
Hyakuretsu after 236236C
Raoh
A > Dash > 2A > 2B > 2A*5 > 2B*3 You only need that
Thouther
22 hits : 2A > Dash > 2A > 2B > 2A*n
23+ hits : 2A > 2B > 2A*n
Because of Thouther's hurtbox, try to always go for the 22 hits version.
Reference video :
http://www.nicovideo.jp/watch/sm32385204
The combos written here have the same number as in the video
Hyakuretsu
Starting from a Throw / Overhead
n°1.1 Boost 1.5, midscreen~corner (Raoh Thouther)
| Throw or 6A > E > 5A > cD > fD > HJA*6 > JB > JC > 2A > 236236C |
23 hits
I said earlier, really hard against Thouther because of his hurtbox. The key is to hit fD high and to get HJA as soon as possible.
For Raoh check the combo 1.5
n°1.2 Boost 2.0, midscreen (Raoh Thouther)
| A+C > JC > Hitstop cancel air 236A > JB > JB > JD > E > HJA*6 > JB > JC > 2A > 5A*2 > 236236C |
26 hits
cD > fD won't hit after you land from JC > hsc air 236a, which makes this combo quite expensive.
n°1.3 Boost 1.5, almost back to the corner~corner (Raoh)
| A+C > E > 2B > cD > fD > HJA*6 > JB > JC > 2A > 236236C |
23 hits
Same as the 1.5 combo against Rei & shin. You can kill if either A+C or 2B hits.
n°1.4 Boost 0.7, corner (Thouther)
| Throw > 2B > fD > JB > JB > JD > E > HJA*6 > JB > JC > 2A > 236236C |
24 hits
Be careful when you're on your health bar corner, as you might cross-up.
n°1.5 Boost 0.5, corner (Raoh)
| Throw > 5A > cD > fD > HJA*6 > JB > JC > 2A > 236236C > 2A > dash > 2A > 2B > 2A*5 > 2B*3 > E > 2B > 2A*10 > 2B*5 > E > 2B > 2A*8 > E > 2A*15 > 2B*2 > 2C > 236A |
23 hits
Corner version of the 1.1 combo. You don't get pushed back from Raoh during 5A > cD in the corner so you can combo up to 236236C even without boost.
About the 2A*8 part :
For some reason, it happens that you don't get enough boost after 2A*8. In that case, don't go for 2A*8 but only *7, and go for [2A > 2B] dribbles. There are some ways to get to get just enough boost for the hyakuretsu but it's really close, and you'll need to work on the dribbles for some other characters anyway.
n°1.6 Boost 0.7, corner (Raoh)
| Throw > cD > C+D > 5A > cD > fD > HJA*6 > JB > JC > 236236C |
24 hits
That's a version that will give you enough boost for the hyakuretsu part, but that requires more meter. Only use this one if you're not confident with your dribbles.
n°1.7 Boost 0.1 corner (Thouther)
| Throw > 2B > fD > HJA*6 > JB > air dash > JB > JD > 236236C > 2A > dash > 2A > 2B > 2A*11 > 2B*3 > E > 2A*8 > E > 2A*10 > [2A > 2B]*n |
22 hits
In this combo fD being only the 3rd hit, HJA shouldn't be too hard to hit.
Since you can go up to 236236C without any boost in this combo, it even works from a boost throw.
Ground vs Ground starter
n°2.1 Boost 2.2, back to the corner~midscreen (Raoh Thouther)
| A : ~fD > JB > JD > E > JB > JB > JD > E > HJA*6 > JB > JC > 2A > 5A*2 > 236236C
B : ~fD > JB > JD > E > HJB*3 > JD > E > HJA*6 > JB > JC > 5A*2 > 236236C |
A : 24+x hits
B : 25+x hits
Because of Thouther's hurtbox, and the fact that you might cross-up during the HJA, it can be better to transform [HJA*6 > JB > JC] into [HJA*4 > JB > JB > JC] in some situations. Requires some training
n°2.2 Boost 2.2, midscreen~corner (Raoh)
| A : ~C+D > E (cross-up) > C+D > E > 5A > cD > fD > HJA*6 > JB > JC > 2A > 5A*2 > 236236C
B : 214C or JC counter > [fD > JD]*2 > [rising JB > falling JB]*2 > boost cancel > C+D > E > 5A > cD > fD > HJA*6 > JB > JC > 2A > 5A*2 > 236236C |
25 hits
This combo can work on Thouther but it's too hard to even bother
As usual, you need to get 2.0 boost on the route B by the time sur cross-up
n°2.3 Boost 1.2, anywhere (Raoh)
| ~fD > HJB*3 > JC > land > HJA*6 > JB > JC > 236236C |
23 hits
2A > 2A > 2B > fD doesn't combo on Raoh if you don't boost your fD, so you'll need that boost
In the corner, 236236C tends to whiff when there are too many hits. But since 22 hits is enough to hyakuretsu Raoh, you can turn [HJA*6 > JB > JC] into [HJA*4 > JB > JB > JC] which will avoid this problem. In that case, instead of going for a full hyakuretsu, it will be better to go for [2A > 2B] dribbles.
When your opponent is in the corner, if you start with 2B > 2C > fD you can kill with only 0.2 boost
n°2.4 Boost 1.2, anywhere (Thouther)
| ~fD > JB > JB > JC > HJA*5 > JB > air dash > JB > JB > 236236C |
22 hits
The same way you can kill with only 0.2 boost in the previous combo, you can kill Thouther with 0 boost starting with 2B > 2C > fD in the corner. In that case you need to whiff a JD after JC or after the last JB to get enough meter.
After the super, go for the same follow-up as in the combo 1.7
n°2.5 Boost 0.7, corner (Thouther)
| [2B > 2C] or air 236A > fD > iad JC > air 236A (1 hit) > fD > JA*2 > JB > JD > E > land > JA*2 > JB > JD > 236236C |
22 hits
Of course the combo 2.4 is better as you can kill without boost, but it can be quite hard if you're not used to it, so here is an easier version for 0.7 boost
n°2.6 Boost 1.0, back to the corner (Thouther)
| 2A > 2B > 2C > E > fD > JB > JB > JC > land > HJA*5 > JB > JC > 2A > 2B > 236236C |
23 hits
Route from abare when being pressured in the corner
n°2.7 Boost 0.8, midscreen~corner (Raoh Thouther)
| 214C or JC counter > [wall combo until you get 2.0 boost] > C+D > E > cD (cross-up) > fD > JB > JB > JD > E > HJA*6 > JB > JC > 236236C |
24 hits
Same route as against Rei & Shin, but harder to hit against Raoh & Thouther. Can still be useful
Anti air
n°3.1 Boost 1.0, anywhere (Raoh)
| JA > JB > JC > E > 2A > cD > fD > HJA*6 > JB > JC > 236236C |
24 hits
n°3.2 Boost 1.0, anywhere (Raoh)
| HJA*2 > JB > JC > cD > E > fD > HJA*6 > JB > JC > 236236C |
24 hits
n°3.3 Boost 1.0, back to the corner~near corner (Thouther)
| JA > JB > JC > E > 2A > cD > fD > JA*3 > JB > JC > 2A > 5A > 236236C |
23 hits
n°3.4 Boost 1.0, back near corner~corner (Thouther)
| JA > JB > JC > cD or 2C > E > fD > JA > JB*2 > JC > air 236A > 236236C |
22 hits
Combo from outside the 3.3 combo range
n°3.5 Boost 0.7, back to the corner (Raoh Thouther)
| JA > JB > JC > cD > C+D > E > 5A > cD > fD > JA*3 > JB > JC > 2A > 236236C |
24 hits
Omit the 2A near the corner
n°3.6 Boost 0.7, anywhere (Raoh)
| cD or fC > C+D > E > 5A > cD > fD > HJA*6 > JB > JC > 236236C |
23 hits
People tend to rear tech when hit by a fire pillar, if you run under damn you get a good occasion to do this combo
n°3.7 Boost 0, corner (Thouther)
| cD > fD > JB > JB > JC > HJA*6 > JB > JC > 236236C |
23 hits
You can get 1.0 boost and then go for dribbles from around 60 hits. You can also go for a full hyakuretsu if you start with 0.1 boost
n°3.8 Boost 0.2, corner (Raoh)
| cD > fD > JB > JB > JC > HJA*6 > JB > air dash > JA > JD > 236236C |
24 hits
Version on Raoh of the previous combo
n°3.9 Boost 1.5, anywhere (Raoh)
| shotgun or fire pillar > E > 5A > cD > fD > HJA*6 > JB > JC > 2A > 236236C |
23 hits
Also possible on Thouther near the corner
Kenshiro
About characters
Kenshiro
Needed air hits
Hyakuretsu : 26
Dribble : 30 (this is where it starts being reliable, possile from 27 hits)
To sum-up Kenshiro : invisible air dash > 40% combo and 2 stars > stun from okizeme > no more star + musou activated + meter for him > you dead
Kenshiro got a really big hurtbox so he's pretty easy to combo though. You'll be using more dribbles against him than hyakuretsu cause of the required hits.
Hyakuretsu after 236236C
Kenshiro
26 hits : 2A > 2A > 2B*n
27+ hits : 2A > 2B*n
2B until 35+, then 2A
Reference video :
http://www.nicovideo.jp/watch/sm32385292
The combos written here have the same number as in the video
Hyakuretsu
Starting from a Throw / Overhead
n°1.1 Boost 0.7, corner
| A : Throw > JB > JB > JB > land > JA*3 > JB > JD > E > HJA*6 > JB > JD > 236236C
B : Throw > cD > fD > HJA*3 > JB > JB > JD > E > HJA*6 > JB > JD > 236236C |
27 hits
Throw > cD > fD > HJA is too hard to do if you're 1P, so in that case use the combo A
On your health bar side you tend to crooss-up after JD boost, so be careful
n°1.2 Boost 1.1, midscreen
| A+C > JA > JD > Hitstop cancel air 236A > cD > fD > HJA*6 > JB > JC > 5A*4 > 236236C |
27 hits
Works from around the round start distance Because of Kenshiro's big hurtbox, air 236A might hit, so you'll need to do some training for this one
Ground vs Ground starter
n°2.1 Boost 2.2, back to the corner~midscreen
| A : ~fD > JB > JD > E > JB > JB > JD > E > HJA*6 > JB > JC > 5A*3 > 236236C
B : ~fD > JB > JD > E > HJB*3 > JD > E > HJA*6 > JB > JC > 5A*3 > 236236C |
A : 27 hits
B : 28 hits
Kenshiro tends to fall after 236236C if he's too close to Jagi. So you want to do at least 5A*3
n°2.2 Boost 2.2, midscreen~corner
| A : ~C+D > E (cross-up) > C+D > E > 5A > cD > fD > HJA*6 > JB > JC > 2A > 5A*3 > 236236C
B : ~C+D > E > iad JD (cross-up) > C+D > E > 5A > cD > fD > HJA*6 > JB > JC > 2A > 5A*3 > 236236C C : 214C or JC counter > [get at least 1.2 boost] > rising JB > air dash > JD (cross-up) > C+D > E > 5A > cD > fD > HJA*6 > JB > JC > 2A > 5A*3 > 236236C |
26 hits
You can add go for 5A*2 instead of *1 after the unbanishing C+D. The hyakuretsu part will become easier, but fD > HJA becomes harder
Anti air
n°3.1 Boost 1.0, back to the corner
| JA > JB > JC > E > 2A > cD > fD > HJA*6 > JB > JC > 2A > 5A > 236236C |
26 hits
n°3.2 Boost 1.0, back to the corner
| JA > JB > JC > cD > C+D > E > 2A > cD > fD > HJA*7 > JB > JC > 236236C |
27 hits
These are the only useful Hyakuretu combos against Kenshiro. There are a lot of Dribble combos though.
Matchups
Kenshiro
X
Raoh
X
Toki
X
Shin
X
Rei
X
Juda
X
Thouther
X
Jagi
X
Mr. Heart
X
Mamiya
X
