| Line 587: | Line 587: | ||
| align="center" colspan="2" | Frame Count || align="center" | 1 || align="center" | 1 || align="center" | 1 || align="center" | 2 || align="center" | 1... | | align="center" colspan="2" | Frame Count || align="center" | 1 || align="center" | 1 || align="center" | 1 || align="center" | 2 || align="center" | 1... | ||
|- | |- | ||
| align="center" colspan="2" | Simplified || align="center" colspan="5" | 38 | | align="center" colspan="2" | Simplified || align="center" colspan="5" | 38 (46 in HSF2) | ||
|} | |} | ||
*<b>Forward Version:</b> | *<b>Forward Version:</b> | ||
| Line 599: | Line 599: | ||
| align="center" colspan="2" | Frame Count || align="center" | 1 || align="center" | 1 || align="center" | 1 || align="center" | 2 || align="center" | 1... | | align="center" colspan="2" | Frame Count || align="center" | 1 || align="center" | 1 || align="center" | 1 || align="center" | 2 || align="center" | 1... | ||
|- | |- | ||
| align="center" colspan="2" | Simplified || align="center" colspan="5" | 38 | | align="center" colspan="2" | Simplified || align="center" colspan="5" | 38 (46 in HSF2) | ||
|} | |} | ||
*<b>Roundhouse Version:</b> | *<b>Roundhouse Version:</b> | ||
| Line 611: | Line 611: | ||
| align="center" colspan="2" | Frame Count || align="center" | 1 || align="center" | 1 || align="center" | 1 || align="center" | 2 || align="center" | 1... | | align="center" colspan="2" | Frame Count || align="center" | 1 || align="center" | 1 || align="center" | 1 || align="center" | 2 || align="center" | 1... | ||
|- | |- | ||
| align="center" colspan="2" | Simplified || align="center" colspan="5" | 38 | | align="center" colspan="2" | Simplified || align="center" colspan="5" | 38 (46 in HSF2) | ||
|} | |} | ||
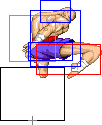
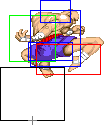
Sagat shouts his trademark move name and throws a projectile while crouching. The kick version determines the speed and damage of the projectile, being Short the lowest and Roundhouse the highest. This move hits low, so the enemy must either evade it with a jump or special move, or crouch block. This move is Sagat's main zoning tool. The Short version is quite slow, while the Roundhouse one is the fastest projectile in the game. Being also the one with fastest recovery (but Sonic Booms, which require charge), it becomes a great way of controlling the ground. No character can defeat Old Sagat in a projectile war: they will eventually be forced to jump, block or try to evade the wave of projectiles somehow. As a few moves quickly go over low Tigers, it is a good idea to mix some High Tigers in and keep the enemy guessing. | Sagat shouts his trademark move name and throws a projectile while crouching. The kick version determines the speed and damage of the projectile, being Short the lowest and Roundhouse the highest. This move hits low, so the enemy must either evade it with a jump or special move, or crouch block. This move is Sagat's main zoning tool. The Short version is quite slow, while the Roundhouse one is the fastest projectile in the game. Being also the one with fastest recovery (but Sonic Booms, which require charge), it becomes a great way of controlling the ground. No character can defeat Old Sagat in a projectile war: they will eventually be forced to jump, block or try to evade the wave of projectiles somehow. As a few moves quickly go over low Tigers, it is a good idea to mix some High Tigers in and keep the enemy guessing. | ||
| Line 628: | Line 628: | ||
| align="center" | Stun Timer || align="center" | 40 | | align="center" | Stun Timer || align="center" | 40 | ||
|- | |- | ||
| align="center" colspan="2" | Frame Count (Jab) || align="center" | | | align="center" colspan="2" | Frame Count (Jab) || align="center" | 1 || align="center" | 2 || align="center" | 4 || align="center" | 3 || align="center" | 14 || align="center" | 4 || align="center" | 4 || align="center" | 13 || align="center" | 6 | ||
|- | |- | ||
| align="center" colspan="2" | Simplified (Jab) || align="center" colspan="2" | | | align="center" colspan="2" | Simplified (Jab) || align="center" colspan="2" | 3 || align="center" | 4 || align="center" colspan="2" | 17 || align="center" colspan="4" | 27 | ||
|- | |- | ||
| align="center" colspan="2" | Frame Count (Strong) || align="center" | | | align="center" colspan="2" | Frame Count (Strong) || align="center" | 1 || align="center" | 2 || align="center" | 4 || align="center" | 3 || align="center" | 22 || align="center" | 4 || align="center" | 4 || align="center" | 15 || align="center" | 6 | ||
|- | |- | ||
| align="center" colspan="2" | Simplified (Strong) || align="center" colspan="2" | | | align="center" colspan="2" | Simplified (Strong) || align="center" colspan="2" | 3 || align="center" | 4 || align="center" colspan="2" | 25 || align="center" colspan="4" | 29 | ||
|- | |- | ||
| align="center" colspan="2" | Frame Count (Fierce) || align="center" | | | align="center" colspan="2" | Frame Count (Fierce) || align="center" | 1 || align="center" | 2 || align="center" | 4 || align="center" | 3 || align="center" | 26 || align="center" | 4 || align="center" | 4 || align="center" | 17 || align="center" | 10 | ||
|- | |- | ||
| align="center" colspan="2" | Simplified (Fierce) || align="center" colspan="2" | | | align="center" colspan="2" | Simplified (Fierce) || align="center" colspan="2" | 3 || align="center" | 4 || align="center" colspan="2" | 29 || align="center" colspan="4" | 35 | ||
|} | |} | ||
Sagat performs a punch similar to a Shoryuken that hits only once, but with higher damage. This move is invulnerable for a split second, making it an unavoidable anti-air if timed right. | Sagat performs a punch similar to a Shoryuken that hits only once, but with higher damage. This move is invulnerable for a split second, making it an unavoidable anti-air if timed right. | ||
| Line 658: | Line 658: | ||
| align="center" colspan="2" | | | align="center" colspan="2" | | ||
|- | |- | ||
| align="center" colspan="2" | Frame Count (Short) || align="center" | | | align="center" colspan="2" | Frame Count (Short) || align="center" | 1 || align="center" | 3 || align="center" | 3 || align="center" | 3 || align="center" | 2 || align="center" | 3 | ||
|- | |- | ||
| align="center" colspan="2" | Simplified (Short) || align="center" colspan="2" | | | align="center" colspan="2" | Simplified (Short) || align="center" colspan="2" | 4 || align="center" colspan="2" | 6 || align="center" colspan="2" | 5 | ||
|- | |- | ||
| align="center" colspan="2" | Frame Count (Forward) || align="center" | | | align="center" colspan="2" | Frame Count (Forward) || align="center" | 1 || align="center" | 3 || align="center" | 3 || align="center" | 3 || align="center" | 2 || align="center" | 4 | ||
|- | |- | ||
| align="center" colspan="2" | Simplified (Forward) || align="center" colspan="2" | | | align="center" colspan="2" | Simplified (Forward) || align="center" colspan="2" | 4 || align="center" colspan="2" | 6 || align="center" colspan="2" | 6 | ||
|- | |- | ||
| align="center" colspan="2" | Frame Count (Rh) || align="center" | | | align="center" colspan="2" | Frame Count (Rh) || align="center" | 1 || align="center" | 4 || align="center" | 3 || align="center" | 3 || align="center" | 2 || align="center" | 5 | ||
|- | |- | ||
| align="center" colspan="2" | Simplified (Rh) || align="center" colspan="2" | | | align="center" colspan="2" | Simplified (Rh) || align="center" colspan="2" | 5 || align="center" colspan="2" | 6 || align="center" colspan="2" | 7 | ||
|} | |} | ||
*<b>Recovery:</b> | *<b>Recovery:</b> | ||
| Line 674: | Line 674: | ||
| align="center" | || align="center" | [[File:OSagat_tk7.png]] || align="center" | [[File:OSagat_tk8.png]] || align="center" | [[File:OSagat_tk9.png]] || align="center" | [[File:OSagat_tk10.png]] | | align="center" | || align="center" | [[File:OSagat_tk7.png]] || align="center" | [[File:OSagat_tk8.png]] || align="center" | [[File:OSagat_tk9.png]] || align="center" | [[File:OSagat_tk10.png]] | ||
|- | |- | ||
| align="center" | Frame Count (Short) || align="center" | | | align="center" | Frame Count (Short) || align="center" | 6 || align="center" | 6 || align="center" | 1 || align="center" | 7 | ||
|- | |- | ||
| align="center" | Simplified (Short) || align="center" colspan="4" | | | align="center" | Simplified (Short) || align="center" colspan="4" | 20 | ||
|- | |- | ||
| align="center" | Frame Count (Forward) || align="center" | | | align="center" | Frame Count (Forward) || align="center" | 6 || align="center" | 6 || align="center" | 2 || align="center" | 7 | ||
|- | |- | ||
| align="center" | Simplified (Forward) || align="center" colspan="4" | | | align="center" | Simplified (Forward) || align="center" colspan="4" | 21 | ||
|- | |- | ||
| align="center" | Frame Count (Rh) || align="center" | | | align="center" | Frame Count (Rh) || align="center" | 6 || align="center" | 6 || align="center" | 3 || align="center" | 7 | ||
|- | |- | ||
| align="center" | Simplified (Rh) || align="center" colspan="4" | | | align="center" | Simplified (Rh) || align="center" colspan="4" | 22 | ||
|} | |} | ||
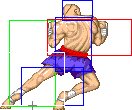
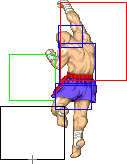
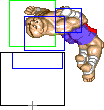
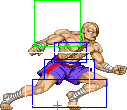
Sagat performs an aerial knee bash attack that hits up to two times. The range, damage and recovery are determined by the kick version, being Short the shortest range and recovery and lowest damage; and Roundhouse the longest reach, longest recovery and highest damage. The first attack does from 14% to 16% damage and forces standing hitstun on the enemy while the second hit does 11% damage and causes a full knock down. This move can be used to avoid projectiles if timed right, finish combos and quickly get close to the enemy, often surprising him with a throw or Tiger Uppercut. | Sagat performs an aerial knee bash attack that hits up to two times. The range, damage and recovery are determined by the kick version, being Short the shortest range and recovery and lowest damage; and Roundhouse the longest reach, longest recovery and highest damage. The first attack does from 14% to 16% damage and forces standing hitstun on the enemy while the second hit does 11% damage and causes a full knock down. This move can be used to avoid projectiles if timed right, finish combos and quickly get close to the enemy, often surprising him with a throw or Tiger Uppercut. Note that with N.Sagat this move is easier to perform because of his 2-frame longer pre-jump animation. | ||
==The Basics== | ==The Basics== | ||
Revision as of 12:08, 17 August 2012
Introduction
Old Sagat, sometimes called Super Sagat, is the SSF2 version of Sagat. However, due to differences in the game engine, he is actually stronger in this game due to gaining other cancelable moves. Particularly, the second active part of his standing Short and Forward kicks can be canceled into special attacks, for devastating combos or ground control.
Old Sagat's moves are mostly similar to those of N.Sagat. The differences one will notice the most is that his Tiger shots recover faster and he has no super. In addition to it, as all characters from SSF2, he can not soften throws. His Tiger Uppercuts knock down on the first hit and do not have any juggle properties. Finally, he does not have a cross-up jumping attack such as N.Sagat's Forward kick, and some normal moves have different frame data while his tigers have better defensive hitboxes.
Picking Old Sagat
To select O.Sagat, choose Sagat and then press ↑ ↓ ↓ ↑ Jab/Fierce, pressing Short simultaneously with the punch button for the alternate color.
| Normal | Secondary |
 |

|
--Born2SPD
Moves Analysis
Normal Moves
Ground Normals
Disclaimer: Ground normals take one extra frame to enter their start-up, which is the reason for the additional frame on the 'Simplified' row.
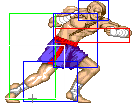
- Close Standing Jab:
| Damage | 11 |  |
 |

|
| Stun | 0~5 | |||
| Stun Timer | 40 | |||
| Chain Cancel | No | |||
| Special Cancel | Yes | |||
| Frame Advantage | ? | |||
| Frame Count | 3 | 4 | 4 | |
| Simplified | 1 + 3 | 4 | 4 | |
- Far Standing Jab:
| Damage | 11 | 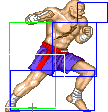 |
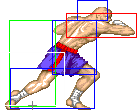 |
 |

|
| Stun | 0~5 | ||||
| Stun Timer | 40 | ||||
| Chain Cancel | No | ||||
| Special Cancel | Yes | ||||
| Frame Advantage | ? | ||||
| Frame Count | 3 | 4 | 4 | 1 | |
| Simplified | 1 + 3 | 4 | 5 | ||
- Crouching Jab:
| Damage | 11 |  |
 |
 |

|
| Stun | 0~5 | ||||
| Stun Timer | 40 | ||||
| Chain Cancel | No | ||||
| Special Cancel | Yes* | ||||
| Frame Advantage | ? | ||||
| Frame Count | 2 | 2 | 3 | 4 | |
| Simplified | 1 + 4 | 3 | 4 | ||
- Close Standing Strong:
| Damage | 19 |  |
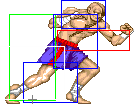 |
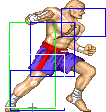 |

|
| Stun | 5~11 | ||||
| Stun Timer | 60 | ||||
| Chain Cancel | No | ||||
| Special Cancel | Yes* | ||||
| Frame Advantage | ? | ||||
| Frame Count | 4 | 6 | 6 | 1 | |
| Simplified | 1 + 4 | 6 | 7 | ||
- Far Standing Strong:
| Damage | 19 |  |
 |
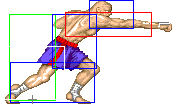 |
 |
 |

|
| Stun | 5~11 | ||||||
| Stun Timer | 60 | ||||||
| Chain Cancel | No | ||||||
| Special Cancel | Yes* | ||||||
| Frame Advantage | ? | ||||||
| Frame Count | 3 | 2 | 4 | 4 | 4 | 1 | |
| Simplified | 1 + 5 | 4 | 9 | ||||
- Crouching Strong:
| Damage | 19 |  |
 |
 |

|
| Stun | 5~11 | ||||
| Stun Timer | 60 | ||||
| Chain Cancel | No | ||||
| Special Cancel | Yes* | ||||
| Frame Advantage | ? | ||||
| Frame Count | 2 | 2 | 4 | 6 | |
| Simplified | 1 + 4 | 4 | 6 | ||
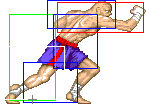
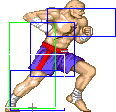
- Close Standing Fierce:
| Damage | 24 |  |
 |
 |

|
| Stun | 10~16 | ||||
| Stun Timer | 80 | ||||
| Chain Cancel | No | ||||
| Special Cancel | No | ||||
| Frame Advantage | ? | ||||
| Frame Count | 6 | 8 | 10 | 1 | |
| Simplified | 1 + 6 | 8 | 11 | ||
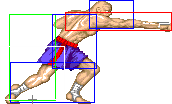
- Far Standing Fierce:
| Damage | 24 |  |
 |
 |
 |
 |

|
| Stun | 10~16 | ||||||
| Stun Timer | 80 | ||||||
| Chain Cancel | No | ||||||
| Special Cancel | No | ||||||
| Frame Advantage | ? | ||||||
| Frame Count | 4 | 3 | 6 | 10 | 12 | 1 | |
| Simplified | 1 + 7 | 6 | 23 | ||||
- Crouching Fierce:
| Damage | 24 |  |
 |
 |

|
| Stun | 10~16 | ||||
| Stun Timer | 80 | ||||
| Chain Cancel | No | ||||
| Special Cancel | No | ||||
| Frame Advantage | ? | ||||
| Frame Count | 6 | 6 | 12 | 1 | |
| Simplified | 1 + 6 | 6 | 13 | ||
- Close/Far Standing Short:
| Damage | 11+11 | 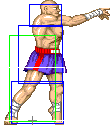 |
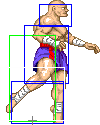 |
 |
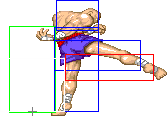 |
 |
 |

|
| Stun | 0~5+0~5 | |||||||
| Stun Timer | 40+40 | |||||||
| Chain Cancel | No | |||||||
| Special Cancel | Yes/Yes* | |||||||
| Frame Advantage | ? | |||||||
| Frame Count | 2 | 1 | 2 | 2 | 2 | 2 | 3 | |
| Simplified | 1 + 3 | 2 | 2 | 7 | ||||
- Crouching Short:
| Damage | 11 |  |
 |
 |

|
| Stun | 0~5 | ||||
| Stun Timer | 40 | ||||
| Chain Cancel | No | ||||
| Special Cancel | Yes* | ||||
| Frame Advantage | ? | ||||
| Frame Count | 4 | 4 | 4 | 1 | |
| Simplified | 1 + 4 | 4 | 5 | ||
- Close/Far Standing Forward:
| Damage | 11+16 |  |
 |
 |
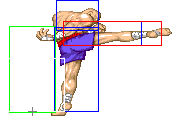 |
 |
 |

|
| Stun | 5~11+5~11 | |||||||
| Stun Timer | 60+60 | |||||||
| Chain Cancel | No | |||||||
| Special Cancel | Yes/Yes* | |||||||
| Frame Advantage | ? | |||||||
| Frame Count | 2 | 1 | 2 | 2 | 3 | 4 | 6 | |
| Simplified | 1 + 3 | 2 | 2 | 13 | ||||
- Crouching Forward:
| Damage | 19 |  |
 |
 |
 |

|
| Stun | 5~11 | |||||
| Stun Timer | 60 | |||||
| Chain Cancel | No | |||||
| Special Cancel | Yes* | |||||
| Frame Advantage | ? | |||||
| Frame Count | 2 | 2 | 4 | 3 | 4 | |
| Simplified | 1 + 4 | 4 | 7 | |||
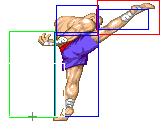
- Close/Far Standing Roundhouse:
| Damage | 14/20 |  |
 |
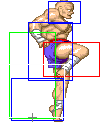 |
 |
 |
 |

|
| Stun | 10~16/1~7 | |||||||
| Stun Timer | 80/70 | |||||||
| Chain Cancel | No | |||||||
| Special Cancel | Yes/No | |||||||
| Frame Advantage | ? | |||||||
| Frame Count | 2 | 1 | 3 | 3 | 6 | 7 | 10 | |
| Simplified | 1 + 3 | 3 | 3 | 23 | ||||
- Crouching Roundhouse:
| Damage | 26 |  |
 |
 |
 |

|
| Stun | 5~11 | |||||
| Stun Timer | 130 | |||||
| Chain Cancel | No | |||||
| Special Cancel | No | |||||
| Frame Advantage | ? | |||||
| Frame Count | 4 | 2 | 6 | 8 | 9 | |
| Simplified | 1 + 6 | 6 | 17 | |||
Aerial Normals
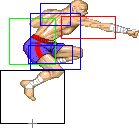
- Neutral Jumping Jab:
| Damage | 11 |  |
|
| Stun | 1~7 | ||
| Stun Timer | 40 | ||
| Frame Count | 3 | ∞ | |
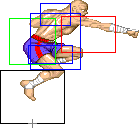
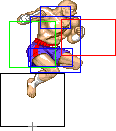
- Diagonal Jumping Jab:
| Damage | 11 |  |
 |
 |
 |

| |
| Stun | 1~7 | ||||||
| Stun Timer | 40 | ||||||
| Frame Count | 3 | 20 | 4 | 4 | ∞ | ||
| Simplified | 3 | 24 | ∞ | ||||
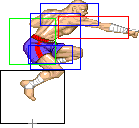
- Neutral Jumping Strong:
| Damage | 19 |  |
 |
 |
 |

|
| Stun | 5~11 | |||||
| Stun Timer | 50 | |||||
| Frame Count | 3 | 14 | 4 | 4 | ∞ | |
| Simplified | 3 | 14 | ∞ | |||
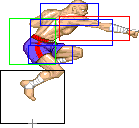
- Diagonal Jumping Strong:
| Damage | 19 |  |
 |
 |
 |

|
| Stun | 5~11 | |||||
| Stun Timer | 50 | |||||
| Frame Count | 3 | 14 | 4 | 4 | ∞ | |
| Simplified | 3 | 14 | ∞ | |||
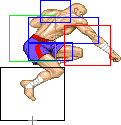
- Neutral Jumping Fierce:
| Damage | 24 |  |
 |
 |
 |

|
| Stun | 11~17 | |||||
| Stun Timer | 60 | |||||
| Frame Count | 5 | 10 | 4 | 4 | ∞ | |
| Simplified | 5 | 10 | ∞ | |||
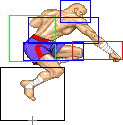
- Diagonal Jumping Fierce:
| Damage | 24 |  |
 |
 |
 |

|
| Stun | 11~17 | |||||
| Stun Timer | 60 | |||||
| Frame Count | 5 | 8 | 4 | 4 | ∞ | |
| Simplified | 5 | 8 | ∞ | |||
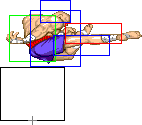
- Neutral Jumping Short:
| Damage | 12 |  |
|
| Stun | 1~7 | ||
| Stun Timer | 40 | ||
| Frame Count | 2 | ∞ | |
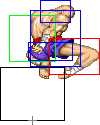
- Diagonal Jumping Short:
| Damage | 14 |  |
|
| Stun | 1~7 | ||
| Stun Timer | 40 | ||
| Frame Count | 2 | ∞ | |
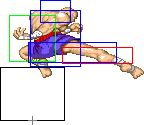
- Neutral/Diagonal Jumping Forward:
| Damage | 19 |  |
 |
 |
 |

|
| Stun | 5~11 | |||||
| Stun Timer | 50 | |||||
| Frame Count | 1 | 2 | 20 | 3 | ∞ | |
| Simplified | 3 | 20 | ∞ | |||
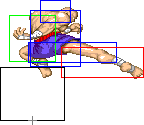
- Neutral Jumping Roundhouse:
| Damage | 24 |  |
 |
 |
 |

|
| Stun | 11~17 | |||||
| Stun Timer | 60 | |||||
| Frame Count | 2 | 3 | 8 | 5 | ∞ | |
| Simplified | 5 | 8 | ∞ | |||
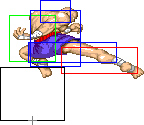
- Diagonal Jumping Roundhouse:
| Damage | 24 |  |
 |
 |
 |

|
| Stun | 11~17 | |||||
| Stun Timer | 60 | |||||
| Frame Count | 2 | 3 | 8 | 5 | ∞ | |
| Simplified | 5 | 8 | ∞ | |||
Throws
Sagat has only one throw, which is a shoulder toss. It is performed by moving the joystick left or right and pressing either Strong or Fierce. The direction you move the stick is the direction your enemy will get tossed at. This does around 22% damage.
Sagat's throw range is not very good: he is only at an advantage against Fei Long. Boxer's Fierce throw and T. Hawk's normal throws have less range, but those characters have longer reach options.
- Tiger Carry: (←/→ + Strong/Fierce)
| Damage | 32 | 
|
| Stun | 7~13 | |
| Stun Timer | 100 | |
| Range (from axis) | 48 | |
| (from throwable box) | 16 |
Special Moves
All motions are listed under the assumption that O.Sagat is facing right.
- Tiger Shot a.k.a. High Tiger: (↓↘→ + P)
Detailed Input: (↓ [0~6f] ↘ [0~6f] → [0~10/9/7f] Jab/Strong/Fierce)
- Startup:
 |
 |
| ||
| Frame Count | 6 | 3 | 1 | |
| Simplified | 10 | |||
- Active:
- Jab Version:
| Damage | 16 | 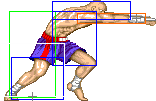 |
 |
 |
 |
|
| Stun | 9~15 | |||||
| Stun Timer | 100 | |||||
| Frame Count | 1 | 1 | 1 | 2 | 1... | |
| Simplified | 38 | |||||
- Strong Version:
| Damage | 17 | 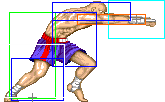 |
 |
 |
 |
|
| Stun | 9~15 | |||||
| Stun Timer | 100 | |||||
| Frame Count | 1 | 1 | 1 | 2 | 1... | |
| Simplified | 38 | |||||
- Fierce Version:
| Damage | 19 |  |
 |
 |
 |
|
| Stun | 9~15 | |||||
| Stun Timer | 100 | |||||
| Frame Count | 1 | 1 | 1 | 2 | 1... | |
| Simplified | 38 | |||||
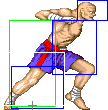
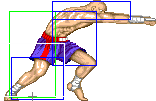
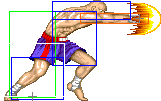
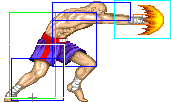
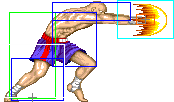
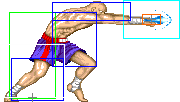
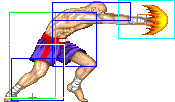
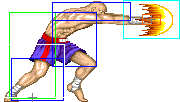
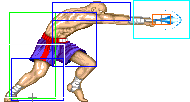
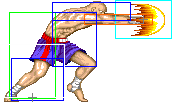
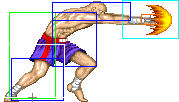
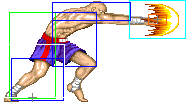
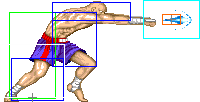
Sagat shouts his trademark move name and throws a projectile while standing still. The strength of the punch determines the speed and damage of the projectile, being Jab the lowest and Fierce the highest. This can be avoided by crouching under the projectile.
- Ground Tiger Shot a.k.a. Low Tiger: (↓↘→ + K)
Detailed Input: (↓ [0~6f] ↘ [0~6f] → [0~10/9/7f] Short/Forward/Roundhouse)
- Startup:
 |
 |

| ||
| Frame Count | 6 | 3 | 1 | |
| Simplified | 10 | |||
- Active:
- Short Version:
| Damage | 15 |  |
 |
 |
 |

|
| Stun | 9~15 | |||||
| Stun Timer | 100 | |||||
| Frame Count | 1 | 1 | 1 | 2 | 1... | |
| Simplified | 38 (46 in HSF2) | |||||
- Forward Version:
| Damage | 16 |  |
 |
 |
 |

|
| Stun | 9~15 | |||||
| Stun Timer | 100 | |||||
| Frame Count | 1 | 1 | 1 | 2 | 1... | |
| Simplified | 38 (46 in HSF2) | |||||
- Roundhouse Version:
| Damage | 17 |  |
 |
 |
 |

|
| Stun | 9~15 | |||||
| Stun Timer | 100 | |||||
| Frame Count | 1 | 1 | 1 | 2 | 1... | |
| Simplified | 38 (46 in HSF2) | |||||
Sagat shouts his trademark move name and throws a projectile while crouching. The kick version determines the speed and damage of the projectile, being Short the lowest and Roundhouse the highest. This move hits low, so the enemy must either evade it with a jump or special move, or crouch block. This move is Sagat's main zoning tool. The Short version is quite slow, while the Roundhouse one is the fastest projectile in the game. Being also the one with fastest recovery (but Sonic Booms, which require charge), it becomes a great way of controlling the ground. No character can defeat Old Sagat in a projectile war: they will eventually be forced to jump, block or try to evade the wave of projectiles somehow. As a few moves quickly go over low Tigers, it is a good idea to mix some High Tigers in and keep the enemy guessing.
- Tiger Uppercut: (→↓↘ + P)
Detailed Input: (→ [0~6f] ↓ [0~6f] ↘ [0~10/9/7f] Jab/Strong/Fierce)
Sagat performs a punch similar to a Shoryuken that hits only once, but with higher damage. This move is invulnerable for a split second, making it an unavoidable anti-air if timed right.
- Tiger Knee Crush: (↓→↗ + K)
Detailed Input: (↓ [0~6f] → [0~6f] ↗ [0~10/9/7/1f] Short/Forward/Roundhouse/any K if you are at a jumpable state)
- Startup + Active:
- Recovery:
 |
 |
 |

| |
| Frame Count (Short) | 6 | 6 | 1 | 7 |
| Simplified (Short) | 20 | |||
| Frame Count (Forward) | 6 | 6 | 2 | 7 |
| Simplified (Forward) | 21 | |||
| Frame Count (Rh) | 6 | 6 | 3 | 7 |
| Simplified (Rh) | 22 | |||
Sagat performs an aerial knee bash attack that hits up to two times. The range, damage and recovery are determined by the kick version, being Short the shortest range and recovery and lowest damage; and Roundhouse the longest reach, longest recovery and highest damage. The first attack does from 14% to 16% damage and forces standing hitstun on the enemy while the second hit does 11% damage and causes a full knock down. This move can be used to avoid projectiles if timed right, finish combos and quickly get close to the enemy, often surprising him with a throw or Tiger Uppercut. Note that with N.Sagat this move is easier to perform because of his 2-frame longer pre-jump animation.


