m (→Throws) |
|||
| Line 6: | Line 6: | ||
===Competitive Overview=== | ===Competitive Overview=== | ||
Dhalsim cannot be played at a competitive level if you don't know all of his anti-air options in every matches. It's a really strenuous training you have to do, and if you don't do it, you'll get crushed without a doubt. | |||
Sim is not a common top tier, like you can know 2/3 cheap tricks and go for cheesy wins. Of course Sim can be very cheesy, but you won't win consistently relying on it. | |||
You have to learn, you have to meditate in order to destroy them. If you want to main sim in order to do tournaments, prepare for reflexion, deep thinking over the game, and learning. | |||
It's such a deep character you'll never be fully satisfied of your level with him. There is a lot of ways you can play with him, but even when you got your style, you have to have ultra solid fundamentals, which is knowing everything about countering the moves in every matches. | |||
That said, Dhalsim is a great character to compete with : claw is his only really unfavorable match, and if you got good reactions, then you'll do good without a doubt. | |||
All in all, what you need is : discipline, learning, humility, reactions, reflexion. And time. Being good with sim doesn't usually happen quick. | |||
===Strengths & Weaknesses=== | ===Strengths & Weaknesses=== | ||
Revision as of 11:20, 25 June 2012
Introduction
Competitive Overview
Dhalsim cannot be played at a competitive level if you don't know all of his anti-air options in every matches. It's a really strenuous training you have to do, and if you don't do it, you'll get crushed without a doubt. Sim is not a common top tier, like you can know 2/3 cheap tricks and go for cheesy wins. Of course Sim can be very cheesy, but you won't win consistently relying on it. You have to learn, you have to meditate in order to destroy them. If you want to main sim in order to do tournaments, prepare for reflexion, deep thinking over the game, and learning. It's such a deep character you'll never be fully satisfied of your level with him. There is a lot of ways you can play with him, but even when you got your style, you have to have ultra solid fundamentals, which is knowing everything about countering the moves in every matches. That said, Dhalsim is a great character to compete with : claw is his only really unfavorable match, and if you got good reactions, then you'll do good without a doubt. All in all, what you need is : discipline, learning, humility, reactions, reflexion. And time. Being good with sim doesn't usually happen quick.
Strengths & Weaknesses
New & Old Versions Comparison
To select O.Dhalsim, choose Dhalsim and then press ↓ ↑ ↑ ↑ Jab/Fierce, pressing Short simultaneously with the punch button for the alternate color.
Here is the list of differences:
- Obvious stuff: O.Dhalsim can not tech throws, does not have the Yoga Blast and Super;
- O.Dhalsim Close Normals behave normally, while for N.Dhalsim they are activated by blocking while pressing the button. N.Dhalsim also received 3 new Close crouching normals (that were missing for O.Dhalsim and/or to keep things consistent): Short, Roundhouse and Fierce;
- O.Dhalsim has some differences in some of his normals:
- Far Standing Jab can be special canceled;
- Close Standing Fierce first hit can be special canceled;
- Far Standing Short can be special canceled;
- Far Standing Forward can be special canceled (!);
- Neutral Jumping Jab has new animation and properties;
- Diagonal Jumping Strong has new animation and properties;
- O.Dhalsim only have the Forward Drill Kick, which is actually activated with Roundhouse;
- O.Dhalsim's teleport has a 1 frame longer startup, a different animation and it does not has a pushbox during the small period of time where Dhalsim's sprites are invisible and he is actually teleporting (i.e. shifting his position);
N.Dhalsim is ofter regarded as the best character in the game (excluding Akuma which is plain broken). O.Dhalsim while very good character isn't as good as his new counterpart, but he is very competitive and can be used against most characters without many problems.
Color Options
| Jab | Strong | Fierce | Start | Old |
 |
 |
 |
 |

|
 |
 |
 |
 |

|
| Short | Forward | Roundhouse | Hold | Old Alternative |
--Born2SPD
Moves Analysis
Normal Moves
Ground Normals
- Close Standing Jab: (← + Jab)
| Damage | ? |  |
 |
 |

|
| Stun | ?~? | ||||
| Stun Timer | ? | ||||
| Chain Cancel | No | ||||
| Special Cancel | Yes/No | ||||
| Super Cancel | Yes/Yes | ||||
| Frame Advantage | ? | ||||
| Frame Count | ? | ? | ? | ? | |
| Simplified | ? | ? | ? | ||
- Far Standing Jab:
| Damage | ? |  |
 |
 |

|
| Stun | ?~? | ||||
| Stun Timer | ? | ||||
| Chain Cancel | No | ||||
| Special Cancel | No | ||||
| Super Cancel | Yes | ||||
| Frame Advantage | ? | ||||
| Frame Count | ? | ? | ? | ? | |
| Simplified | ? | ? | ? | ||
- Close Crouching Jab:
| Damage | ? |  |
 |

|
| Stun | ?~? | |||
| Stun Timer | ? | |||
| Chain Cancel | No | |||
| Special Cancel | Yes | |||
| Super Cancel | Yes | |||
| Frame Advantage | ? | |||
| Frame Count | ? | ? | ? | |
- Far Crouching Jab:
| Damage | ? |  |
 |
 |
 |
 |

|
| Stun | ?~? | ||||||
| Stun Timer | ? | ||||||
| Chain Cancel | No | ||||||
| Special Cancel | No | ||||||
| Super Cancel | No | ||||||
| Frame Advantage | ? | ||||||
| Frame Count | ? | ? | ? | ? | ? | ? | |
| Simplified | ? | ? | ? | ||||
- Close Standing Strong: (← + Strong)
| Damage | ? |  |
 |
 |
 |

|
| Stun | ?~? | |||||
| Stun Timer | ? | |||||
| Chain Cancel | No | |||||
| Special Cancel | Yes/No | |||||
| Super Cancel | Yes/Yes | |||||
| Frame Advantage | ? | |||||
| Frame Count | ? | ? | ? | ? | ? | |
| Simplified | ? | ? | ? | |||
- Far Standing Strong:
| Damage | ? |  |
 |
 |

|
| Stun | ?~? | ||||
| Stun Timer | ? | ||||
| Chain Cancel | No | ||||
| Special Cancel | No | ||||
| Super Cancel | No | ||||
| Frame Advantage | ? | ||||
| Frame Count | ? | ? | ? | ? | |
| Simplified | ? | ? | |||
 |
 |

| |
| Frame Count | ? | ? | ? |
| Simplified | ? | ||
- Close Crouching Strong:
| Damage | ? |  |
 |

|
| Stun | ?~? | |||
| Stun Timer | ? | |||
| Chain Cancel | No | |||
| Special Cancel | Yes | |||
| Super Cancel | Yes | |||
| Frame Advantage | ? | |||
| Frame Count | ? | ? | ? | |
- Far Crouching Strong:
| Damage | ? |  |
 |
 |
 |
 |

|
| Stun | ?~? | ||||||
| Stun Timer | ? | ||||||
| Chain Cancel | No | ||||||
| Special Cancel | No | ||||||
| Super Cancel | No | ||||||
| Frame Advantage | ? | ||||||
| Frame Count | ? | ? | ? | ? | ? | ? | |
| Simplified | ? | ? | ? | ||||
- Close Standing Fierce: (← + Fierce)
| Damage | ? |  |
 |
 |
 |
 |

|
| Stun | ?~? | ||||||
| Stun Timer | ? | ||||||
| Chain Cancel | No | ||||||
| Special Cancel | No | ||||||
| Super Cancel | Yes/No | ||||||
| Frame Advantage | ? | ||||||
| Frame Count | ? | ? | ? | ? | ? | ? | |
| Simplified | ? | ? | ? | ? | |||
- Far Standing Fierce:
| Damage | ? |  |
 |
 |

|
| Stun | ?~? | ||||
| Stun Timer | ? | ||||
| Chain Cancel | No | ||||
| Special Cancel | No | ||||
| Super Cancel | No | ||||
| Frame Advantage | ? | ||||
| Frame Count | ? | ? | ? | ? | |
| Simplified | ? | ? | |||
 |
 |

| |
| Frame Count | ? | ? | 1 |
| Simplified | ? | ||
- Close Crouching Fierce:
| Damage | ? |  |
 |

|
| Stun | ?~? | |||
| Stun Timer | ? | |||
| Chain Cancel | No | |||
| Special Cancel | No | |||
| Super Cancel | Yes | |||
| Frame Advantage | ? | |||
| Frame Count | ? | ? | ? | |
- Far Crouching Fierce:
| Damage | ? |  |
 |
 |
 |
 |

|
| Stun | ?~? | ||||||
| Stun Timer | ? | ||||||
| Chain Cancel | No | ||||||
| Special Cancel | No | ||||||
| Super Cancel | No | ||||||
| Frame Advantage | ? | ||||||
| Frame Count | ? | ? | ? | ? | ? | ? | |
| Simplified | ? | ? | ? | ||||
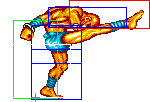
- Close Standing Short:
| Damage | ? |  |
 |

|
| Stun | ?~? | |||
| Stun Timer | ? | |||
| Chain Cancel | No | |||
| Special Cancel | Yes | |||
| Super Cancel | Yes | |||
| Frame Advantage | ? | |||
| Frame Count | ? | ? | ? | |
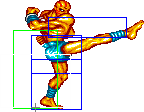
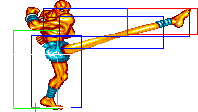
- Far Standing Short: (→ + Short)
| Damage | ? |  |
 |
 |
 |
 |

|
| Stun | ?~? | ||||||
| Stun Timer | ? | ||||||
| Chain Cancel | No | ||||||
| Special Cancel | No | ||||||
| Super Cancel | Yes | ||||||
| Frame Advantage | ? | ||||||
| Frame Count | ? | ? | ? | ? | ? | 1 | |
| Simplified | ? | ? | ? | ||||
- Close Crouching Short:
| Damage | ? |  |
 |

|
| Stun | ?~? | |||
| Stun Timer | ? | |||
| Chain Cancel | No | |||
| Special Cancel | Yes | |||
| Super Cancel | Yes | |||
| Frame Advantage | ? | |||
| Frame Count | ? | ? | ? | |
- Far Crouching Short:
| Damage | ? |  |
 |
 |

|
| Stun | ?~? | ||||
| Stun Timer | ? | ||||
| Chain Cancel | No | ||||
| Special Cancel | Yes | ||||
| Super Cancel | Yes | ||||
| Frame Advantage | ? | ||||
| Frame Count | ? | ? | ? | ? | |
| Simplified | ? | ? | ? | ||
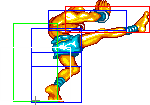
- Close Standing Forward: (← + Forward)
| Damage | ? |  |
 |

|
| Stun | ?~? | |||
| Stun Timer | ? | |||
| Chain Cancel | No | |||
| Special Cancel | Yes | |||
| Super Cancel | Yes | |||
| Frame Advantage | ? | |||
| Frame Count | ? | ? | ? | |
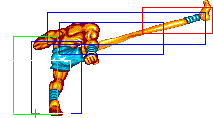
- Far Standing Forward:
| Damage | ? |  |
 |
 |
 |

|
| Stun | ?~? | |||||
| Stun Timer | ? | |||||
| Chain Cancel | No | |||||
| Special Cancel | No | |||||
| Super Cancel | Yes | |||||
| Frame Advantage | ? | |||||
| Frame Count | ? | ? | ? | ? | ? | |
| Simplified | ? | ? | ? | |||
- Close Crouching Forward:
| Damage | ? |  |
 |

|
| Stun | ?~? | |||
| Stun Timer | ? | |||
| Chain Cancel | No | |||
| Special Cancel | Yes | |||
| Super Cancel | Yes | |||
| Frame Advantage | ? | |||
| Frame Count | ? | ? | ? | |
- Far Crouching Forward:
| Damage | ? |  |
 |
 |

|
| Stun | ?~? | ||||
| Stun Timer | ? | ||||
| Chain Cancel | No | ||||
| Special Cancel | No | ||||
| Super Cancel | No | ||||
| Frame Advantage | ? | ||||
| Frame Count | ? | ? | ? | ? | |
| Simplified | ? | ? | ? | ||
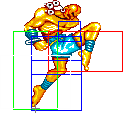
- Close Standing Roundhouse: (← + Roundhouse)
| Damage | ? |  |
 |
 |
 |
 |
 |

|
| Stun | ?~? | |||||||
| Stun Timer | ? | |||||||
| Chain Cancel | No | |||||||
| Special Cancel | No | |||||||
| Super Cancel | No | |||||||
| Frame Advantage | ? | |||||||
| Frame Count | ? | ? | ? | ? | ? | ? | ? | |
| Simplified | ? | ? | ? | |||||
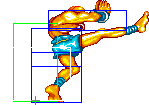
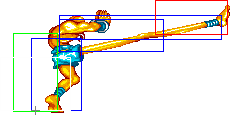
- Far Standing Roundhouse:
| Damage | ? |  |
 |
 |
 |
|
| Stun | ?~? | |||||
| Stun Timer | ? | |||||
| Chain Cancel | No | |||||
| Special Cancel | No | |||||
| Super Cancel | No | |||||
| Frame Advantage | ? | |||||
| Frame Count | ? | ? | ? | ? | ? | |
| Simplified | ? | ? | ||||
 |
 |

| |
| Frame Count | ? | ? | 1 |
| Simplified | ? | ||
- Close Crouching Roundhouse:
| Damage | ? |  |
 |

|
| Stun | ?~? | |||
| Stun Timer | ? | |||
| Chain Cancel | No | |||
| Special Cancel | Yes | |||
| Super Cancel | Yes | |||
| Frame Advantage | ? | |||
| Frame Count | ? | ? | ? | |
- Far Crouching Roundhouse:
| Damage | ? |  |
 |
 |
 |

|
| Stun | ?~? | |||||
| Stun Timer | ? | |||||
| Chain Cancel | No | |||||
| Special Cancel | No | |||||
| Super Cancel | No | |||||
| Frame Advantage | ? | |||||
| Frame Count | ? | ? | ? | ? | 1 | |
| Simplified | ? | ? | ? | |||
Aerial Normals
- Neutral Jumping Jab:
| Damage | ? |  |
 |
 |
 |
 |

|
| Stun | ?~? | ||||||
| Stun Timer | ? | ||||||
| Frame Count | ? | ? | ? | ? | ? | ∞ | |
| Simplified | ? | ? | ∞ | ||||
- Diagonal Jumping Jab:
| Damage | ? |  |
 |
 |
 |

|
| Stun | ?~? | |||||
| Stun Timer | ? | |||||
| Frame Count | ? | ? | ? | ? | ∞ | |
| Simplified | ? | ? | ∞ | |||
- Neutral Jumping Strong:
| Damage | ? |  |
 |
 |
 |

|
| Stun | ?~? | |||||
| Stun Timer | ? | |||||
| Frame Count | ? | ? | ? | ? | ∞ | |
| Simplified | ? | ? | ∞ | |||
- Diagonal Jumping Strong:
| Damage | ? |  |
 |
 |
 |
 |
 |

|
| Stun | ?~? | |||||||
| Stun Timer | ? | |||||||
| Frame Count | ? | ? | ? | ? | ? | ? | ∞ | |
| Simplified | ? | ? | ∞ | |||||
- Neutral/Diagonal Jumping Fierce:
| Damage | ? |  |
 |
 |
 |

|
| Stun | ?~? | |||||
| Stun Timer | ? | |||||
| Frame Count | ? | ? | ? | ? | ∞ | |
| Simplified | ? | ? | ∞ | |||
- Neutral/Diagonal Jumping Short:
| Damage | ? |  |
 |
 |
 |

|
| Stun | ?~? | |||||
| Stun Timer | ? | |||||
| Frame Count | ? | ? | ? | ? | ∞ | |
| Simplified | ? | ? | ∞ | |||
- Neutral/Diagonal Jumping Forward:
| Damage | ? |  |
 |
 |
 |

|
| Stun | ?~? | |||||
| Stun Timer | ? | |||||
| Frame Count | ? | ? | ? | ? | ∞ | |
| Simplified | ? | ? | ∞ | |||
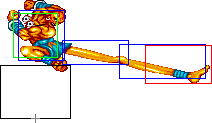
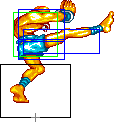
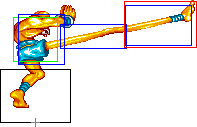
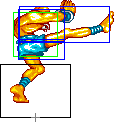
- Neutral/Diagonal Jumping Roundhouse:
| Damage | ? |  |
 |
 |
 |
 |
 |
 |

|
| Stun | ?~? | ||||||||
| Stun Timer | ? | ||||||||
| Frame Count | ? | ? | ? | ? | ? | ? | ? | ∞ | |
| Simplified | ? | ? | ∞ | ||||||
Command Normals
- Drill Zutsuki a.k.a. Mummy Drill: (On air, ↙/↓/↘ + Fierce)
| Damage | ? |  |
File:Dhalsim mummy2anm.png |
| Stun | ?~? | ||
| Stun Timer | ? | ||
| Frame Count | ? | ∞ | |
- Drill Kicks: (On air, ↙/↓/↘ + K)
- Short Version:
| Damage | ? |  |
File:Dhalsim drill2shrtanm.png |
| Stun | ?~? | ||
| Stun Timer | ? | ||
| Frame Count | ? | ∞ | |
- Forward Version:
| Damage | ? |  |
File:Dhalsim drill2frwrdanm.png |
| Stun | ?~? | ||
| Stun Timer | ? | ||
| Frame Count | ? | ∞ | |
- Roundhouse Version:
| Damage | ? |  |
File:Dhalsim drill2rhanm.png |
| Stun | ?~? | ||
| Stun Timer | ? | ||
| Frame Count | ? | ∞ | |
Throws
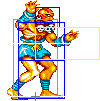
Dhalsim can throw using Strong and Fierce. The direction of the joystick determines the direction the enemy gets thrown at.
- Yoga Smash a.k.a. Noogie: (←/→ + Strong)
| Damage | ? | 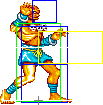 |
 |

|
| Stun | 0 | |||
| Stun Timer | 0 | |||
| Range (from axis) | 64 | |||
| (from throwable box) | 29 |
- Yoga Throw: (←/→ + Fierce)
| Damage | ? |  |
 |

|
| Stun | 7~13 | |||
| Stun Timer | 100 | |||
| Range (from axis) | 64 | |||
| (from throwable box) | 29 |
Special Moves
All motions are listed under the assumption that Dhalsim is facing right.
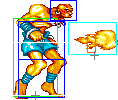
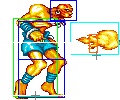
- Yoga Fire: (↓↘→ + P)
- Startup:
| Super Meter | 3 |  |
 |
 |

|
| Frame Count | 2 | 2 | 7 | 1 | |
| Simplified | 12 | ||||
- Active:
- Jab Version:
| Damage | ? |  |
 |
 |
 |

|
| Stun | ?~? | |||||
| Stun Timer | ? | |||||
| Frame Count | 1 | 1 | 3 | 6 | 9... | |
| Simplified | 40 | |||||
- Strong Version:
| Damage | ? |  |
 |
 |
 |

|
| Stun | ?~? | |||||
| Stun Timer | ? | |||||
| Frame Count | 1 | 1 | 3 | 6 | 9... | |
| Simplified | 40 | |||||
- Fierce Version:
| Damage | ? |  |
 |
 |
 |

|
| Stun | ?~? | |||||
| Stun Timer | ? | |||||
| Frame Count | 1 | 1 | 3 | 6 | 9... | |
| Simplified | 40 | |||||
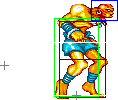
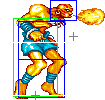
- Yoga Flame: (←↙↓↘→ + P)
- Startup:
| Super Meter | 8 |  |
 |
 |
 |
 |
 |
|
| Frame Count (Jab) | 2 | 2 | 3 | 2 | 2 | 1 | 1 | |
| Simplified (Jab) | 13... (21) | |||||||
| Frame Count (Strng) | 2 | 2 | 3 | 2 | 3 | 1 | 1 | |
| Simplified (Strng) | 14... (22) | |||||||
| Frame Count (Frc) | 2 | 2 | 4 | 2 | 4 | 1 | 1 | |
| Simplified (Frc) | 16... (24) | |||||||
 |
 |
 |
 |

| |
| Frame Count | 1 | 2 | 1 | 3 | 1 |
| Simplified (Jab) | ...8 (21) | ||||
| Simplified (Strng) | ...8 (22) | ||||
| Simplified (Frc) | ...8 (24) | ||||
- Active:
- Jab Version:
| Damage | ? |  |
 |
 |

|
| Stun | ?~? | ||||
| Stun Timer | ? | ||||
| Frame Count | 3 | 1 | 3 | 1 | |
| Simplified | 8 (32) | ||||
 |
 |
 |

| |
| Frame Count | 3 | 1 | 3 | 1 |
| Simplified | 8... (32) | |||
 |
 |
 |

| |
| Frame Count | 3 | 1 | 3 | 1 |
| Simplified | ...8... (32) | |||
 |
 |
 |

| |
| Frame Count | 3 | 1 | 3 | 1 |
| Simplified | ...8 (32) | |||
- Strong Version:
| Damage | ? |  |
 |
 |

|
| Stun | ?~? | ||||
| Stun Timer | ? | ||||
| Frame Count | 3 | 1 | 3 | 1 | |
| Simplified | 8 (48) | ||||
 |
 |
 |

| |
| Frame Count | 3 | 1 | 3 | 1 |
| Simplified | 8... (48) | |||
 |
 |
 |

| |
| Frame Count | 3 | 1 | 3 | 1 |
| Simplified | ...8... (48) | |||
 |
 |
 |

| |
| Frame Count | 3 | 1 | 3 | 1 |
| Simplified | ...8... (48) | |||
 |
 |
 |

| |
| Frame Count | 3 | 1 | 3 | 1 |
| Simplified | ...8... (48) | |||
 |
 |
 |

| |
| Frame Count | 3 | 1 | 3 | 1 |
| Simplified | ...4 (48) | 4 (48) | ||
- Fierce Version:
| Damage | ? |  |
 |
 |

|
| Stun | ?~? | ||||
| Stun Timer | ? | ||||
| Frame Count | 3 | 1 | 3 | 1 | |
| Simplified | 8 (63) | ||||
 |
 |
 |

| |
| Frame Count | 3 | 1 | 3 | 1 |
| Simplified | 8... (63) | |||
 |
 |
 |

| |
| Frame Count | 3 | 1 | 3 | 1 |
| Simplified | ...8... (63) | |||
 |
 |
 |

| |
| Frame Count | 3 | 1 | 3 | 1 |
| Simplified | ...8... (63) | |||
 |
 |
 |

| |
| Frame Count | 3 | 1 | 3 | 1 |
| Simplified | ...8... (63) | |||
 |
 |
 |

| |
| Frame Count | 3 | 1 | 3 | 1 |
| Simplified | ...8... (63) | |||
 |
 |
 |

| |
| Frame Count | 3 | 1 | 3 | 1 |
| Simplified | ...4 (63) | 4... (63) | ||
 |
 |

| |
| Frame Count | 3 | 1 | 3 |
| Simplified | ...7 (63) | ||
- Recovery:
 |
 |
 |
 |
 |

| |
| Frame Count (Jab) | X | 3 | 1 | 3 | 1 | 3 |
| Simplified (Jab) | 11... (19) | |||||
| Frame Count (Strng) | X | 3 | 1 | 3 | 1 | 3 |
| Simplified (Strng) | 11... (19) | |||||
| Frame Count (Frc) | 1 | 3 | 1 | 3 | 1 | 3 |
| Simplified (Frc) | 12... (20) | |||||
 |
 |
 |
 |

| |
| Frame Count | 1 | 3 | 1 | 1 | 2 |
| Simplified (Jab) | ...8 (19) | ||||
| Simplified (Strng) | ...8 (19) | ||||
| Simplified (Frc) | ...8 (20) | ||||
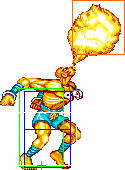
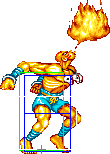
- Yoga Blast: (←↙↓↘→ + K)
- Startup:
| Super Meter | 7 |  |
 |
 |

|
| Frame Count (Shrt) | 6 | 4 | 3 | 1 | |
| Simplified (Shrt) | 14 | ||||
| Frame Count (Frwrd) | 8 | 4 | 3 | 1 | |
| Simplified (Frwrd) | 16 | ||||
| Frame Count (Rh) | 8 | 4 | 4 | 1 | |
| Simplified (Rh) | 19 | ||||
- Active:
- Short Version:
| Damage | ? |  |
 |
 |
 |
 |
 |

|
| Stun | ?~? | |||||||
| Stun Timer | ? | |||||||
| Frame Count | 1 | 1 | 1 | 1 | 1 | 1 | 1 | |
| Simplified | 7 (17) | |||||||
 |
 |
 |
 |
| |
| Frame Count | 1 | 1 | 1 | 1 | 1 |
| Simplified | 5... (17) | ||||
 |
 |
 |
 |

| |
| Frame Count | 1 | 1 | 1 | 1 | 1 |
| Simplified | ...5 (17) | ||||
- Forward Version:
| Damage | ? |  |
 |
 |
 |
 |
 |

|
| Stun | ?~? | |||||||
| Stun Timer | ? | |||||||
| Frame Count | 1 | 1 | 1 | 1 | 1 | 1 | 1 | |
| Simplified | 7 (22) | |||||||
 |
 |
 |
 |

| |
| Frame Count | 1 | 1 | 1 | 1 | 1 |
| Simplified | 5... (22) | ||||
 |
 |
 |
 |

| |
| Frame Count | 1 | 1 | 1 | 1 | 1 |
| Simplified | ...5... (22) | ||||
 |
 |
 |
 |
| |
| Frame Count | 1 | 1 | 1 | 1 | 1 |
| Simplified | ...3 (22) | 2 (22) | |||
- Roundhouse Version:
| Damage | ? |  |
 |
 |
 |
 |
 |
 |
|
| Stun | ?~? | ||||||||
| Stun Timer | ? | ||||||||
| Frame Count | 1 | 1 | 1 | 1 | 1 | 1 | 1 | 1 | |
| Simplified | 8 (27) | ||||||||
 |
 |
 |

| |
| Frame Count | 1 | 1 | 1 | 1 |
| Simplified | 4... (27) | |||
 |
 |
 |
 |

| |
| Frame Count | 1 | 1 | 1 | 1 | 1 |
| Simplified | ...5... (27) | ||||
 |
 |
 |
 |

| |
| Frame Count | 1 | 1 | 1 | 1 | 1 |
| Simplified | ...5... (27) | ||||
 |
 |
 |
 |

| |
| Frame Count | 1 | 1 | 1 | 1 | 1 |
| Simplified | ...2 (27) | 3 (27) | |||
- Recovery:
- Short Version:
 |
 |
 |
 |
 |
 |
 |

| |
| Frame Count | 1 | 1 | 1 | 1 | 1 | 1 | 1 | 2 |
| Simplified | 9 | |||||||
- Forward Version:
 |
 |
 |
 |
 |
 |
 |

| |
| Frame Count | 1 | 1 | 1 | 1 | 1 | 1 | 1 | 2 |
| Simplified | 9 | |||||||
- Roundhouse Version:
 |
 |
 |
 |
 |
 |
 |
 |

| |
| Frame Count | 1 | 1 | 1 | 1 | 1 | 1 | 1 | 1 | 2 |
| Simplified | 10 | ||||||||
- Yoga Teleport: (→↓↘/←↓↙ + PPP/KKK)
- Before Teleporting:
| Super Meter | 8 |  |
 |
 |
 |
File:Dhalsim teleport6&13anm.png | File:Dhalsim teleport7&12anm.png | File:Dhalsim teleport8&11anm.png | ||
| Frame Count | 2 | 3 | 3 | 2 | 2 | 4 | 4 | 4 | 13 | |
| Simplified | 37 | |||||||||
- After Teleporting:
| File:Dhalsim teleport8&11anm.png | File:Dhalsim teleport7&12anm.png | File:Dhalsim teleport6&13anm.png |  |
 |

| |||
| Frame Count | 8 | 3 | 4 | 4 | 2 | 2 | 3 | 3 |
| Simplified | 26 | 3 | ||||||
Super move
- Yoga Inferno: (←↙↓↘←↙↓↘→ + P)
| Damage | ?x5 |  |
 |
 |
 |
 |
 |

|
| Stun | ?~? | |||||||
| Stun Timer | ? | |||||||
| Frame Count | ? | ? | ? | ? | ? | ? | ? | |
| Simplified | ? | |||||||
 |
 |
 |
 |

| |
| Frame Count | ? | ? | ? | ? | ? |
| Simplified | ?... (?) | ||||
 |
 |
 |

| |
| Frame Count | ? | ? | ? | ? |
| Simplified | ...?... (?) | |||
 |
 |
 |

| |
| Frame Count | ? | ? | ? | ? |
| Simplified | ...?... (?) | |||
 |
 |
 |

| |
| Frame Count | ? | ? | ? | ? |
| Simplified | ...? (?) | ?... (?) | ||
 |
 |
 |

| |
| Frame Count | ? | ? | ? | ? |
| Simplified | ...?... (?) | |||
 |
 |
 |

| |
| Frame Count | ? | ? | ? | ? |
| Simplified | ...?... (?) | |||
 |
 |
 |

| |
| Frame Count | ? | ? | ? | ? |
| Simplified | ...?... (?) | |||
 |
 |
 |

| |
| Frame Count | ? | ? | ? | ? |
| Simplified | ...? (?) | ?... (?) | ||
 |
 |

| |
| Frame Count | ? | ? | ? |
| Simplified | ...? (?) | ||
 |
 |
 |
 |
 |

| |
| Frame Count | ? | ? | ? | ? | ? | ? |
| Simplified | ?... (?) | |||||
 |
 |
 |
 |

| |
| Frame Count | ? | ? | ? | ? | ? |
| Simplified | ...? (?) | ||||
Good for chipping. Can juggle too. Hard for someone to jump kick you because his entire body is invulnerable, even the top of his head.
The Basics
Repeated Jab Yoga Flame
If you corner your opponent and get a knockdown, there is a very potent trick you can use. Move into mid range and do Jab Yoga Flames, many characters have a difficult time with this... M Bison especially. If he doesn't have a super, and Dhalsim player doesn't make an execution mistake, there's no escape. Against shotos or somebody with an uppercut style move, do a couple of reps, bait a shoryu then do a fierce flame on their way down.
Advanced Strategy
Combos
Dhalsim isn't a combo character, you should know this by now.
Jab yoga fire (hit) low/stand fierce ... this is stupid but still can work. If you land a random jab yoga fire, go for a normal, it might hit before they recover and will most likely be safe. Mummy drill > Headbutt Short slide xx Super (crouching opp only) J. Fierce \/ Fierce (aka Yoga Strike Back)
Match-ups
Matchups classified with this diagram in mind. For the old characters I guessed the positions.
--Born2SPD
Serious Advantage Match-ups
Vs. Blanka:
- 8 - 2
Space yourself. The second he lands hit standing strong, then either standing fierce immediately. Most of the time he will he will try to jump right away but won't be able to get it off if you time the fierce right. If you can't just through out st. RH. Do this until he starts hesitating to jump and then you are free to throw fireballs every so often to push him back even more. Once he backs you into the corner teleport your ass out and rinse repeat. You will annoy the shit out of every Blanka online. This strat will even rush down Hyper Blanka for free =D
--Jcole
Vs. Dee Jay:
- 8 - 2
Vs. Guile:
- 8.5 - 1.5
Vs. Ken:
- 7.5 - 2.5
Vs. O. Ken:
Vs. Ryu:
- 7 - 3
Vs. O. Ryu:
Vs. Sagat:
- 9 - 1
Vs. O. Sagat:
- 7 - 3
Vs. Zangief:
- 7.5 - 2.5
Advantage Match-ups
Vs. Cammy:
- 6.5 - 3.5
Vs. E. Honda:
- 6.5 - 3.5
Well obviously your first objective is to just keep him away. Use your fireballs wisely, mixing up slow, medium and fast fireballs, and try to make him land on them. If Honda does his flash kick move over the fireball, I like hitting him on the way down with standing roundhouse or you can use standing fierce, but that can be trickier because if you mistime it he will hit your arms clean. Timings a little easier with roundhouse. If he jumps over the fireball, it kind of depends on which attack he uses. If he uses the forward kick splash or short kick butt, it hits down, so you can either use standing kicks or jump back and fierce in the air. Jump back fierce in the air should hit it clean, but standing kicks might trade. If you don't want to trade, just wait till he lands then hit him with low strong, standing fierce to push him back into the corner for more fireballs. Any other jump attack, try to him hit him low with low strong or low fierce followed up by a standing fierce or a fierce fireball to push him away.
Sliding against Honda as an anti air is highly unadvisable unless you see him jumping with Fierce or Jab, I think roundhouse too, but Honda's jump forward splash will hit the slide clean and then he can combo off of that so, the slide as anti-air is a high risk maneuver against Honda.
If timed correctly, Dhalsim's drill can cleanly beat Honda's headbutt. If you're drilling from full screen away make sure to use the short drill. However, for the most part, you should not be drilling from full screen because you want to keep him away.
Also Dhalsim has a really good cornertrap against Honda. If you knock him down in the corner, with the proper spacing you can keep doing jab yoga flames on him, over and over. I saw Gian do this in that 3 on 3 video and it works quite well.
I think Dhalsim's biggest problem with Honda is if Honda gets in a range where he can continue to do his flash kick maneuver. If you see it coming way ahead of time you can do the upwards yoga flame. But if you don't have time for that your best bet is to teleport out. Once again creating a good amount of distance between you two. Another tactic you might try is to short or forward slide out, but this gets tricky. Honda's flash kick maneuver has some weird cross up properties which can get you walking, sliding or blocking the wrong way.
Vs. Fei Long:
- 6.5 - 3.5
Vs. T. Hawk:
- 6.5 - 3.5
Vs. O. T. Hawk:
Fair Match-ups
Vs. Balrog (boxer):
- 5.5 - 4.5
Here is a bit to add for the match vs Boxer.
To start the match you have to set the tone right away. I would recomend you dont even pick your character but let time run out on the character select screen so that your opponent knows what is in store for him. Ahh nothing like prematch strats.
Starting off the round it is wise to cr.strong. If boxer blocks you can put him at the right range right away. If he head butts you will recover and be able to st.mk him before he lands and then a fierce FB will force him to block again. At this point he is in your range. It should be just outside your st.mp rage.
When you have boxer in your range DO NOT wiff to many moves. Most medium/hard wiffed moves will let boxer rushsweep you and then even if you block it he is in on you. At this range it is best to use FB's and st/cr.mp's that are blocked.
Be careful not to toss too many fireballs as a good boxer will strait jump one and then get in on you. after you get him at this range mix up your FB speeds. Toss a Jab and if he straight jumps its you can hit him with a few limbs. If he does the < or > fp/mp you can st.fp him. If he does a RH on the way down you can wait and hit him with rh/mk just before he hits the ground. Again be carefull not to get reckless with FB's at this point keep your calm and hold him down with mk/mp.
When boxer does get in, and he will, you need to watch a few things. If he should jump from far to hit you do a back.mk/lk then you can cancel into jab/strong FB to force him to block and get him back in your range. Back+Jab is an excelent move when boxer is in close on you. Some boxers love to just jump on your head when you are in the corner. If you are not comfortable teleporting you can b.jab him out of the air if you do it early. In this sittuation it is better to do a teleport, the 623KKK will take you the furthest away.
You will now need to know how to deal with close blocked/whiffed buffalos. After boxer buffalos you can do a few things. If it is whiffed and he is close I recommend you cr.jab x Jab FB. This will force him to block and then anticipate your next move. You can cr.strong and push him out but if you anticipate another buffalo just mk him and get him back to your range again. If you block the buffalo cr.mp/cr.mk will hit him but it may not be wise to xx FB. If the boxer is smart they will buffalo again and hit you and then he is in. you should cr.mkx2 to push him out and then set the pace of the match again.
Oh and remember the Fierce FB is your friend. From full screen there isn't any thing he can do to punish you for throwing them. If you play an opponent that likes to use the 1,2,3,4's you will hit him out of them and knock him down. Even if he does a normal rush and trades with you he will be knocked back to the far side of the screen and you are back in controll with more pokes.
When boxer gets super BLOCK!! I can not stress this enough. It will and has turned the whole game because of one bad slide or FB. If you are keeping him at your max range your game will not change to much. He can not super through FB's at full scree. But from 3/4 screed stop tossing them and do not cr.mk xx FB when he has super he will go through the FB with it every time if they are good. Keep it simple and wait for him to burn his super.
Thanks to Gian for showing me the light and making me want to play sim.
It is my opinion that this match is in favor of sim 60/40 and maybe even 70/30 if boxer doesn't have super.
--CigarBoB
Vs. Chun-Li:
- 5 - 5
If she's rushing you down with st.Strong from the right distance, there's nothing that I know of that Sim can do to beat it cleanly except super. You need patience (keep in mind that blocking her st.Strong is not hurting you), and if she comes within your throw range, throw her. Don't try any normals, because they will all get beaten cleanly if she's rushing correctly (leaving just enough room for you to do a move, but not enough room for that move to hit). If she's not doing it correctly (leaving a big gap between Strongs), you can use close cr.Forward or close cr.RH canceled into Yoga Fire.
--NKI
This only works on Vega and Chun li: after performing a Yoga Noogie, you take one step forward and do a forward slide... the slide crosses them up and then you just hit b + fierce for headbutt (instant Dizzy always). After that just rinse repeat ;-)
One good trick that most Dhalsim players have forgotten is this: If she jumps at you with forward and isn't over your head, you can jump back. Wait until last second and clean counter her with foward drill. Doesn't matter what she jumps up with, it will hit everytime cause you are completely over her head. I forget to use it at times to, cause most the time Chun-Li is just turtling like a whore until she gets Super.
--Jcole
Vs. Dhalsim (self):
Disadvantage Match-ups
Vs. Vega (claw):
- 3.5 - 6.5
Vega on sim can be annoying, but honestly his only aresnal is after he knocks you down and goes for wall dive cross up (which can be teleported out of or a very 50/50 block). He will most likely be jumping away from u so just slowly follow him into the corner. Any wall dive attempt can be countered with jump back rh or u can teleport if your timing is a little slow. If he jumps at you, trade hits with back short then you are in. Start the slide/drill noogie throw game and Vega is done. Its insanely hard for him to get out of. His only option is to wake up with flip kick but the slide goes under it so u end up throwing him again.
Takes a bit to get used to the match, but sim has a pretty big advantage on him --- It all depends on the situation and position dhalsim is compared to when vega goes off the wall. Sim has all kinds of ways to counter vega clean, it's just all about recognizing your position and executing the right move. If you have Vega traped in corner and he happens to go off wall, best thing is upward flame. I use to do back strong at last second if i was right under him, or karate chop st. jab, but do to this past evo and Tokido having the luck of the gods to BARELY get over my strong...iv changed my tactic. If you are about mid screen and he goes off the wall, jump back rh or jump straight up and close strong work excellent. The slide technique is mainly saved for when dirty vega's try to cross you up with the claw but its always risky...cause sometimes you will get hit. All in all, if you truely wanna be safe and not risk anything...just teleport and reset the situation...vega cant do anything and you are free to reposition yourself and get back to locking that claw fag down =P
--Jcole
Serious Disadvantage Match-ups
None!
