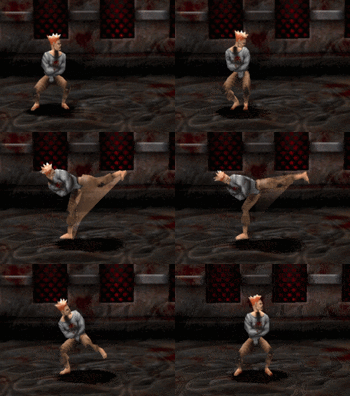
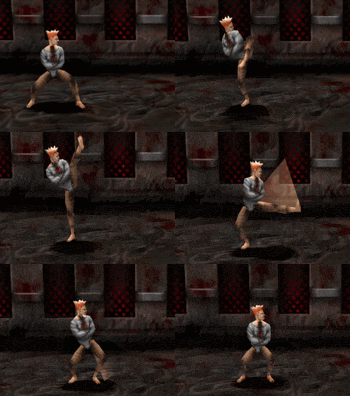
No edit summary |
|||
| Line 12: | Line 12: | ||
<div style="border:2px groove {{#var:primarycolor}}; background-color:{{#var:secondarycolor}}; padding:5px;"> | <div style="border:2px groove {{#var:primarycolor}}; background-color:{{#var:secondarycolor}}; padding:5px;"> | ||
{{MoveData | {{MoveData | ||
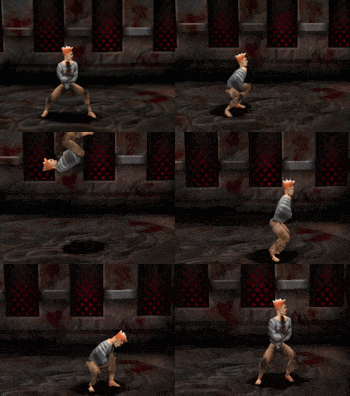
|image= | |image=TK-Odd-1.gif | ||
|caption= | |caption= | ||
|name=Head Jab | |name=Head Jab | ||
| Line 23: | Line 23: | ||
|active=3 | |active=3 | ||
|recovery=6 | |recovery=6 | ||
|advantage=-2 / +5 | |||
|damage=3 | |damage=3 | ||
|range= | |range=3.5 | ||
|property= | |property= | ||
|stance=No | |stance=No | ||
|description=On the slower end as far as jabs go | |description=On the slower end as far as jabs go but its range, active frames, and advantage make it a great high poke.}} | ||
}} | }} | ||
</div> | </div> | ||
| Line 33: | Line 34: | ||
<div style="border:2px groove {{#var:primarycolor}}; background-color:{{#var:secondarycolor}}; padding:5px;"> | <div style="border:2px groove {{#var:primarycolor}}; background-color:{{#var:secondarycolor}}; padding:5px;"> | ||
{{MoveData | {{MoveData | ||
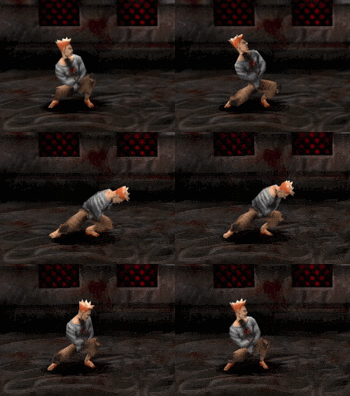
|image= | |image=TK-Odd-f1.gif | ||
|caption= | |caption= | ||
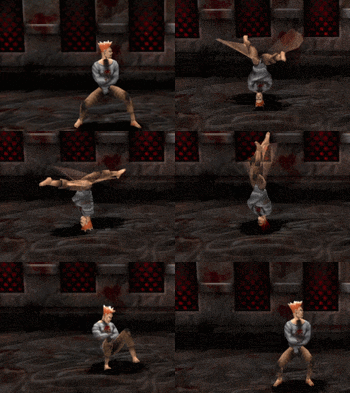
|name=Rising Shoulder | |name=Rising Shoulder | ||
| Line 44: | Line 45: | ||
|active=2 | |active=2 | ||
|recovery=16 | |recovery=16 | ||
|advantage=-11 / +25 | |||
|damage=4 | |damage=4 | ||
|range= | |range=4.4 | ||
|property=[[File:Launch.png]] | |property=[[File:Launch.png]] | ||
|stance=No | |stance=No | ||
|description=Due to its diagonal attack animation, this move | |description=Due to its diagonal attack animation and airborne hitbox, this move loses more than half of its range against crouching players.}} | ||
}} | }} | ||
</div> | </div> | ||
| Line 54: | Line 56: | ||
<div style="border:2px groove {{#var:primarycolor}}; background-color:{{#var:secondarycolor}}; padding:5px;"> | <div style="border:2px groove {{#var:primarycolor}}; background-color:{{#var:secondarycolor}}; padding:5px;"> | ||
{{MoveData | {{MoveData | ||
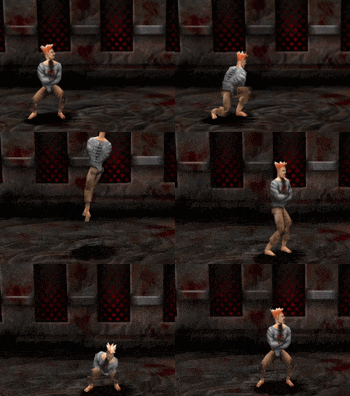
|image= | |image=TK-Odd-bf1.gif | ||
|caption= | |caption= | ||
|name=Super Rising Shoulder | |name=Super Rising Shoulder | ||
| Line 65: | Line 67: | ||
|active=1 | |active=1 | ||
|recovery=24 | |recovery=24 | ||
|advantage=-18 / +78 | |||
|damage=9 | |damage=9 | ||
|range= | |range=0.4 | ||
|property=SUPER [[File:Launch.png]] | |property=SUPER [[File:Launch.png]] | ||
|stance=No | |stance=No | ||
|description=Character defining move. This attack is what makes all of Oddball's extended juggles possible, but it's not recommended you use it on its own due to its poor range and recovery time.}} | |description=Character defining move. This attack is what makes all of Oddball's extended juggles possible, but it's not recommended you use it on its own due to its ''very'' poor range and recovery time.}} | ||
}} | }} | ||
</div> | </div> | ||
| Line 75: | Line 78: | ||
<div style="border:2px groove {{#var:primarycolor}}; background-color:{{#var:secondarycolor}}; padding:5px;"> | <div style="border:2px groove {{#var:primarycolor}}; background-color:{{#var:secondarycolor}}; padding:5px;"> | ||
{{MoveData | {{MoveData | ||
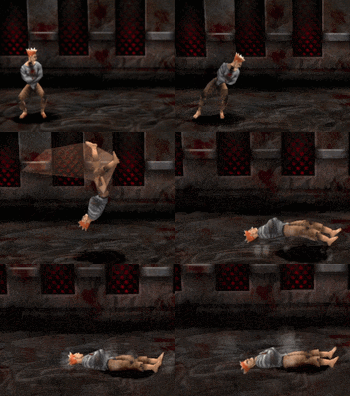
|image= | |image=TK-Odd-qc1.gif | ||
|caption= | |caption= | ||
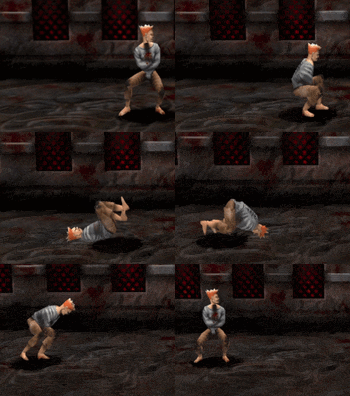
|name=Front Roll Escape | |name=Front Roll Escape | ||
| Line 86: | Line 89: | ||
|active= | |active= | ||
|recovery=26 | |recovery=26 | ||
|advantage= | |||
|damage= | |damage= | ||
|range= | |range= | ||
|property= | |property= | ||
|stance=No | |stance=No | ||
|description=Does not offer any | |description=Does not offer any i-frames, however it's tiny hitbox and fast speed does make you difficult to hit.}} | ||
}} | }} | ||
</div> | </div> | ||
| Line 96: | Line 100: | ||
<div style="border:2px groove {{#var:primarycolor}}; background-color:{{#var:secondarycolor}}; padding:5px;"> | <div style="border:2px groove {{#var:primarycolor}}; background-color:{{#var:secondarycolor}}; padding:5px;"> | ||
{{MoveData | {{MoveData | ||
|image= | |image=TK-Odd-hc1.gif | ||
|caption= | |caption= | ||
|name=Neck Breaker | |name=Neck Breaker | ||
| Line 107: | Line 111: | ||
|active= | |active= | ||
|recovery=98 | |recovery=98 | ||
|advantage=- / 0 | |||
|damage=28 | |damage=28 | ||
|range=0. | |range=0.5<sup>u</sup> - 2.3 | ||
|property=[[File:Knockdown.png]] | |property=[[File:Knockdown.png]] | ||
|stance=No | |stance=No | ||
| Line 117: | Line 122: | ||
<div style="border:2px groove {{#var:primarycolor}}; background-color:{{#var:secondarycolor}}; padding:5px;"> | <div style="border:2px groove {{#var:primarycolor}}; background-color:{{#var:secondarycolor}}; padding:5px;"> | ||
{{MoveData | {{MoveData | ||
|image= | |image=TK-Odd-l21.gif | ||
|caption= | |caption= | ||
|name=Head Butt From Crouch | |name=Head Butt From Crouch | ||
| Line 128: | Line 133: | ||
|active=1 | |active=1 | ||
|recovery=9 | |recovery=9 | ||
|advantage=-3 / 0 | |||
|damage=3 | |damage=3 | ||
|range= | |range=2.2 | ||
|property= | |property= | ||
|stance=No | |stance=No | ||
|description= | |description=Leads to either a mid-stun or a low string. With practice you can also use it to confirm into a ''Super Rising Shoulder'', but the timing is a little annoying.}} | ||
}} | }} | ||
</div> | </div> | ||
| Line 139: | Line 145: | ||
<div style="border:2px groove {{#var:primarycolor}}; background-color:{{#var:secondarycolor}}; padding:5px;"> | <div style="border:2px groove {{#var:primarycolor}}; background-color:{{#var:secondarycolor}}; padding:5px;"> | ||
{{MoveData | {{MoveData | ||
|image= | |image=TK-Odd-2.gif | ||
|caption= | |caption= | ||
|name=Head Butt | |name=Head Butt | ||
| Line 150: | Line 156: | ||
|active=4 | |active=4 | ||
|recovery=14 | |recovery=14 | ||
|advantage=-11 / +3 | |||
|damage=4 | |damage=4 | ||
|range=3. | |range=3.0 | ||
|property= | |property= | ||
|stance=No | |stance=No | ||
|description=Slow startup and poor recovery for a normal, but | |description=Slow startup and poor recovery for a normal, but has tons of active frames.}} | ||
}} | }} | ||
</div> | </div> | ||
| Line 160: | Line 167: | ||
<div style="border:2px groove {{#var:primarycolor}}; background-color:{{#var:secondarycolor}}; padding:5px;"> | <div style="border:2px groove {{#var:primarycolor}}; background-color:{{#var:secondarycolor}}; padding:5px;"> | ||
{{MoveData | {{MoveData | ||
|image= | |image=TK-Odd-f2.gif | ||
|caption= | |caption= | ||
|name=Spinning Head Butt | |name=Spinning Head Butt | ||
| Line 171: | Line 178: | ||
|active=7 | |active=7 | ||
|recovery=18 | |recovery=18 | ||
|advantage=-18 / +23 | |||
|damage=5 | |damage=5 | ||
|range= | |range=5.1 | ||
|property=[[File:Launch.png]] | |property=[[File:Launch.png]] | ||
|stance=No | |stance=No | ||
|description=Oddballs's jumping hitbox and lots of active frames makes this an appealing launcher.}} | |description=Oddballs's jumping hitbox and lots of active frames makes this an appealing launcher, though it comes with the same downsides that ''Rising Shoulder'' has in that it loses its range against crouching players.}} | ||
}} | }} | ||
</div> | </div> | ||
| Line 181: | Line 189: | ||
<div style="border:2px groove {{#var:primarycolor}}; background-color:{{#var:secondarycolor}}; padding:5px;"> | <div style="border:2px groove {{#var:primarycolor}}; background-color:{{#var:secondarycolor}}; padding:5px;"> | ||
{{MoveData | {{MoveData | ||
|image= | |image=TK-Odd-bf2.gif | ||
|caption= | |caption= | ||
|name=Suicide Throw | |name=Suicide Throw | ||
| Line 192: | Line 200: | ||
|active=2 | |active=2 | ||
|recovery=10 | |recovery=10 | ||
|advantage=-5 / +3 | |||
|damage=13 | |damage=13 | ||
|range=2.1<sup>u</sup> - | |range=2.1<sup>u</sup> - 12.2 | ||
|property=[[File:Knockdown.png]] | |property=[[File:Knockdown.png]] | ||
|stance=No | |stance=No | ||
|description=''Very'' far reach, but it having a minimum range makes it tricky to use.}} | |description=''Very'' far reach and good for an extra OTG hit after a juggle, but it having a minimum range makes it tricky to use.}} | ||
}} | }} | ||
</div> | </div> | ||
| Line 202: | Line 211: | ||
<div style="border:2px groove {{#var:primarycolor}}; background-color:{{#var:secondarycolor}}; padding:5px;"> | <div style="border:2px groove {{#var:primarycolor}}; background-color:{{#var:secondarycolor}}; padding:5px;"> | ||
{{MoveData | {{MoveData | ||
|image= | |image=TK-Odd-qc2.gif | ||
|caption= | |caption= | ||
|name=Back Roll Escape | |name=Back Roll Escape | ||
| Line 213: | Line 222: | ||
|active= | |active= | ||
|recovery=26 | |recovery=26 | ||
|advantage= | |||
|damage= | |damage= | ||
|range= | |range= | ||
| Line 223: | Line 233: | ||
<div style="border:2px groove {{#var:primarycolor}}; background-color:{{#var:secondarycolor}}; padding:5px;"> | <div style="border:2px groove {{#var:primarycolor}}; background-color:{{#var:secondarycolor}}; padding:5px;"> | ||
{{MoveData | {{MoveData | ||
|image= | |image=TK-Odd-hc2.gif | ||
|caption= | |caption= | ||
|name=Head Case | |name=Head Case | ||
| Line 234: | Line 244: | ||
|active=42 | |active=42 | ||
|recovery=37 | |recovery=37 | ||
|advantage=-45 / -4 | |||
|damage=5/hit | |damage=5/hit | ||
|range=0. | |range=-0.2 | ||
|property=[[File:Hardknockdown.png]] | |property=[[File:Hardknockdown.png]] | ||
|stance=No | |stance=No | ||
|description=Oddball's corner juggle ender. You move backwards quite a lot during the startup, hence the move's | |description=Oddball's corner juggle ender. You move backwards quite a lot during the startup, hence the move's negative range stat. You can press {{TKin|i=1+2}} to cancel the move, which also rolls you forward some distance.}} | ||
}} | }} | ||
</div> | </div> | ||
| Line 244: | Line 255: | ||
<div style="border:2px groove {{#var:primarycolor}}; background-color:{{#var:secondarycolor}}; padding:5px;"> | <div style="border:2px groove {{#var:primarycolor}}; background-color:{{#var:secondarycolor}}; padding:5px;"> | ||
{{MoveData | {{MoveData | ||
|image= | |image=TK-Odd-l22.gif | ||
|caption= | |caption= | ||
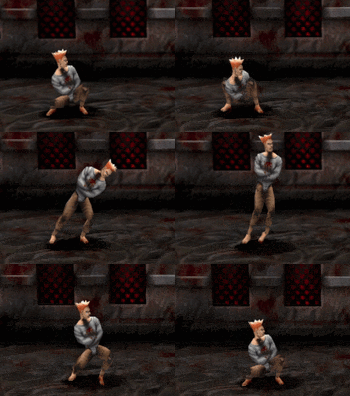
|name=Rising Head From Crouch | |name=Rising Head From Crouch | ||
| Line 255: | Line 266: | ||
|active=2 | |active=2 | ||
|recovery=9 | |recovery=9 | ||
|advantage=-4 / +51 | |||
|damage=5/hit | |damage=5/hit | ||
|range=1. | |range=1.4 | ||
|property=[[File:Dzzy.png]] | |property=[[File:Dzzy.png]] | ||
|stance=No | |stance=No | ||
|description=Great startup and recovery for a stun. One of the few crouching moves that stuns, let alone hits ''high''. Bit of an odd one.}} | |description=Great startup and recovery for a stun. One of the few crouching moves that stuns, let alone one that hits ''high''. Bit of an odd one.}} | ||
}} | }} | ||
</div> | </div> | ||
| Line 265: | Line 277: | ||
<div style="border:2px groove {{#var:primarycolor}}; background-color:{{#var:secondarycolor}}; padding:5px;"> | <div style="border:2px groove {{#var:primarycolor}}; background-color:{{#var:secondarycolor}}; padding:5px;"> | ||
{{MoveData | {{MoveData | ||
|image= | |image=TK-Odd-ff2.gif | ||
|caption= | |caption= | ||
|name=Spinning Head Butt | |name=Spinning Head Butt | ||
| Line 276: | Line 288: | ||
|active=4 | |active=4 | ||
|recovery=6 | |recovery=6 | ||
|advantage=-3 / +27 | |||
|damage=9 | |damage=9 | ||
|range= | |range=16.9 | ||
|property=[[File:Hardknockdown.png]] | |property=[[File:Hardknockdown.png]] | ||
|stance=No | |stance=No | ||
|description= | |description=Very easy to spot with its long startup and it ends with you grounded, but has very good advantage and you can tap a direction to immediately move afterwards.}} | ||
}} | }} | ||
</div> | </div> | ||
| Line 287: | Line 300: | ||
<div style="border:2px groove {{#var:primarycolor}}; background-color:{{#var:secondarycolor}}; padding:5px;"> | <div style="border:2px groove {{#var:primarycolor}}; background-color:{{#var:secondarycolor}}; padding:5px;"> | ||
{{MoveData | {{MoveData | ||
|image= | |image=TK-Odd-3.gif | ||
|caption= | |caption= | ||
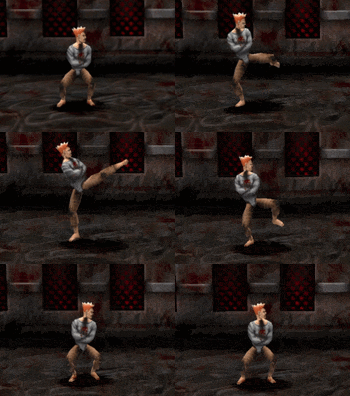
|name=Forward High Kick | |name=Forward High Kick | ||
| Line 298: | Line 311: | ||
|active=1 | |active=1 | ||
|recovery=12 | |recovery=12 | ||
|advantage=-6 / +2 | |||
|damage=3 | |damage=3 | ||
|range=3 | |range=2.3 | ||
|property= | |property= | ||
|stance=No | |stance=No | ||
|description= | |description=Abysmal range for a high makes this not an appealing button to use. You're much better off opening with a jab, since that can string into anything this kick can do.}} | ||
}} | }} | ||
</div> | </div> | ||
| Line 308: | Line 322: | ||
<div style="border:2px groove {{#var:primarycolor}}; background-color:{{#var:secondarycolor}}; padding:5px;"> | <div style="border:2px groove {{#var:primarycolor}}; background-color:{{#var:secondarycolor}}; padding:5px;"> | ||
{{MoveData | {{MoveData | ||
|image= | |image=TK-Odd-f3.gif | ||
|caption= | |caption= | ||
|name=Psycho Sidekick | |name=Psycho Sidekick | ||
| Line 319: | Line 333: | ||
|active=3 | |active=3 | ||
|recovery=10 | |recovery=10 | ||
|advantage=-6 / +3 | |||
|damage=3 | |damage=3 | ||
|range= | |range=4.7 | ||
|property= | |property= | ||
|stance=No | |stance=No | ||
|description= | |description=A much better button to poke with than ''Forward High Kick''.}} | ||
}} | }} | ||
</div> | </div> | ||
| Line 329: | Line 344: | ||
<div style="border:2px groove {{#var:primarycolor}}; background-color:{{#var:secondarycolor}}; padding:5px;"> | <div style="border:2px groove {{#var:primarycolor}}; background-color:{{#var:secondarycolor}}; padding:5px;"> | ||
{{MoveData | {{MoveData | ||
|image= | |image=TK-Odd-bf3.gif | ||
|caption= | |caption= | ||
|name=Ax Kick | |name=Ax Kick | ||
| Line 340: | Line 355: | ||
|active=1 | |active=1 | ||
|recovery=11 | |recovery=11 | ||
|advantage=-5 / +3 | |||
|damage=21 | |damage=21 | ||
|range= | |range=5.5 | ||
|property=[[File:Knockdown.png]] | |property=[[File:Knockdown.png]] | ||
|stance=No | |stance=No | ||
|description= | |description=Unlike most other slow knockdown moves that other characters have, Ax Kick has a ton of range and damage, and its advantage is pretty good even on block.}} | ||
}} | }} | ||
</div> | </div> | ||
Revision as of 12:56, 30 April 2023
Overview
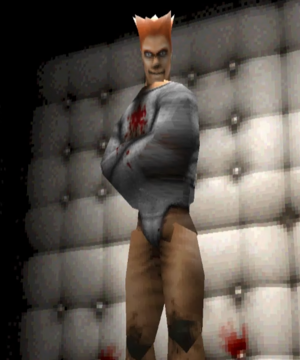
Oddball is one of the most dangerous characters in the game. His low dash cooldown allows him to dart around the stage rapidly, he has unique special attacks that double as mobility tools, and any string ending in a launcher can be converted into massive damage.
What Oddball really has going for him is that he is only one of two characters in the game that has access to a super launcher. Super Rising Shoulder sends whoever gets hit by it comically high into the air, and since Oddball possesses a palette of launching attacks both mid and low, learning how to convert stray hits into very high damaging super launcher strings (and learning the buffers to consistently land the hits) is a must when trying to master Oddball. Mastering him requires learning different routes and buffers to account for wall gravity messing with timings. Your reward for your hard work is a character that can convert 50%+ damage off of any mixup combo or punish string.
Oddball's biggest issue is his attack hitboxes. Even at point-blank range, they have a chance at missing your opponent completely if they're standing at an odd angle leaving open to a free combo.
| At a glance: | |
| Pros | Cons |
|
|
Move List
 Front Punch
| Hit | Startup | Active | Recovery | Adv. (Block / Hit) | Damage | Range | Property | Stance | |
|---|---|---|---|---|---|---|---|---|---|
| - | - | - | 26f | - | - | - | - | No | |
|
| |||||||||
 Back Punch
| Hit | Startup | Active | Recovery | Adv. (Block / Hit) | Damage | Range | Property | Stance | |
|---|---|---|---|---|---|---|---|---|---|
| - | - | - | 26f | - | - | - | - | No | |
|
| |||||||||
 Front Kick
 Back Kick
| Hit | Startup | Active | Recovery | Adv. (Block / Hit) | Damage | Range | Property | Stance | |
|---|---|---|---|---|---|---|---|---|---|
| - | 28f | - | - | {{{advantage}}} | - | - | - | - | |
|
| |||||||||
| Hit | Startup | Active | Recovery | Adv. (Block / Hit) | Damage | Range | Property | Stance | |
|---|---|---|---|---|---|---|---|---|---|
| - | - | - | 47f | {{{advantage}}} | - | - | - | No | |
|
| |||||||||
Grabs / Misc Moves
Oddball has 18f of recovery on a missed grab.
Oddball doesn't have a rear grapple. His side-swap grapple is used instead.
