Lichmassacre (talk | contribs) m (→Solar Flare/Reflector Normals: Removed color background) |
|||
| Line 273: | Line 273: | ||
==Frame Data== | ==Frame Data== | ||
{| cellspacing="0" width="100%" style="border: 1px solid #999 | {| cellspacing="0" width="100%" style="border: 1px solid #999;" | ||
|- | |- | ||
! align="left" | Move Name | ! align="left" | Move Name | ||
Revision as of 00:05, 11 November 2021


Amaterasu
Amaterasu, the sun goddess, lost her physical form defeating the True Orochi. 100 years later she was resurrected in the form of a wolf who now uses her powers to restore beauty to the islands of Japan.
Contributors: Rokmode, EMC
In a nutshell
Amaterasu is a unique,versatile, and underused character with a plethora of tools at her advantage thanks to her three different stances. She excels at controlling space with her respectable normals and has an admirable set of defensive tools in her arsenal. Her specials, while not bad tend to not be overpowering, and thus she is a character reliant on good reads and strong knowledge of spacing/footsies. As a result, most consider her to be one of the more difficult characters in UMVC3, but intelligent players who enjoy having access to a set of strong normals will find ammy and her support value to be rewarding and fun.
Use her reflector stance for close confrontations as it gives her access to strong option selects and allows usage of her projectile and melee counters. Her glaive stance possesses incredibly disjointed hitboxes that allow for blunt rushdown when mixed with her air dash. Finally, her rosary beads stance is largely unused yet criminally underrated. Her air normals while in this stance negate super armor and are notable for their space controlling abilities.
While certainly not a weak point character, Amaterasu is primarily used as a support character in the anchor slot. This is due to the fact that she possesses arguably the strongest assist for pure lockdown, one of the most potent Team Hyper Combos (THC), and multi-directional TAC infinites. Additionally, she is considered by most to be a top tier comeback character due to her deadly combination of Veil of Mist + level 3 xfactor. She is most commonly used with Doctor Doom due to their THC synergy and team support package.
Using a Top>High>Mid>Low standard, Amaterasu tends to be ranked in High tier by most community members. This is due to her strong support options, versatile toolset, and comeback ability. She suffers from lack of variable approach and mediocre damage. This creates many skewed matchups in which she can easily be zoned out. (Note: tiers are never set in stone and the Marvel vs Capcom 3 series tends to have one of the most disputed tier lists due to the sheer number of characters between Mid and Top tier)
Latest Tutorial Video by Philpro: http://www.youtube.com/watch?v=5CncQYS7GMs
Alternate Colors
Players to Watch
TA|Moonz(anchor) , Zak Bennet(anchor) , Marlinpie(anchor) , X-Ray(anchor) , Udaterasu(point), Full Schedule(anchor) , rusty shackleford (point)
Character Vitals
Move List
Note: This is a very long section. If you are looking for something specific, it is advised that you scroll to the top and look for your desired sub-section
Assist Types
Normal Moves : Solar Flare Weapon Stance 


San
Shi
Solar Flare Attack
H
H
60,000
60,000
60,000
can chain into itself to 3 hits
Normal Moves : Thunder Edge Weapon Stance 


(Charged version)
San
Thunder Edge Slash
H
80,000
80,000
can be charged
forced
San
Thunder Edge Slash
(charged versions)
H charge
100,000
100,000
can be charged
(Charged Version)
(Charged Version)
Normal Moves : Devout Beads Weapon Stance 


(79,500)
(79,500)
(79,500)
San
Shi
Devout Beads Whip
H
H
25,000 X 4
25,000 X 4
25,000 X 4
(153,900)
(163,900 for full rosary combo)
(79,500)
Throws
Universal Special Moves
(Paper)
M changes to Thunder Edge
H changes to Devout Beads
Solar Flare Stance Special Moves
Counter vs
Counter vs
if
Thunder Edge Stance Special Moves
L stabs
(Charged Version)
slightly by height and angle
Devout Beads Stance Special Moves
(20,000 ~ 113,600)
mashable
freezes opponent
Hyper Moves
+ 10,000 per ice hit
+ 7,000 per lightning hit
+ 80,000 for final bolt
(295,800)
Damage varies by screen location
soft
for all other hits.
Doesn't scale normally with combo.
More research required.
slow state that affects only
opponent's team.
lasts 5 seconds.
Level 3 Hyper.
Analysis of Normals
See Below This section for Frame Data
Hitbox/Hurtbox Data
Hitbox Data(Missing some Stuff unfortunately)
Universal Normals
Summary: Cr. L and j. l are the best buttons in her "universal normals" arsenal
Standing ![]() 2/10 usefulness outside of combos—Basically useless. The hitbox is very small, and it doesn't hit low. It has 1 frame less startup than crouching l, but it isn't rapid fire. There is no reason to use this over crouching l aside from height adjustment in certain combos.
2/10 usefulness outside of combos—Basically useless. The hitbox is very small, and it doesn't hit low. It has 1 frame less startup than crouching l, but it isn't rapid fire. There is no reason to use this over crouching l aside from height adjustment in certain combos.
Standing ![]() 5/10 usefulness outside of combos—Situationally useful for forward momentum. Useful for combos and has better frame data than the crouching variant, but this one doesn't hit low. Can be used in conjunction with assists to do things such as call assist, standing M, h cold star.
5/10 usefulness outside of combos—Situationally useful for forward momentum. Useful for combos and has better frame data than the crouching variant, but this one doesn't hit low. Can be used in conjunction with assists to do things such as call assist, standing M, h cold star.
Standing ![]() 4/10 usefulness outside of combos—Mediocre hitbox compared to some of the more crazy launchers in the game such as magneto, storm, sentinel, vergil, or doom. Only useful for combos and crossups.
4/10 usefulness outside of combos—Mediocre hitbox compared to some of the more crazy launchers in the game such as magneto, storm, sentinel, vergil, or doom. Only useful for combos and crossups.
Crouching ![]() 9/10 usefulness outside of combos—Very strong normal. It has incredible startup speed, and it's rapid fire. This is a very good normal for mashing, especially in sword/bead stance which lack good closeup options. This is the main low threat from ammy.
9/10 usefulness outside of combos—Very strong normal. It has incredible startup speed, and it's rapid fire. This is a very good normal for mashing, especially in sword/bead stance which lack good closeup options. This is the main low threat from ammy.
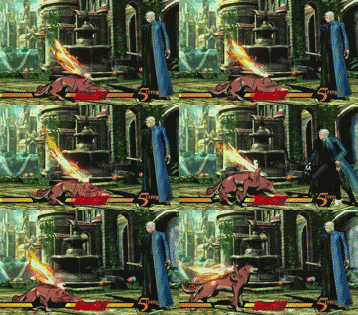
Demonstration of the good range on Crouching ![]()
Crouching ![]() 4.5/10 usefulness outside of combos—This isn't a very useful normal. It's basically like the standing variant, but her hurtbox is slightly lower, and this one hits low. It can be sometimes used to catch your opponent sleeping. Very good normal for combos as this will be your main way to hit confirm in bead stance off a crouching l. For example, cr. l cr. m, switch to sword stance, cr. l, cr. m, etc
4.5/10 usefulness outside of combos—This isn't a very useful normal. It's basically like the standing variant, but her hurtbox is slightly lower, and this one hits low. It can be sometimes used to catch your opponent sleeping. Very good normal for combos as this will be your main way to hit confirm in bead stance off a crouching l. For example, cr. l cr. m, switch to sword stance, cr. l, cr. m, etc
Jumping![]() 10/10 usefulness outside of combos—Very useful normal for mixups. Can be used for fuzzy guards and can hit many characters crouching. Incredibly fast overhead when used in conjunction with air dash downforward for an instant overhead. This normal is also very good for mashing on the way down and can be used to avoid quite a few setups. For example, depending on the timing, you can actually hit dante out of acid rain incomings with j.l and still recover in time to block.
10/10 usefulness outside of combos—Very useful normal for mixups. Can be used for fuzzy guards and can hit many characters crouching. Incredibly fast overhead when used in conjunction with air dash downforward for an instant overhead. This normal is also very good for mashing on the way down and can be used to avoid quite a few setups. For example, depending on the timing, you can actually hit dante out of acid rain incomings with j.l and still recover in time to block.
Jumping![]() 5/10 usefulness outside of combos—Decentish normal. Mostly used at super jump height when in close proximity with someone while in bead/sword stance as those stances lack quick buttons with good coverage. This button is also the easiest to use for stance cancel guard breaks. If you are unfamiliar with this technique, it will likely be covered in a later section of the wiki.
5/10 usefulness outside of combos—Decentish normal. Mostly used at super jump height when in close proximity with someone while in bead/sword stance as those stances lack quick buttons with good coverage. This button is also the easiest to use for stance cancel guard breaks. If you are unfamiliar with this technique, it will likely be covered in a later section of the wiki.
Jumping![]() 2/10 usefulness outside of combos—Terrible normal compared to her other options. Never use this. It even pushes opponents away, so you can't hit confirm off it or use it for hit confirms at all aside from falling s on grounded opponents or air dash downforward s on grounded opponents. Can be used in sword/bead stance as a way to escape pressure but is inferior to j. l in that department.
2/10 usefulness outside of combos—Terrible normal compared to her other options. Never use this. It even pushes opponents away, so you can't hit confirm off it or use it for hit confirms at all aside from falling s on grounded opponents or air dash downforward s on grounded opponents. Can be used in sword/bead stance as a way to escape pressure but is inferior to j. l in that department.
Reflector/Solar Flare Normals
Summary: Good for close option selects, making it a go to stance for close button pressing. The most "balanced" set of normals.
Standing ![]() 6/10 usefulness outside of combos—Somewhat useful normal that tends to be an inferior version of the forward variant. This is probably the strongest anti-air button in reflector stance, but that's not saying a whole lot considering its competition. Very strong for Crossup setups as well and a good back grab option select.
6/10 usefulness outside of combos—Somewhat useful normal that tends to be an inferior version of the forward variant. This is probably the strongest anti-air button in reflector stance, but that's not saying a whole lot considering its competition. Very strong for Crossup setups as well and a good back grab option select.
Standing Forward ![]() 7/10 usefulness outside of combos—Main means of comboing in reflector. Very strong tool since it option selects and combos into more Heavies. Good in conjunction with assists such as jam session and is special cancellable. Provides useful forward momentum which can catch opponents off guard
7/10 usefulness outside of combos—Main means of comboing in reflector. Very strong tool since it option selects and combos into more Heavies. Good in conjunction with assists such as jam session and is special cancellable. Provides useful forward momentum which can catch opponents off guard
Crouching ![]() 3/10 usefulness outside of combos—Pretty damn useless. It's jump cancellable and hits low, so I suppose you could catch a clueless opponent off guard by doing this and then a j. l. Not recommended to see use.
3/10 usefulness outside of combos—Pretty damn useless. It's jump cancellable and hits low, so I suppose you could catch a clueless opponent off guard by doing this and then a j. l. Not recommended to see use.
Jump ![]() 8/10 usefulness outside of combos—Good button with an enveloping hitbox. Very useful against big characters and one of the strongest tools when used in conjunction with a lockdown assist. Extremely powerful as an option select in the corner, which will get you a significant amount of hits, especially in x-factor. While slower than the j.l variant, air dash downforward+j. h is a quick instant overhead that also option selects, making it incredibly useful. Use this normal a lot but intelligently. J. h also causes massive amounts of hitstun (like every h button in the game tbh). If you whiff this normal, it is highly advised to cancel into bead/sword and mash j. l in order to avoid being whiff punished.
8/10 usefulness outside of combos—Good button with an enveloping hitbox. Very useful against big characters and one of the strongest tools when used in conjunction with a lockdown assist. Extremely powerful as an option select in the corner, which will get you a significant amount of hits, especially in x-factor. While slower than the j.l variant, air dash downforward+j. h is a quick instant overhead that also option selects, making it incredibly useful. Use this normal a lot but intelligently. J. h also causes massive amounts of hitstun (like every h button in the game tbh). If you whiff this normal, it is highly advised to cancel into bead/sword and mash j. l in order to avoid being whiff punished.
Glaive Normals
Summary: The go to set of normals for sheer offense with air dash j.h. Good ground control in the form of cr. h.
Standing![]() 5/10 usefulness outside of combos—Very strange normal. It will whiff on jumping opponents very often. It is recommended that the reader go into training mode and test which angles it whiffs at. Still a good space control tool and st. h cancelled into paper is good against predictable characters like haggar. Can be cancelled on whiff.
5/10 usefulness outside of combos—Very strange normal. It will whiff on jumping opponents very often. It is recommended that the reader go into training mode and test which angles it whiffs at. Still a good space control tool and st. h cancelled into paper is good against predictable characters like haggar. Can be cancelled on whiff.
Crouching ![]() 10/10 usefulness outside of combos—VERY VERY good button. This normal is incredibly underused. It has a ridiculous hitbox and can always be hit confirmed into qcf+l (add dash after if necessary), followed by st/cr L. Use this button as a main poke as many many people will get thrown off by it. It is easily one of the best crouching pokes in the entire game. Can be cancelled on whiff.
10/10 usefulness outside of combos—VERY VERY good button. This normal is incredibly underused. It has a ridiculous hitbox and can always be hit confirmed into qcf+l (add dash after if necessary), followed by st/cr L. Use this button as a main poke as many many people will get thrown off by it. It is easily one of the best crouching pokes in the entire game. Can be cancelled on whiff.
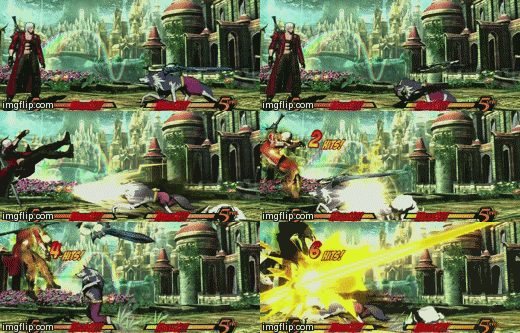
Demonstrating The powerful range on this normal and the ability to hit confirm from max range
Jumping ![]() 9/10 usefulness outside of combos—Insanely good normal when combined with an air dash. For whatever reason, ammy gains a nice little push if you use this after an air dash, making it really easy to cross-up people. The hitbox on this normal is disjointed and difficult to contend with. This button is not special cancellable so use it wisely. Outside of air dashing, it is mostly only useful as a button when falling down. When falling, make sure you use it a good bit before you land as it will likely not become active if you use it too late. One of the best parts about this normal revolves around the fact that the user can charge it, meaning that you can confuse your opponent by waiting a little before actually initiating the active hitting frames. It is best to only charge it up slightly and after an air dash. The fully charged variant is useful for evasion as her downward momentum is temporarily slowed. The fully charged variant can be special cancelled, which is highly advised as it is not safe.
9/10 usefulness outside of combos—Insanely good normal when combined with an air dash. For whatever reason, ammy gains a nice little push if you use this after an air dash, making it really easy to cross-up people. The hitbox on this normal is disjointed and difficult to contend with. This button is not special cancellable so use it wisely. Outside of air dashing, it is mostly only useful as a button when falling down. When falling, make sure you use it a good bit before you land as it will likely not become active if you use it too late. One of the best parts about this normal revolves around the fact that the user can charge it, meaning that you can confuse your opponent by waiting a little before actually initiating the active hitting frames. It is best to only charge it up slightly and after an air dash. The fully charged variant is useful for evasion as her downward momentum is temporarily slowed. The fully charged variant can be special cancelled, which is highly advised as it is not safe.
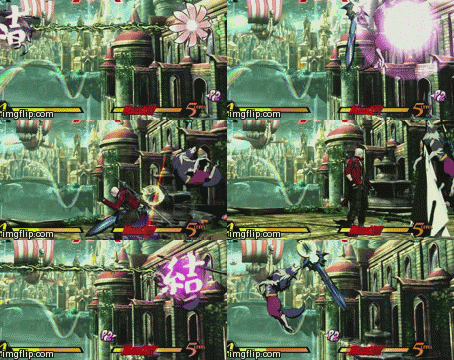
Demonstrating the disjointed hitbox and forward momentum from an airdash. This normal is also easy to crossup with as shown.
Bead Normals
Summary: Ground normals not very good except for some situations. Air normals VERY good.
Standing ![]() 4/10 usefulness outside of combos—Most use you will get out of this is the fact that it is so disjointed that it will actually go through effects such as eye of aggamato. Since ammy has some difficulty vs strange, this is one of your go to normals vs eye spam. Somewhat useful as a poke. Best used with jam session or bolts. It unfortunately cannot be cancelled, meaning that hit confirms are not possible. Not very useful. Has some anti air use.
4/10 usefulness outside of combos—Most use you will get out of this is the fact that it is so disjointed that it will actually go through effects such as eye of aggamato. Since ammy has some difficulty vs strange, this is one of your go to normals vs eye spam. Somewhat useful as a poke. Best used with jam session or bolts. It unfortunately cannot be cancelled, meaning that hit confirms are not possible. Not very useful. Has some anti air use.
Demonstrating the ability for this normal to go past eye of aggamato. The crouching and forward normals in bead stance also can do this.
Crouching ![]() 5/10 usefulness outside of combos—Pretty much same as above. Same strengths and weaknesses except not a good anti air. If 3/4 or less of the hitbox length is used, can be xfactor hit confirmed into a combo. This makes it situationally useful like striders slide as it can be unexpected. If a dormammu player decides to stalking flare at a range in which this normal will hit, this normal will hit him out of it.
5/10 usefulness outside of combos—Pretty much same as above. Same strengths and weaknesses except not a good anti air. If 3/4 or less of the hitbox length is used, can be xfactor hit confirmed into a combo. This makes it situationally useful like striders slide as it can be unexpected. If a dormammu player decides to stalking flare at a range in which this normal will hit, this normal will hit him out of it.
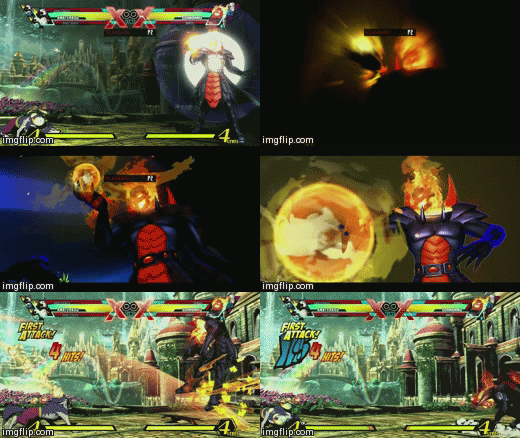
Demonstrating this normal's ability to go through Stalking flare while Dormammu is vulnerable. Standing and forward H can do this as well in Bead Stance.
Forward ![]() 4/10 usefulness outside of combos—Pretty much same as aforementioned, again without good anti air properties. This is unique in the sense that you can get a nice little built in chain combo that does very little damage. Still very disjointed making it useful for the scenarios listed above. Can harass ground based characters but must be used intelligently since it's quite unsafe. If a dormammu player decides to stalking flare at a range in which this normal will hit, this normal will hit him out of it.
4/10 usefulness outside of combos—Pretty much same as aforementioned, again without good anti air properties. This is unique in the sense that you can get a nice little built in chain combo that does very little damage. Still very disjointed making it useful for the scenarios listed above. Can harass ground based characters but must be used intelligently since it's quite unsafe. If a dormammu player decides to stalking flare at a range in which this normal will hit, this normal will hit him out of it.
Jump ![]() 10/10 usefulness outside of combos—Now this is the normal you WANT to use in bead stance. The rest are pretty bad and situational, but this one is fantastic. This normal+cold star are the main uses of bead stance. While not quite as far as visually shown, its hitbox is disjointed and further than basically any other air normal. You can always combo into glaive dive if you hit someone with this, making it a rewarding poke. This is quite possibly ammy's best normal as it is special cancellable on whiff, hit, or block. Use this normal to make ammy difficult to approach, control space, hit confirm, negate super armor (does multiple hits)and to shroud yourself as you approach—ex. bead jh. cancelled into sword dive cancelled into bead jh. This is also her best falling normal as few buttons can challenge this. A good way to use this while falling is bead jh cancelled into sword jh. Air dash bead jh is somewhat outclasses by the sword variant, but it has the benefit of being less obvious since you can special cancel it.
Caution: Pay attention to the range in which you use this button as you can be grabbed.
10/10 usefulness outside of combos—Now this is the normal you WANT to use in bead stance. The rest are pretty bad and situational, but this one is fantastic. This normal+cold star are the main uses of bead stance. While not quite as far as visually shown, its hitbox is disjointed and further than basically any other air normal. You can always combo into glaive dive if you hit someone with this, making it a rewarding poke. This is quite possibly ammy's best normal as it is special cancellable on whiff, hit, or block. Use this normal to make ammy difficult to approach, control space, hit confirm, negate super armor (does multiple hits)and to shroud yourself as you approach—ex. bead jh. cancelled into sword dive cancelled into bead jh. This is also her best falling normal as few buttons can challenge this. A good way to use this while falling is bead jh cancelled into sword jh. Air dash bead jh is somewhat outclasses by the sword variant, but it has the benefit of being less obvious since you can special cancel it.
Caution: Pay attention to the range in which you use this button as you can be grabbed.
Demonstrating ease of confirming from super jump height and ability to catch running opponents
Frame Data
Video Guides
Technology
Hard Tag to doom by HonzoGonzo
whiffed TAC concept
hard knock down reset concepts
Doom and Ammy swag concepts
Leveling up Frank with hard tag
slow down ideas with Rocket Raccoon and Amaterasu
TAC glitch
easy TAC glitch all sides
Combos
850K damage with assists
BnB's by HonzoGonzo
team combos by Adelheid Stark
combos and more
combo with beads
Ammy/Strange combo with bolts and DHC ToD
TAC Infinite
Hit/Hurtbox Guide
Tips for Fighting Amaterasu
1. Recognize her limited approach options
All she has is air dash forward, glaive dive, and ground dash. Analyze your characters' options, and you will likely find good buttons for dealing with her.
2. Abuse the recovery on her counters
Since ammy has to technically make educated guesses when using her reflector counters, you can easily abuse this by baiting them then grabbing or going low/high depending on which counter the ammy player is using. Additionally, for ammys that use projectile counter a lot, you can vary your approach to compensate for this.
3. Snap in Ammy!!
This cannot be emphasized enough. She is a legitimate problem with xfactor, and it is best to snap her in when given the opportunity, especially if the ammy player is using doom/ammy.
4. Mess with her Hurtbox
Amaterasu has a small vertical hitbox, but her body extends horizontally, which can make it difficult for her to block many setups.
5. Punish Okami Shuffle
Teleport users can simply teleport after the fire stage to get behind her and punish her. Warning: do not teleport during the beginning of the super as the fire does hit behind her. All characters can grab her out of the super if they are close enough. Set a recording dummy to okami shuffle and practice methods of punishing her.
Mission Mode
http://www.youtube.com/watch?v=8ZpqmJCPRt8
additional tutorial: http://www.youtube.com/watch?v=GRvfgjLSx94 part 2 part 3 part 4
THIS IS A WORK IN PROGRESS TO CONVERT THE SECTION INTO TABLES FOR VISUAL EASE
