|
|
| Line 1: |
Line 1: |
| [[File:Reiportrait.jpg|right]]
| | {{Infobox Character HNK |
| ==Introduction==
| | |name=Rei |
| | | }} |
| {| style="width:100%" cellpadding=10 border="0"
| |
| |-
| |
| | [[Image:Reiportrait.png|left]]
| |
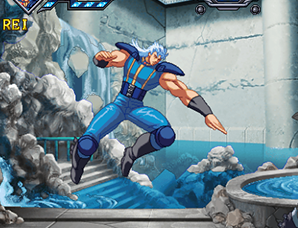
| | Rei is a speedy, movement-based character, having access to a wide array of air moves and the ability to triple jump. He has very powerful normals, many being jump-cancelable, which allow him to keep up the pressure without the use of gauge. He has a strong defense as well, with a great uppercut reversal move as well as his Danko super, which essentially works to deny the opponent the chance to do a wakeup mixup on you. His star-taking ability is quite good, but he also has very practical 100% combos. While using Rei to his full potential requires a great deal of player skill and ad lib, he is also the perfect beginner character, with an easy to understand offense as well as relatively simple and damaging combos.
| |
| That being said, let us start this section off by listing Rei's main strengths and weaknesses.
| |
| |}
| |
| | |
| | |
| '''Strengths:'''
| |
| * Is the only character is the game with an air throw and the ability to triple jump
| |
| * Good at getting out of pressure thanks to his dragon punch and Danko super
| |
| * Most of his normal moves can be Jump Canceled
| |
| * Decent star removing abilities
| |
| * Has many practical 100% combos
| |
| | |
| | |
| '''Weaknesses:'''
| |
| * Has the longest crouching recovery in the game; some character's have crouching-Rei-specific infinites
| |
| | |
|
| |
|
| Before diving right into the combos be sure to familiarize yourself with Rei's special/super moves and important normals. | | Before diving right into the combos be sure to familiarize yourself with Rei's special/super moves and important normals. |
| Line 236: |
Line 217: |
| <br> | | <br> |
| A FKO that can't be used as an OTG. If used too late outside of a banishing strike combo the gravity may be too severe for the 2nd hit too connect.<br> | | A FKO that can't be used as an OTG. If used too late outside of a banishing strike combo the gravity may be too severe for the 2nd hit too connect.<br> |
| ==Combos==
| |
| ==Basic Combos==
| |
|
| |
| Like everyone else Rei has to kara cancel the sweep in order to combo a banishing strike (2D~CD).
| |
|
| |
| '''Starters'''
| |
| {| style="width:100%" cellpadding=10 border="1"
| |
| |
| |
| 2B > 2B > 2D
| |
|
| |
| 5A > 2B > 2D
| |
|
| |
| 2B > 5D > IAD j.B > j.C
| |
|
| |
| 2B > 5D > Banishing Strike (2D~CD)
| |
| |}
| |
|
| |
|
| |
| '''Standard BNB Combo'''
| |
|
| |
| {| style="width:100%" cellpadding=10 border="1"
| |
| |
| |
| 2D > IAD j.C > 5C > j.AC > 236+D > 66 > j.BC > 5C > 623+A > 236+C > 9~C or 96 j.AC > 5C > 623+A > 236+C > 96 j.AB > CD or 236236+A
| |
| |}
| |
|
| |
| Basic bnb which also leads to the chikuseki bug.
| |
|
| |
|
| |
| '''Max range 2D combos'''
| |
|
| |
| When you are too far for his basic bnb Rei has several options:
| |
|
| |
| {| style="width:100%" cellpadding=10 border="1"
| |
| |
| |
| 2D (max range) > IAD j.C > land > Grave Shoot (A+C) > Followups:
| |
|
| |
|
| |
| 1) A+C > sj.ABCD > 214+C
| |
|
| |
|
| |
| 2) A+C > j.BD > 236+D > 214+C
| |
| |}
| |
|
| |
| Basic okizeme knockdown combo from a max range 2D. On the way down Rei can control which side he lands after he activates the barrier.
| |
|
| |
|
| |
| {| style="width:100%" cellpadding=10 border="1"
| |
| |
| |
| 2D (max range) > IAD j.C > 236+C > j.ABC > finisher (CD or super)
| |
|
| |
| 2D (max range) > IAD j.C > f.5B > j.BC > 236+D > 66 > j.BC > 5C > 623+A > 236+C > basic mid screen combo
| |
| |}
| |
|
| |
|
| |
| '''Okizeme setup after a launcher'''
| |
|
| |
| {| style="width:100%" cellpadding=10 border="1"
| |
| |
| |
| A+C or 214+C > 214+C > sj.D > 236+B > j.ABD > 214+C > okizeme
| |
| |}
| |
|
| |
|
| |
| ==Banishing Strike combos==
| |
|
| |
| Notes: All those combos can be started with 5B > 5D > (2D~CD)
| |
|
| |
| {| style="width:100%" cellpadding=10 border="1"
| |
| |
| |
| CD > 6 > (A+B~E or 2C or 5C) > A+C > 2369+D > j.B > 2C > IAD j.D > (2369+C) xN > 2369+D > Super (236236+A)
| |
| |}
| |
|
| |
| Basic setup for his air 236+C loop.
| |
|
| |
|
| |
| {| style="width:100%" cellpadding=10 border="1"
| |
| |
| |
| CD > 6 > 5C > 2C > j.B > 236+D > 66 j.B > 5C > j.B > 236+D > 66 j.B > (236+D > j.B) xN > 236236+A or 2363214+D
| |
|
| |
| CD > 6 > 5C > 2C > j.B > 236+D > 66 j.B > 5C > j.B > 236+D > 66 j.C > 236+C > 2369+D > (j.B > 236+D) xN > 236236+A or 2363214+D
| |
| |}
| |
|
| |
| White version of the banishing strike combo for max damage if you can't do his 2369+C loop yet.
| |
|
| |
|
| |
| '''3 Star Banishing Strike Combo'''
| |
|
| |
| {| style="width:100%" cellpadding=10 border="1"
| |
| |
| |
|
| |
| CD > A+B > E > 5C > A+C > 2369+D > j.B > 2C > IAD j.D > (2369+C) xN > 236+D > 236236+A or 2363214+D
| |
| |}
| |
|
| |
|
| |
| ==Ground IAD loop==
| |
| {| style="width:100%" cellpadding=10 border="1"
| |
| |
| |
| [5D > IAD j.BD] xN
| |
| |}
| |
| Note: works on everyone but Jagi
| |
|
| |
|
| |
| ==Instant overhead 2369+D starter==
| |
|
| |
| {| style="width:100%" cellpadding=10 border="1"
| |
| |
| |
| (corner) 2369+D > j.B > 5A > j.AC > 236+D > basic bnb
| |
|
| |
| (mid screen) 2369+D > E > j.B > 5A > j.AC > 236+D > basic bnb
| |
| |}
| |
|
| |
|
| |
| ==Throw Combos==
| |
|
| |
| {| style="width:100%" cellpadding=10 border="1"
| |
| |
| |
| Throw > j.B > delay j.C > 5C > basic bnb
| |
|
| |
| Throw > j.D > 236+C > 9~C > 5C > j.C > 236+D > 66 > j.BC > 5C > 623+A > 236+C > 9~C > basic bnb
| |
|
| |
| Throw > j.C > 236+C > 9~C > 5C > 623+A > 236+C > 9~C > 5C > 623+A > 236+C > 9~C > 5A > 623+A > 236+C > 9~C > 5B > 5D > 236236+A
| |
|
| |
| Throw > sj. ABC > 236+D > 66 > j.BC > basic bnb
| |
| |}
| |
|
| |
|
| |
| ==Crouch Loop==
| |
|
| |
| {| style="width:100%" cellpadding=10 border="1"
| |
| |
| |
| j.D > [5D > IAD j.D] xN
| |
| |}
| |
|
| |
| Crouching Rei only
| |
|
| |
|
| |
| ==BD Throw Combos==
| |
|
| |
| {| style="width:100%" cellpadding=10 border="1"
| |
| |
| |
| BD Throw > IAD j.C > 5C > j.AC > 236+D > basic bnb
| |
|
| |
| BD Throw > IAD j.C > 5C > CD > E > 5A > 5C > A+C > 236963214+D (4 stars)
| |
|
| |
| BD Throw > IAD j.C > 5C > CD > [E~5C > A+C] or [A+C+E] > j.A > 236+A+E > land > 5A > 5C > 236236+A (4 stars)
| |
| |}
| |
|
| |
|
| |
| ==FKO Combos==
| |
|
| |
| '''0 Stars'''
| |
| {| style="width:100%" cellpadding=10 border="1"
| |
| |
| |
| 2D > IAD j.C > 5C > FKO
| |
| |}
| |
|
| |
| '''1 Star'''
| |
| {| style="width:100%" cellpadding=10 border="1"
| |
| |
| |
| 2D > IAD j.C > 5C > CD > E > 5A > 5C > FKO
| |
| |}
| |
|
| |
| '''2 Stars'''
| |
| {| style="width:100%" cellpadding=10 border="1"
| |
| |
| |
| CD > 6 > A+C > 2369+D > > j.B > FKO
| |
| |}
| |
|
| |
| '''3 Stars'''
| |
| {| style="width:100%" cellpadding=10 border="1"
| |
| |
| |
| CD > 2C > 214+C > 214+C > j.B > delay 236+B > j.B > A+C > 2369+D > E > j.A > FKO
| |
|
| |
| CD > 6 > A+C > jump 236+A+E > A+C > 2369+D > j.B > FKO
| |
| |}
| |
|
| |
|
| |
| ==Throw FKO Combos==
| |
|
| |
| {| style="width:100%" cellpadding=10 border="1"
| |
| |
| |
| Throw > j.B > delay j.C > 5C > CD > E > 5A > 5C > FKO (1 Star)
| |
|
| |
| Throw > j.B > delay j.C > 5C > CD > A+C+E > j.A > 236+A+E > 5A > 5C > FKO (2 Stars)
| |
|
| |
| Throw > j.B > delay j.C > 5C > CD > A+C+E > 923+E~A > 236+C > 96 j.AC > 5A > 5C >FKO (2 Stars)
| |
|
| |
| BD Throw > IAD j.C > 5A > 5C > CD > E > 5A > 5C > FKO (2 Stars)
| |
|
| |
| BD Throw > IAD j.C > 5C > CD > E~5C > A+C > j.A > 236+A+E > 5A > 5C > FKO (3 stars)
| |
| |}
| |
|
| |
|
| |
| ==CH 214+C Combos==
| |
| {| style="width:100%" cellpadding=10 border="1"
| |
| |
| |
| CH 214+C (1 star taken) > E+CD > A+C+E > 2369+D > j.A > FKO (3 stars)
| |
|
| |
| CH 214+C (1 star taken) > E+CD > > A+C+E > 2369+D > j.B (on the way down) > j.B > 236+D > 66 j.D > (2369+C) xN > 2369+D > j.A > 236236+A or 2363214+D (3 Stars)
| |
| |}
| |
|
| |
|
| |
| ==Overhead 6A Combo==
| |
|
| |
| {| style="width:100%" cellpadding=10 border="1"
| |
| |
| |
| 6A > E > 5A > 5C > j.AC > 236+D > j.BC > basic bnb
| |
| |}
| |
|
| |
|
| |
| ==3 Stars Glitch JI Combo==
| |
| {| style="width:100%" cellpadding=10 border="1"
| |
| |
| |
| 2BxN > 2D > IAD j.C > 5C > CD (1 Star) > E~2C > A+C > 923+E~A (2 Stars) > 236+C > 9~C > 5C > 623+A > 236+C > 9~C > 5B > 5D > 236236+A (3 Stars)
| |
| |}
| |
|
| |
|
| |
|
| |
| ==Basket Combos==
| |
|
| |
| {| style="width:100%" cellpadding=10 border="1"
| |
| |
| |
| 2D > IAD j.C > 5C > j.AC > 236+D > 66 > j.BC > 5C > 623+A > 236+C > 9~C > 5A > 5C > 236236+A > 2BxN (basket)
| |
| |}
| |
|
| |
| Note: 2.0 boost requirement
| |
|
| |
| '''1.2 Boost Setup'''
| |
|
| |
| {| style="width:100%" cellpadding=10 border="1"
| |
| |
| |
| 2D > IAD j.C > 5C > j.AC > 236+D > 66 > j.BC > 5C > 623+A > 236+C > 9~C > 5A or 5C > 623+A > 236+C > 96 j.AC > 236236+A > 2BxN > basket
| |
| |}
| |
|
| |
| Note: On some characters Rei can switch to a boost 2A mid basket to increase the number of hits.
| |
|
| |
| {| style="width:100%" cellpadding=10 border="1"
| |
| |
| |
| Kenshiro:
| |
|
| |
| 2Bx6 > E > 2Bx11 > E > (2Bx6 > E > 2Ax2 > 5Ax6) or (2Bx7 > E > 2Ax3 > 5Ax4) 2Ax9 > 2C > IAD j.B > basket activates
| |
|
| |
|
| |
| Rei:
| |
|
| |
| 236236+A (37 hits at the end of the combo)
| |
|
| |
| 2Bx8 > E > 2Bx9 > E > 2Ax8 > E > 2Ax15 > 2C > basket
| |
|
| |
| 236236+A (34 hits at the end of the combo)
| |
|
| |
| 2Bx9 > E > 2Bx9 > E > 2Bx1 > 2Ax7 > E > 2Ax16 > 2Bx1
| |
|
| |
|
| |
| Shin:
| |
|
| |
| 236236+A (38 hits at the end of the combo)
| |
|
| |
| 2Bx5 > E > 2Bx8 > E > 2Ax8 > E > 2Ax2 > 5Ax7 > 2Ax10 > 2C > basket
| |
|
| |
| 236236+A (35 hits at the end of the combo)
| |
|
| |
| 2Bx7 > E > 2Bx9 > E > 2Ax8 > 5Ax2 > 2Ax7 > 2Ax11 > basket
| |
|
| |
|
| |
| Souther:
| |
|
| |
| 236236+A (37 hits at the end of the combo)
| |
|
| |
| 2Bx5 > E > 2Bx9 > E > 2B > 2Ax7 > E >2Ax2 > 5Ax7 > 2Ax7 > 2Bx2 > basket
| |
|
| |
| 236236+A (34 hits at the end of the combo)
| |
|
| |
| 2Bx6 > E > 2Bx11 > E > 2B > 2Ax7 > E > 2Ax2 > 5Ax7 > 2Ax7 > 2Bx2 > basket
| |
|
| |
|
| |
| Heart
| |
|
| |
| 2Ax5 > 2Bx2 > E > 2Ax10 > 2Bx2 > E 2Ax8 > E 2Ax10 > 2Bx2 > basket
| |
| |}
| |
|
| |
|
| |
| ==Dribble Setups==
| |
|
| |
| Note: Be sure to read the movement boost section under advanced techniques before attempting dribbles / basket.
| |
|
| |
| '''Basic Dribble Pattern'''
| |
|
| |
| '''Version #1'''
| |
| {| style="width:100%" cellpadding=10 border="1"
| |
| |
| |
| [dribble activates] d.5A (up to 50 hits) > [5C > IAD j.B] (up to 60 hits) > [5C > f.5C > IAD j.B] (up to 72 hits) > [2Ax10 > 2C > IAD j.B] or [j.ABC ]xN (basket pattern until 100%)
| |
| |}
| |
|
| |
| '''Version #2'''
| |
|
| |
| {| style="width:100%" cellpadding=10 border="1"
| |
| |
| |
| [dribble activates] d.5A (up to 50 hits) > 5A > IAD j.B > 5A > CD > 5A > IAD j.B > 5A > A+C > sj. 236+D > [j.A > j.B] xN
| |
| |}
| |
|
| |
|
| |
| '''Mid Screen Dribble from 2D'''
| |
|
| |
| {| style="width:100%" cellpadding=10 border="1"
| |
| |
| |
| 2B > 2B > 2D > IAD > j.C > 5C > j.AC > 236+D > 66 j.B > j.C > 623+A > 236+C > 96 j.C > 5A > 5A > 623+A > 236+C > 96 j.AC > 5Ax5 > Boost > 5A (use movement boost technique here: 5A~E) > 5Ax5 > 623+C > 236+E~C > j.B or 214+E~C > IAD j.B > 5C > IAD j.B > 5A > Dribble
| |
| |}
| |
|
| |
| Notes: Use 214+E~C on Jagi instead of 236+E~C
| |
|
| |
| There are 3 routes:
| |
|
| |
| {| style="width:100%" cellpadding=10 border="1"
| |
| |
| |
|
| |
| 1) IAD j.C > 5C > j.A > [j.B] > j.C Route
| |
|
| |
| 2) IAD > j.C > 5C > IAD > j.A > j.C Route
| |
|
| |
| 3) IAD j.C > 5C > 623+A > 236+C route
| |
|
| |
| |}
| |
|
| |
| Options after crossing up with 99C (character dependent):
| |
|
| |
| {| style="width:100%" cellpadding=10 border="1"
| |
| |
| |
| 1) 2A > 5A
| |
|
| |
| 2) 5A > 5A (Heart)
| |
|
| |
| 3) 2A > 5C (Juda)
| |
|
| |
| 4) 5A > 5C (Jagi / Heart)
| |
|
| |
| 5) 5A (Mamiya / Jagi)
| |
| |}
| |
|
| |
| On Mamiya use this for the movement boost 5A part:
| |
|
| |
| {| style="width:100%" cellpadding=10 border="1"
| |
| |
| |
| 623+A > 236+C > 5Ax3 > Boost > 5A (5A~E movement boost) > 5Ax2 > Boost > 5Ax5 > 623+C (6 hits) > 236+E~C > j.B > 5C > IAD j.B > 5A > d.5A > dribble
| |
| |}
| |
|
| |
| It's quite hard to crossup Heart using the standard mid screen setup so use this instead:
| |
|
| |
| [https://youtu.be/eakMWpMaIjE?list=PL89vfz5rtXupvUYh4VnAwLGQrOJzfV1qt Video Sample]
| |
|
| |
| {| style="width:100%" cellpadding=10 border="1"
| |
| |
| |
| (starting from almost full screen) 2B > 2B > 2D > IAD j.C > 5C > IAD j.AC > 5C > 623+A > 236+C > 96 j.C (switch sides) > 5A > 5C > 623+A > 236+C > 96 j.AC > 5Ax5 > Boost > 5A > 5Ax5 > Boost > 5A > 5Ax3 > 623+C (6 hits) > 236+E~C > j.B > 5C > IAD j.B > 5A > d.5A > Dribble
| |
| |}
| |
|
| |
|
| |
| '''Corner 623+C+E Dribble (Standard Setup)'''
| |
|
| |
| [https://youtu.be/LHdK4XMdl9E?list=PL89vfz5rtXupvUYh4VnAwLGQrOJzfV1qt Video Sample]
| |
|
| |
| {| style="width:100%" cellpadding=10 border="1"
| |
| |
| |
| 2B > 2B > 2D > IAD j.C > 5C > j.AC > 236+D > 66 j.BC > 5C > 623+A > 236+C > 9~C > 5C > 623+A > 236+C > 96 j.AC > 623+C (5) > E~j.C > 5A > 623+E+C (6) > 236+E~C > j.B or 214+E~C > IAD j.B > 5C > IAD j.B > 5A > d.5A > Dribble
| |
| |}
| |
|
| |
| Notes:
| |
|
| |
| Insert 5A before 623+C on Toki and Raoh.
| |
|
| |
| Use 9C > 623+A or 96AC > 623+A on Toki (skip 5C if you want the corner cross up setup) and use 96AC instead of 9C on Raoh/Mamiya (don't skip 5C).
| |
|
| |
| Use 96AC > 623+E+C instead of 99AC > 623+C on Mamiya. Remember that the 2nd dp is ALSO a 623+E+C since you have to HSC the jab.
| |
|
| |
|
| |
| So on Mamiya the setup looks like this:
| |
|
| |
| {| style="width:100%" cellpadding=10 border="1"
| |
| |
| |
| 2B > 2B > 2D > IAD j.C > 5C > j.AC > 236+D > 66 > j.BC > 5C > 623+A > 236+C > 96 j.AC >5C > 623+A > 236+C > 96 j.AC > [5A] > 623+E~C (5 hits) > E~j.C > 5A > 623+E~C (6 hits) > 236+E~C > j.B > 5C > IAD j.B > 5A > d.5A > Dribble
| |
| |}
| |
|
| |
|
| |
| '''Hyakuretsu Setup'''
| |
| {| style="width:100%" cellpadding=10 border="1"
| |
| |
| |
| 2B > 2B > 2D > IAD j.C > 5C > j.AC > 236+D > 66 j.BC > 5C > 623+A > 236+C > 9C > 5C > 623+A > 236+C > 96 j.AC > 5A > 5C > Super (17 hits) or 5C > 623+A > 236+C > 96 j.AC > Super (22 hits)
| |
| |}
| |
|
| |
| Note: On Raoh replace 5C for 5A to make the corner hyakuretsu a bit easier since Raoh is a heavy type character.
| |
|
| |
| Possible to Super > basket for less meter:
| |
| Heart, Shin, Rei, Kenshiro, Souther, Raoh
| |
|
| |
|
| |
| ''''Mammuuutt 0 Super Bar Hyakuretsu (2.3 Boost)'''
| |
| {| style="width:100%" cellpadding=10 border="1"
| |
| |
| |
| Standard Dribble Setup > 623+C (6) > 236+CE > dj.B > 2B > Hyakuretsu
| |
| |}
| |
|
| |
|
| |
| '''Corner Cross Up Dribble Setup'''
| |
|
| |
| [https://youtu.be/IydEJabjRNU?list=PL89vfz5rtXupvUYh4VnAwLGQrOJzfV1qt Video Sample]
| |
|
| |
| {| style="width:100%" cellpadding=10 border="1"
| |
| |
| |
| 2D > IAD j.C > 5C > sj.ABC (side switch) > delay 214+D > 66 j.BC > 5C > 623+A > 236+C > 5A > 623+A > 236+C > 96 j.AC > 5Ax5 > Boost > 5Ax5 > 623+C > 236+CE > j.B > 5C > 5A > Dribble
| |
| |}
| |
|
| |
| Possible to cross up on Rei's own corner:
| |
| Rei, Ken, Heart, Juda, Jagi, Souther
| |
|
| |
|
| |
| '''Corner Cross Up Dribble Setup on Toki/Raoh'''
| |
|
| |
| Toki:
| |
|
| |
| [https://youtu.be/0ei7LStVggw?list=PL89vfz5rtXupvUYh4VnAwLGQrOJzfV1qt Video Sample]
| |
|
| |
| {| style="width:100%" cellpadding=10 border="1"
| |
| |
| |
| 2B > 2B > 2D > IAD j.C > delay 5C > j.AC > 236+D > 66 j.AC > 623+A > 236+C > 96 j.B > 2A > 5A > 623+A > 236+C > 96 j.AC > 5Ax5 > E~5A > 5Ax4 > 623+C > 236+E+C > j.B > (236+D > j.B)2x > 5B > IAD j.B > 5A > Dribble
| |
|
| |
| 2B > 2B > 2D > IAD j.C > 5C > j.AC > 236+D > 66 j.BC > 623+A > 236+C > 96 j.BC > 5A > 5A > 623+A > standard mid screen dribble
| |
| |}
| |
|
| |
| Raoh:
| |
|
| |
| {| style="width:100%" cellpadding=10 border="1"
| |
| |
| |
| 2B > 2B > 2D > IAD j.C > 5C > j.AC > 236+D > 66 j.AC > Boost (optional) > 5A / 5C > f.5C > 623+A > 236+C > 96 j.AC > 5A > 623+A > 236+C > IAD j.AC > 5Ax5 > E~5A > 5Ax4 > 623+C > 236+E+C > j.B > 5C > IAD j.B > 5A > Dribble
| |
|
| |
| 2B > 2B > 2D > j.AC or BD > 236+D > 66 j.AC (side switch) > 5A > 5C > 623+A > 236+C > 96 j.C (side switch) > 5A > 5A > 623+A > 236+C > 96 j.AC > Hyakuretsu or Corner Dribble
| |
| |}
| |
|
| |
| Note: On Raoh that's actually easier than the standard corner hyakuretsu.
| |
|
| |
|
| |
| '''Raoh Standard Corner Crossup Dribble'''
| |
|
| |
| [https://youtu.be/F7IP2xEkXVs?list=PL89vfz5rtXupvUYh4VnAwLGQrOJzfV1qt Video Sample]
| |
|
| |
| {| style="width:100%" cellpadding=10 border="1"
| |
| |
| |
| 2B > 2B > 2D > sj.ABC > 236+D > 66 > j.AC (side switch) > 5C > f.5C > 623+A > 236+C > mid screen dribble
| |
| |}
| |
|
| |
| Popularized by KI's [https://www.youtube.com/watch?v=KJd7RAh09SM most beautiful bounce combo] video this is probably Rei most practical setup against Raoh.
| |
|
| |
|
| |
| '''Fireball Corner Crossup for Shin/Ken'''
| |
|
| |
| {| style="width:100%" cellpadding=10 border="1"
| |
| |
| |
| 2B > 2B > 2D > IAD j.C > 5C > f.5C > neutral jump j.AC > 236+D > 66 > j.BC > 236+A+E (side switch) > 5C > f.5C > 623+A > 236+C > 96 j.AC > 5A > 5A > 623+A > 236+C > 96 j.AC > 5A > 5A > 623+C > 236+E+C > j.B > 5C > IAD j.B > 5A > Dribble
| |
| |}
| |
|
| |
|
| |
|
| |
| '''Throw Mid Screen Dribble Setup'''
| |
|
| |
| [https://youtu.be/dgGI-7rUHZg?list=PL89vfz5rtXupvUYh4VnAwLGQrOJzfV1qt Video Sample]
| |
|
| |
| {| style="width:100%" cellpadding=10 border="1"
| |
| |
| |
|
| |
| Throw > IAD j.B > j.C > 5C or sj.ABC > 623+A > 236+C > 96 j.C > Mid Screen Dribble Setup
| |
| |}
| |
|
| |
| Note: Use sj.ABD on Souther.
| |
|
| |
|
| |
| '''Corner Throw Dribble Setup'''
| |
|
| |
| {| style="width:100%" cellpadding=10 border="1"
| |
| |
| |
| Throw > IAD j.B > j.C > 5C > j.AC > 236+D > 66> j.BC > 5C > 623+A > 236+C > 9~C > 5C > 623+A > 236+C > 96 j.AC > 623+C [5] > E~j.C > 5A > 623+EC > 236+EC > j.B > 5C > IAD j.B > 5A > Dribble
| |
| |}
| |
|
| |
|
| |
| '''DP Reversal Dribble Setup'''
| |
|
| |
| [https://youtu.be/KxLYqlfhvYQ?list=PL89vfz5rtXupvUYh4VnAwLGQrOJzfV1qt Video Sample]
| |
|
| |
| {| style="width:100%" cellpadding=10 border="1"
| |
| |
| |
| 623+C [4-6] > E~(j.B) > j.C > 236+D > 66 j.BC > 623+A > 236+C > 96 j.C > Mid Screen Dribble or Hyakuretsu
| |
| |}
| |
|
| |
|
| |
| {| style="width:100%" cellpadding=10 border="1"
| |
| |
| |
| 623+C [5-6] > 236+E~C > 66 > j.BC > land > (5C) > 623+A > 236+C > 96 j.AC > 5A > 623+A > 236+C > 96 > j.AC > Corner Dribble or Hyakuretsu
| |
| |}
| |
|
| |
|
| |
| {| style="width:100%" cellpadding=10 border="1"
| |
| |
| |
| 623+C [5-6] > 6E > switch sides > 236+D > 5C > BnB into corner dribble setup or Hyakuretsu
| |
| |}
| |
|
| |
| KI reversal dribble setup.
| |
|
| |
| Note: This setup puts the opponent back in the corner.
| |
|
| |
|
| |
| '''Air to Air Dribble'''
| |
|
| |
| {| style="width:100%" cellpadding=10 border="1"
| |
| |
| |
| j.ABC > 236+C > 2369+D > 66 > j.BC > land > 623+A > 96 j.C > Mid Screen Dribble
| |
| |}
| |
|
| |
|
| |
| '''Corner Grave Shoot Dribble'''
| |
|
| |
| [https://youtu.be/LBU_rknrG_Q?list=PL89vfz5rtXupvUYh4VnAwLGQrOJzfV1qt Video Sample]
| |
|
| |
| {| style="width:100%" cellpadding=10 border="1"
| |
| |
| |
| 2B > 2B > 2D > AC > sj.D > 236+AE > 5A > 5C > IAD j.AC > 5C > 623+A > 236+C > IAD j.AC > 5A > 623+A > 236+C > 96 j.AC > 5A > Mid Screen Dribble
| |
| |}
| |
|
| |
|
| |
| '''214+C Dribble'''
| |
|
| |
| [https://youtu.be/GU2KEX6Ayuo?list=PL89vfz5rtXupvUYh4VnAwLGQrOJzfV1qt Corner Video Sample]
| |
| [https://youtu.be/R9NxkLRfGkg?list=PL89vfz5rtXupvUYh4VnAwLGQrOJzfV1qt Midscreen Video Sample]
| |
|
| |
| {| style="width:100%" cellpadding=10 border="1"
| |
| |
| |
| [mid screen]214+c > 214+C > sj.C > 214+E+C > land > 5C > j.AC > mid screen dribble
| |
|
| |
| [corner] 214+C > 214+C > sj.D > 236+E+A > 5A > 5C > [j.C > 236+D] or [IAD j.AC > 5C > 623+A] > Mid Screen Dribble
| |
| |}
| |
|
| |
| Note: 214+C can be replaced for a grave shoot.
| |
|
| |
|
| |
| '''J-King Dribble'''
| |
|
| |
| {| style="width:100%" cellpadding=10 border="1"
| |
| |
| |
| 214+C > 214+C > sj.D > 236+B > sj.AD > 236+A+E > switch sides > 5C > 623+A > 236+C > 96 j.AC > 5A > 623+A > 96 j.AC > 5A > Mid Screen Dribble
| |
| |}
| |
|
| |
|
| |
| '''Ground IAD Dribble Setup'''
| |
|
| |
| [https://youtu.be/qJ6dkkL-E8I?list=PL89vfz5rtXupvUYh4VnAwLGQrOJzfV1qt Video Sample]
| |
|
| |
| {| style="width:100%" cellpadding=10 border="1"
| |
| |
| |
| 2B > 5D > IAD j.BD > 236+C > land > 5A > 5C > j.AC > 236+D > 66 j.BC > 623+A > 236+C > 96 j.C > Mid Screen Dribble
| |
| |}
| |
|
| |
|
| |
| '''ZYC Dribble'''
| |
|
| |
| [https://youtu.be/kD8pFbTNV3w?list=PL89vfz5rtXupvUYh4VnAwLGQrOJzfV1qt Video Sample]
| |
|
| |
| {| style="width:100%" cellpadding=10 border="1"
| |
| |
| |
| 2B > 5D > IAD j.BC > d.5C > IAD j.C > 5C > j.C > 236+D > 66 j.BC > 623+A > 236+C > 96 j.C > 2A > 5A > 623+A > 96 j.AC > 5A > MId Screen Dribble
| |
| |}
| |
|
| |
|
| |
| '''Ground IAD j.BC Setup'''
| |
|
| |
| {| style="width:100%" cellpadding=10 border="1"
| |
| |
| |
| IAD j.BC > j.ABC > 236+D > 66 BC > 623+A > 236+C > 96 j.C > Mid Screen Dribble
| |
| |}
| |
|
| |
|
| |
| '''Counter 236236+C'''
| |
|
| |
| {| style="width:100%" cellpadding=10 border="1"
| |
| |
| |
| CH Super > dash > 5B > (IAD j.B > 5B) >IAD j.D > CD > E~5A > 5C > mid screen dribble
| |
| |}
| |
|
| |
|
| |
| '''Nightman Dribble'''
| |
|
| |
| [https://youtu.be/DYkAZ_DqeV4?list=PL89vfz5rtXupvUYh4VnAwLGQrOJzfV1qt Video Sample]
| |
|
| |
| {| style="width:100%" cellpadding=10 border="1"
| |
| |
| |
| 2B > 5D > IAD j.BC > dash > 5C > hj.ABD (cross up) > 236+D > 66 j.BC > mid screen dribble
| |
| |}
| |
|
| |
|
| |
| '''Corner 37 Dribble with E~j.B (Standard Setup)'''
| |
| {| style="width:100%" cellpadding=10 border="1"
| |
| |
| |
| 2B > 2B > 2D > IAD j.C > 5C > [5C] > j.A[B]C > 236+D > 66 j.B > j.C > 5C > 623+A > 236+C > 96 j.AC > 5C > 623+A > 236+C > 96 j.AC > 5C > 623+C (6) > E~j.C > 623+C (5) > E~j.B > 5C > IAD j.B > 5A > d.5A > Dribble
| |
| |}
| |
|
| |
| Notes: Easy on Rei/Juda/Heart/Raoh/Toki (replace 5C with 5A)
| |
|
| |
|
| |
| '''Version #2'''
| |
|
| |
| [https://youtu.be/7p0hA7meHec Video Sample]
| |
|
| |
| {| style="width:100%" cellpadding=10 border="1"
| |
| |
| |
| 2B > 2B > 2D > IAD j.C > 5C > IAD > j.AC > 5C > 623+A > 236+C > 9~C > [5C > 623+A > 236+C > 96 j.AC] x2 > 623+C (6 hits) > E~j.C > 623+C (5 hits) > E~j.B > 5C > IAD j.B > 5A > Dribble
| |
| |}
| |
|
| |
|
| |
| '''Raoh Special Corner Dribble (AKA: Mammuut special)'''
| |
|
| |
| {| style="width:100%" cellpadding=10 border="1"
| |
| |
| |
| 2B > 2B > 2D > IAD j.C > 5C > j.AC > 236+D > 66 j.BC > [5C > 623+A > 236+C > 96 j.AC] 2x > E (switch sides) > 5Ax4 > E > 5Ax7 > 623+C > 236+CE > dj.A > 236+C > land > 5A > d.5A > dribble
| |
| |}
| |
|
| |
|
| |
| '''Mid Screen Dribble with j.C+E or 214+C+E'''
| |
|
| |
| {| style="width:100%" cellpadding=10 border="1"
| |
| |
| |
| 2B > 2B > 2D > [IAD j.C > 214+C+E] or [j.C+E] > 5C > Mid Screen Dribble
| |
| |}
| |
|
| |
| ==Mix Ups/Blockstrings==
| |
|
| |
| {| style="width:100%" cellpadding=10 border="1"
| |
| |
| |
| 2B > 2D > IAD j.D/j.B or Boost 2B
| |
|
| |
| 2B > 5D > IAD > j.B > j.D > 2B > 2147+CE > grab or 2B
| |
|
| |
| J.2B > Boost > j.B > Mix Up
| |
|
| |
| 2B > 2D > 9E > air dash backwards > j.D > Boost
| |
|
| |
| 2B > 2D > jump forward > 214+CE cross up
| |
|
| |
| 2B > jump forward j.B > air dash backwards > j.D > Boost
| |
|
| |
| 2B > 2D > IAD j.D > 236+D (double overhead)
| |
|
| |
| Basic BNB > 9~C > 5C > 623+A > 236+D > 66 > 236+B (corner side switch ender) > cross IAD j.B or j.2B
| |
|
| |
| Basic BNB > 623+A (side switch) > 236+C > jump cancel backwards > double jump forward > j.B or empty jump 2B (Toki only coner mixup)
| |
|
| |
| Basic BNB > 623+A (side switch) > 236+C > 96 j.B > 214+C > air j.2B > 2B (Toki only coner mixup)
| |
|
| |
| Basic BNB > 623+A >236+C > 99D (otg) > 214+C (barrier) (safe against some reversal options)
| |
| |}
| |
|
| |
|
| |
| ==Alternative Starters for BNB==
| |
|
| |
| {| style="width:100%" cellpadding=10 border="1"
| |
| |
| |
| 1) 2D > j.D > 2369+C 2x > 2369+D > 66 j.BC > 5C > 623+A loop
| |
|
| |
| 2) 2D > j.C > 236+C > 9C > 236+C > dj.ABC > land > 623+A loop
| |
|
| |
| 3) 2D > IAD j.C > 236+C > dj.ABC > land > 623+A loop
| |
|
| |
| 4) 2D > IAD j.C > 5C > j.AC > 236+D > 66 j.BC > 5C > 623+A loop (standard)
| |
|
| |
| 5) 2D > IAD j.C > 5C > IAD j.AC > 5C > 623+A loop (IAD j.AC loop version)
| |
| |}
| |
|
| |
| ==Matchups==
| |
| ===Kenshiro===
| |
| X
| |
|
| |
| ===Raoh===
| |
| X
| |
|
| |
| ===Toki===
| |
| X
| |
|
| |
| ===Shin===
| |
| X
| |
|
| |
| ===Rei===
| |
| X
| |
|
| |
| ===Juda===
| |
| X
| |
|
| |
| ===Thouther===
| |
| X
| |
|
| |
| ===Jagi===
| |
| X
| |
|
| |
| ===Mr. Heart===
| |
| X
| |
|
| |
| ===Mamiya===
| |
| X
| |
|
| |
|
| |
|
| {{Navbox-HNK}} | | {{Navbox-HNK}} |
| [[Category:Hokuto no Ken]] | | [[Category:Hokuto no Ken]] |
Introduction
Rei is a speedy, movement-based character, having access to a wide array of air moves and the ability to triple jump. He has very powerful normals, many being jump-cancelable, which allow him to keep up the pressure without the use of gauge. He has a strong defense as well, with a great uppercut reversal move as well as his Danko super, which essentially works to deny the opponent the chance to do a wakeup mixup on you. His star-taking ability is quite good, but he also has very practical 100% combos. While using Rei to his full potential requires a great deal of player skill and ad lib, he is also the perfect beginner character, with an easy to understand offense as well as relatively simple and damaging combos.
That being said, let us start this section off by listing Rei's main strengths and weaknesses.
|
|
| Pros |
Cons |
- Is the only character is the game with an air throw and the ability to triple jump
- Good at getting out of pressure thanks to his dragon punch and Danko super
- Most of his normal moves can be Jump Canceled
- Decent star removing abilities
- Has many practical 100% combos
|
- Has the longest crouching recovery in the game; some character's have crouching-Rei-specific infinites
|
Before diving right into the combos be sure to familiarize yourself with Rei's special/super moves and important normals.
Normal Moves
Standing
Close A
5F Startup, 3F Active, +2F on block
Tied for one of Rei's fastest buttons. It is mainly used as used as an anti air against low airdashes and combo filler in midscreen combo routes. Jump cancelable
Far A
5F Startup, 3F Active, +4F on block
The other 5F normal. Same usage as close A but is smaller vertically. Whiffs on Mamiya, Rei, Shin, and Jagi crouch blocking. Whiffs on Souther and Toki neutral crouching. Jump cancelable
Close B
8F Startup, 4F Active, +3 on block
Low kick that is a mid. Not much usage from this button due to it's lack of hitstun. Jump cancelable
Far B
7F Startup, 4F Active, +4 on block
Excellent midrange poke. Confirms into 2D except on crouching Jagi. Jump cancelable
Close C
7F Startup, 6F Active, -3 on block
Excellent anti air. Whiffs on crouching characters. Jump cancelable
Far C
12F Startup, 4F Active, -2 on block
Not really used as a poke. Mainly combo filler. Jump cancelable
Close D
9F Startup, 4F Active, -3 on block
Excellent button for pressure with a lot of blockstun. Can go into instant airdash or 2D. Combos into banishing attack except on crouching Jagi where you would use 2D. Also combos into IAD j.B. Jump cancelable
Far D
14F Startup, 3F Active, 0 on block
Low invulnerable button. Can confirm into banishing strike by kara canceling 2D into CD as 2D~2C. Also confirms into Grave Shoot. Surprisingly not jump cancelable
Crouching
A
6F Startup, 3F Active, +1 on block
Faster crouching normal. Jump cancelable
B
7F Startup, 3F Active, +6 on block
A good low that is jump cancelable and plus. Confirms into 5D and 2D. 2B 2D doesn't work on crouching Jagi
C
12F Startup, 4F Active, -2 on block
Cancels into itself. Combo filler
D
14F Startup, 5F Active, -5 on block
Rei's furthest reaching low. Jump cancelable
Air
A
4F Startup, 16F Active
Rei's Fastest air normal. Good as an air to air.
B
5F Startup, 20F Active
A very active air normal that is great for air to airs and the fastest button that will hit a crouching character from an instant air dash.
C
9F Startup, 6F Active
"Whiffed air throw". Hits above Rei. Mainly used to hitconfirm from 2D
D
11F Startup, 5F Active
Air to ground button that has a lot of blockstun and hitstun
Other
6A
24F Startup, 4F Active, -4 on block
No real reason to use this but it's there if you want to.
Throw
4F Startup
Jump Cancelable
BD Throw
9F Startup, 4F Active
Also jump cancelable
Grave Shoot
16F Startup, 7F Active, -4 on block
Good hitbox that also reflects projectiles. Also moves slightly forward.
Heavy Strike
41F Startup, 4F Active
Standard heavy attack unblockable
Banishing Strike
18-33F Startup, 4F Active, -8 on block
Charged Bani 34-38F Startup, 4F Active
Special Moves
Hien Ryubu
(Air) 236A or B
A version: 11F Startup, Active until it touches the floor, +25F after reflection
B version: 11F Startup, Active until it touches the floor, +90F after reflection
Excellent air to ground projecctile with utility in: stalling in the air to mess up anti air timing, having an active projectile to follow behind in order force a response from the opponentand start pressure, and being a mixup tool with boost. j236A version bounces up off of the ground. j236B glides on the floor.
Nanto Gekisei Kakubu
623A or C
623A: 8F Startup, 14F Active
Air 623A: 8F Startup, 14F Active
623C: 5F Startup, 22F Active
Air 623C: 9F Startup, 25F Active
Grounded A version is cancelable into air special moves but has no invul. Grounded C version is invincible and is used in basket combos. Air C version is mainly used as a reaction to the universal guard cancel while still in the air
Nanto Jinshu Suizan
(Air) 236D / 214D
15F Startup, Active until landing
Used as combo filler and an overhead option. Is airdash cancelable if at jump height. Wall bouncess on counter hit.
Nanto Kyoukaku Shoubu
(Air) 214C
26F Startup, Active until landing
Rei creates a shield around himself with a hitbox that disappears when Rei lands on the ground, it hits, or is blocked. It eats some projectiles such as Souther's 623A
Nanto Kakuyokujinzan

(Air) 236C
19F Startup, 20F Active
A rushing mid attack done in the air that knocks up on normal hit and wallbounce on counter hit. Is jump cancelable on hit or block. Integral in all of Rei's combos by airdash canceling or jump canceling with a button and itself
Nanto Koharyu
214C -> 214C
214C: 20F Startup, 12F Active, -9 on block
214C 214C: 12 Startup, 5F Active, -11 on block
A two part move mainly used to beat guard cancels. 1st portion of the move has armor. 2nd input launches the opponent in a grave shoot state.
Nanto Seiki Mouha
236236A (Uses 1 Bar Aura)
38F Startup, 27F Active
Reversal super with some invulnerability, great damage, and good hykuretsu combo potential. Attacks in the super can also beat projectiles
Danko Sousaiken
236236C (Uses 1 Bar Aura)
30-143F Startup, 50-200F Active
Rei charges up the attack with one hit of armor, flies up with invincibility, and then throws 3 projectiles that bounce around the screen. Charging the super increased the damage and the duration of the projectiles on the screen.
Kubuenrizan
(Air) 2363214D (Uses 1 Bar Aura)
37F Startup, 4-24F Active
A super mainly used to take as many stars as possible after A+C or 214C 214C at the end of a round. Has a little bit of invul that can go through guard cacncele but it isn't generally used in this manner
Hishou Hakurei

236CD (Fatal KO)
13F Startup, 30F Active
A FKO that can't be used as an OTG. If used too late outside of a banishing strike combo the gravity may be too severe for the 2nd hit too connect.
Game Navigation


