|
|
| Line 1: |
Line 1: |
| | {{Infobox Character HNK |
| | |name=Mamiya |
| | }} |
| | |
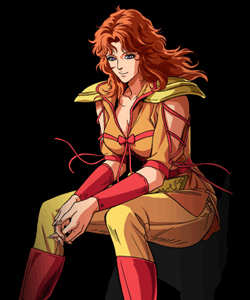
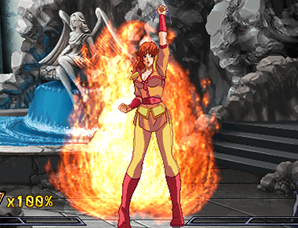
| [[File:Mamiyaportrait.jpg|right]] | | [[File:Mamiyaportrait.jpg|right]] |
| ==Introduction== | | ==Introduction== |
| Line 153: |
Line 157: |
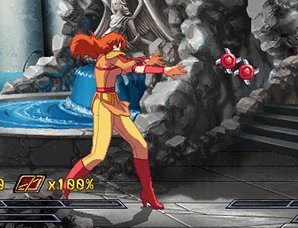
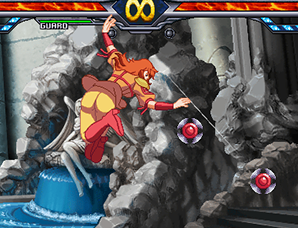
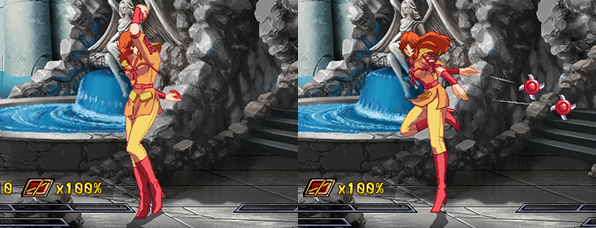
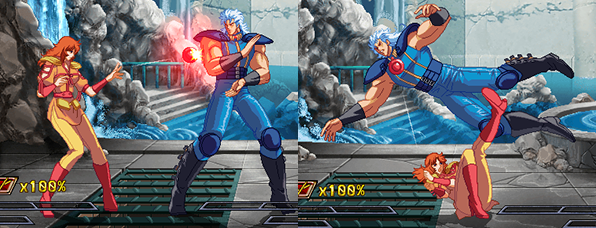
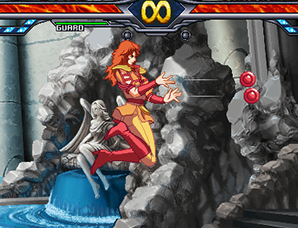
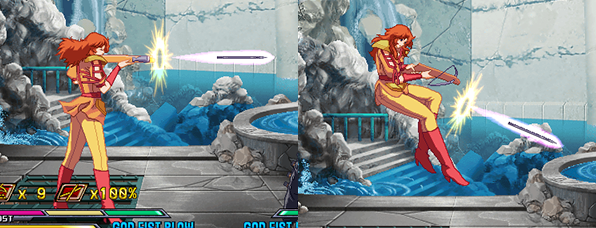
| '''236CD (Fatal KO)'''<br> | | '''236CD (Fatal KO)'''<br> |
| [[File:Mamiya-FKO.png]] | | [[File:Mamiya-FKO.png]] |
|
| |
| ==Combos==
| |
| ==Basic Combos==
| |
| ===Combos without banishing strike===
| |
| {| style="width:100%" cellpadding=10 border="1"
| |
| | 2B > 2D > 623D
| |
| |}
| |
| Better than nothing.
| |
|
| |
|
| |
| {| style="width:100%" cellpadding=10 border="1"
| |
| | 2B > 2D > AC > JA > JB > JC > air 236A > air B+D
| |
| |}
| |
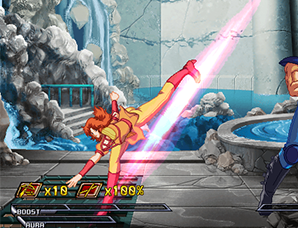
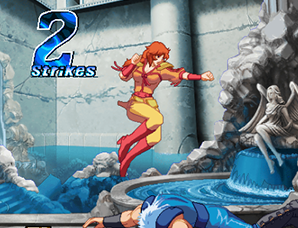
| Basically a corner combo. Can change a bit depending on the other character. 2 stars.
| |
|
| |
|
| |
| {| style="width:100%" cellpadding=10 border="1"
| |
| | 2B > 2D > AC > JA > JB > JC > air 236A > land > C+D
| |
| |}
| |
| Another corner combo. Banishing strike hits OTG. Leaves the opponent in the corner.
| |
|
| |
|
| |
| {| style="width:100%" cellpadding=10 border="1"
| |
| | 2B > 2C > 236C > B
| |
| |}
| |
| 236C > B needs to be done as fast as possible. Getting it blocked basically means dying. Won't combo if her spike gauge is empty. Gives a good okizeme and does not require boost.
| |
|
| |
|
| |
| {| style="width:100%" cellpadding=10 border="1"
| |
| | > 2B > 2C > 236C > B> 5A > 623D
| |
| |}
| |
| Adds a bit of damage. Doesn't work on Juda, hard on Toki.
| |
|
| |
|
| |
| {| style="width:100%" cellpadding=10 border="1"
| |
| | > (close to corner) 2B > 2C > 236C > B > 2A > cC > cD(1~2) > C+D or land >236D meaty
| |
| > (close to corner) 2B > 2C > 236C > B > 2A > cC > A+C > JA > air 236A > JA > JB > JD > air B+D or land > 236D meaty
| |
| > (close to corner) 2B > 2C > 236C > B > 2A > cC > 236236A > B*2 > land > A+C > JA > air 236A > JA > JB > JD > air B+D or land > 236D meaty
| |
| |}
| |
| A+C is easy to do on Kenshiro, Raoh, Toki, Rei, Mamiya.
| |
|
| |
|
| |
| ===Banishing Strike Combos===
| |
| ====Starters====
| |
| {| style="width:100%" cellpadding=10 border="1"
| |
| | 2B > 2C > E~C+D > 6~
| |
| |}
| |
| Basic starter. Won't combo if her spike gauge is empty.
| |
|
| |
|
| |
| {| style="width:100%" cellpadding=10 border="1"
| |
| | > fD (hit confirm) > C+D+E > 6~
| |
| |}
| |
|
| |
|
| |
| ====Wall Combos====
| |
| {| style="width:100%" cellpadding=10 border="1"
| |
| | ~2C > A+C > air 236A > land (small dash) > 5A > JB > JB > land > JB > JB > land > 236236A~
| |
| |}
| |
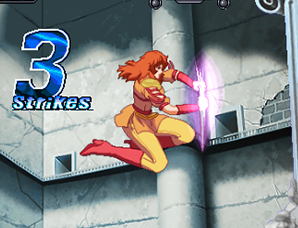
| Basic 3 stars combo. Depending on the character, might have to change 5A to 5B. JB > JB > land can be looped up to 4 times. Had a 5A if you feel like you're going to cross-up. 236236A follow-ups will be written after.
| |
|
| |
|
| |
| {| style="width:100%" cellpadding=10 border="1"
| |
| | ~2C > A+C > air 236A > 2C > 236236A~
| |
| |}
| |
| Easier version that works on everyone.
| |
|
| |
|
| |
| ====236236A follow-ups====
| |
| {| style="width:100%" cellpadding=10 border="1"
| |
| | ~A*n > C > B > A*n > C > B~
| |
| |}
| |
| 5 or 6 times A each time. C > B is used to manage your opponent's height.
| |
|
| |
|
| |
| {| style="width:100%" cellpadding=10 border="1"
| |
| | ~B*2 > land > A+C > JA > JC > JD (1 hit) > air 236A > JA > JB > JD > air B+D
| |
| |}
| |
| 236236A into Grave combo. 3 stars even without banishing strike.
| |
|
| |
|
| |
| {| style="width:100%" cellpadding=10 border="1"
| |
| | ~B > land > backdash > 236D
| |
| |}
| |
| Combo into meaty 236D. Can go for A+B for okizeme after the opponent blocks the 236D.
| |
|
| |
|
| |
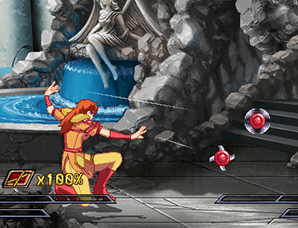
| {| style="width:100%" cellpadding=10 border="1"
| |
| | ~A > B > land > FKO
| |
| |}
| |
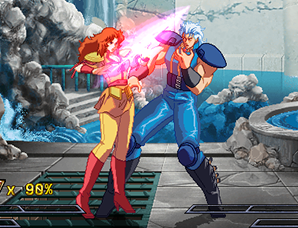
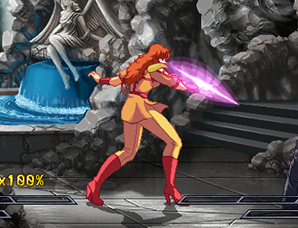
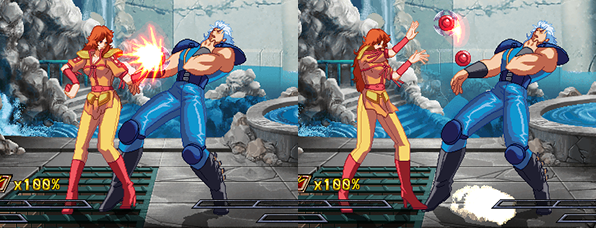
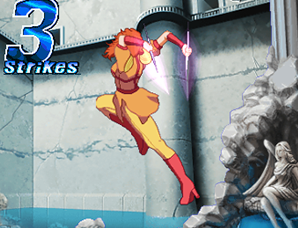
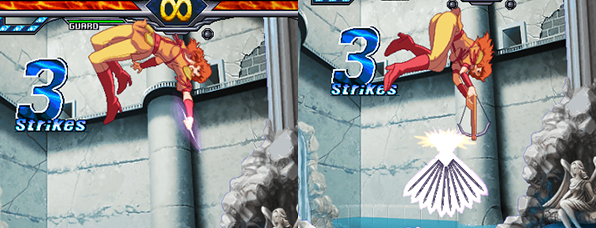
| 236236A into FKO. There are 2 patterns.
| |
|
| |
| ''A''
| |
| Corner :
| |
| Requires at least 2 arrows.
| |
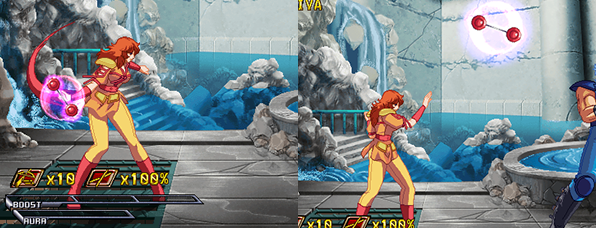
| The bottle hits > One arrow upwards to hit the opponent > Another arrow upward to hit both the bottle and the opponent.
| |
| There is no need to change the direction mamiya is shooting at.
| |
|
| |
| ''B''
| |
| Midscreen :
| |
| Requires at least 3 arrows.
| |
| After hitting the B, try to move under your opponent.
| |
| Launch your FKO and shoot an arrow > shoot an arrow to hit the opponent > lower your angle, shoot one more to hit the bottle.
| |
| Lowering the angle allows the FKO to hit farther away.
| |
|
| |
|
| |
| ===Other Basic Combos===
| |
| ====Combos from overhead====
| |
| {| style="width:100%" cellpadding=10 border="1"
| |
| | 6A > A+C+E > JA > JD > air 236A > air B+D
| |
| |}
| |
| Combo from a hit confirmed 6A
| |
|
| |
|
| |
| {| style="width:100%" cellpadding=10 border="1"
| |
| | instant air dash JD > land > 2B~
| |
| |}
| |
| Good way to engage offense from mid range. Mamiya's air dash is quite fast, so it's hard to see and can easily convert into a combo.
| |
|
| |
|
| |
| ====Anti air Combos====
| |
| {| style="width:100%" cellpadding=10 border="1"
| |
| | 2C > A+C > JA > JD > air 236A > air B+D
| |
| |}
| |
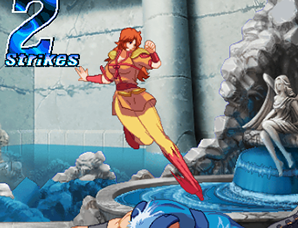
| 2 stars. 3 stars if 2C hits counter. Depending on the height after 236A, you may need to add a JA.
| |
|
| |
|
| |
| {| style="width:100%" cellpadding=10 border="1"
| |
| | 2C > C+D > E~2C > A+C > JA > air B+D
| |
| |}
| |
| 3 stars. Requires boost.
| |
|
| |
|
| |
| {| style="width:100%" cellpadding=10 border="1"
| |
| | JA*n > air B+D
| |
| |}
| |
| Conversion from air to air.
| |
|
| |
|
| |
| ====RELOAD Combos====
| |
| {| style="width:100%" cellpadding=10 border="1"
| |
| | 2B > 2D > 214A or 214C
| |
| |}
| |
| Most of the time same if your opponent doesn't have boost.
| |
|
| |
|
| |
| {| style="width:100%" cellpadding=10 border="1"
| |
| | 236236A > B > land > 214A or 214C
| |
| |}
| |
| Kind of like the meaty 236D setup. Choose depending on the situation.
| |
|
| |
|
| |
| {| style="width:100%" cellpadding=10 border="1"
| |
| | 2B > 2C > E~C+D > 6 > 2C > A+C > air 236A > land > JB > JB (cross-up) > land > 214A or 214C
| |
| |}
| |
| Not a combo you really try to go for, but this is something you can do if you happen to cross-up during a banishing strike combo.
| |
|
| |
|
| |
| {| style="width:100%" cellpadding=10 border="1"
| |
| | 2B > 2C > E~C+D > 6 > 2C > A+C > air 236A > land > JB > JB (cross-up) > land > 236236A > wait a bit and release the bike > 214A or 214C
| |
| |}
| |
| Hard on Shin. Can get all the 236236C hits into meaty 236D against Juda and Jagi.
| |
|
| |
|
| |
| ==Hyakuretsu and Dribble Combos==
| |
| ===Basic Starters===
| |
| {| style="width:100%" cellpadding=10 border="1"
| |
| | ~2D > A+C > JA > JB > JD (2 hits) > air 236A > falling JD > land > 2D (1 hit) > 236236A~ (Except Toki)
| |
|
| |
| ~2D > A+C > JA > JB > JD (2 hits) > air 236A > falling JD > land > A > cD (1 hit) > Hitstop cancel 236236A~
| |
|
| |
| ~2D > A+C > JA > JB > JD (2 hits) > air 236A > falling JD > land > cD (1 hit) > 236236A~ (Kenshiro only)
| |
| |}
| |
| Hold back after 236A against Kenshiro to get the needed spacing when going for 2D. Too hard to do in a real match against Toki, don't even bother trying. Use Toki specific combos instead.
| |
|
| |
|
| |
| ====After 236236A====
| |
| When going for a Hyakuretsu combo, you want to hit the falling B as low as possible.
| |
|
| |
|
| |
| =====Spike 30% A+C into Hyakuretsu=====
| |
| {| style="width:100%" cellpadding=10 border="1"
| |
| | B*3 > A*3 > C > B*3 > A*3 > falling B > Hyakuretsu
| |
| |}
| |
| Against Kenshiro, Rei, Shin, Juda, Raoh
| |
|
| |
|
| |
| {| style="width:100%" cellpadding=10 border="1"
| |
| | B*3 > A*2 > C > B*3 > A*3 > falling B > Hyakuretsu
| |
| |}
| |
| Against Thouther
| |
|
| |
|
| |
| =====Spike 50% A+C into Hyakuretsu=====
| |
| {| style="width:100%" cellpadding=10 border="1"
| |
| | B*2 > A*1 > C > B*3 > A*1 > C > B*3 > A*4 > falling B > Hyakuretsu
| |
| |}
| |
| Against Kenshiro, Rei, Shin, Juda, Raoh, Jagi hit at the top of the jump.
| |
| Against Toki, Heart hit as soon as possible.
| |
|
| |
|
| |
| =====Spike 0% A+C into Hyakuretsu=====
| |
| {| style="width:100%" cellpadding=10 border="1"
| |
| | B*3 > A*2 > delay > B*3 > A*3 > falling B > Hyakuretsu
| |
| |}
| |
| Against Kenshiro, Rei, Shin, Juda, Raoh
| |
|
| |
|
| |
| =====Spike 50% A+C into Dribble=====
| |
| {| style="width:100%" cellpadding=10 border="1"
| |
| | B*3 > A*4 > C > B*4 > A*1 > C > B*5 > D > land > neutral jump JB > air dash JB > land > 2A > Dribble
| |
| |}
| |
| Against Kenshiro, Juda hit at the top of the jump
| |
| Against Rei hit just as soon as you start falling
| |
|
| |
|
| |
| =====Spike 70% A+C into Dribble=====
| |
| {| style="width:100%" cellpadding=10 border="1"
| |
| | B*3 > A*2 > C > B*3 > A*1 > C > B*4 > A*1 > C > B*6 > land > dash 2A > Dribble
| |
| |}
| |
| Against Rei, Shin, Raoh hit just as soon as you start falling
| |
|
| |
|
| |
| After the 236236A part, you want to use 2A and fB since both are the fastest. fB hits farther.
| |
| For example, against Rei you can get up to 25 hits without using boost. Could be either 2A*24 > fB*1 or 2A*16 > fB*9. The only thing you have to be aware is that getting cB is bad.
| |
| To make it easier to remember, we'll go as much as possible for 2A*16 or 2A*13.
| |
|
| |
|
| |
| ====236236A hitting a grounded opponent into Dribble====
| |
| =====Kenshiro, Rei=====
| |
| {| style="width:100%" cellpadding=10 border="1"
| |
| | B*2 > A*5 > C > B*2 > A*4 > C > B*3 > A*1 > C > B*4 > A*1 > C > B*5 > D > Dribble
| |
| |}
| |
|
| |
|
| |
| =====Shin=====
| |
| {| style="width:100%" cellpadding=10 border="1"
| |
| | B*2 > A*4 > C > B*2 > A*4 > C > B*3 > A*2 > C > B*4 > A*1 > C > B*5 > D > Dribble
| |
|
| |
| B*2 > A*7 > C >B*3 > A*2 > C > B*3 > A*1 > C > B*4 > A*1 > C > B*5 > D > Dribble
| |
| |}
| |
|
| |
|
| |
| =====Jagi=====
| |
| {| style="width:100%" cellpadding=10 border="1"
| |
| | B*2 > A*6 > C > B*2 > A*3 > C > B*3 > A*1 > C > B*4 > A*1 > C > B*5 > D > Dribble
| |
| |}
| |
|
| |
|
| |
| =====Thouther=====
| |
| {| style="width:100%" cellpadding=10 border="1"
| |
| | B*2 > A*5 > C > B*2 > A*2 > C > B*3 > A*1 > C > B*3 > A*1 > C > B*4 > D > E > Dribble
| |
| |}
| |
|
| |
|
| |
| =====Raoh=====
| |
| {| style="width:100%" cellpadding=10 border="1"
| |
| | B*2 > A*6 > C > B*2 > A*2 > C > B*3 > A*2 > C > B*4 > A*1 > C > B*5 > D > Dribble
| |
| |}
| |
|
| |
|
| |
| =====Juda=====
| |
| {| style="width:100%" cellpadding=10 border="1"
| |
| | B*1 > A*5 > C > B*2 > A*2 > C > B*3 > A*3 > C > B*4 > A*2 > C > B*5 > D > Dribble
| |
| |}
| |
|
| |
|
| |
| =====Toki, Heart=====
| |
| {| style="width:100%" cellpadding=10 border="1"
| |
| | B*1 > A*6 > C > B*1 > Delay > A*2 > C > B*2 > A*1 > C > B*3 > A*1 > C > B*4 > E > D > Dribble
| |
| |}
| |
|
| |
|
| |
| ===Hyakuretsu Combos against Toki===
| |
| ====A+C into Hyakuretsu====
| |
| {| style="width:100%" cellpadding=10 border="1"
| |
| | ~2D > A+C > JA > JB > JD (2 hits) > air 236A > falling JD > (cD (1 hit)) > 236236A > B*2 > A*1 > C > B*2 > delay > A*1 > C > B*3 > A*4 > falling B > Hyakuretsu
| |
| |}
| |
|
| |
|
| |
| {| style="width:100%" cellpadding=10 border="1"
| |
| | ~2D > A+C > cD (2 hits) > 236236A > B*2 > A*2 > C > B*2 > A*1 > C > B*4 (last one whiffs) > A*1 > C > B*3 > D > land > 6C > 5A > B > 2A~
| |
| |}
| |
| Requires 70+% spike and 1 Boost. Corner only.
| |
|
| |
|
| |
| ====236236A hitting a grounded opponent into Hyakuretsu====
| |
| =====Spike 60+% 8 arrows=====
| |
| {| style="width:100%" cellpadding=10 border="1"
| |
| | ~2C > E~C+D > 236236A > B*1 > A*7 > C > B*1 > delay > A*2 > C > B*2 > A*2 > E > falling B > Hyakuretsu
| |
| |}
| |
|
| |
|
| |
| =====Spike 60+% 8 arrows without delay that also works against Heart=====
| |
| {| style="width:100%" cellpadding=10 border="1"
| |
| | ~2C > E~C+D > 236236A > B*1 > A*6 > C > B*2 > A*1 > C > B*2 > A*2 > E > falling B > Hyakuretsu
| |
| |}
| |
|
| |
|
| |
| ===Setups while cornered===
| |
| What is written here is for no air hit before 236236A.
| |
| Reduce one of the numbers between () by the number of air hits before the launching 236236A hit.
| |
| Hard to do against Raoh without any air hit.
| |
|
| |
| =====Kenshiro, Rei=====
| |
| {| style="width:100%" cellpadding=10 border="1"
| |
| | ~B*2 > A*(5) > C > B*2 > A*(4) > C > B*3 > A*1 > C > B*4 > A*1 > C > B*5 > D > dash under A > Hyakuretsu
| |
| |}
| |
|
| |
|
| |
| =====Shin=====
| |
| {| style="width:100%" cellpadding=10 border="1"
| |
| | ~B*2 > A*(4) > C > B*2 > A*(4) > C > B*3 > A*2 > C > B*4 > A*1 > C > B*5 > D > dash under > Rising JB > Falling JB > Dribble
| |
| |}
| |
|
| |
|
| |
| =====Raoh=====
| |
| {| style="width:100%" cellpadding=10 border="1"
| |
| | ~B*2 > A*(6) > C > B*2 > A*2 > C > B*3 > A*2 > C > B*4 > A*1 > C > B*5 > D > dash under > Rising JB > Falling JB > Dribble
| |
| |}
| |
|
| |
|
| |
| ===Other Dribble and Hyakuretsu setups===
| |
| =====No boost Spike 50% Basket from when you cannot get boost=====
| |
| {| style="width:100%" cellpadding=10 border="1"
| |
| | ~2D > A+C > JA > JB > JD (2 hits) > air 236A > falling JD > land > 2D (1 hit) > 236236A > B*3 > A*2 > C > B*3 > A*1 > C > B*4 > A*3 > falling B > land > 2A~
| |
| |}
| |
| Against Kenshiro, Rei, Shin, Juda, Raoh.
| |
| Starting from 2D against Kenshiro and Juda doesn't increase chikuseki enough.
| |
| Doesn't work straight from 2C for the same reason. 1 hit before 2D is enough though.
| |
|
| |
|
| |
| {| style="width:100%" cellpadding=10 border="1"
| |
| | ~2D > A+C > JA > JB > JD (2 hits) > air 236A > falling JD > land > 2D (1 hit) > 236236A > B*3 > A*2 > C > B*3 > A*1 > C > B*4 > A*3 > D (whiffs) > falling C > land > 6C4 > A > 2A~
| |
| |}
| |
| Against Kenshiro, Rei, Shin, Juda, Raoh.
| |
| Starting from 2D against Kenshiro and Juda doesn't increase chikuseki enough.
| |
| Doesn't work straight from 2C for the same reason. 1 hit before 2D is enough though.
| |
| Can get up to 1.2 boost against Kenshiro, Rei and Raoh.
| |
| Against Kenshiro, Rei and Juda, falling B instead of falling C is also OK.
| |
|
| |
|
| |
| =====No boost Spike 0%=====
| |
| {| style="width:100%" cellpadding=10 border="1"
| |
| | ~2D > A+C > JA > delay > JA > JB > JD (2 hits) > air 236A > falling JD > land > 2D (1 hit) > 236236A > B*3 > A*2 > B*3 > A*2 > B*4 > A*3 > D (whiffs) > falling C > land > 6C4 > A > 2A~
| |
| |}
| |
| Against Kenshiro, Raoh, Shin, Rei, Juda. Corner combo.
| |
| Hard to do on Shin.
| |
| To avoid crossing your opponent, doing a neutral jump after A+C, and then holding 6 after the first JA is better.
| |
|
| |
|
| |
| =====1 Boost Spike 70+% against Heart=====
| |
| {| style="width:100%" cellpadding=10 border="1"
| |
| | ~2D > A+C > cD (2 hits) > 236236A > B*1 > A*2 > C > B*2 > A*1 > C > B*3 > A*1 > C > B*3 > D > land > 6C4 > 2A~
| |
| |}
| |
| Corner only.
| |
|
| |
|
| |
| ====Dribbles from 2C anti air====
| |
| {| style="width:100%" cellpadding=10 border="1"
| |
| | ~2C > A+C > JA > JB > JD (2 hits) > air 236A > falling JD > land > cD (1 hit) > Hitstop cancel 236236A > B*2 > A*1 > C > B*3 > A*1 > C > B*3 > A*1 > C > B*4 > D > land > 6C4 > 2A~
| |
| |}
| |
| Against Kenshiro, Rei, Raoh, Juda, Shin
| |
|
| |
|
| |
| =====No spike Dribble=====
| |
| {| style="width:100%" cellpadding=10 border="1"
| |
| | ~2C > A+C > JA > JB > JD (2 hits) > air 236A > falling JD > land > cD (1 hit) > Hitstop cancel 236236A > B*2 > A*1 > B*2 > A*1 > B*2 > A*1 > B*3 > A*1 > B*4 > D > land > 6C4 > 2A~
| |
| |}
| |
| If the height is bad, you can go for B*3 > D > land > 6C into Hyakuretsu instead.
| |
|
| |
|
| |
| =====Raoh=====
| |
| {| style="width:100%" cellpadding=10 border="1"
| |
| | ~JA > JB > JD (1 hit) > air 236A~E > land > cD (1 hit) > Hitstop cancel 236236A > B*2 > A*1 > C > B*2 > A*1 > C > B*3 > A*1 > C > B*3 > A*1 > C > B*4 > D > land > 6C > 2A~
| |
| |}
| |
|
| |
|
| |
| =====Spike 0%=====
| |
| {| style="width:100%" cellpadding=10 border="1"
| |
| | ~JA > JB > JD (1 hit) > air 236A~E > land > cD (1 hit) > Hitstop cancel 236236A > B*2 > A*1 > B*2 > A*1 > B*2 > A*1 > B*3 > A*1 > B*4 > D > land > 6C > 2A~
| |
| |}
| |
|
| |
|
| |
| ===2A*n ・ fB*n===
| |
| {| style="width:100%" cellpadding=10 border="1"
| |
| | Kenshiro 16 ・ 6
| |
|
| |
| Shin 16 ・ 5
| |
|
| |
| Rei 16 ・ 9
| |
|
| |
| Thouther 16 ・ 5
| |
|
| |
| Raoh 13 ・ 6
| |
|
| |
| Heart 13 ・ 0
| |
|
| |
| Toki 13 ・ 4
| |
|
| |
| Jagi 10 ・ 2
| |
|
| |
| Juda 2 ・ 20
| |
| |}
| |
| Against Juda 2A only hits twice, so there will be some cB too.
| |
|
| |
|
| |
| ===After increasing hit count with Hyakuretsu===
| |
| {| style="width:100%" cellpadding=10 border="1"
| |
| | Around 75~85 hits : fB > 2D > 236236A
| |
|
| |
| Around 85~95 hits : fB > delay > fB > fD > JA
| |
|
| |
| Around 95~115 hits : fB > fD > JA
| |
|
| |
| Over 100 hits : fB > fC > 214B
| |
| |}
| |
|
| |
|
| |
| ==Fatal KO Combos==
| |
| {| style="width:100%" cellpadding=10 border="1"
| |
| | 2B > 2D > FKO
| |
| |}
| |
| Mainly a corner combo. Can work midscreen too, but it gets harder. The farther you are the harder.
| |
|
| |
|
| |
| {| style="width:100%" cellpadding=10 border="1"
| |
| | 2B > 2D > A+C > JA > JC > JD > 236A > land > FKO
| |
| |}
| |
| 1 star version of the previous combo.
| |
|
| |
|
| |
| {| style="width:100%" cellpadding=10 border="1"
| |
| | 2B > 2D > A+C > JA > JB > JC > JD > 236A > land > FKO
| |
| |}
| |
| Toki version.
| |
|
| |
| ==Matchups==
| |
| ===Kenshiro===
| |
| X
| |
|
| |
| ===Raoh===
| |
| X
| |
|
| |
| ===Toki===
| |
| X
| |
|
| |
| ===Shin===
| |
| X
| |
|
| |
| ===Rei===
| |
| X
| |
|
| |
| ===Juda===
| |
| X
| |
|
| |
| ===Thouther===
| |
| X
| |
|
| |
| ===Jagi===
| |
| X
| |
|
| |
| ===Mr. Heart===
| |
| X
| |
|
| |
| ===Mamiya===
| |
| X
| |
|
| |
|
| |
|
| {{Navbox-HNK}} | | {{Navbox-HNK}} |
| [[Category:Hokuto no Ken]] | | [[Category:Hokuto no Ken]] |
