(Created page with "{| class="wikitable" style="float:right; margin-left: 10px;" |- ! align="center" colspan="2" | Taros |- | align="center" colspan="2" |File:AB_taros.png|frameless|center|600x...") |
(taros) |
||
| Line 3: | Line 3: | ||
! align="center" colspan="2" | Taros | ! align="center" colspan="2" | Taros | ||
|- | |- | ||
| align="center" colspan="2" |[[File:AB_taros.png|frameless|center| | | align="center" colspan="2" |[[File:AB_taros.png|frameless|center|400x400px]] | ||
|- | |- | ||
| '''Pre-Jump Frames''' || 3 | | '''Pre-Jump Frames''' || 3 | ||
|- | |- | ||
| '''Play Style''' || Big buttons | | '''Play Style''' || Big buttons / rushdown | ||
|- | |- | ||
| '''Dash Type''' || | | '''Dash Type''' || Step | ||
|- | |- | ||
|} | |} | ||
<br> | <br> | ||
== | == Introduction == | ||
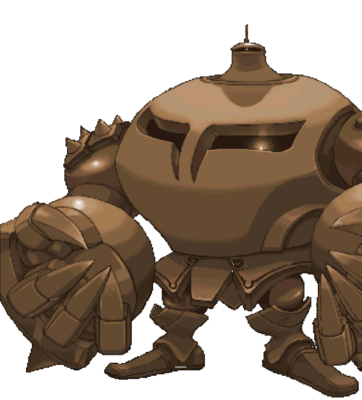
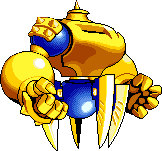
[[ | A large golem in that can form parts of its body into various weapons. Upon encountering the same young boy who had met Rose Mary and learning about the mystery of the lost continent, Taros decides to begin a new mission in investigating the strange and unusual anomaly of the lost continent. | ||
Taros is a large, tanky character with normals that do 1/2 and HP bar physically and emotionally, and specials that can force your opponent to play defensively and by your rules. While throwing out normals and specials haphazardly isn't a bad strat, mastering Taros can completley shut down your opponent via spacing and pressure. | |||
{{StrengthsAndWeaknesses | |||
| intro = | |||
[[File:AB_Taros_idle.png|frameless|center]] | |||
| pros = | |||
* Long combos great for eating the clock | |||
* Godly EX moves | |||
* Boost Mode can guarantee a Last Stand Defense is going to succeed | |||
* Strong pressure game | |||
* High priority attacks | |||
* Can shutdown the approach of some characters | |||
* High damage | |||
* Has a lot of attacks that knockdown | |||
* long pokes | |||
| cons = | |||
* Very large hitbox | |||
* Very slow projectile | |||
* Lackluster Supers | |||
* Situational Boost Mode | |||
* Lack of DP | |||
* Very slow walking speed | |||
* Predictable mixups | |||
}} | |||
== Normals == | |||
=== Standing normals === | |||
{{MoveData | |||
|image=AB_Taros_5a.png | |||
|caption= | |||
|input=5A | |||
|data= | |||
{{AttackData-AB | |||
|guard=M | |||
|cancel=normals | |||
|startup=7 | |||
|advHit=2 | |||
|advBlock=1 | |||
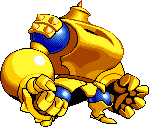
|description= fast jab<br>can be used as a pseudo-anti air | |||
}} | |||
}} | |||
<br> | |||
{{MoveData | |||
|image=AB_Taros_5B.png | |||
|caption= | |||
|input=5B | |||
|data= | |||
{{AttackData-AB | |||
|guard=M | |||
|cancel=normals | |||
|startup= | |||
|advHit= | |||
|advBlock= | |||
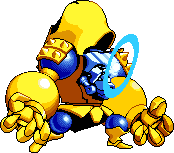
|description= decent combo filler<br>can be combo'd into launcher if done close enough<br>used to combo into his specials | |||
}} | |||
}} | |||
<br> | |||
{{MoveData | |||
|image=AB_Taros_5c.png | |||
|caption= | |||
|input=5C | |||
|data= | |||
{{AttackData-AB | |||
|guard=H | |||
|cancel=O | |||
|startup= | |||
|advHit= | |||
|advBlock= | |||
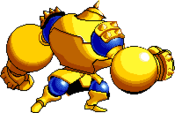
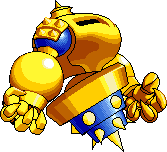
|description= Taros' main anti-air<br>slow but damaging and big attack<br>risky to use in neutral but if oppnenents are getting predictable with their unsafe approaches this is a very great move to use<br>hard to punish on block | |||
}} | |||
}} | |||
=== Crouching normals === | |||
{{MoveData | |||
|image=AB_Taros_2a.png | |||
|caption= | |||
|input=2A | |||
|data= | |||
{{AttackData-AB | |||
|guard=L | |||
|cancel=normals | |||
|startup= | |||
|advHit= | |||
|advBlock= | |||
|description= fast low jab | |||
}} | |||
}} | |||
<br> | |||
{{MoveData | |||
|image=AB_Taros_2B.png | |||
|caption= | |||
|input=2B | |||
|data= | |||
{{AttackData-AB | |||
|guard=L | |||
|cancel=normals | |||
|startup= | |||
|advHit= | |||
|advBlock= | |||
|description= fast stomp<br>Knocks down<br>his main low mixup | |||
}} | |||
}} | |||
<br> | |||
{{MoveData | |||
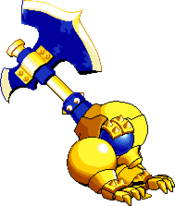
|image=AB_Taros_2c.png | |||
|caption=the AXE | |||
|input=2C | |||
|data= | |||
{{AttackData-AB | |||
|guard=L | |||
|cancel=O | |||
|startup= | |||
|advHit= | |||
|advBlock= | |||
|description= a ''GIANT'' overhead that deals a lot of damage<br>it is extremely slow and easy to see coming<br>but it cannot be punished by some characters | |||
}} | |||
}} | |||
=== Jumping normals === | |||
{{MoveData | |||
|image=AB_Taros_j.a.png | |||
|caption= | |||
|input=j.A | |||
|data= | |||
{{AttackData-AB | |||
|guard=H | |||
|cancel=special | |||
|startup=4 | |||
|advHit=O | |||
|advBlock=O | |||
|description= fast combo starter<br>the safest attack to throw out when jumping in | |||
}} | |||
}} | |||
<br> | |||
{{MoveData | |||
|image=AB_Taros_j.B.png | |||
|caption= | |||
|input=8.B | |||
|data= | |||
{{AttackData-AB | |||
|guard=H | |||
|cancel=special | |||
|startup= | |||
|advHit= | |||
|advBlock= | |||
|description= wide but short hitbox<br>not as useful as the other jumping B but still has some uses<br>very hard to cancel this into another normal or special | |||
}} | |||
}} | |||
<br> | |||
{{MoveData | |||
|image=AB_Taros_j.B2.png | |||
|caption= | |||
|input=7/9.B | |||
|data= | |||
{{AttackData-AB | |||
|guard=H | |||
|cancel=special | |||
|startup= | |||
|advHit= | |||
|advBlock= | |||
|description= 5-hit drill attack that overpowers most normal attacks<br>Taros' main jump in | |||
}} | |||
}} | |||
<br> | |||
{{MoveData | |||
|image=AB_Taros_j.c.png | |||
|caption= | |||
|input=j.C | |||
|data= | |||
{{AttackData-AB | |||
|guard=H | |||
|cancel=O | |||
|startup= | |||
|advHit= | |||
|advBlock= | |||
|description= one of Taros's greatest normals<br>very fast, great range and deals a lot of damage<br>will knock down and send them sliding fullscreen<br>easily spammable due to short recovery<br>deceptively very active | |||
}} | |||
}} | |||
=== Command normals === | |||
{{MoveData | |||
|image=AB_Taros_6c.png | |||
|caption= | |||
|input=6C | |||
|data= | |||
{{AttackData-AB | |||
|guard=H | |||
|cancel=special | |||
|startup= | |||
|advHit= | |||
|advBlock= | |||
|description=very slow but very damaging overhead punch | |||
}} | |||
}} | |||
== Special moves == | |||
{{MoveData | |||
|name=Artillery Attachment 001 - Vulcan Explosion | |||
|image=AB_Taros_623a.png | |||
|input=623A/B/C | |||
|data= | |||
{{AttackData-AB | |||
|guard=M | |||
|cancel=O | |||
|startup= | |||
|advHit= | |||
|advBlock= | |||
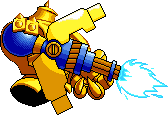
|description=Taros shoots a laser, setting off explosions on the ground. Long startup but quick recovery, so you can hit your opponent into the blasts. Resembles a Power Geyser.<br>EX version shoots dense explosions that travel about a whole screen's length | |||
}} | |||
}} | |||
<br> | |||
{{MoveData | |||
|name=Artillery Attachment 002 - Pavement Roller | |||
|image=AB_Taros_214a.png | |||
|image2=AB_Taros_214ex.png | |||
|caption=A/B/C version | |||
|caption2=EX version | |||
|input=214A/B/C | |||
|data= | |||
{{AttackData-AB | |||
|guard=M | |||
|cancel=O | |||
|startup= | |||
|advHit= | |||
|advBlock= | |||
|description=Taros rushes forward with two large gears spinning in place of his hands.<br> EX version makes Taros rush forward with two big spiked wheels, doing up to 27 hits. Goes just a bit less distance than with C. Last hit is a V. Launcher | |||
}} | |||
}} | |||
<br> | |||
{{MoveData | |||
|name=Artillery Attachment 003 - Bey Blender | |||
|image=AB_Taros_j.236a.png | |||
|input=j.236A/B/C | |||
|data= | |||
{{AttackData-AB | |||
|guard=M | |||
|cancel=O | |||
|startup= | |||
|advHit= | |||
|advBlock= | |||
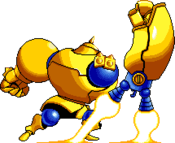
|description= Arguably, '''one of the best moves''' in the game.<br>Taros flies up/forward, with a spinning blade for legs. This move has strange juggle/launcher properties<br>sometimes it works as a launcher, sometimes it counts as two launchers, sometimes it just knocks down.<br>Can apply insane pressure to your opponent, and, if it crosses up in between hits, your opponent must switch sides to block, which is incredibly difficult at the speed the hits come in.<br>EX version travels a similar arc as with button C, but with a bit more height. Usually does 1/3 of an HP bar. | |||
}} | |||
}} | |||
== Supers == | |||
{{MoveData | |||
|name=Legendary Artillery - Hinokagutsuchi Blade | |||
|image=AB_Taros_236236a.png | |||
|caption=Yes...it's that big | |||
|input=236236A/B/C | |||
|data= | |||
{{AttackData-AB | |||
|guard=M | |||
|cancel=O | |||
|startup= | |||
|advHit= | |||
|advBlock= | |||
|description= Taros winds up and then swings a giant sword downwards<br>Seems unavoidable unless you can get behind him before he swings. Damage is OK but not great, considering how the damn thing takes 2-3 business days to come out. | |||
}} | |||
}} | |||
== Boost mode (22+ABC) == | |||
Taros gets Super Armor for during every attack he does.<br> Standing C and 6C do more damage. Standing C is cancellable on either hit. Second hit is a V. Launcher | |||
[[CateTarosry: Asura Buster: Eternal Warriors]] | |||
{{Asura Buster}} | {{Asura Buster}} | ||
Revision as of 14:23, 19 May 2021
| Taros | |
|---|---|
| Pre-Jump Frames | 3 |
| Play Style | Big buttons / rushdown |
| Dash Type | Step |
Introduction
A large golem in that can form parts of its body into various weapons. Upon encountering the same young boy who had met Rose Mary and learning about the mystery of the lost continent, Taros decides to begin a new mission in investigating the strange and unusual anomaly of the lost continent.
Taros is a large, tanky character with normals that do 1/2 and HP bar physically and emotionally, and specials that can force your opponent to play defensively and by your rules. While throwing out normals and specials haphazardly isn't a bad strat, mastering Taros can completley shut down your opponent via spacing and pressure.
| Pros | Cons |
|
|
Normals
Standing normals
| Damage | Startup | Active | Recovery | Guard | Cancel | Adv. Hit | Adv. Block | |
|---|---|---|---|---|---|---|---|---|
| - | 7 | - | - | M | normals | 2 | 1 | |
|
fast jab | ||||||||
| Damage | Startup | Active | Recovery | Guard | Cancel | Adv. Hit | Adv. Block | |
|---|---|---|---|---|---|---|---|---|
| - | - | - | - | M | normals | - | - | |
|
decent combo filler | ||||||||
| Damage | Startup | Active | Recovery | Guard | Cancel | Adv. Hit | Adv. Block | |
|---|---|---|---|---|---|---|---|---|
| - | - | - | - | H | O | - | - | |
|
Taros' main anti-air | ||||||||
Crouching normals
| Damage | Startup | Active | Recovery | Guard | Cancel | Adv. Hit | Adv. Block | |
|---|---|---|---|---|---|---|---|---|
| - | - | - | - | L | normals | - | - | |
|
fast low jab | ||||||||
| Damage | Startup | Active | Recovery | Guard | Cancel | Adv. Hit | Adv. Block | |
|---|---|---|---|---|---|---|---|---|
| - | - | - | - | L | normals | - | - | |
|
fast stomp | ||||||||
| Damage | Startup | Active | Recovery | Guard | Cancel | Adv. Hit | Adv. Block | |
|---|---|---|---|---|---|---|---|---|
| - | - | - | - | L | O | - | - | |
|
a GIANT overhead that deals a lot of damage | ||||||||
Jumping normals
| Damage | Startup | Active | Recovery | Guard | Cancel | Adv. Hit | Adv. Block | |
|---|---|---|---|---|---|---|---|---|
| - | 4 | - | - | H | special | O | O | |
|
fast combo starter | ||||||||
| Damage | Startup | Active | Recovery | Guard | Cancel | Adv. Hit | Adv. Block | |
|---|---|---|---|---|---|---|---|---|
| - | - | - | - | H | special | - | - | |
|
wide but short hitbox | ||||||||
| Damage | Startup | Active | Recovery | Guard | Cancel | Adv. Hit | Adv. Block | |
|---|---|---|---|---|---|---|---|---|
| - | - | - | - | H | special | - | - | |
|
5-hit drill attack that overpowers most normal attacks | ||||||||
| Damage | Startup | Active | Recovery | Guard | Cancel | Adv. Hit | Adv. Block | |
|---|---|---|---|---|---|---|---|---|
| - | - | - | - | H | O | - | - | |
|
one of Taros's greatest normals | ||||||||
Command normals
| Damage | Startup | Active | Recovery | Guard | Cancel | Adv. Hit | Adv. Block | |
|---|---|---|---|---|---|---|---|---|
| - | - | - | - | H | special | - | - | |
|
very slow but very damaging overhead punch | ||||||||
Special moves
| Damage | Startup | Active | Recovery | Guard | Cancel | Adv. Hit | Adv. Block | |
|---|---|---|---|---|---|---|---|---|
| - | - | - | - | M | O | - | - | |
|
Taros shoots a laser, setting off explosions on the ground. Long startup but quick recovery, so you can hit your opponent into the blasts. Resembles a Power Geyser. | ||||||||
| Damage | Startup | Active | Recovery | Guard | Cancel | Adv. Hit | Adv. Block | |
|---|---|---|---|---|---|---|---|---|
| - | - | - | - | M | O | - | - | |
|
Taros rushes forward with two large gears spinning in place of his hands. | ||||||||
| Damage | Startup | Active | Recovery | Guard | Cancel | Adv. Hit | Adv. Block | |
|---|---|---|---|---|---|---|---|---|
| - | - | - | - | M | O | - | - | |
|
Arguably, one of the best moves in the game. | ||||||||
Supers
| Damage | Startup | Active | Recovery | Guard | Cancel | Adv. Hit | Adv. Block | |
|---|---|---|---|---|---|---|---|---|
| - | - | - | - | M | O | - | - | |
|
Taros winds up and then swings a giant sword downwards | ||||||||
Boost mode (22+ABC)
Taros gets Super Armor for during every attack he does.
Standing C and 6C do more damage. Standing C is cancellable on either hit. Second hit is a V. Launcher
CateTarosry: Asura Buster: Eternal Warriors
