Lichmassacre (talk | contribs) m (→Special Moves) |
Lichmassacre (talk | contribs) m (→Combos) |
||
| Line 192: | Line 192: | ||
==Combos== | ==Combos== | ||
See [[Raoh/Combos|Combos]] section. | ==Glossary of Terms== | ||
===5-hit Bani=== | |||
The most basic Banishing Strike combo starter. You can change the normal moves leading into the Banishing Strike, but as the number of hits coming into a Banishing Strike wall combo effects the amount of knockback, you generally do not want to exceed 5 hits. | |||
{| style="width:100%" cellpadding=10 border="1" | |||
| 2Ax2 > 2B > D > CD | |||
|} | |||
===Ura Sai=== | |||
The first discovered and most commonly used method of switching sides with your opponent while near the corner. The exact recipe is: | |||
{| style="width:100%" cellpadding=10 border="1" | |||
| 2Ax9~10 > 2B > c.C > CD+HSC Ex1~2 > (pass through your opponent) air Sai | |||
|} | |||
===Renda Sai=== | |||
Used to go from one corner to the other, usually performed after an Ura Sai. The exact recipe is: | |||
{| style="width:100%" cellpadding=10 border="1" | |||
| 2Ax12 > 2B > c.C > CD+Mash E until you run out of Boost > air Sai | |||
|} | |||
===Round Trip Sai=== | |||
Ura Sai followed by Renda Sai. This itself can be repeated forever, and is in fact quite easy to perform on some characters, but has the disadvantage of not recovering any Boost. | |||
==Banishing Strike Combos== | |||
Banishing Strike combos are Raoh's forte, and generally speaking you will want to try to link into one from any hit you score. As there are so many different possible routes to take, it is best to think of Raoh's combos as made up of many different parts, which you can mix-and-match to best suit each specific situation. | |||
The basic pattern Raoh's Banishing Strike combos follow is: | |||
{| style="width:100%" cellpadding=10 border="1" | |||
| '''2Ax2 > 2B > D > CD > 6 > (First Wall Combo) > (Second Wall Combo) > (Switch Sides) > (Double Grave Shoot Combo) > (Final Combo > Finish)''' | |||
|} | |||
Depending on the situation, any of these parts can be removed if necessary. | |||
Optimal character-specific 5-hit Banishing Strike combos, which aim for maximum Boost recovery with the least difficulty in performing, are listed below in the [[Raoh/Combos#Optimal_Banishing_Strike_Combos|Optimal Banishing Strike Combos]] section. | |||
===First Wall Combo=== | |||
'''Chop Route''' | |||
{| style="width:100%" cellpadding=10 border="1" | |||
| D > 623A > E > c.C > 2C > air dash j.B > air Sai | |||
|} | |||
Used when at midscreen or closer to the corner. Doesn't take off any stars, but can easily be performed on all characters. | |||
'''Sai Route''' | |||
{| style="width:100%" cellpadding=10 border="1" | |||
| D > Sai > E > c.C > 2C > air dash j.B > air Sai | |||
|} | |||
Used when at midscreen or closer to the corner. Will not work on Ken, Toki, Jagi, or Heart unless you have a powerup stock. Works better on Shin and Thouther if you change the D to 2D. | |||
'''Air Goushouha Route''' | |||
{| style="width:100%" cellpadding=10 border="1" | |||
| D > AC > air 236C > E > c.C > 2C > air dash j.B > air Sai | |||
|} | |||
Used when at midscreen or closer to the corner. Works on all characters but can be difficult on some, like Shin. | |||
'''Double Grave Route''' | |||
{| style="width:100%" cellpadding=10 border="1" | |||
| D > AC > E > AC > air Sai | |||
|} | |||
Used when at midscreen or closer to the corner. Works on all characters. | |||
'''Heavy Route''' | |||
{| style="width:100%" cellpadding=10 border="1" | |||
| AB > E > c.C > 2C > air dash j.B > air Sai | |||
|} | |||
Used when far from the corner. Works on all characters but can be difficult on some, like Rei and Juda. | |||
'''6A Route''' | |||
{| style="width:100%" cellpadding=10 border="1" | |||
| 6A > E > c.C > 2C > air dash j.B > air Sai | |||
|} | |||
Used when far from the corner. Doesn't take off any stars, but can easily be performed on all characters. | |||
'''3-Star Route #1''' | |||
{| style="width:100%" cellpadding=10 border="1" | |||
| D > Sai > E > AC > air Sai | |||
|} | |||
Used when at midscreen or closer to the corner. Mostly used against opponents with low health as you often won't have an opportunity to take off the stars later in the combo, or to lead into a FKO. | |||
'''3-Star Route #2''' | |||
{| style="width:100%" cellpadding=10 border="1" | |||
| D > AC > air 236C > E > AC > air Sai | |||
|} | |||
Used when at midscreen or closer to the corner. Mostly used against opponents with low health as you often won't have an opportunity to take off the stars later in the combo, or to lead into a FKO. | |||
'''3-Star Route #3''' | |||
{| style="width:100%" cellpadding=10 border="1" | |||
| AB > E > AC > air Sai | |||
|} | |||
Used when far from the corner. Mostly used against opponents with low health as you often won't have an opportunity to take off the stars later in the combo, or to lead into a FKO. | |||
===Second Wall Combo=== | |||
'''Boost Air Dash B Route''' | |||
{| style="width:100%" cellpadding=10 border="1" | |||
| 2Axn > 2B > c.C > CD > 6 > 2C > air dash j.B+E > air Sai(+E depending on distance) | |||
|} | |||
The most commonly used part. Works on all characters but can be difficult on some. | |||
'''Grave Sai Route''' | |||
{| style="width:100%" cellpadding=10 border="1" | |||
| 2Axn > 2B > c.C > CD > 6 > AC > air Sai+E | |||
|} | |||
An alternate wall combo route. Difficulty corresponds to that of Ura Sai, making it very easy on some characters and hard on others. | |||
===Switch Sides=== | |||
'''Ura Sai''' | |||
{| style="width:100%" cellpadding=10 border="1" | |||
| 2Ax9~10 > 2B > c.C > CD+HSC Ex1~2 > (pass through your opponent) air Sai | |||
|} | |||
The first discovered and most commonly used method of switching sides with your opponent while near the corner. Difficulty varies depending on the character. See the combo [[Raoh/Combos#Frequently_Asked_Questions|FAQ]] for more information. | |||
'''6B Route''' | |||
{| style="width:100%" cellpadding=10 border="1" | |||
| 2Ax9~10 > 2B > c.C > CD+HSC E > 6B+HSC E > air Sai | |||
|} | |||
Mostly used on Juda, but works on most other characters as well. At the time of 6B hitting if the total hits in the combo is above 26, the opponent will be instantly knocked down. For this reason, when using this route it is necessary to cut out the second wall combo part. | |||
'''Insatsu Route''' | |||
{| style="width:100%" cellpadding=10 border="1" | |||
| 2Ax8 > 2B > c.C > AC > Insatsu > air dash j.B > c.D(1 hit) > AC > air Sai > 2A > c.D(1 hit) > AC > air Sai | |||
|} | |||
Requires 1 bar of Aura at the time the Grave Shoot hits. Used on characters that are hard to perform Ura Sai on like Shin. | |||
'''Taashi Route''' | |||
{| style="width:100%" cellpadding=10 border="1" | |||
| 2C > slight delay 9E > j.A > j.B > j.D > land then jump straight up > j.A (right side only) > air Sai | |||
|} | |||
This part is done straight from a 5 hit bani, cutting out the first two wall combos. Generally only used on Toki. | |||
'''Oraora Route''' | |||
{| style="width:100%" cellpadding=10 border="1" | |||
| D > 623C(2 hits) > E > forward jump j.A > slight delay j.D > land then jump straight up > j.A (right side only) > air Sai | |||
|} | |||
This part is done straight from a 5 hit bani, cutting out the first two wall combos. Mostly used on Mamiya. | |||
'''Alternative to Oraora Route''' | |||
{| style="width:100%" cellpadding=10 border="1" | |||
| 2C > air dash j.A > j.B > land 9E > j.A > slight delay j.D > land then jump straight up > j.A (right side only) > air Sai | |||
|} | |||
This part is done straight from a 5 hit bani, cutting out the first two wall combos. Mostly used on Mamiya and Rei. | |||
===Double Grave Shoot Combo=== | |||
The double Grave Shoot combo, which is done after switching sides and comboing into an air Sai, consists of two parts that can be combined in a number of ways. | |||
====First Grave Shoot==== | |||
'''Basic Route''' | |||
{| style="width:100%" cellpadding=10 border="1" | |||
| 2Ax10 > 2B > c.C > AC > j.B > air Sai | |||
|} | |||
'''Kenshiro-specific Route''' | |||
{| style="width:100%" cellpadding=10 border="1" | |||
| 2Ax13 > 2B > 2D > AC > j.D(1 hit) > air Sai | |||
|} | |||
'''Toki-specific Route''' | |||
{| style="width:100%" cellpadding=10 border="1" | |||
| 2Ax12 > c.D(1 hit) > AC > j.D(1 hit) > air Sai | |||
|} | |||
'''Jagi-specific Route''' | |||
{| style="width:100%" cellpadding=10 border="1" | |||
| 2Ax13 > c.D(1 hit) > AC > j.D(1 hit) > air Sai | |||
|} | |||
'''Rei-specific Route''' | |||
{| style="width:100%" cellpadding=10 border="1" | |||
| 2Ax12 > 2B > 2D > AC > j.D(1 hit) > air Sai | |||
|} | |||
'''Juda-specific Route''' | |||
{| style="width:100%" cellpadding=10 border="1" | |||
| 2Ax13 > 2B > D > AC > j.D(1 hit) > air Sai | |||
|} | |||
'''Insatsu Route''' | |||
{| style="width:100%" cellpadding=10 border="1" | |||
| 2Ax14 > 2B > D > 623C > Insatsu > j.B > air Sai | |||
|} | |||
====Second Grave Shoot==== | |||
'''Basic Route''' | |||
{| style="width:100%" cellpadding=10 border="1" | |||
| 2Axn > c.D(1 hit) > AC > j.A > air Sai | |||
|} | |||
'''Toki, Jagi-specific route''' | |||
{| style="width:100%" cellpadding=10 border="1" | |||
| 2A > 2B > c.C > C > c.D > AC > j.A > air Sai | |||
|} | |||
'''Kenshiro, Rei, Shin, Juda-specific Route''' | |||
{| style="width:100%" cellpadding=10 border="1" | |||
| 2A > 2B > c.C > C > c.D(1 hit) > AC > j.A > air Sai | |||
|} | |||
'''Raoh, Heart-specific Route''' | |||
{| style="width:100%" cellpadding=10 border="1" | |||
| 2A > 2B > c.C > C > AC > j.A > air Sai | |||
|} | |||
'''Thouther, Mamiya-specific Route''' | |||
{| style="width:100%" cellpadding=10 border="1" | |||
| 2A > 2B > c.C > C > AC > air Sai | |||
|} | |||
===Final Combo > Finish=== | |||
In the years since this game's release, many 100% combo routes have been developed for Raoh. Most however are lacking in their ability to recover gauge in comparison to the more recently-discovered [[Hokuto_no_Ken/Advanced_Game_Mechanics#.27Traveling.27_Combos|Traveling]]. For this reason and to avoid confusion, only parts that are commonly used in current competitive play will be listed here. | |||
'''Traveling Route #1''' | |||
{| style="width:100%" cellpadding=10 border="1" | |||
| 2Ax14 > 2B > D > Sai+E > 2Ax14 > 2B > 2A~E > 2Ax6 > 2B > D > Sai+E > 2Ax14 > 2B > D > CD > 6~ (Traveling) | |||
|} | |||
The most basic and commonly used part. | |||
'''Traveling Route #2''' | |||
{| style="width:100%" cellpadding=10 border="1" | |||
| 2Ax14 > 2B > D > Sai+E > 2Ax14 > 2B > D > 623C(3 hits) > E > 2Ax3~4 > 2B > c.D(1 hit) > Sai+E > 2Ax10~12 > 2B > c.C > CD > 6~ (Traveling) | |||
|} | |||
An alternate route, used mostly when the [[Hokuto_no_Ken/Advanced_Game_Mechanics#Boost_Bug|Boost Bug]] occurs. | |||
'''Banishing Cancel Traveling Finish''' | |||
{| style="width:100%" cellpadding=10 border="1" | |||
| (One of the above routes) ~CD > Banishing Cancel Musou Tensei > dash 2B > 2A~ (Traveling) | |||
|} | |||
Used when the opponent has very low health near the end of the combo and will die before you have the opportunity to gain meter. | |||
'''Early Banishing Cancel Finish''' | |||
{| style="width:100%" cellpadding=10 border="1" | |||
| ~CD > Banishing Cancel Musou Tensei > (dash) Sai or 2D | |||
|} | |||
As Traveling requires a specific amount of hits to use the above finisher will not work if the opponent has low health very early in a combo. In such cases this combo can be used at any point during any combo to gain a bar of Boost and finish off the opponent | |||
==Optimal Banishing Strike Combos== | |||
The below are what are generally considered to be the optimal Banishing Strike combos for use on each character. They have been fine-tuned to balance ease of use with Boost recovery. However, as it may not be possible to use them in all situations, an understanding of the fundamentals of Raoh's [[Raoh/Combos#Banishing_Strike_Combos|Banishing Strike combos]] is essential. | |||
'''Kenshiro''' | |||
{| style="width:100%" cellpadding=10 border="1" | |||
| 2Ax2 > 2B > D > CD > 6 > D > 623A > E > c.C > 2C > air dash j.B > air Sai > 2Ax3 > 2B > c.C > CD > 6 > AC > air Sai+E > Ura Sai > Renda Sai > 2Ax10 > 2B > c.C > CD > 6 > (Musou Tensei >) 2B+E > 2Axn~ (Traveling) | |||
|} | |||
'''Raoh''' | |||
{| style="width:100%" cellpadding=10 border="1" | |||
| 2Ax2 > 2B > D > CD > 6 > D > 623A > E > c.C > 2C > air dash j.B > air Sai > 2A > 2B > c.C > CD > 6 > 2C > air dash j.B+E > air Sai(+E depending on distance) > Ura Sai > Renda Sai > 2Ax10 > 2B > c.C > CD > 6 > (Musou Tensei >) 2B+E > 2Axn~ (Traveling) | |||
|} | |||
'''Toki''' | |||
{| style="width:100%" cellpadding=10 border="1" | |||
| 2Ax2 > 2B > D > CD > 6 > 2C > slight delay 9E > j.A > j.B > j.D > land then jump straight up > j.A (right side only) > air Sai > 2Ax12 > c.D(1 hit) > AC > j.C > air Sai > 2Ax5 > c.D(1 hit) > AC > j.A > air Sai > 2Ax15 > 2B > D > Sai+E > 2Ax14 > 2A~E > 2Ax4 > 2B > D > Sai+E > 2Ax10 > 2B > c.C > CD > 6 > 2B > 2Ax5 > 2A~E > 2Ax14 > Axn~ (Traveling) | |||
|} | |||
'''Shin''' | |||
{| style="width:100%" cellpadding=10 border="1" | |||
| 2Ax2 > 2B > D > CD > 6 > 2D > Sai > E > c.C > 2C > air dash j.B > air Sai > 2Ax9 > c.D(1 hit) > AC > Insatsu > air dash j.B > c.D(1 hit) > AC > air Sai > 2A > c.D(1 hit) > AC > j.A > air Sai > 2Ax14 > 2B > D > 623C(3 hits) > E > 2Ax7 > 2B > D > Sai+E > 2Ax14 > 2B > D > CD > 6 > c.B > 2Ax5 > 2A~E > 2Axn~ (Traveling) | |||
|} | |||
'''Rei''' | |||
{| style="width:100%" cellpadding=10 border="1" | |||
| 2Ax2 > 2B > D > CD > 6 > c.B (when opponent is near corner only) > 2C > air dash j.B > E > air dash j.B > air Sai > 2Ax12 > 2B > 2D > AC > j.B > air Sai > 2A > 2B > c.C > C > AC > j.A > air Sai > 2Ax14 > 2B > D > 623C(3 hits) > E > 2Ax7 > 2B > D > Sai+E > 2Ax14 > 2B > D > CD > 6 > 2B > 2Ax5 > 2A~E > 2Axn~ (Traveling) | |||
|} | |||
'''Juda''' | |||
{| style="width:100%" cellpadding=10 border="1" | |||
| 2Ax2 > 2B > D > CD > 6 > D > AC > E > AC > air Sai > 2Ax10 > 2B > c.C > CD > HSC 6B+E > E > air Sai > 2Ax13 > 2B > D > AC > j.B > air Sai > 2A > 2B > c.C > C > c.D > AC > j.A > air Sai > 2x15 > 2B > D > Sai+E > 2Ax10 > 2B > c.C > CD > 6 > 2B > 2Ax5 > 2A~E > 2Axn~ (Traveling) | |||
|} | |||
'''Thouther''' | |||
{| style="width:100%" cellpadding=10 border="1" | |||
| 2Ax2 > 2B > D > CD > 6 > D > 623A > E > c.C > 2C > air dash j.B > air Sai > 2A > 2B > c.C > CD > 6 > 2C > air dash j.B+E > air Sai > Ura Sai > Renda Sai > 2Ax11 > 2B > 2D > Musou Tensei > j.B > air Sai > 2A > 2B > c.C > C > AC > air Sai > 2Ax11 > 2B > c.C > c.D > 623C | |||
|} | |||
'''Jagi''' | |||
{| style="width:100%" cellpadding=10 border="1" | |||
| 2Ax2 > 2B > D > CD > 6 > D > 623A > E > c.C > 2C > air dash j.B > air Sai > 2A > 2B > c.C > CD > 6 > 2C > air dash j.B+E > air Sai > Ura Sai > Renda Sai > Ura Sai > 2Ax10 > 2B > c.C > AC > j.A > air Sai > 2A > 2B > c.C > C > c.D > AC > j.A > air Sai > 2Axn~ | |||
|} | |||
'''Mr. Heart''' | |||
{| style="width:100%" cellpadding=10 border="1" | |||
| 2Ax2 > 2B > D > CD > 6 > D > AC > air 236C+E > 2C > air dash j.B > air Sai > 2Ax11 > 2B > c.C > CD+HSC E > air Sai > [2Ax10 > 2B > c.C > CD+HSC E > air Sai]xn (For gauge recovery chain into a double Grave Shoot combo when Heart starts to get low on health) | |||
|} | |||
'''Mamiya''' | |||
{| style="width:100%" cellpadding=10 border="1" | |||
| 2Ax2 > 2B > D > CD > 6 > D > 623C(3 hits) > E > forward jump j.A > delay j.D > land then jump straight up > j.A (right side only) > air Sai > 2Ax10 > 2B > c.D > AC > j.A > air Sai > 2A > 2B > c.C > AC > j.A > air Sai > 2Ax14 > 2B > D > Sai+E > 2Ax14 > 2A~E > 2Ax3 > 2B > D > Sai+E > 2Ax10 > 2B > c.C > CD > 6 > 2B > 2Ax5 > 2A~E > 2Axn~ (Traveling) | |||
|} | |||
==Dribble Combos== | |||
Raoh's [[Hokuto_no_Ken/Advanced_Game_Mechanics#.27Dribble.27_Combos|Dribble]] combos require you to be near the corner, have 1 bar of Aura, and be able to gain Boost(or already have some). The main use for these is when you hit with a 2B or 2D and are not able to go for a Banishing Strike combo. Dribble combos are especially useful against Toki and Rei, as both can be difficult to perform Banishing Strike combos on, and are also characters that you really want to kill in one shot any time you land a hit. | |||
These combos can also be done from a throw as well if you have a powerup stock and at least 1.25 Boost. | |||
'''Basic Dribble Route''' | |||
{| style="width:100%" cellpadding=10 border="1" | |||
| 2Bx2 > 2D > 214A > Insatsu > j.B > air Sai > 2Ax5 > 2B > c.C > 2C > air Sai > 2Ax10 > 2B > c.C > 2C > 623C(7hits) > HSC E > 2A > [c.B > c.B~E]x2 > c.Bx2 > 2Ax4 > dash 2Axn~ (Dribble) | |||
|} | |||
Works on all characters but can be difficult on some. | |||
'''Kenshiro, Raoh-specific Route''' | |||
{| style="width:100%" cellpadding=10 border="1" | |||
| 2Bx2 > 2D > 214A > Insatsu > j.B > air Sai > 2Ax5 > 2B > c.C > 2C > air Sai > 2Ax10 > 2B > c.C > 2C > 623C(7hits) > HSC E > <span style="color:red">2Ax7 > 2A~E > 2Ax3</span> > dash 2Axn~ (Dribble) | |||
|} | |||
Differences from the basic route highlighted in red. Generally not used that much but listed for references sake. | |||
'''Toki-specific Route''' | |||
{| style="width:100%" cellpadding=10 border="1" | |||
| 2Bx2 > 2D > 214A > Insatsu > j.B > air Sai > <span style="color:red">2A > 2B > c.C > C > c.D > AC > j.A > air Sai</span> > 2Ax10 > 2B > c.C > 2C > 623C(7hits) > HSC E > 2A > [c.B > c.B~E]x2 > c.Bx2 > 2Ax4 > dash 2Axn~ (Dribble) | |||
|} | |||
Differences from the basic route highlighted in red. The most important dribble combo - if you are going to practice only one of them make it this one! | |||
'''Shin-specific Route''' | |||
{| style="width:100%" cellpadding=10 border="1" | |||
| 2Bx2 > 2D > 214A > Insatsu > j.B > air Sai > 2Ax5 > 2B > c.C > 2C > air Sai > 2Ax10 > 2B > c.C > 2C > 623C(7hits) > HSC E > <span style="color:red">2Ax4 > 2A~E > 2Ax3 > 2A~E > 2Ax4</span> > dash 2Axn~ (Dribble) | |||
|} | |||
Differences from the basic route highlighted in red. | |||
'''Juda-specific Route''' | |||
{| style="width:100%" cellpadding=10 border="1" | |||
| 2Bx2 > 2D > 214A > Insatsu > j.B > air Sai > 2Ax5 > 2B > c.C > 2C > air Sai > 2Ax10 > 2B > c.C > 2C > 623C(7hits) > HSC E > <span style="color:red">A > 2Ax7 > 2A~E > 2Ax3</span> > dash 2Axn~ (Dribble) | |||
|} | |||
Differences from the basic route highlighted in red. | |||
==Throw Combos== | |||
'''Basic Nagezumi Route''' | |||
{| style="width:100%" cellpadding=10 border="1" | |||
| 4C Throw > E > c.D(1 hit) > AC > j.A > air Sai > 2Ax4 > 2B > c.C > 2C > air Sai > 2Ax14 > 2B > D > Sai+E > 2Ax8 > 2B > c.C > 2C > 214214A > 2Bx4 > 2B~E > 2Bx11 > 2B~E > 2Bx6 > 2B~E > 2Bx7 > 2D > Insatsu > air dash j.B~ (Basuke) | |||
|} | |||
A [[Hokuto_no_Ken/Advanced_Game_Mechanics#.27Hyakuretsu.27_Combos|Hyakuretsu]] combo from Raoh's throw. For use against opponents in or very close to the corner. This combo works on all characters except Jagi, Thouther, and Mamiya. Small tweaks can be made to the number of hits before the 2C or the amount of 2Bs before first using Boost depending on the character. See the [[Raoh/Combos#Other_Important_Information|Other Important Information]] section. | |||
'''Shin, Heart-specific Easy Nagezumi Route''' | |||
{| style="width:100%" cellpadding=10 border="1" | |||
| 4C Throw > E > c.D(1 hit) > AC > j.A > air Sai > 2Ax4 > 2B > c.C > 2C > air Sai > 2Ax14 > 2B > D > Sai+E > 2Ax8 > 2B > c.C > 2C > 214214A > 2Bx4 > 2B~E > <span style="color:red">2B > 2Ax13 > 2A~E > 2Ax8 > 2A~E > 2Axn~ (Basuke)</span> | |||
|} | |||
Differences from the basic route highlighted in red. This is a simplified version that takes advantage of the fact that it is possible to perform Hyakuretsu on Shin and Heart using 2A instead of 2B. | |||
'''Thouther-specific Nagezumi Route''' | |||
{| style="width:100%" cellpadding=10 border="1" | |||
| 4C Throw > E > c.D(1 hit) > AC > j.A > air Sai > <span style="color:red">2A > c.D(1 hit) > AC > air Sai</span> > 2Ax14 > 2B > D > Sai+E > <span style="color:red">2Ax10</span> > 2B > c.C > 2C > <span style="color:red">HSC</span> 214214A > 2Bx4 > 2B~E > 2Bx11 > 2B~E > 2Bx6 > 2B~E > 2Bx7 > 2D > Insatsu > air dash j.B~ (Basuke) | |||
|} | |||
Differences from the basic route highlighted in red. Generally not used that much but listed for references sake. | |||
'''Mamiya-specific Nagezumi Route''' | |||
{| style="width:100%" cellpadding=10 border="1" | |||
| 4C Throw > E > c.D(1 hit) > AC > j.A > air Sai > 2Ax4 > 2B > c.C > 2C > air Sai > 2Ax14 > 2B > D > Sai+E > 2Ax8 > 2B > c.C > 2C > 214214A > 2Bx4 > 2B~E > 2Bx11 > 2B~E > 2Bx6 > 2B~E > <span style="color:red">2Bx8</span> > Insatsu > air dash j.B~ (Basuke) | |||
|} | |||
Differences from the basic route highlighted in red. Generally not used that much but listed for references sake. | |||
'''3-star FKO''' | |||
{| style="width:100%" cellpadding=10 border="1" | |||
| Throw > E > AC > j.C > 236C > E > AC > j.A > air Sai > 2A > 2B > c.C > CD > 6 > FKO | |||
|} | |||
Only requires 0.5 Boost if you are able to gain Boost at the time of throwing, but if you have less than 1 bar you will need at least 0.75 for the bar to fill up. | |||
'''4-star BD Throw Finisher''' | |||
{| style="width:100%" cellpadding=10 border="1" | |||
| (214A) BD > CD+E > Powerup Sai+E | |||
|} | |||
Used to finish off a dizzied opponent with low health. If you don't already have a powerup stock quickly charge one then follow up with the throw. This is pretty much the only real use for Raoh's BD throw. | |||
==Fatal KO Combos== | |||
As a 3-star FKO combo can easily be done from any hit simply by stringing together random Banishing Strike combo parts, only unique and/or gimmicky combos will be listed here. | |||
'''4-star FKO Max Banishing Strike Combo''' | |||
{| style="width:100%" cellpadding=10 border="1" | |||
| CD(Max charge, opponent guards) > Insatsu > air dash j.B > AC > air Sai > 2A > 2B > c.C > CD > 6 > AC > air 236C > E > FKO | |||
|} | |||
Requires 1 bar Aura. Extremely effective and easy to do for a 4-star FKO combo, but as it requires you to get your opponent to block a max charge Banishing Strike it is very situational. | |||
'''Flying Kenoh FKO''' | |||
{| style="width:100%" cellpadding=10 border="1" | |||
| 5 hit Bani > any wall combo ~ air Sai > 2Ax9 > 2B > c.C > CD+HSC E > 2C > slight delay 9E > fly to the opposite corner > FKO | |||
|} | |||
A very stylish FKO finisher! Be sure not to make the combo too long coming into the 2C, otherwise the opponent will be instantly knocked down upon it hitting. | |||
'''Ura Heavy FKO''' | |||
{| style="width:100%" cellpadding=10 border="1" | |||
| 5 hit Bani > any wall combo ~ air Sai > 2Ax9 > 2B > c.C > CD+HSC E > c.C > AB > E > B > c.D(1 hit) > FKO | |||
|} | |||
Another great looking FKO combo. | |||
'''K.A Special''' | |||
{| style="width:100%" cellpadding=10 border="1" | |||
| 5 hit Bani > any wall combo ~ air Sai > 2Ax9 > 2B > c.C > CD+HSC E > AC > jump straight up > 236C > E > FKO | |||
|} | |||
AKA Shirou Special. The final fireball hits after activating the FKO, so you need to remove all of your opponent's stars in the first wall combo. | |||
'''K.A Special Mk. 2''' | |||
{| style="width:100%" cellpadding=10 border="1" | |||
| 5 hit Bani > 6 > CD > E > AC > air 236C > E > AC > 2C > FKO | |||
|} | |||
A nice looking no Sai 2-star FKO combo. | |||
==Other Important Combos== | |||
'''High-low Setup''' | |||
{| style="width:100%" cellpadding=10 border="1" | |||
| 6B > E > 2B > c.D(1 hit) > E > CD~ | |||
|} | |||
By instantly Boosting into 2B from 6B, you get a super quick high-low setup that can be hard to block even when you know its coming. | |||
'''Crouching Rei Infinite''' | |||
{| style="width:100%" cellpadding=10 border="1" | |||
| ~Sai > [2Axn > c.D(1 hit) > Sai]xn | |||
|} | |||
Infinite combo that works on Rei when he takes a hit while crouching. If deep in the corner knockback will eventually come into effect so it is necessary to chain into an air combo before this happens. If you want to really style on your opponent you can do loops of 2Bxn > c.D(1 hit) > Sai instead. | |||
'''Chikuseki Setup Combo (For use on Thouther and Mamiya)''' | |||
{| style="width:100%" cellpadding=10 border="1" | |||
| 2Ax2 > 2B > D > CD > 6 > 2D > Sai > E > AC > air Sai > 2Ax10~11 > c.D(1 hit) > AC > j.D > air Sai > 2Ax10 > 2B > c.C > CD | |||
|} | |||
Follow up with 2Bx2~3 > D > 623C on wakeup for guard crush, dizzy, and massive gauge recovery. If opponent has Aura they will almost always Guard Cancel here so it is a very easy spot to bait it with a chop! | |||
==Other Important Information== | |||
'''Maximum total hits possible before 2C when comboing into an air Sai'''<br> | |||
Kenshiro: 21<br> | |||
Raoh: 15<br> | |||
Toki: 15<br> | |||
Jagi: 21<br> | |||
Rei: 20<br> | |||
Shin: 18<br> | |||
Juda: 18<br> | |||
Thouther: 12<br> | |||
Mamiya: 15<br> | |||
Heart: 15<br> | |||
'''Number of 2B possible before using first Movement Boost during Hyakuretsu'''<br> | |||
Kenshiro: 5<br> | |||
Raoh: 5<br> | |||
Toki: 5<br> | |||
Jagi: 4<br> | |||
Rei: 7<br> | |||
Shin: 5<br> | |||
Juda: 7<br> | |||
Thouther: 5<br> | |||
Mamiya: 4<br> | |||
Heart: 5 | |||
==Frequently Asked Questions== | |||
===How do you combo D into a Banishing Strike?=== | |||
Far D can be linked directly into a Banishing Strike by Kara Canceling a 2D. The input is done as D > 2CDCD or D > slight delay 2CD. This technique can be used by most other characters as well. | |||
===How do you combo into 2A after an air Sai?=== | |||
Practice, practice, practice! Unfortunately there is no trick to it - you have a 2 frame window after landing to input 2A. While this can be difficult at first, once you get the rhythm down you should be able to do it almost every time. Ground Sai has a much larger window to follow up with 2A and generally should not pose much of a problem. One thing to remember however is that powerup ground Sai has a slightly different timing, so you will want to practice a bit with both to get the timings down. | |||
===How do you do a tiger knee air Sai?=== | |||
Air Sai has a height restriction on it, meaning it will only execute if performed at least a certain height off the ground. For this reason if you try to tiger knee it as fast as possible, you will usually just end up with a high jump D. The input itself can be done as 2147D or 8214D, with a slight delay between the lever movement and pressing D. | |||
===How do you do Ura Sai?=== | |||
Learning [[Raoh/Combos#Ura_Sai|Ura Sai]] is often the cause of much grief for aspiring Raoh users. However, it is actually quite simple, and with a little practice you should be able to do it almost every time. | |||
One mistake many people make is reducing the number of 2As before chaining into a Banishing Strike. As it is not possible to Boost while Raoh and his opponent are pinned together by Sai, Hit Stop Cancel cannot be done in this state. 2Ax9 > 2B > c.C > CD is the absolute minimum number of hits you need for the Sai to wear off and allow you to use Boost again. Another problem people have is with the Hit Stop Cancel itself. There is no real trick to it, you simply need to press E the instant the Banishing Strike hits. If you want to practice just this without doing the full Ura Sai combo, simply stand right in front of your opponent and do CD > HSC E over and over until you get it - if you pass through your opponent, you are doing it right. The final and most important part of Ura Sai is the air Sai. Since you pass through your opponent, the direction you need to input changes, so from the perspective you started, you will be doing 2369D and not 2147D. | |||
===How do you do Renda Sai?=== | |||
Renda Sai is essentially the same as Ura Sai, with two small differences. First, while Ura Sai only requires you to press Boost once, with Renda Sai you need to use up all your Boost before you reach the opposite corner. If you are having trouble hitting Boost fast enough, try placing both your index and middle fingers over the Boost button, and quickly tapping it with alternating fingers 4~5 times. Second, unlike Ura Sai you do not end up on the other side of the opponent, so air Sai is performed using the normal input, 2147D. | |||
===How do you do a Movement Boost?=== | |||
In the combo section Cancel Boost is shown as X > E > and Movement Boost as X~E. While the X > E > notation used for Cancel Boost might give the impression that you need to do the command separately, most of the time you can actually press it at the same time as the following command. For example, D > AC > E > AC is usually inputted as D > AC > ACE. Similarly you can press 2BE and get a Movement Boost 2B, which is great for quickly closing the distance to an opponent. However, Movement Boost cannot be done in this manner during a combo - if you were to input 2AE all at the same time while trying to do 2Ax3 >2A~E > 2Ax3, you will get a Cancel Boost and the combo will fail. | |||
Movement Boost within a combo is done by first inputting a normal or special move, and then quickly pressing the Boost button. It is necessary that you press Boost before the attack hits, so for normals like 2A this must be done extremely quickly. This is best performed by drumming your fingers across both buttons in two fast taps. For example, the combo 2Ax3 > 2A~E > 2Ax3 would be done as, tap tap tap, tap-tap, tap tap tap. Once you get the rhythm of it it is quite easy to do. | |||
===How do you do Traveling?=== | |||
[[Hokuto_no_Ken/Advanced_Game_Mechanics#.27Traveling.27_Combos|Traveling]] is a technique done by ending a 55 or more hit air or ground only combo(if you switch from ground to air mid-combo the count resets) with a Banishing Strike, and then rapidly hitting the opponent while they are down. There are two recipes for this, one for Kenshiro and Raoh, and one for the rest of the characters. With Kenshiro and Raoh, you must input ~CD > 6 > Ex2~3 > 2B > 2Axn. The rest of the characters use ~CD > 6 > 2B > 2Ax5 > 2A~E > 2Axn. After 85 hits(only counting air only or ground only hits; this is not necessarily the amount of hits that is displayed on the combo counter) you can switch from 2A to A. Depending on the length of the combo or route you chose you may need to use a Movement Boost if you start getting pushed back too far. | |||
===How do you do a Banishing Cancel?=== | |||
Banishing Cancel, as explained in the [[Hokuto_no_Ken/Advanced_Game_Mechanics#Banishing_Cancel|Advanced Game Mechanics]] section, is a technique that allows the Banishing Strike's follow-up Movement Boost's startup to be canceled, and the free boost bar stored for later use. There is only a 1 frame window for this to be done, but for some unknown reason this window extends to 2 frames when the opponent is under the effect of Sai, making this a very useful technique for Raoh. 2 frames may seem like a very short window of time, but remember that air Sai > 2A is also 2 frames and is in fact quite easy to do. | |||
Raoh is able to Banishing Cancel the following five moves: Musou Tensei, Hikou Shinkesshuu, Tenshou Honretsu, Goushouha, and his FKO. Of these Musou Tensei is by far the most used. Shinkesshuu is also used occasionally, but the other three are generally only done as showy combo finishers and have little practical use. | |||
As far as input goes, you can perform it however you want, as long as the command of the move and forward are inputted at some point. The two most common methods, using Banishing Cancel Musou Tensei as an example, are 6214214B and 21478963214+B. | |||
==Matchups== | ==Matchups== | ||
Revision as of 16:25, 19 January 2021
Introduction
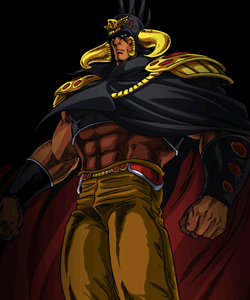
| Raoh is slow, powerful, and more than anything else, a combo character. He is likely the hardest character to learn - he has no 'basic' combos, his bread and butters all being 100%'s. Theoretically he could perhaps be the strongest character in the game, as he is capable of doing 100% combos from any hit with no meter. However, realistically, getting a 100% off of every hit is simply not possible, and due to the length and difficulty of his combos even top Raoh users will often make mistakes. Also, while he is fairly good at applying pressure, his mixup is lacking due to his slow speed. This, along with his very poor defense(no backstep, no reliable reversal, guard lag), is why he is considered to be in the bottom end of the 'top tier.' All in all, Raoh is still a very strong character despite his weaknesses, but is not one that can be recommended to beginners. |
Strengths:
- No gauge 100% combos possible from almost any hit
- Traveling combos recover a large amount of Boost and Aura while granting very little to his opponent
- Decent star reducing ability and easy 3 star combos
- Good matchups against the lower tiers
Weaknesses:
- Bad matchups against Toki and Rei
- No backdash - his KOF98-esque 'fade' is useless and will often be the cause of your demise when you accidentally use it
- Switching guard from high to low/low to high takes 8 frames due to a hardware bug, making quick overheads extremely hard to block
- Can be crossed up in the corner
- Defense relies heavily on Musou or powerup stocks, has no way to get out of pressure without meter
- Relatively poor mixup
Before diving right into the combos be sure to familiarize yourself with Raoh's special/super moves and important normals.
Normal Moves
Standing
Close A
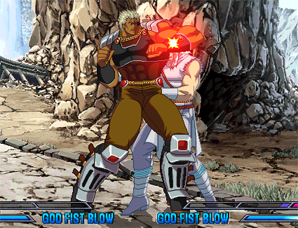
A short elbow jab. Very poor reach, but still can be used as an anti-air sometimes.
Far A
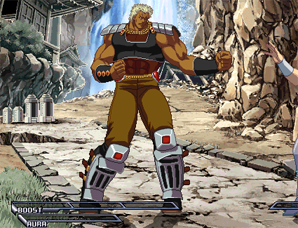
A quick jab while advancing forward. Mostly used in Traveling/Basuke combos. Can be used as an anti-air sometimes.
Close B
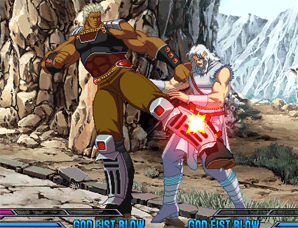
A kick to the shin. Can cancel into itself. Mostly used as a combo part.
Far B
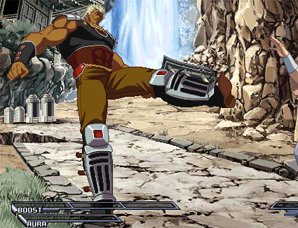
A light kick. Fairly fast execution and good range. Good for zoning and as an anti-air.
Close C
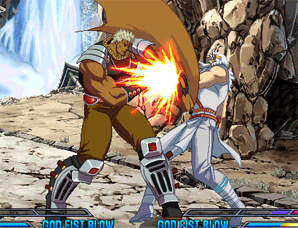
A strong overhead punch. Doesn't hit crouching opponents. Used mostly in combos to connect to a Banishing Strike. Holding C with a powerup stock available grants Super Armor and makes it unblockable.
Far C
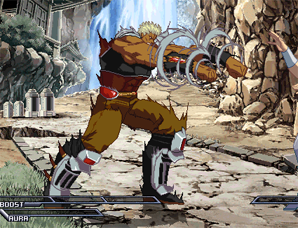
A two-handed punch. Identical to Kenshiro's far C, but due to Raoh's height it does not hit crouching opponents and is much less useful. Holding C with a powerup stock available grants Super Armor and makes it unblockable.
Close D
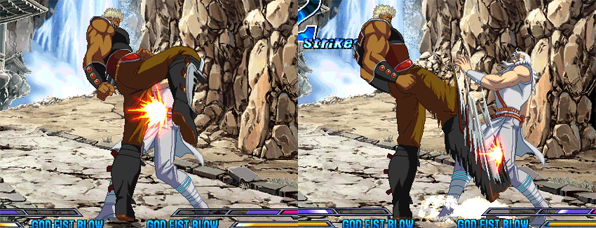
A knee followed by a drop kick. Both hits are cancelable, and the second hits low. The first hit can be a good spot to cancel into 6B as the startup animation looks the same as the second hit.
Far D
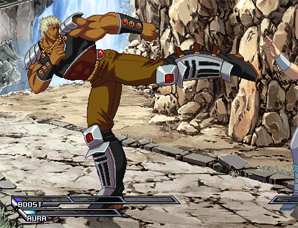
A sidekick. Its long range makes it good for zoning, but it has very long recovery. Can chain into a Banishing Strike by canceling the startup of 2D(input as D > 2CDCD or D > delay 2CD), making it a key move in combos.
Crouching
A
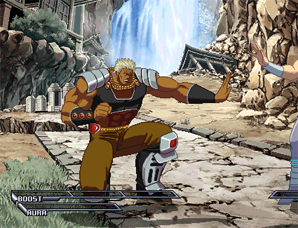
A crouching punch. 4 frame startup - this is Raoh's fastest ground normal and is the only move capable of following up after an air Sai. Can be used to get out of pressure and even as an anti-air in some cases.
B
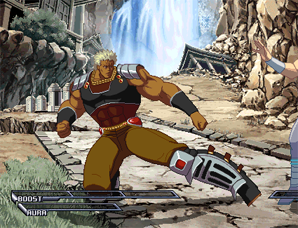
A crouching kick. Fairly decent range, good for zoning. Startup too slow to use to get out of pressure. As it is only a level 2 attack it can be hard to hit confirm Boost into a combo.
C
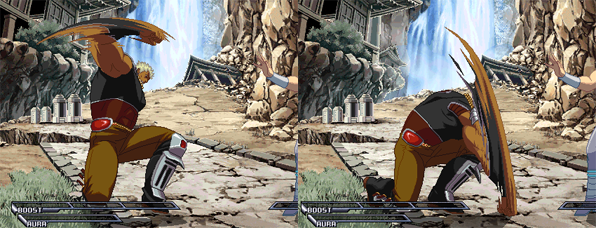
A strong punch to the ground. Causes opponent to bounce into the air even on normal hit, but if the total hits in the combo is over ~20 at the time of it connecting, the opponent will instantly be knocked down. One of Raoh's few jump cancelable moves. Holding C with a powerup charge available makes the move become unblockable and gain Super Armor, and the opponent is launched high into the air on hit(must high jump after connecting to follow up).
D
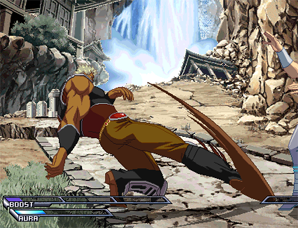
A low sweep kick. Very long range, can follow up with Insatsu, or a Grave Shoot in some situations. Like far D it is dangerous to miss with, but slightly safer as you can cancel the recovery into a Grave Shoot or Banishing Strike. Holding D with a powerup stock available makes the move unblockable and launches the opponent into the air.
Air
A
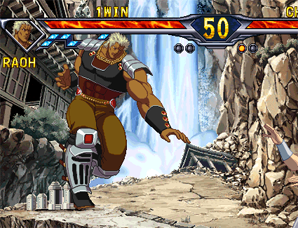
A jumping jab. 3 frame startup. Used mostly for getting out of pressure.
B
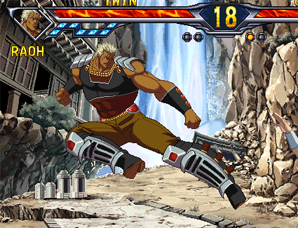
A jumping kick. Decent range. Used mostly for cross ups and in combos.
C
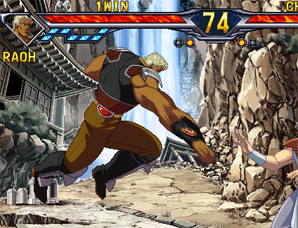
A strong air punch. Can cancel into itself. Has no landing recovery, making it the only normal Raoh can bait a Guard Cancel with. Holding C with a powerup stock available makes the move unblockable and causes wall bounce.
D
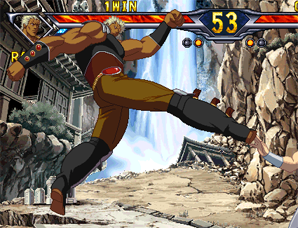
A 4-hit kick. The last hit is almost behind Raoh, making it good for cross ups from normal and high jumps.
Other
6A
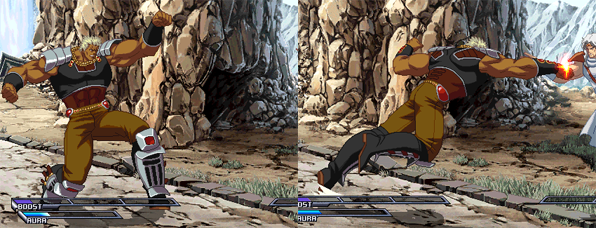
A charging punch. Mostly useless except in certain Banishing Strike combos. This move will likely be the cause of your demise many times as it loves to randomly come out when you try to input a reversal chop.
6B
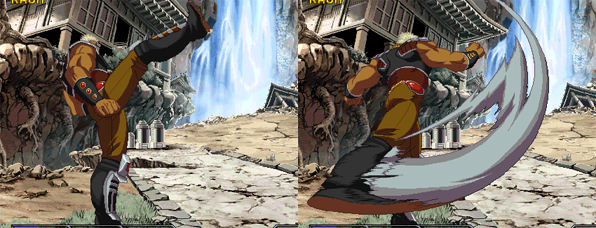
A drop kick. Hits overhead. Extremely hard to block when followed up with Boost 2B. There is no reason to ever use it without Boost or Aura as it is not cancelable and does not give advantage even on hit.
Throw
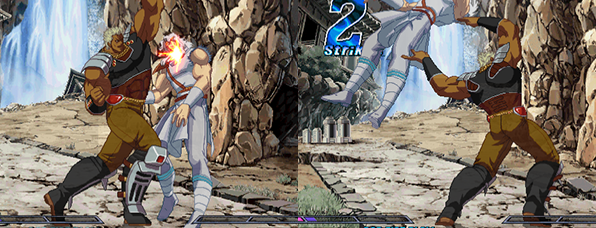
Raoh lifts up the opponent and throws them away. Follow up possible with Boost. Cannot cancel into Musou Insatsu. Great if you have enough Boost to follow up, otherwise not worth using.
BD Throw
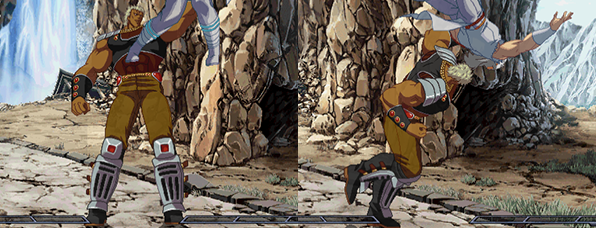
Raoh grabs the opponent by the face and smashes them to the ground. Follow up possible with Boost. Cannot cancel into Musou Insatsu. Generally only ever used to finish off a dizzied opponent.
Grave Shoot
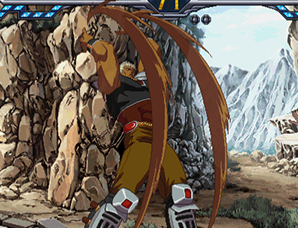
Raoh throws up his arms, launching his opponent into the air. Short range to the sides, but extends high into the air. Aside from its use as a combo part, it also functions as an early anti-air, but suffers from long recovery. Use with caution.
Heavy Strike
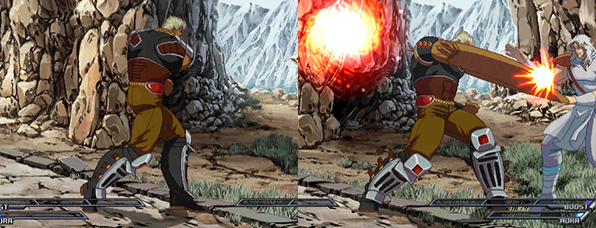
A backhand punch. Range is short and misses on all crouching characters except Heart and Raoh. Fairly bad as far as Heavy Strikes go but still useful in some situations.
Banishing Strike
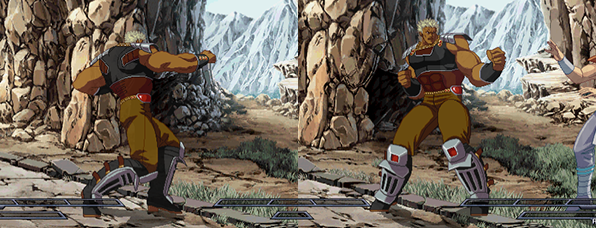
A painful looking body shot. Extremely important move used in pretty much all of Raoh's combos.
Special Moves
Hokuto Goushouha
(Land or Air) 236C

A fireball move. Done on the ground, it is a 3-hit beam-type projectile capable of nullifying other projectiles. Mostly useless due to its large startup and recovery. The air version is a more traditional looking fireball that travels downward at a 45 degree angle. While much more useful than the land version, after shooting off the fireball you do not recover until landing, so it is necessary to exercise caution when using this move. Both versions take off one star on counter hit.
When powered up the land version gains an extra hit and executes faster, and the air version causes wall bounce on counter hit. Despite the improvements the land version remains useless for the most part.
Hokuto Donryuu Kohou
214A
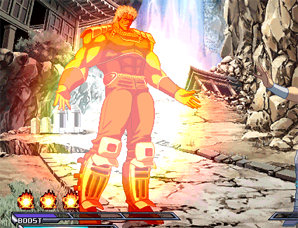
A powerup move. Allows for storing up to three powerup charges, which appear as globes above the Boost gauge. These powerups are used to strengthen several of Raoh's normal and special moves. Having powerup charges available opens up many combo options, and also forces your opponent to adjust their play as well, as they have to worry about the devastating powerup chop. As it has fairly long startup and recovery, Kohou should only be used at a distance. Even then, it is almost never safe to powerup when your opponent has Boost.
Hokuto Tenshou Raigeki
623A
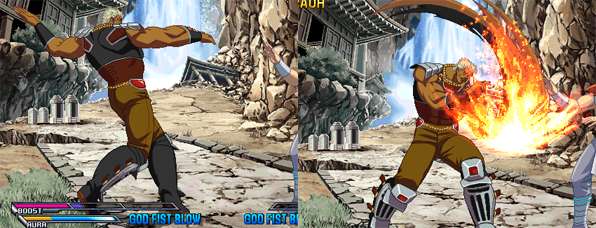
AKA Chop. Raoh winds up and then releases a delayed chop. The startup is invincible, but it wears out 9 frames before the move actually executes, making it hard to use as a reversal. On counter hit the opponent loses one star and is launched high into the air, and it is possible to follow up with a special homing jump, similar to a Grave Shoot. This move is exceptional at dealing with Guard Cancels.
The powerup version gains a second hit during the wind-up animation, making the execution much faster(8F), and is fully invulnerable. This move is a legitimate dragon punch and can be used very effectively as a reversal. Both hits can be canceled into a jump on counter hit. While much better than the normal version in almost all areas, due to its fast execution the powerup version is not suited to baiting Guard Cancels.
Hokuto Raretsuken
623C
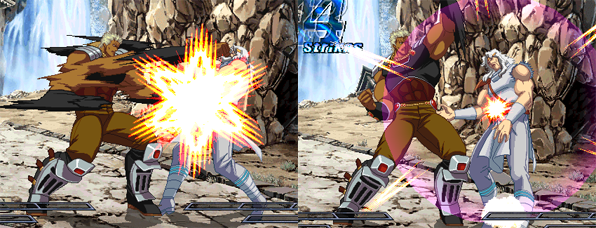
Raoh rushes forward, punching 3 times and finishing with an uppercut. It executes very quickly and nets you a ton of meter on hit or guard. Often clashes with fireball moves and does quite a bit of chip and Guard Crush damage as well - it is especially useful against characters like Thouther and Mamiya. Takes one star and causes wall bounce on counter hit. It is only -6 on guard, but the final hit will sometimes miss if your opponent uses Aura Guard, which will allow them to punish you.
The powerup version gains 4 hits, to a total of 7, and the final uppercut takes one star. Aside from its increased chip and Guard Crush damage as well as meter building abilities, this move is a very important part of Raoh's Dribble combos.
Sai
(Land or Air) 214D

Raoh stabs his opponent through the foot, pinning them to the ground. The opponent and Raoh stay stuck together on the ground for a certain amount of time, during which neither opponent can move(except to crouch) or use Boost.
When performed in the air Raoh first catches the opponent with a kick and brings them to the ground, where he then stabs them. This is without a doubt Raoh's most important move, as it plays a central role in all of his combos. Can be followed up with 2A only(2 frame window). Also it has a minimum height limitation, meaning that if you try to tiger knee it too low, you will only get a high jump air D.
The land version takes one star on hit, and due to its slow execution can only be comboed into using Hitstop Cancel(except vs crouching Rei). Also possesses Super Armor versus weak attacks, but as you will never use this move outside a combo it has no real use. Larger window to follow up with 2A than the air version.
Only the land version can be powered up - it takes two stars on hit and becomes easier to use in wall bounce combos. The Super Armor is also improved but it remains useless. When following up with 2A the timing is slightly different than the normal land version - it is easy to mess up your combo if you use Sai without realizing you have a powerup charge, so it is important to keep this in mind.
Musou Insatsu
41236D (Uses 1 Bar Aura)
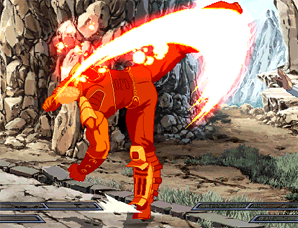
A unique move that allows Raoh to cancel the recovery of almost any move into a powerful kick, at the cost of one bar of Aura. With a very quick startup at only 3 frames and Super Armor, Musou Insatsu is extremely useful and causes your opponent to have to approach you very cautiously when you have meter. This can allow you to get away with a lot - for example Kohou is usually unsafe to use in most situations, but fear of an Insatsu will often keep your opponent from taking advantage of this and attacking you.
Musou Insatsu can be jump canceled on guard or hit. It is also possible to Boost both the startup and recovery of it. On normal hit the opponent is launched into the air, and you will want to follow up with a normal forward jump. A counter hit will take a star and cause wall bounce, and is best followed up with an air dash B.
Hikou Shinkesshuu
214214A (Uses 1 Bar Aura)

An anti-air super. Raoh throws his cape into the air, catching any opponent within range. This move is completely unblockable - if your opponent is in the air and in range they will be caught. Can be extremely useful to get out of pressure, but will likely result in your death if you miss. Takes off one star on normal hit and two on counter hit.
Musou Tensei
214214B (Uses 1 Bar Aura)

A 'charge' super, that after executing(left picture) grants the ability to use the special defensive maneuver Musou Tensei(middle and right pictures) up to 7 times. While active pressing 6(for mid/high attacks) or 2(for low attacks) in time with his opponent's attack hitting will cause Raoh to teleport behind them. Specifically, the time frame for Musou activating is 5 frames within inputing the forward or downward direction. However, if the lever is returned to neutral within 5 frames of the input, the total time is extended to 11 frames. There is a roughly 15 frame window after attempting to Musou in which it is not possible to try again, which prevents continuous Musou attempts.
Musou charges carry over rounds so it is advantageous to try to get off the super as soon as possible.
Tenshou Honretsu
214214C (Uses 1 Bar Aura)

An invincible charging super. Takes two stars on normal hit, three on counter. Its slow startup makes it pretty much useless as a reversal and it is not really suited for combos either. It does have some rare uses, which are covered in the Matchups section.
Hokuto Mettenha
236CD (Fatal KO)

A deadly punch to the skull, from the final fight between Raoh and Kenshiro. A very good FKO, as it locks on the opponent and cannot miss as long as the first hit connects. Also possesses Super Armor, although it is mostly useless except as a gimmick.
Combos
Glossary of Terms
5-hit Bani
The most basic Banishing Strike combo starter. You can change the normal moves leading into the Banishing Strike, but as the number of hits coming into a Banishing Strike wall combo effects the amount of knockback, you generally do not want to exceed 5 hits.
| 2Ax2 > 2B > D > CD |
Ura Sai
The first discovered and most commonly used method of switching sides with your opponent while near the corner. The exact recipe is:
| 2Ax9~10 > 2B > c.C > CD+HSC Ex1~2 > (pass through your opponent) air Sai |
Renda Sai
Used to go from one corner to the other, usually performed after an Ura Sai. The exact recipe is:
| 2Ax12 > 2B > c.C > CD+Mash E until you run out of Boost > air Sai |
Round Trip Sai
Ura Sai followed by Renda Sai. This itself can be repeated forever, and is in fact quite easy to perform on some characters, but has the disadvantage of not recovering any Boost.
Banishing Strike Combos
Banishing Strike combos are Raoh's forte, and generally speaking you will want to try to link into one from any hit you score. As there are so many different possible routes to take, it is best to think of Raoh's combos as made up of many different parts, which you can mix-and-match to best suit each specific situation.
The basic pattern Raoh's Banishing Strike combos follow is:
| 2Ax2 > 2B > D > CD > 6 > (First Wall Combo) > (Second Wall Combo) > (Switch Sides) > (Double Grave Shoot Combo) > (Final Combo > Finish) |
Depending on the situation, any of these parts can be removed if necessary.
Optimal character-specific 5-hit Banishing Strike combos, which aim for maximum Boost recovery with the least difficulty in performing, are listed below in the Optimal Banishing Strike Combos section.
First Wall Combo
Chop Route
| D > 623A > E > c.C > 2C > air dash j.B > air Sai |
Used when at midscreen or closer to the corner. Doesn't take off any stars, but can easily be performed on all characters.
Sai Route
| D > Sai > E > c.C > 2C > air dash j.B > air Sai |
Used when at midscreen or closer to the corner. Will not work on Ken, Toki, Jagi, or Heart unless you have a powerup stock. Works better on Shin and Thouther if you change the D to 2D.
Air Goushouha Route
| D > AC > air 236C > E > c.C > 2C > air dash j.B > air Sai |
Used when at midscreen or closer to the corner. Works on all characters but can be difficult on some, like Shin.
Double Grave Route
| D > AC > E > AC > air Sai |
Used when at midscreen or closer to the corner. Works on all characters.
Heavy Route
| AB > E > c.C > 2C > air dash j.B > air Sai |
Used when far from the corner. Works on all characters but can be difficult on some, like Rei and Juda.
6A Route
| 6A > E > c.C > 2C > air dash j.B > air Sai |
Used when far from the corner. Doesn't take off any stars, but can easily be performed on all characters.
3-Star Route #1
| D > Sai > E > AC > air Sai |
Used when at midscreen or closer to the corner. Mostly used against opponents with low health as you often won't have an opportunity to take off the stars later in the combo, or to lead into a FKO.
3-Star Route #2
| D > AC > air 236C > E > AC > air Sai |
Used when at midscreen or closer to the corner. Mostly used against opponents with low health as you often won't have an opportunity to take off the stars later in the combo, or to lead into a FKO.
3-Star Route #3
| AB > E > AC > air Sai |
Used when far from the corner. Mostly used against opponents with low health as you often won't have an opportunity to take off the stars later in the combo, or to lead into a FKO.
Second Wall Combo
Boost Air Dash B Route
| 2Axn > 2B > c.C > CD > 6 > 2C > air dash j.B+E > air Sai(+E depending on distance) |
The most commonly used part. Works on all characters but can be difficult on some.
Grave Sai Route
| 2Axn > 2B > c.C > CD > 6 > AC > air Sai+E |
An alternate wall combo route. Difficulty corresponds to that of Ura Sai, making it very easy on some characters and hard on others.
Switch Sides
Ura Sai
| 2Ax9~10 > 2B > c.C > CD+HSC Ex1~2 > (pass through your opponent) air Sai |
The first discovered and most commonly used method of switching sides with your opponent while near the corner. Difficulty varies depending on the character. See the combo FAQ for more information.
6B Route
| 2Ax9~10 > 2B > c.C > CD+HSC E > 6B+HSC E > air Sai |
Mostly used on Juda, but works on most other characters as well. At the time of 6B hitting if the total hits in the combo is above 26, the opponent will be instantly knocked down. For this reason, when using this route it is necessary to cut out the second wall combo part.
Insatsu Route
| 2Ax8 > 2B > c.C > AC > Insatsu > air dash j.B > c.D(1 hit) > AC > air Sai > 2A > c.D(1 hit) > AC > air Sai |
Requires 1 bar of Aura at the time the Grave Shoot hits. Used on characters that are hard to perform Ura Sai on like Shin.
Taashi Route
| 2C > slight delay 9E > j.A > j.B > j.D > land then jump straight up > j.A (right side only) > air Sai |
This part is done straight from a 5 hit bani, cutting out the first two wall combos. Generally only used on Toki.
Oraora Route
| D > 623C(2 hits) > E > forward jump j.A > slight delay j.D > land then jump straight up > j.A (right side only) > air Sai |
This part is done straight from a 5 hit bani, cutting out the first two wall combos. Mostly used on Mamiya.
Alternative to Oraora Route
| 2C > air dash j.A > j.B > land 9E > j.A > slight delay j.D > land then jump straight up > j.A (right side only) > air Sai |
This part is done straight from a 5 hit bani, cutting out the first two wall combos. Mostly used on Mamiya and Rei.
Double Grave Shoot Combo
The double Grave Shoot combo, which is done after switching sides and comboing into an air Sai, consists of two parts that can be combined in a number of ways.
First Grave Shoot
Basic Route
| 2Ax10 > 2B > c.C > AC > j.B > air Sai |
Kenshiro-specific Route
| 2Ax13 > 2B > 2D > AC > j.D(1 hit) > air Sai |
Toki-specific Route
| 2Ax12 > c.D(1 hit) > AC > j.D(1 hit) > air Sai |
Jagi-specific Route
| 2Ax13 > c.D(1 hit) > AC > j.D(1 hit) > air Sai |
Rei-specific Route
| 2Ax12 > 2B > 2D > AC > j.D(1 hit) > air Sai |
Juda-specific Route
| 2Ax13 > 2B > D > AC > j.D(1 hit) > air Sai |
Insatsu Route
| 2Ax14 > 2B > D > 623C > Insatsu > j.B > air Sai |
Second Grave Shoot
Basic Route
| 2Axn > c.D(1 hit) > AC > j.A > air Sai |
Toki, Jagi-specific route
| 2A > 2B > c.C > C > c.D > AC > j.A > air Sai |
Kenshiro, Rei, Shin, Juda-specific Route
| 2A > 2B > c.C > C > c.D(1 hit) > AC > j.A > air Sai |
Raoh, Heart-specific Route
| 2A > 2B > c.C > C > AC > j.A > air Sai |
Thouther, Mamiya-specific Route
| 2A > 2B > c.C > C > AC > air Sai |
Final Combo > Finish
In the years since this game's release, many 100% combo routes have been developed for Raoh. Most however are lacking in their ability to recover gauge in comparison to the more recently-discovered Traveling. For this reason and to avoid confusion, only parts that are commonly used in current competitive play will be listed here.
Traveling Route #1
| 2Ax14 > 2B > D > Sai+E > 2Ax14 > 2B > 2A~E > 2Ax6 > 2B > D > Sai+E > 2Ax14 > 2B > D > CD > 6~ (Traveling) |
The most basic and commonly used part.
Traveling Route #2
| 2Ax14 > 2B > D > Sai+E > 2Ax14 > 2B > D > 623C(3 hits) > E > 2Ax3~4 > 2B > c.D(1 hit) > Sai+E > 2Ax10~12 > 2B > c.C > CD > 6~ (Traveling) |
An alternate route, used mostly when the Boost Bug occurs.
Banishing Cancel Traveling Finish
| (One of the above routes) ~CD > Banishing Cancel Musou Tensei > dash 2B > 2A~ (Traveling) |
Used when the opponent has very low health near the end of the combo and will die before you have the opportunity to gain meter.
Early Banishing Cancel Finish
| ~CD > Banishing Cancel Musou Tensei > (dash) Sai or 2D |
As Traveling requires a specific amount of hits to use the above finisher will not work if the opponent has low health very early in a combo. In such cases this combo can be used at any point during any combo to gain a bar of Boost and finish off the opponent
Optimal Banishing Strike Combos
The below are what are generally considered to be the optimal Banishing Strike combos for use on each character. They have been fine-tuned to balance ease of use with Boost recovery. However, as it may not be possible to use them in all situations, an understanding of the fundamentals of Raoh's Banishing Strike combos is essential.
Kenshiro
| 2Ax2 > 2B > D > CD > 6 > D > 623A > E > c.C > 2C > air dash j.B > air Sai > 2Ax3 > 2B > c.C > CD > 6 > AC > air Sai+E > Ura Sai > Renda Sai > 2Ax10 > 2B > c.C > CD > 6 > (Musou Tensei >) 2B+E > 2Axn~ (Traveling) |
Raoh
| 2Ax2 > 2B > D > CD > 6 > D > 623A > E > c.C > 2C > air dash j.B > air Sai > 2A > 2B > c.C > CD > 6 > 2C > air dash j.B+E > air Sai(+E depending on distance) > Ura Sai > Renda Sai > 2Ax10 > 2B > c.C > CD > 6 > (Musou Tensei >) 2B+E > 2Axn~ (Traveling) |
Toki
| 2Ax2 > 2B > D > CD > 6 > 2C > slight delay 9E > j.A > j.B > j.D > land then jump straight up > j.A (right side only) > air Sai > 2Ax12 > c.D(1 hit) > AC > j.C > air Sai > 2Ax5 > c.D(1 hit) > AC > j.A > air Sai > 2Ax15 > 2B > D > Sai+E > 2Ax14 > 2A~E > 2Ax4 > 2B > D > Sai+E > 2Ax10 > 2B > c.C > CD > 6 > 2B > 2Ax5 > 2A~E > 2Ax14 > Axn~ (Traveling) |
Shin
| 2Ax2 > 2B > D > CD > 6 > 2D > Sai > E > c.C > 2C > air dash j.B > air Sai > 2Ax9 > c.D(1 hit) > AC > Insatsu > air dash j.B > c.D(1 hit) > AC > air Sai > 2A > c.D(1 hit) > AC > j.A > air Sai > 2Ax14 > 2B > D > 623C(3 hits) > E > 2Ax7 > 2B > D > Sai+E > 2Ax14 > 2B > D > CD > 6 > c.B > 2Ax5 > 2A~E > 2Axn~ (Traveling) |
Rei
| 2Ax2 > 2B > D > CD > 6 > c.B (when opponent is near corner only) > 2C > air dash j.B > E > air dash j.B > air Sai > 2Ax12 > 2B > 2D > AC > j.B > air Sai > 2A > 2B > c.C > C > AC > j.A > air Sai > 2Ax14 > 2B > D > 623C(3 hits) > E > 2Ax7 > 2B > D > Sai+E > 2Ax14 > 2B > D > CD > 6 > 2B > 2Ax5 > 2A~E > 2Axn~ (Traveling) |
Juda
| 2Ax2 > 2B > D > CD > 6 > D > AC > E > AC > air Sai > 2Ax10 > 2B > c.C > CD > HSC 6B+E > E > air Sai > 2Ax13 > 2B > D > AC > j.B > air Sai > 2A > 2B > c.C > C > c.D > AC > j.A > air Sai > 2x15 > 2B > D > Sai+E > 2Ax10 > 2B > c.C > CD > 6 > 2B > 2Ax5 > 2A~E > 2Axn~ (Traveling) |
Thouther
| 2Ax2 > 2B > D > CD > 6 > D > 623A > E > c.C > 2C > air dash j.B > air Sai > 2A > 2B > c.C > CD > 6 > 2C > air dash j.B+E > air Sai > Ura Sai > Renda Sai > 2Ax11 > 2B > 2D > Musou Tensei > j.B > air Sai > 2A > 2B > c.C > C > AC > air Sai > 2Ax11 > 2B > c.C > c.D > 623C |
Jagi
| 2Ax2 > 2B > D > CD > 6 > D > 623A > E > c.C > 2C > air dash j.B > air Sai > 2A > 2B > c.C > CD > 6 > 2C > air dash j.B+E > air Sai > Ura Sai > Renda Sai > Ura Sai > 2Ax10 > 2B > c.C > AC > j.A > air Sai > 2A > 2B > c.C > C > c.D > AC > j.A > air Sai > 2Axn~ |
Mr. Heart
| 2Ax2 > 2B > D > CD > 6 > D > AC > air 236C+E > 2C > air dash j.B > air Sai > 2Ax11 > 2B > c.C > CD+HSC E > air Sai > [2Ax10 > 2B > c.C > CD+HSC E > air Sai]xn (For gauge recovery chain into a double Grave Shoot combo when Heart starts to get low on health) |
Mamiya
| 2Ax2 > 2B > D > CD > 6 > D > 623C(3 hits) > E > forward jump j.A > delay j.D > land then jump straight up > j.A (right side only) > air Sai > 2Ax10 > 2B > c.D > AC > j.A > air Sai > 2A > 2B > c.C > AC > j.A > air Sai > 2Ax14 > 2B > D > Sai+E > 2Ax14 > 2A~E > 2Ax3 > 2B > D > Sai+E > 2Ax10 > 2B > c.C > CD > 6 > 2B > 2Ax5 > 2A~E > 2Axn~ (Traveling) |
Dribble Combos
Raoh's Dribble combos require you to be near the corner, have 1 bar of Aura, and be able to gain Boost(or already have some). The main use for these is when you hit with a 2B or 2D and are not able to go for a Banishing Strike combo. Dribble combos are especially useful against Toki and Rei, as both can be difficult to perform Banishing Strike combos on, and are also characters that you really want to kill in one shot any time you land a hit.
These combos can also be done from a throw as well if you have a powerup stock and at least 1.25 Boost.
Basic Dribble Route
| 2Bx2 > 2D > 214A > Insatsu > j.B > air Sai > 2Ax5 > 2B > c.C > 2C > air Sai > 2Ax10 > 2B > c.C > 2C > 623C(7hits) > HSC E > 2A > [c.B > c.B~E]x2 > c.Bx2 > 2Ax4 > dash 2Axn~ (Dribble) |
Works on all characters but can be difficult on some.
Kenshiro, Raoh-specific Route
| 2Bx2 > 2D > 214A > Insatsu > j.B > air Sai > 2Ax5 > 2B > c.C > 2C > air Sai > 2Ax10 > 2B > c.C > 2C > 623C(7hits) > HSC E > 2Ax7 > 2A~E > 2Ax3 > dash 2Axn~ (Dribble) |
Differences from the basic route highlighted in red. Generally not used that much but listed for references sake.
Toki-specific Route
| 2Bx2 > 2D > 214A > Insatsu > j.B > air Sai > 2A > 2B > c.C > C > c.D > AC > j.A > air Sai > 2Ax10 > 2B > c.C > 2C > 623C(7hits) > HSC E > 2A > [c.B > c.B~E]x2 > c.Bx2 > 2Ax4 > dash 2Axn~ (Dribble) |
Differences from the basic route highlighted in red. The most important dribble combo - if you are going to practice only one of them make it this one!
Shin-specific Route
| 2Bx2 > 2D > 214A > Insatsu > j.B > air Sai > 2Ax5 > 2B > c.C > 2C > air Sai > 2Ax10 > 2B > c.C > 2C > 623C(7hits) > HSC E > 2Ax4 > 2A~E > 2Ax3 > 2A~E > 2Ax4 > dash 2Axn~ (Dribble) |
Differences from the basic route highlighted in red.
Juda-specific Route
| 2Bx2 > 2D > 214A > Insatsu > j.B > air Sai > 2Ax5 > 2B > c.C > 2C > air Sai > 2Ax10 > 2B > c.C > 2C > 623C(7hits) > HSC E > A > 2Ax7 > 2A~E > 2Ax3 > dash 2Axn~ (Dribble) |
Differences from the basic route highlighted in red.
Throw Combos
Basic Nagezumi Route
| 4C Throw > E > c.D(1 hit) > AC > j.A > air Sai > 2Ax4 > 2B > c.C > 2C > air Sai > 2Ax14 > 2B > D > Sai+E > 2Ax8 > 2B > c.C > 2C > 214214A > 2Bx4 > 2B~E > 2Bx11 > 2B~E > 2Bx6 > 2B~E > 2Bx7 > 2D > Insatsu > air dash j.B~ (Basuke) |
A Hyakuretsu combo from Raoh's throw. For use against opponents in or very close to the corner. This combo works on all characters except Jagi, Thouther, and Mamiya. Small tweaks can be made to the number of hits before the 2C or the amount of 2Bs before first using Boost depending on the character. See the Other Important Information section.
Shin, Heart-specific Easy Nagezumi Route
| 4C Throw > E > c.D(1 hit) > AC > j.A > air Sai > 2Ax4 > 2B > c.C > 2C > air Sai > 2Ax14 > 2B > D > Sai+E > 2Ax8 > 2B > c.C > 2C > 214214A > 2Bx4 > 2B~E > 2B > 2Ax13 > 2A~E > 2Ax8 > 2A~E > 2Axn~ (Basuke) |
Differences from the basic route highlighted in red. This is a simplified version that takes advantage of the fact that it is possible to perform Hyakuretsu on Shin and Heart using 2A instead of 2B.
Thouther-specific Nagezumi Route
| 4C Throw > E > c.D(1 hit) > AC > j.A > air Sai > 2A > c.D(1 hit) > AC > air Sai > 2Ax14 > 2B > D > Sai+E > 2Ax10 > 2B > c.C > 2C > HSC 214214A > 2Bx4 > 2B~E > 2Bx11 > 2B~E > 2Bx6 > 2B~E > 2Bx7 > 2D > Insatsu > air dash j.B~ (Basuke) |
Differences from the basic route highlighted in red. Generally not used that much but listed for references sake.
Mamiya-specific Nagezumi Route
| 4C Throw > E > c.D(1 hit) > AC > j.A > air Sai > 2Ax4 > 2B > c.C > 2C > air Sai > 2Ax14 > 2B > D > Sai+E > 2Ax8 > 2B > c.C > 2C > 214214A > 2Bx4 > 2B~E > 2Bx11 > 2B~E > 2Bx6 > 2B~E > 2Bx8 > Insatsu > air dash j.B~ (Basuke) |
Differences from the basic route highlighted in red. Generally not used that much but listed for references sake.
3-star FKO
| Throw > E > AC > j.C > 236C > E > AC > j.A > air Sai > 2A > 2B > c.C > CD > 6 > FKO |
Only requires 0.5 Boost if you are able to gain Boost at the time of throwing, but if you have less than 1 bar you will need at least 0.75 for the bar to fill up.
4-star BD Throw Finisher
| (214A) BD > CD+E > Powerup Sai+E |
Used to finish off a dizzied opponent with low health. If you don't already have a powerup stock quickly charge one then follow up with the throw. This is pretty much the only real use for Raoh's BD throw.
Fatal KO Combos
As a 3-star FKO combo can easily be done from any hit simply by stringing together random Banishing Strike combo parts, only unique and/or gimmicky combos will be listed here.
4-star FKO Max Banishing Strike Combo
| CD(Max charge, opponent guards) > Insatsu > air dash j.B > AC > air Sai > 2A > 2B > c.C > CD > 6 > AC > air 236C > E > FKO |
Requires 1 bar Aura. Extremely effective and easy to do for a 4-star FKO combo, but as it requires you to get your opponent to block a max charge Banishing Strike it is very situational.
Flying Kenoh FKO
| 5 hit Bani > any wall combo ~ air Sai > 2Ax9 > 2B > c.C > CD+HSC E > 2C > slight delay 9E > fly to the opposite corner > FKO |
A very stylish FKO finisher! Be sure not to make the combo too long coming into the 2C, otherwise the opponent will be instantly knocked down upon it hitting.
Ura Heavy FKO
| 5 hit Bani > any wall combo ~ air Sai > 2Ax9 > 2B > c.C > CD+HSC E > c.C > AB > E > B > c.D(1 hit) > FKO |
Another great looking FKO combo.
K.A Special
| 5 hit Bani > any wall combo ~ air Sai > 2Ax9 > 2B > c.C > CD+HSC E > AC > jump straight up > 236C > E > FKO |
AKA Shirou Special. The final fireball hits after activating the FKO, so you need to remove all of your opponent's stars in the first wall combo.
K.A Special Mk. 2
| 5 hit Bani > 6 > CD > E > AC > air 236C > E > AC > 2C > FKO |
A nice looking no Sai 2-star FKO combo.
Other Important Combos
High-low Setup
| 6B > E > 2B > c.D(1 hit) > E > CD~ |
By instantly Boosting into 2B from 6B, you get a super quick high-low setup that can be hard to block even when you know its coming.
Crouching Rei Infinite
| ~Sai > [2Axn > c.D(1 hit) > Sai]xn |
Infinite combo that works on Rei when he takes a hit while crouching. If deep in the corner knockback will eventually come into effect so it is necessary to chain into an air combo before this happens. If you want to really style on your opponent you can do loops of 2Bxn > c.D(1 hit) > Sai instead.
Chikuseki Setup Combo (For use on Thouther and Mamiya)
| 2Ax2 > 2B > D > CD > 6 > 2D > Sai > E > AC > air Sai > 2Ax10~11 > c.D(1 hit) > AC > j.D > air Sai > 2Ax10 > 2B > c.C > CD |
Follow up with 2Bx2~3 > D > 623C on wakeup for guard crush, dizzy, and massive gauge recovery. If opponent has Aura they will almost always Guard Cancel here so it is a very easy spot to bait it with a chop!
Other Important Information
Maximum total hits possible before 2C when comboing into an air Sai
Kenshiro: 21
Raoh: 15
Toki: 15
Jagi: 21
Rei: 20
Shin: 18
Juda: 18
Thouther: 12
Mamiya: 15
Heart: 15
Number of 2B possible before using first Movement Boost during Hyakuretsu
Kenshiro: 5
Raoh: 5
Toki: 5
Jagi: 4
Rei: 7
Shin: 5
Juda: 7
Thouther: 5
Mamiya: 4
Heart: 5
Frequently Asked Questions
How do you combo D into a Banishing Strike?
Far D can be linked directly into a Banishing Strike by Kara Canceling a 2D. The input is done as D > 2CDCD or D > slight delay 2CD. This technique can be used by most other characters as well.
How do you combo into 2A after an air Sai?
Practice, practice, practice! Unfortunately there is no trick to it - you have a 2 frame window after landing to input 2A. While this can be difficult at first, once you get the rhythm down you should be able to do it almost every time. Ground Sai has a much larger window to follow up with 2A and generally should not pose much of a problem. One thing to remember however is that powerup ground Sai has a slightly different timing, so you will want to practice a bit with both to get the timings down.
How do you do a tiger knee air Sai?
Air Sai has a height restriction on it, meaning it will only execute if performed at least a certain height off the ground. For this reason if you try to tiger knee it as fast as possible, you will usually just end up with a high jump D. The input itself can be done as 2147D or 8214D, with a slight delay between the lever movement and pressing D.
How do you do Ura Sai?
Learning Ura Sai is often the cause of much grief for aspiring Raoh users. However, it is actually quite simple, and with a little practice you should be able to do it almost every time.
One mistake many people make is reducing the number of 2As before chaining into a Banishing Strike. As it is not possible to Boost while Raoh and his opponent are pinned together by Sai, Hit Stop Cancel cannot be done in this state. 2Ax9 > 2B > c.C > CD is the absolute minimum number of hits you need for the Sai to wear off and allow you to use Boost again. Another problem people have is with the Hit Stop Cancel itself. There is no real trick to it, you simply need to press E the instant the Banishing Strike hits. If you want to practice just this without doing the full Ura Sai combo, simply stand right in front of your opponent and do CD > HSC E over and over until you get it - if you pass through your opponent, you are doing it right. The final and most important part of Ura Sai is the air Sai. Since you pass through your opponent, the direction you need to input changes, so from the perspective you started, you will be doing 2369D and not 2147D.
How do you do Renda Sai?
Renda Sai is essentially the same as Ura Sai, with two small differences. First, while Ura Sai only requires you to press Boost once, with Renda Sai you need to use up all your Boost before you reach the opposite corner. If you are having trouble hitting Boost fast enough, try placing both your index and middle fingers over the Boost button, and quickly tapping it with alternating fingers 4~5 times. Second, unlike Ura Sai you do not end up on the other side of the opponent, so air Sai is performed using the normal input, 2147D.
How do you do a Movement Boost?
In the combo section Cancel Boost is shown as X > E > and Movement Boost as X~E. While the X > E > notation used for Cancel Boost might give the impression that you need to do the command separately, most of the time you can actually press it at the same time as the following command. For example, D > AC > E > AC is usually inputted as D > AC > ACE. Similarly you can press 2BE and get a Movement Boost 2B, which is great for quickly closing the distance to an opponent. However, Movement Boost cannot be done in this manner during a combo - if you were to input 2AE all at the same time while trying to do 2Ax3 >2A~E > 2Ax3, you will get a Cancel Boost and the combo will fail.
Movement Boost within a combo is done by first inputting a normal or special move, and then quickly pressing the Boost button. It is necessary that you press Boost before the attack hits, so for normals like 2A this must be done extremely quickly. This is best performed by drumming your fingers across both buttons in two fast taps. For example, the combo 2Ax3 > 2A~E > 2Ax3 would be done as, tap tap tap, tap-tap, tap tap tap. Once you get the rhythm of it it is quite easy to do.
How do you do Traveling?
Traveling is a technique done by ending a 55 or more hit air or ground only combo(if you switch from ground to air mid-combo the count resets) with a Banishing Strike, and then rapidly hitting the opponent while they are down. There are two recipes for this, one for Kenshiro and Raoh, and one for the rest of the characters. With Kenshiro and Raoh, you must input ~CD > 6 > Ex2~3 > 2B > 2Axn. The rest of the characters use ~CD > 6 > 2B > 2Ax5 > 2A~E > 2Axn. After 85 hits(only counting air only or ground only hits; this is not necessarily the amount of hits that is displayed on the combo counter) you can switch from 2A to A. Depending on the length of the combo or route you chose you may need to use a Movement Boost if you start getting pushed back too far.
How do you do a Banishing Cancel?
Banishing Cancel, as explained in the Advanced Game Mechanics section, is a technique that allows the Banishing Strike's follow-up Movement Boost's startup to be canceled, and the free boost bar stored for later use. There is only a 1 frame window for this to be done, but for some unknown reason this window extends to 2 frames when the opponent is under the effect of Sai, making this a very useful technique for Raoh. 2 frames may seem like a very short window of time, but remember that air Sai > 2A is also 2 frames and is in fact quite easy to do.
Raoh is able to Banishing Cancel the following five moves: Musou Tensei, Hikou Shinkesshuu, Tenshou Honretsu, Goushouha, and his FKO. Of these Musou Tensei is by far the most used. Shinkesshuu is also used occasionally, but the other three are generally only done as showy combo finishers and have little practical use.
As far as input goes, you can perform it however you want, as long as the command of the move and forward are inputted at some point. The two most common methods, using Banishing Cancel Musou Tensei as an example, are 6214214B and 21478963214+B.
Matchups
Kenshiro
| Raoh is considered to have the advantage in this matchup, due largely to the fact that Kenshiro is extremely easy to combo, but this is by no means an easy fight. While Raoh can kill Kenshiro from pretty much any hit, Kenshiro is more than capable of returning the favor, as Raoh is the easiest character for him to Dribble. Against any competent Kenshiro user you are more than likely dead if you get hit when he has a bar of Boost stocked.
Raoh's normals are very effective against Kenshiro for the most part, as long as you stay out of the range of his far D. 2B and 2D will beat his ground attacks, and his air dashes can be dealt with using far B. Rising jump A is also great for combating air dash attacks at close range, and can be easily chained into a 100% combo. At the opening of the round your best option is crouch guarding or walking backwards. If you try to jump in or attack you will likely receive a far D to the face for your efforts. However, if Kenshiro does a far D and it misses, which it will if you are just crouching there, you can hit him with 2D while he is recovering. You will be too far away to follow up with a combo in the first round, but if you manage to pull this off in later rounds when you have meter, you can use Insatsu or Boost to follow up into a combo and win the round right there. Another point it is important to understand is that due to hardware lag Raoh has a great deal of difficulty guarding Kenshiro's air dash B on reaction. For this reason the use of fuzzy guard and fuzzy jump is imperative. (Note: guard lag is specific to the Atomiswave version of the game and is not present in the console port. Regardless of which version you are playing, utilizing fuzzy inputs will make your life a lot easier) When being rushed down your first reaction is often to use a Guard Cancel, but this can lead to painful consequences against Kenshiro, who is well equipped for dealing with them. As a rule you never want to use a Guard Cancel against any of his weak attacks, especially 2B, as he will recover with plenty of time to Agility Guard or Musou it. He can even punish Guard Cancels done on strong attacks by canceling them into Ryugekiko or 6B, so you really want to pick your spots carefully. This is a good matchup that can go either way, so you will want to make sure your combos are well practiced and your footsies game is solid. |
Raoh
| Probably the worst mirror match in the game next to Heart versus Heart. This match is all about who hits who first and thus wins the round. Raoh is extremely easy to combo, so you want to make any hit mean death for your opponent. As one hit will mean death for you as well, you need to play extremely tight and avoid anything too risky, especially when your opponent has Boost or Aura. Raoh's mixup is terrible and you should obviously be very familiar with it, so there is nothing wrong with going on the defense and waiting for your opponent to make a mistake.
One thing to note is that while 2B > far D connects during a combo, it is not a continuous string while blocking. This means that can get a guaranteed Counter Hit chop off on your opponent if they always use the same attack pattern, like 2A > 2A > 2B > D. In general luck is a big factor in Raoh mirror, but it is important to play safe and keep your cool even when you are in a seemingly hopeless situation - remember, it only takes one hit to win the round! |
Toki
| Raoh's worst matchup is, as you probably guessed, Toki! Toki's strengths need no introduction - specifically of note in this matchup, Toki is able to cross up Raoh in the corner, and his 6D hits as a high attack.
It is very important that you try to get Musou activated or at least a powerup stock charged up before Toki manages to close in on you and turn on the pressure. Without either, things will usually get messy very fast. Fuzzy jump is also a must in this matchup for escaping Toki's insane rushdown. Generally when guarding your best bet is to stay standing most of the time since Toki's only low, 2B, doesn't see that much use and has a pretty slow startup. This is quite counter-intuitive and it can be hard to get used to, but it is definitely worth it. You will however want to throw in a little bit of low guarding every now and again so your opponent doesn't catch on. Toki can at times be difficult to combo, especially on his stage due to the lag on the left side. As an alternative to going for Traveling, Raoh's Dribble is also viable option, and worth practicing to perfection. As in Raoh's matchup against Rei, you need to take advantage of every opportunity you get if you want to have any hope of victory. |
Shin
| This is a decent matchup, until Raoh activates Musou that is, at which point there is little left for Shin to do. Shin's main normals he uses for zoning are far C and 2B. Once you get Musou Shin can no longer rely on far C, and his 2B can easily be beaten by Raoh's own 2B.
One important point to remember about this matchup is that Raoh has a guard gauge against Shin. If it starts getting low and/or Shin has Boost, you could be in trouble. Between his crossups and command throw Shin also has a solid wakeup game, which can make Raoh's life quite miserable. Don't forget that Raoh can get crossed up in the corner! If you have Musou available you can quickly do 4 > 6 > neutral when waking up, which will get you either an agility guard or Musou depending on which direction you are attacked from. After guarding Shin's Gokutoken, you can usually follow up with a Grave Shoot - technically speaking you need to Agility Guard it to get a guaranteed hit, but most of the time your opponent will not be able to Aura Guard in time to block it. Shin is quite hard to perform Ura-sai on - you will want to make sure you are well practiced in the Shin-specific routes, otherwise you will find yourself dropping a lot of combos. However, as long as you play a solid game and aim to active Musou as soon as possible, you shouldn't have that much trouble winning this matchup. |
Rei
| Rei is a very tough matchup for Raoh. Rei's speed and great normals make him extremely effective at keeping up the pressure, and once he gets Raoh locked down in the corner that can spell the end of the whole match.
Your strategy here should be similar to that you would take against Kenshiro: distance yourself and wait for a good opportunity, try to be the one to make first contact, and activate Musou as soon as possible. You should also be aiming to charge some powerup stocks any time you have the opportunity, as being able to use powerup chop gives you an actual option to get out of pressure, and forces Rei to think a bit when approaching you. It is also very important to use discretion when choosing where to Guard Cancel, as Rei has plenty of options for baiting them. Ura-sai can be relatively difficult to perform on Rei, making him one of the harder characters to combo in some situations. On the other hand, Traveling is quite easy to pull off on him. Also, if you manage to score a hit on Rei while he is crouching and you have or are close to having a bar of Boost, you can easily chain into Raoh's infinite. As this is such a hard match, you really want to make sure you have your Rei-specific combos down pat, because if you miss an opportunity chances are you wont get another one. |
Juda
| Juda is without a doubt Raoh's best matchup of the top 3 - he is extremely easy to combo and many of his setups can be escaped with the help of Musou Tensei. At the same time Raoh's lack of a backstep makes things tougher for him until he is able to activate Musou.
Juda is very easy to cross up, so you will want to use this to your advantage as much as possible. Aside from just air dash B, you can also try to aim for some harder-to-see setups like high jump (air dash) D. Against Judas dam super, Agility Defence > throw or BD throw is your best bet to avoid the water and debris, and if you have Boost you can follow up with a nice combo as well. Also important to remember is that Juda's Banishing Strike has an unreal amount of active frames - even when it looks like he has missed with it you will often receive a counter hit if you try to punish him too early. It is best to exercise caution when Juda is throwing Banishing Strikes around. While generally a garbage move, against Juda ground Goushouha, especially the powerup version, can function well in punishing him when he is setting up land mines etc. Keep in mind that it is still by no means safe, and should not be used when Juda has a Boost stock available. Another move that normally doesn't see much use but can be useful against Juda is Tenshou Honretsu. A common setup for Juda at the end of a combo is 2D > Dagar Rush > max Banishing - in such a situation a reversal Honretsu will take out both Juda and Dagar and net you big damage as well as a nice 3 stars. You can think of it as a really ghetto Sekkakou. While certainly not an easy match, Raoh has a slight advantage overall, and once you get used to Juda's setups you shouldn't have too much trouble dealing with him. |
Thouther
| Thouther is similar to Mamiya in that he is seemingly unstoppable when on the attack, but terrible on defense. Raoh has a definite advantage, but when Thouther gets on a roll, he can make quick work of you. If you let him take a round things start to look bleak, as in most cases you will be down to your last star and one mistake away from losing the match.
Thouther is quite easy to combo for the most part, but as he has such low health most 100% combos will kill him before you are able to start building meter. Since you can Guard Crush him, going for a Chikuseki combo is usually the best option in the first round, as this allows you to max out your meter and take off most of his stars. As many of Thouther's mixup options simply can not be guarded on reaction, this is another matchup where the use of fuzzy guard and fuzzy jump is very important. A few of Raoh's moves are particularly useful against Thouther. Raretsuken is great to add in the the end of a blocked attack string, as is takes off a huge chunk of Thouther's guard bar while building meter for you. It will also go right though his fireballs and Counter Hit him. Combined with Boost this can be a deadly way to close the distance and punish fireball spam. It is also worth noting that Raretsuken is the only move you can punish Thouther's Houshou Juujihou reversal super with on normal guard. This will counter-hit, so ideally you want to follow it with a Boost to continue into a wall combo. Another useful move is ground Goushouha, which can be used to take out Thouther and his fireballs in one stroke from a distance. Against players who like to high jump and throw out a fireball right away at the start of the round, this move can be used every once in a while to shake them up. Keep in mind that the startup and recovery are both huge so caution is necessary when using it. As long as you are able to avoid Thouther's lock down and maintain control of the match, you should be able to make quick work of him. |
Jagi
| Jagi sucks. Really bad. No one will deny that he is cool, and using him makes you awesome, but let's face the facts. Raoh outclasses Jagi in pretty much all areas, and Jagi is also the easiest character for Raoh to combo along with Kenshiro. The match basically ends as soon as Raoh activates Musou Tensei, as this makes most of Jagi's moves unsafe.
One thing you want to remember is that when Jagi takes a hit while crouching he recovers extremely quickly(think the opposite of Rei), and because of this 2B > far D will not combo. In the event you do hit him while he is crouching you will want to connect 2B to 2D and follow up with a (Boost) Grave Shoot or Insatsu. Also it should be noted that Jagi's Rakangeki super is guaranteed as a Counter Hit after blocking any of Raoh's normals and most specials, and will take off two stars and a good amount of health. If your opponent is capable of using Jagi's magical Basuke combo then you will want to avoid getting thrown or hit with his overhead near the corner when he has more than 2 Boost, but otherwise there is not much he can do to you. Jagi has two combo enders that can be a pain if you don't know how to get out of them. The first is 'Gas Hame,' which is done by ending a Banishing Strike combo with a match and then dashing in and dropping gas barrels over and over, causing the match to ignite the barrels and continuously knock you down. This can be escaped using Musou, a Guard Cancel, or any move with big invulnerability like Honretsu or a powered up chop. The other, known as 'Misora-shiki,' is likewise done by ending a Banishing Strike combo with a match, and then using his gas super with a slight delay so it covers the ground under you. This results in the gas igniting in a huge fire when you get up, and will net Jagi a bit over a full bar of Boost if you guard it. This is generally followed up by a Heavy Strike or other mixup, which using the boost gained allows Jagi to reset into another Banishing Strike combo. This however is extremely easy to counter - if you have Musou activated you can just Musou it, otherwise it is safe to simply not guard and take a small amount of damage from the fire. If you are low on health without Musou and can't afford to take the hit you can also Guard Cancel just before the Heavy Strike connects, although the fire still hits sometimes anyways for reasons unexplained. Overall this is a really easy match and you should win most of the time without any problems. |
Mr. Heart
| While Raoh has a huge advantage in this matchup, a single mistake will often spell death, as it is laughably easy for Heart to perform his BD throw infinite on Raoh.
For half a bar of Aura Heart is capable of using a special Guard Cancel that allows him to follow up with a combo on hit. It basically functions in the same way as Baiken's counter moves do in Guilty Gear, with the main difference being that Baiken can't kill you in one combo. If that doesn't sound wonderful enough, Heart can get a guaranteed Guard Cancel off of all* of Raoh's normals, which makes approaching him when he has meter a willful act of suicide. (*Note: There is one exception to this: jump C, which has zero landing recovery. When performed near the end of an air dash you are able to land and Agility Guard or Musou Heart's Guard Cancel) Another important point is that Heart can store up the Super Armor from his jump C by charging the move and then landing before it executes. This makes it so he can absorb a hit if you attack him while he is performing any normal or special move, which really lets him get in your face. Once he has stored the armor you can get rid of it by either hitting him with any attack or normal throw, or making him guard a move that does chip damage(all special moves). However, he is able to guard special moves without losing his armor charge by making use of Aura Guard. Whenever Heart stores up Super Armor, you want to remove it right away with air Goushouha before he is able to get close. Don't forget that if he Aura Guards it he won't lose the armor, so just keep shooting until he either gives up or loses all his Aura. Heart is very similar to Raoh in that his defense relies heavily on having meter, and until he gets enough Aura for a Guard Cancel his options are very limited. For this reason you can really go all out at the beginning of the match, as the worst he can do is hit you with a Banishing Strike combo for 50% life or so. Once he has half a bar or more of Aura however, the whole match changes. You can no longer attack him safely head on, so at this point you should switch to high jumping around and throwing fireballs, powering up with Kohou whenever you make him guard one. As long as you stay out of his anti-air throw range and avoid eating an Earthcrush, there is very little Heart can do, and he will be forced to take risks to approach you. If your opponent doesn't do anything you can just sit there all day throwing fireballs until you win by time up. Quite a few moves that rarely ever see any use have opportunities to really shine in this matchup. Due to his poor mobility Heavy Strikes and max charged Banishing Strikes are extremely effective against Heart, as long as you don't overuse them. Also, since you will often have lot of powerup stocks built up, your charged normal moves can be used to really surprise your opponent. Even most Raoh users forget about them most of the time, so chances are your opponent won't even know they exist. Air C is especially deadly as you can charge it at long range, then Boost in at the last moment, continuing into a wall combo for an easy win. Even Tenshou Honretsu has its place in this matchup, as it can be used to negate Heart's annoying Kenpou Goroshi setups. All in all Raoh undeniably has the advantage, but it is necessary to be very patient and make significant changes to your strategy in comparison to how you would fight most characters. Failure to do so will result in a quick loss against any half-decent Heart user. |
Mamiya
| In theory, Mamiya is a 6:4 favorite in this match. The reality however is that very few players play Mamiya at all, and of those even fewer are capable of using her to her full potential. Against any but these select few this is a pretty easy match.
With her great mobility, crazy projectiles, and unblockable wakeups, Mamiya does pose a threat if you let her build momentum. However, she drops extremely quickly when under pressure. As she possesses a Guard Crush gauge against Raoh, the best course of action to take upon landing a hit is often to go for a Chikuseki setup as opposed to a 100% combo. This will allow you to take off most of her stars and build up a ton of meter, giving you a huge advantage going in to the second round. One thing it is important to note is that in the event you bait Mamiya's Guard Cancel with a chop, it will not Counter Hit due to her Guard Cancel's quick recovery. This makes it so that you need to use either Insatsu or Boost if you want to follow up with a combo. In this matchup you really want to take the fight to Mamiya right away and keep the pressure up the whole time. If you are able to do this then you should be able to come out ahead most of the time. |
