No edit summary |
|||
| Line 1: | Line 1: | ||
=Introduction= | =Introduction= | ||
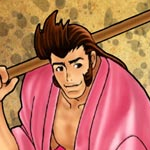
[[Image:amano.png]] | |||
=Moves List= | =Moves List= | ||
==Special Moves== | ==Special Moves== | ||
Revision as of 12:51, 21 February 2017
Introduction
Moves List
Special Moves
Keima's Rage - dp + C
Amano creates a grounded uppercut
Windmill - qcb + A
Amano swings and hits with his sake jug
Piercing Sparrow - f, db, f + A/B
Amano plunges his scabbard into the opponent and shifts to the opposite side
Super Cancel able
Domino Toppler - df, df + C
Amano reaches forward to headbutt opponent multiple times
Badger Bash - A repeatedly
Amano swings his scabbard back and forth
Follow up with Anaguma no Fundoshi Nugi (qcf + B)
Choujouhatsu - qcf + Start
Amano rubs something against his face
Meant to increase his super meter
Destiny - hcb + B
Amano swings his scabbard in a circle. After releasing the button, it can break guard if held long enough
Chargeable
Loudmouth - hcb + C
Amano taunts opponent as a counter. If hit, he ends up on the opposite side, striking the opponent
Desperation Moves
Checkmate of the Queen - hcb, hcb + AB
Amano tosses a ball that explodes on the ground
Chargeable
Super Desperation Moves
Checkmate of the Rook - hcb, hcb + A/B
Similar to Amano's DM, but has a bigger impact
A version shoots up, B version shoots further out
The Basics
Power
- b A (x2 or 3), d A > f b f A / B > HCB HCB A B
- d A > f b f A / B > HCB HCB A B
- C D> (Dash-in for half a second) > DP C (Difficult)
- b B, d A > f b f A / B > HCB HCB A B
- A, b A (x2), d A > f b f A / B > HCB HCB A B
- HCB HCB A / B > (early) DP C > DP C
- Dash A / B > d A > Follow-up of your choice
- A > b A (x2), d A > f b f A > HCB HCB A B
- A > d A > f b f A > HCB HCB A B
- d C > b A > d A > f b f A / B > HCB HCB A B
- d A > df df C
- d A (x4) > f b f A / B > HCB HCB A B (Difficult)
Speed
- b A (x2), d A, d B > f b f B
- b B (x2), b A, d A, d B > f b f B
- b A (x2), d A > df df C
- b A (x2), d A > DP C
- 2C, 4A, combo of choice
- 4A, 2A, 4A, 5A, 2A, 2B xx 616B
- d C > follow-up of your choice
- d d A / B > A, B, C, d C, d C, f B C > f b f A > (Switch sides)
- DP C
(Corner)
- b A, d B, B C > (Dash-in) b A or d A (Reset) >
- d d A / B > A, B, C, A, B, C, C, B, QCF B (only speed combo special you should be using, it does a lot of damage)
EX
- b A (x2), d A, d B > f b f B > HCB HCB A B
- b BCD, b A (x2), d A, d B > f b f B > HCB HCB A B
- d C, b A (x2), d A, d B > f b f B > HCB HCB A B
Advanced Strategy
Gameplay
Stick to jumping C for air to air and jump-ins. A is good as well from certain angles.
Use 2A for footsies, and 623C only to punish air-recoveries or to combo off a ground to air parry.
After any successful 623C or any kind of knockdown where they bounce, dash in and punish their ground recovery with 2A xx 616A/B xx 6321463214AB
After any successful stick rush combo, end with either 5C (whiff) > 616A or 3B xx 63214B (hold), D (cancels move) for meter.
Gonna have to do a lot of hit and run with Amano, since he doesn't have a whole lot mix-up wise, but his damage is just monstrous, and that simple :d::snka: combo is the closest thing you have to c. MK BS in this game. He's not a priority whore the way Chun' is though. Although his jumping :snkc: stuffs a lot of crap.
Avoid jumping :snkb: at all costs.
The :l::snkb: stuff can be semi-useful since it's slightly delayed but recovers quickly.
His SDM isn't great either. It comes out way too slowly for it to actually have a chance of hitting anyone.
His slide is ok on occasion from max range, but it's pretty slow as well.
If your 2A gets blocked and you don't think they'll jump, link (don't cancel) into his 33C
It's an old SF2 style tick throw trick, but it does work on occasion.
