m (→Ground Normals) |
|||
| Line 304: | Line 304: | ||
|} | |} | ||
Zangief's sweep kick. Animates the same as Zangief's other crouching kicks, but with longer recovery. This is a pretty awesome move, with good recovery for a RH sweep and deceptive reach. It can be linked into well, comes out relatively fast, does good damage, has decent recovery, not to say the precious knockdown which can lead into ticking mix ups or safe jumps. This move is very important in tick mix-ups, together with far standing Short: both can be used to punished the enemy for standing up, which is often necessary for inputting invulnerable reversal moves. Always going for the SPD from max range can get predictable, so this is one of the possible mix-ups one can do. | Zangief's sweep kick. Animates the same as Zangief's other crouching kicks, but with longer recovery. This is a pretty awesome move, with good recovery for a RH sweep and deceptive reach. It can be linked into well, comes out relatively fast, does good damage, has decent recovery, not to say the precious knockdown which can lead into ticking mix ups or safe jumps. This move is very important in tick mix-ups, together with far standing Short: both can be used to punished the enemy for standing up, which is often necessary for inputting invulnerable reversal moves. Always going for the SPD from max range can get predictable, so this is one of the possible mix-ups one can do. | ||
====Aerial Normals==== | |||
*<b>Neutral Jumping Jab:</b> | |||
{| border="1em" cellspacing="0" style="border: 1px solid #999;" | |||
| align="center" | Damage || align="center" | 15 || align="center" rowspan="4" | [[File:OZangief_njjab1_djjab1_njstrng1_djstrng1_njfrc1.png]] || align="center" rowspan="4" | [[File:OZangief_njjab2_djjab2.png]] || align="center" rowspan="4" | [[File:OZangief_njjab3.png]] || align="center" rowspan="4" | [[File:OZangief_njjab4_djjab4_njstrng4_djstrng4_njfrc4.png]] | |||
|- | |||
| align="center" | Stun || align="center" | 1-7 | |||
|- | |||
| align="center" | Stun Timer || align="center" | 40 | |||
|- | |||
| align="center" colspan="2" | | |||
|- | |||
| align="center" colspan="2" | Frame Count || align="center" | 2 || align="center" | 3 || align="center" | 8 || align="center" | ∞ | |||
|- | |||
| align="center" colspan="2" | Simplified || align="center" | 2 || align="center" colspan="2" | 11 || align="center" | ∞ | |||
|} | |||
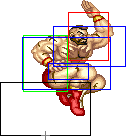
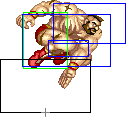
Totally outprioritized by the Strong and Fierce versions since it has the same frames but worse priority and damage. | |||
*<b>Diagonal Jumping Jab:</b> | |||
{| border="1em" cellspacing="0" style="border: 1px solid #999;" | |||
| align="center" | Damage || align="center" | 16 || align="center" rowspan="4" | [[File:OZangief_njjab1_djjab1_njstrng1_djstrng1_njfrc1.png]] || align="center" rowspan="4" | [[File:OZangief_njjab2_djjab2.png]] || align="center" rowspan="4" | [[File:OZangief_djjab3.png]] || align="center" rowspan="4" | [[File:OZangief_njjab4_djjab4_njstrng4_djstrng4_njfrc4.png]] | |||
|- | |||
| align="center" | Stun || align="center" | 1-7 | |||
|- | |||
| align="center" | Stun Timer || align="center" | 40 | |||
|- | |||
| align="center" colspan="2" | | |||
|- | |||
| align="center" colspan="2" | Frame Count || align="center" | 2 || align="center" | 3 || align="center" | 8 || align="center" | ∞ | |||
|- | |||
| align="center" colspan="2" | Simplified || align="center" | 2 || align="center" colspan="2" | 11 || align="center" | ∞ | |||
|} | |||
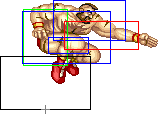
Somewhat outprioritized by the Strong version. It has better air-to-ground priority by 1 or 2 pixels but the damage and range is a lot worse. | |||
*<b>Neutral Jumping Strong:</b> | |||
{| border="1em" cellspacing="0" style="border: 1px solid #999;" | |||
| align="center" | Damage || align="center" | 19 || align="center" rowspan="4" | [[File:OZangief_njjab1_djjab1_njstrng1_djstrng1_njfrc1.png]] || align="center" rowspan="4" | [[File:OZangief_njstrng2_djstrng2.png]] || align="center" rowspan="4" | [[File:OZangief_njstrng3.png]] || align="center" rowspan="4" | [[File:OZangief_njjab4_djjab4_njstrng4_djstrng4_njfrc4.png]] | |||
|- | |||
| align="center" | Stun || align="center" | 1-7 | |||
|- | |||
| align="center" | Stun Timer || align="center" | 40 | |||
|- | |||
| align="center" colspan="2" | | |||
|- | |||
| align="center" colspan="2" | Frame Count || align="center" | 2 || align="center" | 3 || align="center" | 8 || align="center" | ∞ | |||
|- | |||
| align="center" colspan="2" | Simplified || align="center" | 2 || align="center" colspan="2" | 11 || align="center" | ∞ | |||
|} | |||
Totally outprioritized by the Fierce version since it has the same frames but worse priority and damage. | |||
*<b>Diagonal Jumping Strong:</b> | |||
{| border="1em" cellspacing="0" style="border: 1px solid #999;" | |||
| align="center" | Damage || align="center" | 19 || align="center" rowspan="4" | [[File:OZangief_njjab1_djjab1_njstrng1_djstrng1_njfrc1.png]] || align="center" rowspan="4" | [[File:OZangief_njstrng2_djstrng2.png]] || align="center" rowspan="4" | [[File:OZangief_djstrng3.png]] || align="center" rowspan="4" | [[File:OZangief_njjab4_djjab4_njstrng4_djstrng4_njfrc4.png]] | |||
|- | |||
| align="center" | Stun || align="center" | 6-11 | |||
|- | |||
| align="center" | Stun Timer || align="center" | 50 | |||
|- | |||
| align="center" colspan="2" | | |||
|- | |||
| align="center" colspan="2" | Frame Count || align="center" | 2 || align="center" | 3 || align="center" | 8 || align="center" | ∞ | |||
|- | |||
| align="center" colspan="2" | Simplified || align="center" | 2 || align="center" colspan="2" | 11 || align="center" | ∞ | |||
|} | |||
It is your main air to air option. It is not that great at it but it can beat some moves like Blanka's j.Strong, for example. | |||
*<b>Neutral Jumping Fierce:</b> | |||
{| border="1em" cellspacing="0" style="border: 1px solid #999;" | |||
| align="center" | Damage || align="center" | 26 || align="center" rowspan="4" | [[File:OZangief_njjab1_djjab1_njstrng1_djstrng1_njfrc1.png]] || align="center" rowspan="4" | [[File:OZangief_njfrc2.png]] || align="center" rowspan="4" | [[File:OZangief_njfrc3.png]] || align="center" rowspan="4" | [[File:OZangief_njjab4_djjab4_njstrng4_djstrng4_njfrc4.png]] | |||
|- | |||
| align="center" | Stun || align="center" | 10-16 | |||
|- | |||
| align="center" | Stun Timer || align="center" | 60 | |||
|- | |||
| align="center" colspan="2" | | |||
|- | |||
| align="center" colspan="2" | Frame Count || align="center" | 2 || align="center" | 3 || align="center" | 8 || align="center" | ∞ | |||
|- | |||
| align="center" colspan="2" | Simplified || align="center" | 2 || align="center" colspan="2" | 11 || align="center" | ∞ | |||
|} | |||
Your best straight jump move. Has very good priority, enough to even beat Vega's dive and does a pretty good damage. | |||
*<b>Diagonal Jumping Fierce:</b> | |||
{| border="1em" cellspacing="0" style="border: 1px solid #999;" | |||
| align="center" | Damage || align="center" | 26 || align="center" rowspan="4" | [[File:OZangief_djfrc1&7.png]] || align="center" rowspan="4" | [[File:OZangief_djfrc2&6.png]] || align="center" rowspan="4" | [[File:OZangief_djfrc3&5.png]] || align="center" rowspan="4" | [[File:OZangief_djfrc4.png]] | |||
|- | |||
| align="center" | Stun || align="center" | 11-17 | |||
|- | |||
| align="center" | Stun Timer || align="center" | 60 | |||
|- | |||
| align="center" colspan="2" | | |||
|- | |||
| align="center" colspan="2" | Frame Count || align="center" | 1 || align="center" | 3 || align="center" | 3 || align="center" | 7 | |||
|- | |||
| align="center" colspan="2" | Simplified || align="center" colspan="3" | 7 || align="center" | 7 | |||
|} | |||
{| border="1em" cellspacing="0" style="border: 1px solid #999;" | |||
| align="center" | Damage || align="center" | 26 || align="center" rowspan="4" | [[File:OZangief_djfrc3&5.png]] || align="center" rowspan="4" | [[File:OZangief_djfrc2&6.png]] || align="center" rowspan="4" | [[File:OZangief_djfrc1&7.png]] | |||
|- | |||
| align="center" | Stun || align="center" | 11-17 | |||
|- | |||
| align="center" | Stun Timer || align="center" | 60 | |||
|- | |||
| align="center" colspan="2" | | |||
|- | |||
| align="center" colspan="2" | Frame Count || align="center" | 3 || align="center" | 3 || align="center" | ∞ | |||
|- | |||
| align="center" colspan="2" | Simplified || align="center" colspan="3" | ∞ | |||
|} | |||
Your main air to ground attack, great for jumping over fireballs and for surprise jumps. Can also be used to tick into SPD. | |||
*<b>Neutral Jumping Short:</b> | |||
{| border="1em" cellspacing="0" style="border: 1px solid #999;" | |||
| align="center" | Damage || align="center" | 16 || align="center" rowspan="4" | [[File:OZangief_njshrt1_djshrt1_njfrwrd1_djfrwrd1_njrh1.png]] || align="center" rowspan="4" | [[File:OZangief_njshrt2.png]] | |||
|- | |||
| align="center" | Stun || align="center" | 1-7 | |||
|- | |||
| align="center" | Stun Timer || align="center" | 40 | |||
|- | |||
| align="center" colspan="2" | | |||
|- | |||
| align="center" colspan="2" | Frame Count || align="center" | 3 || align="center" | ∞ | |||
|} | |||
It is the only neutral jumping move that stays active till you land, but still I do not see much use in it... | |||
*<b>Diagonal Jumping Short:</b> | |||
{| border="1em" cellspacing="0" style="border: 1px solid #999;" | |||
| align="center" | Damage || align="center" | 16 || align="center" rowspan="4" | [[File:OZangief_njshrt1_djshrt1_njfrwrd1_djfrwrd1_njrh1.png]] || align="center" rowspan="4" | [[File:OZangief_djshrt2_djfrwrd2.png]] || align="center" rowspan="4" | [[File:OZangief_djshrt3_njfrwrd3_djfrwrd3_njrh3.png]] || align="center" rowspan="4" | [[File:OZangief_djshrt4_njfrwrd4_djfrwrd4_njrh4_djrh4.png]] || align="center" rowspan="4" | [[File:OZangief_djshrt5_njfrwrd5_djfrwrd5_njrh5_djrh5.png]] || align="center" rowspan="4" | [[File:OZangief_djshrt6_njfrwrd6_djfrwrd6_njrh6_djrh6.png]] | |||
|- | |||
| align="center" | Stun || align="center" | 1-7 | |||
|- | |||
| align="center" | Stun Timer || align="center" | 40 | |||
|- | |||
| align="center" colspan="2" | | |||
|- | |||
| align="center" colspan="2" | Frame Count || align="center" | 3 || align="center" | 16 || align="center" | 8 || align="center" | 6 || align="center" | 4 || align="center" | ∞ | |||
|- | |||
| align="center" colspan="2" | Simplified || align="center" | 3 || align="center" | 16 || align="center" colspan="4" | ∞ | |||
|} | |||
Your main air ticking move. If your opponent starts to reversal these tick attempts (I mean after blocking this move) then you can mix it up with the Forward version (and even with the Roundhouse version) to disturb his reversal timing. | |||
*<b>Neutral Jumping Forward:</b> | |||
{| border="1em" cellspacing="0" style="border: 1px solid #999;" | |||
| align="center" | Damage || align="center" | 19 || align="center" rowspan="4" | [[File:OZangief_njshrt1_djshrt1_njfrwrd1_djfrwrd1_njrh1.png]] || align="center" rowspan="4" | [[File:OZangief_njfrwrd2.png]] || align="center" rowspan="4" | [[File:OZangief_djshrt3_njfrwrd3_djfrwrd3_njrh3.png]] || align="center" rowspan="4" | [[File:OZangief_djshrt4_njfrwrd4_djfrwrd4_njrh4_djrh4.png]] || align="center" rowspan="4" | [[File:OZangief_djshrt5_njfrwrd5_djfrwrd5_njrh5_djrh5.png]] || align="center" rowspan="4" | [[File:OZangief_djshrt6_njfrwrd6_djfrwrd6_njrh6_djrh6.png]] | |||
|- | |||
| align="center" | Stun || align="center" | 6-11 | |||
|- | |||
| align="center" | Stun Timer || align="center" | 50 | |||
|- | |||
| align="center" colspan="2" | | |||
|- | |||
| align="center" colspan="2" | Frame Count || align="center" | 3 || align="center" | 16 || align="center" | 8 || align="center" | 6 || align="center" | 4 || align="center" | ∞ | |||
|- | |||
| align="center" colspan="2" | Simplified || align="center" | 3 || align="center" | 16 || align="center" colspan="4" | ∞ | |||
|} | |||
No specific use. | |||
*<b>Diagonal Jumping Forward:</b> | |||
{| border="1em" cellspacing="0" style="border: 1px solid #999;" | |||
| align="center" | Damage || align="center" | 19 || align="center" rowspan="4" | [[File:OZangief_njshrt1_djshrt1_njfrwrd1_djfrwrd1_njrh1.png]] || align="center" rowspan="4" | [[File:OZangief_djshrt2_djfrwrd2.png]] || align="center" rowspan="4" | [[File:OZangief_djshrt3_njfrwrd3_djfrwrd3_njrh3.png]] || align="center" rowspan="4" | [[File:OZangief_djshrt4_njfrwrd4_djfrwrd4_njrh4_djrh4.png]] || align="center" rowspan="4" | [[File:OZangief_djshrt5_njfrwrd5_djfrwrd5_njrh5_djrh5.png]] || align="center" rowspan="4" | [[File:OZangief_djshrt6_njfrwrd6_djfrwrd6_njrh6_djrh6.png]] | |||
|- | |||
| align="center" | Stun || align="center" | 6-11 | |||
|- | |||
| align="center" | Stun Timer || align="center" | 50 | |||
|- | |||
| align="center" colspan="2" | | |||
|- | |||
| align="center" colspan="2" | Frame Count || align="center" | 3 || align="center" | 16 || align="center" | 8 || align="center" | 6 || align="center" | 4 || align="center" | ∞ | |||
|- | |||
| align="center" colspan="2" | Simplified || align="center" | 3 || align="center" | 16 || align="center" colspan="4" | ∞ | |||
|} | |||
An Ok move. It can be used for air ticking just like dj.shrt. | |||
'''NOTE:''' You can use this move (and dj.shrt too) as a instant overhead!<br> | |||
<br> | |||
Yeah, thats right, Gief has a instant overhead which can kill someone with 3 to 5 pixels of life, depending on which button you pressed and which character you are facing (heavy characters can suffer 1 pixel less damage in that situation). I recommend pianoing the 2 kick buttons to make it easier to time, they both have the same start-up time and active hitbox, the only difference is the damage. Unfortunatelly, against small characters like Cammy for example its very hard to time it right, even if you piano it. | |||
*<b>Neutral Jumping Roundhouse:</b> | |||
{| border="1em" cellspacing="0" style="border: 1px solid #999;" | |||
| align="center" | Damage || align="center" | 26 || align="center" rowspan="4" | [[File:OZangief_njshrt1_djshrt1_njfrwrd1_djfrwrd1_njrh1.png]] || align="center" rowspan="4" | [[File:OZangief_njrh2.png]] || align="center" rowspan="4" | [[File:OZangief_djshrt3_njfrwrd3_djfrwrd3_njrh3.png]] || align="center" rowspan="4" | [[File:OZangief_djshrt4_njfrwrd4_djfrwrd4_njrh4_djrh4.png]] || align="center" rowspan="4" | [[File:OZangief_djshrt5_njfrwrd5_djfrwrd5_njrh5_djrh5.png]] || align="center" rowspan="4" | [[File:OZangief_djshrt6_njfrwrd6_djfrwrd6_njrh6_djrh6.png]] | |||
|- | |||
| align="center" | Stun || align="center" | 11-17 | |||
|- | |||
| align="center" | Stun Timer || align="center" | 60 | |||
|- | |||
| align="center" colspan="2" | | |||
|- | |||
| align="center" colspan="2" | Frame Count || align="center" | 3 || align="center" | 8 || align="center" | 8 || align="center" | 6 || align="center" | 4 || align="center" | ∞ | |||
|- | |||
| align="center" colspan="2" | Simplified || align="center" | 3 || align="center" | 8 || align="center" colspan="4" | ∞ | |||
|} | |||
The best neutral jump kick, has decent priority and long reach, can beat some stuff and does decent damage. It will mostly be used if you predict a jump from your opponent. | |||
*<b>Diagonal Jumping Roundhouse:</b> | |||
{| border="1em" cellspacing="0" style="border: 1px solid #999;" | |||
| align="center" | Damage || align="center" | 26 || align="center" rowspan="4" | [[File:OZangief_djrh1.png]] || align="center" rowspan="4" | [[File:OZangief_djrh2.png]] || align="center" rowspan="4" | [[File:OZangief_djrh3.png]] || align="center" rowspan="4" | [[File:OZangief_djshrt4_njfrwrd4_djfrwrd4_njrh4_djrh4.png]] || align="center" rowspan="4" | [[File:OZangief_djshrt5_njfrwrd5_djfrwrd5_njrh5_djrh5.png]] || align="center" rowspan="4" | [[File:OZangief_djshrt6_njfrwrd6_djfrwrd6_njrh6_djrh6.png]] | |||
|- | |||
| align="center" | Stun || align="center" | 11-17 | |||
|- | |||
| align="center" | Stun Timer || align="center" | 60 | |||
|- | |||
| align="center" colspan="2" | | |||
|- | |||
| align="center" colspan="2" | Frame Count || align="center" | 3 || align="center" | 8 || align="center" | 8 || align="center" | 6 || align="center" | 4 || align="center" | ∞ | |||
|- | |||
| align="center" colspan="2" | Simplified || align="center" | 3 || align="center" | 8 || align="center" colspan="4" | ∞ | |||
|} | |||
A good trade move or when whiffing it on purpose to do a SPD exactly when you land. | |||
--[[User:Born2SPD|Born2SPD]] | |||
===Special Moves=== | ===Special Moves=== | ||
Revision as of 10:31, 11 June 2011
Introduction
Move Analysis
Normal Moves
O.Zangief's normals are decent, nothing with outstanding priority, but in contrast they do more damage than most characters normals. He does not has many normals with cancel properties.
Ground Normals
- Close Standing Jab:
| Damage | 14/12 |  |
 |
 |
 |
 |
 |

|
| Stun | 0-5 | |||||||
| Stun Timer | 40 | |||||||
| Chain Cancel | Yes | |||||||
| Special Cancel | Yes | |||||||
| Frame Count | 2 | 2 | 2 | 2 | 4 | 4 | 5 | |
| Simplified | 2 | 6 | 15 | |||||
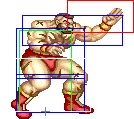
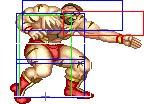
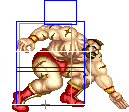
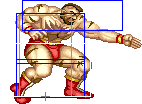
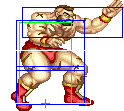
O.Zangief does a knife hand strike from above his head until towards. O.Gief's version isnt as good as N.Gief's, but it can still be considered a viable anti air. The first active animation have the Special Cancel property and the next have the Chain Cancel property. You can also tick this into anything but against half the cast it will simply whiff if they are crouch blocking. Here is the list of characters you can tick if they are crouching: Balrog(Boxer), DeeJay, Dhalsim, FeiLong, Honda, Sagat, T.Hawk, Vega(Claw) and Zangief.
- Far Standing Jab:
| Damage | 14 | 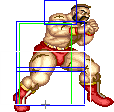 |
 |

|
| Stun | 0-5 | |||
| Stun Timer | 40 | |||
| Chain Cancel | Yes | |||
| Special Cancel | Yes | |||
| Frame Count | 2 | 4 | 5 | |
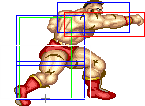
O.Zangief performs a fast straight punch that can be canceled into itself. This happens to be very damaging Jab, and it even does the strong sound when it hits. Unlike most characters' rapid fire Jabs, Gief's st.Jab should not be used to beat advance moves like Blanka's rolls or Honda's Headbutt. This move really comes into play though when facing Dhalsim and Balrog(Boxer). Against Boxer you will use it to beat his Low Rushes (which is basically your only decent option), it can also beat Cammy's Cannon Drills and Hawk's Condor Dive from specific ranges and also trade unfavorably with Bison(dictator)'s Scissor Kicks. It does beat his standing Forward kick, though, from the right range. It is also a very nice ticking move, it allows you to tick from very far (e.g., it allows you to tick Dhalsim while being safe from his BS throw range). Unfortunately, against the majority of the cast, this move will just whiff if they are crouching. Here's the list of characters you can tick if they're crouch blocking: Balrog(Boxer), Dhalsim, Sagat, T.Hawk and Zangief.
- Crouching Jab:
| Damage | 6 |  |

|
| Stun | 0-5 | ||
| Stun Timer | 40 | ||
| Chain Cancel | Yes | ||
| Special Cancel | Yes | ||
| Frame Count | 3 | 5 | |
Crouching spear hand strike. The move does very low damage, but it is your most important ticking move and can also be used into combos such as cr.Jab (n times) linked into st.Short or cr.RH. It can beat a lot of different moves like Honda's Headbutt and HHS, Blanka's crouching Fierce slide, super and rolls (against his rolls it is better to use kick Lariat, and beating his super is not a good idea, unless blocking would get you killed), Bison(dictator) Scissor Kicks and some normals.
- Close/Far Standing Strong:
| Damage | 21 | File:OZangief ststrng1.png | File:OZangief ststrng2.png | File:OZangief ststrng3.png | File:OZangief ststrng4.png |
| Stun | 5-11 | ||||
| Stun Timer | 60 | ||||
| Chain Cancel | No | ||||
| Special Cancel | No | ||||
| Frame Count | 2 | 2 | 3 | 5 | |
| Simplified | 4 | 3 | 5 | ||
Relatively fast straight punch. Doing it close or far will result in the exact same move, which is a horizontal knife hand strike. This attack is very important in combos: almost any decent combo will use this normal. Other than combos, there is not much use for it, since the hitboxes are quite similar to those of the standing Jab, the damage is not much greater but the recovery is. It can also be more easily stuffed before becoming active due to premature projected hitboxes.
- Crouching Strong:
| Damage | 21 |  |
 |
 |
 |

|
| Stun | 5-11 | |||||
| Stun Timer | 60 | |||||
| Chain Cancel | No | |||||
| Special Cancel | No | |||||
| Frame Count | 3 | 3 | 8 | 4 | 5 | |
| Simplified | 6 | 8 | 9 | |||
A crouching straight punch that hits around the stomach, with moderate recovery. It can be used used as a poke, in trade situations and to beat some moves. Sometimes I use it to tick into Suplex after a Fierce splash cross-up: it can be effective because it is a strange use for this move, your opponent can be surprised by this and fail to react accordingly. Do not overuse this tactic, though, as it is easy to be reversed.
- Close/Far Standing Fierce:
| Damage | 26 | File:OZangief stfrc1&7.png | File:OZangief stfrc2&6.png | File:OZangief stfrc3.png | File:OZangief stfrc4.png | File:OZangief stfrc5.png | File:OZangief stfrc2&6.png | File:OZangief stfrc1&7.png |
| Stun | 10-16 | |||||||
| Stun Timer | 80 | |||||||
| Chain Cancel | No | |||||||
| Special Cancel | No | |||||||
| Frame Count | 3 | 3 | 6 | 10 | 8 | 6 | 5 | |
| Simplified | 6 | 6 | 29 | |||||
A powerful straight punch with long recovery. Doing it close or far will result in the exactly same move. Has a nice damage/dizzy potential but can not be properly used in combos. The only decent use I can think for this is if you're going for a trade, as you can not reliably beat something using this.
- Crouching Fierce:
| Damage | 26 |  |
 |
 |
 |

|
| Stun | 10-15 | |||||
| Stun Timer | 80 | |||||
| Chain Cancel | No | |||||
| Special Cancel | No | |||||
| Frame Count | 3 | 3 | 8 | 10 | 13 | |
| Simplified | 6 | 8 | 23 | |||
Another crouching straight punch that hits around the stomach, but with much longer recovery than cr.Strong punch. It works decently as anti-air at certain ranges, it is good in trade situations and to beat some other moves. It is good against Hawk's and Fei Long's j.Jab, Vega's (claw) dive (depending on the spacing), Ryu/Ken's tatsus and Honda's HHS by anticipation.
- Close Standing Short:
| Damage | 16 | 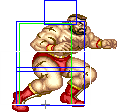 |
 |
 |
 |
 |

|
| Stun | 0-5 | ||||||
| Stun Timer | 40 | ||||||
| Chain Cancel | No | ||||||
| Special Cancel | No | ||||||
| Frame Count | 3 | 2 | 2 | 8 | 4 | 1 | |
| Simplified | 7 | 8 | 5 | ||||
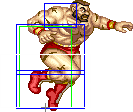
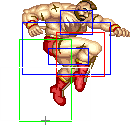
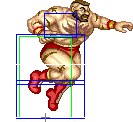
Zangief's knee bash. Used to tick into suplex, it is risky, though, because it is somewhat slow and you can not mix it up, if the opponent sees it coming he can easily reversal.
- Far Standing Short:
| Damage | 16 | 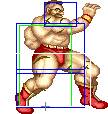 |
 |
|
| Stun | 0-5 | |||
| Stun Timer | 40 | |||
| Chain Cancel | No | |||
| Special Cancel | No | |||
| Frame Count | 2 | 2 | 5 | |
| Simplified | 4 | 5 | ||
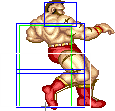
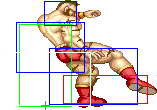
O.Zangief performs a low kick. Your best standing tick for sure. You can also mix between tick SPD or linked sweep to give your opponent extra trouble when trying to reverse. Watch out for reversal tatsus or upkicks when using this against a knocked down opponent.
- Crouching Short:
| Damage | 16 |  |
 |

|
| Stun | 0-5 | |||
| Stun Timer | 40 | |||
| Chain Cancel | No | |||
| Special Cancel | Yes | |||
| Frame Count | 3 | 4 | 7 | |
Fast crouching side kick with poor priority. Has Special Cancel properties, which allows you to combo a Lariat after it, but cr.Fwrd is better for this. You can also cancel an running grab out of it, which will usually connect but doesn't do much damage.
- Close Standing Forward:
| Damage | 21 |  |
 |
 |
 |

|
| Stun | 5-11 | |||||
| Stun Timer | 60 | |||||
| Chain Cancel | No | |||||
| Special Cancel | No | |||||
| Frame Count | 3 | 3 | 4 | 4 | 5 | |
| Simplified | 6 | 4 | 9 | |||
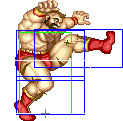
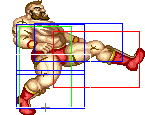
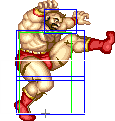
Does not have any specific use that I can think of. It can be used as a tick into suplex, but its start-up makes it unreliable.
- Far Standing Forward:
| Damage | 21 |  |
 |
 |
 |

|
| Stun | 5-11 | |||||
| Stun Timer | 60 | |||||
| Chain Cancel | No | |||||
| Special Cancel | No | |||||
| Frame Count | 3 | 3 | 4 | 4 | 5 | |
| Simplified | 6 | 4 | 9 | |||
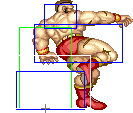
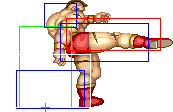
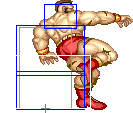
Semi-circular middle kick. O.Gief's version does not has good range as N.Gief's but still can be used as a poke. It is, on the other hand, a viable option for antiair from specific ranges.
- Crouching Forward:
| Damage | 21 |  |
 |

|
| Stun | 5-11 | |||
| Stun Timer | 60 | |||
| Chain Cancel | No | |||
| Special Cancel | Yes | |||
| Frame Count | 3 | 6 | 9 | |
Crouching side kick. Better damage and priority than cr.Short, but longer recovery. It has Special Cancel properties just like cr.Short so you can cancel into Lariat or Running Bear Grab. Cross-up Fierce spash, cr.Forward into kick Lariat is particularly hot. It can also be used as a tick into SPD and suplex, but you have better options for these.
- Close Standing Roundhouse:
| Damage | 26+4 | 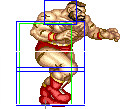 |
 |
 |
 |
 |
|
| Stun | 10-16/1-7 | ||||||
| Stun Timer | 80/70 | ||||||
| Chain Cancel | No | ||||||
| Special Cancel | No | ||||||
| Frame Count | 2 | 2 | 2 | 3 | 6 | 8 | |
| Simplified | 9 | 6 | 8 | ||||
| Damage | 26+4 |  |
 |
 |
|
| Stun | 10-16/1-7 | ||||
| Stun Timer | 80/70 | ||||
| Chain Cancel | No | ||||
| Special Cancel | No | ||||
| Frame Count | 8 | 10 | 8 | 5 | |
| Simplified | 31 | ||||
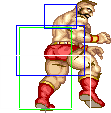
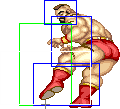
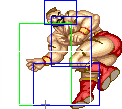
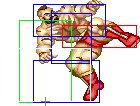
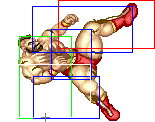
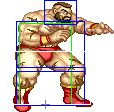
Weird butterfly kick that hits twice. It is a quite useless move. It can hit twice from close range and it is the most damaging normal you have, but it has long start-up and recovery. The second hit has a decent anti-air priority, but the situations where you can use it like that are limited and the use is often shadowed by cl.Jab.
- Far Standing Roundhouse:
| Damage | 26 |  |
 |

|
| Stun | 10-15 | |||
| Stun Timer | 80 | |||
| Chain Cancel | No | |||
| Special Cancel | No | |||
| Frame Count | 4 | 8 | 11 | |
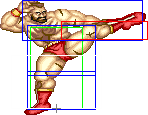
O.Zangief performs a high side kick. O.Gief's version of this move is pretty bad, the only use i can think for it is to fake (whiff) into a SPD.
- Crouching Roundhouse:
| Damage | 26 |  |
 |
 |

|
| Stun | 6-10 | ||||
| Stun Timer | 130 | ||||
| Chain Cancel | No | ||||
| Special Cancel | No | ||||
| Frame Count | 4 | 8 | 12 | 1 | |
| Simplified | 4 | 8 | 13 | ||
Zangief's sweep kick. Animates the same as Zangief's other crouching kicks, but with longer recovery. This is a pretty awesome move, with good recovery for a RH sweep and deceptive reach. It can be linked into well, comes out relatively fast, does good damage, has decent recovery, not to say the precious knockdown which can lead into ticking mix ups or safe jumps. This move is very important in tick mix-ups, together with far standing Short: both can be used to punished the enemy for standing up, which is often necessary for inputting invulnerable reversal moves. Always going for the SPD from max range can get predictable, so this is one of the possible mix-ups one can do.
Aerial Normals
- Neutral Jumping Jab:
| Damage | 15 | 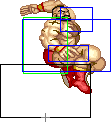 |
 |
 |
|
| Stun | 1-7 | ||||
| Stun Timer | 40 | ||||
| Frame Count | 2 | 3 | 8 | ∞ | |
| Simplified | 2 | 11 | ∞ | ||
Totally outprioritized by the Strong and Fierce versions since it has the same frames but worse priority and damage.
- Diagonal Jumping Jab:
| Damage | 16 |  |
 |
 |

|
| Stun | 1-7 | ||||
| Stun Timer | 40 | ||||
| Frame Count | 2 | 3 | 8 | ∞ | |
| Simplified | 2 | 11 | ∞ | ||
Somewhat outprioritized by the Strong version. It has better air-to-ground priority by 1 or 2 pixels but the damage and range is a lot worse.
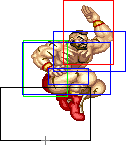
- Neutral Jumping Strong:
| Damage | 19 |  |
 |
 |

|
| Stun | 1-7 | ||||
| Stun Timer | 40 | ||||
| Frame Count | 2 | 3 | 8 | ∞ | |
| Simplified | 2 | 11 | ∞ | ||
Totally outprioritized by the Fierce version since it has the same frames but worse priority and damage.
- Diagonal Jumping Strong:
| Damage | 19 |  |
 |
 |

|
| Stun | 6-11 | ||||
| Stun Timer | 50 | ||||
| Frame Count | 2 | 3 | 8 | ∞ | |
| Simplified | 2 | 11 | ∞ | ||
It is your main air to air option. It is not that great at it but it can beat some moves like Blanka's j.Strong, for example.
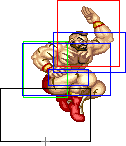
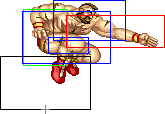
- Neutral Jumping Fierce:
| Damage | 26 |  |
 |
 |

|
| Stun | 10-16 | ||||
| Stun Timer | 60 | ||||
| Frame Count | 2 | 3 | 8 | ∞ | |
| Simplified | 2 | 11 | ∞ | ||
Your best straight jump move. Has very good priority, enough to even beat Vega's dive and does a pretty good damage.
- Diagonal Jumping Fierce:
| Damage | 26 | 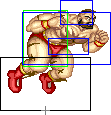 |
 |
 |
|
| Stun | 11-17 | ||||
| Stun Timer | 60 | ||||
| Frame Count | 1 | 3 | 3 | 7 | |
| Simplified | 7 | 7 | |||
| Damage | 26 |  |
 |

|
| Stun | 11-17 | |||
| Stun Timer | 60 | |||
| Frame Count | 3 | 3 | ∞ | |
| Simplified | ∞ | |||
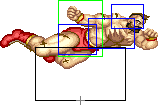
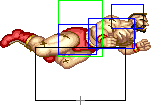
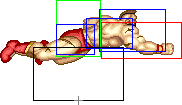
Your main air to ground attack, great for jumping over fireballs and for surprise jumps. Can also be used to tick into SPD.
- Neutral Jumping Short:
| Damage | 16 | 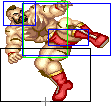 |
|
| Stun | 1-7 | ||
| Stun Timer | 40 | ||
| Frame Count | 3 | ∞ | |
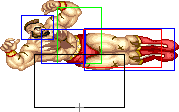
It is the only neutral jumping move that stays active till you land, but still I do not see much use in it...
- Diagonal Jumping Short:
| Damage | 16 |  |
 |
 |
 |
 |
|
| Stun | 1-7 | ||||||
| Stun Timer | 40 | ||||||
| Frame Count | 3 | 16 | 8 | 6 | 4 | ∞ | |
| Simplified | 3 | 16 | ∞ | ||||
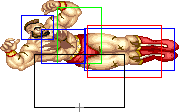
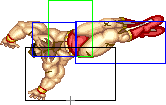
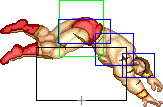
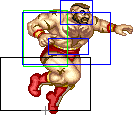
Your main air ticking move. If your opponent starts to reversal these tick attempts (I mean after blocking this move) then you can mix it up with the Forward version (and even with the Roundhouse version) to disturb his reversal timing.
- Neutral Jumping Forward:
| Damage | 19 |  |
 |
 |
 |
 |

|
| Stun | 6-11 | ||||||
| Stun Timer | 50 | ||||||
| Frame Count | 3 | 16 | 8 | 6 | 4 | ∞ | |
| Simplified | 3 | 16 | ∞ | ||||
No specific use.
- Diagonal Jumping Forward:
| Damage | 19 |  |
 |
 |
 |
 |

|
| Stun | 6-11 | ||||||
| Stun Timer | 50 | ||||||
| Frame Count | 3 | 16 | 8 | 6 | 4 | ∞ | |
| Simplified | 3 | 16 | ∞ | ||||
An Ok move. It can be used for air ticking just like dj.shrt.
NOTE: You can use this move (and dj.shrt too) as a instant overhead!
Yeah, thats right, Gief has a instant overhead which can kill someone with 3 to 5 pixels of life, depending on which button you pressed and which character you are facing (heavy characters can suffer 1 pixel less damage in that situation). I recommend pianoing the 2 kick buttons to make it easier to time, they both have the same start-up time and active hitbox, the only difference is the damage. Unfortunatelly, against small characters like Cammy for example its very hard to time it right, even if you piano it.
- Neutral Jumping Roundhouse:
| Damage | 26 |  |
 |
 |
 |
 |

|
| Stun | 11-17 | ||||||
| Stun Timer | 60 | ||||||
| Frame Count | 3 | 8 | 8 | 6 | 4 | ∞ | |
| Simplified | 3 | 8 | ∞ | ||||
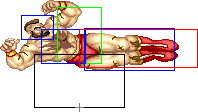
The best neutral jump kick, has decent priority and long reach, can beat some stuff and does decent damage. It will mostly be used if you predict a jump from your opponent.
- Diagonal Jumping Roundhouse:
| Damage | 26 | 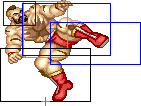 |
 |
 |
 |
 |

|
| Stun | 11-17 | ||||||
| Stun Timer | 60 | ||||||
| Frame Count | 3 | 8 | 8 | 6 | 4 | ∞ | |
| Simplified | 3 | 8 | ∞ | ||||
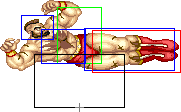
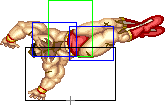
A good trade move or when whiffing it on purpose to do a SPD exactly when you land.
--Born2SPD
