m (→Aerial Normals) |
Oldschool BR (talk | contribs) m (→Special Moves) |
||
| Line 517: | Line 517: | ||
| align="center" | Damage (Frc) || align="center" | 32 | | align="center" | Damage (Frc) || align="center" | 32 | ||
|} | |} | ||
T.Hawk's long range, bread and buter command throw. Grabs the enemy by the face, jumps while spinning them, then smashes their head on the ground for high damage. This is T.Hawk's main attack tool and can be used with a multitude of ticks with Jab being his best. It has better range than any other throw but Zangief's Spinning Pile Driver and can be made safe with the use of negative edge. This is to say, as it does not have a whiff animation, you will obtain a normal if the enemy is not throwable and you press a punch button, but nothing if you use negative-edge. | |||
*<b>Tomahawk Buster a.k.a. Rising Hawk:</b> (→↓↘ + P) | *<b>Tomahawk Buster a.k.a. Rising Hawk:</b> (→↓↘ + P) | ||
| Line 531: | Line 531: | ||
| align="center" colspan="2" | Frame Count (Jab) || align="center" | 4 || align="center" | 5 || align="center" | 7+3 || align="center" | 15 | | align="center" colspan="2" | Frame Count (Jab) || align="center" | 4 || align="center" | 5 || align="center" | 7+3 || align="center" | 15 | ||
|- | |- | ||
| align="center" colspan="2" | Simplified (Jab) || align="center" | | | align="center" colspan="2" | Simplified (Jab) || align="center" | 4 || align="center" colspan="3" | 30 | ||
|- | |- | ||
| align="center" colspan="2" | Frame Count (Strng) || align="center" | | | align="center" colspan="2" | Frame Count (Strng) || align="center" | 4 || align="center" | 5 || align="center" | 7+3 || align="center" | 16 | ||
|- | |- | ||
| align="center" colspan="2" | Simplified (Strng) || align="center" | ? || align="center" colspan="3" | | | align="center" colspan="2" | Simplified (Strng) || align="center" | ? || align="center" colspan="3" | 31 | ||
|- | |- | ||
| align="center" colspan="2" | Frame Count (Frc) || align="center" | | | align="center" colspan="2" | Frame Count (Frc) || align="center" | 4 || align="center" | 5 || align="center" | 7+3 || align="center" | 18 | ||
|- | |- | ||
| align="center" colspan="2" | Simplified (Frc) || align="center" | | | align="center" colspan="2" | Simplified (Frc) || align="center" | 4 || align="center" | 5 || align="center" colspan="2" | 28 | ||
|} | |} | ||
*<b>Recovery:</b> | *<b>Recovery:</b> | ||
| Line 549: | Line 549: | ||
| align="center" | Simplified (Jab) || align="center" colspan="6" | 24 | | align="center" | Simplified (Jab) || align="center" colspan="6" | 24 | ||
|- | |- | ||
| align="center" | Frame Count (Strng) || align="center" | | | align="center" | Frame Count (Strng) || align="center" | 2 || align="center" | 4 || align="center" | 3 || align="center" | 4 || align="center" | 10 || align="center" | 4 | ||
|- | |- | ||
| align="center" | Simplified (Strng) || align="center" colspan="6" | | | align="center" | Simplified (Strng) || align="center" colspan="6" | 27 | ||
|- | |- | ||
| align="center" | Frame Count (Frc) || align="center" | | | align="center" | Frame Count (Frc) || align="center" | 2 || align="center" | 4 || align="center" | 3 || align="center" | 4 || align="center" | 13 || align="center" | 4 | ||
|- | |- | ||
| align="center" | Simplified (Frc) || align="center" colspan="6" | | | align="center" | Simplified (Frc) || align="center" colspan="6" | 30 | ||
|} | |} | ||
Unlike N.T.Hawk's, all versions can pass though projectiles. | Hawk becomes invulnerable for a split second, crouches, then rises diagonally to the air while hitting the enemy. After that, he falls defenseless to the ground. The Jab and Strong versions hit only once and cause a full knockdown, while the Fierce one hits twice, being that the second active part causes a full knock down. Unlike N.T.Hawk's, all versions can pass though projectiles, if timed really close to them. The Jab and Strong versions have the first active part, when T.Hawk is still invulnerable, doing more damage (20%). If it hits late, the Jab and Strong versions will do just 14% damage. The Fierce version, on the other hand, only does 9% damage if it hits up close, but it comboes into the last active part of the move, which does 20% damage. As it has less recovery, only use the Jab version, unless you have confirmed a combo. If you hit late, it will do less damage than the Fierce version, but you will not be wide open for punishment as you would with the Fierce one otherwise. This is T.Hawk's best anti-air move. | ||
*<b>Condor Dive:</b> (In Air, Jab + Strong + Fierce) | *<b>Condor Dive:</b> (In Air, Jab + Strong + Fierce) | ||
| Line 565: | Line 565: | ||
| align="center" colspan="2" | | | align="center" colspan="2" | | ||
|- | |- | ||
| align="center" colspan="2" | Frame Count || align="center" | | | align="center" colspan="2" | Frame Count || align="center" | 10 || align="center" | 7 || align="center" | ∞ || align="center" | 2 || align="center" | 9 || align="center" | 10 || align="center" | 6 | ||
|- | |- | ||
| align="center" colspan="2" | Simplified || align="center" colspan="2" | | | align="center" colspan="2" | Simplified || align="center" colspan="2" | 17 || align="center" | ∞ || align="center" colspan="4" | 27 | ||
|} | |} | ||
*<b>Bounce:</b> | *<b>Bounce:</b> | ||
| Line 573: | Line 573: | ||
| align="center" | || align="center" | [[File:OTHawk_diveb1.png]] || align="center" | [[File:OTHawk_diveb2.png]] || align="center" | [[File:OTHawk_diveb3.png]] || align="center" | [[File:OTHawk_diveb4.png]] || align="center" | [[File:OTHawk_diveb5.png]] || align="center" | [[File:OTHawk_diveb6.png]] | | align="center" | || align="center" | [[File:OTHawk_diveb1.png]] || align="center" | [[File:OTHawk_diveb2.png]] || align="center" | [[File:OTHawk_diveb3.png]] || align="center" | [[File:OTHawk_diveb4.png]] || align="center" | [[File:OTHawk_diveb5.png]] || align="center" | [[File:OTHawk_diveb6.png]] | ||
|- | |- | ||
| align="center" | Frame Count || align="center" | | | align="center" | Frame Count || align="center" | 8 || align="center" | 4 || align="center" | 4 || align="center" | 4 || align="center" | ∞ || align="center" | 6 | ||
|- | |- | ||
| align="center" | Simplified || align="center" colspan="5" | ∞ || align="center" | | | align="center" | Simplified || align="center" colspan="5" | ∞ || align="center" | 6 | ||
|} | |} | ||
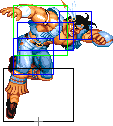
T.Hawk hovers in the air for a small period of time, then dives diagonally from where the move was started towards the ground. This move can only be performed on a neutral or diagonal jump on the way up. Once T.Hawk reaches his apex and starts coming down from his jump, the move cannot be performed. Extremely good move for punishing fireballs. Can be done close to the ground for shenanigans and dodging and punishing slow recovering lows like Guile's sweep. Good for closing distance after a mid screen Typhoon. This move does not have great priority and can be punished by some characters. | |||
*<b>Characters not to hit with Condor dives unless your sure they will not be able to block:</b> Dhalsim, Sagat, Guile (any versions). | |||
Dhalsim the most as he can punish easily with multiple normals. Sagat can punish with fireballs, and Guile can either hit Hawk out of the move with a Flash Kick, or block it and then punish with aerial Roundhouse. Remember also that Guile is extremely hard to punish for Sonic Booms as he recovers very quick compared to Sagat, Ryu and Ken. | |||
*<b>Characters not to spam Condor dives against:</b> Ryu, Ken, Cammy, Fei Long, T.Hawk (any versions). | |||
These characters can react with SRK-like special moves or simply normals. Also be careful as if Ryu and Ken manage to block the move as it is about to cross them up, they can jump immediately after blocking and punish with j.RH. Ryu can also use a Fierce Hadouken, of even a Super, if he has bar. If they do it too late and miss it can leave them in a horrible position(good for T.Hawk). | |||
*<b>Characters not to hit with Condor dives unless your sure they will not be able to block or you know they do not have charge:</b> Balrog(Boxer), Blanka, E. Honda and M.Bison(Dictator) (any versions). | |||
All four can punish with charge back->forward + Fierce. | |||
*<b>Characters that cannot punish after blocking a Condor dive:</b> Chun Li, Cammy, Dee Jay, Fei Long, T.Hawk, Vega(Claw), Zangief. | |||
It can be extremely useful but can get a lot of inexperienced players in loads of trouble if used too much/incorrectly. It covers a lot of ground very fast. You can use it to punish fireballs by jumping and Dive over them. Remember though that if you don't connect, or it's blocked, you hit the ground and "slide" a bit. Now you can be punished by sweeps and/or certain combos at this point. But, this can also be a useful tool against a scared/slow opponent. In your slide you can Tomahawk Buster(DP) or Typhoon while sliding at the end. You can deceive a player thinking your going to connect and bounce back and if they don not react to you hitting the ground you can punish. Again be careful with this move. Can be a big help or a big hindrance. | |||
--[[User:Decca|Decca]]<br> | |||
--Jedi.10 07:40, 24 July 2007 (UTC) | |||
--[[User:Born2SPD|Born2SPD]] | --[[User:Born2SPD|Born2SPD]] | ||
Revision as of 08:46, 24 April 2011
Introduction
T. Hawk is a grappler character added in Super Street Fighter II: They New Challengers (SSF2), and returns in Super Street Fighter II Turbo. The differences from CPS-2 Zangief are that his special throw, the typhoon, does not have a whiff animation or a grab window; he was given a special anti-air move that is similar to the shotos' Shoryuken and and air dash attack like E. Honda's headbutt or Blanka's rolling attack. Also, his arsenal of normal moves is different from Zangief's, making both very different characters which are often weak where the other is strong. Say, Zangief has no dash-like special and his sweep is fast but does not reach very far; T. Hawk has a dash-like attack and his sweep is very slow, but with long reach. The most important difference in high-level play, however, is the lack of a whiff animation. While it is harder to do a tight tick into special throw with T. Hawk, they can be made safe with the use of negative-edge.
Old Hawk is the version from SSF2: he has no super nor he can soften throws. On the other hand, he has better normals across the board.
Color Selection
| Normal | Alternative |
 |

|
--Born2SPD
To select Old T. Hawk, place the cursor over T.Hawk, press any button, then input "right, right, left, left." Press Jab to use the original color from SSF2 and either Jab + Short or Fierce + Short to use an alternate color.
Move Analysis
Only the differences from the N. version will be commented, for info about them check the N.T.Hawk page. Note that at most standing moves, N.T.Hawk's middle vulnerable body hitbox is a bit bigger, this probably is a consequence of the new standing hitbox that CAPCOM put in N.Hawk, but that does not seen to affect the efficiency of these moves at all.
Normal Moves
Ground Normals
- Close/Far Standing Jab:
| Damage | 3 | File:OTHawk stjab1.png | File:OTHawk stjab2.png | File:OTHawk stjab3.png |
| Chain Cancel | No | |||
| Special Cancel | Yes | |||
| Frame Count | 3 | 4 | 4 | |
Has the vulnerable part in the back a bit smaller than the N.T.Hawk version.
- Crouching Jab:
| Damage | 3 |  |
 |
 |

|
| Chain Cancel | Yes | ||||
| Special Cancel | Yes | ||||
| Frame Count | 2 | 1 | 4 | 4 | |
| Simplified | 3 | 4 | 4 | ||
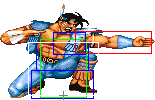
The hitbox is much fatter and slightly longer which makes it a better anti aerial and allows it to beat some low normals which N.T.Hawk's cr.Jab can not.
- Close Standing Strong:
| Damage | 15 |  |
 |
 |

|
| Chain Cancel | No | ||||
| Special Cancel | Yes | ||||
| Frame Count | 3 | 3 | 6 | 5 | |
| Simplified | 3 | 9 | 5 | ||
The hitbox in the back is a bit bigger, like some other standing normals, but thats meaningless.
- Far Standing Strong:
| Damage | 15 | 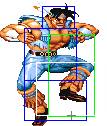 |
 |
 |

|
| Chain Cancel | No | ||||
| Special Cancel | No | ||||
| Frame Count | 3 | 2 | 7 | 7 | |
| Simplified | 5 | 7 | 7 | ||
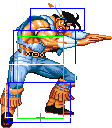
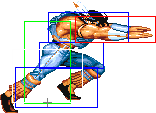
The active hitbox is a bit bigger upwards and downwards, the last is the most important; it will not miss crouching Blanka, Guile, Chun Li, Cammy and M.Bison(Dictator).
- Crouching Strong:
| Damage | 15 |  |
 |

|
| Chain Cancel | No | |||
| Special Cancel | No | |||
| Frame Count | 6 | 8 | 7 | |
Does not has the stray hitbox in the recovery animation, which makes this move a lot better.
- Close Standing Fierce:
| Damage | 12+12 |  |
 |
 |
 |
|
| Chain Cancel | No | |||||
| Special Cancel | No | |||||
| Frame Count | 4 | 4 | 6 | 6 | 9 | |
| Simplified | 8 | 6 | 6 | 9 | ||
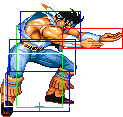
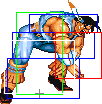
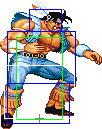
Exactly the same as the N.T.Hawk version of this move.
- Far Standing Fierce:
| Damage | 17 |  |
 |
 |
 |
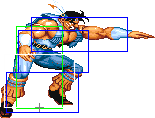 |
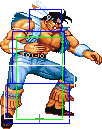
|
| Chain Cancel | No | ||||||
| Special Cancel | No | ||||||
| Frame Count | 5 | 5 | 8 | 4 | 4 | 5 | |
| Simplified | 10 | 8 | 13 | ||||
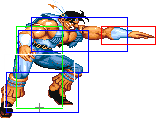
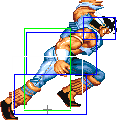
The size of the active hitbox is the same, but its positioned some pixels forward, giving it better priority and range. The vulnerable hitbox is a bit bigger in the back, like some other normals, but it will hardly affect anything.
- Crouching Fierce:
| Damage | 18+12 |  |
 |
 |
 |
 |

|
| Chain Cancel | No | ||||||
| Special Cancel | No | ||||||
| Frame Count | 4 | 4 | 6 | 8 | 3 | 7 | |
| Simplified | 8 | 6 | 8 | 10 | |||
The second active hitbox is a lot more bigger than the N.T.Hawk's version, but it has less horizontal range. Probably the only normal that N. version has better.
- Close Standing Short:
| Damage | 11 |  |
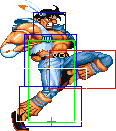 |

|
| Chain Cancel | No | |||
| Special Cancel | Yes | |||
| Frame Count | 3 | 4 | 4 | |
The active hitbox is bigger and the vulnerable hitbox is bigger in the back, changes that don't affect the usage of this move at all.
- Far Standing Short:
| Damage | 11 |  |
 |
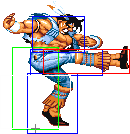 |

|
| Chain Cancel | No | ||||
| Special Cancel | No | ||||
| Frame Count | 2 | 2 | 5 | 4 | |
| Simplified | 4 | 5 | 4 | ||
The active hitbox is a bit bigger downwards, but its no big deal.
- Crouching Short:
| Damage | 3 |  |
 |
 |

|
| Chain Cancel | No | ||||
| Special Cancel | Yes | ||||
| Frame Count | 2 | 1 | 4 | 5 | |
| Simplified | 3 | 4 | 5 | ||
Exactly the same as the N.T.Hawk version of this move.
- Close Standing Forward:
| Damage | 15 |  |
 |

|
| Chain Cancel | No | |||
| Special Cancel | Yes | |||
| Frame Count | 3 | 8 | 7 | |
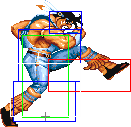
Again, just bigger vulnerable hitbox.
- Far Standing Forward:
| Damage | 15 | 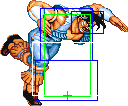 |
 |
 |
 |

|
| Chain Cancel | No | |||||
| Special Cancel | No | |||||
| Frame Count | 4 | 4 | 4 | 3 | 4 | |
| Simplified | 8 | 4 | 7 | |||
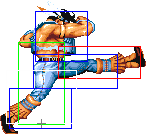
Smaller middle body vulnerable hitbox and bigger active hitbox to upwards, which makes it a better anti aerial, but thats not the purpose of this move.
- Crouching Forward:
| Damage | 15 |  |
 |
 |

|
| Chain Cancel | No | ||||
| Special Cancel | No | ||||
| Frame Count | 3 | 3 | 6 | 5 | |
| Simplified | 6 | 6 | 5 | ||
Bigger active hitbox which gives this moves a lot better priority and range. Helps against Guile.
- Close Standing Roundhouse:
| Damage | 17 |  |
 |
 |
 |
 |
 |

|
| Chain Cancel | No | |||||||
| Special Cancel | No | |||||||
| Frame Count | 2 | 2 | 2 | 2 | 8 | 5 | 6 | |
| Simplified | 8 | 8 | 11 | |||||
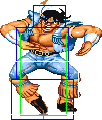
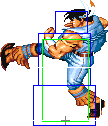
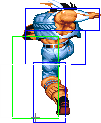
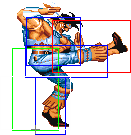
Smaller middle body hitbox in some animation frames and fatter active hitbox: it will not miss crouching Blanka and Cammy.
- Far Standing Roundhouse:
| Damage | 17 |  |
 |
 |
 |
 |
 |

|
| Chain Cancel | No | |||||||
| Special Cancel | No | |||||||
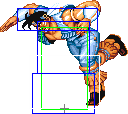
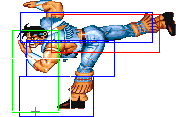
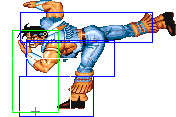
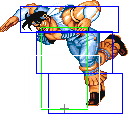
| Frame Count | 3 | 3 | 5 | 8 | 4 | 6 | 7 | |
| Simplified | 11 | 8 | 17 | |||||
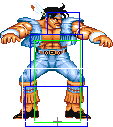
O.T.Hawk's version has a bit less range, but it will not miss crouching Blanka, Cammy and M.Bison(Dictator), which do helps in these matches (all hard ones).
- Crouching Roundhouse:
| Damage | 17/12 |  |
 |
 |
 |
 |

|
| Chain Cancel | No | ||||||
| Special Cancel | No | ||||||
| Frame Count | 6 | 7 | 6 | 8 | 6 | 7 | |
| Simplified | 6 | 7 | 6 | 8 | 13 | ||
The only normal which different frame count. It is a lot more faster than N.T.Hawk's version.
Aerial Normals
- Neutral Jumping Jab:
| Damage | 12 |  |
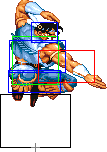
|
| Chain Cancel | No | ||
| Special Cancel | Yes | ||
| Frame Count | 3 | ∞ | |
Unchanged in the N. version.
- Diagonal Jumping Jab:
| Damage | 12 |  |
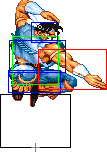
|
| Chain Cancel | No | ||
| Special Cancel | Yes | ||
| Frame Count | 3 | ∞ | |
The same.
- Neutral/Diagonal Jumping Strong:
| Damage | 15 |  |
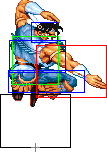 |

|
| Chain Cancel | No | |||
| Special Cancel | No | |||
| Frame Count | 5 | 14 | ∞ | |
The N. Version of this move was completely nerfed. Fortunately, this was not very used in the first place.
- Neutral Jumping Fierce:
| Damage | 17 | 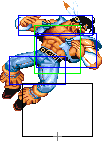 |
 |
 |
 |

|
| Chain Cancel | No | |||||
| Special Cancel | No | |||||
| Frame Count | 2 | 5 | 12 | 5 | ∞ | |
| Simplified | 7 | 12 | ∞ | |||
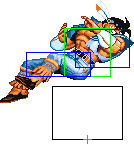
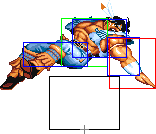
The hitbox in bigger, which do makes it a bit better, but the vertical priority is the same.
- Diagonal Jumping Fierce:
| Damage | 17 |  |
 |
 |

|
| Chain Cancel | No | ||||
| Special Cancel | No | ||||
| Frame Count | 5 | 2 | 11 | ∞ | |
| Simplified | 5 | 13 | ∞ | ||
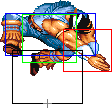
A lot better than the N. version. The first active animation has a good air to air hitbox while the N.T.Hawks version got completely nerfed. But the most important part is in the second active part: it can crossup and hits very low, which allows you to beat Dhalsim's slide, which most characters can not.
- Neutral Jumping Short:
| Damage | 12 | 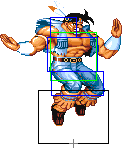 |
 |
|
| Chain Cancel | No | |||
| Special Cancel | No | |||
| Frame Count | 2 | 3 | ∞ | |
| Simplified | 5 | ∞ | ||
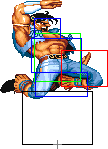
The active hitbox is considerably bigger upwards, but this move does not has much use.
- Diagonal Jumping Short:
| Damage | 12 |  |
 |

|
| Chain Cancel | No | |||
| Special Cancel | No | |||
| Frame Count | 2 | 2 | ∞ | |
| Simplified | 4 | ∞ | ||
Exactly the same.
- Neutral Jumping Forward:
| Damage | 15 |  |
 |
 |
 |

|
| Chain Cancel | No | |||||
| Special Cancel | No | |||||
| Frame Count | 2 | 3 | 13 | 3 | ∞ | |
| Simplified | 5 | 13 | ∞ | |||
Liek the Short version, the hitbox is smaller, but that move is not used much in the first place.
- Diagonal Jumping Forward:
| Damage | 15 |  |
 |
 |
 |

|
| Chain Cancel | No | |||||
| Special Cancel | No | |||||
| Frame Count | 3 | 2 | 16 | 6 | ∞ | |
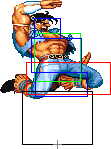
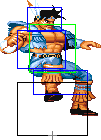
| Simplified | 5 | 16 | ∞ | |||
The same.
- Neutral Jumping Roundhouse:
| Damage | 17 |  |
 |
 |
 |

|
| Chain Cancel | No | |||||
| Special Cancel | No | |||||
| Frame Count | 2 | 5 | 12 | 4 | ∞ | |
| Simplified | 7 | 12 | ∞ | |||
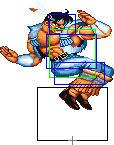
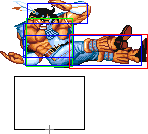
Bigger hitbox which covers T.Hawk's entire legs that do makes it better, but that normal is not used much.
- Diagonal Jumping Roundhouse:
| Damage | 17 |  |
 |
 |
 |

|
| Chain Cancel | No | |||||
| Special Cancel | No | |||||
| Frame Count | 2 | 4 | 8 | 6 | ∞ | |
| Simplified | 6 | 8 | ∞ | |||
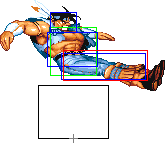
The hitbox is considerably bigger: allows T.Hawk's to crossup with it. It also has better priority by 1 or 2 pixels.
--Born2SPD
Command Normals
- Downward Jab: (On ground, ←/→ + Jab)
| Damage | 3 |  |
 |
|
| Chain Cancel | No | |||
| Special Cancel | Yes | |||
| Frame Count | 3 | 4 | 4 | |
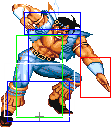
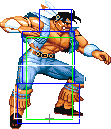
Yet again, just smaller vulnerable hitboxes in the back.
- Elbow Drop: (Jump diagonally, ↙/↓/↘ + Strong)
| Damage | 15 |  |
 |
 |

|
| Chain Cancel | No | ||||
| Special Cancel | No | ||||
| Frame Count | 5 | 30 | 4 | ∞ | |
| Simplified | 5 | 30 | ∞ | ||
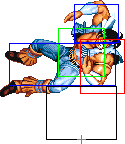
The active hitbox is fatter, but its not used much in the first place.
- Body Slam: (Jump diagonally, ↙/↓/↘ + Fierce)
| Damage | 18 |  |
 |

|
| Chain Cancel | No | |||
| Special Cancel | No | |||
| Frame Count | 3 | 4 | ∞ | |
| Simplified | 7 | ∞ | ||
Stays out until Hawk lands. Unlike N.Hawk's version, this one can crossup, leaving opponents in line for some great dizzy/damage combos. One of the main reasons why O.Hawk is better.
--Born2SPD
Special Moves
- Mexican Typhoon: (360 + P)
| Damage (Jab) | 27 |
| Damage (Strng) | 30 |
| Damage (Frc) | 32 |
T.Hawk's long range, bread and buter command throw. Grabs the enemy by the face, jumps while spinning them, then smashes their head on the ground for high damage. This is T.Hawk's main attack tool and can be used with a multitude of ticks with Jab being his best. It has better range than any other throw but Zangief's Spinning Pile Driver and can be made safe with the use of negative edge. This is to say, as it does not have a whiff animation, you will obtain a normal if the enemy is not throwable and you press a punch button, but nothing if you use negative-edge.
- Tomahawk Buster a.k.a. Rising Hawk: (→↓↘ + P)
- Recovery:
| File:OTHawk tb5.png | 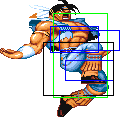 |
 |
 |
 |

| |
| Frame Count (Jab) | 2 | 4 | 3 | 4 | 7 | 4 |
| Simplified (Jab) | 24 | |||||
| Frame Count (Strng) | 2 | 4 | 3 | 4 | 10 | 4 |
| Simplified (Strng) | 27 | |||||
| Frame Count (Frc) | 2 | 4 | 3 | 4 | 13 | 4 |
| Simplified (Frc) | 30 | |||||
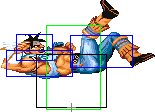
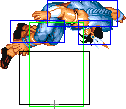
Hawk becomes invulnerable for a split second, crouches, then rises diagonally to the air while hitting the enemy. After that, he falls defenseless to the ground. The Jab and Strong versions hit only once and cause a full knockdown, while the Fierce one hits twice, being that the second active part causes a full knock down. Unlike N.T.Hawk's, all versions can pass though projectiles, if timed really close to them. The Jab and Strong versions have the first active part, when T.Hawk is still invulnerable, doing more damage (20%). If it hits late, the Jab and Strong versions will do just 14% damage. The Fierce version, on the other hand, only does 9% damage if it hits up close, but it comboes into the last active part of the move, which does 20% damage. As it has less recovery, only use the Jab version, unless you have confirmed a combo. If you hit late, it will do less damage than the Fierce version, but you will not be wide open for punishment as you would with the Fierce one otherwise. This is T.Hawk's best anti-air move.
- Condor Dive: (In Air, Jab + Strong + Fierce)
| Damage | 20 |  |
 |
File:OTHawk dive3.png |  |
 |
 |

|
| Frame Count | 10 | 7 | ∞ | 2 | 9 | 10 | 6 | |
| Simplified | 17 | ∞ | 27 | |||||
- Bounce:
 |
 |
 |
 |
 |

| |
| Frame Count | 8 | 4 | 4 | 4 | ∞ | 6 |
| Simplified | ∞ | 6 | ||||
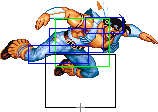
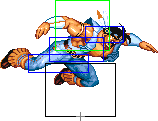
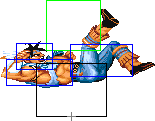
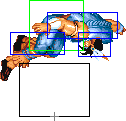
T.Hawk hovers in the air for a small period of time, then dives diagonally from where the move was started towards the ground. This move can only be performed on a neutral or diagonal jump on the way up. Once T.Hawk reaches his apex and starts coming down from his jump, the move cannot be performed. Extremely good move for punishing fireballs. Can be done close to the ground for shenanigans and dodging and punishing slow recovering lows like Guile's sweep. Good for closing distance after a mid screen Typhoon. This move does not have great priority and can be punished by some characters.
- Characters not to hit with Condor dives unless your sure they will not be able to block: Dhalsim, Sagat, Guile (any versions).
Dhalsim the most as he can punish easily with multiple normals. Sagat can punish with fireballs, and Guile can either hit Hawk out of the move with a Flash Kick, or block it and then punish with aerial Roundhouse. Remember also that Guile is extremely hard to punish for Sonic Booms as he recovers very quick compared to Sagat, Ryu and Ken.
- Characters not to spam Condor dives against: Ryu, Ken, Cammy, Fei Long, T.Hawk (any versions).
These characters can react with SRK-like special moves or simply normals. Also be careful as if Ryu and Ken manage to block the move as it is about to cross them up, they can jump immediately after blocking and punish with j.RH. Ryu can also use a Fierce Hadouken, of even a Super, if he has bar. If they do it too late and miss it can leave them in a horrible position(good for T.Hawk).
- Characters not to hit with Condor dives unless your sure they will not be able to block or you know they do not have charge: Balrog(Boxer), Blanka, E. Honda and M.Bison(Dictator) (any versions).
All four can punish with charge back->forward + Fierce.
- Characters that cannot punish after blocking a Condor dive: Chun Li, Cammy, Dee Jay, Fei Long, T.Hawk, Vega(Claw), Zangief.
It can be extremely useful but can get a lot of inexperienced players in loads of trouble if used too much/incorrectly. It covers a lot of ground very fast. You can use it to punish fireballs by jumping and Dive over them. Remember though that if you don't connect, or it's blocked, you hit the ground and "slide" a bit. Now you can be punished by sweeps and/or certain combos at this point. But, this can also be a useful tool against a scared/slow opponent. In your slide you can Tomahawk Buster(DP) or Typhoon while sliding at the end. You can deceive a player thinking your going to connect and bounce back and if they don not react to you hitting the ground you can punish. Again be careful with this move. Can be a big help or a big hindrance.
--Decca
--Jedi.10 07:40, 24 July 2007 (UTC)
--Born2SPD
The Basics
O.Hawk has significantly better normals than N.Hawk. This allows him to use more of his normals in footsies, creating more openings for either punishing with normals or walking in for the Typhoon. After Hawk uses a Typhoon, he can close the gap with a Condor Dive relatively close to the ground. After a knockdown, Hawk usually wants to apply great pressure on the enemy's wake-up with wither a jumping Forward or Fierce aerial cross-up, safe jump then tick into Typhoons or a ground normal as a tick move. Other than O.Hawks ground game, he can use jumping Jab, as it has very good priority; diagonal jumping Fierce, which hits very low, beating moves most characters can't; and Condor Dive, which punishes anti-air sweep attempts and long recovery moves in general, such as a Hadouken.
Advanced Strategy
Option-Select ticks
T. Hawk's main weapon is his Mexican Typhoon throw. Most other tools O.T. Hawk has often find use due to the enemy's (justified) fear of the Mexican Typhoon. Anyway, his strongest strategy is related to the Mexican Typhoon itself, using negative edge so as to avoid whiffed normals.
Say you tick your opponent with any attack, then input a 360 motion and press a punch button for the Typhoon at the exact time he recovers from blockstun. This is a strong strategy, as it forces the enemy to use a reversal attack to avoid the throw. Not any reversal attack, in fact: it must be either a reversal throw, a reversal invulnerable special move or a reversal instantly-airbone move. With the exception of Zangief's Spinning Pile Driver, reversal throws can be dealt with by ticking so as to be outside their throw range. However, if the enemy reversals with an invulnerable move that also attacks, such as a Shoryuken or a Flash Kick, a punch will come out and Hawk will be hit while performing it. If the enemy becomes airbone, he will surely evade the throw and may also evade or even hit Hawk as he punches. Fortunately for T. Hawk, he has a way of not whiffing normals when attempting Typhoons, causing reversal special to whiff or get blocked. As a number of such attacks are unsafe on block, Hawk can throw them afterward and reset the situation.
Negative-edge typhoon
Hawk's most simple option select consists of using a cr.Jab as a tick attack, then quickly pressing the other punch buttons and buffering a 360 motion, ending in defensive crouch. As the enemy recovers from the Jab, release the buttons one-by-one in a quick succession, giving you three chances of obtaining a Typhoon. As you are releasing buttons, no attacks will come out, and eventual reversal attacks will either whiff or get blocked. For instance, Flash Kicks and Shoryukens are unsafe on block, and you can simply do a typhoon or Tomahawk Buster as they recover. Coupling this strategy with safe jumps, it may be very hard or impossible to avoid taking damage for most characters. Even though this is very hard to apply consistently, that's what makes T. Hawk a viable character in high level play.
Walk-up button-release typhoon
Whiff a normal just outside your enemy poke range, and buffer ↑←↓→ (hold) + punches (hold). Continue to hold → and release the punch buttons one by one in a quick succession as you enter the Typhoon range. This allows you to obtain a Typhoon quicker while advancing. Would one try a normal walk-up Typhoon, you could get hit before completing the motion.
Buster-Typhoon option select
Do a negative edge Typhoon, but after reaching down back, move the stick to down towards, and release the buttons. If done right, you will either obtain a Typhoon or a Tomahawk Buster. This is good when dealing with safe-on-block reversal attacks, such as Cammy's Cannon Spike, and moves that may allow the enemy to escape from a corner, such as Ryu's tatsus.
Hit-Confirm cross-up
If T. Hawk scores a knockdown at mid-screen and stays close to his opponent, he has a chance of ending the round right there. In order to do that, he use jumping Forward of Fierce splash to hit the enemy as a cross-up. After that, he can use cr.Jab into st.Jab, which give enough time to check if the combo was blocked or not. If the combo is not blocked, Hawk can cancel the st.Jab into the Tomahawk Buster, for another knockdown and, possibly, a dizzy, leading to another damaging combo. Else, he can use the option-select Typhoon.
