No edit summary |
|||
| Line 62: | Line 62: | ||
|Guard= [[File:Mid.png]] | |Guard= [[File:Mid.png]] | ||
|Stun= | |Stun= | ||
|Properties= | |Properties=[[File:Specialcancel.png]][[File:Supercancel.png]] | ||
|Startup= | |Startup= | ||
|Active= | |Active= | ||
| Line 147: | Line 147: | ||
|Guard=[[File:Low.png]] | |Guard=[[File:Low.png]] | ||
|Stun= | |Stun= | ||
|Properties=[[File: | |Properties=[[File:Specialcancel.png]][[File:Supercancel.png]] | ||
|Startup= | |Startup= | ||
|Active= | |Active= | ||
| Line 168: | Line 168: | ||
|Guard=[[File:Low.png]] | |Guard=[[File:Low.png]] | ||
|Stun= | |Stun= | ||
|Properties=[[File:Knockdown.png]] | |Properties=[[File:Specialcancel.png]][[File:Supercancel.png]][[File:Knockdown.png]] | ||
|Startup= | |Startup= | ||
|Active= | |Active= | ||
| Line 244: | Line 244: | ||
|Adv. Hit= | |Adv. Hit= | ||
|Adv. Guard= | |Adv. Guard= | ||
|description= | |description=Only first hit is cancellable. | ||
}} | }} | ||
}} | }} | ||
| Line 260: | Line 260: | ||
|Guard= [[File:High.png]] | |Guard= [[File:High.png]] | ||
|Stun= | |Stun= | ||
|Properties= | |Properties=[[File:Supercancel.png]] | ||
|Startup= | |Startup= | ||
|Active= | |Active= | ||
| Line 281: | Line 281: | ||
|Guard= [[File:High.png]] | |Guard= [[File:High.png]] | ||
|Stun= | |Stun= | ||
|Properties= | |Properties=[[File:Supercancel.png]] | ||
|Startup= | |Startup= | ||
|Active= | |Active= | ||
| Line 302: | Line 302: | ||
|Guard= [[File:High.png]] | |Guard= [[File:High.png]] | ||
|Stun= | |Stun= | ||
|Properties= | |Properties=[[File:Supercancel.png]] | ||
|Startup= | |Startup= | ||
|Active= | |Active= | ||
| Line 345: | Line 345: | ||
|Guard= [[File:High.png]] | |Guard= [[File:High.png]] | ||
|Stun= | |Stun= | ||
|Properties= | |Properties=[[File:Supercancel.png]] | ||
|Startup= | |Startup= | ||
|Active= | |Active= | ||
| Line 389: | Line 389: | ||
|Guard= [[File:High.png]] | |Guard= [[File:High.png]] | ||
|Stun= | |Stun= | ||
|Properties= | |Properties=[[File:Supercancel.png]] | ||
|Startup= | |Startup= | ||
|Active= | |Active= | ||
| Line 416: | Line 416: | ||
|Adv. Hit= | |Adv. Hit= | ||
|Adv. Guard= | |Adv. Guard= | ||
|description= | |description=Can fuzzy with dj.D after a jump in. | ||
}} | }} | ||
}} | }} | ||
| Line 493: | Line 493: | ||
{{AttackData-BreakersR | {{AttackData-BreakersR | ||
|Damage= | |Damage= | ||
|Guard= [[File: | |Guard= [[File:Mid.png]] | ||
|Stun= | |Stun= | ||
|Properties=[[File:Supercancel.png]] | |Properties=[[File:Supercancel.png]] | ||
Revision as of 01:37, 10 December 2022
Introduction
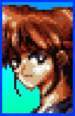
Sho Kamui is a master of Karate and the protagonist of Breakers Revenge. He enters the FIST Tournament in order to prove the strength of his martial art and to face off against his old rival, Lee Dao-Long, who gave him the scar on his cheek.
Overview
Sho is a versatile character with a wide array of strong special moves. He has tremendous damage and stun output, access to air supers, a divekick he can do from any jump, and a running dash. His active jumping moves and air fireball super also give oppressive control over the air.
Despite his strong fireballs, Sho isn't really a zoner. He mainly runs behind 236A to pressure the opponent. This becomes especially tough for opponents when they get put into the corner. Sho doesn't just excel at getting in, either. He sports two of the strongest breakers in the game: 214K and his backdash.
There really isn't anywhere on the screen Sho isn't dangerous.

| Strengths | Weaknesses |
|---|---|
|
|
| Sho | |
|---|---|
| [[File:BR{{{filename}}}Victory.png|center]] | |
| Defense | 126 |
| Stun | 2976 |
Move List
Normals
Standing
| Damage | Guard | Stun | Properties | |
|---|---|---|---|---|
| - | - | |||
| Startup | Active | Recovery | Adv. Hit | Adv. Guard |
| - | - | - | - | - |
| Damage | Guard | Stun | Properties | |
|---|---|---|---|---|
| - | - | |||
| Startup | Active | Recovery | Adv. Hit | Adv. Guard |
| - | - | - | - | - |
| Damage | Guard | Stun | Properties | ||
|---|---|---|---|---|---|
| - | - | ||||
| Startup | Active | Recovery | Adv. Hit | Adv. Guard | |
| - | - | - | - | - | |
|
This move has a lot of priority and can be done while dashing after a meaty LP fireball for a good frametrap. Cancellable into supers and specials and chains to his command normals. | |||||
| Damage | Guard | Stun | Properties | |
|---|---|---|---|---|
| - | - | - | ||
| Startup | Active | Recovery | Adv. Hit | Adv. Guard |
| - | - | - | - | - |
Crouching
| Damage | Guard | Stun | Properties | |
|---|---|---|---|---|
| - | - | |||
| Startup | Active | Recovery | Adv. Hit | Adv. Guard |
| - | - | - | - | - |
| Damage | Guard | Stun | Properties | ||
|---|---|---|---|---|---|
| - | - | ||||
| Startup | Active | Recovery | Adv. Hit | Adv. Guard | |
| - | - | - | - | - | |
|
Basic low combo starter. | |||||
| Damage | Guard | Stun | Properties | ||
|---|---|---|---|---|---|
| - | - | ||||
| Startup | Active | Recovery | Adv. Hit | Adv. Guard | |
| - | - | - | - | - | |
|
This move is one of Sho's best anti-airs. He can combo into all of his specials and supers afterwards. | |||||
| Damage | Guard | Stun | Properties | |
|---|---|---|---|---|
| - | - | |||
| Startup | Active | Recovery | Adv. Hit | Adv. Guard |
| - | - | - | - | - |
Close
| C | Damage | Guard | Stun | Properties | |
|---|---|---|---|---|---|
| - | - | ||||
| Startup | Active | Recovery | Adv. Hit | Adv. Guard | |
| - | - | - | - | - | |
| CC | Damage | Guard | Stun | Properties | |
| - | - | ||||
| Startup | Active | Recovery | Adv. Hit | Adv. Guard | |
| - | - | - | - | - | |
| CCC | Damage | Guard | Stun | Properties | |
| - | - | ||||
| Startup | Active | Recovery | Adv. Hit | Adv. Guard | |
| - | - | - | - | - | |
| Damage | Guard | Stun | Properties | ||
|---|---|---|---|---|---|
| - | - | ||||
| Startup | Active | Recovery | Adv. Hit | Adv. Guard | |
| - | - | - | - | - | |
|
Only first hit is cancellable. | |||||
Neutral Jumping
| Damage | Guard | Stun | Properties | |
|---|---|---|---|---|
| - | - | |||
| Startup | Active | Recovery | Adv. Hit | Adv. Guard |
| - | - | - | - | - |
| Damage | Guard | Stun | Properties | |
|---|---|---|---|---|
| - | - | |||
| Startup | Active | Recovery | Adv. Hit | Adv. Guard |
| - | - | - | - | - |
| Damage | Guard | Stun | Properties | |
|---|---|---|---|---|
| - | - | |||
| Startup | Active | Recovery | Adv. Hit | Adv. Guard |
| - | - | - | - | - |
| Damage | Guard | Stun | Properties | ||
|---|---|---|---|---|---|
| - | - | ||||
| Startup | Active | Recovery | Adv. Hit | Adv. Guard | |
| - | - | - | - | - | |
|
This move causes knockdown and beats a LOT of air moves. Extremely big hitbox and priority. | |||||
Diagonal Jumping
| Damage | Guard | Stun | Properties | ||
|---|---|---|---|---|---|
| - | - | ||||
| Startup | Active | Recovery | Adv. Hit | Adv. Guard | |
| - | - | - | - | - | |
|
You can combo into ground or air supers from this very easily. You can use this if you don't feel like timing a different air move and just want to spam. Use this for getting some extra damage or to set up a reset as the opponent lands. | |||||
| Damage | Guard | Stun | Properties | ||
|---|---|---|---|---|---|
| - | - | ||||
| Startup | Active | Recovery | Adv. Hit | Adv. Guard | |
| - | - | - | - | - | |
|
This move stays out for the duration of Sho's jump. It can cross up and combos into super. Can be canceled by super at any time during its animation, even on whiff. Beats a ridiculous amount of air moves. | |||||
| Damage | Guard | Stun | Properties | ||
|---|---|---|---|---|---|
| - | - | ||||
| Startup | Active | Recovery | Adv. Hit | Adv. Guard | |
| - | - | - | - | - | |
|
This move crosses up extremely easily and also beats a ton of moves, causes a great deal of hitstun, and is cancellable at any time during its animation by supers. | |||||
| Damage | Guard | Stun | Properties | ||
|---|---|---|---|---|---|
| - | - | ||||
| Startup | Active | Recovery | Adv. Hit | Adv. Guard | |
| - | - | - | - | - | |
|
Can fuzzy with dj.D after a jump in. | |||||
Command Normals
| Damage | Guard | Stun | Properties | ||
|---|---|---|---|---|---|
| - | - | ||||
| Startup | Active | Recovery | Adv. Hit | Adv. Guard | |
| - | - | - | - | - | |
|
Grounded overhead that can confirm into combos. Can be chained into but is very breakable as a combo. | |||||
| Damage | Guard | Stun | Properties | ||
|---|---|---|---|---|---|
| - | - | ||||
| Startup | Active | Recovery | Adv. Hit | Adv. Guard | |
| - | - | - | - | - | |
|
a dumb kick where Sho kicks the opponent with one foot. | |||||
| Damage | Guard | Stun | Properties | ||
|---|---|---|---|---|---|
| - | - | ||||
| Startup | Active | Recovery | Adv. Hit | Adv. Guard | |
| - | - | - | - | - | |
|
Sho hops and can dodge low moves. Is not an overhead, but makes Sho airborne. Cancellable to air fireball and air kick super. Moves Sho forward very far, though easily interrupted it is a good way to stay in. | |||||
| Damage | Guard | Stun | Properties | ||
|---|---|---|---|---|---|
| - | - | ||||
| Startup | Active | Recovery | Adv. Hit | Adv. Guard | |
| - | - | - | - | - | |
|
Sho does a upwards punch in the air. Not as good as his j.B but will beat things way above him. | |||||
| Damage | Guard | Stun | Properties | ||
|---|---|---|---|---|---|
| - | - | ||||
| Startup | Active | Recovery | Adv. Hit | Adv. Guard | |
| - | - | - | - | - | |
|
Sho does Chun-Li's stomp from ST. Can do air moves afterwards and is super cancellable. This is one of Sho's most awesome moves, use this often as it can even stuff DP's and is difficult to hit. You can cancel it into air fireball super on whiff or hit at any time. Possible to verify a hit into super or bait an anti-air with a super. | |||||
| Damage | Guard | Stun | Properties | ||
|---|---|---|---|---|---|
| - | - | ||||
| Startup | Active | Recovery | Adv. Hit | Adv. Guard | |
| - | - | - | - | - | |
|
Sho does a divekick. Super cancellable at any time during animation, even on whiff. Does not hit high but has excellent priority. Can be performed instantly after jumping. | |||||
Throws
| Damage | Guard | Stun | Properties | |
|---|---|---|---|---|
| - | - | - | ||
| Startup | Active | Recovery | Adv. Hit | Adv. Guard |
| - | - | - | - | - |
| Damage | Guard | Stun | Properties | |
|---|---|---|---|---|
| - | - | - | ||
| Startup | Active | Recovery | Adv. Hit | Adv. Guard |
| - | - | - | - | - |
Specials

| 236A | Damage | Guard | Stun | Properties | ||
|---|---|---|---|---|---|---|
| - | - | |||||
| Startup | Active | Recovery | Adv. Hit | Adv. Guard | ||
| - | - | - | - | - | ||
|
Sho throws a slow fireball, useful for running behind, particularly as a meaty fireball. | ||||||
| 236C | Damage | Guard | Stun | Properties | ||
| - | - | |||||
| Startup | Active | Recovery | Adv. Hit | Adv. Guard | ||
| - | - | - | - | - | ||

| 214B | Damage | Guard | Stun | Properties | ||
|---|---|---|---|---|---|---|
| - | - | |||||
| Startup | Active | Recovery | Adv. Hit | Adv. Guard | ||
| - | - | - | - | - | ||
|
Sho does a flying fire kick. Sho's anti-air and reversal move. Has invulnerability on startup; press K up to 3 times to get the all the hits. | ||||||
| 214D | Damage | Guard | Stun | Properties | ||
| - | - | |||||
| Startup | Active | Recovery | Adv. Hit | Adv. Guard | ||
| - | - | - | - | - | ||

| 236B | Damage | Guard | Stun | Properties | ||
|---|---|---|---|---|---|---|
| - | - | |||||
| Startup | Active | Recovery | Adv. Hit | Adv. Guard | ||
| - | - | - | - | - | ||
|
Sho does a hop spin kick that hits 2 times. If blocked, Sho becomes airborne where he can perform either of his air supers, but leave him vulnerable to air throws and counter attacks. If it hits, Sho rolls to safety on the other side of the opponent. Good when done against an airborne opponent as it knocks down and puts you right next to them. | ||||||
| 236D | Damage | Guard | Stun | Properties | ||
| - | - | |||||
| Startup | Active | Recovery | Adv. Hit | Adv. Guard | ||
| - | - | - | - | - | ||

| Damage | Guard | Stun | Properties | ||
|---|---|---|---|---|---|
| - | - | ||||
| Startup | Active | Recovery | Adv. Hit | Adv. Guard | |
| - | - | - | - | - | |
|
Sho does a vacuuming punch attack that hits several times for a lot of damage. Possible super link afterwards in corner. Very excellent damage and useful in combos. | |||||
Supers

| Damage | Guard | Stun | Properties | ||
|---|---|---|---|---|---|
| - | - | ||||
| Startup | Active | Recovery | Adv. Hit | Adv. Guard | |
| - | - | - | - | - | |
|
Sho punches rapidly, creating several powerful fireballs that strike the opponent for increasing damage. | |||||

| Damage | Guard | Stun | Properties | ||
|---|---|---|---|---|---|
| - | - | ||||
| Startup | Active | Recovery | Adv. Hit | Adv. Guard | |
| - | - | - | - | - | |
|
Sho shoots a big air fireball downward at the opponent. One of Sho's best utilities as it can be canceled into from any air normal even on whiff. Small invulnerability. | |||||

| Damage | Guard | Stun | Properties | ||
|---|---|---|---|---|---|
| - | - | ||||
| Startup | Active | Recovery | Adv. Hit | Adv. Guard | |
| - | - | - | - | - | |
|
Sho launches forward and hits his opponent with a multi-hitting flame kick that ends in an explosion. Good in combos and occasionally as a breaker. Can combo from a trip if the command is input immediately. | |||||
Combos
- Meterless Combos
- cr.A/cr.B xn, cr.D - Basic knockdown combo.
- LP+HP xx a special move - The HK version of hopkick is breakerable but the LK version usually isn't, depending on range. Basic combo from overhead. Different moves work differently in this combo, test them out to see their nuances.
- cr.A/cr.B xn, cr.C xx multipunch/flamekick - Use this combo as your bread and butter if you are deep enough to land the flamekick or multipunch. Multipunch may do more damage, but is more difficult to land. Multipunch gives a TON of meter.
- cr.A/cr.B xn, st.A, st.C xx fireball/hop kick - st.A is optional, and the hop kick will more than likely make your combo breakerable. Ending with a fireball up close or too far away is bad because it can make you open to attacks via breakers.
- st.C, st.C xx mutlipunch/flamekick - Great punish combo. Use the mutlipunch unless for some reason you forget. The flamekick will hit and everything but it doesn't do as good of damage. Unbreakerable and multipunch will give you a lot of super meter.
- cr.A/cr.B xn, st.C, LP+HP xx fireball/hop kick - This combo is so breakerable you should not use it, ever. But it is here anyway because you can use it as a pressure string.
- Combos with meter
- cr.A/cr.B xn, cr.D xx kick super - Great combo.
- cr.A/cr.B xn, cr.C xx kick super - Another good combo.
- cr.A/cr.B x2, st.A, st.C xx kick super - Yet another combo!
- cr.A/cr.B x2, st.A, st.C, LK+HK xx either air super - This combo will more than likely be breakerable no metter how it is spaced. St.A is optional.
- While opponent cornered, cr.A/cr.B xn, cr.C xx multipunch, kick/fireball super. Fireball super is easier to land, do not push yourself too far out of the corner. Recommended number of cr.a/cr.b is 2. Great damage.
- j.LP xn, land, ground fireball super - Bad damage but at least its something.
- j.LP xn, air fireball super/air kick super - Still bad damage but at least its damage. Fireball will only hit if opponent is in a certain range. Test it out to find the proper ranges to use it.
- j.B xx air fireball super - A combo. You can cancel this as late as it takes to make the combo work!
- any air move vs aerial opponent, land, ground fireball super - This is a good way to milk some damage.
- d+HK in the air xx fireball super - Easy to verify the divekick into super. You can land and do a ground combo but sometimes this is easier. The way that damage scaling works makes either one a good choice.
- Fireball vs an aerial opponent, any super - Combo off a fireball that hits a jumping opponent!
- Vertical jump D, Air fireball super - This works well!
- in corner, anti-air cr.C, LK flamekick (one hit), land, st.C xx either ground super - This combo does bad damage and is basically just for show. Do it for cool points though!
Advanced Strategy
How does Sho play?
Sho is quite possibly the most versatile character in the game. He can rush down and play a damn good bait-and-punish game. With one of the most damaging normal combos in the game, st.C, st.C, Multipunch, he can do a gigantic amount of damage if he baits nearly anything. He gains super so quickly that he can rush down from the air with cover from whiff-canceled air normals into super. His normals are incredible and his divekicks can scare the opponent from chasing him, allowing him to throw fireballs.
Breakering
Kurenai is a standard breaker move, since it functions as an uppercut; however it is punishable on block. If you use the LK version and do not press another kick until the opponent has been hit, that makes the move safer than quickly hammering on kicks to make him fly all over the screen.
If you ever attempt to mix up or combo with his hop or overhead, be aware that this is breakerable. It is extremely dangerous but the reward can be a shitload of damage. His normal strings are generally not breakerable, unless they use Fireball, dash Normal, Fireball type pressure. If you suspect the opponent will breaker your fireball pressure after a knockdown, you can stop short and throw another fireball instead of a normal to bait their breaker attempt. Sho has a breakerable infinite with chained normals into Hop much like Maherl's infinite. It is completely worthless because it is very tight and nearly impossible to do without getting breakered by random mashing.
Random Tips
- All of Sho's knockdown combos including flame kick allow him to pressure with an LP fireball leading to a mixup opportunity.
- Sho gets meter so incredibly fast that he can use it more frequently than any other character without any drawbacks. Since his air moves are cancellable even on whiff by air fireball super, you can use this to punish anti-airs. If you see a super flash while you're jumping in, input your air fireball super during the flash to hit the opponent easily.
- Sho has far more options than other characters, especially considering that he will typically always have meter if you're playing him correctly. Without any meter he can do a lot of damage and can sometimes afford to use supers solely for pressure via air fireball canceled from a whiffed or connected j.B or divekick.
- Sho's vertical j.D attack has an enormous amount of priority. A vertical j.d slightly outside of uppercut range can work wonders against some character. It also makes the opponent do a tiny bounce when they slam into the ground. You can combo into an air fireball off this bounce to milk extra damage from his j.D.
Matchups
Matchup Table
| Great | Maherl, Condor |
| Good | Pielle, Dao-Long, Rila, Alsion III |
| Even | Saizo |
| Weak | Tia |
| Bad |
Character Specific Tips
Alsion III
Condor
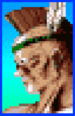
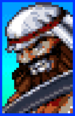
Dao-Long
Maherl
Pielle
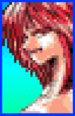
Rila
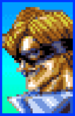
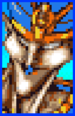
Sho
Sho
Tia

