(→Throws) |
|||
| Line 133: | Line 133: | ||
|Adv. Hit= | |Adv. Hit= | ||
|Adv. Guard= | |Adv. Guard= | ||
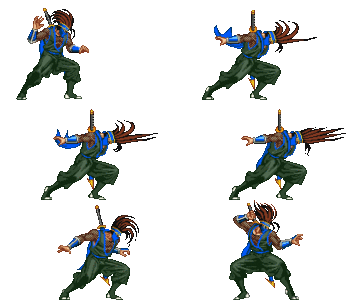
|description=Low toe poke, great range and part of your BnB combos. | |description=Low toe poke, great range and part of your BnB combos. Moves Saizo's hurtbox back and down enough low profile some moves. | ||
}} | }} | ||
}} | }} | ||
| Line 242: | Line 242: | ||
|Adv. Hit= | |Adv. Hit= | ||
|Adv. Guard= | |Adv. Guard= | ||
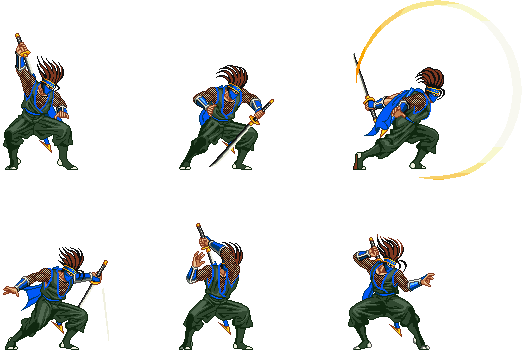
|description= | |description=Long reaching sword poke extending down slightly. Very reliable for controlling space in front of Saizo for situations where nj.C might whiff. | ||
}} | }} | ||
}} | }} | ||
| Line 263: | Line 263: | ||
|Adv. Hit= | |Adv. Hit= | ||
|Adv. Guard= | |Adv. Guard= | ||
|description= | |description=Saizo shifts forward in the air and does a light kick. Allows for some air control after neutral jump. | ||
}} | }} | ||
}} | }} | ||
| Line 305: | Line 305: | ||
|Adv. Hit= | |Adv. Hit= | ||
|Adv. Guard= | |Adv. Guard= | ||
|description= | |description=Similar to nj.B but more damage and it doesn't move forward. | ||
}} | }} | ||
}} | }} | ||
| Line 327: | Line 327: | ||
|Adv. Hit= | |Adv. Hit= | ||
|Adv. Guard= | |Adv. Guard= | ||
|description= | |description=Fast air chop with the Sword. Stick to dj.C. | ||
}} | }} | ||
}} | }} | ||
| Line 369: | Line 369: | ||
|Adv. Hit= | |Adv. Hit= | ||
|Adv. Guard= | |Adv. Guard= | ||
|description= | |description=Big air chop with the sword. Hits very deep below Saizo, if you do it deep enough it will avoid many invincible type anti-air moves. Use a direction to add in Airthrow attempts. | ||
}} | }} | ||
}} | }} | ||
| Line 390: | Line 390: | ||
|Adv. Hit= | |Adv. Hit= | ||
|Adv. Guard= | |Adv. Guard= | ||
|description= | |description= Similar move to dj.B but fewer active frames and more hitstun. Allows for easier combo and less chance of Breaker Throw. Crosses up. | ||
}} | }} | ||
}} | }} | ||
| Line 411: | Line 411: | ||
|Adv. Hit= | |Adv. Hit= | ||
|Adv. Guard= | |Adv. Guard= | ||
|description= | |description=Must be blocked high, cannot be comboed after, uncancellable. Slow overhead, but Saizo doesn't have any other grounded overheads and it cannot be breakered inbetween hits. | ||
}} | }} | ||
}} | }} | ||
| Line 432: | Line 432: | ||
|Adv. Hit= | |Adv. Hit= | ||
|Adv. Guard= | |Adv. Guard= | ||
|description= | |description=A slide that travels far and knocks down. Must be blocked low. If it hits or is blocked early on, it can be canceled for safety. Use out of dash for a full screen low. Low profile on the slide allows escapes that dash does not. | ||
}} | }} | ||
}} | }} | ||
| Line 601: | Line 601: | ||
|Adv. Hit= | |Adv. Hit= | ||
|Adv. Guard= | |Adv. Guard= | ||
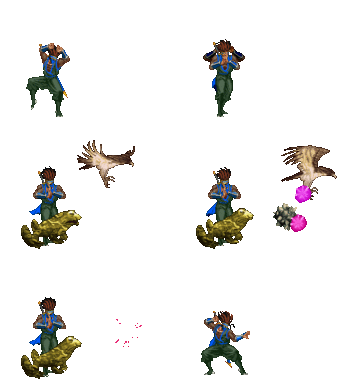
|description= | |description=Saizo summons a frog that shoots a projectile and a bird that flies across the screen. Button strength determines speed of bird and frog. | ||
Has some situational anti-air and combo usage. Can loop light version in the corner. | |||
<nowiki>#</nowiki>Bird's Revenge: Trade with a projectile, Saizo will take some damage and frog will be cancelled but the bird will continue across the screen while Saizo is free to move. | |||
}} | }} | ||
}} | }} | ||
| Line 621: | Line 625: | ||
|Adv. Hit= | |Adv. Hit= | ||
|Adv. Guard= | |Adv. Guard= | ||
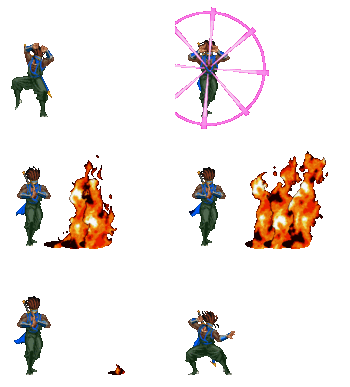
|description= | |description=Saizo summons a pillar of flames in front of him. Light version is always directly in front of Saizo, Heavy version tracks the opponent. In combos it is fine to always use the Heavy version. | ||
This is the preferred damage super for juggles. | |||
}} | }} | ||
}} | }} | ||
| Line 641: | Line 647: | ||
|Adv. Hit= | |Adv. Hit= | ||
|Adv. Guard= | |Adv. Guard= | ||
|description= | |description=Saizo dashes and performs an auto combo. Extremely fast startup and range is approximately half-screen, speed and range allows this move to be an extremely good punisher when used as a breaker. | ||
This is your preferred damage super for grounded combos, cancel out of light hair. If used in a juggle, the damage will be significantly lower. | |||
}} | }} | ||
}} | }} | ||
Revision as of 20:42, 8 December 2022
Introduction
Saizo Tobikageno is a ninja seeking revenge for the slaughter of his clan.
Overview
Saizo is primarily a zoner but he has the ability to switch rapidly between strong zoning and strong offense. The ability to threaten both amplify the effectiveness of each.
- For zoning, his kunai shut down other projectiles and his bombs, though not fullscreen, recover much faster than any other projectile. Couple this with very good reach on his jumping C attacks as air to airs or his 623P swords to keep opponents out.
- For offense, his dash into jump forward C is difficult to deal with and using dashing grounded attacks he can keep a large amount of pressure, even from half screen. Due to his lack of a good overhead, going for a crossup or going back to bomb zoning are likely options.
If you do manage to get in on him he has above average defense and is very difficult to stun, making him quite durable. 214A breaker is easily hit confirmable into super and hair super can punish a wide array of moves on block (and sometimes on hit), making Saizo a difficult opponent to break down.
| Strengths | Weaknesses |
|---|---|
|
|
| Saizo | |
|---|---|
| [[File:BR{{{filename}}}Victory.png|center]] | |
| Defense | 128 |
| Stun | 3456 |
Move List
Normals
Standing
Crouching
Close
Neutral Jumping
Diagonal Jumping
Command Normals
Throws
Specials
Supers
Combos
- Meterless Combos
- cr.B x2, cl.st.C xx Sword Move - This is Saizo's bread and butter combo. Great to use after a crossup.
- cr.B x2, Slide (d + LK + HK) - This combo is good when you are too far away for close st.C to hit. The slide can be canceled early into a bomb for safety. You can mash this combo out very quickly before waiting to verify if the cr.B's hit.
- cr.B x2, cr.A, cr.D - This is Saizo's bread and butter combo when he is too far away to be able to cancel slide into bomb for safety or when you didn't get a chance to verify if the cr.B's hit or not. It could be useful to stop this combo at cr.A and end your blockstring there if it is blocked.
- st.B xn, cr.A, cr.D - Knockdown from connected st.B's.
- Combos with meter
- cr.B/cr.A xn xx Hair (LP version) xx Combo Super - Saizo's basic combo into super.
- st.B xn xx Hair (LP version), Combo Super - Another basic combo into super.
- cr.B x2, cl.st.C xx Sword Move, Fire Super - Saizo's most damaging super combo. Learn to land this at every opportunity.
- Anti-air Sword Move, Flame Super/Birdfrog - Use Flame Super if anti-air the opponent up close, use Birdfrog if you anti-air the opponent at range.
- Anti-air Sword Move, Birdfrog x3 - Corner combo only, and basically a showoff combo. It isn't really worth the meter unless it will kill. Use LP version of Birdfrog. Very difficult to space on the fly.
- Anti-air Hair (LP version) xx Flame Super/Birdfrog/Combo Super - Any super will connect after an anti-air LP Hair, but the height and distance you hit the opponent at determines what super will land the best. Flame Super/Birdfrog are the easiest to land for the maximum number of hits and damage, with Birdfrog being easier to hit with but much less damaging than Flame Super. The Combo Super will hit, but since it is hitting versus an aerial opponent it will do much less damage than if you had used it on the ground. Use the Combo Super when you have used the invulnerability from LP Hair to let your opponent land before you have hit them with the Hair.
Be careful to link all hits as tightly as possible or your combo will be easily breakered.
Advanced Strategy
- Saizo can instantly block by holding back during his dash. Use the dash to pressure.
- Knives can lock opponents down because they can be thrown incredibly fast. Don't be afraid to spam knives from full screen. If you anticipate a jump, use sword move to knock them out of the air and combo into your fire super. If you're spamming knives and want to fake out the opponent you can use a st.A, which can trick the opponent into jumping where you can sword move them on reaction. If you have a blocked vertical jump C, you can follow it up with knives to push them across the screen.
- For zoning, ending blockstrings in bomb is a good idea. Cr.b x2, slide xx bomb is a good pressure string. In general you want to push the opponent away from you so you can zone them until you score a knockdown.
- Saizo has tricky crossups with his j.B and j.D. You can score them off knockdowns by using Saizo's huge dash-jump range to clear over half a screen length. After a knockdown you can also dash repeatedly and cancel the dash with a vertical jump straight up with a j.B at the end of it. The momentum from his dash combined with the forward movement of his vertical jump B will make it a crossup. Dont be afraid to rejump after a blocked crossup against charge characters or characters with bad anti-airs because Saizo's air moves have excellent priority.
- Saizo's best punish combo is close st.C, sword move, flame super. Punish every chance you get. Be careful on punishing with far st.C because it can be punished on hit easily and you will die for using it against a non-airborne. Instead, try cr.C, slide, bomb, or just dry sword move if you have time.
- Saizo's st.B can be repeated a lot and will eventually combo to hair and then super. This move is fast and moves Saizo's hitbox very quickly, so you can breaker with it and get damage!
- Holding onto 1 meter for breakers and punishes is recommended.
Matchups
Matchup Table
| Great | Maherl, Condor, Alsion III |
| Good | Pielle, Dao-Long, Rila, Tia |
| Even | |
| Weak | Sho |
| Bad |
Matchup Info
Alsion III
Condor
Be careful comboing Condor because he can breaker you with a 360 or 720 if you are too slow on your links. He can slide under your knives but not under your bomb. Vertical jump C can be beaten by Condor's st.D. Jumping back with j.C is good but mainly throwing bombs is key to winning this. Overall this matchup is very favorable to Saizo, but if you get cornered or caught in the air the match can quickly turn.
Dao-Long
If he ends a combo with A+C or a fireball, you can breaker it with combo super and hit him. Be careful against his jump ins because your anti-air options are not good. Crossups can lose badly to his upkicks, so be careful. Throw knives at his fireballs. His air moves can go toe-to-toe with you.
Maherl
Pielle
Be careful on meaty crossups and jump ins because Thunder Riser will suck you in and do damage to you. Even without meter, Pielle can st.C many of Saizo's jumping attacks. Approaching from the ground is preferable in this match up. Be careful following him if he jumps back, because he can do his air ABC and smack you.
Rila
Rila can hop over your fireballs and combo you into super. Be careful on when you throw fireballs. Her st.C will beat your crossups and her upkicks can screw your meaties up. Only jump backwards if Rila doesn't have a charge because she can follow you with her dash move that will do a ton of damage.
Saizo
Rush him down.
Sho
He had projectile advantages, remember If he throws a fireball, knife it. Don't jump in too much because of flamekicks. Be careful on meaties because of flamekicks.
Tia
Knife her fireball. She can uppercut super through your knives. If she throws a fireball from close you can breaker and do combo super.


