(→Combos) |
m (fix motion tags) |
||
| Line 32: | Line 32: | ||
=== Normal Moves === | === Normal Moves === | ||
* | *'''Standing Normal Moves (st.)''' | ||
{{SF2HFMoveListHeader}} | {{SF2HFMoveListHeader}} | ||
{{SF2HFMoveListRow | Standing Light Punch | lp | 6 | - | 4 | 40 | 3 | 4 | 4 | +6/+5 | rpdfire specialcancel }} | {{SF2HFMoveListRow | Standing Light Punch | {{lp}} | 6 | - | 4 | 40 | 3 | 4 | 4 | +6/+5 | {{rpdfire}} {{specialcancel}} }} | ||
{{SF2HFMoveListRow | Standing Medium Punch | mp | 16 | [[ | {{SF2HFMoveListRow | Standing Medium Punch | {{mp}} | 16 | [[Damage Scaling (HF)#0x020|0x020]] | 8 | 60 | 4 | 4 | 6 | +10/+8 | {{specialcancel}} }} | ||
{{SF2HFMoveListRow | Standing Hard Punch | hp | 26 | [[ | {{SF2HFMoveListRow | Standing Hard Punch | {{hp}} | 26 | [[Damage Scaling (HF)#0x040|0x040]] | 14 | 80 | 6 | 6 | 22 | -6 | }} | ||
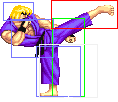
{{SF2HFMoveListRow | Standing Light Kick | lk | 8 | - | 4 | 40 | 7 | 8 | 5 | +3/+1 | }} | {{SF2HFMoveListRow | Standing Light Kick | {{lk}} | 8 | - | 4 | 40 | 7 | 8 | 5 | +3/+1 | }} | ||
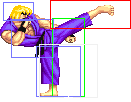
{{SF2HFMoveListRow | Standing Medium Kick | mk | 16 | [[ | {{SF2HFMoveListRow | Standing Medium Kick | {{mk}} | 16 | [[Damage Scaling (HF)#0x020|0x020]] | 8 | 60 | 12 | 12 | 7* | +1 | {{specialcancel}} }} | ||
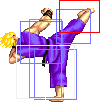
{{SF2HFMoveListRow | Standing Hard Kick | hk | 22 | [[ | {{SF2HFMoveListRow | Standing Hard Kick | {{hk}} | 22 | [[Damage Scaling (HF)#0x040|0x040]] | 14 | 80 | 3 | 12 | 17* | -2 | }} | ||
{{MoveListFooter}} | {{MoveListFooter}} | ||
* | *'''Close Standing Normal Moves (cl.)''' | ||
{{SF2HFMoveListHeader}} | {{SF2HFMoveListHeader}} | ||
{{SF2HFMoveListRow | Close Light Punch | (near opponent) lp | 6 | - | 4 | 40 | 3 | 4 | 5 | +6/+5 | specialcancel }} | {{SF2HFMoveListRow | Close Light Punch | (near opponent) {{lp}} | 6 | - | 4 | 40 | 3 | 4 | 5 | +6/+5 | {{specialcancel}} }} | ||
{{SF2HFMoveListRow | Close Medium Punch | (near opponent) mp | 16 | [[ | {{SF2HFMoveListRow | Close Medium Punch | (near opponent) {{mp}} | 16 | [[Damage Scaling (HF)#0x020|0x020]] | 8 | 60 | 4 | 2 | 17 | +2/+1 | {{specialcancel}} }} | ||
{{SF2HFMoveListRow | Close Hard Punch | (near opponent) hp | 26 | [[ | {{SF2HFMoveListRow | Close Hard Punch | (near opponent) {{hp}} | 26 | [[Damage Scaling (HF)#0x020|0x020]] | 14 | 80 | 4 | 8 | 23 | -8 | {{specialcancel}} }}{{SF2HFMoveListRow | Close Light Kick | (near opponent) {{lk}} | 8 | - | 4 | 40 | 6 | 6 | 4 | +5 | {{rpdfire}} }} | ||
{{SF2HFMoveListRow | Close Medium Kick | (near opponent) mk | 16 | [[ | {{SF2HFMoveListRow | Close Medium Kick | (near opponent) {{mk}} | 16 | [[Damage Scaling (HF)#0x020|0x020]] | 8 | 60, | 5 | 6 | 8 | +6/+4 | {{specialcancel}} }} | ||
{{SF2HFMoveListRow | Close Hard Kick | (near opponent) hk | 24,6 | [[ | {{SF2HFMoveListRow | Close Hard Kick | (near opponent) {{hk}} | 24,6 | [[Damage Scaling (HF)#0x020|0x020]] | 14 | 80,80 | 8 | 12 | 11 | +8/+7 | }} | ||
{{MoveListFooter}} | {{MoveListFooter}} | ||
* | *'''Crouching Normal Moves (cr.)''' | ||
{{SF2HFMoveListHeader}} | {{SF2HFMoveListHeader}} | ||
{{SF2HFMoveListRow | Crouching Light Punch | d + lp | 6 | - | 4 | 40 | 3 | 4 | 4 | +6/+5 | rpdfire low specialcancel }} | {{SF2HFMoveListRow | Crouching Light Punch | {{d}} + {{lp}} | 6 | - | 4 | 40 | 3 | 4 | 4 | +6/+5 | {{rpdfire}} {{low}} {{specialcancel}} }} | ||
{{SF2HFMoveListRow | Crouching Medium Punch | d + mp | 14 | [[ | {{SF2HFMoveListRow | Crouching Medium Punch | {{d}} + {{mp}} | 14 | [[Damage Scaling (HF)#0x020|0x020]] | 8 | 60 | 4 | 4 | 6 | +10/+8 | {{specialcancel}} }} | ||
{{SF2HFMoveListRow | Crouching Hard Punch | d + hp | 22 | [[ | {{SF2HFMoveListRow | Crouching Hard Punch | {{d}} + {{hp}} | 22 | [[Damage Scaling (HF)#0x040|0x040]] | 14 | 80 | 9 | 6 | 18* | -11 | {{specialcancel}} }} | ||
{{SF2HFMoveListRow | Crouching Light Kick | d + lk | 6 | - | 4 | 40 | 3 | 4 | 4 | +6/+5 | rpdfire low specialcancel }} | {{SF2HFMoveListRow | Crouching Light Kick | {{d}} + {{lk}} | 6 | - | 4 | 40 | 3 | 4 | 4 | +6/+5 | {{rpdfire}} {{low}} {{specialcancel}} }} | ||
{{SF2HFMoveListRow | Crouching Medium Kick | d + mk | 14 | [[ | {{SF2HFMoveListRow | Crouching Medium Kick | {{d}} + {{mk}} | 14 | [[Damage Scaling (HF)#0x020|0x020]] | 8 | 60 | 4 | 6 | 8 | +6/+4 | {{low}} {{specialcancel}} }} | ||
{{SF2HFMoveListRow | Crouching Hard Kick | d + hk | 22 | [[ | {{SF2HFMoveListRow | Crouching Hard Kick | {{d}} + {{hk}} | 22 | [[Damage Scaling (HF)#0x040|0x040]] | 8 | 130 | 4 | 6 | 25 | +1/+2 | {{low}} {{knockdown}} }} | ||
{{MoveListFooter}} | {{MoveListFooter}} | ||
* | *'''Jumping Normal Moves (nj.)''' | ||
{{SF2HFMoveListHeader}} | {{SF2HFMoveListHeader}} | ||
{{SF2HFMoveListRow | Neutral Jump Light Punch | u + lp | 10 | [[ | {{SF2HFMoveListRow | Neutral Jump Light Punch | {{u}} + {{lp}} | 10 | [[Damage Scaling (HF)#0x020|0x020]] | 4 | 40 | 4 | ∞ | - | - | {{high}} }} | ||
{{SF2HFMoveListRow | Neutral Jump Medium Punch | u + mp | 16 | [[ | {{SF2HFMoveListRow | Neutral Jump Medium Punch | {{u}} + {{mp}} | 16 | [[Damage Scaling (HF)#0x040|0x040]] | 8 | 50 | 4 | 20 | ∞ | - | {{high}} }} | ||
{{SF2HFMoveListRow | Neutral Jump Hard Punch | u + hp | 24 | [[ | {{SF2HFMoveListRow | Neutral Jump Hard Punch | {{u}} + {{hp}} | 24 | [[Damage Scaling (HF)#0x060|0x060]] | 14 | 60 | 4 | 8 | ∞ | - | {{high}} }} | ||
{{SF2HFMoveListRow | Neutral Jump Light Kick | u + lk | 10 | [[ | {{SF2HFMoveListRow | Neutral Jump Light Kick | {{u}} + {{lk}} | 10 | [[Damage Scaling (HF)#0x020|0x020]] | 4 | 40 | 3 | ∞ | - | - | {{high}} }} | ||
{{SF2HFMoveListRow | Neutral Jump Medium Kick | u + mk | 16 | [[ | {{SF2HFMoveListRow | Neutral Jump Medium Kick | {{u}} + {{mk}} | 16 | [[Damage Scaling (HF)#0x040|0x040]] | 8 | 50 | 5 | 13 | ∞ | - | {{high}} }} | ||
{{SF2HFMoveListRow | Neutral Jump Hard Kick | u + hk | 24 | [[ | {{SF2HFMoveListRow | Neutral Jump Hard Kick | {{u}} + {{hk}} | 24 | [[Damage Scaling (HF)#0x060|0x060]] | 14 | 60 | 3 | 10 | ∞ | - | {{high}} }} | ||
{{MoveListFooter}} | {{MoveListFooter}} | ||
* | *'''Diagonal Jumping Normal Moves (j.)''' | ||
{{SF2HFMoveListHeader}} | {{SF2HFMoveListHeader}} | ||
{{SF2HFMoveListRow | Diagonal Jump Light Punch | ub / uf + lp | 8 | [[ | {{SF2HFMoveListRow | Diagonal Jump Light Punch | {{ub}} / {{uf}} + {{lp}} | 8 | [[Damage Scaling (HF)#0x020|0x020]] | 4 | 40 | 4 | ∞ | - | - | {{high}} }} | ||
{{SF2HFMoveListRow | Diagonal Jump Medium Punch | ub / uf + mp | 16 | [[ | {{SF2HFMoveListRow | Diagonal Jump Medium Punch | {{ub}} / {{uf}} + {{mp}} | 16 | [[Damage Scaling (HF)#0x040|0x040]] | 8 | 50 | 4 | 20 | ∞ | - | {{high}} }} | ||
{{SF2HFMoveListRow | Diagonal Jump Hard Punch | ub / uf + hp | 22 | [[ | {{SF2HFMoveListRow | Diagonal Jump Hard Punch | {{ub}} / {{uf}} + {{hp}} | 22 | [[Damage Scaling (HF)#0x060|0x060]] | 14 | 60 | 4 | 8 | ∞ | - | {{high}} }} | ||
{{SF2HFMoveListRow | Diagonal Jump Light Kick | ub / uf + lk | 8 | [[ | {{SF2HFMoveListRow | Diagonal Jump Light Kick | {{ub}} / {{uf}} + {{lk}} | 8 | [[Damage Scaling (HF)#0x020|0x020]] | 4 | 40 | 5 | ∞ | - | - | {{high}} }} | ||
{{SF2HFMoveListRow | Diagonal Jump Medium Kick | ub / uf + mk | 16 | [[ | {{SF2HFMoveListRow | Diagonal Jump Medium Kick | {{ub}} / {{uf}} + {{mk}} | 16 | [[Damage Scaling (HF)#0x040|0x040]] | 8 | 50 | 5 | 13 | ∞ | - | {{high}} }} | ||
{{SF2HFMoveListRow | Diagonal Jump Hard Kick | ub / uf + hk | 22 | [[ | {{SF2HFMoveListRow | Diagonal Jump Hard Kick | {{ub}} / {{uf}} + {{hk}} | 22 | [[Damage Scaling (HF)#0x060|0x060]] | 14 | 60 | 5 | 7 | ∞ | - | {{high}} }} | ||
{{MoveListFooter}} | {{MoveListFooter}} | ||
===Throws=== | ===Throws=== | ||
{{SF2HFMoveListHeader}} | {{SF2HFMoveListHeader}} | ||
{{SF2HFMoveListRow | Seoi Nage | b / f + mp or hp | 32 | - | 10 | 99 | - | - | - | - | throw }} | {{SF2HFMoveListRow | Seoi Nage | {{b}} / {{f}} + {{mp}} or {{hp}} | 32 | - | 10 | 99 | - | - | - | - | {{throw}} }} | ||
{{SF2HFMoveListRow |Tsukami Nage | b / f + mk or hk | 32 | - | 14 | 80 | - | - | - | - | throw }} | {{SF2HFMoveListRow |Tsukami Nage | {{b}} / {{f}} + {{mk}} or {{hk}} | 32 | - | 14 | 80 | - | - | - | - | {{throw}} }} | ||
{{MoveListFooter}} | {{MoveListFooter}} | ||
| Line 90: | Line 90: | ||
{{SF2HFMoveListHeader}} | {{SF2HFMoveListHeader}} | ||
{{SF2HFMoveListRow | Hadoken | qcf + lp | 12 | ? | 16 | 120 | 14 | ? | 37 | ? | }} | {{SF2HFMoveListRow | Hadoken | {{qcf}} + {{lp}} | 12 | ? | 16 | 120 | 14 | ? | 37 | ? | }} | ||
{{SF2HFMoveListRow | Hadoken | qcf + mp | 14 | ? | 16 | 120 | 14 | ? | 37 | ? | }} | {{SF2HFMoveListRow | Hadoken | {{qcf}} + {{mp}} | 14 | ? | 16 | 120 | 14 | ? | 37 | ? | }} | ||
{{SF2HFMoveListRow | Hadoken | qcf + hp | 16 | ? | 16 | 120 | 14 | ? | 37 | ? | }} | {{SF2HFMoveListRow | Hadoken | {{qcf}} + {{hp}} | 16 | ? | 16 | 120 | 14 | ? | 37 | ? | }} | ||
{{SF2HFMoveListRow | Shoryuken | dp + lp | 32 | ? | 16 | 120 | 1 | 18 | 17/20/27 + 6 | KD/-11 | }} | {{SF2HFMoveListRow | Shoryuken | {{dp}} + {{lp}} | 32 | ? | 16 | 120 | 1 | 18 | 17/20/27 + 6 | KD/-11 | }} | ||
{{SF2HFMoveListRow | Shoryuken | dp + mp | 32 | ? | 16 | 120 | 1 | 26 | 17/20/27 + 6 | KD/-22 | }} | {{SF2HFMoveListRow | Shoryuken | {{dp}} + {{mp}} | 32 | ? | 16 | 120 | 1 | 26 | 17/20/27 + 6 | KD/-22 | }} | ||
{{SF2HFMoveListRow | Shoryuken | dp + hp | 32,16 | ? | ? | ? | 1 | 30 | 17/20/27 + 6 | KD/-33 | }} | {{SF2HFMoveListRow | Shoryuken | {{dp}} + {{hp}} | 32,16 | ? | ? | ? | 1 | 30 | 17/20/27 + 6 | KD/-33 | }} | ||
{{SF2HFMoveListRow | Tatsumaki Senpu Kyaku| qcb + lk | 10 | ? | 16 | 120 | 11 | 1,2,2,(2),1,2,2,(2),1,2 | 14 + 6 | KD/-3 | }} | {{SF2HFMoveListRow | Tatsumaki Senpu Kyaku| {{qcb}} + {{lk}} | 10 | ? | 16 | 120 | 11 | 1,2,2,(2),1,2,2,(2),1,2 | 14 + 6 | KD/-3 | }} | ||
{{SF2HFMoveListRow | Tatsumaki Senpu Kyaku| qcb + mk | 10 | ? | 16 | 120 | 11 | 1,2,2,(2),1,2,2,(2),1,2,2,(2),1,2 | 14 + 6 | KD/-3 | }} | {{SF2HFMoveListRow | Tatsumaki Senpu Kyaku| {{qcb}} + {{mk}} | 10 | ? | 16 | 120 | 11 | 1,2,2,(2),1,2,2,(2),1,2,2,(2),1,2 | 14 + 6 | KD/-3 | }} | ||
{{SF2HFMoveListRow | Tatsumaki Senpu Kyaku| qcb + hk | 10 | ? | 16 | 120 | 11 | 1,2,2,(2),1,2,2,(2),1,2,2,(2),1,2,2,(2),1,2 | 14 + 6 | KD/-3 | }} | {{SF2HFMoveListRow | Tatsumaki Senpu Kyaku| {{qcb}} + {{hk}} | 10 | ? | 16 | 120 | 11 | 1,2,2,(2),1,2,2,(2),1,2,2,(2),1,2,2,(2),1,2 | 14 + 6 | KD/-3 | }} | ||
{{SF2HFMoveListRow | Air Tatsumaki Senpu Kyaku| qcb + lk | 10 | ? | 16 | 120 | 3 | ? | 13/14/15 + 6 | ? | Aironly }} | {{SF2HFMoveListRow | Air Tatsumaki Senpu Kyaku| {{qcb}} + {{lk}} | 10 | ? | 16 | 120 | 3 | ? | 13/14/15 + 6 | ? | Aironly }} | ||
{{SF2HFMoveListRow | Air Tatsumaki Senpu Kyaku| qcb + mk | 10 | ? | 16 | 120 | 3 | ? | 13/14/15 + 6 | ? | Aironly }} | {{SF2HFMoveListRow | Air Tatsumaki Senpu Kyaku| {{qcb}} + {{mk}} | 10 | ? | 16 | 120 | 3 | ? | 13/14/15 + 6 | ? | Aironly }} | ||
{{SF2HFMoveListRow | Air Tatsumaki Senpu Kyaku| qcb + hk | 10 | ? | 16 | 120 | 3 | ? | 13/14/15 + 6 | ? | Aironly }} | {{SF2HFMoveListRow | Air Tatsumaki Senpu Kyaku| {{qcb}} + {{hk}} | 10 | ? | 16 | 120 | 3 | ? | 13/14/15 + 6 | ? | Aironly }} | ||
{{MoveListFooter}} | {{MoveListFooter}} | ||
| Line 143: | Line 143: | ||
==Match-ups== | ==Match-ups== | ||
===Vs. Balrog (boxer) | ===Vs. Balrog (boxer)=== | ||
Once the round starts, the main objective is just to be patient and not get caught by rush punches, or st hp. Blocking high is actually pretty good since he has no low rush like in ST,this lets you block his attacks, and not get caught by dash upper whiff into throw. Once you get distance, it's just a case of getting a jab fireball on screen, then punishing whatever he does. Sweep his jumps when he's far, if he tries to tap through a fireball, srk him. | Once the round starts, the main objective is just to be patient and not get caught by rush punches, or st hp. Blocking high is actually pretty good since he has no low rush like in ST,this lets you block his attacks, and not get caught by dash upper whiff into throw. Once you get distance, it's just a case of getting a jab fireball on screen, then punishing whatever he does. Sweep his jumps when he's far, if he tries to tap through a fireball, srk him. | ||
===Vs. Blanka | ===Vs. Blanka=== | ||
Punish the Roll with Hadoken or Shoryuken,Vertical Roll can be shoryukened correctly,remember you have a weak Hadoken and he can Vertical Roll you easily, so your objective will be make him jump. | Punish the Roll with Hadoken or Shoryuken,Vertical Roll can be shoryukened correctly,remember you have a weak Hadoken and he can Vertical Roll you easily, so your objective will be make him jump. | ||
===Vs. Chun-Li | ===Vs. Chun-Li=== | ||
Spinning Bird Kick can be countered with crouching Strong,but now can be a fireball match at the correct distance, if she Kikoken's you, its better to use Air TSK instead of jump for crossups. | Spinning Bird Kick can be countered with crouching Strong,but now can be a fireball match at the correct distance, if she Kikoken's you, its better to use Air TSK instead of jump for crossups. | ||
===Vs. Dhalsim | ===Vs. Dhalsim=== | ||
His nerfed damage and normals make this more managable, but not by any means an easy fight. Tatsu goes through fireballs, learn the ranges where you can safely get in with this while landing a hit. Though if he does a flame, you get punished hard, so this is not too reliable in some cases.... | His nerfed damage and normals make this more managable, but not by any means an easy fight. Tatsu goes through fireballs, learn the ranges where you can safely get in with this while landing a hit. Though if he does a flame, you get punished hard, so this is not too reliable in some cases.... | ||
| Line 161: | Line 161: | ||
Once you get him down, you can pressure easily as he has no true reversal, his throw range is much larger than yours, but you can hit him low, or use srk to deter throws. | Once you get him down, you can pressure easily as he has no true reversal, his throw range is much larger than yours, but you can hit him low, or use srk to deter throws. | ||
===Vs. E. Honda | ===Vs. E. Honda=== | ||
Same as Ryu's strategy versus E. Honda: from about halfscreen away, throw slow fireballs, and sweep with cr.HK to hit with the very tip of the toe as Honda lands. You should be a little more careful chucking fireballs than with Ryu however, since Ken's fireball has more recovery time than Ryu's. | Same as Ryu's strategy versus E. Honda: from about halfscreen away, throw slow fireballs, and sweep with cr.HK to hit with the very tip of the toe as Honda lands. You should be a little more careful chucking fireballs than with Ryu however, since Ken's fireball has more recovery time than Ryu's. | ||
===Vs. Guile | ===Vs. Guile=== | ||
This is an annoying match, probably less so than in CE, but he still has the same advantages. You can't really zone when close as he can sonic boom, then punish your recovery most of the time. His cr mk is also incredibly hard to deal with because of the range. The best option is to whiff punish it with your sweep. | This is an annoying match, probably less so than in CE, but he still has the same advantages. You can't really zone when close as he can sonic boom, then punish your recovery most of the time. His cr mk is also incredibly hard to deal with because of the range. The best option is to whiff punish it with your sweep. | ||
| Line 174: | Line 174: | ||
Jumping in can sometimes work if he has no charge, make sure not to be too far, or he will cr mk you for free. Otherwise j hp is usually your best bet. | Jumping in can sometimes work if he has no charge, make sure not to be too far, or he will cr mk you for free. Otherwise j hp is usually your best bet. | ||
===Vs. Ken (self) | ===Vs. Ken (self)=== | ||
Best Ken must use wisely his Shoryuken | Best Ken must use wisely his Shoryuken | ||
===Vs. M. Bison (dictator) | ===Vs. M. Bison (dictator)=== | ||
A better matchup than CE, but its because he is worst than you now, try to start the round with a Jab or Strong Shoryuken , that will be the check for the kind of Dictador he is, remember to be careful with your Hadoken and wait to punish Head Stomp with Shoryuken. | A better matchup than CE, but its because he is worst than you now, try to start the round with a Jab or Strong Shoryuken , that will be the check for the kind of Dictador he is, remember to be careful with your Hadoken and wait to punish Head Stomp with Shoryuken. | ||
===Vs. Ryu | ===Vs. Ryu=== | ||
He has a lot of the same tools as you, just most of these are significantly better, making this an uphill battle. You can use hp srk when close to counter his fireballs, useful at round start, aim for the last hit to touch his arms for a knockdown. His tatsu can be used in the same way vs your fireballs when he is close, so be careful. Another option at round start is walk up sweep, trades with his fireball. | He has a lot of the same tools as you, just most of these are significantly better, making this an uphill battle. You can use hp srk when close to counter his fireballs, useful at round start, aim for the last hit to touch his arms for a knockdown. His tatsu can be used in the same way vs your fireballs when he is close, so be careful. Another option at round start is walk up sweep, trades with his fireball. | ||
| Line 191: | Line 191: | ||
You can use cr mp for safe pressure/bait. Space it so it will connect at max range if he's crouching, srk will whiff, you can punish whiffed srk with walk up>close hp> srk if you react in time, his tatsu whiffs since you crouch while doing cr mp. Ryu's only true answer is to stand up, which leaves him vulnerable to low kicks. | You can use cr mp for safe pressure/bait. Space it so it will connect at max range if he's crouching, srk will whiff, you can punish whiffed srk with walk up>close hp> srk if you react in time, his tatsu whiffs since you crouch while doing cr mp. Ryu's only true answer is to stand up, which leaves him vulnerable to low kicks. | ||
===Vs. Sagat | ===Vs. Sagat=== | ||
Isn't changed too much with CE, but now you had an aerial version of your Hurricane Kick that will comboing him or evade/trade hit with a Tiger Uppercut, the main objective of Ken will be about playing grounds, from evading Low Tiger Shots with a jumping Roundhouse to approach with a sweep a High one. | Isn't changed too much with CE, but now you had an aerial version of your Hurricane Kick that will comboing him or evade/trade hit with a Tiger Uppercut, the main objective of Ken will be about playing grounds, from evading Low Tiger Shots with a jumping Roundhouse to approach with a sweep a High one. | ||
Try to start a round with a Hadoken or a sweep instead, then if he responds with a Tiger Uppercut combo it a 2-in-1 Hadoken or Shoryuken. | Try to start a round with a Hadoken or a sweep instead, then if he responds with a Tiger Uppercut combo it a 2-in-1 Hadoken or Shoryuken. | ||
===Vs. Vega (claw) | ===Vs. Vega (claw)=== | ||
An anti air vs air matchup, Vega its a bit untouched character compared to you and that will be a reason that its a more fair matchup than CE, Aerial Tatsumaki can be a good coin flip trade hit with a Dive Attack , If he jumps or use Barcelona use the Shoryuken to punish him,but watch out with lows. | An anti air vs air matchup, Vega its a bit untouched character compared to you and that will be a reason that its a more fair matchup than CE, Aerial Tatsumaki can be a good coin flip trade hit with a Dive Attack , If he jumps or use Barcelona use the Shoryuken to punish him,but watch out with lows. | ||
Your main weakness will be now ground due that your Hadoken its still a bad one | Your main weakness will be now ground due that your Hadoken its still a bad one | ||
===Vs. Zangief | ===Vs. Zangief=== | ||
You need to be careful since one mistake can lead to losing the round. Fireball isn't too useful here because of lariats. You'll need to focus on ground game, and be patient. Cr mk/sweep are good when in neutral as he doesn't have a reliable way to deal with it, unlike in future games, his far mk is trash, you don't need to worry about it at all. His only options are to sweep you first, or jump it, both incredibly risky. Whiff punish his sweeps with your own, and walk up sweep is best vs punch lariat if you have time, for kick lariat, use st mp if he's close enough to get hit. With the walk up cr mk/sweep, you can cancel into fireball, though he'll be able to lariat through. | You need to be careful since one mistake can lead to losing the round. Fireball isn't too useful here because of lariats. You'll need to focus on ground game, and be patient. Cr mk/sweep are good when in neutral as he doesn't have a reliable way to deal with it, unlike in future games, his far mk is trash, you don't need to worry about it at all. His only options are to sweep you first, or jump it, both incredibly risky. Whiff punish his sweeps with your own, and walk up sweep is best vs punch lariat if you have time, for kick lariat, use st mp if he's close enough to get hit. With the walk up cr mk/sweep, you can cancel into fireball, though he'll be able to lariat through. | ||
| Line 213: | Line 213: | ||
===Standing Normals=== | ===Standing Normals=== | ||
* | *'''Standing LP:''' | ||
{| border="1em" cellspacing="0" style="border: 1px solid #999;" | {| border="1em" cellspacing="0" style="border: 1px solid #999;" | ||
|- valign="bottom" | |- valign="bottom" | ||
| Line 233: | Line 233: | ||
|} | |} | ||
* | *'''Standing MP:''' | ||
{| border="1em" cellspacing="0" style="border: 1px solid #999;" | {| border="1em" cellspacing="0" style="border: 1px solid #999;" | ||
|- valign="bottom" | |- valign="bottom" | ||
| Line 253: | Line 253: | ||
|} | |} | ||
* | *'''Standing HP:''' | ||
{| border="1em" cellspacing="0" style="border: 1px solid #999;" | {| border="1em" cellspacing="0" style="border: 1px solid #999;" | ||
|- valign="bottom" | |- valign="bottom" | ||
| Line 273: | Line 273: | ||
|} | |} | ||
* | *'''Standing LK:''' | ||
{| border="1em" cellspacing="0" style="border: 1px solid #999;" | {| border="1em" cellspacing="0" style="border: 1px solid #999;" | ||
|- valign="bottom" | |- valign="bottom" | ||
| Line 293: | Line 293: | ||
|} | |} | ||
* | *'''Standing MK:''' | ||
{| border="1em" cellspacing="0" style="border: 1px solid #999;" | {| border="1em" cellspacing="0" style="border: 1px solid #999;" | ||
|- valign="bottom" | |- valign="bottom" | ||
| Line 313: | Line 313: | ||
|} | |} | ||
* | *'''Standing HK:''' | ||
{| border="1em" cellspacing="0" style="border: 1px solid #999;" | {| border="1em" cellspacing="0" style="border: 1px solid #999;" | ||
|- valign="bottom" | |- valign="bottom" | ||
| Line 334: | Line 334: | ||
===Close Standing Normals=== | ===Close Standing Normals=== | ||
* | *'''Close Standing LP:''' | ||
{| border="1em" cellspacing="0" style="border: 1px solid #999;" | {| border="1em" cellspacing="0" style="border: 1px solid #999;" | ||
|- valign="bottom" | |- valign="bottom" | ||
| Line 352: | Line 352: | ||
|} | |} | ||
* | *'''Close Standing MP:''' | ||
{| border="1em" cellspacing="0" style="border: 1px solid #999;" | {| border="1em" cellspacing="0" style="border: 1px solid #999;" | ||
|- valign="bottom" | |- valign="bottom" | ||
| Line 372: | Line 372: | ||
|} | |} | ||
* | *'''Close Standing HP:''' | ||
{| border="1em" cellspacing="0" style="border: 1px solid #999;" | {| border="1em" cellspacing="0" style="border: 1px solid #999;" | ||
|- valign="bottom" | |- valign="bottom" | ||
| Line 392: | Line 392: | ||
|} | |} | ||
* | *'''Close Standing LK:''' | ||
{| border="1em" cellspacing="0" style="border: 1px solid #999;" | {| border="1em" cellspacing="0" style="border: 1px solid #999;" | ||
|- valign="bottom" | |- valign="bottom" | ||
| Line 413: | Line 413: | ||
* | *'''Close Standing MK:''' | ||
{| border="1em" cellspacing="0" style="border: 1px solid #999;" | {| border="1em" cellspacing="0" style="border: 1px solid #999;" | ||
|- valign="bottom" | |- valign="bottom" | ||
| Line 433: | Line 433: | ||
|} | |} | ||
* | *'''Close Standing HK:''' | ||
{| border="1em" cellspacing="0" style="border: 1px solid #999;" | {| border="1em" cellspacing="0" style="border: 1px solid #999;" | ||
|- valign="bottom" | |- valign="bottom" | ||
| Line 454: | Line 454: | ||
===Crouching Normals=== | ===Crouching Normals=== | ||
* | *'''Crouching LP:''' | ||
{| border="1em" cellspacing="0" style="border: 1px solid #999;" | {| border="1em" cellspacing="0" style="border: 1px solid #999;" | ||
|- valign="bottom" | |- valign="bottom" | ||
| Line 474: | Line 474: | ||
|} | |} | ||
* | *'''Crouching MP:''' | ||
{| border="1em" cellspacing="0" style="border: 1px solid #999;" | {| border="1em" cellspacing="0" style="border: 1px solid #999;" | ||
|- valign="bottom" | |- valign="bottom" | ||
| Line 494: | Line 494: | ||
|} | |} | ||
* | *'''Crouching HP:''' | ||
{| border="1em" cellspacing="0" style="border: 1px solid #999;" | {| border="1em" cellspacing="0" style="border: 1px solid #999;" | ||
|- valign="bottom" | |- valign="bottom" | ||
| Line 514: | Line 514: | ||
|} | |} | ||
* | *'''Crouching LK:''' | ||
{| border="1em" cellspacing="0" style="border: 1px solid #999;" | {| border="1em" cellspacing="0" style="border: 1px solid #999;" | ||
| align="center" | Damage || align="center" | 6 || align="center" rowspan="6" | [[File:Sf2hf-ken-crlk-s1.png]] || align="center" rowspan="6" | [[File:Sf2hf-ken-crlk-a.png]] || align="center" rowspan="6" | [[File:Sf2hf-ken-crlk-s1.png]] || align="center" rowspan="6" | [[File:Sf2hf-ken-crlp-r1.png]] | | align="center" | Damage || align="center" | 6 || align="center" rowspan="6" | [[File:Sf2hf-ken-crlk-s1.png]] || align="center" rowspan="6" | [[File:Sf2hf-ken-crlk-a.png]] || align="center" rowspan="6" | [[File:Sf2hf-ken-crlk-s1.png]] || align="center" rowspan="6" | [[File:Sf2hf-ken-crlp-r1.png]] | ||
| Line 533: | Line 533: | ||
|} | |} | ||
* | *'''Crouching MK:''' | ||
{| border="1em" cellspacing="0" style="border: 1px solid #999;" | {| border="1em" cellspacing="0" style="border: 1px solid #999;" | ||
|- valign="bottom" | |- valign="bottom" | ||
| Line 553: | Line 553: | ||
|} | |} | ||
* | *'''Crouching HK:''' | ||
{| border="1em" cellspacing="0" style="border: 1px solid #999;" | {| border="1em" cellspacing="0" style="border: 1px solid #999;" | ||
|- valign="bottom" | |- valign="bottom" | ||
| Line 574: | Line 574: | ||
===Aerial Normals=== | ===Aerial Normals=== | ||
* | *'''Neutral Jumping LP:''' | ||
{| border="1em" cellspacing="0" style="border: 1px solid #999;" | {| border="1em" cellspacing="0" style="border: 1px solid #999;" | ||
|- valign="bottom" | |- valign="bottom" | ||
| Line 586: | Line 586: | ||
|} | |} | ||
* | *'''Diagonal Jumping LP:''' | ||
{| border="1em" cellspacing="0" style="border: 1px solid #999;" | {| border="1em" cellspacing="0" style="border: 1px solid #999;" | ||
|- valign="bottom" | |- valign="bottom" | ||
| Line 598: | Line 598: | ||
|} | |} | ||
* | *'''Neutral/Diagonal Jumping MP:''' | ||
{| border="1em" cellspacing="0" style="border: 1px solid #999;" | {| border="1em" cellspacing="0" style="border: 1px solid #999;" | ||
|- valign="bottom" | |- valign="bottom" | ||
| Line 612: | Line 612: | ||
|} | |} | ||
* | *'''Neutral Jumping HP:''' | ||
{| border="1em" cellspacing="0" style="border: 1px solid #999;" | {| border="1em" cellspacing="0" style="border: 1px solid #999;" | ||
|- valign="bottom" | |- valign="bottom" | ||
| Line 626: | Line 626: | ||
|} | |} | ||
* | *'''Diagonal Jumping HP:''' | ||
{| border="1em" cellspacing="0" style="border: 1px solid #999;" | {| border="1em" cellspacing="0" style="border: 1px solid #999;" | ||
|- valign="bottom" | |- valign="bottom" | ||
| Line 640: | Line 640: | ||
|} | |} | ||
* | *'''Neutral Jumping LK:''' | ||
{| border="1em" cellspacing="0" style="border: 1px solid #999;" | {| border="1em" cellspacing="0" style="border: 1px solid #999;" | ||
|- valign="bottom" | |- valign="bottom" | ||
| Line 652: | Line 652: | ||
|} | |} | ||
* | *'''Diagonal Jumping LK:''' | ||
{| border="1em" cellspacing="0" style="border: 1px solid #999;" | {| border="1em" cellspacing="0" style="border: 1px solid #999;" | ||
|- valign="bottom" | |- valign="bottom" | ||
| Line 666: | Line 666: | ||
|} | |} | ||
* | *'''Neutral Jumping MK:''' | ||
{| border="1em" cellspacing="0" style="border: 1px solid #999;" | {| border="1em" cellspacing="0" style="border: 1px solid #999;" | ||
|- valign="bottom" | |- valign="bottom" | ||
| Line 680: | Line 680: | ||
|} | |} | ||
* | *'''Diagonal Jumping MK:''' | ||
{| border="1em" cellspacing="0" style="border: 1px solid #999;" | {| border="1em" cellspacing="0" style="border: 1px solid #999;" | ||
|- valign="bottom" | |- valign="bottom" | ||
| Line 694: | Line 694: | ||
|} | |} | ||
* | *'''Neutral Jumping HK:''' | ||
{| border="1em" cellspacing="0" style="border: 1px solid #999;" | {| border="1em" cellspacing="0" style="border: 1px solid #999;" | ||
|- valign="bottom" | |- valign="bottom" | ||
| Line 708: | Line 708: | ||
|} | |} | ||
* | *'''Diagonal Jumping HK:''' | ||
{| border="1em" cellspacing="0" style="border: 1px solid #999;" | {| border="1em" cellspacing="0" style="border: 1px solid #999;" | ||
|- valign="bottom" | |- valign="bottom" | ||
| Line 724: | Line 724: | ||
===Throws=== | ===Throws=== | ||
* | *'''Normal Throw Boxes''' (←/→ + HP) and (←/→ + HK) | ||
{| border="1em" cellspacing="0" style="border: 1px solid #999;" | {| border="1em" cellspacing="0" style="border: 1px solid #999;" | ||
| align="center" | Damage || align="center" | 32 || align="center" rowspan="6" colspan="2" | [[File:Sf2hf-ken-throw.png]] | | align="center" | Damage || align="center" | 32 || align="center" rowspan="6" colspan="2" | [[File:Sf2hf-ken-throw.png]] | ||
| Line 741: | Line 741: | ||
===Special Moves=== | ===Special Moves=== | ||
* | *'''Hadoken:''' (↓↘→ + P) | ||
Startup: | Startup: | ||
{| border="1em" cellspacing="0" style="border: 1px solid #999;" | {| border="1em" cellspacing="0" style="border: 1px solid #999;" | ||
| Line 803: | Line 803: | ||
Ken's Hadoken its a riskful tool for spacing compared to Ryu's one, also its more vulnerable with the mind tricks of the new Special Moves of some characters like E.Honda's Sumo Splash,Blanka Vertical Roll,etc. | Ken's Hadoken its a riskful tool for spacing compared to Ryu's one, also its more vulnerable with the mind tricks of the new Special Moves of some characters like E.Honda's Sumo Splash,Blanka Vertical Roll,etc. | ||
* | *'''Shoryuken:''' →↓↘ + Punch | ||
Startup: | Startup: | ||
{| border="1em" cellspacing="0" style="border: 1px solid #999;" | {| border="1em" cellspacing="0" style="border: 1px solid #999;" | ||
| Line 824: | Line 824: | ||
Instead of use the Hadoken, Ken will be focused in use the Shoryuken for provoke the opponent to jump. LP version its the greatest 2-in-1 ender with close Fierce or Strong. | Instead of use the Hadoken, Ken will be focused in use the Shoryuken for provoke the opponent to jump. LP version its the greatest 2-in-1 ender with close Fierce or Strong. | ||
* | *'''Tatsumaki Senpuu Kyaku:''' ↓↙← + Kick | ||
Startup: | Startup: | ||
{| border="1em" cellspacing="0" style="border: 1px solid #999;" | {| border="1em" cellspacing="0" style="border: 1px solid #999;" | ||
| Line 861: | Line 861: | ||
Ken Egg Rolling strategies are gone, also it was a fix that Japanese Dash version made. | Ken Egg Rolling strategies are gone, also it was a fix that Japanese Dash version made. | ||
* | *'''Kuchuu Tatsumaki Senpuu Kyaku:''' During Jump ↓↙← + Kick | ||
| Line 882: | Line 882: | ||
|- | |- | ||
|} | |} | ||
* | *'''Standing reel:''' | ||
{| border="1em" cellspacing="0" style="border: 1px solid #999;" | {| border="1em" cellspacing="0" style="border: 1px solid #999;" | ||
| align="center" | [[File:Sf2hf-ken-reel1.png]] || align="center" | [[File:Sf2hf-ken-reel2.png]] || align="center" | [[File:Sf2hf-ken-reel3.png]] || align="center" | [[File:Sf2hf-ken-reel4.png]] | | align="center" | [[File:Sf2hf-ken-reel1.png]] || align="center" | [[File:Sf2hf-ken-reel2.png]] || align="center" | [[File:Sf2hf-ken-reel3.png]] || align="center" | [[File:Sf2hf-ken-reel4.png]] | ||
|- | |- | ||
|} | |} | ||
* | *'''Standing gut reel:''' | ||
{| border="1em" cellspacing="0" style="border: 1px solid #999;" | {| border="1em" cellspacing="0" style="border: 1px solid #999;" | ||
| align="center" | [[File:Sf2hf-ken-gutreel1.png]] || align="center" | [[File:Sf2hf-ken-gutreel2.png]] || align="center" | [[File:Sf2hf-ken-gutreel3.png]] || align="center" | [[File:Sf2hf-ken-gutreel4.png]] | | align="center" | [[File:Sf2hf-ken-gutreel1.png]] || align="center" | [[File:Sf2hf-ken-gutreel2.png]] || align="center" | [[File:Sf2hf-ken-gutreel3.png]] || align="center" | [[File:Sf2hf-ken-gutreel4.png]] | ||
|- | |- | ||
|} | |} | ||
* | *'''Crouching reel:''' | ||
{| border="1em" cellspacing="0" style="border: 1px solid #999;" | {| border="1em" cellspacing="0" style="border: 1px solid #999;" | ||
| align="center" | [[File:Sf2hf-ken-creel1.png]] || align="center" | [[File:Sf2hf-ken-creel2.png]] || align="center" | [[File:Sf2hf-ken-creel3.png]] | | align="center" | [[File:Sf2hf-ken-creel1.png]] || align="center" | [[File:Sf2hf-ken-creel2.png]] || align="center" | [[File:Sf2hf-ken-creel3.png]] | ||
| Line 898: | Line 898: | ||
|} | |} | ||
* | *'''Dizzy:''' | ||
{| border="1em" cellspacing="0" style="border: 1px solid #999;" | {| border="1em" cellspacing="0" style="border: 1px solid #999;" | ||
| align="center" | [[File:Sf2hf-ken-dizzy1.png]] || align="center" | [[File:Sf2hf-ken-dizzy2.png]] || align="center" | [[File:Sf2hf-ken-dizzy3.png]] | | align="center" | [[File:Sf2hf-ken-dizzy1.png]] || align="center" | [[File:Sf2hf-ken-dizzy2.png]] || align="center" | [[File:Sf2hf-ken-dizzy3.png]] | ||
Revision as of 00:39, 9 December 2020


Ken
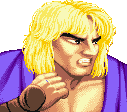
Shoryuken! A millionaire (by birthright, not effort) playboy with bleached hair (but not eyebrows - representing his 3/4ths Japanese heritage), Ken gets the Money, the Glory, and the Girl. He trained with his rival and friend, Ryu, in a Japanese Dojo under the tutelage of Gouken, a very powerful martial artist who famously went on to simply wake up from being dead. Ken favours a flashy, gung-ho fighting style over the more stoic and traditional Ryu.
In a nutshell
While certainly an overall poorer character than Ryu in SF2HF, Ken is not far behind. In some matchups his slower fireballs and wider arcing Dragon Punch can actually be helpful, and his very doable 'Touch of Death' combos mean one solid hit can always spell an opponent's doom.
Character Specific Information
Color Options
| Default | Start |
 |

|
Moves List
Normal Moves
- Standing Normal Moves (st.)
- Close Standing Normal Moves (cl.)
- Crouching Normal Moves (cr.)
- Jumping Normal Moves (nj.)
- Diagonal Jumping Normal Moves (j.)
Throws
Special Moves
The Basics
Not as powerful as Ryu overall, but he still has a lot of good tools. For the most part you will be playing more aggressive, trying to set up ambigious crossup into touch of death, or safejump/tick into srk/throw OS. His slower jab fireball can actually be more useful in some scenarios, and fierce srk goes quite far, making it better for anti air, and punishment in general. Faster walk speed can be ok in matchups where footsies are important, like vs gief for instance.
Pros
- Good Anti Air Special
- Fast Normals
Cons
- Bad Projectile
- Tatsumaki recovery or blocked hit flipcoin safe guard
Advanced Strategy
Crossup j hk into close hp>hp srk is the main touch of death combo to aim for after knockdown. You can get them into a situation where you can throw, do the srk motion and end with forward+lp+mk, if they try to throw you back or reversal, you get jab srk, if they block you throw. The new air tatsu is only useful in niche situations, like dodging fireballs, and some tall characters like boxer and sagat, you can use the overhead mixup for damage.
Combos
Bread And Butter
- cr.MK xx QCF+HP (low option 2-in-1)
- cr.MK xx qcb+K (if whiffs its a good crossup tool)
- Crossup j.HK, cl.HP xx HP Shoryuken (f,d,df+HP) (Touch of Death)
- j.HP/HK > close st mp> jab srk (if you can't cross them up this is usually the best for damage)
CPS1 Chains
- cr lk x1/2 xx cl.HP (cps1 chain) xx QCF+HP/ LP Shoryuken (f,d,df+LP)
- st lk x1/2 xx cr.HP (cps1 chain) xx QCF+HP/ LP Shoryuken (f,d,df+LP)
Specifics
- cr mk (meaty)> cr hk
- Jump lp (instant) > hk air tatsu (only works on tall characters if the opponent crouches, decent overhead mixup)
Match-ups
Vs. Balrog (boxer)
Once the round starts, the main objective is just to be patient and not get caught by rush punches, or st hp. Blocking high is actually pretty good since he has no low rush like in ST,this lets you block his attacks, and not get caught by dash upper whiff into throw. Once you get distance, it's just a case of getting a jab fireball on screen, then punishing whatever he does. Sweep his jumps when he's far, if he tries to tap through a fireball, srk him.
Vs. Blanka
Punish the Roll with Hadoken or Shoryuken,Vertical Roll can be shoryukened correctly,remember you have a weak Hadoken and he can Vertical Roll you easily, so your objective will be make him jump.
Vs. Chun-Li
Spinning Bird Kick can be countered with crouching Strong,but now can be a fireball match at the correct distance, if she Kikoken's you, its better to use Air TSK instead of jump for crossups.
Vs. Dhalsim
His nerfed damage and normals make this more managable, but not by any means an easy fight. Tatsu goes through fireballs, learn the ranges where you can safely get in with this while landing a hit. Though if he does a flame, you get punished hard, so this is not too reliable in some cases....
Cr lk is a good counter as it beats just about every normal he has from far. Cr mp can also beat slides, drills can be dealt with by mashing jab if you have not enough time to do an srk. Speaking of which, you can use hp srk to punish fireballs and flames like in shoto matchups. Be careful throwing fireballs when in range for his st hk to punish you, the trade is ok if you get it, but sim often hits you first and wins. The best way to get in is just patiently bulldog. Jumping is punishable with his many anti airs, mainly slides. And he can punish neutral jumps with his low punches. Tatsu is ok when in range.
Once you get him down, you can pressure easily as he has no true reversal, his throw range is much larger than yours, but you can hit him low, or use srk to deter throws.
Vs. E. Honda
Same as Ryu's strategy versus E. Honda: from about halfscreen away, throw slow fireballs, and sweep with cr.HK to hit with the very tip of the toe as Honda lands. You should be a little more careful chucking fireballs than with Ryu however, since Ken's fireball has more recovery time than Ryu's.
Vs. Guile
This is an annoying match, probably less so than in CE, but he still has the same advantages. You can't really zone when close as he can sonic boom, then punish your recovery most of the time. His cr mk is also incredibly hard to deal with because of the range. The best option is to whiff punish it with your sweep.
Sweep into fireball is good for getting him to the corner, flash kick whiffs at max sweep range as well, making this an ok pressure option, though crossup or safejump is often preferred. Tatsu can go through sonic booms, but you need to learn the ranges where it's safe. And it's not as useful as you'd think, thanks to his recovery speed.
Jumping in can sometimes work if he has no charge, make sure not to be too far, or he will cr mk you for free. Otherwise j hp is usually your best bet.
Vs. Ken (self)
Best Ken must use wisely his Shoryuken
Vs. M. Bison (dictator)
A better matchup than CE, but its because he is worst than you now, try to start the round with a Jab or Strong Shoryuken , that will be the check for the kind of Dictador he is, remember to be careful with your Hadoken and wait to punish Head Stomp with Shoryuken.
Vs. Ryu
He has a lot of the same tools as you, just most of these are significantly better, making this an uphill battle. You can use hp srk when close to counter his fireballs, useful at round start, aim for the last hit to touch his arms for a knockdown. His tatsu can be used in the same way vs your fireballs when he is close, so be careful. Another option at round start is walk up sweep, trades with his fireball.
If he jumps from far away, hp srk is usually the best option if you have time, anti air sweep can't punish him if he does j hk, you can try wait for him to land and bait an srk, or throw him. Close hp is your best bet if he jumps above you, works great as an anti crossup. When punishing blocked/whiff tatsu, srk is preferred for the knockdown, jab srk is the optimal one since it is 1 hit, and you have more time to pressure. If he goes over you, cr hp is alright.
When you are close, you have an advantage in neutral thanks to faster walk speed. Use normals like cr lk/st lp to activate proximity block preventing him from walking backwards, then go for walk up sweep. Likewise, whiff punish his sweeps and cr mk whiffs with it. When he's far away and zoning you, bulldogging is a good way to get closer thanks to your good walk speed. Neutral jumping is best vs medium and heavy fireballs, since he has no time to close the gap.
You can use cr mp for safe pressure/bait. Space it so it will connect at max range if he's crouching, srk will whiff, you can punish whiffed srk with walk up>close hp> srk if you react in time, his tatsu whiffs since you crouch while doing cr mp. Ryu's only true answer is to stand up, which leaves him vulnerable to low kicks.
Vs. Sagat
Isn't changed too much with CE, but now you had an aerial version of your Hurricane Kick that will comboing him or evade/trade hit with a Tiger Uppercut, the main objective of Ken will be about playing grounds, from evading Low Tiger Shots with a jumping Roundhouse to approach with a sweep a High one.
Try to start a round with a Hadoken or a sweep instead, then if he responds with a Tiger Uppercut combo it a 2-in-1 Hadoken or Shoryuken.
Vs. Vega (claw)
An anti air vs air matchup, Vega its a bit untouched character compared to you and that will be a reason that its a more fair matchup than CE, Aerial Tatsumaki can be a good coin flip trade hit with a Dive Attack , If he jumps or use Barcelona use the Shoryuken to punish him,but watch out with lows.
Your main weakness will be now ground due that your Hadoken its still a bad one
Vs. Zangief
You need to be careful since one mistake can lead to losing the round. Fireball isn't too useful here because of lariats. You'll need to focus on ground game, and be patient. Cr mk/sweep are good when in neutral as he doesn't have a reliable way to deal with it, unlike in future games, his far mk is trash, you don't need to worry about it at all. His only options are to sweep you first, or jump it, both incredibly risky. Whiff punish his sweeps with your own, and walk up sweep is best vs punch lariat if you have time, for kick lariat, use st mp if he's close enough to get hit. With the walk up cr mk/sweep, you can cancel into fireball, though he'll be able to lariat through.
If he jumps at you, srk deals with this easily, far hk is also great for anti airs, comes out very fast, so at worst you might trade. Jumping in is also not so bad in this match, as his anti air game is very poor, though I'd recommend only relying on this when you have no other option. When he gets in after a knockdown things get tricky, you can try reversal srk, but his safe ticks are not punishable if he times it right, though on block your jab srk is safe, so if he's at point blank range it's never a bad choice. The spd can be negative edged, so nothing can stop it.
Other useful things in neutral, cr mp beats his sweep from far away, but is vulnerable to standing spd. Try to aim for your low kicks to always connect, as he can punish the whiffs with his sweep. Far stand lk is decent for faking fireballs and baiting lariats/sweeps.
Hitboxes
Standing Normals
- Standing LP:
| Damage | 6 |  |
 |
 |

|
| Stun | 1~7 | ||||
| Stun Timer | 40 | ||||
| Chain Cancel | Yes | ||||
| Special Cancel | Yes | ||||
| Frame Advantage | +6 | ||||
| Frame Count | 2 | 4 | 4 | 1 | |
| Simplified | 1+2 | 4 | 5 | ||
- Standing MP:
| Damage | 16 |  |
 |
 |
 |
 |

|
| Stun | 5~11 | ||||||
| Stun Timer | 60 | ||||||
| Chain Cancel | No | ||||||
| Special Cancel | Yes | ||||||
| Frame Advantage | +10 | ||||||
| Frame Count | 1 | 2 | 4 | 3 | 3 | 1 | |
| Simplified | 1+3 | 4 | 7 | ||||
- Standing HP:
| Damage | 26 |  |
 |
 |
 |
 |

|
| Stun | 11~17 | ||||||
| Stun Timer | 80 | ||||||
| Chain Cancel | No | ||||||
| Special Cancel | No | ||||||
| Frame Advantage | -6 | ||||||
| Frame Count | 3 | 2 | 6 | 10 | 12 | 1 | |
| Simplified | 1+5 | 6 | 23 | ||||
- Standing LK:
| Damage | 8 |  |
 |
 |
 |

|
| Stun | 1~7 | |||||
| Stun Timer | 40 | |||||
| Chain Cancel | Yes | |||||
| Special Cancel | No | |||||
| Frame Advantage | +3 | |||||
| Frame Count | 3 | 3 | 8 | 4 | 1 | |
| Simplified | 1+6 | 8 | 5 | |||
- Standing MK:
| Damage | 16 |  |
 |
 |
 |

|
| Stun | 5~11 | |||||
| Stun Timer | 60 | |||||
| Chain Cancel | No | |||||
| Special Cancel | No | |||||
| Frame Advantage | +1 | |||||
| Frame Count | 5 | 6 | 12 | 6 | 1 | |
| Simplified | 1+11 | 12 | 7 | |||
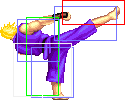
- Standing HK:
| Damage | 22 |  |
 |
 |
 |

|
| Stun | 11~17 | |||||
| Stun Timer | 80 | |||||
| Chain Cancel | No | |||||
| Special Cancel | No | |||||
| Frame Advantage | -2 | |||||
| Frame Count | 2 | 4 | 8 | 10 | 7 | |
| Simplified | 2+1 | 12 | 17 | |||
Close Standing Normals
- Close Standing LP:
| Damage | 6 |  |
 |

|
| Stun | 1~7 | |||
| Stun Timer | 40 | |||
| Chain Cancel | Yes | |||
| Special Cancel | Yes | |||
| Frame Advantage | +6 | |||
| Frame Count | 1+2 | 4 | 5 | |
- Close Standing MP:
| Damage | 16 |  |
 |
 |
 |
 |
 |

|
| Stun | 5~11 | |||||||
| Stun Timer | 60 | |||||||
| Chain Cancel | No | |||||||
| Special Cancel | Yes | |||||||
| Frame Advantage | +2 | |||||||
| Frame Count | 1 | 2 | 2 | 6 | 4 | 3 | 4 | |
| Simplified | 1+3 | 2 | 17 | |||||
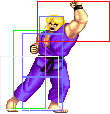
- Close Standing HP:
| Damage | 26 |  |
 |
 |
 |

|
| Stun | 11~17 | |||||
| Stun Timer | 80 | |||||
| Chain Cancel | No | |||||
| Special Cancel | Yes | |||||
| Frame Advantage | -8 | |||||
| Frame Count | 3 | 2 | 6 | 10 | 13 | |
| Simplified | 1+3 | 8 | 23 | |||
- Close Standing LK:
| Damage | 8 |  |
 |
 |
 |
 |

|
| Stun | 1~7 | ||||||
| Stun Timer | 40 | ||||||
| Chain Cancel | Yes | ||||||
| Special Cancel | No | ||||||
| Frame Advantage | +5 | ||||||
| Frame Count | 2 | 3 | 2 | 4 | 3 | 1 | |
| Simplified | 1+5 | 2 | 5 | ||||
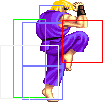
- Close Standing MK:
| Damage | 16 |  |
 |
 |
 |
 |

|
| Stun | 5~11 | ||||||
| Stun Timer | 60 | ||||||
| Chain Cancel | No | ||||||
| Special Cancel | Yes | ||||||
| Frame Advantage | +6 | ||||||
| Frame Count | 2 | 1 | 6 | 4 | 4 | 1 | |
| Simplified | 1+3 | 6 | 9 | ||||
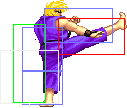
- Close Standing HK:
| Damage | 24,6 |  |
 |
 |
 |
 |

|
| Stun | 11~17 | ||||||
| Stun Timer | 80 | ||||||
| Chain Cancel | No | ||||||
| Special Cancel | Yes/No | ||||||
| Frame Advantage | +8 | ||||||
| Frame Count | 3 | 4 | 8 | 4 | 10 | 1 | |
| Simplified | 1+7 | 12 | 11 | ||||
Crouching Normals
- Crouching LP:
| Damage | 6 |  |
 |
 |

|
| Stun | 1~7 | ||||
| Stun Timer | 40 | ||||
| Chain Cancel | Yes | ||||
| Special Cancel | Yes | ||||
| Frame Advantage | +6 | ||||
| Frame Count | 2 | 4 | 4 | 1 | |
| Simplified | 1+2 | 4 | 5 | ||
- Crouching MP:
| Damage | 14 |  |
 |
 |
 |
 |

|
| Stun | 5~11 | ||||||
| Stun Timer | 60 | ||||||
| Chain Cancel | No | ||||||
| Special Cancel | Yes | ||||||
| Frame Advantage | +10 | ||||||
| Frame Count | 1 | 2 | 4 | 3 | 3 | 1 | |
| Simplified | 1+3 | 4 | 7 | ||||
- Crouching HP:
| Damage | 22 |  |
 |
 |
 |
 |

|
| Stun | 11~17 | ||||||
| Stun Timer | 80 | ||||||
| Chain Cancel | No | ||||||
| Special Cancel | Yes,No | ||||||
| Frame Advantage | -11 | ||||||
| Frame Count | 3 | 3 | 8 | 10 | 12 | 1 | |
| Simplified | 1+3 | 11 | 23 | ||||
- Crouching LK:
| Damage | 6 |  |
 |
 |

|
| Stun | 1~7 | ||||
| Stun Timer | 40 | ||||
| Chain Cancel | Yes | ||||
| Special Cancel | Yes | ||||
| Frame Advantage | +6 | ||||
| Frame Count | 2 | 4 | 4 | 1 | |
| Simplified | 1+2 | 4 | 5 | ||
- Crouching MK:
| Damage | 14 |  |
 |
 |
 |
 |

|
| Stun | 5~11 | ||||||
| Stun Timer | 60 | ||||||
| Chain Cancel | No | ||||||
| Special Cancel | Yes | ||||||
| Frame Advantage | +6 | ||||||
| Frame Count | 1 | 2 | 6 | 4 | 4 | 1 | |
| Simplified | 1+3 | 6 | 9 | ||||
- Crouching HK:
| Damage | 22 |  |
 |
 |
 |

|
| Stun | 11~17 | |||||
| Stun Timer | 80 | |||||
| Chain Cancel | No | |||||
| Special Cancel | Yes | |||||
| Frame Advantage | +2 | |||||
| Frame Count | 3 | 6 | 6 | 8 | 11 | |
| Simplified | 1+3 | 6 | 25 | |||
Aerial Normals
- Neutral Jumping LP:
| Damage | 10 |  |

|
| Stun | 1~7 | ||
| Stun Timer | 40 | ||
| Frame Count | 2 | ∞ | |
- Diagonal Jumping LP:
| Damage | 8 |  |

|
| Stun | 1~7 | ||
| Stun Timer | 40 | ||
| Frame Count | 2 | ∞ | |
- Neutral/Diagonal Jumping MP:
| Damage | 16 |  |
 |
 |
 |
 |
 |

|
| Stun | 5~11 | |||||||
| Stun Timer | 50 | |||||||
| Frame Count | 2 | 2 | 20 | 4 | 4 | 4 | ∞ | |
| Simplified | 4 | 20 | ∞ | |||||
- Neutral Jumping HP:
| Damage | 24 |  |
 |
 |
 |
 |
 |

|
| Stun | 11~17 | |||||||
| Stun Timer | 60 | |||||||
| Frame Count | 2 | 2 | 20 | 4 | 4 | 4 | ∞ | |
| Simplified | 4 | 20 | ∞ | |||||
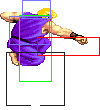
- Diagonal Jumping HP:
| Damage | 22 |  |
 |
 |
 |
 |
 |

|
| Stun | 11~17 | |||||||
| Stun Timer | 60 | |||||||
| Frame Count | 2 | 2 | 8 | 4 | 4 | 4 | ∞ | |
| Simplified | 4 | 8 | ∞ | |||||
- Neutral Jumping LK:
| Damage | 10 |  |
 |

|
| Stun | 1~7 | |||
| Stun Timer | 40 | |||
| Frame Count | 3 | 40 | ∞ | |
- Diagonal Jumping LK:
| Damage | 8 |  |
 |

|
| Stun | 1~7 | |||
| Stun Timer | 40 | |||
| Frame Count | 2 | 3 | ∞ | |
| Simplified | 5 | ∞ | ||
- Neutral Jumping MK:
| Damage | 16 |  |
 |
 |
 |

|
| Stun | 5~11 | |||||
| Stun Timer | 50 | |||||
| Frame Count | 5 | 13 | 6 | 6 | ∞ | |
| Simplified | 5 | 13 | ∞ | |||
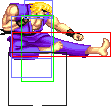
- Diagonal Jumping MK:
| Damage | 16 |  |
 |
 |
 |
 |
 |

|
| Stun | 5~11 | |||||||
| Stun Timer | 50 | |||||||
| Frame Count | 2 | 3 | 13 | 3 | 3 | 3 | ∞ | |
| Simplified | 5 | 13 | ∞ | |||||
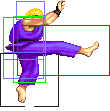
- Neutral Jumping HK:
| Damage | 24 |  |
 |
 |
 |
 |
 |

|
| Stun | 11~17 | |||||||
| Stun Timer | 60 | |||||||
| Frame Count | 2 | 4 | 4 | 3 | 3 | 3 | ∞ | |
| Simplified | 2 | 8 | ∞ | |||||
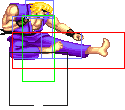
- Diagonal Jumping HK:
| Damage | 22 |  |
 |
 |
 |
 |
 |

|
| Stun | 11~17 | |||||||
| Stun Timer | 60 | |||||||
| Frame Count | 2 | 3 | 7 | 3 | 3 | 3 | ∞ | |
| Simplified | 5 | 7 | ∞ | |||||
Throws
- Normal Throw Boxes (←/→ + HP) and (←/→ + HK)
| Damage | 32 | 
| |
| Duration | 130 | ||
| Stun | 7~13 | ||
| Stun Timer | 100 | ||
| Range (from axis) | 48 | ||
| Range advantage | 19 | ||
Special Moves
- Hadoken: (↓↘→ + P)
Startup:
 |
 |
 |

| |
| Frame Count | 2 | 7 | 2 | 1 |
Active:
LP version:
| Damage | 12 |  |
 |
 |

|
| Stun | 13~19 | ||||
| Stun Timer | 120 | ||||
| Frame Advantage | - | ||||
| Frame Count | 1 | 1 | 2 | 2.. | |
| Simplified | 40 | ||||
MP version:
| Damage | 12 |  |
 |
 |

|
| Stun | 13~19 | ||||
| Stun Timer | 120 | ||||
| Frame Advantage | - | ||||
| Frame Count | 1 | 1 | 2 | 2.. | |
| Simplified | 40 | ||||
HP version:
| Damage | 12 |  |
 |
 |

|
| Stun | 13~19 | ||||
| Stun Timer | 120 | ||||
| Frame Advantage | - | ||||
| Frame Count | 1 | 1 | 2 | 2.. | |
| Simplified | 40 | ||||
Ken's Hadoken its a riskful tool for spacing compared to Ryu's one, also its more vulnerable with the mind tricks of the new Special Moves of some characters like E.Honda's Sumo Splash,Blanka Vertical Roll,etc.
- Shoryuken: →↓↘ + Punch
Startup:
| Damage | 32/32,16 |  |
 |
 |
 |
 |

|
| Stun | 13~19 | ||||||
| Stun Timer | 120 | ||||||
| Frame Advantage | -11/-22/-33 | ||||||
| Jab | 4 | 4 | 14 | 6 | 11 | 5 | |
| Strong | 4 | 4 | 22 | 6 | 14 | 5 | |
| Fierce | 4 | 4 | 26 | 6 | 21 | 5 | |
Instead of use the Hadoken, Ken will be focused in use the Shoryuken for provoke the opponent to jump. LP version its the greatest 2-in-1 ender with close Fierce or Strong.
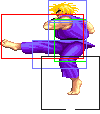
- Tatsumaki Senpuu Kyaku: ↓↙← + Kick
Startup:
| Damage | 10 |  |
 |

|
| Stun | 13~19 | |||
| Stun Timer | 120 | |||
| Frame Advantage | -1 | |||
| Frame Count | 4 | 4 | 3 | |
Active:
 |
 |
 |

| |
| Frame Count | 1 | 1 | 2 | 2 |
Short: 2 Times
Foward: 3 Times
Rounhouse: 4 Times
Recovery:
 |
 |
 |

| |
| Frame Count | 4 | 4 | 4 | 0 |
Ken Egg Rolling strategies are gone, also it was a fix that Japanese Dash version made.
- Kuchuu Tatsumaki Senpuu Kyaku: During Jump ↓↙← + Kick
Recovery:
 |
 |
 |
 |

| |
| Frame Count | 4 | 4 | 4 | 4 |
A great corner escape tool and your 2-in-1 ender against Sagat or Boxer, your main disadvantage its that you will had a worst recovery.
Misc Animations
| Walk back | Neutral | Walk Fwd | Crouch |
 |
 |
 |

|
- Standing reel:
 |
 |
 |

|
- Standing gut reel:
 |
 |
 |

|
- Crouching reel:
 |
 |

|
- Dizzy:
 |
 |

|
| General | Game Mechanics | Strategy | Tiers | |
| The Characters | Balrog (Boxer) | Blanka | Chun-Li | Dhalsim | E. Honda | Guile | Ken | M. Bison (Dictator) | Ryu | Sagat | Vega (Claw) | Zangief |
