(→Marvel) |
mNo edit summary |
||
| (85 intermediate revisions by 12 users not shown) | |||
| Line 1: | Line 1: | ||
[[Image:mvc3.png|right]] | |||
==Notation== | ==Notation== | ||
* | * [[File:l.png]] - '''Light Attack''' | ||
* | * [[File:m.png]] - '''Medium Attack''' | ||
* | * [[File:h.png]] - '''Heavy Attack''' | ||
* | * [[File:s.png]] - '''"Exchange" / Special''' | ||
* | * [[File:a1.png]] - '''Assist 1''' | ||
* | * [[File:a2.png]] - '''Assist 2''' | ||
* | * [[File:atk.png]][[File:atk.png]] - '''Any two simultaneous attacks (for Hypers)''' | ||
* DHC - Delayed Hyper Combo | * [[File:airokay.png]] - '''Can be performed in the air''' | ||
* | * DHC - '''Delayed Hyper Combo''' | ||
* AD - | * XFC - '''X-Factor Cancel''' | ||
* AD - '''Airdash''' | |||
=Game Mechanics= | ==Game Mechanics== | ||
===HUD=== | |||
* ''' | * '''Life Gauge''' - When a character takes damage in MvC, he sustains some permanent damage and some recoverable (red) damage. If you tag out your point character, he will slowly regain his red life while on the sidelines. A character is KO'd once his life bar is emptied, whether or not he has red life remaining. | ||
* '''Guts''' - This is a defense boost that is automatically triggered when a character is at low health. An attack that takes off a tenth of the opponent's life bar when he's at full health may do noticeably less damage when he's in "Danger" territory. Furthermore, '''Pixel Rage''' refers to the way characters seem to not die when they "should" from looking at the bar. More health may be "packed" into the bottom half of the life bar. You should think of the life bar in MvC3 as "offset" somewhat. There's a small amount of life "past" the 0 mark on the bar that you can't see. This primarily is a factor at the end of a long combo where extreme damage scaling has taken effect or in efforts to "chip" someone out with block damage. Capcom has stated that the effect is intentional and isn't going away, and it's presumably in to make the game seem more exciting. | |||
* ''' | * '''Hyper Combo Gauge''' - Hyper Meter is an important part of your management and strategy, being used to power the most useful moves and techniques in the game. In general you gain meter by interacting with your opponent, and you can store up to 5 "stocks" or levels of your meter. Unlike in previous games, intentionally missing ("whiffing") does not give any meter, but gains from successfully attacking are much greater than in previous games. The following things gain meter: Hitting with any move including hyper combos, having attacks blocked (note that this gives far less meter than hitting), being hit by an opponents attacks, and blocking opponents attacks (which again gives far less). In addition, Morrigan's and Amaterasu's Y assists each give a bit more than 1/3 of a bar of meter, and Felicia and Thor have special moves that charge meter over time. You also get a bonus to meter generation for any attacks after an aerial exchange. Hyper meter is used for Hyper Combos, Cross-Over Counters, and Snap Backs, all of which are explained below. | ||
* '''Timer''' - If time expires, the team with the most combined life remaining wins the match. One "second" on the game timer is roughly equal to 2 real seconds. | |||
===Movement=== | |||
* '''Double Jump''' - Some characters can jump more than once before touching the ground. This is character dependent. | |||
*''' | * '''Super Jump''' - Pressing down then immediately pressing up will cause your character to super jump. Super jumps can help every character become mobile and escape intense situations. After a launcher, you can hold up to jump the instant after the launch to continue the combo. This is called an SJC (Super Jump Cancel). The main drawback of using super jumps instead of normal or double jumps is that you cannot call an assist after super jumping, though other team-based mechanics (DHC, air exchange) are still at your disposal. | ||
* '''Dash''' - Used to move quickly around the screen. The basic inputs to dash are either double-tapping a direction, or two simultaneous attack buttons plus a direction. Two attacks with no direction will dash forward. Dash speed and distance varies from character to character. | |||
*''' | * '''Dash Cancel''' - You can cancel dashes with attacks or by ducking. Duck cancelling dashes just ends the approach early and is good for approaching the opponent safely and baiting, and attack cancelling is an important part of rushdown. It should be noted that in the current build, Ryu, Dormammu, Chris Redfield, Doctor Doom, and the Hulk cannot cancel dashes. This is a known issue for some characters, but may be intentional for others. | ||
The | * '''Wavedash''' - The act of using multiple dashes in order to cover ground quickly. The best way to do it is tapping two simultaneous attack buttons repeatedly. It is a common misconception that you need to duck cancel (see above) to wavedash as in MvC2, but this isn't true. Dashes automatically cancel into dashes. | ||
* '''Air Dash''' - Some characters can dash wile in the air. Like ground dashes, the exact behavior (speed, trajectory, etc.) of air dashes varies between characters who have them. | |||
* '''8-Way Dash and Triangle Jump''' - Some characters with an air dash can dash in 8 directions (up, down, left, right, up-forward, down-forward, up-back, down-back). This ability is known as an 8-Way AD. This further enables the character to employ what is known as a trijump/tridash in which the character can dash down-forward, down, or down-back after jumping, most of the time with an attack after. Some examples of characters in MvC3 with tridashes are Iron Man, Trish, and Morrigan. Tridashing is useful because it allows for very fast overhead attacks. This works because nearly all air normals are overheads and cannot be blocked low. (An air attack that isn't an overhead is the exception rather than the rule; once again, know your character.) If you jump and then dash forward/downforward immediately you can get an almost instant attack that will catch ducking blocks, and can be continued into a combo. They are a very important element of most character's rushdown game. | |||
''' | * '''Flight''' - | ||
===Attacking=== | |||
* '''Chain Combos and Magic Series''' - The Vs series employs many kinds of chain combos, which allow you to instantly cancel the recovery on one attack and move into another with no delay and very lenient timing. The Magic Series is a specific type of chain combo that allows you to cancel any normal attack into another normal attack of greater strength for an easy combo, provided that the first normal connects with the opponent. The most straightforward example would be [[File:l.png]]>[[File:m.png]]>[[File:h.png]]>[[File:s.png]]. These are general rules, and what will actually work varies from character to character. (For instance, [[File:l.png]]>[[File:m.png]]>[[File:h.png]]>[[File:s.png]] usually won't combo for Viewtiful Joe for range reasons on his launcher, and Thor has to do [[File:l.png]]>[[File:m.png]]>[[File:s.png]] or [[File:m.png]]>[[File:h.png]]>[[File:s.png]] to launch.) You cannot combo into a command normal of lesser strength (such as [[File:h.png]] into [[File:f.gif]] + [[File:m.png]]). You can combo any normal into a launcher, special attacks, or hypers. In an air combo, [[File:l.png]]>[[File:l.png]]>[[File:m.png]]>[[File:m.png]]>[[File:h.png]]>[[File:s.png]] seems to work. These rules are general and may not work from character to character. Know the character you're playing and what works! | |||
* '''Launchers and Air Combos''' - On the ground, neutral [[File:s.png]] is the universal launcher attack. After hitting with a launcher, hold up or up/forward to automatically super jump and try to continue the combo. While airborne, you can perform chain combos, specials/hypers (character dependent), and air tags, described below. | |||
* '''Wallbounce''' - Several characters have attacks that cause the opponent to bounce off of the wall, setting them up for additional combos. Examples include Wesker's B Ghost Butterfly, or his C Jaguar Kick, both of which can be followed up with or without his teleports depending on the situation. Note that you are only permitted one wallbounce per combo. Performing a wallbounce attack a second time in the same combo will not cause a second wallbounce. | |||
* '''Knockdown, Wakeup, and Off-The-Ground (OTG) Attacks''' - If you end an air combo with a hard knockdown, the opponent will hit the ground and lay flat on his back for a brief period of time, after which he can roll left or right to safety by simply holding left or right. While he is laying on the ground, however, he is completely open to any attack that can hit OTG, so you can use OTG attacks to continue your combo. Note that only specific attacks are able to hit OTG; again, know your character. Like wallbounces, you are only permitted one OTG attack per combo. Furthermore, it should be noted that if you knock the opponent to the ground from very low altitudes, he will immediately roll backward upon touching the ground (similar in appearance to an MvC2 style tech roll), during which he is completely invulnerable and cannot be hit OTG. | |||
''' | * '''Throws and Break Away''' - | ||
''' | * '''Hyper Combos''' - This is the name used for super moves in the Versus series, and these require either one or three stocks of meter. Hypers are usually extremely strong attack moves, but there are also "utility" hypers with a variety of effects. In addition, attack hypers can be split into a few loose categories that have slightly different effects. "Normal" hypers do their attack no matter what. They do much more "chip" than any other type, but will not stop on a miss or juggle a dead opponent and can leave you with increased vulnerability in some situations. The classic hypers of this type are probably Iron Man's Proton Cannon or Ryu's Shinkuu Hadouken, both of which shoot giant lasers. "Catch" hypers generally have your character rush towards the enemy and on hit do a "canned" combination (i.e. you cannot control it). These have the advantage of being more cinematic in general, and less vulnerable if you totally miss or kill your opponent in the beginning of the move but can be blocked and do almost no "chip." Most level 3 hypers are of the catch variety; the classic examples are Morrigan's Darkness Illusion and Captain America's Final Justice. The third category is throw hypers. Like the description says, they have the same properties as throws, having extremely short range but generally being unblockable. Otherwise they work like the "catch" hypers. There are very few throw hypers in the game, but Thor, Tron Bonne and M.O.D.O.K. all have one. Finally there are Utility hypers. These do no damage, but have some other useful advantage. The best examples are Wolverine's Berzerker Charge/speed boost, and Morrigan's Astral Vision which makes a copy of her that can hit appear on the opposite side of your opponent. | ||
* '''Unblockable Attacks''' - | |||
== | ===Team Mechanics=== | ||
* '''Assist Selection''' - Each character has 3 assists you can choose from: α (Alpha), β (Beta), and γ (Gamma). As compared to MvC2, which had labels for the assists such as "anti-air" or "combo extender," in MvC3 the assists have a set of two descriptors: the "type," and the "direction." The type is what kind of attack it is: "direct" means a physical attack, "shot" means a projectile, and "special" means something weird. The direction is straightforward, ranging from "upward" (straight up), "tilt up," "front," to "tilt dw." This can be largely meaningless though, as an assist can be labeled "direct front" and be either a low attack (X-23's ankle cutter or Felicia's rolling buckler) or a projectile antiair attack (Dante's "Jam Session"). Know your assists and pick wisely. Some good assists to start with are the Dr. Doom Y (Molecular shield/"doom rocks") which is good to cover advancing on the enemy, Trish's B "Peekaboo" (air trap), which is a good trap/zoning assist, or Dante's A (Jam session) which is a good AA/combo extender. | |||
*''' | * '''Team Order''' - During the pre-fight "VS" screen, hold the [[File:a1.png]] button to begin the match with your second character or the [[File:a2.png]] button to begin with your third character. | ||
*''' | * '''Using Assists''' - Tap the [[File:a1.png]] or [[File:a2.png]] button to call the corresponding teammate in to perform their chosen assist attack. There are some rules for assists as well. You cannot call an assist during a special move or a superjump. In addition, during and briefly after an assist you cannot call the other one again (but the other assist is available more rapidly than the one you just used). You also cannot tag in during an assist, with identical lockout rules. | ||
* '''Dry Tag''' - This is the act of changing your character out for one of your assists. In the simplest terms, you tag via holding the appropriate assist button ([[File:a1.png]] or [[File:a2.png]]) for a half-second or so. The tag can be buffered to some degree but will not negate the recovery of the move in question, so if you do a hyper combo with a slow recovery while holding the assist button, you will not be automatically protected from a punish. (check!) Tagging a teammate in via this method also eliminates any red life that he has not yet recovered. You can alternatively tag through aerial exchanges, Delayed Hyper Combos (DHC's), and Cross-Counters (all described below), although the last two options take one or more bars of meter to execute. As a general rule, "naked" or random tagging is a very bad idea, so use one of the alternative methods whenever possible. | |||
* '''Team Air Combos''' - Also known as Aerial Exchange. In the air, neutral [[File:s.png]] is a knockdown attack, but any directional input plus [[File:s.png]] during an air combo will tag in your next teammate and allow you to continue the combo. The opponent can break out of your team aerial combo by matching your [[File:s.png]] input, however. (Need specifics on the timing for the combo breaker and whatnot.) Tagging your teammate in via [[File:s.png]] preserves any of his/her red life that has not yet been recovered. | |||
*''' | * '''Delayed Hyper Combo (DHC)''' - This is the process in which you cancel one Hyper Combo with another. For example I am using Ryu's Shinkuu Hadouken. If I have another bar of meter I can input the command for my next teammate's hyper and that teammate will immediately switch-in and perform that hyper for extra damage. This can be done a second time to bring in the third member of your team as well. Tagging your teammate in via DHC preserves any of his/her red life that has not yet been recovered. Many use this technique as a safe way to get a character out and get another one in. | ||
* '''Team Hyper Combo (THC)''' - These are utilized by hitting both assist buttons at once. Essentially as many people as as you have bars or characters left will come out and do their hyper combos, to a maximum of three. The hyper used in the THC is determined by the assist chosen. | |||
* '''Cross-Over Counter''' - If you enter [[File:f.gif]] + [[File:a1.png]] or [[File:a2.png]] while blocking you will tag out your character and permanently bring in the associated character with their chosen assist. This uses one bar of meter. Tagging your teammate in via Cross-Over Counter preserves any of his/her red life that has not yet been recovered. | |||
*''' | * '''Snap Back''' - Forces out the opponent's point character and brings in one of his teammates determined by the assist button used to perform the technique. This uses one bar of meter and eliminates any red life that the opposing character has not yet recovered. | ||
== | ===Misc=== | ||
*''' | * '''Jump Canceling''' - | ||
*''' | * '''Advancing Guard (Pushblock)''' - | ||
*''' | * '''X-Factor''' - A mechanic new to MvC3 but based on the "Baroque" concept from Tatsunoko vs. Capcom. X-Factor is activated by pressing all four attack buttons at once. When X-Factor is active, your point character regains "red life" at an extremely rapid rate, your character is substantially sped up, and both normal and "chip" damage are greatly increased. In addition, on activation, all of your cooldowns are reset (see XFC below). The potency and duration of X-Factor is dependent on the number of teammates you have remaining. If all 3 of your characters are alive, then you get a level 1 X-Factor. If you're down to your last character, you get a level 3 X-Factor. You can only use it once per round. | ||
*''' | * '''X-Factor Cancel (XFC)''' - XFC allows X-Factor to be used to its full potential. Executing X-Factor during any point of an attack (normal, special, or hyper) cancels the remainder of that attack's animation and recovery. This leaves you with the opportunity to either get your character out of harm's way or continue with another attack that would not have been able to be comboed without XFC. The damage boost granted during X-Factor can make the damage from XFC combos very potent. Furthermore, you can also activate XFC during blockstun, which allows for "custom alpha counters:" block > XFC > counterattack. | ||
==Characters== | ==Characters== | ||
<table><tr><td> | <table><tr><td> | ||
=== | <center> | ||
{| border="0" cellspacing="0" | |||
| width="96pt" align="center"| [[Image:marvel-logo.jpg]] | |||
|} | |||
</center> | |||
<center> | |||
{| border="0" cellspacing="0" | |||
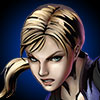
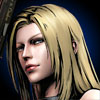
| width="96pt" align="center"| [[Image:captamericaface.jpg|link=Captain America (MvC3)]] || width="96pt" align="center"| [[Image:deadpoolface.jpg|link=Deadpool (MvC3)]] || width="96pt" align="center"| [[Image:doomface.jpg|link=Doctor Doom (MvC3)]] || width="96pt" align="center"| [[Image:dormammuface.jpg|link=Dormammu (MvC3)]] || width="96pt" align="center"| [[Image:hulkface.jpg|link=Hulk (MvC3)]] || width="96pt" align="center"| [[Image:ironmanface.jpg|link=Iron Man (MvC3)]] | |||
|} | |||
</center> | |||
</ | <center> | ||
{| border="0" cellspacing="0" | |||
| width="97pt" align="center"| [[Captain America (MvC3) | Captain America]] || width="97pt" align="center"| [[Deadpool (MvC3)|Deadpool]] || width="97pt" align="center"| [[Doctor Doom (MvC3)|Doctor Doom]] || width="97pt" align="center"| [[Dormammu (MvC3)|Dormammu]] || width="97pt" align="center"| [[Hulk (MvC3)|Hulk]] || width="97pt" align="center"| [[Iron Man (MvC3)|Iron Man]] | |||
|} | |||
</center> | |||
<center> | |||
{| border="0" cellspacing="0" | |||
| width="96pt" align="center"| [[Image:magnetoface.jpg|link=Magneto (MvC3)]] || width="96pt" align="center"| [[Image:modokface.jpg|link=MODOK (MvC3)]] || width="96pt" align="center"| [[Image:phoenixface.jpg|link=Phoenix (MvC3)]] || width="96pt" align="center"| [[Image:sentinelface.jpg|link=Sentinel (MvC3)]] || width="96pt" align="center"| [[Image:shehulkface.jpg|link=She-Hulk (MvC3)]] || width="96pt" align="center"| [[Image:shumagorathface.jpg|link=Shuma-Gorath (MvC3)]] | |||
|} | |||
</center> | |||
<center> | |||
</ | {| border="0" cellspacing="0" | ||
| width="97pt" align="center"| [[Magneto (MvC3)|Magneto]] || width="97pt" align="center"| [[MODOK (MvC3)|MODOK]] || width="97pt" align="center"| [[Phoenix (MvC3)|Phoenix]] || width="97pt" align="center"| [[Sentinel (MvC3)|Sentinel]] || width="97pt" align="center"| [[She-Hulk (MvC3)|She-Hulk]] || width="97pt" align="center"| [[Shuma-Gorath (MvC3)|Shuma-Gorath]] | |||
|} | |||
</center> | |||
<center> | |||
{| border="0" cellspacing="0" | |||
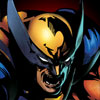
| width="96pt" align="center"| [[Image:spider-manface.jpg|link=Spider Man (MvC3)]] || width="96pt" align="center"| [[Image:stormface.jpg|link=Storm (MvC3)]] || width="96pt" align="center"| [[Image:superskrullface.jpg|link=Super-Skrull (MvC3)]] || width="96pt" align="center"| [[Image:taskmasterface.jpg|link=Taskmaster (MvC3)]] || width="96pt" align="center"| [[Image:thorface.jpg|link=Thor (MvC3)]] || width="96pt" align="center"| [[Image:wolverineface.jpg|link=Wolverine (MvC3)]] | |||
|} | |||
</center> | |||
<center> | |||
{| border="0" cellspacing="0" | |||
| width="97pt" align="center"| [[Spider Man (MvC3)|Spider Man]] || width="97pt" align="center"| [[Storm (MvC3)|Storm]] || width="97pt" align="center"| [[Super-Skrull (MvC3)|Super-Skrull]] || width="97pt" align="center"| [[Taskmaster (MvC3)|Taskmaster]] || width="97pt" align="center"| [[Thor (MvC3)|Thor]] || width="97pt" align="center"| [[Wolverine (MvC3)|Wolverine]] | |||
|} | |||
</center> | |||
<center> | |||
{| border="0" cellspacing="0" | |||
| width="96pt" align="center"| [[Image:x23face.jpg|link=X-23 (MvC3)]] | |||
|} | |||
</center> | |||
<center> | |||
{| border="0" cellspacing="0" | |||
| width="97pt" align="center"| [[X-23 (MvC3)|X-23]] | |||
|} | |||
</center> | |||
</td> | |||
=== | <td> | ||
<center> | |||
{| border="0" cellspacing="0" | |||
| width="96pt" align="center"| [[Image:capcom-logo.jpg]] | |||
|} | |||
</center> | |||
<center> | |||
{| border="0" cellspacing="0" | |||
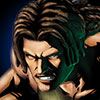
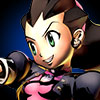
| width="96pt" align="center"| [[Image:akumaface.jpg|link=Akuma (MvC3)]] || width="96pt" align="center"| [[Image:amaterasuface.jpg|link=Amaterasu (MvC3)]] || width="96pt" align="center"| [[Image:arthurface.jpg|link=Arthur (MvC3)]] || width="96pt" align="center"| [[Image:chrisface.jpg|link=Chris Redfield (MvC3)]] || width="96pt" align="center"| [[Image:chunliface.jpg|link=Chun-Li (MvC3)]] || width="96pt" align="center"| [[Image:danteface.jpg|link=Dante (MvC3)]] | |||
|} | |||
</ | </center> | ||
<center> | |||
{| border="0" cellspacing="0" | |||
| width="97pt" align="center"| [[Akuma (MvC3)|Akuma]] || width="97pt" align="center"| [[Amaterasu (MvC3)|Amaterasu]] || width="97pt" align="center"| [[Arthur (MvC3)|Arthur]] || width="97pt" align="center"| [[Chris Redfield (MvC3)|Chris Redfield]] || width="97pt" align="center"| [[Chun-Li (MvC3)|Chun-Li]] || width="97pt" align="center"| [[Dante (MvC3)|Dante]] | |||
|} | |||
</center> | |||
<center> | |||
{| border="0" cellspacing="0" | |||
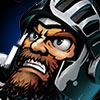
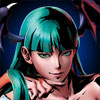
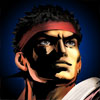
| width="96pt" align="center"| [[Image:feliciaface.jpg|link=Felicia (MvC3)]] || width="96pt" align="center"| [[Image:haggarface.jpg|link=Haggar (MvC3)]] || width="96pt" align="center"| [[Image:hsienkoface.jpg|link=Hsien-Ko (MvC3)]] || width="96pt" align="center"| [[Image:jillface.jpg|link=Jill (MvC3)]] || width="96pt" align="center"| [[Image:morriganface.jpg|link=Morrigan (MvC3)]] || width="96pt" align="center"| [[Image:ryuface.jpg|link=Ryu (MvC3)]] | |||
|} | |||
</center> | |||
</ | <center> | ||
{| border="0" cellspacing="0" | |||
| width="97pt" align="center"| [[Felicia (MvC3)|Felicia]] || width="97pt" align="center"| [[Haggar (MvC3)|Haggar]] || width="97pt" align="center"| [[Hsien-Ko (MvC3)|Hsien-Ko]] || width="97pt" align="center"| [[Jill (MvC3)|Jill]] || width="97pt" align="center"| [[Morrigan (MvC3)|Morrigan]] || width="97pt" align="center"| [[Ryu (MvC3)|Ryu]] | |||
|} | |||
</center> | |||
<center> | |||
{| border="0" cellspacing="0" | |||
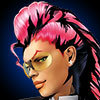
| width="96pt" align="center"| [[Image:spencerface.jpg|link=Spencer (MvC3)]] || width="96pt" align="center"| [[Image:trishface.jpg|link=Trish (MvC3)]] || width="96pt" align="center"| [[Image:tronface.jpg|link=Tron Bonne (MvC3)]] || width="96pt" align="center"| [[Image:vjoeface.jpg|link=Viewtiful Joe (MvC3)]] || width="96pt" align="center"| [[Image:viperface.jpg|link=C. Viper (MvC3)]] || width="96pt" align="center"| [[Image:weskerface.jpg|link=Wesker (MvC3)]] | |||
|} | |||
</center> | |||
<center> | |||
{| border="0" cellspacing="0" | |||
| width="97pt" align="center"| [[Spencer (MvC3)|Spencer]] || width="97pt" align="center"| [[Trish (MvC3)|Trish]] || width="97pt" align="center"| [[Tron Bonne (MvC3)|Tron Bonne]] || width="97pt" align="center"| [[Viewtiful Joe (MvC3)|Viewtiful Joe]] || width="97pt" align="center"| [[C. Viper (MvC3)|C. Viper]] || width="97pt" align="center"| [[Wesker (MvC3)|Wesker]] | |||
|} | |||
</center> | |||
<center> | |||
{| border="0" cellspacing="0" | |||
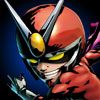
| width="96pt" align="center"| [[Image:zeroface.jpg|link=Zero (MvC3)]] | |||
|} | |||
</center> | |||
<center> | |||
{| border="0" cellspacing="0" | |||
| width="97pt" align="center"| [[Zero (MvC3)|Zero]] | |||
|} | |||
</center> | |||
</tr></table> | |||
==External Links== | ==External Links== | ||
[http://marvelvscapcom3.com Official Website] | [http://marvelvscapcom3.com Official Website] | ||
[http://www.capcom.co.jp/mvsc3/index.html Official Japanese MvC3 Website] | |||
[http://shoryuken.com/f340/ MvC3 Shoryuken.com subforum] | |||
{{Marvel vs Capcom 3}} | {{Marvel vs Capcom 3}} | ||
[[Category: Old MvC3 Pages]] | |||
Latest revision as of 05:46, 3 July 2011

Notation
 - Light Attack
 - Medium Attack
 - Heavy Attack
 - "Exchange" / Special
 - Assist 1
 - Assist 2
 - Any two simultaneous attacks (for Hypers)
 - Can be performed in the air
- DHC - Delayed Hyper Combo
- XFC - X-Factor Cancel
- AD - Airdash
Game Mechanics
HUD
- Life Gauge - When a character takes damage in MvC, he sustains some permanent damage and some recoverable (red) damage. If you tag out your point character, he will slowly regain his red life while on the sidelines. A character is KO'd once his life bar is emptied, whether or not he has red life remaining.
- Guts - This is a defense boost that is automatically triggered when a character is at low health. An attack that takes off a tenth of the opponent's life bar when he's at full health may do noticeably less damage when he's in "Danger" territory. Furthermore, Pixel Rage refers to the way characters seem to not die when they "should" from looking at the bar. More health may be "packed" into the bottom half of the life bar. You should think of the life bar in MvC3 as "offset" somewhat. There's a small amount of life "past" the 0 mark on the bar that you can't see. This primarily is a factor at the end of a long combo where extreme damage scaling has taken effect or in efforts to "chip" someone out with block damage. Capcom has stated that the effect is intentional and isn't going away, and it's presumably in to make the game seem more exciting.
- Hyper Combo Gauge - Hyper Meter is an important part of your management and strategy, being used to power the most useful moves and techniques in the game. In general you gain meter by interacting with your opponent, and you can store up to 5 "stocks" or levels of your meter. Unlike in previous games, intentionally missing ("whiffing") does not give any meter, but gains from successfully attacking are much greater than in previous games. The following things gain meter: Hitting with any move including hyper combos, having attacks blocked (note that this gives far less meter than hitting), being hit by an opponents attacks, and blocking opponents attacks (which again gives far less). In addition, Morrigan's and Amaterasu's Y assists each give a bit more than 1/3 of a bar of meter, and Felicia and Thor have special moves that charge meter over time. You also get a bonus to meter generation for any attacks after an aerial exchange. Hyper meter is used for Hyper Combos, Cross-Over Counters, and Snap Backs, all of which are explained below.
- Timer - If time expires, the team with the most combined life remaining wins the match. One "second" on the game timer is roughly equal to 2 real seconds.
Movement
- Double Jump - Some characters can jump more than once before touching the ground. This is character dependent.
- Super Jump - Pressing down then immediately pressing up will cause your character to super jump. Super jumps can help every character become mobile and escape intense situations. After a launcher, you can hold up to jump the instant after the launch to continue the combo. This is called an SJC (Super Jump Cancel). The main drawback of using super jumps instead of normal or double jumps is that you cannot call an assist after super jumping, though other team-based mechanics (DHC, air exchange) are still at your disposal.
- Dash - Used to move quickly around the screen. The basic inputs to dash are either double-tapping a direction, or two simultaneous attack buttons plus a direction. Two attacks with no direction will dash forward. Dash speed and distance varies from character to character.
- Dash Cancel - You can cancel dashes with attacks or by ducking. Duck cancelling dashes just ends the approach early and is good for approaching the opponent safely and baiting, and attack cancelling is an important part of rushdown. It should be noted that in the current build, Ryu, Dormammu, Chris Redfield, Doctor Doom, and the Hulk cannot cancel dashes. This is a known issue for some characters, but may be intentional for others.
- Wavedash - The act of using multiple dashes in order to cover ground quickly. The best way to do it is tapping two simultaneous attack buttons repeatedly. It is a common misconception that you need to duck cancel (see above) to wavedash as in MvC2, but this isn't true. Dashes automatically cancel into dashes.
- Air Dash - Some characters can dash wile in the air. Like ground dashes, the exact behavior (speed, trajectory, etc.) of air dashes varies between characters who have them.
- 8-Way Dash and Triangle Jump - Some characters with an air dash can dash in 8 directions (up, down, left, right, up-forward, down-forward, up-back, down-back). This ability is known as an 8-Way AD. This further enables the character to employ what is known as a trijump/tridash in which the character can dash down-forward, down, or down-back after jumping, most of the time with an attack after. Some examples of characters in MvC3 with tridashes are Iron Man, Trish, and Morrigan. Tridashing is useful because it allows for very fast overhead attacks. This works because nearly all air normals are overheads and cannot be blocked low. (An air attack that isn't an overhead is the exception rather than the rule; once again, know your character.) If you jump and then dash forward/downforward immediately you can get an almost instant attack that will catch ducking blocks, and can be continued into a combo. They are a very important element of most character's rushdown game.
- Flight -
Attacking
- Chain Combos and Magic Series - The Vs series employs many kinds of chain combos, which allow you to instantly cancel the recovery on one attack and move into another with no delay and very lenient timing. The Magic Series is a specific type of chain combo that allows you to cancel any normal attack into another normal attack of greater strength for an easy combo, provided that the first normal connects with the opponent. The most straightforward example would be >>>. These are general rules, and what will actually work varies from character to character. (For instance, >>> usually won't combo for Viewtiful Joe for range reasons on his launcher, and Thor has to do >> or >> to launch.) You cannot combo into a command normal of lesser strength (such as into
 + ). You can combo any normal into a launcher, special attacks, or hypers. In an air combo, >>>>> seems to work. These rules are general and may not work from character to character. Know the character you're playing and what works!
- Launchers and Air Combos - On the ground, neutral is the universal launcher attack. After hitting with a launcher, hold up or up/forward to automatically super jump and try to continue the combo. While airborne, you can perform chain combos, specials/hypers (character dependent), and air tags, described below.
- Wallbounce - Several characters have attacks that cause the opponent to bounce off of the wall, setting them up for additional combos. Examples include Wesker's B Ghost Butterfly, or his C Jaguar Kick, both of which can be followed up with or without his teleports depending on the situation. Note that you are only permitted one wallbounce per combo. Performing a wallbounce attack a second time in the same combo will not cause a second wallbounce.
- Knockdown, Wakeup, and Off-The-Ground (OTG) Attacks - If you end an air combo with a hard knockdown, the opponent will hit the ground and lay flat on his back for a brief period of time, after which he can roll left or right to safety by simply holding left or right. While he is laying on the ground, however, he is completely open to any attack that can hit OTG, so you can use OTG attacks to continue your combo. Note that only specific attacks are able to hit OTG; again, know your character. Like wallbounces, you are only permitted one OTG attack per combo. Furthermore, it should be noted that if you knock the opponent to the ground from very low altitudes, he will immediately roll backward upon touching the ground (similar in appearance to an MvC2 style tech roll), during which he is completely invulnerable and cannot be hit OTG.
- Throws and Break Away -
- Hyper Combos - This is the name used for super moves in the Versus series, and these require either one or three stocks of meter. Hypers are usually extremely strong attack moves, but there are also "utility" hypers with a variety of effects. In addition, attack hypers can be split into a few loose categories that have slightly different effects. "Normal" hypers do their attack no matter what. They do much more "chip" than any other type, but will not stop on a miss or juggle a dead opponent and can leave you with increased vulnerability in some situations. The classic hypers of this type are probably Iron Man's Proton Cannon or Ryu's Shinkuu Hadouken, both of which shoot giant lasers. "Catch" hypers generally have your character rush towards the enemy and on hit do a "canned" combination (i.e. you cannot control it). These have the advantage of being more cinematic in general, and less vulnerable if you totally miss or kill your opponent in the beginning of the move but can be blocked and do almost no "chip." Most level 3 hypers are of the catch variety; the classic examples are Morrigan's Darkness Illusion and Captain America's Final Justice. The third category is throw hypers. Like the description says, they have the same properties as throws, having extremely short range but generally being unblockable. Otherwise they work like the "catch" hypers. There are very few throw hypers in the game, but Thor, Tron Bonne and M.O.D.O.K. all have one. Finally there are Utility hypers. These do no damage, but have some other useful advantage. The best examples are Wolverine's Berzerker Charge/speed boost, and Morrigan's Astral Vision which makes a copy of her that can hit appear on the opposite side of your opponent.
- Unblockable Attacks -
Team Mechanics
- Assist Selection - Each character has 3 assists you can choose from: α (Alpha), β (Beta), and γ (Gamma). As compared to MvC2, which had labels for the assists such as "anti-air" or "combo extender," in MvC3 the assists have a set of two descriptors: the "type," and the "direction." The type is what kind of attack it is: "direct" means a physical attack, "shot" means a projectile, and "special" means something weird. The direction is straightforward, ranging from "upward" (straight up), "tilt up," "front," to "tilt dw." This can be largely meaningless though, as an assist can be labeled "direct front" and be either a low attack (X-23's ankle cutter or Felicia's rolling buckler) or a projectile antiair attack (Dante's "Jam Session"). Know your assists and pick wisely. Some good assists to start with are the Dr. Doom Y (Molecular shield/"doom rocks") which is good to cover advancing on the enemy, Trish's B "Peekaboo" (air trap), which is a good trap/zoning assist, or Dante's A (Jam session) which is a good AA/combo extender.
- Team Order - During the pre-fight "VS" screen, hold the button to begin the match with your second character or the button to begin with your third character.
- Using Assists - Tap the or button to call the corresponding teammate in to perform their chosen assist attack. There are some rules for assists as well. You cannot call an assist during a special move or a superjump. In addition, during and briefly after an assist you cannot call the other one again (but the other assist is available more rapidly than the one you just used). You also cannot tag in during an assist, with identical lockout rules.
- Dry Tag - This is the act of changing your character out for one of your assists. In the simplest terms, you tag via holding the appropriate assist button ( or ) for a half-second or so. The tag can be buffered to some degree but will not negate the recovery of the move in question, so if you do a hyper combo with a slow recovery while holding the assist button, you will not be automatically protected from a punish. (check!) Tagging a teammate in via this method also eliminates any red life that he has not yet recovered. You can alternatively tag through aerial exchanges, Delayed Hyper Combos (DHC's), and Cross-Counters (all described below), although the last two options take one or more bars of meter to execute. As a general rule, "naked" or random tagging is a very bad idea, so use one of the alternative methods whenever possible.
- Team Air Combos - Also known as Aerial Exchange. In the air, neutral is a knockdown attack, but any directional input plus during an air combo will tag in your next teammate and allow you to continue the combo. The opponent can break out of your team aerial combo by matching your input, however. (Need specifics on the timing for the combo breaker and whatnot.) Tagging your teammate in via preserves any of his/her red life that has not yet been recovered.
- Delayed Hyper Combo (DHC) - This is the process in which you cancel one Hyper Combo with another. For example I am using Ryu's Shinkuu Hadouken. If I have another bar of meter I can input the command for my next teammate's hyper and that teammate will immediately switch-in and perform that hyper for extra damage. This can be done a second time to bring in the third member of your team as well. Tagging your teammate in via DHC preserves any of his/her red life that has not yet been recovered. Many use this technique as a safe way to get a character out and get another one in.
- Team Hyper Combo (THC) - These are utilized by hitting both assist buttons at once. Essentially as many people as as you have bars or characters left will come out and do their hyper combos, to a maximum of three. The hyper used in the THC is determined by the assist chosen.
- Cross-Over Counter - If you enter + or while blocking you will tag out your character and permanently bring in the associated character with their chosen assist. This uses one bar of meter. Tagging your teammate in via Cross-Over Counter preserves any of his/her red life that has not yet been recovered.
- Snap Back - Forces out the opponent's point character and brings in one of his teammates determined by the assist button used to perform the technique. This uses one bar of meter and eliminates any red life that the opposing character has not yet recovered.
Misc
- Jump Canceling -
- Advancing Guard (Pushblock) -
- X-Factor - A mechanic new to MvC3 but based on the "Baroque" concept from Tatsunoko vs. Capcom. X-Factor is activated by pressing all four attack buttons at once. When X-Factor is active, your point character regains "red life" at an extremely rapid rate, your character is substantially sped up, and both normal and "chip" damage are greatly increased. In addition, on activation, all of your cooldowns are reset (see XFC below). The potency and duration of X-Factor is dependent on the number of teammates you have remaining. If all 3 of your characters are alive, then you get a level 1 X-Factor. If you're down to your last character, you get a level 3 X-Factor. You can only use it once per round.
- X-Factor Cancel (XFC) - XFC allows X-Factor to be used to its full potential. Executing X-Factor during any point of an attack (normal, special, or hyper) cancels the remainder of that attack's animation and recovery. This leaves you with the opportunity to either get your character out of harm's way or continue with another attack that would not have been able to be comboed without XFC. The damage boost granted during X-Factor can make the damage from XFC combos very potent. Furthermore, you can also activate XFC during blockstun, which allows for "custom alpha counters:" block > XFC > counterattack.
Characters


External Links
Official Japanese MvC3 Website
| Marvel | Captain America • Deadpool • Doctor Doom • Dormammu • Hulk • Iron Man • Magneto • MODOK • Phoenix • Sentinel • She-Hulk • Shuma-Gorath • Spider Man • Storm • Super-Skrull • Taskmaster • Thor • Wolverine • X-23 | |
|---|---|---|
| Capcom | Akuma • Amaterasu • Arthur • Chris Redfield • Chun-Li • Dante • Felicia • Haggar • Hsien-Ko • Jill • Morrigan • Ryu • Spencer • Trish • Tron Bonne • Viewtiful Joe • C. Viper • Wesker • Zero |