m (Fixed typo in boost mode (214C -> 623C)) |
No edit summary |
||
| (14 intermediate revisions by one other user not shown) | |||
| Line 1: | Line 1: | ||
{ | {{Infobox-ABEW | ||
| | |name=AB_Alice!_Name | ||
|image=AB_Alice! | |||
| | |playstyle=Zoner | ||
|dash=Run | |||
| | |backdash=Grounded | ||
|defmod=0.875 | |||
| | |airopts=Double Jump<br>Walljump | ||
|meter=48 | |||
| | |||
| | |||
| | |||
| | |||
}} | }} | ||
| Line 107: | Line 70: | ||
}} | }} | ||
}} | }} | ||
==== Crouching Normals ==== | ==== Crouching Normals ==== | ||
| Line 164: | Line 128: | ||
}} | }} | ||
==== | |||
==== Air Normals ==== | |||
{{MoveData | {{MoveData | ||
|image=AB_Alice!_j.a.png | |image=AB_Alice!_j.a.png | ||
| Line 172: | Line 137: | ||
{{AttackData-AB | {{AttackData-AB | ||
|guard=H | |guard=H | ||
|cancel=B, C, UM, -J- | |cancel=A, B, C, UM, -J- | ||
|damage=6 | |damage=6 | ||
|startup=3 | |startup=3 | ||
| Line 218: | Line 183: | ||
}} | }} | ||
}} | }} | ||
==== Command Normals ==== | ==== Command Normals ==== | ||
| Line 228: | Line 194: | ||
{{AttackData-AB | {{AttackData-AB | ||
|guard=H | |guard=H | ||
|cancel=SP, UM | |cancel=C, SP, UM | ||
|damage=14 | |damage=14 | ||
|startup=21 | |startup=21 | ||
| Line 239: | Line 205: | ||
}} | }} | ||
}} | }} | ||
=== Universal Mechanics === | === Universal Mechanics === | ||
| Line 290: | Line 257: | ||
|active=4 | |active=4 | ||
|recovery=33 | |recovery=33 | ||
|advHit= | |advHit=23 | ||
|advBlock=N/A | |advBlock=N/A | ||
|description=A quick, unblockable point blank attack that stuns grounded opponents. Throw function.<br>236EX can be used to as a followup into a potential full combo in the corner. | |description=A quick, unblockable point blank attack that stuns grounded opponents. Throw function.<br>236EX can be used to as a followup into a potential full combo in the corner. | ||
}} | }} | ||
}} | }} | ||
=== Special Moves === | === Special Moves === | ||
| Line 433: | Line 401: | ||
}} | }} | ||
}} | }} | ||
=== Supers === | === Supers === | ||
| Line 457: | Line 426: | ||
}} | }} | ||
== Boost Mode ( | |||
Skull Swarm: Skull Assist | === Boost Mode (22ABC) === | ||
'''Skull Swarm: Skull Assist''' | |||
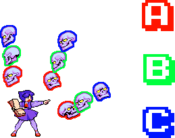
*Four skulls float down from the top of the screen to surround Alice!. | *Four skulls float down from the top of the screen to surround Alice!. | ||
| Line 466: | Line 436: | ||
***Because taunting is disabled during Boost Mode, you can press ABC to send out a skull without attacking. | ***Because taunting is disabled during Boost Mode, you can press ABC to send out a skull without attacking. | ||
*Alice!'s normals all do 2 more points of damage per hit, except j.C, which does 4 more. This damage bonus is | *Alice!'s normals all do 2 more points of damage per hit before combo scaling, except j.C, which does 4 more. This damage bonus is independent of the bonus skulls. | ||
*'''6B''' becomes a vertical launcher, counting towards the 3 launcher cap. | *'''6B''' becomes a vertical launcher, counting towards the 3 launcher cap. | ||
| Line 477: | Line 447: | ||
*'''623X''' now summons three skeletons, with the potential to do two hits each. | *'''623X''' now summons three skeletons, with the potential to do two hits each. | ||
**'''None of the skeletons grant a knockdown anymore''', except the final skeleton of 623C. They effectively act as 623EX skeletons. | **'''None of the skeletons grant a knockdown anymore''', except the final skeleton of 623C. They effectively act as 623EX skeletons. | ||
==Gameplan== | |||
===Neutral=== | |||
This is why you're here. Alice! has quite the array of neutral options, but her tools get to shine most when used to keep the opponent at bay and punishing them for trying to close the gap. Harassment tools in the form of 236X and 623X, pokes with great horizontal reach like 5B, 2B, 2C, j.B and air launcher, a crucial keepaway tool in 214X, and great mobility can all be used for this purpose. Using her complete toolkit will be necessary if you want to keep a savvy opponent where you want them to be. | |||
Arguably the most important tool in her kit, 214X, or Skull Field, lets her summon skulls above and in front of her that stay active for almost a full second. As she lacks a real anti-air move, setting this up when you're safe to do so is important. Which version to use is usually matchup or even situation-dependent, as different characters have different angles they can get through more easily. For example, {{Character Label|Asura Buster: Eternal Warriors|Alice|22px|AB_Alice_CSS.png}} can dash under 214B and 214C, but not under 214A; on the other hand, {{Character Label|Asura Buster: Eternal Warriors|Taros|22px|AB_Taros_CSS.png}} can easily reach you through 214A, but struggles to deal with 214C because of its size. | |||
214X isn't a foolproof way of preventing approaches, however, and you'll find yourself needing to contest your opponent more directly if they know how to deal with it. You can dashblock into skulls to get rid of them, ost of the cast can punish skull set on reaction with a sweep if they're close enough, and a lot of characters can force favorable trades, like {{Character Label|Asura Buster: Eternal Warriors|Goat|22px|AB_Goat_CSS.png}} with his j.C. As such, Alice! will need to use her own buttons to discourage her opponent. 2C is a go-to long-range option to catch opponents standing up or running at you, being a low that knocks down. From the air, Alice!'s air launcher is a force to be reckoned with, able to outrange every air normal in the game thanks to its sheer size and disjointed hitbox. You can rely on it to push people out of your airspace if they're not letting you set up skulls. Moreover, you can rise with j.B, then fall with an air launcher, essentially putting up a wall for most of your air time. | |||
Another issue with playing a neutral game based on 214X is that an opponent with the life lead or with the right projectile, like {{Character Label|Asura Buster: Eternal Warriors|Yashaou|22px|AB_Yashaou_CSS.png}}'s fireball, can easily stay on the other side of the stage and ignore the skulls. That's where her remaining specials come in. 236X can be used as a decent fireball in most matchups, with a few exceptions like opposing Alice(!), who can dash under it, and Yashaou, who can low profile it ''with his own fireball''. Meanwhile, 623X is particularly good at catching opposing attempts at zoning, notably being able to punish or counter-hit every fireball in the game — even low-to-the-ground air fireballs. | |||
However, it is inevitable that projectile-based zoning alone won't net you victory against certain characters and playstyles. That is why you must get moving. Alice! making full use of her movement is Alice! at her best, at her scariest, and at her most ''annoying''. The ability to walljump and double jump is obviously amazing in and of itself, especially in a game where you can airblock nearly anything. As if that weren't enough, Alice! gets to use her oppressive set of air normals, plus her amazing air launcher, while having the ability to cancel any of them ''at any point'' with a double jump, letting her threaten space and still remain safe and cozy. On top of that, she can make use of her low-profile dash to get under an opponent expecting her to take to the air, letting her anti-air them from behind. | |||
Combining all these tools is what makes Alice! particularly hard to catch, hard to beat out, and what makes her such a strong character in Asura Buster. | |||
===Offense=== | |||
On offense, Alice! is on the linear side. She doesn't get any tools tuned for offense; she has no forward-moving moves, no good source of plus frames other than 5A, and no offensive specials. | |||
To open people up, Alice! has to rely on her basic tools to keep her opponents honest. Her B and C normals are quite vulnerable to guard canceling, so using mostly 5A and 2A staggers and mixing in redashes to stay in is your best bet. If you can get enough respect, you can start integrating j.A as a mixup tool, as it is extremely fast and correctly blocking 1-3 of them without getting opened up by the ensuing lows can be made very difficult. A deep enough j.A can also go into a guaranteed guard break! | |||
After a knockdown, you can set up 214A skulls to safely meaty or cover rolls. Otherwise, 2B and 2C are great tools for punishing rolls on wakeup. Still, it's better not to commit too hard to a roll punish if it can put you in a bad position; Alice! rarely regrets going back to neutral. | |||
===Defense=== | |||
As Alice!, defense is where you will struggle the most in the majority of your matchups. While she is less vulnerable to overheads than a lot of the cast thanks to her small size, she lacks good guard cancel options, reversals, or good range for {{Tooltip | text=abare| hovertext=Pressing a button in a defensive situation or when you're at frame disadvantage}}. Still, she has a few tricks at her disposal. | |||
As a character with a double jump and a walljump, the most reliable method of getting out of defensive situations is often to jump out. While there's always a risk of getting caught during prejump frames or by an air unblockable low attack, the lack of high-hitting air unblockable moves in Asura Buster makes upbacking a defensive staple for the entire roster. However, Alice! gets to make particularly good use of it by walljumping or double jumping to safety once she's in a good spot. [[Asura Buster: Eternal Warriors/System#Pushblock|Pushblocking]] prior to jumping makes it especially safe. | |||
If your opponent is committing to pressure, Alice! does have a workable guard cancel option in 623A. While it becomes active pretty slowly, the skeleton is guaranteed to come out after just a few frames, and will become active even if you get hit. This will usually grant Alice! a favorable trade, letting her return to neutral at the cost of some HP. | |||
When in MAX, you can activate [[Asura Buster: Eternal Warriors/Alice!#Boost Mode (22ABC)|Boost Mode]] as a guard cancel option. This will immediately end blockstun and let you react to whatever your opponent was doing, granting you a potential escape opportunity. This isn't a get-out-of-jail-free card, however, because the opponent may still have cancel opportunities or outrange Alice's fastest buttons. The safest option is sending out Boost Mode's skulls by pressing A during blockstun or pressing ABC to send one out while remaining fully actionable, letting you interrupt the opponent easily. | |||
If you think mashing is necessary, Alice!'s fastest abare option is actually ''rising j.A'' (1 frame of prejump + 3 frames of startup, vs 5 frames of startup for your ground A normals). Using rising j.A defensively has the additional benefits of moving her forward and doubles as an instant overhead that can hit a crouch-blocking opponent trying to bait a guard cancel. | |||
==Combos== | |||
===Combo Theory=== | |||
Alice! has a simple combo game. There are two main things to keep in mind: | |||
* Additional A normals at the start of a combo will '''always''' reduce damage. | |||
* 2B can be interchanged with 5B at your convenience, but note that 5B whiffs crouching Alice(!). | |||
===BnBs=== | |||
{| class="wikitable" width="80%" border="1em" cellpadding="3" cellspacing="0" | |||
| align="center" width="55%" style="background:#858585;color:black;"|'''Combo''' | |||
| align="center" width="5%"style="background:#858585;color:black;"|'''Dmg''' | |||
| align="center" width="35%"style="background:#858585;color:black;"|'''Notes''' | |||
| align="center" width="5%"style="background:#858585;color:black;"|'''Video''' | |||
|- | |||
|2A > 2B > 2C | |||
|32 | |||
|Basic confirm into sweep. | |||
|- | |||
|2A > 2B > 5AB, j.B > j.AB, j.B > j.C | |||
|43 | |||
|Meterless BnB. Works anywhere, but will require a very fast rising j.B if done in the corner.<br> | |||
j.C ender can be swapped out for another air launcher (j.AB) to get better frame advantage at the cost of damage. | |||
|[https://www.youtube.com/watch?v=v73iVtmBoLc Link] | |||
|- | |||
|} | |||
===Guard Break / Overhead Confirms=== | |||
'''22C will not properly combo into 236AB and 623AB if Alice! is cornered''', as she won't get pushed back far enough for the projectile to connect.<br> | |||
All instances of '''236AB, j.B > j.AB''' in this section can be replaced with '''623AB, walk > j.AB''' midscreen for more damage. 623AB will not connect properly if her opponent is in the corner. These combos are tighter to execute, especially for rejump routes. | |||
All damage values are taken from a 22C starter. | |||
{| class="wikitable" width="80%" border="1em" cellpadding="3" cellspacing="0" | |||
| align="center" width="55%" style="background:#858585;color:black;"|'''Combo''' | |||
| align="center" width="5%"style="background:#858585;color:black;"|'''Dmg''' | |||
| align="center" width="35%"style="background:#858585;color:black;"|'''Notes''' | |||
| align="center" width="5%"style="background:#858585;color:black;"|'''Video''' | |||
|- | |||
|22C/6B, 236AB, j.B > j.AB, land > j.B > j.AB, land > j.B > j.C | |||
|44 | |||
|Basic metered confirm from guard break. Doesn't work off of 22C if you're cornered. | |||
|[https://www.youtube.com/watch?v=YFmmb4pxGCU Link] | |||
|- | |||
|22C/6B, 236AB, j.B > j.AB, land > 5AB, j.A×3 > double jump > j.A×3 > j.B > j.AB | |||
|48 | |||
|More advanced version. Doesn't work off of 22C if you're cornered. | |||
|[https://www.youtube.com/watch?v=YFmmb4pxGCU&t=9s Link] | |||
|- | |||
|22C/6B, 236AB, j.B > j.AB, j.A, delay j.A×2 > j.B, land > 5A > 5AB, j.A×3 > double jump > j.A×3 > j.B > j.AB | |||
|53 | |||
|Rejump route off of guard break. Doesn't work off of 22C if you're cornered. | |||
|[https://www.youtube.com/watch?v=YFmmb4pxGCU&t=18s Link] | |||
|- | |||
|22C/6B, 236AB, j.B > j.AB, j.A, delay j.A×2 > j.B, land > 5A > 5AB, j.A, delay j.A×2 > j.B, land > j.A×3 > double jump > j.A×3 > j.B > j.AB | |||
|57 | |||
|Optimized metered confirm from guard break. Requires two rejumps. Doesn't work off of 22C if you're cornered. | |||
|[https://www.youtube.com/watch?v=YFmmb4pxGCU&t=29s Link] | |||
|- | |||
|} | |||
==Color Palettes== | ==Color Palettes== | ||
<br> | <br> | ||
[[File:AB_Palettes_Alice!.png|none| | [[File:AB_Palettes_Alice!.png|none|402px]] | ||
<br> | <br> | ||
Latest revision as of 16:43, 14 May 2024
Alice! (referred to as Alice Blade in Japan, sometimes known as Hidden or Secret Alice) is a character ported from the previous game in the series, Asura Blade: Sword of Dynasty. She is a young girl wielding a special book that gives her control over the undead.
Alice is a young necromancer and the daughter of a prestigious king. She seeks to discover the secret of immortality. Alice believes that the Sword of Dynasty can help with her current research and thus, she goes on a journey to find it from within her own time.
Alice!'s storyline in Asura Buster implies that she somehow time traveled three years into the future after the events of the first game and managed to get herself involved with the mystery of the lost continent.
Alice! is a port of the original Alice from Asura Blade, who played very differently from this game's version. Her kit was polished and buffed up, making her ready to take on the world.
How to select Alice!
Alice! is a secret character, unlocked after playing a single match against another player. To select her on the first match, highlight, then press Start on: Yashaou > Goat > Rose Mary > Taros > Zam-B. She then takes the spot of the upper random slot in the character selection screen.
OverviewAlice! is a strong zoner with a simple gameplan and good mobility. |
|
| Pros | Cons |
|
|
| Play Style | Zoner |
| Dash Type | Run |
| Backdash Type | Grounded |
| Defense Modifier | 0.875 |
| Air Options | Double Jump Walljump |
| Meter Gauge | 48 |
Movelist
Normals
Standing Normals
| Damage | Startup | Active | Recovery | Guard | Cancel | Adv. Hit | Adv. Block | |
|---|---|---|---|---|---|---|---|---|
| 6 | 5 | 5 | 6 | M | -A-, -B-, -C-, -SP-, -UM- | 2 | 1 | |
|
Quick chop. More range than 2A. | ||||||||
| Damage | Startup | Active | Recovery | Guard | Cancel | Adv. Hit | Adv. Block | |
|---|---|---|---|---|---|---|---|---|
| 16 | 8 | 10 | 25 | M | C, SP, UM | -18 | -19 | |
|
Alice! summons a skeleton who slashes in front of her. Strong poke. Farther hitbox gets low profiled by crouching Alice(!). | ||||||||
| Damage | Startup | Active | Recovery | Guard | Cancel | Adv. Hit | Adv. Block | |
|---|---|---|---|---|---|---|---|---|
| 12, 12, 14 (29) | 9 | 4 (9) 4 (11) 6 | 12 | M, M, H | - | Knockdown | +4 | |
|
Summons a skeleton who performs a 3-hit combo ending with an overhead slash. The third and last hit causes a sliding knockdown. | ||||||||
Crouching Normals
| Damage | Startup | Active | Recovery | Guard | Cancel | Adv. Hit | Adv. Block | |
|---|---|---|---|---|---|---|---|---|
| 6 | 5 | 6 | 9 | L | -A-, -B-, -C-, -SP-, -UM- | -2 | -3 | |
|
Quick low slap. Very little reach. Has a great cancel window, but is significantly worse on block than 5A. | ||||||||
| Damage | Startup | Active | Recovery | Guard | Cancel | Adv. Hit | Adv. Block | |
|---|---|---|---|---|---|---|---|---|
| 16 | 8 | 7 | 18 | L | C, SP, UM | -8 | -9 | |
|
Alice summons a zombie that shoots daggers out of its body. Has an amazing cancel window and cannot get low profiled, making it the superior B normal to use in pressure. | ||||||||
| Damage | Startup | Active | Recovery | Guard | Cancel | Adv. Hit | Adv. Block | |
|---|---|---|---|---|---|---|---|---|
| 22 | 10 | 11 | 20 | L | - | Knockdown | -9 | |
|
Summons a skeleton that performs a long-ranged low slice with two daggers. Knocks down. | ||||||||
Air Normals
| Damage | Startup | Active | Recovery | Guard | Cancel | Adv. Hit | Adv. Block | |
|---|---|---|---|---|---|---|---|---|
| 6 | 3 | 5 | 5 | H | A, B, C, UM, -J- | N/A | N/A | |
|
Alice! swipes with her book at inhuman speed. | ||||||||
| Damage | Startup | Active | Recovery | Guard | Cancel | Adv. Hit | Adv. Block | |
|---|---|---|---|---|---|---|---|---|
| 16 | 7 | 9 | 7 | H | C, UM, -J- | N/A | N/A | |
|
Shoots a skull out of her hand. | ||||||||
| Damage | Startup | Active | Recovery | Guard | Cancel | Adv. Hit | Adv. Block | |
|---|---|---|---|---|---|---|---|---|
| 28 | 7 | 7 | 14 | H | -J- | Knockdown | N/A | |
|
Summons an armored skeleton who performs a downwards slash. | ||||||||
Command Normals
| Damage | Startup | Active | Recovery | Guard | Cancel | Adv. Hit | Adv. Block | |
|---|---|---|---|---|---|---|---|---|
| 14 | 21 | 4 | 27 | H | C, SP, UM | -2 | -15 | |
|
Overhead book smash. Very little range. | ||||||||
Universal Mechanics
| Damage | Startup | Active | Recovery | Guard | Cancel | Adv. Hit | Adv. Block | |
|---|---|---|---|---|---|---|---|---|
| 5 | 6 | 4 | 21 | M | - | Launches | -3 | |
|
Summons a skeleton holding a zombie, who quickly rips it apart and swings its upper body forward. | ||||||||
| Damage | Startup | Active | Recovery | Guard | Cancel | Adv. Hit | Adv. Block | |
|---|---|---|---|---|---|---|---|---|
| 5 | 6 | 13 | 25 | M | -J- | Launches | N/A | |
|
Alice! shoots out a flaming bone construct from her hand. | ||||||||
| Damage | Startup | Active | Recovery | Guard | Cancel | Adv. Hit | Adv. Block | |
|---|---|---|---|---|---|---|---|---|
| 1, 1 (2) | 5 | 4 | 33 | U | - | 23 | N/A | |
|
A quick, unblockable point blank attack that stuns grounded opponents. Throw function. | ||||||||
Special Moves
| Version | Damage | Startup | Active | Recovery | Guard | Cancel | Adv. Hit | Adv. Block |
|---|---|---|---|---|---|---|---|---|
| A/B/C | 16 | 18 | - | 21 | M | - | Knockdown | 0 |
|
Alice! summons a skeleton that shoots its own head. Be careful using this in neutral against some characters, as it can be easily low profiled.
Having a launcher hitbox out while the skull connects with the opponent will make the skull itself act as a launcher. | ||||||||
| Version | Damage | Startup | Active | Recovery | Guard | Cancel | Adv. Hit | Adv. Block |
| EX (any two buttons) | 16*5 (53) | 18 | - | 21 | M | - | Launcher | 4 |
|
EX version is the fastest, has 5 hits and launches vertically. Excellent damage and can be confirmed into an air combo if you're close. Does not count towards the 3 launcher cap in a combo. | ||||||||
| Version | Damage | Startup | Active | Recovery | Guard | Cancel | Adv. Hit | Adv. Block |
|---|---|---|---|---|---|---|---|---|
| A | 20 | 16 | 11 | 9 | M | - | Knockdown | 2 |
| Version | Damage | Startup | Active | Recovery | Guard | Cancel | Adv. Hit | Adv. Block |
| B | 20 | 19 | 10 | 7 | M | - | Knockdown | 5 |
| Version | Damage | Startup | Active | Recovery | Guard | Cancel | Adv. Hit | Adv. Block |
| C | 20 | 21 | 10 | 7 | M | - | Knockdown | 5 |
|
Alice! summons an uppercutting skeleton from the ground. | ||||||||
| Version | Damage | Startup | Active | Recovery | Guard | Cancel | Adv. Hit | Adv. Block |
| EX (any two buttons) | 20 per hit | 14 / 19 / 24 / 33 / 35 | 9* | 14* | M | - | Launcher | 12 ~ 29 |
|
EX version summons up to 5 skeletons that appear in a row, one after the other in rapid succession. If the edge of the screen is reached, the remaining skeletons will not appear. Each skeleton can hit twice, but whether they do or not depends on very specific spacing. Last hit is a vertical launcher. | ||||||||
| Version | Damage | Startup | Active | Recovery | Guard | Cancel | Adv. Hit | Adv. Block |
|---|---|---|---|---|---|---|---|---|
| A | 1 / 16 | 18 / 21 / 24 | 58 | 23 | M | - | Knockdown | 0~5 |
| Version | Damage | Startup | Active | Recovery | Guard | Cancel | Adv. Hit | Adv. Block |
| B | 1 / 16 | 18 / 21 / 24 | 58 | 23 | M | - | Knockdown | 0~5 |
| Version | Damage | Startup | Active | Recovery | Guard | Cancel | Adv. Hit | Adv. Block |
| C | 1 / 16 | 18 / 21 / 24 | 58 | 24 | M | - | Knockdown | 0~5 |
|
Alice! summons 3 skulls in a pattern around her. Inarguably one of the best neutral tools in the game. This move's damage value is glitched, doing a single point of damage if the opponent gets hit on the first active frame of a skull. | ||||||||
| Version | Damage | Startup | Active | Recovery | Guard | Cancel | Adv. Hit | Adv. Block |
| EX | 1 / 16 | 19 | 57 | 23 | M | - | Knockdown | -1 ~ 9 |
|
Alice! summons 10 skulls in a huge triangle pattern covering above and in front of her. Extremely strong defensive EX move. This move is also affected by the first active frame damage glitch. | ||||||||
Supers
| Damage | Startup | Active | Recovery | Guard | Cancel | Adv. Hit | Adv. Block | |
|---|---|---|---|---|---|---|---|---|
| 16 (skull) 4 (debris) |
1 (1+0) | 120 | 25 | M | - | Knockdown | Inconsistent but very + | |
|
A huge skull drops into the center of the screen and explodes into several pieces. Very strong as the defender in Last Stand situations, as you can cover the screen with multiple supers' worth of debris without waiting for the previous pieces to disappear. | ||||||||
Boost Mode (22ABC)
Skull Swarm: Skull Assist
- Four skulls float down from the top of the screen to surround Alice!.
- Any time you press the A button, be it to attack or not, a skull will float out a small distance, active for 17 frames and dealing 2 damage if it hits.
- Unfortunately, Alice!'s meter is so small that the boost mode is half-over by the time the skulls reach her.
- j.B also sends a skull out. This skull hits overhead.
- Because taunting is disabled during Boost Mode, you can press ABC to send out a skull without attacking.
- Any time you press the A button, be it to attack or not, a skull will float out a small distance, active for 17 frames and dealing 2 damage if it hits.
- Alice!'s normals all do 2 more points of damage per hit before combo scaling, except j.C, which does 4 more. This damage bonus is independent of the bonus skulls.
- 6B becomes a vertical launcher, counting towards the 3 launcher cap.
- 214X now summons skulls in a different pattern:
- 214A summons 4 skulls in a triangular pattern (with one in the center) above and in front of Alice!
- 214B summons a bigger version of that same pattern; still 4 skulls, but more spread out.
- 214C summons 7 skulls in a hexagonal pattern (with one in the center) above and in front of Alice!
- 623X now summons three skeletons, with the potential to do two hits each.
- None of the skeletons grant a knockdown anymore, except the final skeleton of 623C. They effectively act as 623EX skeletons.
Gameplan
Neutral
This is why you're here. Alice! has quite the array of neutral options, but her tools get to shine most when used to keep the opponent at bay and punishing them for trying to close the gap. Harassment tools in the form of 236X and 623X, pokes with great horizontal reach like 5B, 2B, 2C, j.B and air launcher, a crucial keepaway tool in 214X, and great mobility can all be used for this purpose. Using her complete toolkit will be necessary if you want to keep a savvy opponent where you want them to be.
Arguably the most important tool in her kit, 214X, or Skull Field, lets her summon skulls above and in front of her that stay active for almost a full second. As she lacks a real anti-air move, setting this up when you're safe to do so is important. Which version to use is usually matchup or even situation-dependent, as different characters have different angles they can get through more easily. For example, ![]() Alice can dash under 214B and 214C, but not under 214A; on the other hand,
Alice can dash under 214B and 214C, but not under 214A; on the other hand, ![]() Taros can easily reach you through 214A, but struggles to deal with 214C because of its size.
Taros can easily reach you through 214A, but struggles to deal with 214C because of its size.
214X isn't a foolproof way of preventing approaches, however, and you'll find yourself needing to contest your opponent more directly if they know how to deal with it. You can dashblock into skulls to get rid of them, ost of the cast can punish skull set on reaction with a sweep if they're close enough, and a lot of characters can force favorable trades, like ![]() Goat with his j.C. As such, Alice! will need to use her own buttons to discourage her opponent. 2C is a go-to long-range option to catch opponents standing up or running at you, being a low that knocks down. From the air, Alice!'s air launcher is a force to be reckoned with, able to outrange every air normal in the game thanks to its sheer size and disjointed hitbox. You can rely on it to push people out of your airspace if they're not letting you set up skulls. Moreover, you can rise with j.B, then fall with an air launcher, essentially putting up a wall for most of your air time.
Goat with his j.C. As such, Alice! will need to use her own buttons to discourage her opponent. 2C is a go-to long-range option to catch opponents standing up or running at you, being a low that knocks down. From the air, Alice!'s air launcher is a force to be reckoned with, able to outrange every air normal in the game thanks to its sheer size and disjointed hitbox. You can rely on it to push people out of your airspace if they're not letting you set up skulls. Moreover, you can rise with j.B, then fall with an air launcher, essentially putting up a wall for most of your air time.
Another issue with playing a neutral game based on 214X is that an opponent with the life lead or with the right projectile, like ![]() Yashaou's fireball, can easily stay on the other side of the stage and ignore the skulls. That's where her remaining specials come in. 236X can be used as a decent fireball in most matchups, with a few exceptions like opposing Alice(!), who can dash under it, and Yashaou, who can low profile it with his own fireball. Meanwhile, 623X is particularly good at catching opposing attempts at zoning, notably being able to punish or counter-hit every fireball in the game — even low-to-the-ground air fireballs.
Yashaou's fireball, can easily stay on the other side of the stage and ignore the skulls. That's where her remaining specials come in. 236X can be used as a decent fireball in most matchups, with a few exceptions like opposing Alice(!), who can dash under it, and Yashaou, who can low profile it with his own fireball. Meanwhile, 623X is particularly good at catching opposing attempts at zoning, notably being able to punish or counter-hit every fireball in the game — even low-to-the-ground air fireballs.
However, it is inevitable that projectile-based zoning alone won't net you victory against certain characters and playstyles. That is why you must get moving. Alice! making full use of her movement is Alice! at her best, at her scariest, and at her most annoying. The ability to walljump and double jump is obviously amazing in and of itself, especially in a game where you can airblock nearly anything. As if that weren't enough, Alice! gets to use her oppressive set of air normals, plus her amazing air launcher, while having the ability to cancel any of them at any point with a double jump, letting her threaten space and still remain safe and cozy. On top of that, she can make use of her low-profile dash to get under an opponent expecting her to take to the air, letting her anti-air them from behind.
Combining all these tools is what makes Alice! particularly hard to catch, hard to beat out, and what makes her such a strong character in Asura Buster.
Offense
On offense, Alice! is on the linear side. She doesn't get any tools tuned for offense; she has no forward-moving moves, no good source of plus frames other than 5A, and no offensive specials.
To open people up, Alice! has to rely on her basic tools to keep her opponents honest. Her B and C normals are quite vulnerable to guard canceling, so using mostly 5A and 2A staggers and mixing in redashes to stay in is your best bet. If you can get enough respect, you can start integrating j.A as a mixup tool, as it is extremely fast and correctly blocking 1-3 of them without getting opened up by the ensuing lows can be made very difficult. A deep enough j.A can also go into a guaranteed guard break!
After a knockdown, you can set up 214A skulls to safely meaty or cover rolls. Otherwise, 2B and 2C are great tools for punishing rolls on wakeup. Still, it's better not to commit too hard to a roll punish if it can put you in a bad position; Alice! rarely regrets going back to neutral.
Defense
As Alice!, defense is where you will struggle the most in the majority of your matchups. While she is less vulnerable to overheads than a lot of the cast thanks to her small size, she lacks good guard cancel options, reversals, or good range for abare. Still, she has a few tricks at her disposal.
As a character with a double jump and a walljump, the most reliable method of getting out of defensive situations is often to jump out. While there's always a risk of getting caught during prejump frames or by an air unblockable low attack, the lack of high-hitting air unblockable moves in Asura Buster makes upbacking a defensive staple for the entire roster. However, Alice! gets to make particularly good use of it by walljumping or double jumping to safety once she's in a good spot. Pushblocking prior to jumping makes it especially safe.
If your opponent is committing to pressure, Alice! does have a workable guard cancel option in 623A. While it becomes active pretty slowly, the skeleton is guaranteed to come out after just a few frames, and will become active even if you get hit. This will usually grant Alice! a favorable trade, letting her return to neutral at the cost of some HP.
When in MAX, you can activate Boost Mode as a guard cancel option. This will immediately end blockstun and let you react to whatever your opponent was doing, granting you a potential escape opportunity. This isn't a get-out-of-jail-free card, however, because the opponent may still have cancel opportunities or outrange Alice's fastest buttons. The safest option is sending out Boost Mode's skulls by pressing A during blockstun or pressing ABC to send one out while remaining fully actionable, letting you interrupt the opponent easily.
If you think mashing is necessary, Alice!'s fastest abare option is actually rising j.A (1 frame of prejump + 3 frames of startup, vs 5 frames of startup for your ground A normals). Using rising j.A defensively has the additional benefits of moving her forward and doubles as an instant overhead that can hit a crouch-blocking opponent trying to bait a guard cancel.
Combos
Combo Theory
Alice! has a simple combo game. There are two main things to keep in mind:
- Additional A normals at the start of a combo will always reduce damage.
- 2B can be interchanged with 5B at your convenience, but note that 5B whiffs crouching Alice(!).
BnBs
| Combo | Dmg | Notes | Video |
| 2A > 2B > 2C | 32 | Basic confirm into sweep. | |
| 2A > 2B > 5AB, j.B > j.AB, j.B > j.C | 43 | Meterless BnB. Works anywhere, but will require a very fast rising j.B if done in the corner. j.C ender can be swapped out for another air launcher (j.AB) to get better frame advantage at the cost of damage. |
Link |
Guard Break / Overhead Confirms
22C will not properly combo into 236AB and 623AB if Alice! is cornered, as she won't get pushed back far enough for the projectile to connect.
All instances of 236AB, j.B > j.AB in this section can be replaced with 623AB, walk > j.AB midscreen for more damage. 623AB will not connect properly if her opponent is in the corner. These combos are tighter to execute, especially for rejump routes.
All damage values are taken from a 22C starter.
| Combo | Dmg | Notes | Video |
| 22C/6B, 236AB, j.B > j.AB, land > j.B > j.AB, land > j.B > j.C | 44 | Basic metered confirm from guard break. Doesn't work off of 22C if you're cornered. | Link |
| 22C/6B, 236AB, j.B > j.AB, land > 5AB, j.A×3 > double jump > j.A×3 > j.B > j.AB | 48 | More advanced version. Doesn't work off of 22C if you're cornered. | Link |
| 22C/6B, 236AB, j.B > j.AB, j.A, delay j.A×2 > j.B, land > 5A > 5AB, j.A×3 > double jump > j.A×3 > j.B > j.AB | 53 | Rejump route off of guard break. Doesn't work off of 22C if you're cornered. | Link |
| 22C/6B, 236AB, j.B > j.AB, j.A, delay j.A×2 > j.B, land > 5A > 5AB, j.A, delay j.A×2 > j.B, land > j.A×3 > double jump > j.A×3 > j.B > j.AB | 57 | Optimized metered confirm from guard break. Requires two rejumps. Doesn't work off of 22C if you're cornered. | Link |
Color Palettes


