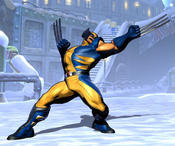
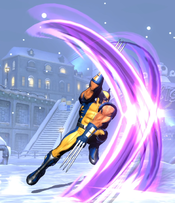
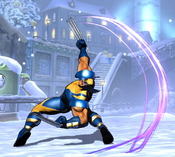
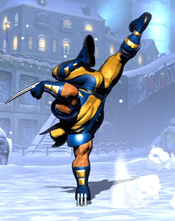
(Reworked page using new layout. Added frame data to movelist, some common synergies and their players, and some sample combos. (1/50 reworked)) |
|||
| (21 intermediate revisions by 6 users not shown) | |||
| Line 1: | Line 1: | ||
{{ | <div style="display: flex; flex-wrap:wrap-reverse;"> | ||
|name=Wolverine | <div style="display: flex;flex-direction: column;flex:5;min-width:300px;padding: 10px;"> | ||
{{Character Subnav UMVC3|name=Wolverine}} | |||
==Introduction== | ==Introduction== | ||
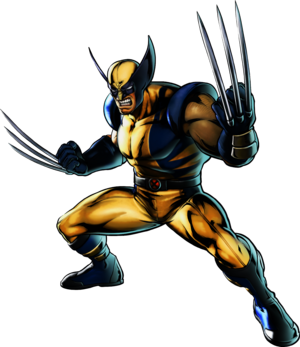
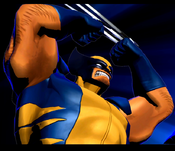
A mutant and member of the X-Men, Wolverine's power gives him immense capability for regeneration, also known as a Healing Factor. Far more iconic, however, is the adamantium skeleton grafted into his body as part of the Weapon X project, including three retractable claws on each hand. | A mutant and member of the X-Men, Wolverine's power gives him immense capability for regeneration, also known as a Healing Factor. Far more iconic, however, is the adamantium skeleton grafted into his body as part of the Weapon X project, including three retractable claws on each hand. | ||
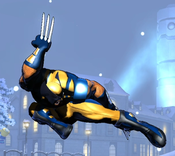
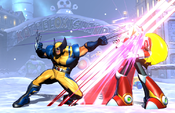
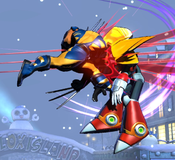
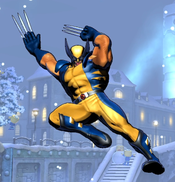
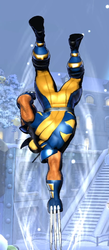
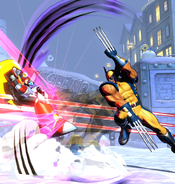
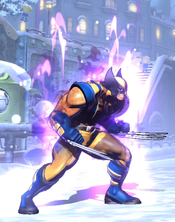
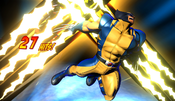
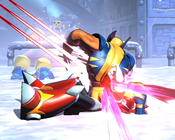
In UMvC3, Wolverine is a high-speed, momentum-focused rushdown character. While lacking long-ranged attacks or projectiles of any kind, he can quickly close in with his fast ground dash and aerial divekick. Once there, he has no shortage of tools to open an opponent's defense with cross-ups, instant overheads, and hit/throw mixups. | '''In UMvC3''', Wolverine is a high-speed, momentum-focused rushdown character. While lacking long-ranged attacks or projectiles of any kind, he can quickly close in with his fast ground dash and aerial divekick. Once there, he has no shortage of tools to open an opponent's defense with cross-ups, instant overheads, and hit/throw mixups. | ||
{{ProConTable | {{ProConTable | ||
| pros = | | pros = | ||
*Very strong mixup potential via crossup Berserker Slash, instant overhead j.5L, and strong throw game through OS Divekick | *'''Extremely Powerful Mixups:''' Very strong & efficient mixup potential via crossup Berserker Slash, instant overhead j.5L, and strong throw game through OS Divekick. | ||
*Exceptional grounded dash speed | *'''Exceptional Mobility: ''' Incredibly fast grounded dash speed and movement. | ||
*Has very practical routes for converting stray air hits into a standard combo | *'''Versatile Conversions:''' Has very practical routes for converting stray air hits into a standard combo. | ||
*'''Great Normals:''' Wolverine's normals open up for strong mixup combos and can easily string into forward specials, such as Berserker Barrage. (SWISS CHEESE!) | |||
| cons = | | cons = | ||
*Virtually no projectile game and limited aerial movement makes it hard for him to approach zoners | *'''Limited Zoning & Aerial Movement:''' Virtually no projectile game and limited aerial movement makes it hard for him to approach zoners. | ||
* | *'''Weak Synergy:''' Wolverine has poor assists and mostly awkward DHC options. | ||
*Needs assist support or X- | *'''Requires Support:''' Needs assist support or X-Factor to convert his strongest mixup options. | ||
*'''Swiss Cheese:''' Berserker Rage (more commonly referred to as 'Swiss Cheese' is a move purposely made bad that was given to Wolverine in UMvC3 to discourage players from mashing. | |||
}} | }} | ||
</div> | |||
<div style="display: flex;flex-direction: column;flex:2;min-width:350px;padding: 10px;">{{UMVC3_Character_Query|reversals=236XX, 623XX}}</div></div> | |||
== Move List == | == Move List == | ||
| Line 46: | Line 28: | ||
{{MoveData | {{MoveData | ||
|image= | |image=UMVC3_Wolverine_623L.png | ||
|caption= | |caption= | ||
|name=Tornado Claw | |name=Tornado Claw | ||
| Line 59: | Line 41: | ||
|onhit=- | |onhit=- | ||
|onblock=- | |onblock=- | ||
|properties= | |properties=Invuln (as Crossover Counter) frames 1 - ???, Fixed Hitstun | ||
|description= | |description= | ||
THC Hyper: Fatal Claw. Has no invulnerability despite the DP-esque appearance (neither does the non-assist version). Since Wolverine's assists are quite poor no matter what, it may be worth taking this assist just for the more damaging THC Hyper. | THC Hyper: Fatal Claw. Has no invulnerability despite the DP-esque appearance (neither does the non-assist version). Since Wolverine's assists are quite poor no matter what, it may be worth taking this assist just for the more damaging THC Hyper. | ||
| Line 66: | Line 48: | ||
{{MoveData | {{MoveData | ||
|image= | |image=UMVC3_Wolverine_214X_Dash.png | ||
|caption= | |caption= | ||
|name=Berserker Slash | |name=Berserker Slash | ||
| Line 86: | Line 68: | ||
{{MoveData | {{MoveData | ||
|image= | |image=UMVC3_Wolverine_236X.png | ||
|caption= | |caption= | ||
|name=Berserker Barrage | |name=Berserker Barrage | ||
| Line 108: | Line 90: | ||
{{MoveData | {{MoveData | ||
|image= | |image=UMVC3_Wolverine_5L.png | ||
|caption= | |caption= | ||
|name=Stand Light | |name=Stand Light | ||
| Line 128: | Line 110: | ||
{{MoveData | {{MoveData | ||
|image= | |image=UMVC3_Wolverine_5M.png | ||
|caption= | |caption= | ||
|name=Stand Medium | |name=Stand Medium | ||
| Line 148: | Line 130: | ||
{{MoveData | {{MoveData | ||
|image= | |image=UMVC3_Wolverine_5H.png | ||
|caption= | |caption= | ||
|name=Stand Heavy | |name=Stand Heavy | ||
| Line 169: | Line 151: | ||
{{MoveData | {{MoveData | ||
|image= | |image=UMVC3_Wolverine_2L.png | ||
|caption= | |caption= | ||
|name=Crouching Light | |name=Crouching Light | ||
| Line 189: | Line 171: | ||
{{MoveData | {{MoveData | ||
|image= | |image=UMVC3_Wolverine_2M.png | ||
|caption= | |caption= | ||
|name=Crouching Medium | |name=Crouching Medium | ||
| Line 204: | Line 186: | ||
|properties={{strk}} | |properties={{strk}} | ||
|description= | |description= | ||
Good anti-air attack (although the upward-angled part of the attack is not active right away). This button is also very strong for | Good anti-air attack (although the upward-angled part of the attack is not active right away). This button is also very strong for bare purposes: If you are crouch blocking and mash L+M pushblock, this button will come out during gaps. It is quite fast when used this way and, on hit, forces an air recovery that gives you time to reset to neutral or steal momentum. | ||
}} | }} | ||
}} | }} | ||
{{MoveData | {{MoveData | ||
|image= | |image=UMVC3_Wolverine_2H.png | ||
|caption= | |caption= | ||
|name=Crouching Heavy | |name=Crouching Heavy | ||
| Line 229: | Line 211: | ||
{{MoveData | {{MoveData | ||
|image= | |image=UMVC3_Wolverine_5S.png | ||
|caption= | |caption= | ||
|name=Launcher/Special | |name=Launcher/Special | ||
| Line 251: | Line 233: | ||
{{MoveData | {{MoveData | ||
|image= | |image=UMVC3_Wolverine_jL.png | ||
|caption= | |caption= | ||
|name=Jumping Light | |name=Jumping Light | ||
| Line 271: | Line 253: | ||
{{MoveData | {{MoveData | ||
|image= | |image=UMVC3_Wolverine_jM.png | ||
|caption= | |caption= | ||
|name=Jumping Medium | |name=Jumping Medium | ||
| Line 291: | Line 273: | ||
{{MoveData | {{MoveData | ||
|image= | |image=UMVC3_Wolverine_jH.png | ||
|caption= | |caption= | ||
|name=Jumping Heavy | |name=Jumping Heavy | ||
| Line 311: | Line 293: | ||
{{MoveData | {{MoveData | ||
|image= | |image=UMVC3_Wolverine_jS.png | ||
|caption= | |caption= | ||
|name=Jumping Special | |name=Jumping Special | ||
| Line 333: | Line 315: | ||
{{MoveData | {{MoveData | ||
|image= | |image=UMVC3_Wolverine_LML.png | ||
|caption= | |caption= | ||
|name=Cross Slash | |name=Cross Slash | ||
| Line 339: | Line 321: | ||
|data= | |data= | ||
{{AttackData-UMVC3 | {{AttackData-UMVC3 | ||
|damage= | |damage=60,000 | ||
|guard=Mid | |guard=Mid | ||
|startup=3/3 | |startup=3/3 | ||
| Line 346: | Line 328: | ||
|onhit=0/+4 | |onhit=0/+4 | ||
|onblock=-2/+2 | |onblock=-2/+2 | ||
|properties= | |properties=scales by 0.8 | ||
|description= | |description= | ||
5M > 5L chain unique to Wolverine. On hit or block, it pulls the opponent slightly closer to Wolvie. It's primary use is as combo filler, or to give more time to hit confirm. Can be chained into heavy attacks (or launcher), but not back into medium attacks. | 5M > 5L chain unique to Wolverine. On hit or block, it pulls the opponent slightly closer to Wolvie. It's primary use is as combo filler, or to give more time to hit confirm. Can be chained into heavy attacks (or launcher), but not back into medium attacks. | ||
| Line 355: | Line 337: | ||
{{MoveData | {{MoveData | ||
|image= | |image=UMVC3_Wolverine_3M.png | ||
|caption= | |caption= | ||
|name=Sliding Claw | |name=Sliding Claw | ||
| Line 376: | Line 358: | ||
{{MoveData | {{MoveData | ||
|image= | |image=UMVC3_Wolverine_jLML.png | ||
|caption= | |caption= | ||
|name=Brutal Claw | |name=Brutal Claw | ||
| Line 382: | Line 364: | ||
|data= | |data= | ||
{{AttackData-UMVC3 | {{AttackData-UMVC3 | ||
|damage= | |damage=60,000 | ||
|guard=OH | |guard=OH | ||
|startup=3/3 | |startup=3/3 | ||
| Line 389: | Line 371: | ||
|onhit=+15/+14 | |onhit=+15/+14 | ||
|onblock=-13/+19(?) | |onblock=-13/+19(?) | ||
|properties= | |properties=scales by 0.8 | ||
|description= | |description= | ||
Combo filler similar to Cross Slash, but airborne. Unlike Cross Slash, it does not pull the opponent closer. | Combo filler similar to Cross Slash, but airborne. Unlike Cross Slash, it does not pull the opponent closer. | ||
| Line 397: | Line 379: | ||
{{MoveData | {{MoveData | ||
|image= | |image=UMVC3_Wolverine_j2H.png | ||
|caption= | |caption= | ||
|name=Diving Kick | |name=Diving Kick | ||
| Line 419: | Line 401: | ||
{{MoveData | {{MoveData | ||
|image= | |image=UMVC3_Wolverine_236X.png | ||
|caption= | |caption= | ||
|name=Berserker Barrage | |name=Berserker Barrage | ||
| Line 461: | Line 443: | ||
|description= | |description= | ||
Wolverine rushes forward with multiple consecutive attacks. Because it is fairly fast and moves forward, it can work as a sort of "poke" in neutral. However, it does not practically combo into anything except its hyper version, Berserker Barrage X. Deals decent damage, but standard combo routes do not use any version of this move. | Wolverine rushes forward with multiple consecutive attacks. Because it is fairly fast and moves forward, it can work as a sort of "poke" in neutral. However, it does not practically combo into anything except its hyper version, Berserker Barrage X. Deals decent damage, but standard combo routes do not use any version of this move. | ||
All 3 versions can be mashed to add up to 2 extra hits. For the M and H versions, base damage on these extra hits is 25,000. }} | |||
}} | }} | ||
{{MoveData | {{MoveData | ||
|image= | |image=UMVC3_Wolverine_623L.png | ||
|caption= | |caption= | ||
|name=Tornado Claw | |name=Tornado Claw | ||
| Line 507: | Line 489: | ||
|properties=Mashable, {{strk}} | |properties=Mashable, {{strk}} | ||
|description= | |description= | ||
Despite appearances, this move has no invulnerability and is a fairly poor anti-air. Tornado Claw is mainly used as a combo tool for its solid damage output. Tornado Claw xx Fatal Claw can link into itself multiple times, allowing Wolverine to dump meter in exchange for securing a kill. | Despite appearances, this move has no invulnerability and is a fairly poor anti-air. Tornado Claw is mainly used as a combo tool for its solid damage output. Tornado Claw xx Fatal Claw can link into itself multiple times, allowing Wolverine to dump meter in exchange for securing a kill. All 3 versions can be mashed for more hits; for the M and H versions, base damage on these extra hits is 20,000. | ||
}} | }} | ||
}} | }} | ||
| Line 513: | Line 495: | ||
{{MoveData | {{MoveData | ||
|image= | |image=UMVC3_Wolverine_XS.png | ||
|caption= | |caption=By default, Drill Claw goes forward. | ||
|image2=UMVC3_Wolverine_2XS.png | |||
|caption2=Drill Claw can be aimed in any direction. | |||
|name=Drill Claw | |name=Drill Claw | ||
|input=X+S | |input=X+S | ||
| Line 526: | Line 510: | ||
|onhit=+18/+20 | |onhit=+18/+20 | ||
|onblock=+9/+11 | |onblock=+9/+11 | ||
|properties={{airok}}, 8-way directable (5 ways on the ground), {{strk}}, *On whiff, | |properties={{airok}}, 8-way directable (5 ways on the ground), {{strk}}, *On whiff, Wolverine does not recover until landing | ||
|description= | |description= | ||
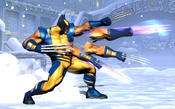
Much slower and less versatile than a real airdash, but still a useful tool to increase Wolverine's aerial mobility. Wolverine can combo his aerial normals into Drill Claw and then follow up with either Dive Kick or Fatal Claw, making it an important asset for combo extensions and air-to-air confirms. | Much slower and less versatile than a real airdash, but still a useful tool to increase Wolverine's aerial mobility. Wolverine can combo his aerial normals into Drill Claw and then follow up with either Dive Kick or Fatal Claw, making it an important asset for combo extensions and air-to-air confirms. | ||
| Line 534: | Line 518: | ||
{{MoveData | {{MoveData | ||
|image= | |image=UMVC3_Wolverine_214X_Dash.png | ||
|image2=UMVC3_Wolverine_214X_Hit.png | |||
|caption= | |caption= | ||
|name=Berserker Slash | |name=Berserker Slash | ||
| Line 581: | Line 566: | ||
{{MoveData | {{MoveData | ||
|image= | |image=UMVC3_Wolverine_MashX.png | ||
|caption= | |caption= | ||
|name=Berserker Rage | |name=Berserker Rage | ||
| Line 604: | Line 589: | ||
{{MoveData | {{MoveData | ||
|image= | |image=UMVC3_Wolverine_236XX.png | ||
|caption= | |caption= | ||
|name=Berserker Barrage X | |name=Berserker Barrage X | ||
| Line 610: | Line 595: | ||
|data= | |data= | ||
{{AttackData-UMVC3 | {{AttackData-UMVC3 | ||
|damage=286,000 - 343,600 | |damage=20,000 x15 + 80,000 x2(286,000 - 343,600) | ||
|guard=Mid | |guard=Mid | ||
|startup=13+3 | |startup=13+3 | ||
| Line 619: | Line 604: | ||
|properties=Invuln frames 1-7. {{strk}}, {{softknockdown}}, Mashable | |properties=Invuln frames 1-7. {{strk}}, {{softknockdown}}, Mashable | ||
|description= | |description= | ||
Enhanced version of Berserker Barrage. Wolverine charges forward while rapidly attacking. Deals lower damage than Fatal Claw, and ironically also more difficult to efficiently combo into. Mainly used if a stray Berserker Barrage connects or if an extended combo such as a jump loop causes too much hitstun deterioration for Fatal Claw to be used. | |||
}} | }} | ||
}} | }} | ||
| Line 625: | Line 610: | ||
{{MoveData | {{MoveData | ||
|image= | |image=UMVC3_Wolverine_214XX.png | ||
|caption= | |caption= | ||
|name=Fatal Claw | |name=Fatal Claw | ||
| Line 631: | Line 616: | ||
|data= | |data= | ||
{{AttackData-UMVC3 | {{AttackData-UMVC3 | ||
|damage=302,100 - 362,500 | |damage=40,000 x13(302,100 - 362,500) | ||
|guard=Mid | |guard=Mid | ||
|startup=9+8 | |startup=9+8 | ||
| Line 638: | Line 623: | ||
|onhit=- | |onhit=- | ||
|onblock=-17 | |onblock=-17 | ||
|properties={{airok}}, Mashable, [[File:truesoftknockdown.png]] | |properties={{airok}}, Mashable, [[File:truesoftknockdown.png]], scales by 0.9 | ||
|description= | |description= | ||
Wolverine's standard combo ender. Deals solid damage and can be comboed into easily from either Drill Claw or Tornado Claw. | Wolverine's standard combo ender. Deals solid damage and can be comboed into easily from either Drill Claw or Tornado Claw. The Tornado Claw > Fatal Claw sequence juggles opponents high enough into the air that Wolverine will land and recover before the opponent, which can be used to: | ||
*Link another Tornado Claw into another Fatal Claw, looping as needed until the opponent dies. | |||
*Link 5L and go for an air reset | |||
*Link Snapback and go for an oncoming mixup on another character. | |||
*Wolverine recovers upon landing, recovery listed is for a grounded Fatal Claw. | |||
}} | }} | ||
}} | }} | ||
| Line 646: | Line 636: | ||
{{MoveData | {{MoveData | ||
|image= | |image=UMVC3_Wolverine_22XX_Flash.png | ||
|image2=UMVC3_Wolverine_22XX.png | |||
|caption= | |caption= | ||
|name=Berserker Charge | |name=Berserker Charge | ||
| Line 659: | Line 650: | ||
|onhit=- | |onhit=- | ||
|onblock=- | |onblock=- | ||
|properties=400 frame duration, 30% speed increase | |properties=400 frame duration, 30% speed increase | ||
|description= | |description= | ||
Install hyper. Fast startup and recovery allow Wolverine to combo into this easily (such as after Berserker Slash), | Install hyper. Fast startup and recovery allow Wolverine to combo into this easily (such as after Berserker Slash), or use as an emergency cancel option if in an unsafe position. This is also a strong DHC tool in either direction. Use this hyper and DHC to another to effectively give that hyper a 4 frame startup. Alternatively, do a hyper with another character and then DHC into Berserker Charge. On hit or block, Wolverine will almost certainly recover well before the opponent. Wolverine does not build meter for the duration. | ||
}} | }} | ||
}} | }} | ||
| Line 667: | Line 658: | ||
{{MoveData | {{MoveData | ||
|image= | |image=UMVC3_Wolverine_623XX_Cinematic.png | ||
|caption= | |caption= | ||
|name=Weapon X | |name=Weapon X | ||
| Line 680: | Line 671: | ||
|onhit=- | |onhit=- | ||
|onblock=-6 | |onblock=-6 | ||
|properties=Invuln | |properties=Invuln until frame 21, {{hardknockdown}}, forced {{groundbounce}} Unscaled damage | ||
|description= | |description= | ||
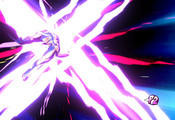
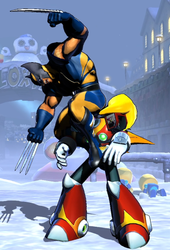
Standard cinematic level 3 hyper. Typically used to secure an easy kill on the opponent's last character. | Standard cinematic level 3 hyper. Typically used to secure an easy kill on the opponent's last character. It is also Wolverine's only reversal, and can be used an an expensive counter-call to an opponent's hyper. | ||
It is possible for Wolverine to combo after the Hard Knockdown caused by Weapon X, with a sufficiently fast dash up 3M. However, the cinematic portion of this hyper (bizarrely) consumes Ground Bounce, so keep in mind that any divekicks done after this hyper will cause the combo to drop. | |||
}} | }} | ||
}} | }} | ||
=== Universal Mechanics === | === Universal Mechanics === | ||
{{MoveData | {{MoveData | ||
|image= | |image=UMVC3_Wolverine_GroundThrow.png | ||
|image2=UMVC3_Wolverine_GroundBackThrow.png | |||
|caption= | |caption= | ||
|name=Ground Throw | |name=Ground Throw | ||
| Line 696: | Line 689: | ||
|data= | |data= | ||
{{AttackData-UMVC3 | {{AttackData-UMVC3 | ||
|damage=60,000 - 100,000 | |damage=10,000 x4~8 + 20,000(60,000 - 100,000) | ||
|guard=Throw | |guard=Throw | ||
|startup=1 | |startup=1 | ||
| Line 710: | Line 703: | ||
{{MoveData | {{MoveData | ||
|image= | |image=UMVC3_Wolverine_AirThrow.png | ||
|caption= | |caption= | ||
|name=Air Throw | |name=Air Throw | ||
| Line 716: | Line 709: | ||
|data= | |data= | ||
{{AttackData-UMVC3 | {{AttackData-UMVC3 | ||
|damage=60,000 - 100,000 | |damage=10,000 x6~10(60,000 - 100,000) | ||
|guard=Airthrow | |guard=Airthrow | ||
|startup=1 | |startup=1 | ||
| Line 731: | Line 724: | ||
{{MoveData | {{MoveData | ||
|image= | |image=UMVC3_Wolverine_5H.png | ||
|caption= | |caption= | ||
|name=Snap Back | |name=Snap Back | ||
| Line 752: | Line 745: | ||
{{MoveData | {{MoveData | ||
|image= | |image=UMVC3_Wolverine_HardTag.png | ||
|caption= | |caption= | ||
|name=Hard Tag | |name=Hard Tag | ||
| Line 758: | Line 751: | ||
|data= | |data= | ||
{{AttackData-UMVC3 | {{AttackData-UMVC3 | ||
|damage= | |damage=30,000 | ||
|guard=OH | |guard=OH | ||
|startup=- | |startup=- | ||
| Line 771: | Line 764: | ||
}} | }} | ||
{{MoveData | |||
|image= | |||
|image2= | |||
|image3= | |||
|caption= | |||
|name=Air Exchange | |||
|input=(During a Launcher Combo) {{u}} / {{f}} / {{b}} / {{d}} + {{s}} | |||
|data= | |||
{{AttackData-UMVC3 | |||
|version=Up | |||
|subtitle={{u}} + {{s}} | |||
|damage=25,000 | |||
|guard=- | |||
|startup=8/7 | |||
|active=2/4(?) | |||
|recovery=26/16 | |||
|onhit=- | |||
|onblock=- | |||
|properties=- | |||
}} | |||
{{AttackData-UMVC3 | |||
|version=Side | |||
|subtitle={{f}} / {{b}} + {{s}} | |||
|damage=40,000 | |||
|guard=- | |||
|startup=6/5 | |||
|active=2/2 | |||
|recovery=23/21 | |||
|onhit=- | |||
|onblock=- | |||
|properties=[[File:forcedwallbounce.png]] | |||
}} | |||
{{AttackData-UMVC3 | |||
|version=Down | |||
|subtitle={{d}} + {{h}} | |||
|damage=60,000 | |||
|guard=- | |||
|startup=11/9 | |||
|active=4/4 | |||
|recovery=21/15 | |||
|onhit=- | |||
|onblock=- | |||
|properties={{forcedgroundbounce}} | |||
|description= | |||
- | |||
}} | |||
}} | |||
== Team Position == | == Team Position == | ||
| Line 782: | Line 823: | ||
'''Akuma:''' Wolverine and Akuma have historically been referred to as "best friends" in UMvC3, owing mostly to Akuma's Tatsumaki assist as a support tool for Wolverine. Tatsu assist destroys (non-hyper) projectiles it collides with, allowing Wolverine to close the distance against zoning opponents. It also has a very long duration, meaning it can keep opponents in hitstun or blockstun for quite a long time. If Wolverine can call Akuma and then attempt either an Instant Overhead or a cross-up Berserker Slash. If these attacks hit, Akuma will juggle the opponent long enough for Wolverine to recover and start a combo for free. If the opponent manages to block, Akuma will still keep Wolverine safe. | '''Akuma:''' Wolverine and Akuma have historically been referred to as "best friends" in UMvC3, owing mostly to Akuma's Tatsumaki assist as a support tool for Wolverine. Tatsu assist destroys (non-hyper) projectiles it collides with, allowing Wolverine to close the distance against zoning opponents. It also has a very long duration, meaning it can keep opponents in hitstun or blockstun for quite a long time. If Wolverine can call Akuma and then attempt either an Instant Overhead or a cross-up Berserker Slash. If these attacks hit, Akuma will juggle the opponent long enough for Wolverine to recover and start a combo for free. If the opponent manages to block, Akuma will still keep Wolverine safe. | ||
'''Players to Watch:''' Justin Wong (Wolverine/Storm/Akuma), | '''Players to Watch:''' Justin Wong (Wolverine/Storm/Akuma), SumBrownKid (Wolverine/Dante/Akuma), SBK (Wolverine/Dante/Akuma) | ||
'''Doctor Doom:''' All three of Doom's assists have been used to tournament success with Wolverine. Molecular Shield in particular is nice for Wolverine, who can hide inside or behind the rocks to approach in relative safety, or use them as a combo extension tool after his 3M OTG. Wolverine's Fatal Claw hyper, while strong, can be awkward to use in DHC setups. Doom provides a solid, consistent option via a Fatal Claw -> Sphere Flame DHC, which works anywhere on the screen and even recovers fast enough to hard tag Wolverine back in for more a mixup afterward. | '''Doctor Doom:''' All three of Doom's assists have been used to tournament success with Wolverine. Molecular Shield in particular is nice for Wolverine, who can hide inside or behind the rocks to approach in relative safety, or use them as a combo extension tool after his 3M OTG. Wolverine's Fatal Claw hyper, while strong, can be awkward to use in DHC setups. Doom provides a solid, consistent option via a Fatal Claw -> Sphere Flame DHC, which works anywhere on the screen and even recovers fast enough to hard tag Wolverine back in for more a mixup afterward. | ||
| Line 800: | Line 841: | ||
'''Players to Watch:''' Justin Wong (Wolverine/Storm/Akuma, Wolverine/Storm/Vergil) | '''Players to Watch:''' Justin Wong (Wolverine/Storm/Akuma, Wolverine/Storm/Vergil) | ||
== | == Alternate Colors == | ||
{{Chara-Colors-UMVC3}} | |||
== | == Hitspheres and Hurtspheres == | ||
{{#ev:youtube|R8Y3Qk803C0}} | |||
{{Content Box|content= | {{Content Box|content= | ||
{{Navbox-UMVC3}} | {{Navbox-UMVC3}} | ||
}} | }} | ||
Latest revision as of 09:20, 15 January 2025
Introduction
A mutant and member of the X-Men, Wolverine's power gives him immense capability for regeneration, also known as a Healing Factor. Far more iconic, however, is the adamantium skeleton grafted into his body as part of the Weapon X project, including three retractable claws on each hand.
In UMvC3, Wolverine is a high-speed, momentum-focused rushdown character. While lacking long-ranged attacks or projectiles of any kind, he can quickly close in with his fast ground dash and aerial divekick. Once there, he has no shortage of tools to open an opponent's defense with cross-ups, instant overheads, and hit/throw mixups.
| Strengths | Weaknesses |
|---|---|
|
|
Move List
Assists
| Damage | Startup | Active | Recovery |
|---|---|---|---|
| 35,000 x3 | 30/24 | 11/9 | 135/126, 106/83 |
| On Hit | On Block | Guard | Properties |
| - | - | Mid | Invuln (as Crossover Counter) frames 1 - ???, Fixed Hitstun |
|
THC Hyper: Fatal Claw. Has no invulnerability despite the DP-esque appearance (neither does the non-assist version). Since Wolverine's assists are quite poor no matter what, it may be worth taking this assist just for the more damaging THC Hyper. | |||
| Damage | Startup | Active | Recovery |
|---|---|---|---|
| 100,000 | 44/35 | 3/3 | 121/114, 91/71 |
| On Hit | On Block | Guard | Properties |
| - | - | Mid | |
|
THC Hyper: Berserker Barrage X. | |||
| Damage | Startup | Active | Recovery |
|---|---|---|---|
| 30,000 x4 | 33/26 | 16/13 | 117/112, 87/69 |
| On Hit | On Block | Guard | Properties |
| - | - | Mid | - |
|
THC Hyper: Berserker Barrage X. Out of Wolverine's assists, this causes the most hitstun/blockstun, and thus is the best to choose for its actual assist potential. It juggles in an awkward way that makes it difficult to use for relaunches. | |||
Ground Normals
| Damage | Startup | Active | Recovery |
|---|---|---|---|
| 53,000 | 4/4 | 3/3 | 11/8 |
| On Hit | On Block | Guard | Properties |
| 0/+3 | -1/+2 | Mid | - |
|
Wolverine's fastest attack; good to throw out in scramble situations. He can set up reset attempts by using this normal on airborne opponents, then jumping up as they air recover for a throw/divekick mixup. | |||
| Damage | Startup | Active | Recovery |
|---|---|---|---|
| 67,000 | 6/5 | 3/3 | 22/17 |
| On Hit | On Block | Guard | Properties |
| -6/-1 | -8/-3 | Mid | - |
|
Decent poke | |||
| Damage | Startup | Active | Recovery |
|---|---|---|---|
| 95,000 | 11/9 | 4/4 | 24/18 |
| On Hit | On Block | Guard | Properties |
| +11/+17 | -6/0 | Mid | |
|
Good button for converting combos on airborne opponents, such as after an assist hit. Causes a significant amount of blockstun for a normal, so it is useful to cancel this into a variant of Berserker Slash, forcing them to block the crossup. | |||
| Damage | Startup | Active | Recovery |
|---|---|---|---|
| 48,000 | 6/5 | 3/3 | 12/9 |
| On Hit | On Block | Guard | Properties |
| -1/+2 | -2/+1 | Low | |
|
Slower than standing light, but VERY low-profile. Rhythmically tapping 2L allows Wolverine to evade underneath many projectiles, such as Doom's Plasma Beam. Be careful not to mash too quickly, which will result in Berserker Rage. Simply throwing out this fast low works quite well, as opponents are usually more scared of Wolverine's instant overhead attacks. | |||
| Damage | Startup | Active | Recovery |
|---|---|---|---|
| 70,000 | 7/6 | 3/3 | 19/14 |
| On Hit | On Block | Guard | Properties |
| +15/+20 | -5/0 | Mid | |
|
Good anti-air attack (although the upward-angled part of the attack is not active right away). This button is also very strong for bare purposes: If you are crouch blocking and mash L+M pushblock, this button will come out during gaps. It is quite fast when used this way and, on hit, forces an air recovery that gives you time to reset to neutral or steal momentum. | |||
| Damage | Startup | Active | Recovery |
|---|---|---|---|
| 78,000 | 12/10 | 4/4 | 20/15 |
| On Hit | On Block | Guard | Properties |
| - | -2/+3 | Low | |
|
- | |||
| Damage | Startup | Active | Recovery |
|---|---|---|---|
| 80,000 | 9/7 | 4/4 | 27/21 |
| On Hit | On Block | Guard | Properties |
| Launch | -9/-3 | Mid | |
|
Fairly standard launcher. Combos easily after 5H or 2H except at the very end of 5H's range. | |||
Aerial Normals
| Damage | Startup | Active | Recovery |
|---|---|---|---|
| 50,000 | 4/4 | 7/6 | 12/9 |
| On Hit | On Block | Guard | Properties |
| +9/+9 | +8/+8 | OH | - |
|
Very fast instant overhead normal. Works without needing to set up fuzzy guard even on normal-sized characters. Needs either an assist or X-Factor activation to convert into a combo. If you land this attack without an assist, activate X-Factor and then immediately perform a falling j.5M to convert into a full combo. | |||
| Damage | Startup | Active | Recovery |
|---|---|---|---|
| 70,000 | 6/5 | 3/3 | 24/18 |
| On Hit | On Block | Guard | Properties |
| +13/+14 | +12/+11 | OH | - |
|
- | |||
| Damage | Startup | Active | Recovery |
|---|---|---|---|
| 80,000 | 8/7 | 2/2 | 26/20 |
| On Hit | On Block | Guard | Properties |
| +17/+15 | +14/+13 | OH | - |
|
Upward-angled attack, which makes it difficult to use against grounded opponents (read: don't do it). | |||
| Damage | Startup | Active | Recovery |
|---|---|---|---|
| 90,000 | 11/9 | 4/4 | 21/16 |
| On Hit | On Block | Guard | Properties |
| +16 | +14 | OH | |
|
Solid cross-up attack. Also useful for jump loops or similar airborne combos due to its high hitstun. | |||
Command Normals
| Damage | Startup | Active | Recovery |
|---|---|---|---|
| 60,000 | 3/3 | 2/2 | 17/13 |
| On Hit | On Block | Guard | Properties |
| 0/+4 | -2/+2 | Mid | scales by 0.8 |
|
5M > 5L chain unique to Wolverine. On hit or block, it pulls the opponent slightly closer to Wolvie. It's primary use is as combo filler, or to give more time to hit confirm. Can be chained into heavy attacks (or launcher), but not back into medium attacks. | |||
| Damage | Startup | Active | Recovery |
|---|---|---|---|
| 70,000 | 10/8 | 8/7 | 21/16 |
| On Hit | On Block | Guard | Properties |
| - | -12/-6 | Low | |
|
Wolverine's only OTG option. He can not follow this up normally, but is very easy to relaunch when combining this move with common assists. As it lowers Wolverine's hurtbox very low to the ground, it can also be used to advance underneath certain projectiles. | |||
| Damage | Startup | Active | Recovery |
|---|---|---|---|
| 60,000 | 3/3 | 3/3 | 29/22 |
| On Hit | On Block | Guard | Properties |
| +15/+14 | -13/+19(?) | OH | scales by 0.8 |
|
Combo filler similar to Cross Slash, but airborne. Unlike Cross Slash, it does not pull the opponent closer. | |||
| Damage | Startup | Active | Recovery |
|---|---|---|---|
| 75,000 | 8/7 | Until Grounded | 10/8 |
| On Hit | On Block | Guard | Properties |
| - | -1* | Mid | |
|
Very powerful command normal with a variety of uses. Can (and should) be input as j.1H or j.3H to option select an airthrow. Use it to alter your jump arc and maneuver through projectiles. Jump and immediately divekick to bait attempted throwbreaks or pushblocks. Use Drill Claw to combo into this move, allowing Wolverine to finish his air combos with a ground bounce and solo relaunch. | |||
Special Moves
| L |
Damage | Startup | Active | Recovery |
|---|---|---|---|---|
| 35,000 x2 - x4 | 6/5 | 7-16/6-13 | 25/20 | |
| On Hit | On Block | Guard | Properties | |
| -4/+2 | -6/0 | Mid | Mashable, extra mashed hits cause | |
| M |
Damage | Startup | Active | Recovery |
| 30,000 x4 - x6 | 9/7 | 16-25/13-20 | 25/20 | |
| On Hit | On Block | Guard | Properties | |
| -5/+3 | -7/+1 | Mid | Mashable, extra mashed hits cause | |
| H |
Damage | Startup | Active | Recovery |
| 28,000 x6 - x8 | 13/10 | 24-34/19-27 | 25/20 | |
| On Hit | On Block | Guard | Properties | |
| -6/0 | -8/-2 | Mid | Mashable, extra mashed hits cause | |
|
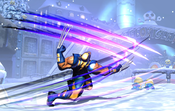
Wolverine rushes forward with multiple consecutive attacks. Because it is fairly fast and moves forward, it can work as a sort of "poke" in neutral. However, it does not practically combo into anything except its hyper version, Berserker Barrage X. Deals decent damage, but standard combo routes do not use any version of this move. All 3 versions can be mashed to add up to 2 extra hits. For the M and H versions, base damage on these extra hits is 25,000. | ||||
| L |
Damage | Startup | Active | Recovery |
|---|---|---|---|---|
| 30,000 x3 - x7 | 6/5 | 11-24/9-20 | 26-32/20-23 | |
| On Hit | On Block | Guard | Properties | |
| - | -18/-8 | Mid | Mashable, | |
| M |
Damage | Startup | Active | Recovery |
| 30,000 x4 - x10 | 6/5 | 11-32/9-28 | 35-30/27-22 | |
| On Hit | On Block | Guard | Properties | |
| - | -28/-16 | Mid | Mashable, | |
| H |
Damage | Startup | Active | Recovery |
| 30,000 x5 - x11 | 6/5 | 12-41/9-34 | 45-22/39-18 | |
| On Hit | On Block | Guard | Properties | |
| - | -38/-24 | Mid | Mashable, | |
|
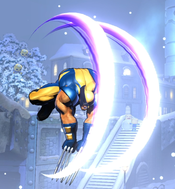
Despite appearances, this move has no invulnerability and is a fairly poor anti-air. Tornado Claw is mainly used as a combo tool for its solid damage output. Tornado Claw xx Fatal Claw can link into itself multiple times, allowing Wolverine to dump meter in exchange for securing a kill. All 3 versions can be mashed for more hits; for the M and H versions, base damage on these extra hits is 20,000. | ||||
| Damage | Startup | Active | Recovery |
|---|---|---|---|
| 80,000 | 16/13 | 14/11 | 25/19 |
| On Hit | On Block | Guard | Properties |
| +18/+20 | +9/+11 | Mid | |
|
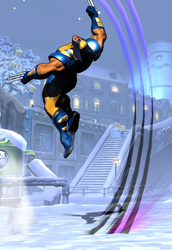
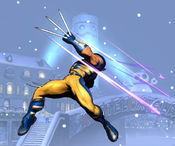
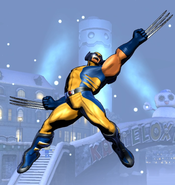
Much slower and less versatile than a real airdash, but still a useful tool to increase Wolverine's aerial mobility. Wolverine can combo his aerial normals into Drill Claw and then follow up with either Dive Kick or Fatal Claw, making it an important asset for combo extensions and air-to-air confirms. | |||
| L |
Damage | Startup | Active | Recovery |
|---|---|---|---|---|
| 100,000 | 18/14 | 3/3 | 24/18 | |
| On Hit | On Block | Guard | Properties | |
| - | -10/-5 | Mid | Passthrough, | |
| M |
Damage | Startup | Active | Recovery |
| 100,000 | 20/16 | 3/3 | 26/20 | |
| On Hit | On Block | Guard | Properties | |
| - | -12/-6 | Mid | Passthrough, | |
| H |
Damage | Startup | Active | Recovery |
| 100,000 | 22/17 | 3/3 | 27/21 | |
| On Hit | On Block | Guard | Properties | |
| - | -13/-7 | Mid | Passthrough, | |
|
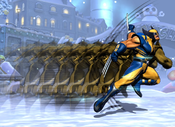
Dedicated crossup attack. Button strength determines the distance Wolverine travels and the amount of time he has passthrough (10 frames for L, 12 for M, 15 for H). Thus, Wolverine can use a higher-strength button to dash behind the opponent or a lower-strength to fake a crossup but stay in front. If Wolverine passes through the opponent, he automatically turns around to hit behind him. This is ideally converted into a combo using assist support, but Wolverine can also convert solo by canceling the slash into Berserker Charge install hyper. | ||||
| Damage | Startup | Active | Recovery |
|---|---|---|---|
| 20,000 x5 - x52 | 11/9 | 29/23 | 14/11 |
| On Hit | On Block | Guard | Properties |
| +9/+8 | +7/+6 | Mid | Mashable |
|
A move that was made bad on purpose in order to discourage Wolverine players from mashing (not a joke). Button strength only determines the maximum number of mashed hits (L: 18, M: 24, H: 52). | |||
Hyper Combos
| Damage | Startup | Active | Recovery |
|---|---|---|---|
| 20,000 x15 + 80,000 x2(286,000 - 343,600) | 13+3 | 71(13)4 | 29 |
| On Hit | On Block | Guard | Properties |
| - | -10 | Mid | Invuln frames 1-7. |
|
Enhanced version of Berserker Barrage. Wolverine charges forward while rapidly attacking. Deals lower damage than Fatal Claw, and ironically also more difficult to efficiently combo into. Mainly used if a stray Berserker Barrage connects or if an extended combo such as a jump loop causes too much hitstun deterioration for Fatal Claw to be used. | |||
| Damage | Startup | Active | Recovery |
|---|---|---|---|
| - | 4+0 | - | 8 |
| On Hit | On Block | Guard | Properties |
| - | - | - | 400 frame duration, 30% speed increase |
|
Install hyper. Fast startup and recovery allow Wolverine to combo into this easily (such as after Berserker Slash), or use as an emergency cancel option if in an unsafe position. This is also a strong DHC tool in either direction. Use this hyper and DHC to another to effectively give that hyper a 4 frame startup. Alternatively, do a hyper with another character and then DHC into Berserker Charge. On hit or block, Wolverine will almost certainly recover well before the opponent. Wolverine does not build meter for the duration. | |||
| Damage | Startup | Active | Recovery |
|---|---|---|---|
| 440,000 | 16+1 | 17 | 15 |
| On Hit | On Block | Guard | Properties |
| - | -6 | Mid | Invuln until frame 21, |
|
Standard cinematic level 3 hyper. Typically used to secure an easy kill on the opponent's last character. It is also Wolverine's only reversal, and can be used an an expensive counter-call to an opponent's hyper. It is possible for Wolverine to combo after the Hard Knockdown caused by Weapon X, with a sufficiently fast dash up 3M. However, the cinematic portion of this hyper (bizarrely) consumes Ground Bounce, so keep in mind that any divekicks done after this hyper will cause the combo to drop. | |||
Universal Mechanics
| Damage | Startup | Active | Recovery |
|---|---|---|---|
| 10,000 x4~8 + 20,000(60,000 - 100,000) | 1 | 1 | - |
| On Hit | On Block | Guard | Properties |
| - | - | Throw | Mashable, |
|
Wolverine's throw by default deals less damage than the standard throw, but can be mashed for additional hits. Fully mashed, it does slightly more than a regular throw (although this also causes more damage scaling). On a successful airthrow, Wolverine can follow up with OTG 3M, but needs assists or X-Factor to convert further. | |||
| Damage | Startup | Active | Recovery |
|---|---|---|---|
| 10,000 x6~10(60,000 - 100,000) | 1 | 1 | - |
| On Hit | On Block | Guard | Properties |
| - | - | Airthrow | Mashable, |
|
Wolverine's airthrow by default deals less damage than the standard throw, but can be mashed for additional hits. Fully mashed, it does slightly more than a regular throw (although this also causes more damage scaling). On a successful airthrow, Wolverine can follow up with OTG 3M, but needs assists or X-Factor to convert further. | |||
| Damage | Startup | Active | Recovery |
|---|---|---|---|
| 50,000 | 2 | 3 | 28 |
| On Hit | On Block | Guard | Properties |
| - | -10 | Mid | Snapback |
|
Animation and hitbox based on 5H. | |||
| Damage | Startup | Active | Recovery |
|---|---|---|---|
| 30,000 | - | 20 | 34 |
| On Hit | On Block | Guard | Properties |
| - | -15 | OH | |
|
- | |||
Team Position
Wolverine is almost exclusively played as a Point character. While strong on his own, he benefits heavily from assist coverage that can help him approach long-range fighters, and lock down opponents while he sets up his offense. In addition, Wolverine's own assists have very poor coverage and are awkward to use in combo extensions, so he does not offer much from the backline.
Wolverine's level 3 x-factor provides a significant (35%) boost to speed. When combined with his naturally high base speed, and possibly the speed boost from Berserker Charge, he hits truly ludicrous speeds, to the point where controlling him properly is difficult. Wolverine used as an Anchor, while funny, is not particularly effective.
Notable Synergies
Akuma: Wolverine and Akuma have historically been referred to as "best friends" in UMvC3, owing mostly to Akuma's Tatsumaki assist as a support tool for Wolverine. Tatsu assist destroys (non-hyper) projectiles it collides with, allowing Wolverine to close the distance against zoning opponents. It also has a very long duration, meaning it can keep opponents in hitstun or blockstun for quite a long time. If Wolverine can call Akuma and then attempt either an Instant Overhead or a cross-up Berserker Slash. If these attacks hit, Akuma will juggle the opponent long enough for Wolverine to recover and start a combo for free. If the opponent manages to block, Akuma will still keep Wolverine safe.
Players to Watch: Justin Wong (Wolverine/Storm/Akuma), SumBrownKid (Wolverine/Dante/Akuma), SBK (Wolverine/Dante/Akuma)
Doctor Doom: All three of Doom's assists have been used to tournament success with Wolverine. Molecular Shield in particular is nice for Wolverine, who can hide inside or behind the rocks to approach in relative safety, or use them as a combo extension tool after his 3M OTG. Wolverine's Fatal Claw hyper, while strong, can be awkward to use in DHC setups. Doom provides a solid, consistent option via a Fatal Claw -> Sphere Flame DHC, which works anywhere on the screen and even recovers fast enough to hard tag Wolverine back in for more a mixup afterward.
Players to Watch: Winrich (Wolverine/Doom/Vergil), Noel Brown (Wolverine/Doom/Phoenix), PR Balrog (Wolverine/Doom/Vergil, Wolverine/Doom/Rocket)
Shuma-Gorath: Shuma's Mystic Ray assist is among the best in the game, and in particular provides a lot of what Wolverine is looking for in an assist. It is a beam attack with massive coverage, hitting almost the entire screen for at least part of its duration. It connects OTG, can snipe opponents at superjump height, and punish the opponent's assists. On hit, it causes a significant amount of hitstun, more than enough for a prepared Wolverine player to convert into a combo. Lastly, although it has quite long startup, Mystic Ray has a very low assist cooldown period - one of the few assists in the game whose self-recovery period is less than 100 frames - making it very spammable.
Players to Watch: Angelic (Wolverine/Dorm/Shuma)
Vergil: Like the other characters on this list, Vergil provides Wolverine with a high-duration, horizontal coverage assist in the form of Rapid Slash. Wolverine can use it in the usual ways: to force an opponent to block, to confirm off berserker slash, or to pick up after a knockdown. Additionally, Vergil provides generically strong DHC options via Devil Trigger and Spiral Swords, taking advantage of the knockdown caused by an early-canceled Fatal Claw. In particular, DHCing into Spiral Swords and doing a Swords Loop is one of the highest damage ways to spend meter in the game.
Players to Watch: Winrich (Wolverine/Doom/Vergil), PR Balrog (Wolverine/Doom/Vergil),
Storm: Her "Hail Storm" hyper hits OTG, which is uniquely useful when used in THCs. Rather than bother with picking up using OTG 3M slide, Wolverine can end his combos with a hard knockdown, dash up, and activate a 2-bar THC to combine his own high-damage Fatal Claw with Hail Storm. Even a very basic Wolverine combo into this setup causes close to 900000 damage, enough to kill many popular point characters. This setup was popularized (and almost exclusively used) by Justin Wong, who would use the THC setup to secure a quick kill, then tag in Storm to run away while maintaining a one-character life lead for as long as possible.
Players to Watch: Justin Wong (Wolverine/Storm/Akuma, Wolverine/Storm/Vergil)
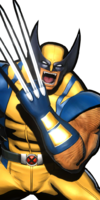
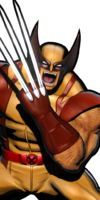
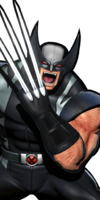
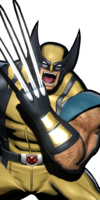
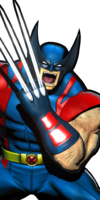
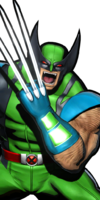
Alternate Colors
| Color 1 | Color 2 | Color 3 | Color 4 | Color 5 | Color 6 | Alt Color |
|---|---|---|---|---|---|---|
|
|
|
|
|
|
|
Hitspheres and Hurtspheres

