(→Combos) |
|||
| (23 intermediate revisions by 2 users not shown) | |||
| Line 1: | Line 1: | ||
{{Infobox Character HNK | |||
|name=Mr._Heart | |||
}} | |||
{{TOClimit|3}} | |||
Before diving right into the combos be sure to familiarize yourself with Mr. Heart's special/super moves and his unique normals. | Before diving right into the combos be sure to familiarize yourself with Mr. Heart's special/super moves and his unique normals. | ||
==Normal Moves== | ==Normal Moves== | ||
==Standing== | ===Standing=== | ||
=== | ===== <span class="invisible-header">5A</span> ===== | ||
{{MoveData | |||
|image=Mr. Heart-A.png | |||
|name=5A | |||
|linkname=5A | |||
One of Mr. Hearts most important | |subtitle= | ||
|caption= | |||
|data= | |||
{{AttackData-HNK | |||
|Damage= | |||
|Guard=Mid | |||
|Startup=5 | |||
|Active=4,4 | |||
|Recovery= | |||
|Hit Adv= | |||
|Block Adv=+3 | |||
|description=One of Mr. Hearts most important normals, it serves as a combo filler, anti-air and combo starter. | |||
}} | |||
}} | |||
=== | ===== <span class="invisible-header">5B</span> ===== | ||
{{MoveData | |||
|image=Mr. Heart-B.png | |||
|name=5B | |||
|subtitle= | |||
|caption= | |||
|data= | |||
{{AttackData-HNK | |||
|Damage= | |||
|Guard=Mid | |||
|Startup=9 | |||
|Active=4 | |||
|Recovery= | |||
|Hit Adv= | |||
|Block Adv=-5 | |||
|description=Not nearly as good as crouch B, but still occasionally useful. Is used in some combo enders to stuff some extra damage before a [[Mr._Heart#5A|Heart's A]]. | |||
}} | |||
}} | |||
===== <span class="invisible-header">5C</span> ===== | |||
{{MoveData | |||
This move should almost never be used. It has an incrediblity long startup time, which is only worth it if you can get the full charge damage wise. It is also neither special or normal cancelable. | |image=Mr. Heart-C.png | ||
|name=5C | |||
|subtitle= | |||
|caption= | |||
|data= | |||
{{AttackData-HNK | |||
|Damage= | |||
|Guard=Mid | |||
|Startup=29 (Uncharged) | |||
|Active=4 | |||
|Recovery= | |||
|Hit Adv= | |||
|Block Adv=-4 | |||
|description=*Has one hit of armor | |||
This move should almost never be used. It has an incrediblity long startup time, which is only worth it if you can get the full charge damage wise. It is also neither special or normal cancelable, although it can be used in a gimmicky blockstring due to its range and hit of armor. | |||
}} | |||
}} | |||
=== | ===== <span class="invisible-header">5D</span> ===== | ||
{{MoveData | |||
|image=Mr. Heart-D.png | |||
|name=5D | |||
|subtitle= | |||
|caption= | |||
|data= | |||
{{AttackData-HNK | |||
|Damage= | |||
|Guard=Mid | |||
|Startup=10 | |||
|Active=4 | |||
|Recovery= | |||
|Hit Adv= | |||
|Block Adv=-24 | |||
|description=A launcher that can be chained into from standing A. Is used heavily in combos and as a hit confirm. Can be jump cancelled allowing IAD pressure from strings such as 2B 5D/5A 5D. Not a very good button to press in neutral though. | |||
}} | |||
}} | |||
===Crouching=== | |||
===== <span class="invisible-header">2A</span> ===== | |||
A | {{MoveData | ||
|image=Mr. Heart-2A.png | |||
|name=2A | |||
|subtitle= | |||
|caption= | |||
|data= | |||
{{AttackData-HNK | |||
|Damage= | |||
|Guard=Mid | |||
|Startup=7 | |||
|Active=4 | |||
|Recovery= | |||
|Hit Adv= | |||
|Block Adv=+7 | |||
|description=A quite fast and good reaching jab. Usually best used in conjunction with 2B to hit confirm. | |||
}} | |||
}} | |||
== | ===== <span class="invisible-header">2B</span> ===== | ||
=== | {{MoveData | ||
|image=Mr. Heart-2B.png | |||
|name=2B | |||
|subtitle= | |||
|caption= | |||
|data= | |||
{{AttackData-HNK | |||
|Damage= | |||
|Guard=Low | |||
|Startup=7 | |||
|Active=4 | |||
|Recovery= | |||
|Hit Adv= | |||
|Block Adv=+6 | |||
|description=Mr. Heart's most trusted companion and main poke, this baby not only has alright range, it also combos into Banishing Strike or Earthcrush (depending on range) on hit. Use it often. | |||
}} | |||
}} | |||
===== <span class="invisible-header">2C</span> ===== | |||
< | {{MoveData | ||
|image=Mr. Heart-2C.png | |||
|name=2C | |||
=== | |subtitle= | ||
|caption= | |||
|data= | |||
{{AttackData-HNK | |||
|Damage= | |||
|Guard=Mid | |||
|Startup=17 (Uncharged) | |||
=== | |Active=4 | ||
|Recovery= | |||
|Hit Adv= | |||
|Block Adv=-4 | |||
|description=*Has one hit of armor | |||
See [[Mr._Heart/Normal_Moves#C|Standing C]]. | See [[Mr._Heart/Normal_Moves#C|Standing C]]. | ||
Also doesn't hit low but launches on charged hit for an Earthcrush style combo. Not worth the risk though. | Also doesn't hit low but launches on charged hit for an Earthcrush style combo. Not worth the risk though. | ||
}} | |||
}} | |||
=== | ===== <span class="invisible-header">2D</span> ===== | ||
{{MoveData | |||
|image=Mr. Heart-2D.png | |||
|name=2D | |||
|subtitle= | |||
|caption= | |||
|data= | |||
{{AttackData-HNK | |||
|Damage= | |||
|Guard=High | |||
|Startup=35 | |||
|Active=4 | |||
|Recovery= | |||
|Hit Adv= | |||
|Block Adv=-22 | |||
|description=A slow, overhead sweep that can't be cancelled into anything and doesn't lead into anything except seeing your opponents cool combo when they punish it. Try to avoid this normal, unless you like seeing cool combos. | |||
}} | |||
}} | |||
==Air== | ===Air=== | ||
===A=== | ===== <span class="invisible-header">j.A</span> ===== | ||
{{MoveData | |||
|image=Mr. Heart-j.A.png | |||
|name=j.A | |||
|subtitle= | |||
|caption= | |||
|data= | |||
{{AttackData-HNK | |||
|Damage= | |||
|Guard=High | |||
|Startup=10 | |||
|Active=6 | |||
|Recovery= | |||
|Hit Adv= | |||
|Block Adv= | |||
|description=A good air-to-air poke that can be special cancelled into AC air grab. | |||
}} | |||
}} | |||
===== <span class="invisible-header">j.B</span> ===== | |||
< | {{MoveData | ||
|image=Mr. Heart-j.B.png | |||
|name=j.B | |||
|subtitle= | |||
|caption= | |||
|data= | |||
{{AttackData-HNK | |||
|Damage= | |||
|Guard=High | |||
|Startup=13 | |||
|Active=6 | |||
|Recovery= | |||
|Hit Adv= | |||
|Block Adv= | |||
|description=Can occasionally be used as an instant air-dash pressure tool, but is otherwise primarily used to adjust the height in wall bounce combos. | |||
}} | |||
}} | |||
=== | ===== <span class="invisible-header">j.C</span> ===== | ||
{{MoveData | |||
|image=Mr. Heart-j.C.png | |||
|name=j.C | |||
|subtitle= | |||
|caption= | |||
|data= | |||
{{AttackData-HNK | |||
|Damage= | |||
|Guard=High | |||
|Startup=13 (Uncharged) | |||
|Active=40 | |||
|Recovery= | |||
|Hit Adv= | |||
|Block Adv= | |||
|description=*Has one hit of armor | |||
Holding this button will make Mr. Heart float in the air, and if he lands without launching the attack, he will gain one hit of super armor that lasts until he gets hit, takes chip damage, or performs another armored move such as 5C or 623C.<br> | |||
In general an alright air button as well just for its range. Hitstuns for a very long time as well. | In general an alright air button as well just for its range. Hitstuns for a very long time as well. | ||
}} | |||
}} | |||
===D=== | ===== <span class="invisible-header">j.D</span> ===== | ||
{{MoveData | |||
|image=Mr. Heart-j.D.png | |||
|name=j.D | |||
|subtitle= | |||
Mr. Heart's crossup tool, also an alright jump-in button, combo extender (in wall bounce combos) and suprisingly often win air-trades. | |caption= | ||
|data= | |||
{{AttackData-HNK | |||
|Damage= | |||
|Guard=High | |||
|Startup=9 | |||
|Active=40 | |||
|Recovery= | |||
|Hit Adv= | |||
|Block Adv= | |||
|description=Mr. Heart's crossup tool, also an alright jump-in button, combo extender (in wall bounce combos) and suprisingly often win air-trades. | |||
}} | |||
}} | |||
===Other=== | |||
< | ===== <span class="invisible-header">6A</span> ===== | ||
A | {{MoveData | ||
|image=Mr. Heart-6A.png | |||
|name=6A | |||
|subtitle= | |||
|caption= | |||
|data= | |||
{{AttackData-HNK | |||
|Damage= | |||
|Guard=High | |||
|Startup=23 | |||
|Active=4 | |||
|Recovery= | |||
|Hit Adv= | |||
|Block Adv=-20 | |||
|description=A relatively fast overhead that shares its animation with 5D, but cannot be canceled. Unfortunately its poor reward on hit and bad frame advantage stop it from being very useful. On a deep corner hit, you can OTG with [[Mr._Heart#5A|Heart's A]] | |||
}} | |||
}} | |||
=== | ===== <span class="invisible-header">Throw</span> ===== | ||
{{MoveData | |||
|image=Mr. Heart-Throw.png | |||
|name=Throw | |||
|subtitle= | |||
|caption= | |||
|data= | |||
{{AttackData-HNK | |||
|Damage= | |||
|Guard= | |||
|Startup=4 | |||
|Active=4 | |||
|Recovery= | |||
|Hit Adv= | |||
|Block Adv= | |||
|description=A sideswitching throw that allows for combos when the opponent is thrown into the corner. A great mixup option that leads to huge damage or even death vs some characters. Has an incredibly short whiff animation that can let you 623A or 5A an opponent that jumps out. | |||
}} | |||
}} | |||
===== <span class="invisible-header">BD Throw</span> ===== | |||
< | {{MoveData | ||
|image=Mr. Heart-BD.png | |||
|name=BD Throw | |||
|subtitle= | |||
|caption= | |||
|data= | |||
{{AttackData-HNK | |||
|Damage= | |||
|Guard= | |||
|Startup=17 (Without movement) | |||
|Active=9 | |||
|Recovery= | |||
|Hit Adv= | |||
|Block Adv= | |||
|description=*Has one hit of armor | |||
Probably the best BD Throw in the game. Unique to Mr. Heart, this BD Throw can grab crouching opponents and combo into itself during Itteyo!! When performed far away from the opponent, Mr. Heart will wait for a bit and then begin to run at the opponent, and throw them when he reaches them. | |||
}} | |||
}} | |||
=== | ===== <span class="invisible-header">Heavy Strike</span> ===== | ||
{{MoveData | |||
|image=Mr. Heart-Heavy.png | |||
|name=Heavy Strike | |||
|subtitle= | |||
|caption= | |||
|data= | |||
{{AttackData-HNK | |||
|Damage= | |||
|Guard= | |||
|Startup=34 | |||
|Active=4 | |||
|Recovery= | |||
|Hit Adv= | |||
|Block Adv= | |||
|description=A regular Heavy Strike with great range, but like all other Heavy Strikes it's quite risky to use. | |||
}} | |||
}} | |||
18- | ===== <span class="invisible-header">Banishing Strike</span> ===== | ||
{{MoveData | |||
One of Mr. Heart's most important moves. Anytime it's possible try to confirm into Banishing Strike as the follow up boost is free. It is also an essential combo starter (just like his [[Mr._Heart/Special_Moves#Bring_it_on.21|Guard Cancel]]) that can often lead to 50% without meter, or 100% with it. | |image=Mr. Heart-Bani.png | ||
|name=Banishing Strike | |||
|subtitle= | |||
|caption= | |||
|data= | |||
{{AttackData-HNK | |||
|Damage= | |||
|Guard=Mid | |||
|Startup=18-33 | |||
|Active=4 | |||
|Recovery= | |||
|Hit Adv= | |||
|Block Adv=-8 | |||
|description=One of Mr. Heart's most important moves. Anytime it's possible try to confirm into Banishing Strike as the follow up boost is free. It is also an essential combo starter (just like his [[Mr._Heart/Special_Moves#Bring_it_on.21|Guard Cancel]]) that can often lead to 50% without meter, or 100% with it. | |||
}} | |||
}} | |||
==Special Moves== | ==Special Moves== | ||
===No Escape=== | ===== <span class="invisible-header">No Escape!</span> ===== | ||
{{MoveData | |||
|image=Mr.Heart-NoEscape.png | |||
|name=No Escape! | |||
Mr. Heart vacuums the opponent in | |input=63214A | ||
|subtitle= | |||
|caption= | |||
|data= | |||
{{AttackData-HNK | |||
|Damage= | |||
|Guard= | |||
|Startup= | |||
|Active= | |||
|Recovery= | |||
|Hit Adv= | |||
|Block Adv= | |||
|description=*Has one hit of armor | |||
Mr. Heart vacuums the opponent in with his powerful lungs. This will pull in the opponent from ''anywhere'', letting you extend wall combos, change their jump arc, pull them in from neutral, etc. Get creative! | |||
}} | |||
}} | |||
===== <span class="invisible-header">Bring it on!</span> ===== | |||
{{MoveData | |||
|image=Mr.Heart-Bring.png | |||
|name=Bring it on! | |||
|input=214A -> 6 | |||
|subtitle= | |||
|caption= | |||
|data= | |||
{{AttackData-HNK | |||
|Damage= | |||
|Guard=Mid | |||
|Startup= | |||
|Active= | |||
|Recovery= | |||
|Hit Adv= | |||
|Block Adv= | |||
|description= | |||
A special combo starting counter and projectile reflector, Mr. Heart puffs out his chest and sends the opponent away similar to a Banishing Strike. If 6 is held, Mr. Heart will follow the opponent. Cannot counter low attacks, and has a small amount of punishable recovery, making it a bit risky. Takes off 1 star on hit. | A special combo starting counter and projectile reflector, Mr. Heart puffs out his chest and sends the opponent away similar to a Banishing Strike. If 6 is held, Mr. Heart will follow the opponent. Cannot counter low attacks, and has a small amount of punishable recovery, making it a bit risky. Takes off 1 star on hit. | ||
If done during blockstun, it functions as a unique Guard Cancel that takes half a bar of Aura, and applies a Banishing Strike effect, allowing for deadly combos. One of your most important tools. | If done during blockstun, it functions as a unique Guard Cancel that takes half a bar of Aura, and applies a Banishing Strike effect, allowing for deadly combos. One of your most important tools. | ||
}} | |||
}} | |||
===Earthcrush=== | ===== <span class="invisible-header">Earthcrush</span> ===== | ||
{{MoveData | |||
|image=Mr.Heart-EarthCrush.png | |||
|name=Earthcrush | |||
|input=214B/D | |||
|subtitle= | |||
|caption= | |||
|data= | |||
{{AttackData-HNK | |||
|Damage= | |||
|Guard=Mid | |||
|Startup= | |||
|Active= | |||
|Recovery= | |||
|Hit Adv= | |||
|Block Adv= | |||
|description=One of your most important moves, Earthcrush functions as Mr. Hearts primary long range tool and Grave Shoot. B version is right in front of Heart, and D version is full screen but has slower startup. Sadly it's hitbox isn't as large as the sprite would make it out to be, but it's still a key part of your neutral and combo game. B version takes 1 star on counter hit, D version takes 1 star on hit and 2 on counter hit. | |||
}} | |||
}} | |||
===== <span class="invisible-header">Earthquake</span> ===== | |||
{{MoveData | |||
|image=Mr.Heart-Earthquake.png | |||
|name=Earthquake | |||
|input=j.2B | |||
|subtitle= | |||
|caption= | |||
|data= | |||
{{AttackData-HNK | |||
|Damage= | |||
|Guard=High (First hit) | |||
|Startup= | |||
|Active= | |||
|Recovery= | |||
|Hit Adv= | |||
|Block Adv= | |||
|description=A unique aerial slam. Sends out an unblockable shockwave along the ground that knocks down the opponent. Stalls your air momentum, allowing you to mix up opponents trying to anti air or tech chase. Due to its long recovery, you don't get much advantage on hit. | |||
}} | |||
}} | |||
=== | ===== <span class="invisible-header">Dunk Receive</span> ===== | ||
{{MoveData | |||
|image=Mr.Heart-DunkReceive.png | |||
|name=Dunk Receive | |||
|input=623A/C | |||
|subtitle= | |||
|caption= | |||
|data= | |||
{{AttackData-HNK | |||
|Damage= | |||
|Guard= | |||
|Startup= | |||
|Active= | |||
|Recovery= | |||
|Hit Adv= | |||
|Block Adv= | |||
|description=*C version has one hit of armor | |||
An anti-air grab with extreme range. The A version has quick startup, while the C version has delayed startup, forward movement, and 1 hit of armor. Key part of your defense and combos, leading to an infinite on a few characters. Very strong move. 623A has slightly less recovery than 623C, allowing you to link a D Earthcrush for an extra star. 1 star on hit. | |||
}} | |||
}} | |||
===== <span class="invisible-header">Kenpou Goroshi</span> ===== | |||
{{MoveData | |||
|image=Mr.Heart-Kenpogoroshi.png | |||
|name=Kenpou Goroshi | |||
|input=214214A | |||
|subtitle= | |||
|caption= | |||
|data= | |||
{{AttackData-HNK | |||
|Damage= | |||
|Guard= | |||
|Startup=Mid (Initial clubs), High (Falling clubs) | |||
|Active= | |||
|Recovery= | |||
|Hit Adv= | |||
|Block Adv= | |||
|description=The club super. Completely invincible after the super flash, Mr. Heart sends out 7 spinning clubs, each of which can hit multiple times. About a second after all clubs leave the screen, 3 will fall back down from offscreen, one landing in each corner and one landing midscreen. These falling clubs will hit overhead, and take off 1 star on normal hit and 2 on counter hit. The initial clubs will not take off any stars. If you can force the opponent to block this super point blank, it does an ''incredible'' amount of Guard Gauge damage, letting you set up a Guard Break if in the corner. | |||
With two bars of aura, you can force an unblockable setup via the falling clubs. Use the first Kenpou Goroshi, force the opponent to block low, and then immediately perform another Kenpou Goroshi. While the opponent is stuck blocking low, the long screen freeze will let the overhead clubs come back down on the opponent and will combo them into the 2nd set of clubs. | |||
}} | |||
}} | |||
===== <span class="invisible-header">Hearts A</span> ===== | |||
{{MoveData | |||
|image=Mr.Heart-HeartsA.png | |||
|name=Hearts A | |||
|input=236236A | |||
|subtitle= | |||
|caption= | |||
|data= | |||
{{AttackData-HNK | |||
|Damage= | |||
|Guard= | |||
|Startup= | |||
|Active= | |||
|Recovery= | |||
|Hit Adv= | |||
|Block Adv= | |||
|description=The #1 command grab. Huge range, catches prejump, will OTG for combo extensions, and can do nearly 50% by itself. Huge use of aura, but if it hits its well worth it. Takes off 1 star on hit. Interestingly, this move is able to grab the opponent '''out of normally invincible moves such as DPs or supers.''' | |||
}} | |||
}} | |||
== | ==Itteyo!!== | ||
{{MoveData | |||
|image=Mr.Heart-ItHurts.png | |||
|name=Activation | |||
|input=236236C | |||
|subtitle= | |||
== | |caption= | ||
|data= | |||
{{AttackData-HNK | |||
|Damage= | |||
|Guard= | |||
|Startup= | |||
== | |Active= | ||
= | |Recovery= | ||
|Hit Adv= | |||
|Block Adv= | |||
|description=Like Dragon Install, but you've got diabetes. | |||
Like Dragon Install, but you've got diabetes. | |||
Itteyo is the most important part of Mr. Heart's combo game, giving him access to a multitude of new options such as a wall jump, full horizontal air control, new special moves, altering the properties of BD throw and FKO allowing them to be combo'd into, and a constant single hit of armor. Unfortunately, in this state Heart both cannot block and is always running towards the opponent, making using it in neutral basically a death sentence and turning a dropped combo into a horrifying scramble situation, especially when coupled with its long recovery. | Itteyo is the most important part of Mr. Heart's combo game, giving him access to a multitude of new options such as a wall jump, full horizontal air control, new special moves, altering the properties of BD throw and FKO allowing them to be combo'd into, and a constant single hit of armor. Unfortunately, in this state Heart both cannot block and is always running towards the opponent, making using it in neutral basically a death sentence and turning a dropped combo into a horrifying scramble situation, especially when coupled with its long recovery. | ||
}} | |||
}} | |||
{{MoveData | |||
|image=Mr.Heart-BigHug.png | |||
|name=Big Hug | |||
|input=236A | |||
|subtitle= | |||
|caption= | |||
|data= | |||
{{AttackData-HNK | |||
|Damage= | |||
|Guard= | |||
|Startup= | |||
|Active= | |||
|Recovery= | |||
|Hit Adv= | |||
|Block Adv= | |||
|description=Launching command grab. Nothing too special, but can lead to some decent combos, along with being a key part in Typhoon loops. | |||
}} | |||
}} | |||
=== | {{MoveData | ||
- | |image=Mr.Heart-Cross.png | ||
|name=Meat Cross | |||
|input=j.236B | |||
|subtitle= | |||
|caption= | |||
|data= | |||
{{AttackData-HNK | |||
|Damage= | |||
|Guard=High | |||
|Startup= | |||
|Active= | |||
|Recovery= | |||
|Hit Adv= | |||
|Block Adv= | |||
|description=A wide aerial swing that knocks the opponent to the ground. Useful as part of Typhoon loop enders. Takes 1 star on regular hit, applies a Banishing Strike effect and takes 2 stars on counter hit. | |||
}} | |||
}} | |||
{{MoveData | |||
|image=Mr.Heart-Typhoon.png | |||
|name=Big Typhoon | |||
|input=236C/j.236C | |||
|subtitle= | |||
|caption= | |||
|data= | |||
{{AttackData-HNK | |||
|Damage= | |||
|Guard=Mid | |||
|Startup= | |||
|Active= | |||
|Recovery= | |||
|Hit Adv= | |||
|Block Adv= | |||
|description=*'''MAWARI!!''' | |||
By far the best part of Itteyo. As the name implies, Heart becomes a spinning typhoon, bouncing the opponent up and around. Both versions are cancellable into other Itteyo moves on hit, and the grounded version is jump cancellable. Applies a Banishing Strike effect and takes 1 star on counter hit. | |||
}} | |||
}} | |||
=== | {{MoveData | ||
|image=Mr.Heart-Body.png | |||
|name=Body Throwing | |||
|input=j.236D | |||
|subtitle= | |||
|caption= | |||
|data= | |||
{{AttackData-HNK | |||
|Damage= | |||
|Guard= | |||
|Startup= | |||
|Active= | |||
|Recovery= | |||
|Hit Adv= | |||
|Block Adv= | |||
|description=Aerial command grab. Relatively large range, and used most often in Typhoon enders. Takes off 1 star on counter hit. | |||
}} | |||
}} | |||
=== | {{MoveData | ||
|image=Mr.Heart-MeatDunk.png | |||
|name=Meat Dunk | |||
|input=j.236E | |||
|subtitle= | |||
|caption= | |||
|data= | |||
{{AttackData-HNK | |||
|Damage= | |||
|Guard= | |||
|Startup= | |||
|Active= | |||
|Recovery= | |||
|Hit Adv= | |||
|Block Adv= | |||
|description=Another aerial command grab. Has no whiff animation, and can be used as an OTG after jB. Takes off 1 star on hit. | |||
}} | |||
}} | |||
=== | {{MoveData | ||
|image=Mr.Heart-FKO.png | |||
|name=It really hurts!! | |||
|input=236CD (Fatal KO) | |||
|subtitle= | |||
|caption= | |||
|data= | |||
{{AttackData-HNK | |||
|Damage=FATAL KO | |||
|Guard= | |||
|Startup=8F startup (pre flash), 0F post flash | |||
|Active= | |||
|Recovery= | |||
|Hit Adv= | |||
|Block Adv= | |||
|description=FKO command grab with almost nonexistent combo options. Sadly, it has slightly less range than Heart's A and cannot grab prejump, along with a short amount of startup before it goes active. Thankfully, after the super flash appears, the opponent cannot do anything to escape. Best to think of it as an extremely high risk/high reward BD throw. | |||
}} | |||
}} | |||
{{Navbox-HNK}} | {{Navbox-HNK}} | ||
[[Category:Hokuto no Ken]] | [[Category:Hokuto no Ken]] | ||
Latest revision as of 03:40, 18 November 2021
Introduction
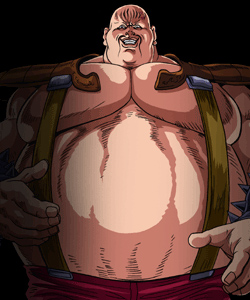
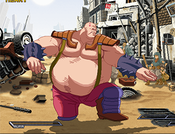
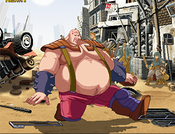
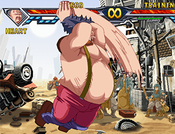
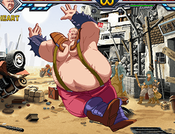
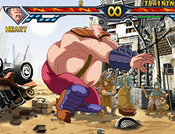
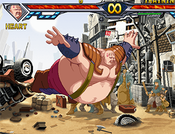
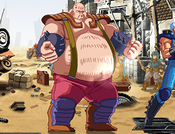
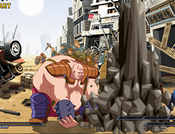
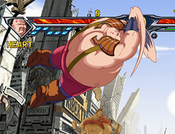
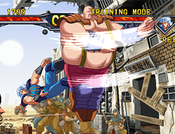
Mr. Heart is a 'grappler' type character, and he plays similarly to the grappler characters in other ARC games. Specifically, he moves very slowly and has no forward dash. Mr. Heart also has no Boost gauge, but his Banishing Strike still functions identically to other character's in that he is able to do a follow-up wallbounce combo. He is also able to use his Aura to perform a special Guard Cancel that can be followed up with a combo. As you would expect of a grappler character, he has a large amount of grab type moves, including both a grab super move and grab Fatal KO(which is the only FKO in the game that cannot be comboed into).
While fairly decent on both the offensive and defensive, his poor maneuverability is what causes Mr. Heart to be considered a weak character. Because of his slow speed Mr. Heart is often unable to get out of disadvantageous situations without taking a risk. That said, he has extremely high potential, and is quite capable of overcoming his bad matchups.
| Pros | Cons |
|
|
Before diving right into the combos be sure to familiarize yourself with Mr. Heart's special/super moves and his unique normals.
Normal Moves
Standing
5A
| Damage | Guard | Startup | Active | Recovery | Hit Adv | Block Adv | |||||
|---|---|---|---|---|---|---|---|---|---|---|---|
| - | Mid | 5 | 4,4 | - | - | +3 | |||||
|
One of Mr. Hearts most important normals, it serves as a combo filler, anti-air and combo starter. | |||||||||||
5B
| Damage | Guard | Startup | Active | Recovery | Hit Adv | Block Adv | |||||
|---|---|---|---|---|---|---|---|---|---|---|---|
| - | Mid | 9 | 4 | - | - | -5 | |||||
|
Not nearly as good as crouch B, but still occasionally useful. Is used in some combo enders to stuff some extra damage before a Heart's A. | |||||||||||
5C
| Damage | Guard | Startup | Active | Recovery | Hit Adv | Block Adv | |||||
|---|---|---|---|---|---|---|---|---|---|---|---|
| - | Mid | 29 (Uncharged) | 4 | - | - | -4 | |||||
This move should almost never be used. It has an incrediblity long startup time, which is only worth it if you can get the full charge damage wise. It is also neither special or normal cancelable, although it can be used in a gimmicky blockstring due to its range and hit of armor. | |||||||||||
5D
| Damage | Guard | Startup | Active | Recovery | Hit Adv | Block Adv | |||||
|---|---|---|---|---|---|---|---|---|---|---|---|
| - | Mid | 10 | 4 | - | - | -24 | |||||
|
A launcher that can be chained into from standing A. Is used heavily in combos and as a hit confirm. Can be jump cancelled allowing IAD pressure from strings such as 2B 5D/5A 5D. Not a very good button to press in neutral though. | |||||||||||
Crouching
2A
| Damage | Guard | Startup | Active | Recovery | Hit Adv | Block Adv | |||||
|---|---|---|---|---|---|---|---|---|---|---|---|
| - | Mid | 7 | 4 | - | - | +7 | |||||
|
A quite fast and good reaching jab. Usually best used in conjunction with 2B to hit confirm. | |||||||||||
2B
| Damage | Guard | Startup | Active | Recovery | Hit Adv | Block Adv | |||||
|---|---|---|---|---|---|---|---|---|---|---|---|
| - | Low | 7 | 4 | - | - | +6 | |||||
|
Mr. Heart's most trusted companion and main poke, this baby not only has alright range, it also combos into Banishing Strike or Earthcrush (depending on range) on hit. Use it often. | |||||||||||
2C
| Damage | Guard | Startup | Active | Recovery | Hit Adv | Block Adv | |||||
|---|---|---|---|---|---|---|---|---|---|---|---|
| - | Mid | 17 (Uncharged) | 4 | - | - | -4 | |||||
See Standing C. Also doesn't hit low but launches on charged hit for an Earthcrush style combo. Not worth the risk though. | |||||||||||
2D
| Damage | Guard | Startup | Active | Recovery | Hit Adv | Block Adv | |||||
|---|---|---|---|---|---|---|---|---|---|---|---|
| - | High | 35 | 4 | - | - | -22 | |||||
|
A slow, overhead sweep that can't be cancelled into anything and doesn't lead into anything except seeing your opponents cool combo when they punish it. Try to avoid this normal, unless you like seeing cool combos. | |||||||||||
Air
j.A
| Damage | Guard | Startup | Active | Recovery | Hit Adv | Block Adv | |||||
|---|---|---|---|---|---|---|---|---|---|---|---|
| - | High | 10 | 6 | - | - | - | |||||
|
A good air-to-air poke that can be special cancelled into AC air grab. | |||||||||||
j.B
| Damage | Guard | Startup | Active | Recovery | Hit Adv | Block Adv | |||||
|---|---|---|---|---|---|---|---|---|---|---|---|
| - | High | 13 | 6 | - | - | - | |||||
|
Can occasionally be used as an instant air-dash pressure tool, but is otherwise primarily used to adjust the height in wall bounce combos. | |||||||||||
j.C
| Damage | Guard | Startup | Active | Recovery | Hit Adv | Block Adv | |||||
|---|---|---|---|---|---|---|---|---|---|---|---|
| - | High | 13 (Uncharged) | 40 | - | - | - | |||||
Holding this button will make Mr. Heart float in the air, and if he lands without launching the attack, he will gain one hit of super armor that lasts until he gets hit, takes chip damage, or performs another armored move such as 5C or 623C. In general an alright air button as well just for its range. Hitstuns for a very long time as well. | |||||||||||
j.D
| Damage | Guard | Startup | Active | Recovery | Hit Adv | Block Adv | |||||
|---|---|---|---|---|---|---|---|---|---|---|---|
| - | High | 9 | 40 | - | - | - | |||||
|
Mr. Heart's crossup tool, also an alright jump-in button, combo extender (in wall bounce combos) and suprisingly often win air-trades. | |||||||||||
Other
6A
| Damage | Guard | Startup | Active | Recovery | Hit Adv | Block Adv | |||||
|---|---|---|---|---|---|---|---|---|---|---|---|
| - | High | 23 | 4 | - | - | -20 | |||||
|
A relatively fast overhead that shares its animation with 5D, but cannot be canceled. Unfortunately its poor reward on hit and bad frame advantage stop it from being very useful. On a deep corner hit, you can OTG with Heart's A | |||||||||||
Throw
| Damage | Guard | Startup | Active | Recovery | Hit Adv | Block Adv | |||||
|---|---|---|---|---|---|---|---|---|---|---|---|
| - | - | 4 | 4 | - | - | - | |||||
|
A sideswitching throw that allows for combos when the opponent is thrown into the corner. A great mixup option that leads to huge damage or even death vs some characters. Has an incredibly short whiff animation that can let you 623A or 5A an opponent that jumps out. | |||||||||||
BD Throw
| Damage | Guard | Startup | Active | Recovery | Hit Adv | Block Adv | |||||
|---|---|---|---|---|---|---|---|---|---|---|---|
| - | - | 17 (Without movement) | 9 | - | - | - | |||||
Probably the best BD Throw in the game. Unique to Mr. Heart, this BD Throw can grab crouching opponents and combo into itself during Itteyo!! When performed far away from the opponent, Mr. Heart will wait for a bit and then begin to run at the opponent, and throw them when he reaches them. | |||||||||||
Heavy Strike
| Damage | Guard | Startup | Active | Recovery | Hit Adv | Block Adv | |||||
|---|---|---|---|---|---|---|---|---|---|---|---|
| - | - | 34 | 4 | - | - | - | |||||
|
A regular Heavy Strike with great range, but like all other Heavy Strikes it's quite risky to use. | |||||||||||
Banishing Strike
| Damage | Guard | Startup | Active | Recovery | Hit Adv | Block Adv | |||||
|---|---|---|---|---|---|---|---|---|---|---|---|
| - | Mid | 18-33 | 4 | - | - | -8 | |||||
|
One of Mr. Heart's most important moves. Anytime it's possible try to confirm into Banishing Strike as the follow up boost is free. It is also an essential combo starter (just like his Guard Cancel) that can often lead to 50% without meter, or 100% with it. | |||||||||||
Special Moves
No Escape!
| Damage | Guard | Startup | Active | Recovery | Hit Adv | Block Adv | |||||
|---|---|---|---|---|---|---|---|---|---|---|---|
| - | - | - | - | - | - | - | |||||
Mr. Heart vacuums the opponent in with his powerful lungs. This will pull in the opponent from anywhere, letting you extend wall combos, change their jump arc, pull them in from neutral, etc. Get creative! | |||||||||||
Bring it on!
| Damage | Guard | Startup | Active | Recovery | Hit Adv | Block Adv | |||||
|---|---|---|---|---|---|---|---|---|---|---|---|
| - | Mid | - | - | - | - | - | |||||
|
A special combo starting counter and projectile reflector, Mr. Heart puffs out his chest and sends the opponent away similar to a Banishing Strike. If 6 is held, Mr. Heart will follow the opponent. Cannot counter low attacks, and has a small amount of punishable recovery, making it a bit risky. Takes off 1 star on hit. If done during blockstun, it functions as a unique Guard Cancel that takes half a bar of Aura, and applies a Banishing Strike effect, allowing for deadly combos. One of your most important tools. | |||||||||||
Earthcrush
| Damage | Guard | Startup | Active | Recovery | Hit Adv | Block Adv | |||||
|---|---|---|---|---|---|---|---|---|---|---|---|
| - | Mid | - | - | - | - | - | |||||
|
One of your most important moves, Earthcrush functions as Mr. Hearts primary long range tool and Grave Shoot. B version is right in front of Heart, and D version is full screen but has slower startup. Sadly it's hitbox isn't as large as the sprite would make it out to be, but it's still a key part of your neutral and combo game. B version takes 1 star on counter hit, D version takes 1 star on hit and 2 on counter hit. | |||||||||||
Earthquake
| Damage | Guard | Startup | Active | Recovery | Hit Adv | Block Adv | |||||
|---|---|---|---|---|---|---|---|---|---|---|---|
| - | High (First hit) | - | - | - | - | - | |||||
|
A unique aerial slam. Sends out an unblockable shockwave along the ground that knocks down the opponent. Stalls your air momentum, allowing you to mix up opponents trying to anti air or tech chase. Due to its long recovery, you don't get much advantage on hit. | |||||||||||
Dunk Receive
| Damage | Guard | Startup | Active | Recovery | Hit Adv | Block Adv | |||||
|---|---|---|---|---|---|---|---|---|---|---|---|
| - | - | - | - | - | - | - | |||||
An anti-air grab with extreme range. The A version has quick startup, while the C version has delayed startup, forward movement, and 1 hit of armor. Key part of your defense and combos, leading to an infinite on a few characters. Very strong move. 623A has slightly less recovery than 623C, allowing you to link a D Earthcrush for an extra star. 1 star on hit. | |||||||||||
Kenpou Goroshi
| Damage | Guard | Startup | Active | Recovery | Hit Adv | Block Adv | |||||
|---|---|---|---|---|---|---|---|---|---|---|---|
| - | - | Mid (Initial clubs), High (Falling clubs) | - | - | - | - | |||||
|
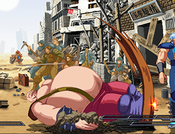
The club super. Completely invincible after the super flash, Mr. Heart sends out 7 spinning clubs, each of which can hit multiple times. About a second after all clubs leave the screen, 3 will fall back down from offscreen, one landing in each corner and one landing midscreen. These falling clubs will hit overhead, and take off 1 star on normal hit and 2 on counter hit. The initial clubs will not take off any stars. If you can force the opponent to block this super point blank, it does an incredible amount of Guard Gauge damage, letting you set up a Guard Break if in the corner. With two bars of aura, you can force an unblockable setup via the falling clubs. Use the first Kenpou Goroshi, force the opponent to block low, and then immediately perform another Kenpou Goroshi. While the opponent is stuck blocking low, the long screen freeze will let the overhead clubs come back down on the opponent and will combo them into the 2nd set of clubs. | |||||||||||
Hearts A
| Damage | Guard | Startup | Active | Recovery | Hit Adv | Block Adv | |||||
|---|---|---|---|---|---|---|---|---|---|---|---|
| - | - | - | - | - | - | - | |||||
|
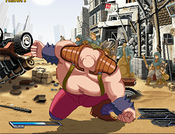
The #1 command grab. Huge range, catches prejump, will OTG for combo extensions, and can do nearly 50% by itself. Huge use of aura, but if it hits its well worth it. Takes off 1 star on hit. Interestingly, this move is able to grab the opponent out of normally invincible moves such as DPs or supers. | |||||||||||
Itteyo!!
| Damage | Guard | Startup | Active | Recovery | Hit Adv | Block Adv | |||||
|---|---|---|---|---|---|---|---|---|---|---|---|
| - | - | - | - | - | - | - | |||||
|
Like Dragon Install, but you've got diabetes. Itteyo is the most important part of Mr. Heart's combo game, giving him access to a multitude of new options such as a wall jump, full horizontal air control, new special moves, altering the properties of BD throw and FKO allowing them to be combo'd into, and a constant single hit of armor. Unfortunately, in this state Heart both cannot block and is always running towards the opponent, making using it in neutral basically a death sentence and turning a dropped combo into a horrifying scramble situation, especially when coupled with its long recovery. | |||||||||||
| Damage | Guard | Startup | Active | Recovery | Hit Adv | Block Adv | |||||
|---|---|---|---|---|---|---|---|---|---|---|---|
| - | - | - | - | - | - | - | |||||
|
Launching command grab. Nothing too special, but can lead to some decent combos, along with being a key part in Typhoon loops. | |||||||||||
| Damage | Guard | Startup | Active | Recovery | Hit Adv | Block Adv | |||||
|---|---|---|---|---|---|---|---|---|---|---|---|
| - | High | - | - | - | - | - | |||||
|
A wide aerial swing that knocks the opponent to the ground. Useful as part of Typhoon loop enders. Takes 1 star on regular hit, applies a Banishing Strike effect and takes 2 stars on counter hit. | |||||||||||
| Damage | Guard | Startup | Active | Recovery | Hit Adv | Block Adv | |||||
|---|---|---|---|---|---|---|---|---|---|---|---|
| - | Mid | - | - | - | - | - | |||||
By far the best part of Itteyo. As the name implies, Heart becomes a spinning typhoon, bouncing the opponent up and around. Both versions are cancellable into other Itteyo moves on hit, and the grounded version is jump cancellable. Applies a Banishing Strike effect and takes 1 star on counter hit. | |||||||||||
| Damage | Guard | Startup | Active | Recovery | Hit Adv | Block Adv | |||||
|---|---|---|---|---|---|---|---|---|---|---|---|
| - | - | - | - | - | - | - | |||||
|
Aerial command grab. Relatively large range, and used most often in Typhoon enders. Takes off 1 star on counter hit. | |||||||||||
| Damage | Guard | Startup | Active | Recovery | Hit Adv | Block Adv | |||||
|---|---|---|---|---|---|---|---|---|---|---|---|
| - | - | - | - | - | - | - | |||||
|
Another aerial command grab. Has no whiff animation, and can be used as an OTG after jB. Takes off 1 star on hit. | |||||||||||
| Damage | Guard | Startup | Active | Recovery | Hit Adv | Block Adv | |||||
|---|---|---|---|---|---|---|---|---|---|---|---|
| FATAL KO | - | 8F startup (pre flash), 0F post flash | - | - | - | - | |||||
|
FKO command grab with almost nonexistent combo options. Sadly, it has slightly less range than Heart's A and cannot grab prejump, along with a short amount of startup before it goes active. Thankfully, after the super flash appears, the opponent cannot do anything to escape. Best to think of it as an extremely high risk/high reward BD throw. | |||||||||||
