|
|
| (13 intermediate revisions by 4 users not shown) |
| Line 1: |
Line 1: |
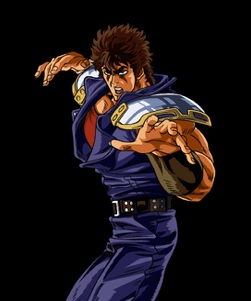
| [[File:Kenshiroportrait.jpg|right]]
| | {{Infobox Character HNK |
| | |name=Kenshiro |
| | }} |
| | |
| {{TOClimit|3}} | | {{TOClimit|3}} |
|
| |
| ==Introduction==
| |
| [[Image:Kenshiroportrait.png|left]]
| |
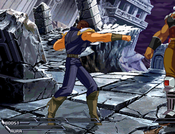
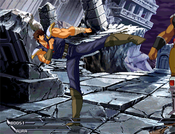
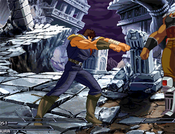
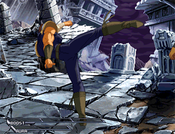
| Kenshiro's play-style is quite standard, as one might expect from the main character of a fighting game. He has good normals, well-balanced specials, and his bread and butter combos are very easy to master. His mixup abilities are very good as well thanks to his extremely fast instant air dash B, and he is capable of applying a lot of pressure in the corner. On the defense he is not lacking either, having both an invincible uppercut and Musou Tensei that he can use to get out of bad spots. Overall Kenshiro is a very solid character, and great choice for players of any level.
| |
|
| |
| {|
| |
| |-style="text-align:left;"
| |
| ! Pros !! Cons
| |
| |- style="vertical-align:top;text-align:left"
| |
| | style="width: 50%;"|
| |
| * Good corner mixup
| |
| * Great star reducing ability, capable of 4 and even 5-star combos
| |
| * Equipped with many options for escaping pressure
| |
| | style="width: 50%;"|
| |
| * Bad matchups against Toki and Juda
| |
| * Has a huge hitbox, which makes him very easy to combo
| |
| |-
| |
| |}
| |
|
| |
|
| Before diving right into the combos be sure to familiarize yourself with Kenshiro's special/super moves and important normals. | | Before diving right into the combos be sure to familiarize yourself with Kenshiro's special/super moves and important normals. |
|
| |
|
| ==Normal Moves== | | ==Normal Moves== |
| ===Standing=== | | ===Close=== |
| ====Close A==== | | ===== <span class="invisible-header">cl.A</span> ===== |
| [[Image:Kenshiro-c.A.png]]
| | {{MoveData |
| | | |image=Kenshiro-c.A.png |
| 5F Startup, 4F Active, -4 on block<br>
| | |name=cl.A |
| <br>
| | |subtitle= |
| A quick jab. Not very useful for pressure or zoning, but used in some combos.<br> | | |caption= |
| | | |data= |
| ====Far A====
| | {{AttackData-HNK |
| [[Image:Kenshiro-A.png]]<br>
| | |Damage= |
| | | |Guard=Mid |
| 5F Startup, 4F Active, -4 on block<br>
| | |Startup=5 |
| <br>
| | |Active=4 |
| A straight punch. Mostly the same as close A but perhaps slightly more useful as an anti-air.<br>
| | |Recovery= |
| | | |Hit Adv= |
| ====Close B====
| | |Block Adv=-4 |
| [[Image:Kenshiro-c.B.png]]
| | |description=A quick jab. Not very useful for pressure or zoning, but used in some combos. |
| | }} |
| | }} |
|
| |
|
| 8F Startup, 4F Active, +2 on block<br>
| | ===== <span class="invisible-header">cl.B</span> ===== |
| <br>
| | {{MoveData |
| A low kick. Decent but lacking in comparison to 2B.<br> | | |image=Kenshiro-c.B.png |
| | |name=cl.B |
| | |subtitle= |
| | |caption= |
| | |data= |
| | {{AttackData-HNK |
| | |Damage= |
| | |Guard=Mid |
| | |Startup=8 |
| | |Active=4 |
| | |Recovery= |
| | |Hit Adv= |
| | |Block Adv=+2 |
| | |description=A low kick. Decent but lacking in comparison to 2B. |
| | }} |
| | }} |
|
| |
|
| ====Far B==== | | ===== <span class="invisible-header">cl.C</span> ===== |
| [[Image:Kenshiro-B.png]]
| | {{MoveData |
| | |image=Kenshiro-c.C.png |
| | |name=cl.C |
| | |subtitle= |
| | |caption= |
| | |data= |
| | {{AttackData-HNK |
| | |Damage= |
| | |Guard=Mid |
| | |Startup=9 |
| | |Active=4 |
| | |Recovery= |
| | |Hit Adv= |
| | |Block Adv=-1 |
| | |description=Two quick punches. No real use, seen mostly when missing a throw attempt. |
| | }} |
| | }} |
|
| |
|
| 7F Startup, 4F Active, +2 on block<br>
| | ===== <span class="invisible-header">cl.D</span> ===== |
| <br> | | {{MoveData |
| A straight kick. Gives advantage on guard and cancelable into itself. Very useful for mid-range zoning.<br>
| | |image=Kenshiro-c.D.png |
| | |name=cl.D |
| | |subtitle= |
| | |caption= |
| | |data= |
| | {{AttackData-HNK |
| | |Damage= |
| | |Guard=Mid |
| | |Startup=7 |
| | |Active=4 |
| | |Recovery= |
| | |Hit Adv= |
| | |Block Adv=-17 |
| | |description=An upward kick. Its quick startup and big hitbox make it a very good anti-air. Also useful in combos. |
| | }} |
| | }} |
|
| |
|
| ====Close C==== | | ===Far=== |
| [[Image:Kenshiro-c.C.png]]
| | ===== <span class="invisible-header">f.A</span> ===== |
| | {{MoveData |
| | |image=Kenshiro-A.png |
| | |name=f.A |
| | |subtitle= |
| | |caption= |
| | |data= |
| | {{AttackData-HNK |
| | |Damage= |
| | |Guard=Mid |
| | |Startup=5 |
| | |Active=4 |
| | |Recovery= |
| | |Hit Adv= |
| | |Block Adv=-4 |
| | |description=A straight punch. Mostly the same as close A but perhaps slightly more useful as an anti-air. |
| | }} |
| | }} |
|
| |
|
| 9F Startup, 4F Active, -1 on block<br>
| | ===== <span class="invisible-header">f.B</span> ===== |
| <br>
| | {{MoveData |
| Two quick punches. No real use, seen mostly when missing with a throw attempt.<br>
| | |image=Kenshiro-B.png |
| | |name=f.B |
| | |subtitle= |
| | |caption= |
| | |data= |
| | {{AttackData-HNK |
| | |Damage= |
| | |Guard=Mid |
| | |Startup=7 |
| | |Active=4 |
| | |Recovery= |
| | |Hit Adv= |
| | |Block Adv=+2 |
| | |description=A straight kick. Gives advantage on guard and cancelable into itself. Very useful for mid-range zoning. |
| | }} |
| | }} |
|
| |
|
| ====Far C==== | | ===== <span class="invisible-header">f.C</span> ===== |
| [[Image:Kenshiro-C.png]]
| | {{MoveData |
| | |image=Kenshiro-C.png |
| | |name=f.C |
| | |subtitle= |
| | |caption= |
| | |data= |
| | {{AttackData-HNK |
| | |Damage= |
| | |Guard=Mid |
| | |Startup=11 |
| | |Active=4 |
| | |Recovery= |
| | |Hit Adv= |
| | |Block Adv=-5 |
| | |description=A two-handed punch. Long active frames and good range. Very useful for zoning, can hit confirm Boost into a combo. Against Rei only, far C combos into 236D when you hit him crouching - this is very useful as far D does not hit crouching opponents. |
| | }} |
| | }} |
|
| |
|
| 11F Startup, 4F Active, -5 on block<br>
| | ===== <span class="invisible-header">f.D</span> ===== |
| <br>
| | {{MoveData |
| A two-handed punch. Long active frames and good range. Very useful for zoning, can hit confirm Boost into a combo. Against Rei only, far C combos into 236D when you hit him crouching - this is very useful as far D does not hit crouching opponents.<br>
| | |image=Kenshiro-D.png |
| | | |name=f.D |
| ====Close D==== | | |subtitle= |
| [[Image:Kenshiro-c.D.png]]
| | |caption= |
| | | |data= |
| 7F Startup, 4F Active, -17 on block<br>
| | {{AttackData-HNK |
| <br>
| | |Damage= |
| An upward kick. Its quick startup and big hitbox make it a very good anti-air. Also useful in combos.<br>
| | |Guard=Mid |
| | | |Startup=7 |
| ====Far D==== | | |Active=4 |
| [[Image:Kenshiro-D.png]]
| | |Recovery= |
| | | |Hit Adv= |
| 7F Startup, 4F Active, -14 on block<br>
| | |Block Adv=-14 |
| <br>
| | |description=A strong kick. With 7 frame startup, great range, and good comboability, this is without a doubt one of Kenshiro's best normals. |
| A strong kick. With 7 frame startup, great range, and good comboability, this is without a doubt one of Kenshiro's best normals.<br> | | }} |
| | }} |
|
| |
|
| ===Crouching=== | | ===Crouching=== |
| ====A==== | | ===== <span class="invisible-header">2A</span> ===== |
| [[Image:Kenshiro-2A.png]]
| | {{MoveData |
| | | |image=Kenshiro-2A.png |
| 5F Startup, 4F Active, -4 on block<br>
| | |name=2A |
| <br>
| | |subtitle= |
| A crouching jab. Fast startup, used at close range and in combos.<br> | | |caption= |
| | | |data= |
| ====B====
| | {{AttackData-HNK |
| [[Image:Kenshiro-2B.png]]
| | |Damage= |
| | | |Guard=Mid |
| 7F Startup, 2F Active, +6 on block<br>
| | |Startup=5 |
| <br>
| | |Active=4 |
| A low crouching kick. 8 frame advantage on block, allowing for mixup with another 2B or air dash B. Very useful.<br>
| | |Recovery= |
| | | |Hit Adv= |
| ====C====
| | |Block Adv=-4 |
| [[Image:Kenshiro-2C.png]]
| | |description=A crouching jab. Fast startup, used at close range and in combos. |
| | }} |
| | }} |
|
| |
|
| 11F Startup, 4F Active, -5 on block<br>
| | ===== <span class="invisible-header">2B</span> ===== |
| <br>
| | {{MoveData |
| A crouching straight punch. Cancelable into itself, but it's slow startup and short range makes it not very useful.<br> | | |image=Kenshiro-2B.png |
| | |name=2B |
| | |subtitle= |
| | |caption= |
| | |data= |
| | {{AttackData-HNK |
| | |Damage= |
| | |Guard=Low |
| | |Startup=7 |
| | |Active=2 |
| | |Recovery= |
| | |Hit Adv= |
| | |Block Adv=+6 |
| | |description=A low crouching kick. 6 frame advantage on block, allowing for mixup with another 2B or air dash B. Very useful. |
| | }} |
| | }} |
|
| |
|
| ====D==== | | ===== <span class="invisible-header">2C</span> ===== |
| [[Image:Kenshiro-2D.png]]
| | {{MoveData |
| | |image=Kenshiro-2C.png |
| | |name=2C |
| | |subtitle= |
| | |caption= |
| | |data= |
| | {{AttackData-HNK |
| | |Damage= |
| | |Guard=Mid |
| | |Startup=11 |
| | |Active=4 |
| | |Recovery= |
| | |Hit Adv= |
| | |Block Adv=-5 |
| | |description=A crouching straight punch. Cancelable into itself, but it's slow startup and short range makes it not very useful. |
| | }} |
| | }} |
|
| |
|
| 13F Startup, 4F Active, -6 on block<br>
| | ===== <span class="invisible-header">2D</span> ===== |
| <br>
| | {{MoveData |
| A sweep kick. Fairly long range but slow startup. | | |image=Kenshiro-2D.png |
| | |name=2D |
| | |subtitle= |
| | |caption= |
| | |data= |
| | {{AttackData-HNK |
| | |Damage= |
| | |Guard=Low |
| | |Startup=13 |
| | |Active=4 |
| | |Recovery= |
| | |Hit Adv=Launch |
| | |Block Adv=-6 |
| | |description=A sweep kick. Fairly long range but slow startup. |
| | }} |
| | }} |
|
| |
|
| ===Air=== | | ===Air=== |
| ====A==== | | ===== <span class="invisible-header">j.A</span> ===== |
| [[Image:Kenshiro-j.A.png]]
| | {{MoveData |
| | | |image=Kenshiro-j.A.png |
| 3F Startup, 6F Active<br>
| | |name=j.A |
| <br>
| | |subtitle= |
| A quick air jab. Used mostly for getting out of pressure and as a mixup option after an air dash B.<br> | | |caption= |
| | | |data= |
| ====B====
| | {{AttackData-HNK |
| [[Image:Kenshiro-j.B.png]]
| | |Damage= |
| | | |Guard=High |
| 10F Startup, 3F Active<br>
| | |Startup=3 |
| <br>
| | |Active=6 |
| An air kick. Its long range and quick execution make this move Kenshiro's main overhead.<br>
| | |Recovery= |
| | | |Hit Adv= |
| ====C====
| | |Block Adv= |
| [[Image:Kenshiro-j.C.png]]
| | |description=A quick air jab. Used mostly for getting out of pressure and as a mixup option after an air dash B. |
| | | }} |
| 10F Startup, 6F Active<br>
| | }} |
| <br>
| |
| A strong air punch. Fairly slow startup, works alright as an air-to-ground. Used mostly in combos.<br>
| |
| | |
| ====D====
| |
| [[Image:Kenshiro-j.D.png]]
| |
| | |
| 9F Startup, 2 Active per hit<br>
| |
| <br>
| |
| A 3-hit air kick. Good range to the side but not very effective against opponents below you. Use mostly in combos or for long range zoning.
| |
|
| |
|
| ===Other=== | | ===== <span class="invisible-header">j.B</span> ===== |
| ====6A==== | | {{MoveData |
| [[Image:Kenshiro-6A.png]]
| | |image=Kenshiro-j.B.png |
| | |name=j.B |
| | |subtitle= |
| | |caption= |
| | |data= |
| | {{AttackData-HNK |
| | |Damage= |
| | |Guard=High |
| | |Startup=10 |
| | |Active=3 |
| | |Recovery= |
| | |Hit Adv= |
| | |Block Adv= |
| | |description=An air kick. Its long range and quick execution make this move Kenshiro's main overhead. |
| | }} |
| | }} |
|
| |
|
| 27F Startup, 4F Active, -1 on block<br>
| | ===== <span class="invisible-header">j.C</span> ===== |
| <br>
| | {{MoveData |
| An overhead chop. Aside from being quite slow with a 27 frame startup, Kenshiro screaming 'GANZANRYOUZANHA!' at the top of his lungs doesn't help make this move any less telegraphed either. Still, using Boost it is possible follow up with a combo on a successful hit or a quick low on guard, making this move worth using every once in a while.
| | |image=Kenshiro-j.C.png |
| | |name=j.C |
| | |subtitle= |
| | |caption= |
| | |data= |
| | {{AttackData-HNK |
| | |Damage= |
| | |Guard=High |
| | |Startup=10 |
| | |Active=6 |
| | |Recovery= |
| | |Hit Adv= |
| | |Block Adv= |
| | |description=A strong air punch. Fairly slow startup, works alright as an air-to-ground. Used mostly in combos. |
| | }} |
| | }} |
|
| |
|
| ====6B==== | | ===== <span class="invisible-header">j.D</span> ===== |
| [[Image:Kenshiro-6B.png]]
| | {{MoveData |
| | |image=Kenshiro-j.D.png |
| | |name=j.D |
| | |subtitle= |
| | |caption= |
| | |data= |
| | {{AttackData-HNK |
| | |Damage= |
| | |Guard=High |
| | |Startup=9 |
| | |Active=2 () 2 () 2 |
| | |Recovery= |
| | |Hit Adv= |
| | |Block Adv= |
| | |description=A 3-hit air kick. Good range to the side but not very effective against opponents below you. Use mostly in combos or for long range zoning. |
| | }} |
| | }} |
|
| |
|
| 23F Startup, 4F Active, -1 on block<br>
| |
| <br>
| |
| A backhand punch. Jump cancelable and possesses Super Armor. Knocks opponent into the air on normal hit and causes wall bounce on counter. Very useful for dealing with [[Hokuto_no_Ken/Basic_Game_Mechanics#Guard_Cancel|Guard Cancels]].
| |
|
| |
|
| ====Throw==== | | ===Command Normals=== |
| [[Image:Kenshiro-Throw.png]]
| | ===== <span class="invisible-header">6A</span> ===== |
| | {{MoveData |
| | |image=Kenshiro-6A.png |
| | |name=6A |
| | |subtitle= |
| | |caption= |
| | |data= |
| | {{AttackData-HNK |
| | |Damage= |
| | |Guard=High |
| | |Startup=27 |
| | |Active=4 |
| | |Recovery= |
| | |Hit Adv= |
| | |Block Adv=-1 |
| | |description=An overhead chop. Aside from being quite slow with a 27 frame startup, Kenshiro screaming 'GANZANRYOUZANHA!' at the top of his lungs doesn't help make this move any less telegraphed either. Still, using Boost it is possible follow up with a combo on a successful hit or a quick low on guard, making this move worth using every once in a while. |
| | }} |
| | }} |
|
| |
|
| 4F Startup, 4F Active<br>
| | ===== <span class="invisible-header">6B</span> ===== |
| <br> | | {{MoveData |
| Kenshiro picks up his opponent, slaps them around a bit, then tosses them to the ground. Follow up possible in the corner. Can also follow up mid-screen with the use of Boost. Very useful and an important part of Kenshiro's mixup game. | | |image=Kenshiro-6B.png |
| | |name=6B |
| | |subtitle= |
| | |caption= |
| | |data= |
| | {{AttackData-HNK |
| | |Damage= |
| | |Guard=Mid |
| | |Startup=23 |
| | |Active=4 |
| | |Recovery= |
| | |Hit Adv= |
| | |Block Adv=-1 |
| | |description=A backhand punch. Jump cancelable and possesses Super Armor. Knocks opponent into the air on normal hit and causes wall bounce on counter. Very useful for dealing with [[Hokuto_no_Ken/Basic_Game_Mechanics#Guard_Cancel|Guard Cancels]]. |
| | }} |
| | }} |
|
| |
|
| ====BD Throw==== | | ===Universal Mechanics=== |
| [[Image:Kenshiro-BD.png]]
| | ===== <span class="invisible-header">Throw</span> ===== |
| | {{MoveData |
| | |image=Kenshiro-Throw.png |
| | |name=Throw |
| | |subtitle= |
| | |caption= |
| | |data= |
| | {{AttackData-HNK |
| | |Damage= |
| | |Guard=Throw |
| | |Startup=4 |
| | |Active=4 |
| | |Recovery= |
| | |Hit Adv=Launch |
| | |Block Adv=N/A |
| | |description=Kenshiro picks up his opponent, slaps them around a bit, then tosses them to the ground. Follow up possible in the corner. Can also follow up mid-screen with the use of Boost. Very useful and an important part of Kenshiro's mixup game. |
| | }} |
| | }} |
|
| |
|
| 9F Startup, 4F Active<br>
| | ===== <span class="invisible-header">BD Throw</span> ===== |
| <br> | | {{MoveData |
| Kenshiro throws his opponent into the air then hits them with his nunchaku. Follow up possible in the corner. Can also follow up mid-screen with the use of Boost. As it hits multiple times it is great for building meter. Like all BD throws its use is pretty much limited to dizzied opponents. | | |image=Kenshiro-BD.png |
| | |name=BD Throw |
| | |subtitle= |
| | |caption= |
| | |data= |
| | {{AttackData-HNK |
| | |Damage= |
| | |Guard=Throw (whiffs vs. crouch) |
| | |Startup=9 |
| | |Active=4 |
| | |Recovery= |
| | |Hit Adv=Launch |
| | |Block Adv=N/A |
| | |description=Kenshiro throws his opponent into the air then hits them with his nunchaku. Follow up possible in the corner. Can also follow up mid-screen with the use of Boost. As it hits multiple times it is great for building meter. Like all BD throws its use is pretty much limited to dizzied opponents. |
| | }} |
| | }} |
|
| |
|
| ====Grave Shoot==== | | ===== <span class="invisible-header">Grave Shoot</span> ===== |
| [[Image:Kenshiro-Grave.png]]
| | {{MoveData |
| | |image=Kenshiro-Grave.png |
| | |name=Grave Shoot |
| | |subtitle= |
| | |caption= |
| | |data= |
| | {{AttackData-HNK |
| | |Damage= |
| | |Guard=Mid |
| | |Startup=17 |
| | |Active=4 |
| | |Recovery= |
| | |Hit Adv=Grave Launch |
| | |Block Adv=+2 |
| | |description=A really, really high kick that launches the opponent into the air. Great range both above and to the sides, but will not hit crouching opponents. Extremely powerful as an early anti-air, and has a fairly short recovery. Also an important combo part. |
| | }} |
| | }} |
|
| |
|
| 17F Startup, 4F Active, +2 on block<br>
| | ===== <span class="invisible-header">Heavy Strike</span> ===== |
| <br> | | {{MoveData |
| A really, really high kick that launches the opponent into the air. Great range both above and to the sides, but will not hit crouching opponents. Extremely powerful as an early anti-air, and has a fairly short recovery. Also an important combo part. | | |image=Kenshiro-Heavy.png |
| | |name=Heavy Strike |
| | |subtitle= |
| | |caption= |
| | |data= |
| | {{AttackData-HNK |
| | |Damage= |
| | |Guard=Unblockable |
| | |Startup=39 |
| | |Active=4 |
| | |Recovery= |
| | |Hit Adv= |
| | |Block Adv=N/A |
| | |description=A body shot. Its really short range makes it one of the least useful Heavy Strikes in the game. |
| | }} |
| | }} |
|
| |
|
| ====Heavy Strike==== | | ===== <span class="invisible-header">Banishing Strike</span> ===== |
| [[Image:Kenshiro-Heavy.png]]
| | {{MoveData |
| | |image=Kenshiro-Bani.png |
| | |name=Banishing Strike |
| | |subtitle= |
| | |caption= |
| | |data= |
| | {{AttackData-HNK |
| | |Damage= |
| | |Guard=Mid |
| | |Startup=19-39 |
| | |Active=4 |
| | |Recovery= |
| | |Hit Adv=Banish Launch |
| | |Block Adv=-9 |
| | |description=A left-hook. Important combo part. |
| | }} |
| | }} |
|
| |
|
| 39F Startup, 4F Active<br>
| | ==Special Moves== |
| <br> | | ===== <span class="invisible-header">Touki</span> ===== |
| A body shot. Its really short range makes it one of the least useful Heavy Strikes in the game. | | {{MoveData |
| | |image=Kenshiro-Touki.png |
| | |name=Touki |
| | |subtitle=236A |
| | |caption= |
| | |data= |
| | {{AttackData-HNK |
| | |Damage= |
| | |Guard=Mid |
| | |Startup=5 |
| | |Active=4 |
| | |Recovery= |
| | |Hit Adv= |
| | |Block Adv=-4 |
| | |description=A small fireball that travels roughly half-screen. Used mostly for putting out other fireball moves and applying pressure. Takes off one star on counter hit. |
| | }} |
| | }} |
|
| |
|
| ====Banishing Strike==== | | ===== <span class="invisible-header">Hokuto Ujou Moushouha</span> ===== |
| [[Image:Kenshiro-Bani.png]]
| | {{MoveData |
| | | |image=Kenshiro-DPA.png |
| 19-39F Startup, 4F Active, -9 on block<br>
| | |image2=Kenshiro-DPC.png |
| <br> | | |name=Hokuto Ujou Moushouha |
| A left-hook. Important combo part.
| | |subtitle=623A/C (Air OK) |
| | | |caption= |
| ===Special Moves=== | | |data= |
| ====Touki==== | | {{AttackData-HNK |
| '''236A'''<br>
| | |version=Ground 623A |
| [[Image:Kenshiro-Touki.png]]<br>
| | |Damage= |
| A small fireball that travels roughly half-screen. Used mostly for putting out other fireball moves and applying pressure. Takes off one star on counter hit.
| | |Guard=Mid |
| | | |Startup= |
| ====Hokuto Ujou Moushouha==== | | |Active= |
| '''(Land or Air) 623A or C'''<br>
| | |Recovery= |
| [[Image:Kenshiro-DPA.png]][[Image:Kenshiro-DPC.png]]<br>
| | |Hit Adv=Launch |
| A dragon punch move with two versions - the A version(left picture) does a quick uppercut and Kenshiro remains grounded, while the C version(right picture) rises into the air. The ground A version has upper-body invulnerability and takes off a star on hit. On counterhit it takes off 2 stars, and the opponent is launched high into the air. It cannot be air guarded, even with the use of Aura Guard. | | |Block Adv= |
| | | |description=A dragon punch move with two versions - the A version(left picture) does a quick uppercut and Kenshiro remains grounded, while the C version(right picture) rises into the air. The ground A version has upper-body invulnerability and takes off a star on hit. On counterhit it takes off 2 stars, and the opponent is launched high into the air. It cannot be air guarded, even with the use of Aura Guard. |
| The ground C version of the uppercut is your classic invulnerable dragon punch, and takes one star on counter hit. An interesting bug exists in which it is possible to cancel the uppercut into ground moves, even though you are in the air. This makes Kenshiro's reversals particularly deadly when he has meter. While very unpractical, it is also possible to perform some extremely confusing mixups using this bug. See [http://www.nicovideo.jp/watch/sm8366267 this] video for some examples. | | }} |
| | {{AttackData-HNK |
| | |version=Ground 623C |
| | |Damage= |
| | |Guard=Mid |
| | |Startup= |
| | |Active= |
| | |Recovery= |
| | |Hit Adv=Launch |
| | |Block Adv= |
| | |description=The ground C version of the uppercut is your classic invulnerable dragon punch, and takes one star on counter hit. An interesting bug exists in which it is possible to cancel the uppercut into ground moves, even though you are in the air. This makes Kenshiro's reversals particularly deadly when he has meter. While very unpractical, it is also possible to perform some extremely confusing mixups using this bug. See [http://www.nicovideo.jp/watch/sm8366267 this] video for some examples. |
|
| |
|
| For the most part it is best to forget that the air versions of the uppercut exist as they have absolutely no use whatsoever. | | For the most part it is best to forget that the air versions of the uppercut exist as they have absolutely no use whatsoever. |
| | }} |
| | }} |
|
| |
|
| ====Hokuto Hieiken==== | | ===== <span class="invisible-header">Hokuto Hieiken</span> ===== |
| '''623B'''<br>
| | {{MoveData |
| [[Image:Kenshiro-Hieiken.png]]<br>
| | |image=Kenshiro-Hieiken.png |
| A diagonal rising kick move similar in appearance to Shin's Gokutoken, but lacking any invulnerability. Used mostly as a combo ender when it isn't possible to continue into anything else and as a very situational anti-air. Connecting with an airborne opponent causes wall bounce and can lead to some very big combos. Removes one star on counter hit. | | |name=Hokuto Hieiken |
| | |subtitle=623B |
| | |caption= |
| | |data= |
| | {{AttackData-HNK |
| | |Damage= |
| | |Guard=Mid |
| | |Startup= |
| | |Active= |
| | |Recovery= |
| | |Hit Adv=Launch |
| | |Block Adv= |
| | |description=A diagonal rising kick move similar in appearance to Shin's Gokutoken, but lacking any invulnerability. Used mostly as a combo ender when it isn't possible to continue into anything else and as a very situational anti-air. Connecting with an airborne opponent causes wall bounce and can lead to some very big combos. Removes one star on counter hit. |
| | }} |
| | }} |
|
| |
|
| ====Hikou Seieikou==== | | ===== <span class="invisible-header">Hokuto Seieikou</span> ===== |
| '''236C'''<br>
| | {{MoveData |
| [[Image:Kenshiro-Seiei.png]]<br>
| | |image=Kenshiro-Seiei.png |
| A short-ranged move in which Kenshiro strikes his opponent's pressure point, stunning them and taking off one star on normal hit and two on counter hit. Connecting with Seieikou also causes the victim to take chip damage from normal moves for a short duration. Due to its short range it is considered a combo-only move. | | |name=Hokuto Seieikou |
| | |subtitle=236C |
| | |caption= |
| | |data= |
| | {{AttackData-HNK |
| | |Damage= |
| | |Guard=Mid |
| | |Startup= |
| | |Active= |
| | |Recovery= |
| | |Hit Adv= |
| | |Block Adv= |
| | |description=A short-ranged move in which Kenshiro strikes his opponent's pressure point, stunning them and taking off one star on normal hit and two on counter hit. Connecting with Seieikou also causes the victim to take chip damage from normal moves for a short duration. Due to its short range it is considered a combo-only move. |
| | }} |
| | }} |
|
| |
|
| ====Tenha no Kamae==== | | ===== <span class="invisible-header">Tenha no Kamae</span> ===== |
| '''214C'''<br>
| | {{MoveData |
| [[Image:Kenshiro-Tenha.png]]<br>
| | |image=Kenshiro-Tenha.png |
| A charge type move that when executed causes the next attack to take off one extra star than it usually would if it connects. However, the charge is used up when you perform any attack, including normal moves, making it rather hard to use effectively. Even Guard Cancels will take off a star, and interestingly do not use up the charge, even after a successful hit. For some reason the C version Moushouha only will take off two stars(three on counterhit) when connecting. A small amount of Boost and Aura is gained when executing this move so it is also possible to build up meter when at a distance, provided your opponent doesn't have any Boost. The most common spot to use Tenha no Kamae is after dizzying an opponent in the corner, when coupled with a BD throw one can easily pull off a 5-star combo. | | |name=Tenha no Kamae |
| | |subtitle=214C |
| | |caption= |
| | |data= |
| | {{AttackData-HNK |
| | |Damage= |
| | |Guard= |
| | |Startup= |
| | |Active= |
| | |Recovery= |
| | |Hit Adv= |
| | |Block Adv= |
| | |description=A charge type move that when executed causes the next attack to take off one extra star than it usually would if it connects. However, the charge is used up when you perform any attack, including normal moves, making it rather hard to use effectively. Even Guard Cancels will take off a star, and interestingly do not use up the charge, even after a successful hit. For some reason the C version Moushouha only will take off two stars(three on counterhit) when connecting. A small amount of Boost and Aura is gained when executing this move so it is also possible to build up meter when at a distance, provided your opponent doesn't have any Boost. The most common spot to use Tenha no Kamae is after dizzying an opponent in the corner, when coupled with a BD throw one can easily pull off a 5-star combo. |
| | }} |
| | }} |
|
| |
|
| ====Hokuto Jaraikou==== | | ===== <span class="invisible-header">Hokuto Jaraikou</span> ===== |
| '''236D'''<br>
| | {{MoveData |
| [[Image:Kenshiro-Hebi.png]]<br>
| | |image=Kenshiro-Hebi.png |
| A strong rushing punch, with Super Armor at the very beginning of the animation. It combos only from far D, and is jump cancelable on hit. Despite the Super Armor this move should generally only be used in combos. Takes off one star on counter hit. | | |name=Hokuto Jaraikou |
| | |subtitle=236D |
| | |caption= |
| | |data= |
| | {{AttackData-HNK |
| | |Damage= |
| | |Guard=Mid |
| | |Startup= |
| | |Active= |
| | |Recovery= |
| | |Hit Adv= |
| | |Block Adv= |
| | |description=A strong rushing punch, with Super Armor at the very beginning of the animation. It combos only from far D, and is jump cancelable on hit. Despite the Super Armor this move should generally only be used in combos. Takes off one star on counter hit. |
| | }} |
| | }} |
|
| |
|
| ====Hokuto Shichishiki Heizan==== | | ===== <span class="invisible-header">Hokuto Shichishiki Heizan</span> ===== |
| '''(Air) 214A'''<br>
| | {{MoveData |
| [[Image:Kenshiro-Shichishiki.png]]<br>
| | |image=Kenshiro-Shichishiki.png |
| A rushing air punch that travels diagonally downward towards the ground. Used mostly as a tricky mixup option after a blocked air dash string such as j.B > j.A in the corner. While this can very hard to see it is important to use it only sparingly, as having this move blocked will usually result in your death. Generally there is not much merit in tiger kneeing Shichishiki Heizan as Kenshiro's air dash B is faster and risk free for the most part. Takes off one star on counter hit. | | |name=Hokuto Shichishiki Heizan |
| | |subtitle=j.214A |
| | |caption= |
| | |data= |
| | {{AttackData-HNK |
| | |Damage= |
| | |Guard=High |
| | |Startup= |
| | |Active= |
| | |Recovery= |
| | |Hit Adv= |
| | |Block Adv= |
| | |description=A rushing air punch that travels diagonally downward towards the ground. Used mostly as a tricky mixup option after a blocked air dash string such as j.B > j.A in the corner. While this can very hard to see it is important to use it only sparingly, as having this move blocked will usually result in your death. Generally there is not much merit in tiger kneeing Shichishiki Heizan as Kenshiro's air dash B is faster and risk free for the most part. Takes off one star on counter hit. |
| | }} |
| | }} |
|
| |
|
| ====Hokuto Ryugekiko==== | | ===== <span class="invisible-header">Hokuto Ryugekiko</span> ===== |
| '''214A'''<br>
| | {{MoveData |
| [[Image:Kenshiro-Ryugekiko.png]]
| | |image=Kenshiro-Ryugekiko.png |
| | |name=Hokuto Ryugekiko |
| | |subtitle=214A |
| | |caption= |
| | |data= |
| | {{AttackData-HNK |
| | |Damage= |
| | |Guard= |
| | |Startup=4 |
| | |Active= |
| | |Recovery= |
| | |Hit Adv= |
| | |Block Adv= |
| | |description=A 'catch' move for mid and high attacks that causes wall bounce upon successfully connecting. 4F startup. Can also reflect projectiles. Removes one star on counter hit. |
| | }} |
| | }} |
|
| |
|
| 4F Startup<br>
| | ==Super Moves== |
| <br> | | ===== <span class="invisible-header">Musou Tensei</span> ===== |
| A 'catch' move for mid and high attacks that causes wall bounce upon successfully connecting. 4F startup. Can also reflect projectiles. Removes one star on counter hit.
| | {{MoveData |
| | | |image=Kenshiro-Musou.png |
| ====Musou Tensei==== | | |name=Musou Tensei |
| '''214214B (Uses 1 Bar Aura)'''<br>
| | |subtitle=214214B |
| [[Image:Kenshiro-Musou.png]]<br>
| | |caption= |
| | |data= |
| | {{AttackData-HNK |
| | |Damage= |
| | |Guard= |
| | |Startup= |
| | |Active= |
| | |Recovery= |
| | |Hit Adv= |
| | |Block Adv= |
| | |description= |
| | * Uses 1 bar of Aura. |
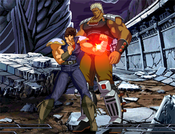
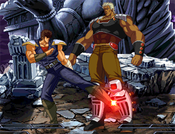
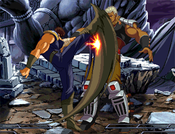
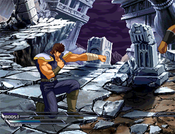
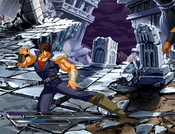
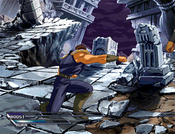
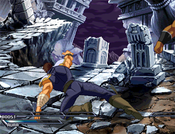
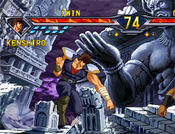
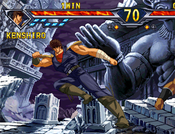
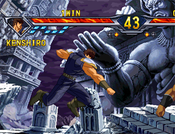
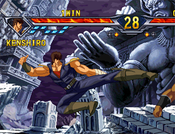
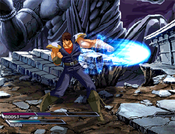
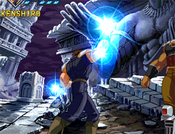
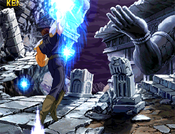
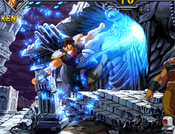
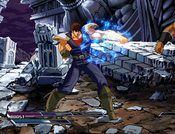
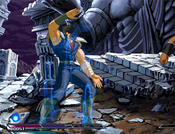
| A 'charge' super, that after executing(left picture) grants the ability to use the special defensive maneuver Musou Tensei(middle and right pictures) up to 7 times. While active pressing 6(for mid/high attacks) or 2(for low attacks) in time with his opponent's attack hitting will cause Kenshiro to teleport behind the opponent. Specifically, the time frame for Musou activating is 5 frames within inputing the forward or downward direction. However, if the lever is returned to neutral within 5 frames of the input, the total time is extended to 11 frames. There is a roughly 15 frame window after attempting to Musou in which it is not possible to try again, which prevents continuous Musou attempts. | | A 'charge' super, that after executing(left picture) grants the ability to use the special defensive maneuver Musou Tensei(middle and right pictures) up to 7 times. While active pressing 6(for mid/high attacks) or 2(for low attacks) in time with his opponent's attack hitting will cause Kenshiro to teleport behind the opponent. Specifically, the time frame for Musou activating is 5 frames within inputing the forward or downward direction. However, if the lever is returned to neutral within 5 frames of the input, the total time is extended to 11 frames. There is a roughly 15 frame window after attempting to Musou in which it is not possible to try again, which prevents continuous Musou attempts. |
|
| |
|
| Musou charges carry over rounds so it is advantageous to try to get off the super as soon as possible. | | Musou charges carry over rounds so it is advantageous to try to get off the super as soon as possible. |
| | }} |
| | }} |
|
| |
|
| ====Tenha Kassatsu==== | | ===== <span class="invisible-header">Tenha Kassatsu</span> ===== |
| '''236236A (Uses 1 Bar Aura)'''<br>
| | {{MoveData |
| [[Image:Kenshiro-Kassatsu.png]]
| | |image=Kenshiro-Kassatsu.png |
| | | |name=Tenha Kassatsu |
| 11F Startup pre flash, 6F post flash<br>
| | |subtitle=236236A |
| <br>
| | |caption= |
| | |data= |
| | {{AttackData-HNK |
| | |Damage= |
| | |Guard=All |
| | |Startup=11+6 |
| | |Active= |
| | |Recovery= |
| | |Hit Adv=Launch |
| | |Block Adv= |
| | |description= |
| | * Uses 1 bar of Aura. |
| A laser beam super used mostly as a combo ender. While it does have some invulnerability it wears out before the super executes and except for some very rare cases(chip damage finishes, punishing fireballs), should never be used outside a combo. The opponent bounces slightly after being hit by the beam, and it is possible to follow up with some moves when in the corner. Takes off one star normally, and two as a counter hit. | | A laser beam super used mostly as a combo ender. While it does have some invulnerability it wears out before the super executes and except for some very rare cases(chip damage finishes, punishing fireballs), should never be used outside a combo. The opponent bounces slightly after being hit by the beam, and it is possible to follow up with some moves when in the corner. Takes off one star normally, and two as a counter hit. |
| | }} |
| | }} |
|
| |
|
| ====Hokuto Zankaiken==== | | ===== <span class="invisible-header">Hokuto Zankaiken</span> ===== |
| '''214214C (Uses 2 Bars Aura)'''<br>
| | {{MoveData |
| [[Image:Kenshiro-Zankai.png]]
| | |image=Kenshiro-Zankai.png |
| | | |name=Hokuto Zankaiken |
| 8F Startup pre flash, 9F post flash<br>
| | |subtitle=214214C |
| <br>
| | |caption= |
| | |data= |
| | {{AttackData-HNK |
| | |Damage= |
| | |Guard=Throw (whiffs vs. crouch) |
| | |Startup=8+9 |
| | |Active= |
| | |Recovery= |
| | |Hit Adv=Launch |
| | |Block Adv=N/A |
| | |description= |
| | * Uses 2 bars of Aura. |
| When executed, Kenshiro jumps into the air and attacks the opponent from above. If the attack is successful, a timer reading '3.00' will appear above the victim's head that will slowly begin to count down - although Kenshiro says 'you will die in 3 seconds,' it actually takes about 20 or so. Once the count reaches 0, the player dies and the round ends. | | When executed, Kenshiro jumps into the air and attacks the opponent from above. If the attack is successful, a timer reading '3.00' will appear above the victim's head that will slowly begin to count down - although Kenshiro says 'you will die in 3 seconds,' it actually takes about 20 or so. Once the count reaches 0, the player dies and the round ends. |
|
| |
|
| As it is extremely slow, cannot be comboed into, and uses up two full bars of Aura, Zankaiken should be considered a gimmick move only. In addition to being very easy to guard, it misses completely versus all crouching characters except Mr. Heart, and doesn't affect Thouther at all. Also, even if it ''does'' somehow connect, you still have to stay alive for 20 seconds. If you really want to use this move the only realistic spot where you can hope to get a guaranteed hit in is by using it after a missed reversal dragon punch against an opponent without any Boost. | | As it is extremely slow, cannot be comboed into, and uses up two full bars of Aura, Zankaiken should be considered a gimmick move only. In addition to being very easy to guard, it misses completely versus all crouching characters except Mr. Heart, and doesn't affect Thouther at all. Also, even if it ''does'' somehow connect, you still have to stay alive for 20 seconds. If you really want to use this move the only realistic spot where you can hope to get a guaranteed hit in is by using it after a missed reversal dragon punch against an opponent without any Boost. |
| | }} |
| | }} |
|
| |
|
| ====Hokuto Hyakuretsuken==== | | ==Fatal KO== |
| '''236CD (Fatal KO)'''<br>
| | ===== <span class="invisible-header">Fatal KO</span> ===== |
| [[Image:Kenshiro-FKO.png]]
| | {{MoveData |
| | | |image=Kenshiro-FKO.png |
| 8F Startup pre flash, 3F Post flash<br>
| | |name=Fatal KO |
| <br>
| | |subtitle=236CD |
| | |caption= |
| | |data= |
| | {{AttackData-HNK |
| | |Damage=FATAL KO |
| | |Guard=Mid |
| | |Startup=8+3 |
| | |Active= |
| | |Recovery= |
| | |Hit Adv= |
| | |Block Adv= |
| | |description= |
| | * Requires the opponent to have 0 stars. |
| Kenshiro's most famous move, in which he strikes his opponent quickly 100 times, killing them horribly. As far as Fatal KO's go, this is one of the better ones, able to hit OTG and having a quick startup. | | Kenshiro's most famous move, in which he strikes his opponent quickly 100 times, killing them horribly. As far as Fatal KO's go, this is one of the better ones, able to hit OTG and having a quick startup. |
| | | }} |
| ==Combos==
| | }} |
| ===Basic Combos===
| |
| ====High Jump Combos====
| |
| Kenshiro's main bread and butters are his high jump combos, nicknamed 'Hebikon' or 'Hebi Combos.' When learning Kenshiro, practice these first!
| |
| | |
| '''Hebi Combo'''
| |
| {| style="width:100%" cellpadding=10 border="1"
| |
| |[http://www.youtube.com/watch?v=KFE610Yf-ks ~D > 236D > air dash j.C > c.D > 236D > high jump j.A > j.B > j.A > j.B > (j.A >) j.D > land~]
| |
| |}
| |
| Kenshiro's most basic and often-used combo. The last j.A will miss if the opponent is too high in the air, and thus must be left out in some situations. The air dash j.C can be changed to j.D, or replaced with forward jump j.C > slight delay j.D if you find it difficult to perform. Cannot be used on crouching opponents except Heart, and, if you change the first far D to far C, Rei. This combo works on all characters but can be hard to pull off on Toki, against who you need to time your attacks precisely.
| |
| | |
| | |
| '''Toki-specific Hebi Combo'''
| |
| {| style="width:100%" cellpadding=10 border="1"
| |
| | ~D > 236D > forward jump j.C > delay j.D > c.D > 236D > forward jump j.A > j.B > j.A > j.D > land~
| |
| |}
| |
| A modified version of the above combo for use on Toki. The opponent doesn't bounce as high, so some finishing options, like 236C, are harder to connect with.
| |
| | |
| | |
| After landing Kenshiro has many options for ending the combo. The most basic of these are:
| |
| | |
| '''No Gauge'''
| |
| {| style="width:100%" cellpadding=10 border="1"
| |
| | [http://www.youtube.com/watch?v=KFE610Yf-ks~ CD] or [http://www.youtube.com/watch?v=ktOTrrLGEQ0 ~236C] or [http://www.youtube.com/watch?v=-qNKJHpkSac ~FKO]
| |
| |}
| |
| | |
| '''Using Only Aura'''
| |
| {| style="width:100%" cellpadding=10 border="1"
| |
| | [http://www.youtube.com/watch?v=gdDNTVFS6Po ~236236A > 623A]
| |
| |}
| |
| | |
| '''Using Only Boost'''
| |
| {| style="width:100%" cellpadding=10 border="1"
| |
| | [http://www.youtube.com/watch?v=BmA6Qb9yjYA ~CD > 236C+E > 623A+E]
| |
| |}
| |
| | |
| '''Using Boost and Aura'''
| |
| {| style="width:100%" cellpadding=10 border="1"
| |
| | [http://www.youtube.com/watch?v=ToErJW3t1kg ~CD > 236C+E > 236236A+E]
| |
| |}
| |
| | |
| ====Banishing Strike Combos====
| |
| Kenshiro's Banishing Strike combos are quite powerful, and can be divided into two types: quick 3-star FKO combos, usually done from a hit confirmed 2B, and longer wall bounce combos that focus on damage. For the former type of Banishing Strike combo, see the [[Kenshiro/Combos#Fatal_KO_Combos|Fatal KO Combos]] section.
| |
| | |
| There are many different possible wall bounce patterns, but for the most part they involve looping air dash attacks and the Jaraikou special, which is great for closing distance and thus lengthening the combo. As a general tip, when attempting long wall bounce combos, utilizing longer air dashes will make them much easier to perform. This is done by putting a slight delay between the air dash and the air attack.
| |
| | |
| '''Basic Banishing Strike Combo Starter'''
| |
| {| style="width:100%" cellpadding=10 border="1"
| |
| | [http://www.youtube.com/watch?v=O4YpQ7m2xqU ~2B > 236C~E > CD+E > 6~]
| |
| |}
| |
| Kenshiro's most useful Banishing Strike combo starter. Requires 1 bar of Boost. It is also possible to cancel the startup of 2D into a Banishing Strike from far D like Raoh can, but you need to be extremely close to the opponent for it to connect, making this method difficult to make use of in a real match.
| |
| | |
| | |
| '''Hieiken Wall Combo Starter'''
| |
| {| style="width:100%" cellpadding=10 border="1"
| |
| | [http://www.youtube.com/watch?v=CLlLFfVMZq0 623B > (air dash) j.B or j.D > dash D~]
| |
| |}
| |
| While technically not a Banishing Strike combo, Hieiken causes wall bounce and can be used to start a wall combo in the same manner as a Banishing Strike. Whether or not you are able to continue into a combo is very position dependent and requires some ad-lib.
| |
| | |
| | |
| '''Ryugekiko Wall Combo Starter'''
| |
| {| style="width:100%" cellpadding=10 border="1"
| |
| | [http://www.youtube.com/watch?v=rD3r3bOTqYw 214A > (E >) D~]
| |
| |}
| |
| While technically not a Banishing Strike combo, Ryugekiko causes wall bounce and can be used to start a wall combo in the same manner as a Banishing Strike. Near the corner it is possible to follow up without the use of Boost.
| |
| | |
| | |
| '''6B Wall Combo Starter'''
| |
| {| style="width:100%" cellpadding=10 border="1"
| |
| | [http://www.youtube.com/watch?v=ATed7tsmuRo 6B(CH) > air dash j.B(+E) > dash D~]
| |
| |}
| |
| While technically not a Banishing Strike combo, 6B causes wall bounce on Counter Hit and can be used to start a wall combo in the same manner as a Banishing Strike. Quite useful as 6B is extremely effective against Guard Cancels, and is easier to use than Musou Tensei since you can simply hold forward and mash B on seeing the Guard Cancel flash.
| |
| | |
| | |
| '''Basic Banishing Strike Wall Combo'''
| |
| {| style="width:100%" cellpadding=10 border="1"
| |
| | [http://www.youtube.com/watch?v=O0LeWPT86SI ~c.D > D > 236D > air dash j.A > c.D > D > 236D > [air dash j.C > 236D<nowiki>]</nowiki>x2 > air dash j.D > 236236A]
| |
| |}
| |
| A basic and very damaging wall combo. The first set of c.D > D should be performed quickly, while the second is best done with a delay in between the hits.
| |
| | |
| | |
| '''Banishing Strike Wall Combo #1'''
| |
| {| style="width:100%" cellpadding=10 border="1"
| |
| | [http://www.youtube.com/watch?v=ptwjYCRC3iY ~c.D > 236C > D > 236A > D > 236D > air dash j.C > [236D > air dash j.B<nowiki>]</nowiki>x2 > 236D > air dash j.D > 236236A]
| |
| |}
| |
| If there are too many hits in the combo leading up to the Banishing Strike the knockback will cause the combo to fail. Must be in corner at the time of connecting with close D.
| |
| | |
| | |
| '''Banishing Strike Wall Combo #2'''
| |
| {| style="width:100%" cellpadding=10 border="1"
| |
| | [http://www.youtube.com/watch?v=cOqCJa4fHKM ~c.D > 623A > E > c.D > 236C > D > 236A > D > [236D > air dash j.C<nowiki>]</nowiki>x3 > 236D > air dash j.D > 236236A]
| |
| |}
| |
| For use from a raw Banishing Strike or other wall combo starter. Can be a little more difficult than the above combo, but has the benefit of removing 3 stars early in the combo and taking off a bit more life.
| |
| | |
| ====Other Basic Combos====
| |
| '''"Better than Nothing" Combo'''
| |
| {| style="width:100%" cellpadding=10 border="1"
| |
| | [http://www.youtube.com/watch?v=kh6a6SbxYDs ~2D > 623B] or [http://www.youtube.com/watch?v=XoR_Tqjselo 236236A]
| |
| |}
| |
| Used midscreen when comboing into far D isn't possible, ie. against a crouching opponent.
| |
| | |
| | |
| '''2D Grave Shoot Combo'''
| |
| {| style="width:100%" cellpadding=10 border="1"
| |
| | [http://www.youtube.com/watch?v=z_5nqBE68t8 ~2D > AC > D > 236D > high jump~]
| |
| |}
| |
| For use in the corner against crouching opponents. Also works midscreen if you are very close to the opponent or Boost the Grave Shoot. Can be difficult to perform on Toki, Jagi, and Mamiya.
| |
| | |
| | |
| '''Anti-air Grave Shoot Combo'''
| |
| {| style="width:100%" cellpadding=10 border="1"
| |
| | [http://www.youtube.com/watch?v=neEhxfbwtIg D > AC(~E) > D > 236D > high jump~]
| |
| |}
| |
| Used after connecting with D on an airborne opponent. Depending on the distance you may need to Boost the Grave Shoot in some situations. Can be difficult to perform on Toki, Jagi, and Mamiya.
| |
| | |
| ===Advanced Combos===
| |
| ====Dizzied Opponent Combos====
| |
| Thanks to his high jump combos which make great use of the [[Hokuto_no_Ken/Advanced_Game_Mechanics#.27Chikuseki.27_Phenomenon|Chikuseki phenomenon]], Kenshiro often dizzies his opponents. Once you see that you have done so, you want to immediately end your combo with a Banishing Strike, then quickly confirm your opponent's remaining stars, life, and your own available Boost and Aura. You will then use this information to select an appropriate combo to follow up with - your goal is for your opponent to start the next round with 3 stars or less, and to conserve at least one bar of Boost. Keep in mind that you can take off an extra star by doing 214C before your combo, but cannot exceed 3 stars unless you ended the combo that dizzied your opponent with a Banishing Strike. For more information see the [[Hokuto_no_Ken/Advanced_Game_Mechanics#Exceeding_the_.273-Star_Limit.27|Advanced Game Mechanics]] section.
| |
| | |
| '''2-star Zero Life Finisher'''
| |
| {| style="width:100%" cellpadding=10 border="1"
| |
| | [http://www.youtube.com/watch?v=15oOPS889qk AB > 623A(+E)] or [http://www.youtube.com/watch?v=vz205UDhOuc CD(+E)]
| |
| |}
| |
| Used when you need to remove 2 stars but your opponent has very little life left.
| |
| | |
| | |
| '''3-star Ujou Finisher'''
| |
| {| style="width:100%" cellpadding=10 border="1"
| |
| | [http://www.youtube.com/watch?v=VdoEliM3At8 c.B > 623A > (c.D >) 236C > 236236A]
| |
| |}
| |
| Uses 1 Aura. Hard to perform on Toki.
| |
| | |
| | |
| '''3-star Banishing Strike Finisher'''
| |
| {| style="width:100%" cellpadding=10 border="1"
| |
| | [http://www.youtube.com/watch?v=vZVFLqcffPA c.D > D > CD > 6 > 623A > E > 236C > c.D > 236A > D > [236D > air dash j.C<nowiki>]</nowiki>x3 > 236D > air dash j.D > 236236A or dash 2B]
| |
| |}
| |
| Big damage. For use when your opponent still has a lot of health left.
| |
| | |
| | |
| '''4-star Ujou Finisher'''
| |
| {| style="width:100%" cellpadding=10 border="1"
| |
| | [http://www.youtube.com/watch?v=UqB6c6qrQKM c.B > 623A > c.D > CD > c.D+E > 236C > 236236A]
| |
| |}
| |
| Uses 0.2 Boost 1 Aura. Hard to perform on Toki. Will only take off 4 stars if you ended the combo that dizzied your opponent with a Banishing Strike.
| |
| | |
| | |
| '''4-star BD Throw Finisher'''
| |
| {| style="width:100%" cellpadding=10 border="1"
| |
| | [http://www.youtube.com/watch?v=5wCAiRPXrsY BD > 623A > CD+E > c.D+E > D > 236236A]
| |
| |}
| |
| Uses 1 Boost 1 Aura. Doesn't work on Mamiya, and can be difficult on Raoh. Does less damage than a Banishing Strike combo, so is good to use when the opponent has little health left.
| |
| | |
| ====Other Advanced Combos====
| |
| '''100% Banishing Strike Combo'''
| |
| {| style="width:100%" cellpadding=10 border="1"
| |
| | c.D > D > CD > 6 > 623A > 236C+E > c.D > 236A > D > [236D > air dash j.C]x3 > 236D > air dash j.C+E > CD+E > c.D+E > D > 236236A > 236236A
| |
| |}
| |
| Uses 2 Boost and 2 Aura. Doesn't work on Kenshiro or Toki, and won't kill Raoh from full health. The final far D is not needed against Mamiya. This combo was actually discovered quite soon after the games release and does not see much use anymore, but is listed for references sake.
| |
| | |
| | |
| ===Dribble Combos===
| |
| Kenshiro's [[Hokuto_no_Ken/Advanced_Game_Mechanics#.27Dribble.27_Combos|Dribble]] combos are quite powerful, but require a great deal of effort to master as different recipes are used depending on location on the screen. Raoh and Toki are the exceptions to this, and for the most part you can use the most basic dribble combos on them anywhere on the screen. Unfortunately, against Toki even the most 'basic' dribble has very severe timings and is in fact quite difficult to perform.
| |
| | |
| To actually begin a dribble, it is necessary to get in a 35 or more hit air combo ended with a Kassatsu super, after which you begin bouncing your opponent off the ground using A > 2Ax4 > B, then follow with dash 2A > B repeatedly. All hits after and including the first Jaraikou are considered part of the 'air combo.' Using the A > 2Ax4 > B method it is necessary to get in 36 hits against Jagi and Juda, and 37 hits on Kenshiro. When you are not able to get in enough air hits, A > 236D > air dash j.B > 2Ax5 > B can be used after the Kassatsu instead and works from 35 hits for Kenshiro and 33 hits for all other characters(except Toki, Shin, and Mamiya). Against Toki, Shin, and Mamiya, you must always get at least 35 hits, and bounce them using A > delay 2A > B follow by repeated dash 2A's.
| |
| | |
| While possible, Kenshiro for the most part no longer makes use of [[Hokuto_no_Ken/Advanced_Game_Mechanics#.27Hyakuretsu.27_Combos|Hyakuretsu]] combos, as they require much more meter and are are less practical than his relatively easy dribble combos.
| |
| | |
| ====Basic Dribble Combos====
| |
| =====High Jump Dribble=====
| |
| Kenshiro's most basic dribble can be done with 1.2 Boost and 1 Aura, and requires you to be near the corner and facing the opposite direction. If your opponent is already deep in the corner when you perform the Boost jump D, you will not be able to switch sides with them and the combo will fail. The exceptions to this are Raoh and Toki, on who you can perform the basic dribble from any location on the screen.
| |
| | |
| '''Basic High Jump Dribble'''
| |
| {| style="width:100%" cellpadding=10 border="1"
| |
| | ~236D > forward jump j.B > delay j.C > D > 236D > air dash j.A > j.D > E > high jump j.A > j.B > j.A > j.B > j.A > j.B > air dash j.A > j.B or j.D > 2A > Ax2 > A~E > Ax6 > A~E > Ax2 > 236236A > A > 2Ax4 > B > dash 2A > B~
| |
| |}
| |
| The base form of the dribble, which works on Raoh, Rei, and Thouther. This combo alone has changed the Kenshiro vs Raoh matchup greatly, and puts Kenshiro on more even ground.
| |
| | |
| Against Raoh when in the corner it is important to keep him fairly high in the air throughout the beginning of the combo, and then delay the highjump very slightly after the Boost jump D, which allows you to switch sides with him.
| |
| | |
| Versus Rei you will sometimes drop the combo at the very end when doing 2Ax4 > B depending on how high he is bouncing. This is easily fixed by doing 2Ax5 > B or adding in an extra standing A before the Kassatsu.
| |
| | |
| | |
| '''Kenshiro-specific High Jump Dribble'''
| |
| {| style="width:100%" cellpadding=10 border="1"
| |
| | ~236D > forward jump j.B > delay j.C > D > 236D > air dash j.A > j.D > E > high jump j.A > j.B > j.A > j.B > j.A > j.B > air dash j.A > j.B or j.D > 2A > <span style="color:red">Ax3 > A~E > Ax7</span> > A~E > Ax2 > 236236A > A > 2Ax4 > B > dash 2A > B~
| |
| |}
| |
| Against Kenshiro, using close A at any point will cause the combo to drop, so it is important to follow the above recipe precisely. Differences from the basic dribble are highlighted in red.
| |
| | |
| | |
| '''Toki-specific High Jump Dribble'''
| |
| {| style="width:100%" cellpadding=10 border="1"
| |
| | ~236D > <span style="color:red">air dash j.D</span> > D > 236D > air dash j.A > j.D > E > high jump j.A > j.B > j.A > j.B > j.A > j.B > air dash <span style="color:red">slight delay j.A > j.B or j.C or j.D > 2Ax2</span> > Ax2 > A~E > Ax6 > A~E > Ax2 > 236236A > A > <span style="color:red">delay 2A > B > dash 2A~</span>
| |
| |}
| |
| Works from any position on the screen. The air dash during the high jump combo must be lengthened slightly or the rest of the combo will not connect. To practice this you can switch up jump B or D with jump C, which will only hit if you have delayed your attacks properly. When done deep in the corner, it is necessary to high jump towards the corner(performed as 2 > 9 from the direction you started the combo), which for some reason magically results in you high jumping in the opposite direction. If you attempt to high jump as normal you will end up doing a vertical jump and the combo will fail. In addition to this, if at any point you do close A instead of far A, the combo will fail. Also, you must hit with Kassatsu at the highest point of Toki's bounce '''and''' follow up with standing A at the fastest possible timing or, you guessed it, the combo will fail. Definitely the most difficult of all the basic dribble combos. Differences from the basic dribble are highlighted in red.
| |
| | |
| | |
| '''Jagi, Juda-specific High Jump Dribble'''
| |
| {| style="width:100%" cellpadding=10 border="1"
| |
| | ~236D > forward jump j.B > delay j.C > D > 236D > air dash j.A > j.D > E > high jump j.A > j.B > j.A > j.B > j.A > j.B > air dash j.A > j.B or j.D > 2A > Ax2 > A~E > <span style="color:red">Ax7</span> > A~E > Ax2 > 236236A > A > 2Ax4 > B > dash 2A > B~
| |
| |}
| |
| Against Jagi, you want the Kassatsu to hit at the highest point of his bounce after the last standing A. Also, during the A > 2Ax4 part, the timing is quicker than usual as Jagi does not bounce very high. These considerations do not apply to Juda, on who you can perform the combo as usual. Differences from the basic dribble are highlighted in red.
| |
| | |
| | |
| '''Shin-specific High Jump Dribble'''
| |
| {| style="width:100%" cellpadding=10 border="1"
| |
| | ~236D > forward jump j.B > delay j.C > D > 236D > air dash j.A > j.D > E > high jump j.A > j.B > j.A > j.B > j.A > j.B > air dash j.A > j.B or j.D > 2A > Ax2 > A~E > Ax6 > A~E > Ax2 > 236236A > A > <span style="color:red">delay 2A > B > dash 2A~</span>
| |
| |}
| |
| Like with Jagi, Kassatsu must hit Shin at the highest point of his bounce after the last standing A. The way you start the dribble with Shin is also different from that of most characters and requires some practice to get used to. It is also possible to loop dash 2A > B if doing just dash 2A is difficult, but the way Shin bounces is a bit weird and may be hard to control. At around 50 hits you may want to switch to doing dash A > AC loops if you find yourself dropping the combo a lot. Differences from the basic dribble are highlighted in red.
| |
| | |
| | |
| '''Heart-specific High Jump Dribble'''
| |
| {| style="width:100%" cellpadding=10 border="1"
| |
| | ~236D > forward jump j.B > delay j.C > D > 236D > air dash j.A > j.D > E > high jump j.A > j.B > j.A > j.B > j.A > j.B > air dash <span style="color:red">slight delay j.A</span> > j.B or j.D > 2A > <span style="color:red">A > A~E > Ax7 > A~E > A</span> > 236236A > A > 2Ax4 > B > dash 2A > B~
| |
| |}
| |
| For some unknown reason this works, despite the fact that this is only 34 air hits. To avoid dropping Heart during the high jump portion of the combo it is necessary to do a slightly longer air dash. Differences from the basic dribble are highlighted in red.
| |
| | |
| | |
| '''Mamiya-specific High Jump Dribble'''
| |
| {| style="width:100%" cellpadding=10 border="1"
| |
| | ~236D > forward jump j.B > <span style="color:red">air dash j.B</span> > D > 236D > air dash j.A > j.D > E > high jump j.A > j.B > j.A > j.B > j.A > j.B > air dash j.A > j.B or j.D > 2A > Ax2 > A~E > Ax6 > A~E > Ax2 > 236236A > A > <span style="color:red">delay 2A > B > dash 2A~</span>
| |
| |}
| |
| The beginning is modified as using forward jump B > jump C will cause the following part of the combo to fail almost every time. The rest is done identically to the Shin-specific dribble. Overall quite difficult. Good thing no one uses Mamiya! Differences from the basic dribble are highlighted in red.
| |
| | |
| | |
| =====Double High Jump Dribble=====
| |
| A modified version of the High Jump Dribble, this combo is used when you hit the opponent at around the middle of the screen. Costs 1.2 Boost and 1 Aura. Similar to the above combo, if your opponent is already deep in the corner when you do the Boost D, you will not be able to pass through them and the combo will fail.
| |
| | |
| '''Basic Double High Jump Dribble'''
| |
| {| style="width:100%" cellpadding=10 border="1"
| |
| | ~236D > high jump j.A > j.B > j.A > j.C > delay j.D~E > high jump j.A > j.B > j.A > j.B > j.A > j.B > air dash j.A > j.B > 2A > Ax2 > A~E > Ax5 > A~E > Ax4 > 236236A > A > 2Ax4 > B > dash 2A > B~
| |
| |}
| |
| Works on Rei and Thouther. Also works on Raoh but is mostly pointless since you can use the most basic High Jump Dribble on him from anywhere on the screen. On Thouther it is necessary to delay the first high jump slightly, or the air combo will fail.
| |
| | |
| | |
| '''Kenshiro-specific Double High Jump Dribble'''
| |
| {| style="width:100%" cellpadding=10 border="1"
| |
| | ~236D > high jump j.A > j.B > j.A > j.C > delay j.D~E > high jump j.A > j.B > j.A > j.B > j.A > j.B > air dash j.A > j.B > 2A > <span style="color:red">Ax3 > A~E > Ax7 > A~E > A</span> > 236236A > A > <span style="color:red">236D > air dash j.B > 2Ax5</span> > B > dash 2A > B~
| |
| |}
| |
| Like other dribbles done on Kenshiro, you must use far A at all times, as connecting with close A will cause the combo to fail. Differences from the basic dribble are highlighted in red.
| |
| | |
| | |
| '''Toki-specific Double High Jump Dribble'''
| |
| {| style="width:100%" cellpadding=10 border="1"
| |
| | ~236D > high jump j.A > j.B > j.A > j.C > delay j.D~E > high jump j.A > j.B > j.A > j.B > j.A > j.B > air dash j.A > j.B or <span style="color:red">j.C or</span> j.D > <span style="color:red">2Ax2 > Ax2 > A~E > Ax6 > A~E > Ax2</span> > 236236A > A > <span style="color:red">delay 2A > B > dash 2A~</span>
| |
| |}
| |
| Differences from the basic dribble are highlighted in red.
| |
| | |
| | |
| '''Jagi-specific Double High Jump Dribble'''
| |
| {| style="width:100%" cellpadding=10 border="1"
| |
| | ~236D > high jump j.A > j.B > j.A > j.C > delay j.D~E > high jump j.A > j.B > j.A > j.B > j.A > j.B > air dash j.A > j.B > 2A > Ax2 > A~E > Ax5 > A~E > <span style="color:red">Ax3</span> > 236236A > A > <span style="color:red">236D > air dash j.B > 2Ax5</span> > B > dash 2A > B~
| |
| |}
| |
| Kassatsu must hit Jagi at the highest point of his bounce. Differences from the basic dribble are highlighted in red.
| |
| | |
| | |
| '''Juda-specific Double High Jump Dribble'''
| |
| {| style="width:100%" cellpadding=10 border="1"
| |
| | ~236D > high jump j.A > j.B > j.A > j.C > delay j.D~E > high jump j.A > j.B > j.A > j.B > j.A > j.B > air dash j.A > j.B > 2A > Ax2 > A~E > Ax5 > A~E > Ax4 > 236236A > A > <span style="color:red">236D > air dash j.B > 2Ax3~5</span> > B > dash 2A > B~
| |
| |}
| |
| Differences from the basic dribble are highlighted in red.
| |
| | |
| | |
| '''Shin-specific Double High Jump Dribble'''
| |
| {| style="width:100%" cellpadding=10 border="1"
| |
| | ~236D > high jump j.A > j.B > j.A > j.C > delay j.D~E > high jump j.A > j.B > j.A > j.B > j.A > j.B > air dash j.A > j.B > 2A > Ax2 > A~E > Ax5 > A~E > Ax4 > 236236A > A > <span style="color:red">delay 2A > B > dash 2A~</span>
| |
| |}
| |
| Differences from the basic dribble are highlighted in red.
| |
| | |
| | |
| '''Heart-specific Double High Jump Dribble'''
| |
| {| style="width:100%" cellpadding=10 border="1"
| |
| | ~236D > high jump j.A > j.B > j.A > j.C > delay j.D~E > high jump j.A > j.B > j.A > j.B > j.A > j.B > air dash j.A > j.B > <span style="color:red">A > A~E > Ax7 > A~E > A</span> > 236236A > A > <span style="color:red">236D > air dash j.B > 2Ax3</span> > B > dash 2A > B~
| |
| |}
| |
| Differences from the basic dribble are highlighted in red.
| |
| | |
| | |
| ====Advanced Dribble Combos====
| |
| =====Boost Jump D Dribble=====
| |
| For use when you score a hit on your opponent in the area between midscreen and just before the corner - there needs to be some space between your opponent and the wall at the time of the jump D hitting or you will not be able to switch sides. Requires 1.2 Boost and 1 Aura.
| |
| | |
| '''Basic Boost Jump D(2 hit) Dribble'''
| |
| {| style="width:100%" cellpadding=10 border="1"
| |
| | ~236D > air dash j.D~E > landing recovery cancel AC > 2A > A > D > 236D > forward jump j.A > j.B > j.A > j.B > j.D > 2A > Ax2 > B > D > A+E > Ax4 > A~E > Ax4~5 > 236236A > A > 2Ax4 > B > dash 2A > B~
| |
| |}
| |
| Works on Rei. The trick is to press Boost as soon as you hit with jump D - if done correctly it will hit twice and you will land on the other side of your opponent. Landing recovery cancel can be done by inputting a move the instant you touch the ground, which allows you do perform an action without first waiting to recover. After you Boost the jump D you land very quickly, so you pretty much just press AC immediately after Boosting. When slightly farther away from the corner, changing the beginning of the combo to ~236D > forward jump j.B > delay j.D~E > 2A > A > D > 236D~ puts you in a better position.
| |
| | |
| | |
| '''Kenshiro-specific Boost Jump D(2 hit) Dribble'''
| |
| {| style="width:100%" cellpadding=10 border="1"
| |
| | ~236D > air dash <span style="color:red">slight delay</span> j.D~E > landing recovery cancel AC > 2A > A > D > 236D > forward jump j.A > j.B > j.A > j.B > j.D > 2A > <span style="color:red">Ax3 > A~E > Ax7 > A~E > Ax2</span> > 236236A > A > <span style="color:red">236D > air dash j.B > 2Ax5</span> > B > dash 2.A > B~
| |
| |}
| |
| The air dash jump D will miss if you do it instantly, so you need to do a slightly longer air dash. Differences from the basic dribble are highlighted in red.
| |
| | |
| | |
| '''Jagi-specific Boost Jump D(1 hit) Dribble'''
| |
| {| style="width:100%" cellpadding=10 border="1"
| |
| | ~236D > air dash j.D~E > landing recovery cancel AC > <span style="color:red">4B > c.D</span> > D > 236D > forward jump j.A > j.B > j.A > j.B > j.D > 2A > <span style="color:red">B > D</span> > A+E > Ax4 > A~E > Ax5 > 236236A > A > <span style="color:red">236D > air dash j.B > 2Ax5</span> > B > dash 2.A > B~
| |
| |}
| |
| After the Grave Shoot you actually need to walk backwards ever so slightly, which can be done by just holding the lever back when inputting B. Differences from the basic dribble are highlighted in red.
| |
| | |
| | |
| '''Juda-specific Boost Jump D(1 hit) Dribble'''
| |
| {| style="width:100%" cellpadding=10 border="1"
| |
| | ~236D > air dash j.D~E > landing recovery cancel AC > <span style="color:red">2B > c.D</span> > D > 236D > <span style="color:red">slight delay</span> forward jump j.A > j.B > j.A > j.B > j.D > 2A > <span style="color:red">Bx2</span> > D > A+E > Ax4 > A~E > Ax4~5 > 236236A > A > <span style="color:red">236D > air dash j.B > 2Ax5</span> > B > dash 2.A > B~
| |
| |}
| |
| Differences from the basic dribble are highlighted in red.
| |
| | |
| | |
| '''Juda-specific Boost Jump D(1 hit) Dribble #2'''
| |
| {| style="width:100%" cellpadding=10 border="1"
| |
| | ~236D > air dash j.D~E > landing recovery cancel AC > <span style="color:red">2B > c.D</span> > D > 236D > forward jump j.A > j.B > j.A > j.B > j.D > <span style="color:red">c.B > Bx2</span> > D > A+E > Ax4 > A~E > Ax4 > 236236A > A > <span style="color:red">236D > air dash j.B > 2Ax5</span> > B > dash 2.A > B~
| |
| |}
| |
| Used when you end up deep in the corner after switching sides. Differences from the basic dribble are highlighted in red.
| |
| | |
| | |
| '''Shin-specific Boost Jump D(2 hit) Dribble'''
| |
| {| style="width:100%" cellpadding=10 border="1"
| |
| | ~236D > air dash j.D~E > landing recovery cancel AC > 2A > A > D > 236D > forward jump j.A > j.B > <span style="color:red">j.B > j.A</span> > j.D > 2A > <span style="color:red">A</span> > B > D > A+E > Ax4 > A~E > Ax5 > 236236A > A > <span style="color:red">delay 2A > B > dash 2A~</span>
| |
| |}
| |
| To make sure you get a 2-hit jump D, you need to delay it slightly after air dashing. In cases when the Boost jump D only does one hit, it is still possible to continue the combo by doing the below combo. Differences from the basic dribble are highlighted in red.
| |
| | |
| | |
| '''Shin-specific Boost Jump D(1 hit) Dribble'''
| |
| {| style="width:100%" cellpadding=10 border="1"
| |
| | ~236D > air dash j.D~E > landing recovery cancel AC > <span style="color:red">2B</span> > 2A > A > D > 236D > forward jump j.A > j.B > <span style="color:red">j.B > j.A</span> > j.D > <span style="color:red">2A > B</span> > D > A+E > Ax4 > A~E > <span style="color:red">Ax6</span> > 236236A > A > <span style="color:red">delay 2A > B > dash 2A~</span>
| |
| |}
| |
| While possible to perform away from the corner, the timing is quite severe. When near the corner you will get close D instead of far D, which makes the rest of the combo much easier. Differences from the basic dribble are highlighted in red.
| |
| | |
| | |
| '''Thouther-specific Boost Jump D(1 hit) Dribble'''
| |
| {| style="width:100%" cellpadding=10 border="1"
| |
| | ~236D > air dash j.D~E > landing recovery cancel AC > 2A > <span style="color:red">c.D</span> > 236D > forward jump <span style="color:red">j.B > j.A > j.B > j.A</span> > j.D > <span style="color:red">c.B > Bx2</span> > D > A+E > Ax4 > A~E > <span style="color:red">Ax5~6</span> > 236236A > A > <span style="color:red">236D > air dash j.B > 2Ax5</span> > B > dash 2.A > B~
| |
| |}
| |
| For use when the Boost jump D hits once. Whether it hits onces or twice is dependent on the length of your air dash. If you air dash then instantly do a jump D, it will hit once, whereas if you delay the jump D slightly it will hit twice. Differences from the basic dribble are highlighted in red.
| |
| | |
| | |
| '''Thouther-specific Boost Jump D(2 hit) Dribble'''
| |
| {| style="width:100%" cellpadding=10 border="1"
| |
| | ~236D > air dash j.D~E > <span style="color:red">c.B</span> > D > 236D > forward jump <span style="color:red">j.B > j.A > j.B > j.A</span> > j.D > <span style="color:red">c.B > Bx2</span> > D > A+E > Ax4 > A~E > <span style="color:red">Ax5~6</span> > 236236A > A > <span style="color:red">236D > air dash j.B > 2Ax5</span> > B > dash 2.A > B~
| |
| |}
| |
| For use when the Boost jump D hits twice. Differences from the basic dribble are highlighted in red.
| |
| | |
| | |
| =====Banishing Debounce Dribbles=====
| |
| A dribble done by 'debouncing' an opponent in the wall bounce state using a Banishing Strike. This type of dribble can be done on characters deep in the corner. The combo requires 1 Aura and 1.4~1.5 Boost for Rei and Juda, and 2.2 Boost for all other characters when done on a grounded opponent. However, with a little bit of ad-lib you can do this combo from any [[Kenshiro/Combos#Banishing_Strike_Combos|Banishing Strike combo starter]], which in some cases allows you to perform it with little or even no starting Boost.
| |
| | |
| The basic flow of a debounce dribble goes like this: first, you must get your opponent into wall bounce state, either by a Banishing Strike or other means like a 6B counter hit. From there, you use standing A, 236D > air dash jump A, or 236A to create a gap between your opponent and they wall by increasing the knockback, then follow with standing A or jump A as necessary to adjust their height in relation to the ground. When hitting an opponent with a weak attack during wall bounce they lose height, and hitting them with a strong attack will cause them to gain height up to a certain amount of hits. For the debounce dribble you want your opponent to be very close to the ground before hitting them with a Banishing Strike, which removes them from the wall bounce state and allows you to continue the combo with a Boost 2B followed by a Grave Shoot. After that you can use the same recipes outlined in the Boost Jump D Dribble section
| |
|
| |
| The below recipes show just one starting option, for use from an air dash attack on a grounded opponent. As long as you follow the above pattern, you can turn any wall bounce hit into a dribble combo. Note that Banishing Debounce Dribbles cannot be used on Toki, Mamiya, or Heart.
| |
| | |
| '''Basic Banishing Strike Debounce Dribble'''
| |
| {| style="width:100%" cellpadding=10 border="1"
| |
| | Air dash j.B > 2B > delay D > CD > 6 > 2C > CD > E > 2B > AC > 2B > c.D > D > 236D > forward jump j.A > j.B > j.A > j.B > j.D > 2A > A > B > D > A+E > Ax4 > A~E > Ax5 > 236236A > A > 236D > air dash j.B > 2Ax5 > B > dash 2A > B~
| |
| |}
| |
| For use on Rei. If you do not delay the input of the first D you will end up getting close D instead of far D, and will not be able to combo into a Banishing Strike.
| |
| | |
| | |
| '''Juda-specific Banishing Strike Debounce Dribble'''
| |
| {| style="width:100%" cellpadding=10 border="1"
| |
| | Air dash j.B > 2B > delay D > CD > 6 > 2C > CD > E > 2B > <span style="color:red">2C</span> > AC > <span style="color:red">A</span> > D > 236D > forward jump j.A > j.B > j.A > j.B > j.D > 2A > <span style="color:red">Bx2</span> > D > A+E > Ax4 > A~E > Ax5 > 236236A > A > 236D > air dash j.B > 2Ax5 > B > dash 2A > B~
| |
| |}
| |
| Differences from the basic dribble are highlighted in red.
| |
| | |
| | |
| '''Shin-specific Banishing Strike Debounce Dribble'''
| |
| {| style="width:100%" cellpadding=10 border="1"
| |
| | Air dash j.B > 2B > delay D<span style="color:red">~E</span> > CD > 6 > <span style="color:red">236D > air dash j.B > j.A</span> > CD > E > 2B > AC > 2B > <span style="color:red">2A > A</span> > D > 236D > forward jump j.A > j.B > <span style="color:red">j.B > j.A</span> > j.D > 2A > <span style="color:red">B</span> > D > A+E > Ax4 > A~E > <span style="color:red">Ax6</span> > 236236A > A > <span style="color:red">delay 2A > B > dash 2A~</span>
| |
| |}
| |
| Must Boost the far D or you will be too far away for the Banishing Strike to connect. Differences from the basic dribble are highlighted in red.
| |
| | |
| | |
| '''Thouther-specific Banishing Strike Debounce Dribble'''
| |
| {| style="width:100%" cellpadding=10 border="1"
| |
| | Air dash j.B > 2B > delay D<span style="color:red">~E</span> > CD > 6 > <span style="color:red">236D > air dash j.B > j.A</span> > CD > E > 2B > AC > <span style="color:red">2A</span> > D > 236D > forward jump <span style="color:red">j.B > j.A > j.B > j.A</span> > j.D > <span style="color:red">c.B > Bx2</span> > D > A+E > Ax4 > A~E > Ax5 > 236236A > A > 236D > air dash j.B > 2Ax5 > B > dash 2A > B~
| |
| |}
| |
| Must Boost the far D or you will be too far away for the Banishing Strike to connect. Differences from the basic dribble are highlighted in red.
| |
| | |
| | |
| '''Kenshiro-specific Banishing Strike Debounce Dribble'''
| |
| {| style="width:100%" cellpadding=10 border="1"
| |
| | Air dash j.B > 2B > delay D<span style="color:red">~E</span> > CD > 6 > <span style="color:red">236D > air dash j.B > j.A</span> > CD > E > 2B > AC > 2B > <span style="color:red">2A > A</span> > D > 236D > forward jump j.A > j.B > j.A > j.B > j.D > <span style="color:red">2Ax3 > Ax2 > A+E > Ax5 > A~E > Ax3</span> > 236236A > A > 236D > air dash j.B > 2Ax5 > B > dash 2A > B~
| |
| |}
| |
| Must Boost the far D or you will be too far away for the Banishing Strike to connect. When comboing in the corner on the side of your own health bar, Yuyu Special(explained in the next section) should be used as it requires less meter and is much simpler to perform. Differences from the basic dribble are highlighted in red.
| |
| | |
| | |
| =====Other Advanced Dribbles=====
| |
| The four types of dribbles covered so far make up Kenshiro's 'standard' dribble arsenal. With a little bit of ad-lib these recipes can be modified for use from an anti air far D, air to air jump A, or even reversal uppercut - once you have the fundamentals down the possibilities are endless! To prevent this page from becoming overly long, this final section will only list unique combos that could not be figured out by simple experimenting.
| |
| | |
| '''Yuyu Special'''
| |
| {| style="width:100%" cellpadding=10 border="1"
| |
| | ~236D > highjump rising j.B > j.B > delay, falling j.B > 2A > A > D > 236D > forward jump j.A > j.B > j.A > j.B > j.D > 2A > Ax3 > A~E > Ax7 > A~E > Ax2 > 236236A > A > 236D > air dash j.B > 2Ax5 > B > dash A > B~
| |
| |}
| |
| A very specialized dribble for use only on Kenshiro, and only in the corner on the side of your health bar. Costs 1 Boost 1 Aura, but can be done from 0.3 Boost/Aura if meter gain is possible at the beginning of the combo and your opponent was standing when hit. Versus a crouching opponent, an extra use of Movement Boost is required so you will need 1.2 Boost. Specifically, you will need to do something like ~2A > 2B > D~E > 236D~ as far D will not hit a crouching opponent from its usual distance.
| |
| | |
| | |
| '''Yuyu Special Throw Version'''
| |
| {| style="width:100%" cellpadding=10 border="1"
| |
| | Throw > c.D > 236D > forward jump j.B > air dash j.B > 2A > A > c.D > 236D > forward jump j.A > j.B > j.A > j.B > j.D > 2A > Ax3 > A~E > Ax7 > A~E > Ax2 > 236236A > A > 236D > air dash j.B > 2Ax5 > B > dash A > B~
| |
| |}
| |
| Extremely difficult. Boosting the air dash jump B will make it slightly easier, but still a very hard combo to perform.
| |
| | |
| | |
| ====Dribble Followups====
| |
| You may be wondering what to do once you actually get your opponent bouncing. Nothing is set in stone, but as a general guide you should continue with dash 2A > B until you reach around 50 to 56 hits, at which point your opponent should be bouncing quite high. From this point you can switch to dash A > A, timing your blows to hit as your opponent begins to fall. At 60 to 66 hits they will be bouncing even higher, and you can start doing forward jump A > jump A, timed so that one hits while you are rising up, and one when you are on the way down. Although it will take a while, you can continue doing this until your opponent dies or time runs out. On Toki and Shin you may want to to do dash A > AC instead of dash A > A if you find you are dropping them often.
| |
| | |
| Once they are really bouncing you can pretty much do whatever you want as long as you keep hitting them, so experiment. To kill your opponent a bit faster you can do loops of A > 236C or 623A, jump A > jump A > jump C, or even A > 2A > c.D > D > 236D > air dash slight delay j.A > j.B
| |
| | |
| One important trick that it is good to practice is known as the 'elevator,' and can be performed by doing A > AC > slight delay j.A > [j.A]xn. You never land and just need to keep hitting your opponent as they bounce back up to you. The reason this technique is so awesome is that during a Grave Shoot combo, the rate at which both you and your opponent gain Boost and Aura is extremely slow. Then, when your opponent is near death, you can land and do A > [mash 2A]xn or loops of c.D > 214C, which will max out your meter while giving your opponent very little.
| |
| | |
| | |
| ===Throw Combos===
| |
| Kenshiro has a fairly decent normal throw, which accents his corner mixup nicely. His BD throw also sees quite a bit of use, as he dizzies his opponents more than any other character. The [[Kenshiro/Combos#Dizzied_Opponent_Combos|Dizzied Opponent Combos]] and [[Kenshiro/Combos#Fatal_KO_Combos|Fatal KO Combos]] sections cover BD throw combos.
| |
| | |
| '''Basic Corner Throw'''
| |
| {| style="width:100%" cellpadding=10 border="1"
| |
| | Throw > 2A > c.D > (D >) 236D > high jump combo~
| |
| |}
| |
| Works against all characters in the corner. Possible to perform midscreen as well with the use of Boost.
| |
| | |
| | |
| '''Kenshiro, Rei-specific Midscreen Throw #1'''
| |
| {| style="width:100%" cellpadding=10 border="1"
| |
| | Throw > D > 236D > air dash j.D > D > 236D > high jump combo~
| |
| |}
| |
| For use on Kenshiro and Rei from a midscreen throw. The timing on the first D is very severe but worth practicing.
| |
| | |
| | |
| '''Kenshiro, Rei-specific Midscreen Throw #2'''
| |
| {| style="width:100%" cellpadding=10 border="1"
| |
| | Throw > 2A > D > 236D > air dash j.D > D > 236D > air dash j.A > j.D > 623A
| |
| |}
| |
| Easier to pull off than the above combo, but less flexible.
| |
| | |
| | |
| '''Midscreen Throw Finisher'''
| |
| {| style="width:100%" cellpadding=10 border="1"
| |
| | Throw > D+E > 236C > 236236A
| |
| |}
| |
| A 2-star combo for finishing off the opponent from a midscreen throw. Only requires 0.2 Boost.
| |
|
| |
| | |
| ===Fatal KO Combos===
| |
| | |
| '''1-star 2D Grave Shoot FKO'''
| |
| {| style="width:100%" cellpadding=10 border="1"
| |
| | [http://www.youtube.com/watch?v=yxeXO_kNteI ~2D > AC(+E) > c.D > CD > FKO+E]
| |
| |}
| |
| Uses 1 Boost.
| |
| | |
| | |
| '''1-star High Jump FKO #1'''
| |
| {| style="width:100%" cellpadding=10 border="1"
| |
| | [http://www.youtube.com/watch?v=CK_mkBmSh6I ~high jump combo > CD > FKO+E]
| |
| |}
| |
| Uses 1 Boost.
| |
| | |
| | |
| '''1-star High Jump FKO #2'''
| |
| {| style="width:100%" cellpadding=10 border="1"
| |
| | [http://www.youtube.com/watch?v=ck0tq9fgLjw ~high jump combo > 236236A > FKO]
| |
| |}
| |
| Uses 1 Aura.
| |
| | |
| | |
| '''2-star High Jump FKO'''
| |
| {| style="width:100%" cellpadding=10 border="1"
| |
| | [http://www.youtube.com/watch?v=3uZmRCI_KaQ ~high jump combo > CD > 236C+E > FKO+E]
| |
| |}
| |
| Uses 1 Boost. Doesn't work on Raoh or Toki.
| |
| | |
| | |
| '''2-star Raoh-specific High Jump FKO'''
| |
| {| style="width:100%" cellpadding=10 border="1"
| |
| | ~high jump combo > CD > c.D+E > 236C > FKO+E
| |
| |}
| |
| Uses 1 Boost.
| |
| | |
| | |
| '''3-star Hit Confirm Banishing FKO'''
| |
| {| style="width:100%" cellpadding=10 border="1"
| |
| | [http://www.youtube.com/watch?v=6RPn16cTqTo 2Bx1~2 > 236C~E > CD+E > 6 > c.D > 623A > FKO+E]
| |
| |}
| |
| Uses 1 Boost. Kenshiro's most practical 3-star FKO, which is both simple to do and very easy to confirm from 2B.
| |
| | |
| | |
| '''3-star Heart, Shin-specific High Jump FKO'''
| |
| {| style="width:100%" cellpadding=10 border="1"
| |
| | ~high jump combo > 236236A > A > CD > 623A+E > FKO+E
| |
| |}
| |
| Uses 1 Boost 1 Aura.
| |
| | |
| | |
| '''3-star Jaraikou FKO'''
| |
| {| style="width:100%" cellpadding=10 border="1"
| |
| | [http://www.youtube.com/watch?v=-QgwhwMQwzg ~236D > air dash j.A > j.D > 623A > CD+E > c.D+E > 236C > FKO+E]
| |
| |}
| |
| Uses 1.2 Boost. Doesn't work on Raoh or Toki.
| |
| | |
| | |
| '''4-star BD Throw FKO #1'''
| |
| {| style="width:100%" cellpadding=10 border="1"
| |
| | [http://www.youtube.com/watch?v=ryrLGyLuz3w BD > 623A > CD+E > c.D+E > 236C > FKO+E]
| |
| |}
| |
| Uses just 1.2 Boost!
| |
| | |
| | |
| '''4-star BD Throw FKO #2'''
| |
| {| style="width:100%" cellpadding=10 border="1"
| |
| | [http://www.youtube.com/watch?v=BccVAH8HJNk BD > 2A > D > 236C+E > CD+E > c.D+E > 623A > FKO+E]
| |
| |}
| |
| Much easier to perform than the above combo, but requires 2 Boost.
| |
| | |
| ==Other Important Combos==
| |
| | |
| '''Quick Overhead'''
| |
| {| style="width:100%" cellpadding=10 border="1"
| |
| | Air dash j.B > (j.A >) 2A > 2B~
| |
| |}
| |
| Insanely fast overhead. Mostly for use in the corner. The j.A is a mixup option that will hit opponents who are expecting you to do an air dash j.B > 2B.
| |
| | |
| | |
| '''Quick Overhead Mixup Option #1'''
| |
| {| style="width:100%" cellpadding=10 border="1"
| |
| | Air dash j.B > j.A > 214A > 2A > D~
| |
| |}
| |
| A mixup option for the above pattern. Extremely risky, but effective if used sparsely.
| |
| | |
| | |
| '''Quick Overhead Mixup Option #2'''
| |
| {| style="width:100%" cellpadding=10 border="1"
| |
| | Air dash j.B > j.A > 214A~E > Throw
| |
| |}
| |
| Another mixup option. The Shichishiki sound and animation play but you land without the move actually hitting, and quickly perform a throw. Almost impossible to react to unless you know it is coming.
| |
| | |
| | |
| '''High-low Setup'''
| |
| {| style="width:100%" cellpadding=10 border="1"
| |
| | 6A > 2B+E > c.D~
| |
| |}
| |
| Not very efficient use of meter when you consider that air dash jump B is faster and doesn't cost anything to use, but it doesn't hurt to have this in your arsenal. Similar to Raoh's 6B > 2B setup, this can difficult to block even when you are expecting it.
| |
| | |
| | |
| '''Raoh, Heart-specific Overhead Setup'''
| |
| {| style="width:100%" cellpadding=10 border="1"
| |
| | Forward jump j.A > j.B > j.B > j.B > (j.A >) 2B~
| |
| |}
| |
| A gimmicky but truly unfair setup for use against Raoh and Heart in the corner. The trick is to make your opponent standing guard the first j.A, which you input as soon as possible after jumping. After that they will be hit if they try to switch to low guard, which usually happens after the second or third hit.
| |
| | |
| ==Matchups==
| |
| ===Kenshiro===
| |
| {| style="width:100%" cellpadding=10 border="0"
| |
| |One of the better mirror matches, Kenshiro versus Kenshiro play comes down to who has the best grasp of the character. Zoning is very important, and you will want to be familiar with how to use and combat Kenshiro's main normals, which are far C, far D, 2B, 2D, and air dash jump B.
| |
| | |
| Although you need to memorize quite a few combo variations to be able to dribble Kenshiro from any location on the screen, if you are capable of doing so and your opponent is not you will be at a significant advantage, so it is definitely something worth practicing.
| |
| | |
| Unlike a Raoh mirror match, luck is not much of a factor here, and generally the better player will come out ahead most of the time.
| |
| |}
| |
| | |
| ===Raoh===
| |
| {| style="width:100%" cellpadding=10 border="0"
| |
| |While Raoh is at the advantage, this is still a very close match. Raoh can and will kill you from pretty much any hit, so it is important to not give away rounds by making overly risky plays. On the other hand, Raoh is hands down the easiest character for Kenshiro to dribble, so you will want to practice until you can do it consistently.
| |
| | |
| At round start your best bet is usually just to crouching guard. From starting distance your far D will beat pretty much anything Raoh does, but most Raoh users know this and will just wait to see if you do it, then hit you with his 2D while you are recovering. This of course will result in your death if he has Boost or Aura, so you should be especially cautious in such situations.
| |
| | |
| As far as normals go, you are at the advantage at far D range, but at closer distances Raoh can beat out most of your attacks. You can get guaranteed hits with far D when Raoh misses with most of his moves, such as his Grave Shoot, [[Raoh/Special_Moves#Hokuto_Donryuu_Kohou|Kohou]], 2D etc, but in many cases you are not able to capitalize on opportunities because you always have to be wary of [[Raoh/Special_Moves#Musou_Insatsu|Insatsu]]. You also want to be careful to avoid careless air dashing as Raoh's far B, far D, and jump A are all extremely effective against low jumping opponents and can easily be chained into 100% combos.
| |
| | |
| Guard Cancels are guaranteed off of '''all''' of Raoh's moves, both specials and normals, but you still need to pick your spots carefully or you will end up eating a Counter Hit chop. You especially want to avoid doing a Guard Cancel off of Raoh's close or far D as most Raoh users will buffer a chop here every time. Some players also like to bait your Guard Cancel with [[Raoh/Special_Moves#Hokuto_Raretsuken|Raretsuken]], then Boost cancel it into a chop, so this is also not necessarily a safe spot to Guard Cancel when your opponent has meter.
| |
| | |
| This is a good matchup that can go either way, so you will want to make sure your combos are well practiced and you don't take unnecessary risks.
| |
| |}
| |
| | |
| ===Toki===
| |
| {| style="width:100%" cellpadding=10 border="0"
| |
| |Although it probably comes as no surprise, Kenshiro's worst matchup is Toki. On top of all of his other strengths which need no introduction, Toki is blessed with being extremely hard to combo. Even basic high jump combos are very difficult on Toki, and while you can use the so-called 'basic' recipe on him from any location on the screen, he is hands down the hardest character for Kenshiro to dribble.
| |
| | |
| Your far A and B are very effective against Toki's air dash jump D, but you want to avoid using far D for zoning as Toki can easily punish it with his 2D. Close D also functions well as an anti-air when Toki uses his A teleport to attack you from above. If your opponent does 2A > teleport > 2A, you can hit them with your own 2A as they arrive behind you, but you cannot punish teleports done after 2C or 2D unless you Agility Guard them.
| |
| | |
| If you are able to get Musou off things get a bit easier for you, as Toki can no longer carelessly spam his 2D at mid range. 2A > 2D does not combo on block, which means you are able to Musou the 2D - you should try to buffer in a Musou every time you guard 2A. When you do successfully Musou one of your opponents moves, he will often try to escape by using Boost. If you have Boost as well you can chase after them and punish with a big combo.
| |
| | |
| Toki users love to use [[Toki/Special_Moves#Tenshou_Hyakuretsuken|Tenshou Hyakuretsuken]] after air attacks or by itself as a tiger knee in the corner, but this is quite easy to deal with once you realize that you rarely ever need to actually block low. 2B is Toki's only low attack and it comes out quite slow, so you should generally only block high and just focus on guarding in the right direction and not getting thrown. This is quite counter-intuitive as blocking low is generally the default in most fighting games, but is definitely something you want to get used to.
| |
| | |
| At the opening of the round jumping back is usually your safest option. If you think your opponent is going to open with a 2D however, you can beat it with your own 2D and follow up with a combo.
| |
| | |
| When you use Guard Cancels on Toki you want to make sure you perform them as quickly as possible after blocking his attack. If you are too slow he will often simply teleport through you and get a free combo.
| |
| | |
| This is an awful matchup, but unfortunately cannot be avoided. While extremely difficult, if you are able to master the Toki-specific dribble combo, you should see a big increase in your win rate.
| |
| |}
| |
| | |
| ===Shin===
| |
| {| style="width:100%" cellpadding=10 border="0"
| |
| |Kenshiro versus Shin is a very even match, which is quite fitting for these two rivals!
| |
| | |
| Since Shin has such a strong mixup game, you will want to activate Musou as soon as possible. If you get knocked down and think you are going to get crossed up with Shin's jump B, you can do 4 > 6 > neutral on wakeup, which will get you an Agility Guard or Musou, depending on which direction you are hit from. Musou also forces Shin to be cautious with his zoning moves, especially far C.
| |
| | |
| When Musou is not an option, Shin's far C can be avoided by crouching, after which you can hit him during the recovery with far D. His 2B can also be really annoying, and is effective against your air dash attacks. Depending on the positioning, Shin can just mash 2B when you air dash, avoid your attack, and hit you when you land.
| |
| | |
| You can bait a reversal super from Shin with your 2B, as long as you time it right and aren't too close to him. To punish use 236D, which will counter hit and net you a free star. Shin can also do the exact same thing to you with his 2B, so reversal uppercuts are not advisable unless you have Boost. If you guard a [[Shin/Special_Moves#Nanto_Gokutoken|Gokutoken]], you can get a guaranteed hit with 623A or close D and follow up with a high jump combo.
| |
| | |
| Another thing to keep in mind is that you have a guard bar against Shin. Since he is very lacking in ways to deal with Guard Cancels, don't be afraid to use one to escape a Guard Crush string. Failing that your best bet is to Aura Guard and try to jump away when he gets pushed back far enough.
| |
| | |
| This is one a the few matchups where you might actually mistake Hokuto for a 'normal' fighting game. Rarely will you see a dribble combo, and both sides have an even chance of winning.
| |
| |}
| |
| | |
| ===Rei===
| |
| {| style="width:100%" cellpadding=10 border="0"
| |
| |Kenshiro's best matchup out of the top 4 characters. Rei is considered to have a slight advantage, but it is nothing that can't be overcome with a little bit of practice.
| |
| | |
| While not quite on the same level as Raoh, who you can use the same combo on in every situation, Rei is very easy for Kenshiro to dribble. At the very least if you master the [[Kenshiro/Combos#High_Jump_Dribble|Basic High Jump Dribble]] and [[Kenshiro/Combos#Boost_Jump_D_Dribble|Boost Jump D Dribble]], you will be able kill him from most locations on the screen.
| |
| | |
| Rei's corner lockdown is down right ridiculous thanks to his ability to Jump Cancel many of his normals, but luckily Kenshiro has quite a few ways of getting out of pressure. If your opponent does a close D or 2D > air dash jump B > jump D, you can Agility Guard the jump B and get a guaranteed hit with 623A. The same thing applies if your opponent goes for air dash jump B > 2A. However if they do air dash jump B > 2B your uppercut will not hit and you will probably die - in this case you can beat his 2B with 2A instead, which will net you a ground hit and allow you to go for a dribble easily. Doing Agility Guard > 623C will beat out all of Rei's options, but costs more meter to follow up with after. 2B > air dash jump B can be beaten by 2A before the jump B hits. Also, 2B > 2D does not combo on guard, and is a great spot to go for a Musou. Knowing this, you can easily punish Rei users who are too predictable with their attack strings.
| |
| | |
| If Rei tries to close the distance on you from mid range with an air dash jump B, you can hit him with far B or D and go for a high jump combo. If the moves clash, quickly follow up far B with far D, and far D with a Grave Strike, respectively. You can also try out other options to punish Rei's air dash attacks such as 214A and 6B.
| |
| | |
| Due to his long crouching recovery, when you score a hit on Rei while he is crouching, far C, 2C, and close D will all combo into 236D or a Banishing Strike.
| |
| | |
| Overall this is a very even matchup - if you practice countering Rei's rushdown and perfect your dribble combos, you should be able to win more often than not.
| |
| |}
| |
| | |
| ===Juda===
| |
| {| style="width:100%" cellpadding=10 border="0"
| |
| |Juda is a very tough match for Kenshiro. Whereas Kenshiro struggles to approach him, Juda is able to apply pressure and create favorable situations easily thanks to his followers.
| |
| | |
| Air dashing to close the distance is not recommended as Juda is able to effectively beat your attacks with his far A, far C, Banishing Strike, and Stamp uppercut. This limits you to the ground for the most part. Far C is quite effective against most of Juda's normals, and can be hit confirm Boosted into far D. When possible, kill Dagar with far B instead of blocking his attack.
| |
| | |
| At the opening of the round Juda will usually go for a 2D or Banishing Strike, but unfortunately there is little you can do about it. Your best bet is generally to just crouching guard and see what he does. If you jump backwards Juda can set up a land mine safely, which is never good for you.
| |
| | |
| Don't forget that Juda's Banishing Strike has an insane amount of active frames. You will probably have to get hit with it a few dozen times to get the sense of it. Juda users love to throw around raw Banishing Strikes, so being able to Musou them is very important.
| |
| | |
| This is one of Kenshiro's worst matchups, and it definitely shows - facing off with Juda often feels like an upward battle, and you have to struggle for each win.
| |
| |}
| |
| | |
| ===Thouther===
| |
| {| style="width:100%" cellpadding=10 border="0"
| |
| |Thouther's biggest strength lies in his all-out style of constant attacking and hard-to-see wakeup patterns. As Kenshiro is equipped with a variety of moves that help him deal with Thouther's pressure, he is considered to have a very big advantage in this matchup.
| |
| | |
| Your far D is extremely effective against Thouther, and really shines in a variety of situations. It allows you to prevent him from dashing in, and can beat low air fireballs before they are able to execute. Far D is also good for catching him when he tries to jump away from you. As Thouther has no real way of dealing with it, you can use far D much more freely than in other matchups. If your opponent tries to combat your far D with [[Thouther/Special_Moves#Kyokusei_Jyuuji_Ken.28Hitai.29|Hikanu!]] you can bait him by canceling the recovery into 6B, which has Super Armor and will cause wall bounce on Counter Hit.
| |
| | |
| Thouther has a guard bar against you, which means he is always under pressure to escape when defending. Kenshiro's 2B will beat two of his main normals, 2B and 2C, which makes simply doing dash 2B over and over a very effective way of locking him down. If your opponent guards you can go for an air dash jump B, and you can pick off any attempt to jump away with far D. Getting too close to Thouther can be dangerous however, as his close B is his fastest normal, having a 4 frame startup. Back dash close B is especially effective against careless wakeup attacks, so you will want to be cautious in such situations.
| |
| | |
| You should try to avoid guarding Thouther's fireballs as much as possible, as this will allow him to rush in and put pressure on you. Low air fireballs can be combated with far D, whereas 214A is effective against fireballs done higher in the air. You can even Boost after you reflect the projectile, which often will catch Thouther off guard and allow you to go for a big combo. 623B and air dash jump D are also very good for preventing fireballs done at a distance, and 623C works well against fireballs of any height as long as you are in range. 236236A can be used to net you huge damage and 2 stars if your opponent is carelessly shooting off fireballs from long range. Finally, if you are unable to combat his fireballs in any of the above ways, just high jump away and look for a better opportunity.
| |
| | |
| Once you get knocked down in the corner Thouther's mixup is very deadly, so you always want to make sure you active Musou as quickly as possible. This allows you to effectively deny some of his setups, and forces your opponent to approach you differently. When blocking, using Aura Guard is a good way to push Thouther back, and will often allow you to jump away and escape.
| |
| | |
| All in all Kenshiro's ability to combat many of Thouther's strong points give him a significant advantage in this matchup.
| |
| |}
| |
| | |
| ===Jagi===
| |
| {| style="width:100%" cellpadding=10 border="0"
| |
| |Although somewhat hard to combo, at 7:3 Jagi is one Kenshiro's easiest matchups. Kenshiro is superior to Jagi in almost all aspects, and Musou makes most of Jagi's zoning and mixup options unsafe.
| |
| | |
| When Jagi takes a hit while crouching he recovers extremely fast(think the opposite of Rei), and because of this 2B > far D will not combo. In the event you do hit him while he is crouching you will want to connect 2B to 2D and follow up with a (Boost) Grave Shoot or 623B.
| |
| | |
| If your opponent is capable of using Jagi's magical [[Hokuto_no_Ken/Advanced_Game_Mechanics#.27Basuke.27_State|Basuke]] combo then you will want to avoid getting thrown or hit with his overhead near the corner when he has more than 2 Boost.
| |
| | |
| Jagi has two combo enders that can be a pain if you don't know how to get out of them. The first is 'Gas Hame,' which is done by ending a Banishing Strike combo with a match and then dashing in and dropping gas barrels over and over, causing the match to ignite the barrels and continuously knock you down. This can be escaped using Musou, a Guard Cancel, or a reversal uppercut.
| |
| | |
| The other, known as 'Misora-shiki,' is likewise done by ending a Banishing Strike combo with a match, and then using his gas super with a slight delay so it covers the ground under you. This results in the gas igniting in a huge fire when you get up, and will net Jagi a bit over a full bar of Boost if you guard it. This is generally followed up by a Heavy Strike or other mixup, which using the boost gained allows Jagi to reset into another Banishing Strike combo. This however is extremely easy to counter - if you have Musou activated you can just Musou it, otherwise it is safe to simply not guard and take a small amount of damage from the fire. If you are low on health without Musou and can't afford to take the hit you can also Guard Cancel just before the Heavy Strike connects, although the fire still hits sometimes anyways for reasons unexplained.
| |
| | |
| That said, Kenshiro has a big advantage in this match and you should be able to win here most of the time.
| |
| |}
| |
| | |
| ===Mr. Heart===
| |
| {| style="width:100%" cellpadding=10 border="0"
| |
| |While Kenshiro is considered to have a huge advantage, the way you must approach this matchup is unique, and playing against Heart as you would any other character is a recipe for disaster. If you go into this match not knowing how to deal with Heart's style of play, you will probably lose before you even figure out what is going on. If at all possible you want to take the Player 2 side to secure an even bigger advantage - Mr. Heart is unique in that when he is sitting in the Player 2 position some of his combos become easier to perform, and he gains access to combos that will not work when he is Player 1.
| |
| | |
| For half a bar of Aura Heart is capable of using a special Guard Cancel that allows him to follow up with a combo on hit. It basically functions in the same way as Baiken's counter moves do in [[Guilty Gear]], with the main difference being that Baiken can't kill you in one combo. This makes it very hard to pressure Heart in the conventional means, as your usual attack strings will be quickly countered if he has meter.
| |
| | |
| Another important point is that Heart can store up the Super Armor from his jump C by charging the move and then landing before it executes. This makes it so he can absorb a hit if you attack him while he is performing any normal or special move, which really lets him get in your face. Once he has stored the armor you can get rid of it by either hitting him with any attack or normal throw, or making him guard a move that does chip damage(all special moves). However, he is able to guard special moves without losing his armor charge by making use of Aura Guard.
| |
| | |
| At the very beginning of the round you can go all out on the attack, but once Heart builds up 50% Aura your general strategy should be to stay at around mid range and pressure him with far B and 2B. When he tries to jump back and apply armor you can punish him with 623B, and if he high jumps towards you you can knock him out of the air with 623A. If he does manage to store up an armor charge, use 236A repeatedly just outside of [[Mr._Heart/Special_Moves#Earthcrush|Earthcrush]] range, which forces him to choose between saving his armor or conserving Aura.
| |
| | |
| If you guard a B Earthcrush you can hit him with far D if he does not have armor, or 623B if he does. D Earthcrush is harder to punish, but it you Musou it you can usually get a guaranteed hit with 236D.
| |
| | |
| This is another matchup where Kenshiro is at a big advantage, but it is necessary to make significant adjustments to your general strategy.
| |
| |}
| |
| | |
| ===Mamiya===
| |
| {| style="width:100%" cellpadding=10 border="0"
| |
| |Mamiya is considered to be at a 6:4 advantage in this matchup. Add to that the fact that you have probably never practiced any combos on Mamiya because no one uses her, and you are likely going to be at a serious disadvantage if you ever actually come across a competent Mamiya user.
| |
| | |
| With her great mobility, crazy projectiles, and unblockable wakeups, Mamiya poses a real threat if you let her take the initiative. Once on the defense however, she drops extremely quickly. Because she possesses a guard gauge against Kenshiro, [[Hokuto_no_Ken/Advanced_Game_Mechanics#.27Chikuseki.27_Phenomenon|Chikuseki]] high jump combos are extremely effective, and one combo is often enough to take the whole round.
| |
| | |
| Against Mamiya you really want to take the fight to her right away and keep the pressure up the whole time. As long as you don't let her build momentum you should be able to come out on top in this fight.
| |
| |}
| |
|
| |
|
| {{Navbox-HNK}} | | {{Navbox-HNK}} |
| [[Category:Hokuto no Ken]] | | [[Category:Hokuto no Ken]] |
