m (→Supers) |
No edit summary |
||
| (30 intermediate revisions by 3 users not shown) | |||
| Line 1: | Line 1: | ||
{ | {{Infobox-ABEW | ||
| | |name=AB_Name_Taros | ||
|image=AB_taros | |||
| | |playstyle=Gorilla | ||
|dash=Stepdash | |||
| | |backdash=Grounded | ||
| | |defmod=0.9375 | ||
| | |airopts=None | ||
| | |meter=64 | ||
|imgsize=305 | |||
| | |||
| | |||
}} | }} | ||
| Line 76: | Line 45: | ||
{{MoveData | {{MoveData | ||
|image=AB_Taros_5c.png | |image=AB_Taros_5c.png | ||
|caption= | |caption=Not exactly a DP, but we take what we can get | ||
|input=5C | |input=5C | ||
|data= | |data= | ||
| Line 85: | Line 54: | ||
|advHit=-15 | |advHit=-15 | ||
|advBlock=-16 | |advBlock=-16 | ||
|description= Taros' main anti-air<br>laggy but damaging and big attack<br>risky to use in neutral but if | |description= Taros' main anti-air<br>laggy but damaging and big attack<br>risky to use in neutral but if opponents are getting predictable with their unsafe approaches this is a very great move to use<br>hard to punish on block | ||
}} | }} | ||
}} | }} | ||
| Line 182: | Line 151: | ||
{{MoveData | {{MoveData | ||
|image=AB_Taros_j.c.png | |image=AB_Taros_j.c.png | ||
|caption= | |caption=ONE PUUUUNCH! | ||
|input=j.C | |input=j.C | ||
|data= | |data= | ||
| Line 208: | Line 177: | ||
|advBlock=-3 | |advBlock=-3 | ||
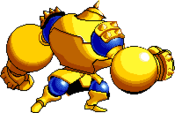
|description=very slow but very damaging overhead punch | |description=very slow but very damaging overhead punch | ||
}} | |||
}} | |||
=== Universal mechanics === | |||
{{MoveData | |||
|name=Launcher | |||
|image=AB_Taros_AB.png | |||
|caption= | |||
|input=any 2 buttons | |||
|data= | |||
{{AttackData-AB | |||
|guard=M | |||
|cancel=O | |||
|startup=7 | |||
|advHit= Launches | |||
|advBlock= inconsistent | |||
|description=on hit, Causes a big wall bounce and puts the opponent on indefinite hitstun until they hit the ground or use meter to tech it<br>can be combo'd universally with A>B>C or A>B>Launcher combos.<br>most characters can add an air special or delay the launcher and do a ground special<br>if you hit an opponent with 3 launchers in the same combo they become completely invincible until waking up from the knockdown state<br>a lot of EX moves (Rose's 214EX), few meterless specials (Taros j.236x) and very rarely normals (Rokurouta's 6C) have last hits with the properties of a launcher. these hits count towards the 3 launcher cap. | |||
}} | |||
}} | |||
{{MoveData | |||
|name=Air launcher | |||
|image=AB_Taros_jAB.png | |||
|caption= | |||
|input=any 2 buttons | |||
|data= | |||
{{AttackData-AB | |||
|guard=M | |||
|cancel=O | |||
|startup= 7 | |||
|advHit= Launches | |||
|advBlock=inconsistent | |||
|description= No difference from the ground version, but some characters have air launchers with slightly less recovery frames | |||
}} | |||
}} | |||
<br> | |||
{{MoveData | |||
|name=Guard break | |||
|image=AB_Taros_GB.png | |||
|caption= | |||
|input=22C | |||
|data= | |||
{{AttackData-AB | |||
|guard= don't | |||
|cancel=O | |||
|startup= 6 | |||
|advHit= Stun | |||
|advBlock=O | |||
|description=This replaces grab, a quick attack that stuns blocking opponents.<br>common followups are combos, launchers, knockdowns and some supers<br>countered by not blocking, jumping or attacking back | |||
}} | }} | ||
}} | }} | ||
| Line 248: | Line 264: | ||
|name=Artillery Attachment 003 - Bey Blender | |name=Artillery Attachment 003 - Bey Blender | ||
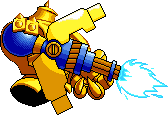
|image=AB_Taros_j.236a.png | |image=AB_Taros_j.236a.png | ||
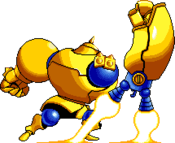
|caption=get used to seeing this sprite | |||
|input=j.236A/B/C | |input=j.236A/B/C | ||
|data= | |data= | ||
| Line 270: | Line 287: | ||
|guard=M | |guard=M | ||
|cancel=O | |cancel=O | ||
|startup= | |startup=79(53+26) | ||
|advHit= | |advHit=-24 | ||
|advBlock= | |advBlock=-38 | ||
|description= Taros winds up and then swings a giant sword downwards<br>Seems unavoidable unless you can get behind him before he swings. Damage is OK but not great, considering how the damn thing takes 2-3 business days to come out. | |description= Taros winds up and then swings a giant sword downwards<br>Seems unavoidable unless you can get behind him before he swings. Damage is OK but not great, considering how the damn thing takes 2-3 business days to come out.<br>'''Minus on both hit and block'''. although the fullscreen pushback is somewhat safe, some characters like Yashaou can punish on block with their own super | ||
}} | }} | ||
}} | }} | ||
== Boost mode (22+ABC) == | == Boost mode (22+ABC) == | ||
Taros gets Super Armor during every attack he does. | Taros gets Super Armor during every attack he does. | ||
* Standing C and 6C do more damage | |||
* Standing C is cancellable on either hit. Second hit is a V. Launcher | * Standing C is cancellable on either hit. Second hit is a V. Launcher | ||
== Combos == | |||
{| class="wikitable "border="1em" cellpadding="3" cellspacing="0" | |||
| align="center" style="background:#858585;color:black;"|'''Combos''' | |||
| align="center" style="background:#858585;color:black;"|'''Dmg''' | |||
| align="center" style="background:#858585;color:black;"|'''Notes''' | |||
|- | |||
|5A > 5B > 5AB > j.A > j.B > j.AB > j.A > j.B > j.C | |||
|36 - 40 | |||
|Universal combo. Ends with a knockdown. | |||
|- | |||
|5A > 5B > 5C | |||
|37 | |||
|Basic ground combo. | |||
|- | |||
|5B > 5AB > 5B > 5AB > 5B > 5C | |||
|43 | |||
|Basic ground launcher combo. | |||
|- | |||
|214AB > j.A > j.B > j.236B... | |||
|? | |||
|Corner combo that leads into the Taros j.A > j.B > j.236B loop. Video 🡪 https://youtu.be/ClHxI3_Ebxw | |||
|- | |||
|5B > 5AB > j.A > j.B > j.A > j.B > J.C | |||
|37 | |||
|The first j.B is delayed. Video 🡪 https://youtu.be/0KL-gnsmL_E | |||
|- | |||
|5B > 5AB > j.A > j.B > j.Ax2 > j.B > j.236C > j.A > j.B > j.236B... | |||
|? | |||
|Combo that leads into the Taros loop. Video 🡪 https://youtu.be/726gBfkleKY | |||
|- | |||
|5B > 5AB > j.A > j.B > j.236C > j.Ax2 > j.B > j.C | |||
|39 | |||
|Video 🡪 https://youtu.be/UTK26YuZcns | |||
|- | |||
|j.B > j.A > j.B > j.C | |||
|24 | |||
|knocks the opponent into the ground. Video 🡪 https://youtu.be/4oYkgYc5P9s | |||
|- | |||
|5B > 5C > j.Ax2 > j.C | |||
|66 | |||
|Can only be done in boost mode. Video 🡪 https://youtu.be/UOjs6dN0dq0 | |||
|- | |||
|5A > 5B > 5AB > 5A > 5C > j.A > j.B > j.C | |||
|45 | |||
|Can only be done in boost mode. Video 🡪 https://youtu.be/3Wy9KvL9bfE | |||
|} | |||
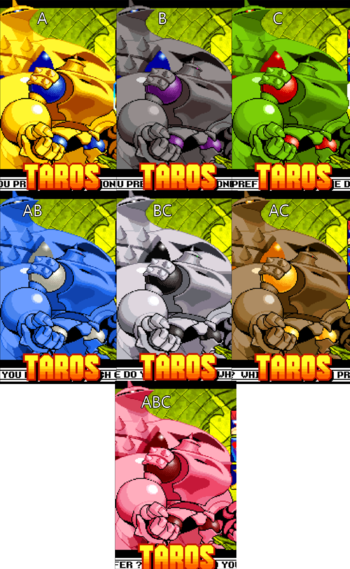
==Color Palettes== | |||
<br> | |||
[[File:AB_Palettes_Taros.png|none|350px]] | |||
<br> | |||
[[Category: Asura Buster: Eternal Warriors]] | [[Category: Asura Buster: Eternal Warriors]] | ||
{{Asura Buster}} | {{Asura Buster}} | ||
Latest revision as of 16:41, 14 May 2024
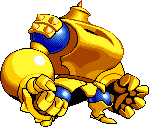
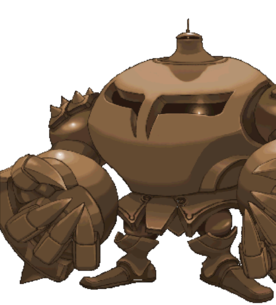
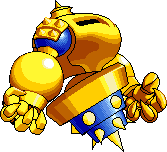
A large golem in that can form parts of its body into various weapons. Upon encountering the same young boy who had met Rose Mary and learning about the mystery of the lost continent, Taros decides to begin a new mission in investigating the strange and unusual anomaly of the lost continent.
Taros is a large, tanky character with normals that do half an HP bar — both physically and mentally — and specials that can force your opponent to play defensively and by your rules. While throwing out normals and specials haphazardly isn't a bad strat, mastering Taros can completely shut down your opponent via spacing and pressure.
OverviewIn a game without grapplers, Taros manages to strike the same fear into the hearts of opponents. |
|
| Pros | Cons |
|
|
| Play Style | Gorilla |
| Dash Type | Stepdash |
| Backdash Type | Grounded |
| Defense Modifier | 0.9375 |
| Air Options | None |
| Meter Gauge | 64 |
Normals
Standing normals
| Damage | Startup | Active | Recovery | Guard | Cancel | Adv. Hit | Adv. Block | |
|---|---|---|---|---|---|---|---|---|
| - | 6 | - | - | M | normals | -3 | -4 | |
|
fast jab | ||||||||
| Damage | Startup | Active | Recovery | Guard | Cancel | Adv. Hit | Adv. Block | |
|---|---|---|---|---|---|---|---|---|
| - | 9 | - | - | M | normals | -2 | -4 | |
|
decent combo filler | ||||||||
| Damage | Startup | Active | Recovery | Guard | Cancel | Adv. Hit | Adv. Block | |
|---|---|---|---|---|---|---|---|---|
| - | 7 / 9 | - | - | M | O | -15 | -16 | |
|
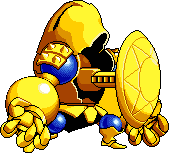
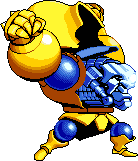
Taros' main anti-air | ||||||||
Crouching normals
| Damage | Startup | Active | Recovery | Guard | Cancel | Adv. Hit | Adv. Block | |
|---|---|---|---|---|---|---|---|---|
| - | 6 | - | - | L | normals | 5 | 4 | |
|
fast low jab | ||||||||
| Damage | Startup | Active | Recovery | Guard | Cancel | Adv. Hit | Adv. Block | |
|---|---|---|---|---|---|---|---|---|
| - | 16 | - | - | L | normals | Knocks down | -10 | |
|
stomp with a wide ripple | ||||||||
| Damage | Startup | Active | Recovery | Guard | Cancel | Adv. Hit | Adv. Block | |
|---|---|---|---|---|---|---|---|---|
| - | 31 | - | - | H | O | Knocks down | -11 | |
|
a GIANT overhead that deals a lot of damage | ||||||||
Jumping normals
| Damage | Startup | Active | Recovery | Guard | Cancel | Adv. Hit | Adv. Block | |
|---|---|---|---|---|---|---|---|---|
| - | 4 | - | - | H | special | O | O | |
|
fast combo starter | ||||||||
| Damage | Startup | Active | Recovery | Guard | Cancel | Adv. Hit | Adv. Block | |
|---|---|---|---|---|---|---|---|---|
| - | 10 | - | - | H | special | O | O | |
|
wide but short hitbox | ||||||||
| Damage | Startup | Active | Recovery | Guard | Cancel | Adv. Hit | Adv. Block | |
|---|---|---|---|---|---|---|---|---|
| - | 7 | - | - | H | special | O | O | |
|
5-hit drill attack that overpowers most normal attacks | ||||||||
| Damage | Startup | Active | Recovery | Guard | Cancel | Adv. Hit | Adv. Block | |
|---|---|---|---|---|---|---|---|---|
| - | 10 | - | - | H | O | O | O | |
|
one of Taros's greatest normals | ||||||||
Command normals
| Damage | Startup | Active | Recovery | Guard | Cancel | Adv. Hit | Adv. Block | |
|---|---|---|---|---|---|---|---|---|
| - | 39... yes 39 | - | - | H | special | Knocks down | -3 | |
|
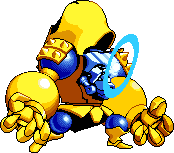
very slow but very damaging overhead punch | ||||||||
Universal mechanics
| Damage | Startup | Active | Recovery | Guard | Cancel | Adv. Hit | Adv. Block | |
|---|---|---|---|---|---|---|---|---|
| - | 7 | - | - | M | O | Launches | inconsistent | |
|
on hit, Causes a big wall bounce and puts the opponent on indefinite hitstun until they hit the ground or use meter to tech it | ||||||||
| Damage | Startup | Active | Recovery | Guard | Cancel | Adv. Hit | Adv. Block | |
|---|---|---|---|---|---|---|---|---|
| - | 7 | - | - | M | O | Launches | inconsistent | |
|
No difference from the ground version, but some characters have air launchers with slightly less recovery frames | ||||||||
| Damage | Startup | Active | Recovery | Guard | Cancel | Adv. Hit | Adv. Block | |
|---|---|---|---|---|---|---|---|---|
| - | 6 | - | - | don't | O | Stun | O | |
|
This replaces grab, a quick attack that stuns blocking opponents. | ||||||||
Special moves
| Damage | Startup | Active | Recovery | Guard | Cancel | Adv. Hit | Adv. Block | |
|---|---|---|---|---|---|---|---|---|
| - | 38 | - | - | M | O | a lot | still a lot | |
|
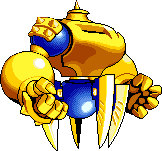
Taros shoots a laser, setting off explosions on the ground. Long startup but quick recovery, so you can hit your opponent into the blasts. Resembles a Power Geyser. | ||||||||
| Damage | Startup | Active | Recovery | Guard | Cancel | Adv. Hit | Adv. Block | |
|---|---|---|---|---|---|---|---|---|
| - | 9 / 9 / 9 | - | - | M | O | inconsistent | inconsistent | |
|
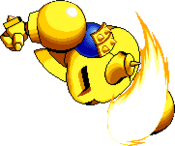
Taros rushes forward with two large gears spinning in place of his hands. | ||||||||
| Damage | Startup | Active | Recovery | Guard | Cancel | Adv. Hit | Adv. Block | |
|---|---|---|---|---|---|---|---|---|
| - | 6 / 8 / 10 | - | - | M | O | inconsistent | inconsistent | |
|
Arguably, one of the best moves in the game. | ||||||||
Supers
| Damage | Startup | Active | Recovery | Guard | Cancel | Adv. Hit | Adv. Block | |
|---|---|---|---|---|---|---|---|---|
| - | 79(53+26) | - | - | M | O | -24 | -38 | |
|
Taros winds up and then swings a giant sword downwards | ||||||||
Boost mode (22+ABC)
Taros gets Super Armor during every attack he does.
- Standing C and 6C do more damage
- Standing C is cancellable on either hit. Second hit is a V. Launcher
Combos
| Combos | Dmg | Notes |
| 5A > 5B > 5AB > j.A > j.B > j.AB > j.A > j.B > j.C | 36 - 40 | Universal combo. Ends with a knockdown. |
| 5A > 5B > 5C | 37 | Basic ground combo. |
| 5B > 5AB > 5B > 5AB > 5B > 5C | 43 | Basic ground launcher combo. |
| 214AB > j.A > j.B > j.236B... | ? | Corner combo that leads into the Taros j.A > j.B > j.236B loop. Video 🡪 https://youtu.be/ClHxI3_Ebxw |
| 5B > 5AB > j.A > j.B > j.A > j.B > J.C | 37 | The first j.B is delayed. Video 🡪 https://youtu.be/0KL-gnsmL_E |
| 5B > 5AB > j.A > j.B > j.Ax2 > j.B > j.236C > j.A > j.B > j.236B... | ? | Combo that leads into the Taros loop. Video 🡪 https://youtu.be/726gBfkleKY |
| 5B > 5AB > j.A > j.B > j.236C > j.Ax2 > j.B > j.C | 39 | Video 🡪 https://youtu.be/UTK26YuZcns |
| j.B > j.A > j.B > j.C | 24 | knocks the opponent into the ground. Video 🡪 https://youtu.be/4oYkgYc5P9s |
| 5B > 5C > j.Ax2 > j.C | 66 | Can only be done in boost mode. Video 🡪 https://youtu.be/UOjs6dN0dq0 |
| 5A > 5B > 5AB > 5A > 5C > j.A > j.B > j.C | 45 | Can only be done in boost mode. Video 🡪 https://youtu.be/3Wy9KvL9bfE |
Color Palettes
