| (34 intermediate revisions by 4 users not shown) | |||
| Line 1: | Line 1: | ||
= | {{Infobox Character BreakersR | ||
|name=Rila | |||
|filename=Rila | |||
|defense=118 | |||
|stun=3136 | |||
}} | |||
= | ==Move List== | ||
===Normals=== | |||
<big>'''Standing'''</big> | |||
------ | |||
{{MoveData | |||
|image=BreakersR_Rila_5A.png | |||
|caption= | |||
|name= | |||
|input=5A | |||
|data= | |||
{{AttackData-BreakersR | |||
|Damage= | |||
|Guard= {{Mid}} | |||
|Stun= | |||
|Properties={{Specialcancel}}{{Supercancel}} | |||
|Startup= | |||
|Active= | |||
|Recovery= | |||
|Adv. Hit= | |||
|Adv. Guard= | |||
|description=Not your standard jab. Your fastest move and a combo staple but also functions as a far counter poking tool. Has applications as a high reward far anti-air tool. | |||
}} | |||
}} | |||
= | {{MoveData | ||
|image=BreakersR_Rila_5B.png | |||
|caption= | |||
|name= | |||
|input=5B | |||
|data= | |||
{{AttackData-BreakersR | |||
|Damage= | |||
|Guard= {{Mid}} | |||
|Stun= | |||
|Properties= | |||
|Startup= | |||
|Active= | |||
|Recovery= | |||
|Adv. Hit= | |||
|Adv. Guard= | |||
|description=Has decent applications as an anti-air but it is slower than 5A and has far less reward. | |||
}} | |||
}} | |||
{{MoveData | |||
|image=BreakersR_Rila_5C.png | |||
|caption= | |||
|name= | |||
|input=5C | |||
|data= | |||
{{AttackData-BreakersR | |||
|Damage= | |||
|Guard= {{Mid}} | |||
|Stun= | |||
|Properties= | |||
|Startup= | |||
|Active= | |||
|Recovery= | |||
|Adv. Hit= | |||
|Adv. Guard= | |||
|description= | |||
}} | |||
}} | |||
{{MoveData | |||
|image=BreakersR_Rila_5D.png | |||
|caption= | |||
|name= | |||
|input=5D | |||
|data= | |||
{{AttackData-BreakersR | |||
|Damage= | |||
|Guard= {{Mid}} | |||
|Stun= | |||
|Properties= | |||
|Startup= | |||
|Active= | |||
|Recovery= | |||
|Adv. Hit= | |||
|Adv. Guard= | |||
|description=Leans back and goes airborne towards the end of the move. | |||
}} | |||
}} | |||
<big>'''Crouching'''</big> | |||
------ | |||
{{MoveData | |||
|image=BreakersR_Rila_2A.png | |||
|caption= | |||
|name= | |||
|input=2A | |||
|data= | |||
{{AttackData-BreakersR | |||
|Damage= | |||
|Guard={{Mid}} | |||
|Stun= | |||
|Properties={{Specialcancel}}{{Supercancel}} | |||
|Startup= | |||
|Active= | |||
|Recovery= | |||
|Adv. Hit= | |||
|Adv. Guard= | |||
|description= | |||
}} | |||
}} | |||
= | {{MoveData | ||
|image=BreakersR_Rila_2B.png | |||
|caption= | |||
|name= | |||
|input=2B | |||
|data= | |||
{{AttackData-BreakersR | |||
|Damage= | |||
|Guard={{Low}} | |||
|Stun= | |||
|Properties={{Specialcancel}}{{Supercancel}} | |||
|Startup= | |||
|Active= | |||
|Recovery= | |||
|Adv. Hit= | |||
|Adv. Guard= | |||
|description= | |||
}} | |||
}} | |||
== | {{MoveData | ||
|image=BreakersR_Rila_2C.png | |||
== | |caption= | ||
|name= | |||
|input=2C | |||
|data= | |||
{{AttackData-BreakersR | |||
|Damage= | |||
|Guard={{Mid}} | |||
|Stun= | |||
|Properties= | |||
|Startup= | |||
|Active= | |||
|Recovery= | |||
|Adv. Hit= | |||
|Adv. Guard= | |||
|description=This move is super annoying and beats a lot of stuff. Be careful on the range you do it at, you want to do it pretty far away. Passable anti-air from really far out. | |||
}} | |||
}} | |||
== | |||
{{MoveData | |||
{{ | |image=BreakersR_Rila_2D.png | ||
|caption= | |||
|name= | |||
|input=2D | |||
|data= | |||
{{AttackData-BreakersR | |||
|Damage= | |||
|Guard={{Low}} | |||
|Stun= | |||
|Properties={{Knockdown}} | |||
|Startup= | |||
|Active= | |||
|Recovery= | |||
|Adv. Hit= | |||
|Adv. Guard= | |||
|description= | |||
}} | |||
}} | |||
<big>'''Close'''</big> | |||
------ | |||
{{MoveData | |||
|image=BreakersR_Rila_cl5A.png | |||
|caption= | |||
|name= | |||
|input=5A | |||
|data= | |||
{{AttackData-BreakersR | |||
|Damage= | |||
|Guard={{Mid}} | |||
|Stun= | |||
|Properties={{Specialcancel}}{{Supercancel}} | |||
|Startup= | |||
|Active= | |||
|Recovery= | |||
|Adv. Hit= | |||
|Adv. Guard= | |||
|description= | |||
}} | |||
}} | |||
{{MoveData | |||
|image=BreakersR_Rila_cl5B.png | |||
|caption= | |||
|name= | |||
|input=5B | |||
|data= | |||
{{AttackData-BreakersR | |||
|Damage= | |||
|Guard={{Mid}} | |||
|Stun= | |||
|Properties={{Specialcancel}}{{Supercancel}} | |||
|Startup= | |||
|Active= | |||
|Recovery= | |||
|Adv. Hit= | |||
|Adv. Guard= | |||
|description= | |||
}} | |||
}} | |||
{{MoveData | |||
|image=BreakersR_Rila_cl5C.png | |||
|caption= | |||
|name= | |||
|input=5C | |||
|data= | |||
{{AttackData-BreakersR | |||
|Damage= | |||
|Guard={{Mid}} | |||
|Stun= | |||
|Properties={{Specialcancel}}{{Supercancel}} | |||
|Startup= | |||
|Active= | |||
|Recovery= | |||
|Adv. Hit= | |||
|Adv. Guard= | |||
|description= | |||
}} | |||
}} | |||
{{MoveData | |||
|image=BreakersR_Rila_cl5D.png | |||
|caption= | |||
|name= | |||
|input=5D | |||
|data= | |||
{{AttackData-BreakersR | |||
|Damage= | |||
|Guard= {{Mid}} | |||
|Stun= | |||
|Properties= | |||
|Startup= | |||
|Active= | |||
|Recovery= | |||
|Adv. Hit= | |||
|Adv. Guard= | |||
|description=Rila goes airborne, avoiding lows and throws. Leaves her advantaged afterwards, making this an excellent oki option. | |||
}} | |||
}} | |||
<big>'''Neutral Jumping'''</big> | |||
------ | |||
{{MoveData | |||
|image=BreakersR_Rila_njA.png | |||
|caption= | |||
|name= | |||
|input=nj.A | |||
|data= | |||
{{AttackData-BreakersR | |||
|Damage= | |||
|Guard= {{High}} | |||
|Stun= | |||
|Properties= | |||
|Startup= | |||
|Active= | |||
|Recovery= | |||
|Adv. Hit= | |||
|Adv. Guard= | |||
|description= | |||
}} | |||
}} | |||
{{MoveData | |||
|image=BreakersR_Rila_njB.png | |||
|caption= | |||
|name= | |||
|input=nj.B | |||
|data= | |||
{{AttackData-BreakersR | |||
|Damage= | |||
|Guard= {{High}} | |||
|Stun= | |||
|Properties= | |||
|Startup= | |||
|Active= | |||
|Recovery= | |||
|Adv. Hit= | |||
|Adv. Guard= | |||
|description= | |||
}} | |||
}} | |||
{{MoveData | |||
|image=BreakersR_Rila_njC.png | |||
|caption= | |||
|name= | |||
|input=nj.C | |||
|data= | |||
{{AttackData-BreakersR | |||
|Damage= | |||
|Guard= {{High}} | |||
|Stun= | |||
|Properties= | |||
|Startup= | |||
|Active= | |||
|Recovery= | |||
|Adv. Hit= | |||
|Adv. Guard= | |||
|description= | |||
}} | |||
}} | |||
{{MoveData | |||
|image=BreakersR_Rila_njD.png | |||
|caption= | |||
|name= | |||
|input=nj.D | |||
|data= | |||
{{AttackData-BreakersR | |||
|Damage= | |||
|Guard= {{High}} | |||
|Stun= | |||
|Properties= | |||
|Startup= | |||
|Active= | |||
|Recovery= | |||
|Adv. Hit= | |||
|Adv. Guard= | |||
|description= | |||
}} | |||
}} | |||
<big>'''Diagonal Jumping'''</big> | |||
------ | |||
{{MoveData | |||
|image=BreakersR_Rila_djA.png | |||
|caption= | |||
|name= | |||
|input=dj.A | |||
|data= | |||
{{AttackData-BreakersR | |||
|Damage= | |||
|Guard= {{High}} | |||
|Stun= | |||
|Properties= | |||
|Startup= | |||
|Active= | |||
|Recovery= | |||
|Adv. Hit= | |||
|Adv. Guard= | |||
|description= | |||
}} | |||
}} | |||
{{MoveData | |||
|image=BreakersR_Rila_djB.png | |||
|caption= | |||
|name= | |||
|input=dj.B | |||
|data= | |||
{{AttackData-BreakersR | |||
|Damage= | |||
|Guard= {{High}} | |||
|Stun= | |||
|Properties= | |||
|Startup= | |||
|Active= | |||
|Recovery= | |||
|Adv. Hit= | |||
|Adv. Guard= | |||
|description= | |||
}} | |||
}} | |||
{{MoveData | |||
|image=BreakersR_Rila_djC.png | |||
|caption= | |||
|name= | |||
|input=dj.C | |||
|data= | |||
{{AttackData-BreakersR | |||
|Damage= | |||
|Guard= {{High}} | |||
|Stun= | |||
|Properties= | |||
|Startup= | |||
|Active= | |||
|Recovery= | |||
|Adv. Hit= | |||
|Adv. Guard= | |||
|description= | |||
}} | |||
}} | |||
{{MoveData | |||
|image=BreakersR_Rila_djD.png | |||
|caption= | |||
|name= | |||
|input=dj.D | |||
|data= | |||
{{AttackData-BreakersR | |||
|Damage= | |||
|Guard= {{High}} | |||
|Stun= | |||
|Properties= | |||
|Startup= | |||
|Active= | |||
|Recovery= | |||
|Adv. Hit= | |||
|Adv. Guard= | |||
|description= | |||
}} | |||
}} | |||
===Command Normals=== | |||
{{MoveData | |||
|image=BreakersR_Rila_6Dpng | |||
|caption= | |||
|name=Dynamite Kick | |||
|input=6D | |||
|data= | |||
{{AttackData-BreakersR | |||
|Damage= | |||
|Guard= {{Mid}} | |||
|Stun= | |||
|Properties= | |||
|Startup= | |||
|Active= | |||
|Recovery= | |||
|Adv. Hit= | |||
|Adv. Guard= | |||
|description=Rila is airborne, avoiding lows and throws. Juggles the opponent on hit, allowing for followups in the corner. | |||
}} | |||
}} | |||
===Throws=== | |||
{{MoveData | |||
|image=BreakersR_Rila_Throw.png | |||
|caption= | |||
|name=Hard Slam | |||
|input=4/6C | |||
|data= | |||
{{AttackData-BreakersR | |||
|Damage= | |||
|Guard={{Unblockable}} | |||
|Stun= | |||
|Properties={{Throw}}{{Knockdown}} | |||
|Startup= | |||
|Active= | |||
|Recovery= | |||
|Adv. Hit= | |||
|Adv. Guard= | |||
|description=Consider CD as an alternative throw OS to cl.5C. | |||
}} | |||
}} | |||
===Specials=== | |||
{{MoveData | |||
|image=RilaScratch.gif | |||
|caption= | |||
|name=Quick Scratch | |||
|input=[4]6A | |||
|data= | |||
{{AttackData-BreakersR | |||
|Damage= | |||
|Guard= {{Mid}} | |||
|Stun= | |||
|Properties= | |||
|Startup= | |||
|Active= | |||
|Recovery= | |||
|Adv. Hit= | |||
|Adv. Guard= | |||
|description=Rila dashes across the screen and will scratch the opponent. Quick Scratch is relatively safe and does good stun damage. | |||
}} | |||
}} | |||
{{MoveData | |||
|image=RilaUpper.gif | |||
|caption= | |||
|name=Quick Uppercut | |||
|input=[4]6C | |||
|data= | |||
{{AttackData-BreakersR | |||
|Damage= | |||
|Guard= {{Mid}} | |||
|Stun= | |||
|Properties={{Knockdown}} | |||
|Startup= | |||
|Active= | |||
|Recovery= | |||
|Adv. Hit= | |||
|Adv. Guard= | |||
|description=Sets them on fire and causes knockdown in addition to having slightly more start-up time and strong anti-air properties. Does higher damage than Quick Scratch at the cost of being unsafe. | |||
}} | |||
}} | |||
{{MoveData | |||
|image=RilaSaber.gif | |||
|caption= | |||
|name=Wild Saber | |||
|input=[2]8K | |||
|data= | |||
{{AttackData-BreakersR | |||
|version=B | |||
|Damage= | |||
|Guard= {{Mid}} | |||
|Stun= | |||
|Properties= | |||
|Startup= | |||
|Recovery= | |||
|Adv. Hit= | |||
|Adv. Guard= | |||
|description=Both versions have invulnerable startup, but the LK version will hit while it is invulnerable and the HK version loses its lower-body invulnerability before it begins to hit. | |||
}} | |||
{{AttackData-BreakersR | |||
|version=D | |||
|Damage= | |||
|Guard= {{Mid}} | |||
|Stun= | |||
|Properties= | |||
|Startup= | |||
|Recovery= | |||
|Adv. Hit= | |||
|Adv. Guard= | |||
|description= The HK version hits a lot more and for more damage. | |||
}} | |||
}} | |||
{{MoveData | |||
|image=RilaSnake.gif | |||
|caption= | |||
|name=Killer Snake | |||
|input=[4]3K | |||
|data= | |||
{{AttackData-BreakersR | |||
|version=B | |||
|Damage= | |||
|Guard= {{Mid}} | |||
|Stun= | |||
|Properties={{Startupinv}} | |||
|Startup= | |||
|Recovery= | |||
|Adv. Hit= | |||
|Adv. Guard= | |||
|description=Rila launches herself at the opponent and kicks the opponent two times. The pounce can hop over lows and projectiles and has a good deal of priority. | |||
}} | |||
{{AttackData-BreakersR | |||
|version=D | |||
|Damage= | |||
|Guard= {{Mid}} | |||
|Stun= | |||
|Properties={{Startupinv}}{{Knockdown}} | |||
|Startup= | |||
|Startup= | |||
|Recovery= | |||
|Adv. Hit= | |||
|Adv. Guard= | |||
|description=Rila launches herself at the opponent and kicks the opponent three times. Goes further, faster, and higher than the B version. | |||
* Thanks to startup invincibility and distance travelled this can be used as an escape from lows or mobility tool after knockdown. | |||
* Juggles into her Bloody Fang super; for purposes of knockdown and range, use HK Killer Snake more frequently. | |||
}} | |||
}} | |||
{{MoveData | |||
|image=RilaClaw.gif | |||
|caption= | |||
|name=Spinning Claw | |||
|input=Px5 (rapidly) | |||
|data= | |||
{{AttackData-BreakersR | |||
|version=A | |||
|Damage= | |||
|Guard= {{Mid}} | |||
|Stun= | |||
|Properties={{Knockdown}} | |||
|Startup= | |||
|Recovery= | |||
|Adv. Hit= | |||
|Adv. Guard= | |||
|description=Rila spins around on the floor and slowly moves forward. If the opponent is hit, they are sucked into the attack and struck multiple times before they are released. It can be comboed into. | |||
}} | |||
{{AttackData-BreakersR | |||
|version=C | |||
|Damage= | |||
|Guard= {{Mid}} | |||
|Stun= | |||
|Properties={{Knockdown}} | |||
|Startup= | |||
|Recovery= | |||
|Adv. Hit= | |||
|Adv. Guard= | |||
|description=Requires faster mash. More hits, moves faster. | |||
}} | |||
}} | |||
===Supers=== | |||
{{MoveData | |||
|image=RilaBeast.gif | |||
|caption= | |||
|name=Shine Beast | |||
|input=[4]646P (Hold to delay) | |||
|data= | |||
{{AttackData-BreakersR | |||
|Damage= | |||
|Guard={{Mid}} | |||
|Stun= | |||
|Properties={{Startupinv}}{{Hardknockdown}} | |||
|Startup= | |||
|Recovery= | |||
|Adv. Hit= | |||
|Adv. Guard= | |||
|description=Rila turns into a glowing cat and then zigzags across the screen. If held for too long, Rila will turn back into a human. Moreover, if the opponent touches Rila while she is still transformed, she will automatically launch the attack. This move has start-up invulnerability making it a great reversal. | |||
}} | |||
}} | |||
{{MoveData | |||
|image=RilaFang.gif | |||
|caption= | |||
|name=Bloody Fang | |||
|input=[1]319K | |||
|data= | |||
{{AttackData-BreakersR | |||
|Damage= | |||
|Guard={{Mid}} | |||
|Stun= | |||
|Properties={{Startupinv}}{{Hardknockdown}} | |||
|Startup= | |||
|Recovery= | |||
|Adv. Hit= | |||
|Adv. Guard= | |||
|description=Rila jumps at her opponent and bites them, violently biting. Once it connects it becomes a mashable grab with a max of 21 hits, your opponent can counter mash. This will hit both grounded and airborne opponents. | |||
Rila jumps very quickly at the opponent, making this an effective way to punish projectiles on reaction. | |||
''Very forgiving input, although the inputs are listed as [1]319, the only strict requirement is the [1] charge. You can substitute 6, 4 instead of 3, 1 and you can end in any up direction.''}} | |||
}} | |||
==Combos== | |||
===Meterless Combos=== | |||
*2B, 5A xx [4]A/C - Use A for stun, C for damage | |||
*j.A, cr.A/st.A xx Spinning Claw | |||
*dj.C, 2B xx [4]6C - far jump conversion | |||
*cl.5D, 2C - good link combo for oki | |||
*In the corner - cl.5D, 2B, 5A xx [4]A - link after 5D | |||
*crossup j.B, cl.5C xx [2]8D - input is [2]8C~D to get the standing charge special | |||
*In the corner - 6D, 5A xx [4]6C | |||
===Combos with meter=== | |||
*[4]3D, Bloody Fang - basic super combo | |||
*crossup j.B, 2B, 5A xx Bloody Fang - requires the motion for bloody fang to be built into the 2B, 5A link | |||
*Anti-air 5A xx [4]6C, Bloody Fang | |||
*In the corner - 6D, 5A xx [4]6C, Bloody Fang | |||
*crossup j.B, cl.5C xx C Spinning Claw, Bloody Fang - huge damage | |||
===Combo videos=== | |||
<youtube>https://youtu.be/NzeskKbDFt8</youtube> | |||
==Advanced Strategy== | |||
Rila's gameplan is the unortodox rusher character that likes to get closer/poking the opponent with charging specials and make Spinning Claw traps (mashing special), or answering projectiles with supers, she is a gender bender Blanka In a Nutshell. | |||
===Anti-airs=== | |||
# [2]8B (invuln) | |||
# 8C (react) | |||
# fall 8D (read) | |||
# 2C (react) | |||
# far 2D (react) | |||
# f.5D (read) | |||
# f.5A>[4]6C (situational) | |||
[https://twitter.com/breakrevgif/status/863684572202053632 Source: Breakrevgifs] | |||
===Charging=== | |||
All specials require 30 frames of charge, her supers require 28. | |||
The charge buffer on super in theory allows for short walk up supers. You have 22 frames of buffer time once the charge requirement is met. | |||
===Oki=== | |||
* Meaty cl.5D or far 5D works to beat wakeup throws or abare. | |||
* Meaty 2B for the low mixup, loses to wakeup throw. | |||
* Killer Snake, Scratch, Uppercut and dashes can all be used to pursue enemies. D Killer Snake goes very far and recovers quickly. Keep in mind opponent's ukemi options. | |||
** https://gfycat.com/infinitehighlevelgelding | |||
===Breakers=== | |||
Rila has a pretty good selection of breakers. | |||
*Invincibility - [2]8B or Shine Beast | |||
*Anti low/projectile - [4]3C/D or Bloody Fang | |||
*Safer options - Backdash or jump | |||
==Matchups== | |||
===Matchup Table=== | |||
{| class="wikitable" | |||
|+ Advantage | |||
|- | |||
| Great || | |||
|- | |||
| Good || Pielle, Condor, Maherl, Alsion III | |||
|- | |||
| Even || | |||
|- | |||
| Weak || Tia, Sho | |||
|- | |||
| Bad || Dao-Long, Saizo | |||
|} | |||
===Character Specific Tips=== | |||
-------- | |||
'''Sho'''<br> | |||
-------- | |||
'''Pielle'''<br> | |||
-------- | |||
'''Condor'''<br> | |||
-------- | |||
'''Rila'''<br> | |||
-------- | |||
'''Tia'''<br> | |||
-------- | |||
'''Alsion III'''<br> | |||
-------- | |||
'''Maherl'''<br> | |||
-------- | |||
'''Dao-Long'''<br> | |||
-------- | |||
'''Saizo'''<br> | |||
{{Navbox-BreakersR}} | |||
[[Category:Breakers Revenge]] | |||
Latest revision as of 15:14, 13 December 2023
Introduction
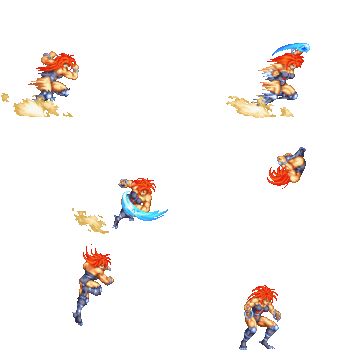
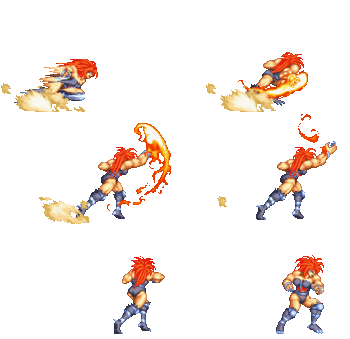
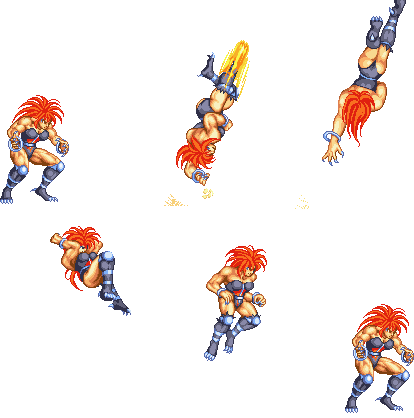
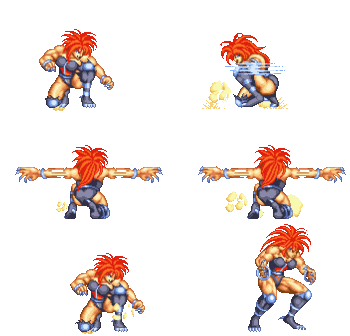
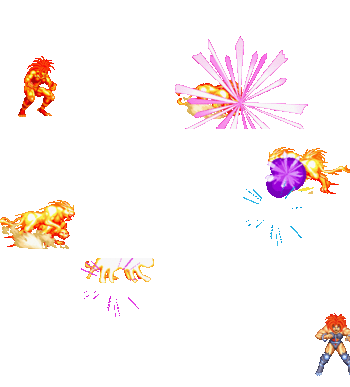
Rila Estansia is a wild-hearted Brazilian woman from the Amazon Forest. A protector of nature, Rila enters the FIST Tournament to find out about the evil spirit that is threatening the Amazonian people.
Overview
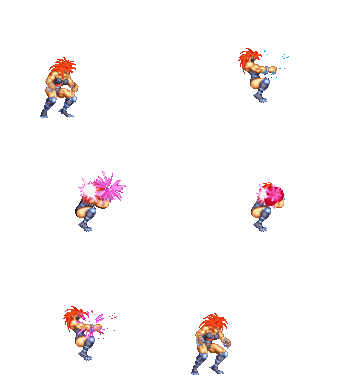
Rila is an unorthodox character with quick dashes and jumps. She hits hard and has very punishing anti-projectile properties. She sticks out as having quite a few unbreakerable link combos. Her supers are not the easiest to combo into but both have very strong uses and do a lot of damage.
| Strengths | Weaknesses |
|---|---|
|
|
Move List
Normals
Standing
| Damage | Guard | Stun | Properties | ||
|---|---|---|---|---|---|
| - | - | ||||
| Startup | Active | Recovery | Adv. Hit | Adv. Guard | |
| - | - | - | - | - | |
|
Not your standard jab. Your fastest move and a combo staple but also functions as a far counter poking tool. Has applications as a high reward far anti-air tool. | |||||
| Damage | Guard | Stun | Properties | ||
|---|---|---|---|---|---|
| - | - | - | |||
| Startup | Active | Recovery | Adv. Hit | Adv. Guard | |
| - | - | - | - | - | |
|
Has decent applications as an anti-air but it is slower than 5A and has far less reward. | |||||
| Damage | Guard | Stun | Properties | |
|---|---|---|---|---|
| - | - | - | ||
| Startup | Active | Recovery | Adv. Hit | Adv. Guard |
| - | - | - | - | - |
| Damage | Guard | Stun | Properties | ||
|---|---|---|---|---|---|
| - | - | - | |||
| Startup | Active | Recovery | Adv. Hit | Adv. Guard | |
| - | - | - | - | - | |
|
Leans back and goes airborne towards the end of the move. | |||||
Crouching
| Damage | Guard | Stun | Properties | |
|---|---|---|---|---|
| - | - | |||
| Startup | Active | Recovery | Adv. Hit | Adv. Guard |
| - | - | - | - | - |
| Damage | Guard | Stun | Properties | |
|---|---|---|---|---|
| - | - | |||
| Startup | Active | Recovery | Adv. Hit | Adv. Guard |
| - | - | - | - | - |
| Damage | Guard | Stun | Properties | ||
|---|---|---|---|---|---|
| - | - | - | |||
| Startup | Active | Recovery | Adv. Hit | Adv. Guard | |
| - | - | - | - | - | |
|
This move is super annoying and beats a lot of stuff. Be careful on the range you do it at, you want to do it pretty far away. Passable anti-air from really far out. | |||||
| Damage | Guard | Stun | Properties | |
|---|---|---|---|---|
| - | - | |||
| Startup | Active | Recovery | Adv. Hit | Adv. Guard |
| - | - | - | - | - |
Close
| Damage | Guard | Stun | Properties | |
|---|---|---|---|---|
| - | - | |||
| Startup | Active | Recovery | Adv. Hit | Adv. Guard |
| - | - | - | - | - |
| Damage | Guard | Stun | Properties | |
|---|---|---|---|---|
| - | - | |||
| Startup | Active | Recovery | Adv. Hit | Adv. Guard |
| - | - | - | - | - |
| Damage | Guard | Stun | Properties | |
|---|---|---|---|---|
| - | - | |||
| Startup | Active | Recovery | Adv. Hit | Adv. Guard |
| - | - | - | - | - |
| Damage | Guard | Stun | Properties | ||
|---|---|---|---|---|---|
| - | - | - | |||
| Startup | Active | Recovery | Adv. Hit | Adv. Guard | |
| - | - | - | - | - | |
|
Rila goes airborne, avoiding lows and throws. Leaves her advantaged afterwards, making this an excellent oki option. | |||||
Neutral Jumping
| Damage | Guard | Stun | Properties | |
|---|---|---|---|---|
| - | - | - | ||
| Startup | Active | Recovery | Adv. Hit | Adv. Guard |
| - | - | - | - | - |
| Damage | Guard | Stun | Properties | |
|---|---|---|---|---|
| - | - | - | ||
| Startup | Active | Recovery | Adv. Hit | Adv. Guard |
| - | - | - | - | - |
| Damage | Guard | Stun | Properties | |
|---|---|---|---|---|
| - | - | - | ||
| Startup | Active | Recovery | Adv. Hit | Adv. Guard |
| - | - | - | - | - |
| Damage | Guard | Stun | Properties | |
|---|---|---|---|---|
| - | - | - | ||
| Startup | Active | Recovery | Adv. Hit | Adv. Guard |
| - | - | - | - | - |
Diagonal Jumping
| Damage | Guard | Stun | Properties | |
|---|---|---|---|---|
| - | - | - | ||
| Startup | Active | Recovery | Adv. Hit | Adv. Guard |
| - | - | - | - | - |
| Damage | Guard | Stun | Properties | |
|---|---|---|---|---|
| - | - | - | ||
| Startup | Active | Recovery | Adv. Hit | Adv. Guard |
| - | - | - | - | - |
| Damage | Guard | Stun | Properties | |
|---|---|---|---|---|
| - | - | - | ||
| Startup | Active | Recovery | Adv. Hit | Adv. Guard |
| - | - | - | - | - |
| Damage | Guard | Stun | Properties | |
|---|---|---|---|---|
| - | - | - | ||
| Startup | Active | Recovery | Adv. Hit | Adv. Guard |
| - | - | - | - | - |
Command Normals
| Damage | Guard | Stun | Properties | ||
|---|---|---|---|---|---|
| - | - | - | |||
| Startup | Active | Recovery | Adv. Hit | Adv. Guard | |
| - | - | - | - | - | |
|
Rila is airborne, avoiding lows and throws. Juggles the opponent on hit, allowing for followups in the corner. | |||||
Throws
| Damage | Guard | Stun | Properties | ||
|---|---|---|---|---|---|
| - | - | ||||
| Startup | Active | Recovery | Adv. Hit | Adv. Guard | |
| - | - | - | - | - | |
|
Consider CD as an alternative throw OS to cl.5C. | |||||
Specials
| Damage | Guard | Stun | Properties | ||
|---|---|---|---|---|---|
| - | - | - | |||
| Startup | Active | Recovery | Adv. Hit | Adv. Guard | |
| - | - | - | - | - | |
|
Rila dashes across the screen and will scratch the opponent. Quick Scratch is relatively safe and does good stun damage. | |||||
| Damage | Guard | Stun | Properties | ||
|---|---|---|---|---|---|
| - | - | ||||
| Startup | Active | Recovery | Adv. Hit | Adv. Guard | |
| - | - | - | - | - | |
|
Sets them on fire and causes knockdown in addition to having slightly more start-up time and strong anti-air properties. Does higher damage than Quick Scratch at the cost of being unsafe. | |||||
| B | Damage | Guard | Stun | Properties | ||
|---|---|---|---|---|---|---|
| - | - | - | ||||
| Startup | Active | Recovery | Adv. Hit | Adv. Guard | ||
| - | - | - | - | - | ||
|
Both versions have invulnerable startup, but the LK version will hit while it is invulnerable and the HK version loses its lower-body invulnerability before it begins to hit. | ||||||
| D | Damage | Guard | Stun | Properties | ||
| - | - | - | ||||
| Startup | Active | Recovery | Adv. Hit | Adv. Guard | ||
| - | - | - | - | - | ||
|
The HK version hits a lot more and for more damage. | ||||||
| B | Damage | Guard | Stun | Properties | ||
|---|---|---|---|---|---|---|
| - | - | |||||
| Startup | Active | Recovery | Adv. Hit | Adv. Guard | ||
| - | - | - | - | - | ||
|
Rila launches herself at the opponent and kicks the opponent two times. The pounce can hop over lows and projectiles and has a good deal of priority. | ||||||
| D | Damage | Guard | Stun | Properties | ||
| - | - | |||||
| Startup | Active | Recovery | Adv. Hit | Adv. Guard | ||
| - | - | - | - | - | ||
|
Rila launches herself at the opponent and kicks the opponent three times. Goes further, faster, and higher than the B version.
| ||||||
| A | Damage | Guard | Stun | Properties | ||
|---|---|---|---|---|---|---|
| - | - | |||||
| Startup | Active | Recovery | Adv. Hit | Adv. Guard | ||
| - | - | - | - | - | ||
|
Rila spins around on the floor and slowly moves forward. If the opponent is hit, they are sucked into the attack and struck multiple times before they are released. It can be comboed into. | ||||||
| C | Damage | Guard | Stun | Properties | ||
| - | - | |||||
| Startup | Active | Recovery | Adv. Hit | Adv. Guard | ||
| - | - | - | - | - | ||
|
Requires faster mash. More hits, moves faster. | ||||||
Supers
| Damage | Guard | Stun | Properties | ||
|---|---|---|---|---|---|
| - | - | ||||
| Startup | Active | Recovery | Adv. Hit | Adv. Guard | |
| - | - | - | - | - | |
|
Rila turns into a glowing cat and then zigzags across the screen. If held for too long, Rila will turn back into a human. Moreover, if the opponent touches Rila while she is still transformed, she will automatically launch the attack. This move has start-up invulnerability making it a great reversal. | |||||
| Damage | Guard | Stun | Properties | ||
|---|---|---|---|---|---|
| - | - | ||||
| Startup | Active | Recovery | Adv. Hit | Adv. Guard | |
| - | - | - | - | - | |
|
Rila jumps at her opponent and bites them, violently biting. Once it connects it becomes a mashable grab with a max of 21 hits, your opponent can counter mash. This will hit both grounded and airborne opponents. Rila jumps very quickly at the opponent, making this an effective way to punish projectiles on reaction. Very forgiving input, although the inputs are listed as [1]319, the only strict requirement is the [1] charge. You can substitute 6, 4 instead of 3, 1 and you can end in any up direction. | |||||
Combos
Meterless Combos
- 2B, 5A xx [4]A/C - Use A for stun, C for damage
- j.A, cr.A/st.A xx Spinning Claw
- dj.C, 2B xx [4]6C - far jump conversion
- cl.5D, 2C - good link combo for oki
- In the corner - cl.5D, 2B, 5A xx [4]A - link after 5D
- crossup j.B, cl.5C xx [2]8D - input is [2]8C~D to get the standing charge special
- In the corner - 6D, 5A xx [4]6C
Combos with meter
- [4]3D, Bloody Fang - basic super combo
- crossup j.B, 2B, 5A xx Bloody Fang - requires the motion for bloody fang to be built into the 2B, 5A link
- Anti-air 5A xx [4]6C, Bloody Fang
- In the corner - 6D, 5A xx [4]6C, Bloody Fang
- crossup j.B, cl.5C xx C Spinning Claw, Bloody Fang - huge damage
Combo videos
Advanced Strategy
Rila's gameplan is the unortodox rusher character that likes to get closer/poking the opponent with charging specials and make Spinning Claw traps (mashing special), or answering projectiles with supers, she is a gender bender Blanka In a Nutshell.
Anti-airs
- [2]8B (invuln)
- 8C (react)
- fall 8D (read)
- 2C (react)
- far 2D (react)
- f.5D (read)
- f.5A>[4]6C (situational)
Charging
All specials require 30 frames of charge, her supers require 28.
The charge buffer on super in theory allows for short walk up supers. You have 22 frames of buffer time once the charge requirement is met.
Oki
- Meaty cl.5D or far 5D works to beat wakeup throws or abare.
- Meaty 2B for the low mixup, loses to wakeup throw.
- Killer Snake, Scratch, Uppercut and dashes can all be used to pursue enemies. D Killer Snake goes very far and recovers quickly. Keep in mind opponent's ukemi options.
Breakers
Rila has a pretty good selection of breakers.
- Invincibility - [2]8B or Shine Beast
- Anti low/projectile - [4]3C/D or Bloody Fang
- Safer options - Backdash or jump
Matchups
Matchup Table
| Great | |
| Good | Pielle, Condor, Maherl, Alsion III |
| Even | |
| Weak | Tia, Sho |
| Bad | Dao-Long, Saizo |
Character Specific Tips
Sho
Pielle
Condor
Rila
Tia
Alsion III
Maherl
Dao-Long
Saizo


