Oldschool BR (talk | contribs) |
Oldschool BR (talk | contribs) |
||
| Line 501: | Line 501: | ||
| align="center" colspan="2" | Simplified (Frc) || align="center" | 4 || align="center" colspan="2" | 30 || align="center" colspan="3" | 32 | | align="center" colspan="2" | Simplified (Frc) || align="center" | 4 || align="center" colspan="2" | 30 || align="center" colspan="3" | 32 | ||
|} | |} | ||
Ryu becomes invulnerable, does a damaging upper, then follows up with a rising punch. After that, he remains completely defenseless as he falls back to the ground. Hit anyone with with move and they will take a [http://wiki.shoryuken.com/Super_Street_Fighter_2_Turbo#Knockdowns full knockdown]. Jab makes him jump the lowest and most vertical and does 20% if it hits early. This move is very good for evading projectiles, it's O.Ryu's best reversal, and it has two advantages over N.Ryu's Jab Shoryuken: it is completely invulnerable while active, so you can never be thrown or comboed, and it has more active frames while having as many less recovery frames, so it stays out there controlling space for more time. The Strong version rises a bit higher and does 21% damage and Fierce rises up the highest and does the most damage (24%), so this is O.Ryu's move of choise for punishing people who jump at you honestly. If Ryu hits the enemy during the rising part of the move, it will deal 18% damage for all versions. | |||
Since a properly-timed Dragon Punch will beat most other moves, its simplest and most common application is as a general anti-air counter, because you have a lot of time to react and time the attack as you see the opponent approaching through the air. Because it'll knock down, you can continue pressuring with whatever you like, such as a meaty fireball or a cross-up attack. In addition to it, any character that can not alter its jump arc will be unable to evade the move if you time it late, for highest damage, as Ryu will be invulnerable. | |||
You can also use it to stuff virtually any normal ground attack from your opponent, but the timing for this is much more difficult. It's high-reward but also high-risk strategy, since missing can result in you being wide open to punishment. Unless your opponent is very predictable, this can be considered a very high-level strategy that should only be attempted with caution. Again, it seems largely a matter of taste; some excellent Ryu players attempt a lot of ground Dragon Punches, while other great players almost never try them. Sometimes players will immediately do another ground Dragon Punch if the first one misses, reasoning that the second might connect with the opponent's counterattack if they time it just a bit too late. | |||
The Dragon Punch is an excellent reversal move in general: it avoids or beats pretty much all other attacks in the game, but few exceptions that have sort of hidden, retracted hitboxes. | |||
*<b>Tatsumaki Senpuu Kiaku a.k.a. Hurricane Kick:</b> (↓↙← + K) | *<b>Tatsumaki Senpuu Kiaku a.k.a. Hurricane Kick:</b> (↓↙← + K) | ||
| Line 536: | Line 542: | ||
|} | |} | ||
Ryu advances with a spinning kick that will knock down the opponent if it hits. Different kicks have different effects: Short has the lowest duration and speed, while Roundhouse has the highest. The Short and Forward versions do 15% damage; the Roundhouse version does 16%. Ryu is invulnerable during the first four frames of the move and is airbone by the time he can be hit again: this makes this attack a good option for evading safe jumps, meaty cross-ups and tick throws such as Zangief's spinning pile driver or T. Hawk's typhoon: he can never be thrown out of the move from the ground. This also makes it a good option to avoid meaty cross-ups and safe jumps. As soon as Ryu recovers from the move, he can only jump or block, thus the recovery listed as of zero frame. The next frame, he can not throw. | |||
The Hurricane Kick safely travels right over some projectiles and, with good positioning and timing, can be used to punish characters like Dhalsim and Guile for trying to use them. More information can be found in the specific character match-ups. | |||
Another trick with the Hurricane Kick is to use it to set up throws. Often this is done at close range with the Short version so that it takes place quickly, hopefully before the opponent can react in time. They see the Hurricane Kick come out and stay ducking, and then you land and throw them. A few people are not used to facing O.Ryu, and expect either one rotation, or either three or more. O.Ryu's Forward Tatsu can position him in a way players do not expect. | |||
*<b>Air Tatsumaki Senpuu Kiaku:</b> (In air, ↓↙← + K) | *<b>Air Tatsumaki Senpuu Kiaku:</b> (In air, ↓↙← + K) | ||
| Line 561: | Line 572: | ||
| align="center" | Simplified || align="center" colspan="5" | ∞ || align="center" | 5 | | align="center" | Simplified || align="center" colspan="5" | ∞ || align="center" | 5 | ||
|} | |} | ||
The Tatsumaki can also be done while airborne. Again, stronger kicks give it longer duration. Unlike the ground version, it does not always move O.Ryu forward; if performed while jumping backwards, O.Ryu will continue moving in that direction. | |||
The Air Hurricane Kick has some interesting effects on the speed and trajectory of the jump, as felineki writes: | |||
''The character's vertical velocity is not directly affected. Rather, their gravity value is temporarily adjusted. Every character has their own jump gravity value (as I'm sure you've noticed, Dhalsim falls much more slowly from a jump than Claw). This normally stays constant throughout a jump. However, when a shoto performs a mid-air Hurricane Kick, their gravity value is temporarily decreased. This gives them the effect of falling more slowly if it is performed on the way down, or allowing them to gain more height if done on the way up.'' | |||
''The decreased gravity value lasts as long as the character's leg is out, able to hit. As soon as they pull their leg back in, the gravity value returns to normal.'' | |||
''In addition, they are given a slight boost in horizontal velocity as the kick starts (a forward boost if jumping forward or straight up, a backward boost if jumping back). This additional velocity lasts until they actually touch the ground.'' | |||
The Air Hurricane Kick has a multitude of uses. It serves as an alternative air attack with alternative properties than O.Ryu's normal attacks and may interact with opponent anti-air moves differently. As it changes jump properties, it can surprise the opponent. Done correctly, it can actually cross-up enemy air counters like the Flash Kick to hit the opponent from behind. Or it can be used for purposes as simple as building meter on the way down from a jump that you otherwise aren't interested in doing an attack in, such as when jumping far back away from an opponent or jumping straight up over a projectile from a distance. Finally, if it hits on the first attacking frame, it has a 50% chance of being unblockable. | |||
While the air Tatsumaki looks like the grounded one, in fact it has much worse priority. Also, it does not recover instantly when O.Ryu touches the ground. | |||
--[[User:Raisin|Raisin]] (March 29, 2007) <br> | |||
--Special thanks to [[User:felineki|felineki]] for the info on the Air Hurricane Kick. | |||
= The Basics = | = The Basics = | ||
Revision as of 08:53, 8 May 2011
Introduction
This page is about the Super Street Fighter II version of Ryu, also known as Old Ryu, or simply O.Ryu, for short. Ryu is the game's protagonist, and is considered a good all around character. Even though he is not the strongest in any aspect, he does have very good moves overall. Say, his projectile, the Hadouken, is the second best in the game, only after O.Sagat's Tiger. His special anti-air, the Shoryuken, is also the one with second best priority in the whole game, only after O.Ken's Shoryuken. Finally, his Tatsumaki Senpuu Kyaku recovers very quickly for this version, being good to reposition O.Ryu or surprise the enemy with a throw.
Ryu's strategy in the Street Fighter II series is, mostly, to employ his Hadoukens wisely so as to pressure enemies and either force them to take risks or get pushed into the corner. As O.Ryu does not have a super, this is stressed even more. Would the enemy jump forward, Ryu has several moves to deal with that, being the Shoryuken the most damaging one. However, unlike Ken, his projectile has a relatively fast start-up, which allows him to use it as a poke tool. This is the main reason why he has less trouble against a number of characters which have the advantage or fair match-ups against Ken.
Super Street Fighter II Ryu has a completely invulnerable Shoryuken, which helps him in situations N.Ryu has trouble, such as against T.Hawk's Tomahawk Buster and Boxer's Buffalo Headbutt. His Hurricane Kick is not invulnerable up until it hits, like it was in CPS-1 Street Fighter II Champion Edition and Hyper Fighting, but ti recovers quicker than N.Ryu's. In addition to it, his crouching kicks have much better priority, making him a more solid zoning character. However, as any old character, he can never soften throws, he does not have ST Ryu's command punches and he has no super moves.
Among all characters (old versions included), O.Ryu is considered to be in the same league as other strong characters, such as Guile, Dee Jay, O.Ken, O.Chun and O.Dhalsim. He is certainly behind the so called "big five", which consists of Dhalsim, Vega (Claw), Old Sagat, Balrog (Boxer) and Chun Li, and also behind N.Ryu, but not by any large margin.
Color Selection
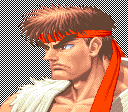
To select O.Ryu, choose Ryu and then press → → → ← Jab/Fierce, pressing Short simultaneously with the punch button for the alternate color.
| Normal | Alternative |
 |

|
--Born2SPD
New & Old Versions Comparison
Here is the list of differences:
- Obvious stuff: N.Ryu can soften throws, has new punches(dash, overhead and air juggle) and Super;
- N.Ryu has a longer pre-jump animation by 1 frame;
- N.Ryu has some differences in some of his normals:
- far.standing Jab has a thinner hitbox;
- cr.Short, cr.Fwd and cr.RH have much worse priority;
- far standing Short and Forward kicks have faster start-up;
- a few aerial attacks' hitboxes are much worse for N.Ryu;
- N.Ryu's ordinary (blue) Hadoukens have one more start-up and one more recovery frames, making the overall recovery 2 frames longer. Thus, he is an inferior zoning character, without super;
- N.Ryu's Shoryukens are worse
- they have less active frames and as many more recovery frames;
- N.Ryu is vulnerable on the way up, and his Shoryukens have two frames where he is on the ground and vulnerable, thus throwable and in danger of getting comboed if being cross-up;
- N.Ryu's Forward and Roundhouse Tatsus spin one more time than O.Ryu's;
- N.Ryu's air Tatsus behave normally, while O.Ryu's air Tatsus have a 50% of being unblockable if they connect on the first frame.
Moves List
Normal Moves
Ground Normals
- Close Standing Jab:
| Damage | 3 |  |
 |

|
| Chain Cancel | No | |||
| Special Cancel | Yes | |||
| Frame Count | 2 | 4 | 5 | |
ORyu performs an elbow smash in front and above his head. Fast start-up anti-air up close, with just OK priority.
- Far Standing Jab:
| Damage | 3 |  |
 |
 |

|
| Chain Cancel | Yes | ||||
| Special Cancel | Yes | ||||
| Frame Count | 2 | 4 | 4 | 1 | |
| Simplified | 2 | 4 | 5 | ||
Rapid-fire Jab that has very good priority (ORyu's arm is completely invulnerable) but just acceptable reach and very low damage.
- Crouching Jab:
| Damage | 3 |  |
 |
 |

|
| Chain Cancel | Yes | ||||
| Special Cancel | Yes | ||||
| Frame Count | 2 | 4 | 4 | 1 | |
| Simplified | 2 | 4 | 5 | ||
Rapid-fire ducking Jab with OK reach and very good priority. ORyu's arm is completely invincible.
- Close Standing Strong:
| Damage | 14 |  |
 |
 |
 |
 |
 |

|
| Chain Cancel | No | |||||||
| Special Cancel | Yes | |||||||
| Frame Count | 1 | 2 | 2 | 6 | 4 | 3 | 4 | |
| Simplified | 3 | 2 | 17 | |||||
ORyu performs a hook. This move has a not very good recovery, so try canceling it into some special such as the hadouken to avoid punishment.
- Far Standing Strong:
| Damage | 14 |  |
 |
 |
 |
 |

|
| Chain Cancel | No | ||||||
| Special Cancel | Yes | ||||||
| Frame Count | 1 | 2 | 4 | 3 | 3 | 1 | |
| Simplified | 3 | 4 | 7 | ||||
ORyu performs a straight punch. This move has very good recovery, reach and priority. Works as anti-air against some moves, but notice ORyu's body moves forward a bit, so you need some room to use it correctly. ORyu's whole arm is invincible in this attack.
- Crouching Strong:
| Damage | 14 |  |
 |
 |
 |
 |

|
| Chain Cancel | No | ||||||
| Special Cancel | Yes | ||||||
| Frame Count | 1 | 2 | 4 | 3 | 3 | 1 | |
| Simplified | 3 | 4 | 7 | ||||
ORyu does a crouching straight. Good damage, stun, recovery and priority. ORyu's whole arm is completely invincible.
- Close Standing Fierce:
| Damage | 18 |  |
 |
 |
 |

|
| Chain Cancel | No | |||||
| Special Cancel | Yes | |||||
| Frame Count | 3 | 2 | 6 | 10 | 13 | |
| Simplified | 3 | 8 | 23 | |||
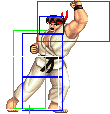
ORyu does a close upper. Good priority anti-air if the enemy is on top of you, and if he is close it can be canceled into any special attack for a basic but damaging combo. Bad recovery.
- Far Standing Fierce:
| Damage | 18 |  |
 |
 |
 |
 |

|
| Chain Cancel | No | ||||||
| Special Cancel | No | ||||||
| Frame Count | 3 | 2 | 6 | 10 | 12 | 1 | |
| Simplified | 5 | 6 | 23 | ||||
Similar to far.Strong, but with higher damage and longer reach, but the head hitbox moves forward just as much and the recovery is hideous. This move can not be canceled into specials, so make sure it hits or you will pay the price.
- Crouching Fierce:
| Damage | 18 |  |
 |
 |
 |
 |

|
| Chain Cancel | No | ||||||
| Special Cancel | Yes | ||||||
| Frame Count | 3 | 3 | 8 | 10 | 12 | 1 | |
| Simplified | 3 | 11 | 23 | ||||
Uppercut from crouching position. It does good damage and has a deceptively long horizontal reach, but just average to low priority and quite long recovery. This move is unsafe on block or hit and is mainly used in combos or as close-up anti-air. Favor standing Fierce if you can for the latter.
- Close Standing Short:
| Damage | 8 |  |
 |
 |
 |
 |

|
| Chain Cancel | Yes | ||||||
| Special Cancel | No | ||||||
| Frame Count | 2 | 3 | 2 | 4 | 3 | 1 | |
| Simplified | 5 | 2 | 8 | ||||
O.Ryu performs a low kick that can be canceled into a far Short or crouching Short. This move must be blocked low.
- Far Standing Short:
| Damage | 9 |  |
 |
 |
 |

|
| Chain Cancel | No | |||||
| Special Cancel | Yes | |||||
| Frame Count | 3 | 3 | 8 | 4 | 1 | |
| Simplified | 6 | 8 | 5 | |||
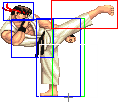
High side kick with good priority, but sort of slow. Good anti-air, but it is slower than N.Ryu's.
- Crouching Short:
| Damage | 3 |  |
 |
 |

|
| Chain Cancel | Yes | ||||
| Special Cancel | Yes | ||||
| Frame Count | 2 | 4 | 4 | 1 | |
| Simplified | 2 | 4 | 5 | ||
Rapid fire crouching low kick. This comes out slightly fasteer than N.Ryu's and has great priority: the whole leg is completely invincible during the move.
- Close Standing Forward:
| Damage | 15 |  |
 |
 |
 |
 |

|
| Chain Cancel | No | ||||||
| Special Cancel | Yes | ||||||
| Frame Count | 2 | 1 | 6 | 4 | 4 | 1 | |
| Simplified | 3 | 6 | 9 | ||||
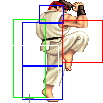
Knee bash with a good recovery.
- Far Standing Forward:
| Damage | 15 |  |
 |
 |
 |

|
| Chain Cancel | No | |||||
| Special Cancel | No | |||||
| Frame Count | 5 | 6 | 8 | 6 | 1 | |
| Simplified | 11 | 8 | 7 | |||
High side kick with good priority, but hideous start-up. Good anti-air if you can hit the button early enough, but odds are you can't.
- Crouching Forward:
| Damage | 14 |  |
 |
 |
 |
 |

|
| Chain Cancel | No | ||||||
| Special Cancel | Yes | ||||||
| Frame Count | 1 | 2 | 6 | 4 | 4 | 1 | |
| Simplified | 3 | 6 | 9 | ||||
Crouching side kick. This move has good reach and recovery, but is has projected vulnerable hitboxes before it becomes active. It is an important tool when closing the gap on the enemy and trying to push him into the corner as it can be canceled into Hadoukens. It is also used in bread and butter combos.
- Close Standing Roundhouse:
| Damage | 19 + 3 |  |
 |
 |
 |
 |

|
| Chain Cancel | No | ||||||
| Special Cancel | No | ||||||
| Frame Count | 3 | 4 | 8 | 4 | 10 | 1 | |
| Simplified | 7 | 8 | 4 | 11 | |||
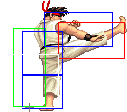
ORyu performs an axe kick that hits twice if the enemy is close enough. This is not a very useful move, but it is safe on block from point-blank range and often trades with aerial attacks. If you use it as a meaty, you can combo a crouching kick for two or three hits. you often have better options, though.
- Far Standing Roundhouse:
| Damage | 19 |  |
 |
 |
 |

|
| Chain Cancel | No | |||||
| Special Cancel | Yes | |||||
| Frame Count | 2 | 4 | 8 | 10 | 7 | |
| Simplified | 2 | 12 | 17 | |||
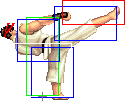
ORyu's staple Roundhouse kick. Mediocre anti-air that can be canceled in the odd event that it hits during the first active part. This move can not be canceled into specials if it hits while the leg is fully extended.
- Crouching Roundhouse:
| Damage | 17 |  |
 |
 |
 |

|
| Chain Cancel | No | |||||
| Special Cancel | Yes | |||||
| Frame Count | 3 | 6 | 6 | 8 | 11 | |
| Simplified | 3 | 6 | 25 | |||
ORyu's sweep kick. This move generates a fast knockdown if it hits. It has good range and the priority is such that it beats or trades with a number of moves. The recovery, however, is very long, so good players will try to bait this move so as to punish it afterward. This can be canceled into Hadoukens so you can push the enemy towards his corner or Shoryukens and Short tatsus for super meter.
Aerial normals
- Neutral Jumping Jab:
| Damage | 8 |  |

|
| Chain Cancel | No | ||
| Special Cancel | Yes | ||
| Frame Count | 2 | ∞ | |
ORyu performs a jumping jab that is active throughout the whole jump. ORyu's hand has a relatively large active hitbox around it, making this a good air-to-air move. It can be used for jumping on you opponent after a knockdown and not generate much push-back, allowing you to apply mix-ups such as throw, cr.forward xx Hadouken/super or delayed Jab SRK (to beat reversal throws).
- Diagonal Jumping Jab:
| Damage | 8 |  |

|
| Chain Cancel | No | ||
| Special Cancel | Yes | ||
| Frame Count | 2 | ∞ | |
ORyu performs a jumping jab that is active throughout the whole jump. ORyu's hand has a relatively large active hitbox around it, making this a good air-to-air move. It can be used for jumping on you opponent after a knockdown and not generate much push-back, allowing you to apply mix-ups such as throw, cr.forward xx Hadouken/super or delayed Jab SRK (to beat reversal throws). This beats Zangief's Lariats from the right distance and still hits him if he crouches.
- Neutral/Diagonal Jumping Strong:
| Damage | 14 |  |
 |
 |
 |
 |
 |

|
| Chain Cancel | No | |||||||
| Special Cancel | Yes | |||||||
| Frame Count | 2 | 2 | 20 | 4 | 4 | 4 | ∞ | |
| Simplified | 4 | 20 | ∞ | |||||
This aerial punch stays active for quite some time, for a Strong punch. It has very good horizontal reach and ORyu's arm is completely invincible. A move to be considered when afraid of wall dives crossing you or aerial attacks in general. This attack does not hit crouching opponents.
- Neutral/Diagonal Jumping Fierce:
| Damage | 17 |  |
 |
 |
 |
 |
 |

|
| Chain Cancel | No | |||||||
| Special Cancel | Yes | |||||||
| Frame Count | 2 | 2 | 8 | 4 | 4 | 4 | ∞ | |
| Simplified | 4 | 8 | ∞ | |||||
This move has very good air to ground priority, and ORyu's arm is also completely invincible. It can be used as anti-air from certain distances, and also beats or trades most other aerial attacks.
- Neutral Jumping Short:
| Damage | 9 |  |
 |

|
| Chain Cancel | No | |||
| Special Cancel | Yes | |||
| Frame Count | 3 | 40 | ∞ | |
This stays out for quite some time, but it has a very short reach. Mostly useless.
- Diagonal Jumping Short:
| Damage | 8 |  |
 |

| |
| Chain Cancel | No | ||||
| Special Cancel | No | ||||
| Frame Count | 2 | 3 | ∞ | ||
| Simplified | 5 | ∞ | |||
This stays out for quite some time, but safe jumps aside, this does not have many uses. Its main downside is the short reach.
- Neutral Jumping Forward:
| Damage | 14 |  |
 |
 |
 |

|
| Chain Cancel | No | |||||
| Special Cancel | No | |||||
| Frame Count | 5 | 13 | 6 | 6 | ∞ | |
| Simplified | 5 | 13 | ∞ | |||
OK kick that stays active for some time. It can be used in certain situations where the enemy has trouble knowing which way to block. That aside, prefer neutral Strong, Fierce or Roundhouse.
- Diagonal Jumping Forward:
| Damage | 14 |  |
 |
 |
 |
 |
 |

|
| Chain Cancel | No | |||||||
| Special Cancel | No | |||||||
| Frame Count | 2 | 3 | 13 | 3 | 3 | 3 | ∞ | |
| Simplified | 5 | 13 | ∞ | |||||
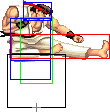
Rather long aerial kick with poor priority. It can be used as a cross-up aerial attack, but diagonal Roundhouse is better for that. It can be used in safe jumps, to get less push-back if it gets blocked.
- Neutral Jumping Roundhouse:
| Damage | 18 |  |
 |
 |
 |
 |
 |

|
| Chain Cancel | No | |||||||
| Special Cancel | Yes | |||||||
| Frame Count | 2 | 4 | 4 | 4 | 3 | 3 | ∞ | |
| Simplified | 2 | 8 | ∞ | |||||
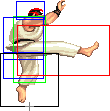
Neutral spin kick that has good reach. The first active part becomes active very fast, saving you from some troublesome situations.
- Diagonal Jumping Roundhouse:
| Damage | 17 |  |
 |
 |
 |
 |
 |

|
| Chain Cancel | No | |||||||
| Special Cancel | No | |||||||
| Frame Count | 2 | 3 | 7 | 3 | 3 | 3 | ∞ | |
| Simplified | 5 | 7 | ∞ | |||||
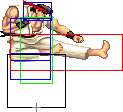
ORyu's best cross-up attack. This also has good reach, but as it projects vulnerable hitboxes, it can also be countered if you whiff. From certain distances, this can also be used as anti-air, in the same fashion as diagonal jumping Fierce, hitting your enemy from above his attack or around the head.
Special Moves
- Shouryuken a.k.a. Dragon Punch: (→↓↘ + P)
Ryu becomes invulnerable, does a damaging upper, then follows up with a rising punch. After that, he remains completely defenseless as he falls back to the ground. Hit anyone with with move and they will take a full knockdown. Jab makes him jump the lowest and most vertical and does 20% if it hits early. This move is very good for evading projectiles, it's O.Ryu's best reversal, and it has two advantages over N.Ryu's Jab Shoryuken: it is completely invulnerable while active, so you can never be thrown or comboed, and it has more active frames while having as many less recovery frames, so it stays out there controlling space for more time. The Strong version rises a bit higher and does 21% damage and Fierce rises up the highest and does the most damage (24%), so this is O.Ryu's move of choise for punishing people who jump at you honestly. If Ryu hits the enemy during the rising part of the move, it will deal 18% damage for all versions.
Since a properly-timed Dragon Punch will beat most other moves, its simplest and most common application is as a general anti-air counter, because you have a lot of time to react and time the attack as you see the opponent approaching through the air. Because it'll knock down, you can continue pressuring with whatever you like, such as a meaty fireball or a cross-up attack. In addition to it, any character that can not alter its jump arc will be unable to evade the move if you time it late, for highest damage, as Ryu will be invulnerable.
You can also use it to stuff virtually any normal ground attack from your opponent, but the timing for this is much more difficult. It's high-reward but also high-risk strategy, since missing can result in you being wide open to punishment. Unless your opponent is very predictable, this can be considered a very high-level strategy that should only be attempted with caution. Again, it seems largely a matter of taste; some excellent Ryu players attempt a lot of ground Dragon Punches, while other great players almost never try them. Sometimes players will immediately do another ground Dragon Punch if the first one misses, reasoning that the second might connect with the opponent's counterattack if they time it just a bit too late.
The Dragon Punch is an excellent reversal move in general: it avoids or beats pretty much all other attacks in the game, but few exceptions that have sort of hidden, retracted hitboxes.
- Tatsumaki Senpuu Kiaku a.k.a. Hurricane Kick: (↓↙← + K)
- Startup:
 |
 |

| |
| Frame Count | 4 | 4 | 3 |
| Simplified | 11 | ||
- Active:
- Short Version: This happens only once.
- Forward Version: This happens twice.
- Roundhouse Version: This happens 3 times.
| Damage (Shrt) | 15 |  |
 |
 |

|
| Damage (Frwrd) | 15 | ||||
| Damage (Rh) | 16 | ||||
| Frame Count | 3 | 3 | 3 | 3 | |
- Recovery:
 |
 |
 |

| |
| Frame Count | 4 | 4 | 4 | 0 |
| Simplified | 4 | 4 | 4 | 0 |
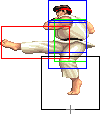
Ryu advances with a spinning kick that will knock down the opponent if it hits. Different kicks have different effects: Short has the lowest duration and speed, while Roundhouse has the highest. The Short and Forward versions do 15% damage; the Roundhouse version does 16%. Ryu is invulnerable during the first four frames of the move and is airbone by the time he can be hit again: this makes this attack a good option for evading safe jumps, meaty cross-ups and tick throws such as Zangief's spinning pile driver or T. Hawk's typhoon: he can never be thrown out of the move from the ground. This also makes it a good option to avoid meaty cross-ups and safe jumps. As soon as Ryu recovers from the move, he can only jump or block, thus the recovery listed as of zero frame. The next frame, he can not throw.
The Hurricane Kick safely travels right over some projectiles and, with good positioning and timing, can be used to punish characters like Dhalsim and Guile for trying to use them. More information can be found in the specific character match-ups.
Another trick with the Hurricane Kick is to use it to set up throws. Often this is done at close range with the Short version so that it takes place quickly, hopefully before the opponent can react in time. They see the Hurricane Kick come out and stay ducking, and then you land and throw them. A few people are not used to facing O.Ryu, and expect either one rotation, or either three or more. O.Ryu's Forward Tatsu can position him in a way players do not expect.
- Air Tatsumaki Senpuu Kiaku: (In air, ↓↙← + K)
- Active: (The Air version does not has a startup animation)
- Short Version: This happens only once.
- Forward Version: This happens twice.
- Roundhouse Version: This happens 3 times.
| Damage (Shrt) | 11 |  |
 |
 |

|
| Damage (Frwrd) | 11 | ||||
| Damage (Rh) | 14 | ||||
| Frame Count | 3 | 3 | 3 | 3 | |
- Recovery:
 |
 |
 |
 |
 |

| |
| Frame Count | 4 | 4 | 4 | 4 | ∞ | 5 |
| Simplified | ∞ | 5 | ||||
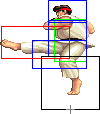
The Tatsumaki can also be done while airborne. Again, stronger kicks give it longer duration. Unlike the ground version, it does not always move O.Ryu forward; if performed while jumping backwards, O.Ryu will continue moving in that direction.
The Air Hurricane Kick has some interesting effects on the speed and trajectory of the jump, as felineki writes:
The character's vertical velocity is not directly affected. Rather, their gravity value is temporarily adjusted. Every character has their own jump gravity value (as I'm sure you've noticed, Dhalsim falls much more slowly from a jump than Claw). This normally stays constant throughout a jump. However, when a shoto performs a mid-air Hurricane Kick, their gravity value is temporarily decreased. This gives them the effect of falling more slowly if it is performed on the way down, or allowing them to gain more height if done on the way up.
The decreased gravity value lasts as long as the character's leg is out, able to hit. As soon as they pull their leg back in, the gravity value returns to normal.
In addition, they are given a slight boost in horizontal velocity as the kick starts (a forward boost if jumping forward or straight up, a backward boost if jumping back). This additional velocity lasts until they actually touch the ground.
The Air Hurricane Kick has a multitude of uses. It serves as an alternative air attack with alternative properties than O.Ryu's normal attacks and may interact with opponent anti-air moves differently. As it changes jump properties, it can surprise the opponent. Done correctly, it can actually cross-up enemy air counters like the Flash Kick to hit the opponent from behind. Or it can be used for purposes as simple as building meter on the way down from a jump that you otherwise aren't interested in doing an attack in, such as when jumping far back away from an opponent or jumping straight up over a projectile from a distance. Finally, if it hits on the first attacking frame, it has a 50% chance of being unblockable.
While the air Tatsumaki looks like the grounded one, in fact it has much worse priority. Also, it does not recover instantly when O.Ryu touches the ground.
--Raisin (March 29, 2007)
--Special thanks to felineki for the info on the Air Hurricane Kick.
