No edit summary |
Lichmassacre (talk | contribs) m (→Colors: Grammar and wording adjustments, with paraphrasing.) |
||
| (87 intermediate revisions by 3 users not shown) | |||
| Line 1: | Line 1: | ||
=Introduction= | ==Introduction== | ||
The famous electric seducer and Kyo's Friend in KOF. | The famous electric seducer and Kyo's Friend in KOF. | ||
Top-tier character (best character of the game among no-banned characters). | |||
He's chosen in all the teams or almost. | |||
Benimaru is a poking, footsies and block strings based character. | |||
{| | |||
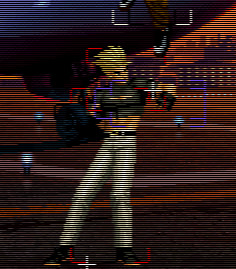
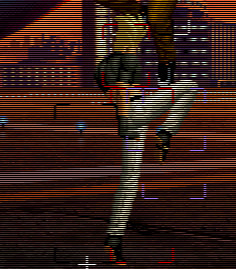
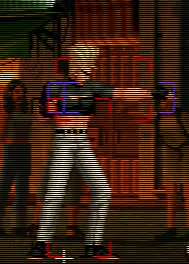
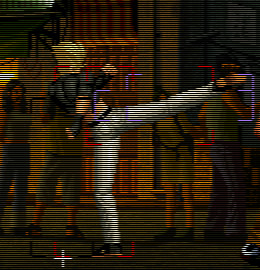
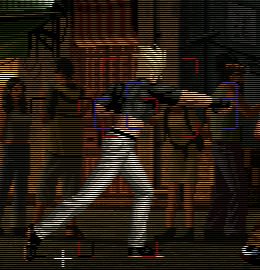
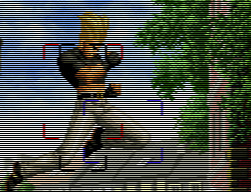
! Stand | |||
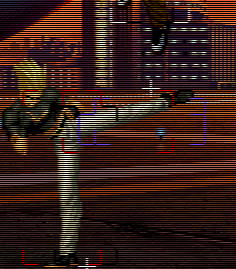
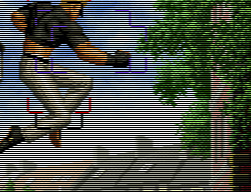
! Crouch | |||
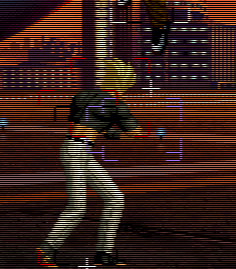
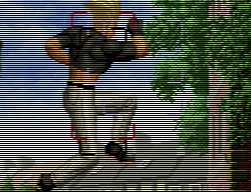
! Backdash | |||
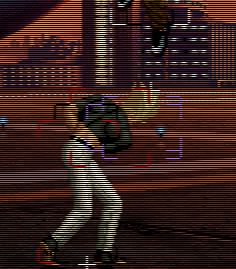
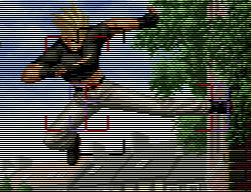
! Run | |||
|- | |||
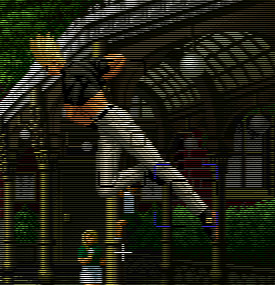
|valign="bottom"| [[image:Stand Beni kof99.jpg]] | |||
|valign="bottom"| [[image:Crouch Beni kof99.jpg ]] | |||
|valign="bottom"| [[image:Backdash Beni kof99.jpg]] | |||
|valign="bottom"| [[image:Run Beni kof99.jpg]] | |||
|} | |||
===Colors=== | |||
{| | |||
! [[image:snka.gif]] | |||
! [[image:snkb.gif]] | |||
|- | |||
! [[File:Color A Beni kof99.jpg]] | |||
! [[File:Color B Beni kof99.jpg]] | |||
|} | |||
{{ ProConTable | |||
| pros= | |||
* Only character in the game who can call a striker and guard at same time | |||
* Builds meter very quickly | |||
* '''Some of the best set of normals in the game:''' Great hitboxes, good reach, and both fast startup and recovery. | |||
* Attacks negate opponent's strikers quite well | |||
* '''Strong mixups:''' Benimaru has access to crossup j.D, which is especially good for okizeme. Besides that, he has an air throw, his cr.B > cr.C [https://youtu.be/uEGLuOaBdwY?si=g9kR-G_o29-9697p&t=148 option select], and meaty cl.D on the opponent's wakeup. | |||
* High stun potential | |||
* '''Easy to play:''' The only combo that requires execution skills is cr.Bx1-3 > qcf,qcf A, which is still easy if you regularly play KOF. | |||
| cons= | |||
* No reversal, due to losing his Super Inazuma Kick and Benimaru Collider | |||
* Gen'ei Hurricane is generally useless | |||
* Mediocre damage compared to other characters | |||
}} | |||
==Movelist== | |||
=Movelist= | |||
THROWS------------------------------------------------------------------------- | THROWS------------------------------------------------------------------------- | ||
| Line 34: | Line 59: | ||
Front Suplex | Front Suplex | ||
>> When close - b / f + D | >> When close - b / f + D | ||
>> Best Benimaru's throw because it reverse knockdown opponent which helps Benimaru's okizeme gameplay | |||
Spinning Knee Drop | Spinning Knee Drop | ||
| Line 65: | Line 91: | ||
Raijin Ken | Raijin Ken | ||
>> qcf + P | >> qcf + P | ||
>>Main chip damage and pressure attack of Benimaru. The C version is generally useful to combo with striker Clark when you has no meter | |||
Kuuchuu Raijin Ken | Kuuchuu Raijin Ken | ||
>> In the air - qcf + P | >> In the air - qcf + P | ||
DESPERATION MOVES-------------------------------------------------------------- | DESPERATION MOVES-------------------------------------------------------------- | ||
| Line 74: | Line 101: | ||
Raikou Ken | Raikou Ken | ||
>> qcf, qcf + A | >> qcf, qcf + A | ||
>> Main combo ender when you have a meter. The C version is his main DM to combo with strikers | |||
Gen'ei Hurricane | Gen'ei Hurricane | ||
>> qcf, qcf + K | >> qcf, qcf + K | ||
>> Evades 1-hit strong normal attack and specials. | >> Evades 1-hit strong normal attack and specials. | ||
>> This move is unfortunately useless in kof 99 | |||
==Combos== | |||
===Normal Combos=== | |||
*cr.B x1-3 > qcf+K > d,u+K | |||
cr.C > qcb+ | *j.B / j.C / j.D > cr.C > qcb+P / qcf,qcf+A | ||
*j.B / j.C / j.D > cl.C / cl.D > qcf+A / qcf+K / qcb+P / qcf,qcf+A | |||
*cr.A > cl.D > qcf+A / qcf+K / qcb+P / qcf,qcf+A | |||
*cr.B x1-3 > qcf,qcf+A | |||
===Combos in Counter Mode=== | |||
==Fastest Attacks== | |||
* 0F: C throw; D throw , Air Throw | |||
* 1F: | |||
* 2F: cl.D ; cr.B ; nj.D | |||
* 3F: cl.A ; cl.B ; far.A ; far.B ; cr.A ; j.B | |||
* 4F: cl.C ; cr.C | |||
* 5F: far.C ; cr.D ; j.A ; j.C ; j.D ; nj.A ; nj.C | |||
* 6F: | |||
* 7F: | |||
* 8F: | |||
* 9F: | |||
* 10F: qcf.C | |||
==Frame Data and Hitboxes== | |||
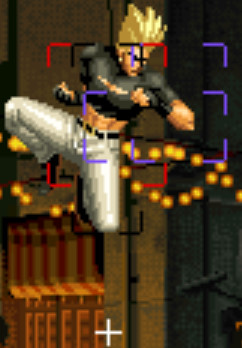
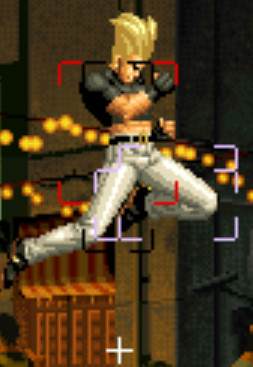
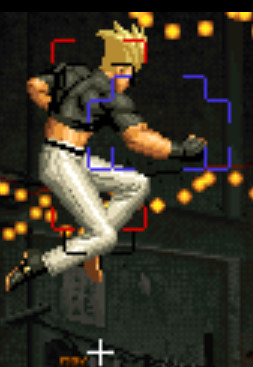
Red Color = Hurtbox | |||
Purple / White Color = Hitbox | |||
Medium : You can guard move of the opponent while standing and crouching | |||
For Special Moves : | |||
Black Color = Hitbox | |||
Yellow = Fireball | |||
{|border="1" | {|border="1" | ||
| Line 94: | Line 160: | ||
! Frames | ! Frames | ||
! Advantage | ! Advantage | ||
! Cancel | ! Cancel , movement and hit | ||
([https://wiki.supercombo.gg/w/The_King_of_Fighters_XIII/Glossary glossary]) | |||
! Block | ! Block | ||
!colspan="2"| Hitbox | !colspan="2"| Hitbox | ||
| Line 104: | Line 171: | ||
|align="center"| 3/2/9 | |align="center"| 3/2/9 | ||
|align="center"| +1/-1 | |align="center"| +1/-1 | ||
|align="center"| | |align="center"| [[image:Chaincancel.png]][[image:Cancel.png]] | ||
|align="center"| | |align="center"| Medium | ||
|colspan="2" | [[image:Beni_cl_A.jpg|center]] | |colspan="2" | [[image:Beni_cl_A.jpg|center]] | ||
| | |This move is really useless in many situations. The top players almost never use it. | ||
|- | |- | ||
! [[image:snkb.gif]] | ! [[image:snkb.gif]] | ||
|align="center"| 3/5/7 | |align="center"| 3/5/7 | ||
|align="center"| 0/-2 | |align="center"| 0/-2 | ||
|align="center"| | |align="center"| [[image:Cancel.png]] | ||
|align="center"| | |align="center"| Medium | ||
|colspan="2" | [[image:Beni_cl_B.jpg|center]] | |colspan="2" | [[image:Beni_cl_B.jpg|center]] | ||
| | |Like cl.A, generally it's not a move you will use often in matches situations | ||
|- | |- | ||
! [[image:snkc.gif]] | ! [[image:snkc.gif]] | ||
|align="center"| 4/3+3/15 | |align="center"| 4/3+3/15 | ||
|align="center"| -1/-3 | |align="center"| -1/-3 | ||
|align="center"| | |align="center"| 1st hit : [[image:Cancel.png]] | ||
|align="center"| | |align="center"| Medium | ||
|valign="bottom" style="border-right:0px;"| [[image:Beni_cl_C_1.jpg|center]] | |valign="bottom" style="border-right:0px;"| [[image:Beni_cl_C_1.jpg|center]] | ||
|valign="bottom" style="border-left:0px;"| [[image:Beni_cl_C_2.jpg |center]] | |valign="bottom" style="border-left:0px;"| [[image:Beni_cl_C_2.jpg |center]] | ||
| Line 131: | Line 196: | ||
|align="center"|2/6/16 | |align="center"|2/6/16 | ||
|align="center"| -2/-4 | |align="center"| -2/-4 | ||
|align="center"| | |align="center"| [[image:Cancel.png]] | ||
|align="center"| | |align="center"| Medium | ||
|colspan="2"| [[image:Beni_cl_D.jpg|center]] | |colspan="2"| [[image:Beni_cl_D.jpg|center]] | ||
| | |Nice as meaty attack. You can also combo it after cr.A. | ||
|- | |- | ||
|colspan="8" align="center"| '''Standing Far''' | |colspan="8" align="center"| '''Standing Far''' | ||
| Line 141: | Line 206: | ||
|align="center"| 3/4/9 | |align="center"| 3/4/9 | ||
|align="center"| -1/-3 | |align="center"| -1/-3 | ||
|align="center"| | |align="center"| [[image:Nocancel.png]] | ||
|align="center"| | |align="center"| Medium | ||
|colspan="2" | [[image:Beni_stA.jpg|center]] | |colspan="2" | [[image:Beni_stA.jpg|center]] | ||
| | |Solid move vs short hop | ||
|- | |- | ||
! [[image:snkb.gif]] | ! [[image:snkb.gif]] | ||
|align="center"| 3/7/9 | |align="center"| 3/7/9 | ||
|align="center"| -4/-6 | |align="center"| -4/-6 | ||
|align="center"| | |align="center"| [[image:Nocancel.png]] | ||
|align="center"| | |align="center"| Medium | ||
|colspan="2" | [[image:Beni_st_B.jpg|center]] | |colspan="2" | [[image:Beni_st_B.jpg|center]] | ||
| | |Very splashable move of Benimaru, with wonderful priority, reach and startup. This is the best Benimarus and even of game. You can use it also as chain ender. This move is also really good in frametrap situations | ||
|- | |- | ||
! [[image:snkc.gif]] | ! [[image:snkc.gif]] | ||
|align="center"| 5/6/18 | |align="center"| 5/6/18 | ||
|align="center"| -4/-6 | |align="center"| -4/-6 | ||
|align="center"| | |align="center"| [[image:Nocancel.png]] | ||
|align="center"| | |align="center"| Medium | ||
|colspan="2" | [[image:Beni_stC.jpg|center]] | |colspan="2" | [[image:Beni_stC.jpg|center]] | ||
| | |Very good mid-range poke of Benimaru with good priority. Effective vs short hop. However it whiffs on crouchers. | ||
|- | |- | ||
! [[image:snkd.gif]] | ! [[image:snkd.gif]] | ||
|align="center"| 11/5/16 | |align="center"| 11/5/16 | ||
|align="center"| -1/-3 | |align="center"| -1/-3 | ||
|align="center"| | |align="center"| [[image:Nocancel.png]][[image:Lowerbodyinv.png]] | ||
|align="center"| | |align="center"| Medium | ||
|colspan="2"| [[image:Beni_stD.jpg|center]] | |colspan="2"| [[image:Beni_stD.jpg|center]] | ||
| | |Slow move but very good long/mid-range poke of Benimaru that beats many standing and normal moves of game. You can escape low crouchers moves like Ralf's cr.D for example. | ||
|- | |- | ||
! [[image:snkc.gif]]+[[image:snkd.gif]] | ! [[image:snkc.gif]]+[[image:snkd.gif]] | ||
|align="center"| 17/4/20 | |align="center"| 17/4/20 | ||
|align="center"| KD/-2 | |align="center"| KD/-2 | ||
|align="center"| | |align="center"| [[image:Cancel.png]] | ||
|align="center"| | [[image:Softknockdown.png]] | ||
[[image:Lowerbodyinv.png]] | |||
|align="center"| Medium | |||
|colspan="2"| [[image:Beni_st_CD.jpg|center]] | |colspan="2"| [[image:Beni_st_CD.jpg|center]] | ||
| | | | ||
| Line 185: | Line 250: | ||
|align="center"| 3/4/5 | |align="center"| 3/4/5 | ||
|align="center"| 2/0 | |align="center"| 2/0 | ||
|align="center"| | |align="center"| [[image:Cancel.png]] | ||
|align="center"| | [[image:Chaincancel.png]] | ||
|align="center"| Medium | |||
|colspan="2" | [[image:Beni_crA.jpg|center]] | |colspan="2" | [[image:Beni_crA.jpg|center]] | ||
| | |1 frame slowest than cr.B but with better recovery. Links into cl.D and can combo into qcf+A or qcb+A for block string | ||
|- | |- | ||
! [[image:snkb.gif]] | ! [[image:snkb.gif]] | ||
|align="center"| 2/4/7 | |align="center"| 2/4/7 | ||
|align="center"| 1/-1 | |align="center"| 1/-1 | ||
|align="center"| | |align="center"| [[image:Chaincancel.png]][[image:Cancel.png]] | ||
|align="center"| | |align="center"| [[image:Low.png]] | ||
|colspan="2" | [[image:Beni_cr_B.jpg|center]] | |colspan="2" | [[image:Beni_cr_B.jpg|center]] | ||
| | |Benimaru's great normal move. This is his main combo starter and his "footsies" move also. | ||
|- | |- | ||
! [[image:snkc.gif]] | ! [[image:snkc.gif]] | ||
|align="center"| 4/3+3/24 | |align="center"| 4/3+3/24 | ||
|align="center"| -10/-12 | |align="center"| -10/-12 | ||
|align="center"| | |align="center"| [[image:Cancel.png]] | ||
|align="center"| | |align="center"| Medium | ||
|valign="bottom" style="border-right:0px;"| [[image:Beni_cr_C_1.jpg|center]] | |valign="bottom" style="border-right:0px;"| [[image:Beni_cr_C_1.jpg|center]] | ||
|valign="bottom" style="border-left:0px;"| [[image:Beni_cr_C_2.jpg|center]] | |valign="bottom" style="border-left:0px;"| [[image:Beni_cr_C_2.jpg|center]] | ||
| Line 212: | Line 276: | ||
|align="center"| 5/6/23 | |align="center"| 5/6/23 | ||
|align="center"| KD/-11 | |align="center"| KD/-11 | ||
|align="center"| | |align="center"| [[image:Cancel.png]][[image:Softknockdown.png]] | ||
|align="center"| | |align="center"| [[image:Low.png]] | ||
|colspan="2"| [[image:Beni_cr_D.jpg|center]] | |colspan="2"| [[image:Beni_cr_D.jpg|center]] | ||
| | |Interesting move as meaty attack and whiff cancelable if the opponent short hops it. | ||
|- | |- | ||
|colspan="8" align="center"| '''Jump''' | |colspan="8" align="center"| '''Jump''' | ||
| Line 222: | Line 286: | ||
|align="center"| 5/9/- | |align="center"| 5/9/- | ||
|align="center"| -/- | |align="center"| -/- | ||
|align="center"| | |align="center"| [[image:Cancel.png]] | ||
|align="center"| | |align="center"| [[image:High.png]] | ||
|colspan="2" | [[image:Beni_j_A.jpg|center]] | |colspan="2" | [[image:Beni_j_A.jpg|center]] | ||
| | | | ||
| Line 230: | Line 294: | ||
|align="center"| 3/12/- | |align="center"| 3/12/- | ||
|align="center"| -/- | |align="center"| -/- | ||
|align="center"| | |align="center"| [[image:Cancel.png]] | ||
|align="center"| | |align="center"| [[image:High.png]] | ||
|colspan="2" | [[image:Beni_j_B.jpg|center]] | |colspan="2" | [[image:Beni_j_B.jpg|center]] | ||
| | |Benimaru's instant overhead. This move is fast, great priority, is active a long time and can crossup. His 2nd best jump-in after j.D | ||
|- | |- | ||
! [[image:snkc.gif]] | ! [[image:snkc.gif]] | ||
|align="center"| 5/3+7/- | |align="center"| 5/3+7/- | ||
|align="center"| -/- | |align="center"| -/- | ||
|align="center"| | |align="center"| [[image:Cancel.png]] | ||
|align="center"| | |align="center"| [[image:High.png]] | ||
|valign="bottom" style="border-right:0px;"| [[image:Beni_j_C_1.jpg|center]] | |valign="bottom" style="border-right:0px;"| [[image:Beni_j_C_1.jpg|center]] | ||
|valign="bottom" style="border-left:0px;"| [[image:Beni_j_C_2.jpg|center]] | |valign="bottom" style="border-left:0px;"| [[image:Beni_j_C_2.jpg|center]] | ||
| Line 247: | Line 311: | ||
|align="center"| 5/8/- | |align="center"| 5/8/- | ||
|align="center"| -/- | |align="center"| -/- | ||
|align="center"| | |align="center"| [[image:Cancel.png]] | ||
|align="center"| | |align="center"| [[image:High.png]] | ||
|colspan="2"| [[image:Beni_j_D.jpg|center]] | |colspan="2"| [[image:Beni_j_D.jpg|center]] | ||
| | |Good air-to-air move. Good priority, good reach and can easily crossup. Generally his main jump-in | ||
|- | |- | ||
! [[image:snkc.gif]]+[[image:snkd.gif]] | ! [[image:snkc.gif]]+[[image:snkd.gif]] | ||
|align="center"| 14/5/- | |align="center"| 14/5/- | ||
|align="center"| KD/- | |align="center"| KD/- | ||
|align="center"| | |align="center"| [[image:Softknockdown.png]] | ||
|align="center"| | [[image:Cancel.png]] | ||
|align="center"| Medium | |||
|colspan="2"| [[image:Beni_j_CD.jpg|center]] | |colspan="2"| [[image:Beni_j_CD.jpg|center]] | ||
| | |Slow but with good priority to air-to-ground situation | ||
|- | |- | ||
|colspan="8" align="center"| '''Neutral Jump''' | |colspan="8" align="center"| '''Neutral Jump''' | ||
| Line 265: | Line 330: | ||
|align="center"| 5/9/- | |align="center"| 5/9/- | ||
|align="center"| -/- | |align="center"| -/- | ||
|align="center"| | |align="center"| [[image:Cancel.png]] | ||
|align="center"| [[image:High.png]] | |||
|colspan="2"| [[image:Beni_neutre_A.jpg|center]] | |colspan="2"| [[image:Beni_neutre_A.jpg|center]] | ||
| | | | ||
| Line 272: | Line 338: | ||
|align="center"| 3/12/- | |align="center"| 3/12/- | ||
|align="center"| -/- | |align="center"| -/- | ||
|align="center"| | |align="center"| [[image:Cancel.png]] | ||
|align="center"| [[image:High.png]] | |||
|colspan="2" | [[image:Beni_neutre_B.jpg|center]] | |colspan="2" | [[image:Beni_neutre_B.jpg|center]] | ||
| | |This neutral jump is especially interesting as instant overhead | ||
|- | |- | ||
! [[image:snkc.gif]] | ! [[image:snkc.gif]] | ||
|align="center"| 5/3+7/- | |align="center"| 5/3+7/- | ||
|align="center"| -/- | |align="center"| -/- | ||
|align="center"| | |align="center"| [[image:Cancel.png]] | ||
|align="center"| [[image:High.png]] | |||
|valign="bottom" style="border-right:0px;"|[[image:Beni_neutre_C_1.jpg|center]] | |valign="bottom" style="border-right:0px;"|[[image:Beni_neutre_C_1.jpg|center]] | ||
|valign="bottom" style="border-left:0px;"|[[image:Beni_neutre_C_2.jpg|center]] | |valign="bottom" style="border-left:0px;"|[[image:Beni_neutre_C_2.jpg|center]] | ||
| Line 287: | Line 355: | ||
|align="center"| 2/10/- | |align="center"| 2/10/- | ||
|align="center"| -/- | |align="center"| -/- | ||
|align="center"| | |align="center"| [[image:Nocancel.png]] | ||
|align="center"| [[image:High.png]] | |||
|colspan="2"| [[image:Beni_neutre_D.jpg|center]] | |colspan="2"| [[image:Beni_neutre_D.jpg|center]] | ||
| | |Benimaru's best neutral jump, with very fast startup, good reach and splendid priority | ||
|- | |- | ||
! [[image:snkc.gif]]+[[image:snkd.gif]] | ! [[image:snkc.gif]]+[[image:snkd.gif]] | ||
|align="center"| 14/5/6 | |align="center"| 14/5/6 | ||
|align="center"| -/- | |align="center"| -/- | ||
|align="center"| | |align="center"| [[image:Softknockdown.png]][[image:Cancel.png]] | ||
|align="center"| Medium | |||
|colspan="2"| [[image:Beni_neutre_CD.jpg|center]] | |colspan="2"| [[image:Beni_neutre_CD.jpg|center]] | ||
| | | | ||
| Line 300: | Line 370: | ||
|colspan="8" align="center"| '''Command Normals''' | |colspan="8" align="center"| '''Command Normals''' | ||
|- | |- | ||
! | ! [[image:F.png]]+[[image:snkb.gif]] | ||
|align="center"| 19/3/27 | |align="center"| 19/3/27 | ||
|align="center"| / | |align="center"| -10/-12 | ||
|align="center"| | |align="center"| [[image:Cancel.png]] | ||
|align="center"| | |align="center"| [[image:Low.png]] | ||
|colspan="2" | [[image:Beni_f+B.jpg|center]] | |colspan="2" | [[image:Beni_f+B.jpg|center]] | ||
| '''Jackknife Kick - f+B'''<br> | | '''Jackknife Kick - f+B''' You can use it on block strings combos and cancel into qcf+A or qcb+A<br> | ||
|- | |- | ||
! | ! [[image:U.png]],[[image:D.png]]+[[image:snkd.gif]] | ||
|align="center"| 13/1(1)2(2)2/- | |align="center"| 13/1(1)2(2)2/- | ||
|align="center"| -/- | |align="center"| -/- | ||
|align="center"| | |align="center"| [[image:Softknockdown.png]] (when the opponent is in air) | ||
|align="center"| | [[image:aironly.png]] | ||
|align="center"| Medium | |||
|colspan="2" | [[image:Beni_j+d_D.jpg|center]] | |colspan="2" | [[image:Beni_j+d_D.jpg|center]] | ||
| '''Flying Drill - d+D (air)'''<br> | | '''Flying Drill - d+D (air)'''Useful move to Benimaru's pressure/mixups.<br> | ||
| | |||
|- | |||
|colspan="8" align="center"| '''Special Moves''' | |||
|- | |||
! [[image:Qcf.png]]+[[image:snka.gif]] | |||
|align="center"| 12/5(3)4(3)3/24 | |||
|align="center"| -6/-8 | |||
|align="center"| When opponent in air : [[image:Softknockdown.png]] , In Counter Mode : [[image:Supercancel.png]] | |||
|align="center"| Medium | |||
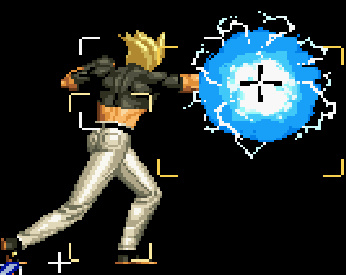
|valign="bottom" colspan="2" style="border-right:0px;"| [[image:Qcf+A Benimaru kof 99.jpg|center|]] | |||
| '''Raijin Ken - qcf+A''' | |||
* Benimaru extends his arm forward and a ball of energy surrounds his hand. His main block string and combo ender. | |||
|- | |||
! [[image:Qcf.png]]+[[image:snkc.gif]] | |||
|align="center"| 10/5(3)4(3)4/25 | |||
|align="center"| / | |||
|align="center"| When opponent in air : [[image:Softknockdown.png]] , In Counter Mode : [[image:Supercancel.png]] | |||
|align="center"| Medium | |||
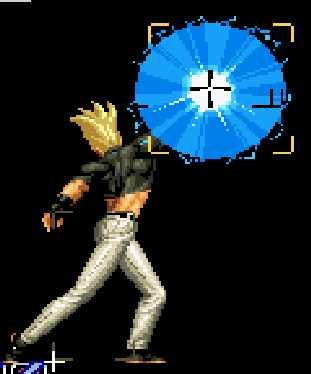
|valign="bottom" colspan="2" style="border-right:0px;"| [[image:Qcf+C Benimaru kof 99.jpg|center|]] | |||
| '''Taikuu Raijin Ken - qcf+C''' | |||
* Benimaru extends his arm diagonally upwards and a ball of energy surrounds his hand. His move is useful as anti-air and to combo with strikers when you has no meter. | |||
|- | |||
! <br>[[image:U.png]],[[image:Qcf.png]]+[[image:snka.gif]]<br><br> | |||
|align="center"| / / | |||
|align="center"| -/- | |||
|align="center"| [[image:Softknockdown.png]] (when the opponent is in air) | |||
[[image:aironly.png]] | |||
|align="center"| Medium | |||
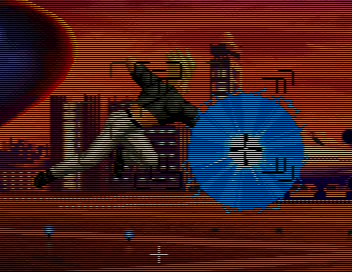
|valign="bottom" colspan="2" style="border-right:0px;"| [[image:Beni_j_qcfA.jpg|center|]] | |||
|* similar to his qcf+P except done in the air. Benimaru does the attack diagonally downward and it comes out fairly fast | |||
* make Benimaru float in the air for a bit, before coming down | |||
* if Benimaru jumps over the opponent and does this move, Benimaru will face the correct direction | |||
* free cancellable into | |||
|- | |||
! [[image:U.png]],[[image:Qcf.png]]+[[image:snkc.gif]] | |||
|align="center"| / / | |||
|align="center"| -/- | |||
|align="center"| [[image:Softknockdown.png]] (when the opponent is in air) | |||
[[image:aironly.png]] | |||
|align="center"| Medium | |||
|- | |||
! <br>[[image:Qcb.png]]+[[image:snka.gif]]<br><br> | |||
|align="center"| / / | |||
|align="center"| KD/ | |||
|align="center"| In Counter Mode : [[image:Supercancel.png]] | |||
|align="center"| Medium | |||
|valign="bottom" colspan="2" style="border-right:0px;"| [[image:Beni_qcbP.jpg|center|]] | |||
|rowspan="2"| '''Shinkuu Katategoma - qcb+P''' | |||
|- | |- | ||
! [[image:Qcb.png]]+[[image:snkc.gif]]<br><br> | |||
|align="center"| / / | |||
|align="center"| KD/ | |||
|align="center"| In Counter Mode : [[image:Supercancel.png]] | |||
|align="center"| Medium | |||
|valign="bottom" colspan="2" style="border-right:0px;"| [[image:Beni_qcbP.jpg|center|]] | |||
|rowspan="2"| '''Shinkuu Katategoma - qcb+P''' | |||
|- | |||
! [[image:Qcf.png]]+[[image:kick.gif]] | |||
|align="center"| / / | |||
|align="center"| / | |||
|align="center"| In Counter Mode : [[image:Supercancel.png]] | |||
|align="center"| Medium | |||
|valign="bottom" colspan="2" style="border-right:0px;"| [[image:Beni_qcfK.jpg|center|]] | |||
| '''Iai Geri - qcf+K''' | |||
* Benimaru does a quick knee | |||
* If the second active period hits, it couses hard knockdown, and on counterhit, counterwires. | |||
* can be followed up by Handou Sandan Geri d,u+K on hit or whiff, 5 frames after the active period. | |||
* free cancellable into | |||
|- | |||
| Line 323: | Line 464: | ||
{{Navbox-KOF99}} | |||
[[Category:The King of Fighters '99]] | [[Category:The King of Fighters '99]] | ||
Latest revision as of 02:34, 12 April 2025
Introduction
The famous electric seducer and Kyo's Friend in KOF.
Top-tier character (best character of the game among no-banned characters).
He's chosen in all the teams or almost.
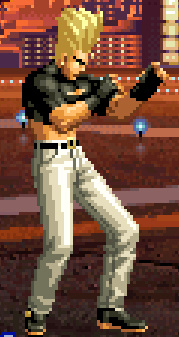
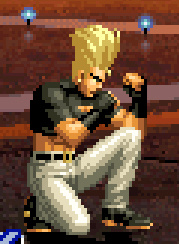
Benimaru is a poking, footsies and block strings based character.
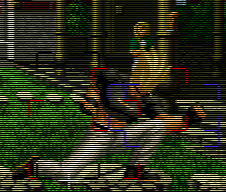
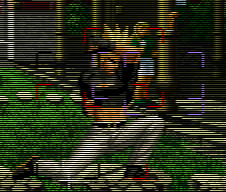
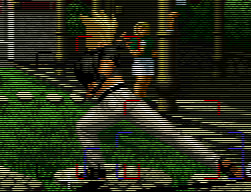
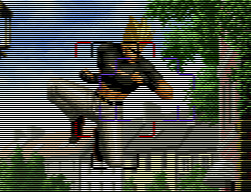
| Stand | Crouch | Backdash | Run |
|---|---|---|---|
|
|
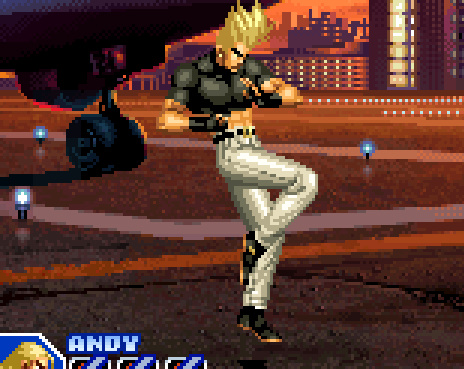
|
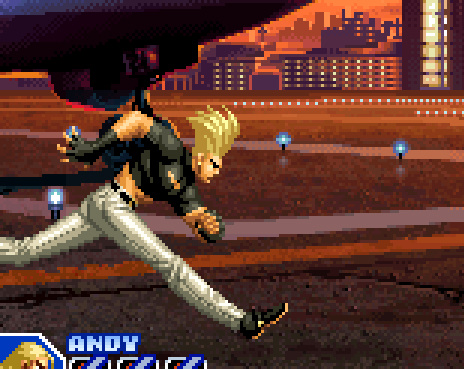
|
Colors
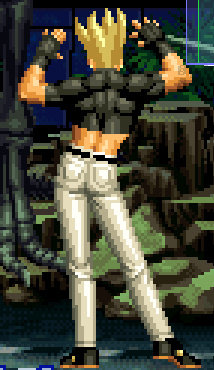
|
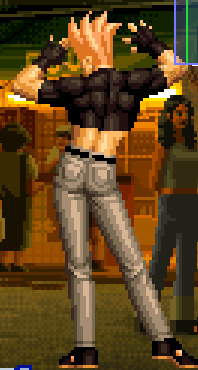
|
|---|
| Strengths | Weaknesses |
|---|---|
|
|
Movelist
THROWS-------------------------------------------------------------------------
Catch and Shoot >> When close - b / f + C
Front Suplex >> When close - b / f + D >> Best Benimaru's throw because it reverse knockdown opponent which helps Benimaru's okizeme gameplay
Spinning Knee Drop >> When close in the air - any dir. except u + C / D
COMMAND ATTACKS----------------------------------------------------------------
Jackknife Kick >> f + B >> No Overhead.
   Evades several low attacks.
   Can be cancelled into a special move or DM move.
Flying Drill >> In the air - d + D
SPECIAL MOVES------------------------------------------------------------------
Iai-geri >> qcf + K >> Can be followed with Handou Sandan Geri.
/Handou Sandan Geri >> After Iai-geri - d, u + K
Shinkuu Katategoma >> qcb + P
Raijin Ken >> qcf + P >>Main chip damage and pressure attack of Benimaru. The C version is generally useful to combo with striker Clark when you has no meter
Kuuchuu Raijin Ken
>> In the air - qcf + P
DESPERATION MOVES--------------------------------------------------------------
Raikou Ken >> qcf, qcf + A >> Main combo ender when you have a meter. The C version is his main DM to combo with strikers
Gen'ei Hurricane >> qcf, qcf + K >> Evades 1-hit strong normal attack and specials. >> This move is unfortunately useless in kof 99
Combos
Normal Combos
- cr.B x1-3 > qcf+K > d,u+K
- j.B / j.C / j.D > cr.C > qcb+P / qcf,qcf+A
- j.B / j.C / j.D > cl.C / cl.D > qcf+A / qcf+K / qcb+P / qcf,qcf+A
- cr.A > cl.D > qcf+A / qcf+K / qcb+P / qcf,qcf+A
- cr.B x1-3 > qcf,qcf+A
Combos in Counter Mode
Fastest Attacks
- 0F: C throw; D throw , Air Throw
- 1F:
- 2F: cl.D ; cr.B ; nj.D
- 3F: cl.A ; cl.B ; far.A ; far.B ; cr.A ; j.B
- 4F: cl.C ; cr.C
- 5F: far.C ; cr.D ; j.A ; j.C ; j.D ; nj.A ; nj.C
- 6F:
- 7F:
- 8F:
- 9F:
- 10F: qcf.C
Frame Data and Hitboxes
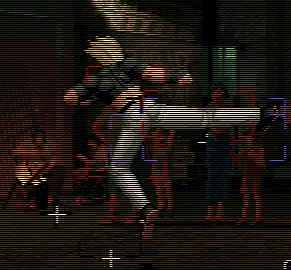
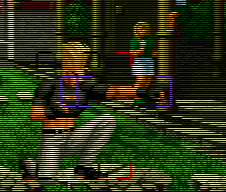
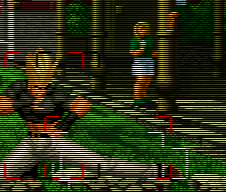
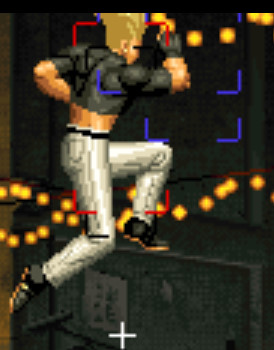
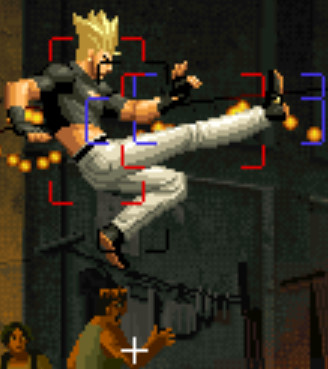
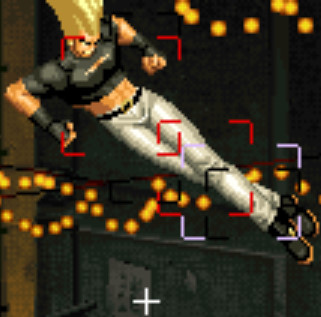
Red Color = Hurtbox
Purple / White Color = Hitbox
Medium : You can guard move of the opponent while standing and crouching
For Special Moves :
Black Color = Hitbox
Yellow = Fireball
| Frames | Advantage | Cancel , movement and hit
(glossary) |
Block | Hitbox | Notes | |||
|---|---|---|---|---|---|---|---|---|
| Standing Close | ||||||||
| 3/2/9 | +1/-1 | Medium | This move is really useless in many situations. The top players almost never use it. | |||||
| 3/5/7 | 0/-2 | Medium | Like cl.A, generally it's not a move you will use often in matches situations | |||||
| 4/3+3/15 | -1/-3 | 1st hit : |
Medium | |||||
| 2/6/16 | -2/-4 | Medium | Nice as meaty attack. You can also combo it after cr.A. | |||||
| Standing Far | ||||||||
| 3/4/9 | -1/-3 | Medium | Solid move vs short hop | |||||
| 3/7/9 | -4/-6 | Medium | Very splashable move of Benimaru, with wonderful priority, reach and startup. This is the best Benimarus and even of game. You can use it also as chain ender. This move is also really good in frametrap situations | |||||
| 5/6/18 | -4/-6 | Medium | Very good mid-range poke of Benimaru with good priority. Effective vs short hop. However it whiffs on crouchers. | |||||
| 11/5/16 | -1/-3 | Medium | Slow move but very good long/mid-range poke of Benimaru that beats many standing and normal moves of game. You can escape low crouchers moves like Ralf's cr.D for example. | |||||
| 17/4/20 | KD/-2 | Medium | ||||||
| Crouching | ||||||||
| 3/4/5 | 2/0 | Medium | 1 frame slowest than cr.B but with better recovery. Links into cl.D and can combo into qcf+A or qcb+A for block string | |||||
| 2/4/7 | 1/-1 | Benimaru's great normal move. This is his main combo starter and his "footsies" move also. | ||||||
| 4/3+3/24 | -10/-12 | Medium | ||||||
| 5/6/23 | KD/-11 | Interesting move as meaty attack and whiff cancelable if the opponent short hops it. | ||||||
| Jump | ||||||||
| 5/9/- | -/- | |||||||
| 3/12/- | -/- | Benimaru's instant overhead. This move is fast, great priority, is active a long time and can crossup. His 2nd best jump-in after j.D | ||||||
| 5/3+7/- | -/- | |||||||
| 5/8/- | -/- | Good air-to-air move. Good priority, good reach and can easily crossup. Generally his main jump-in | ||||||
| 14/5/- | KD/- | Medium | Slow but with good priority to air-to-ground situation | |||||
| Neutral Jump | ||||||||
| 5/9/- | -/- | |||||||
| 3/12/- | -/- | This neutral jump is especially interesting as instant overhead | ||||||
| 5/3+7/- | -/- | |||||||
| 2/10/- | -/- | Benimaru's best neutral jump, with very fast startup, good reach and splendid priority | ||||||
| 14/5/6 | -/- | Medium | ||||||
| Command Normals | ||||||||
| 19/3/27 | -10/-12 | Jackknife Kick - f+B You can use it on block strings combos and cancel into qcf+A or qcb+A | ||||||
| 13/1(1)2(2)2/- | -/- | Medium | Flying Drill - d+D (air)Useful move to Benimaru's pressure/mixups. |
|||||
| Special Moves | ||||||||
| 12/5(3)4(3)3/24 | -6/-8 | When opponent in air : |
Medium | Raijin Ken - qcf+A
| ||||
| 10/5(3)4(3)4/25 | / | When opponent in air : |
Medium | Taikuu Raijin Ken - qcf+C
| ||||
| / / | -/- | Medium | * similar to his qcf+P except done in the air. Benimaru does the attack diagonally downward and it comes out fairly fast
| |||||
| / / | -/- | Medium | ||||||
| / / | KD/ | In Counter Mode : |
Medium | Shinkuu Katategoma - qcb+P | ||||
| / / | KD/ | In Counter Mode : |
Medium | Shinkuu Katategoma - qcb+P | ||||
| / / | / | In Counter Mode : |
Medium | Iai Geri - qcf+K
| ||||
