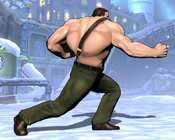
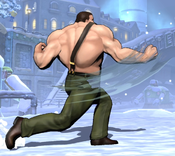
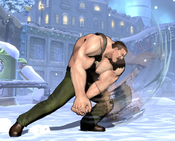
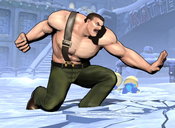
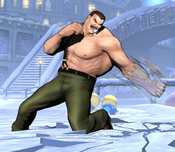
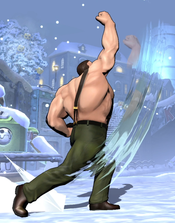
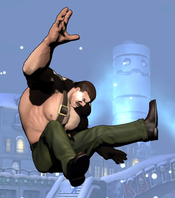
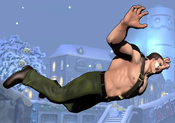
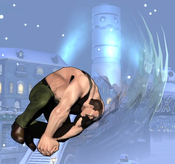
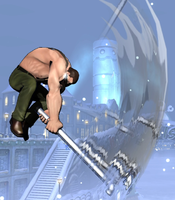
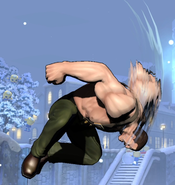
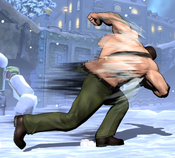
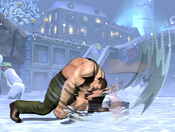
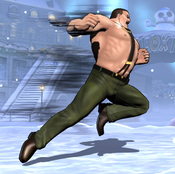
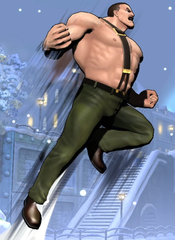
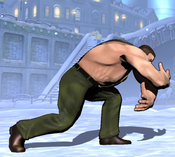
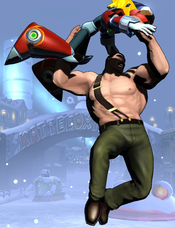
(Reworked page using new layout. Added frame data to movelist, some common synergies and their players, and some sample combos (12/50 reworked)) |
|||
| (24 intermediate revisions by 9 users not shown) | |||
| Line 1: | Line 1: | ||
{{ | <div style="display: flex; flex-wrap:wrap-reverse;"> | ||
|name=Haggar | <div style="display: flex;flex-direction: column;flex:5;min-width:300px;padding: 10px;"> | ||
{{Character Subnav UMVC3|name=Haggar}} | |||
==Introduction== | ==Introduction== | ||
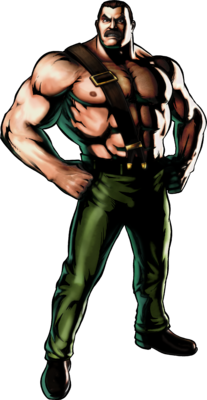
A former professional wrestler, Mike Haggar became a popular figure and was elected the mayor of Metro City. With his city overrun by crime and his daughter kidnapped, Haggar chose to personally take on the Mad Gear gang in his home series, Final Fight. | A former professional wrestler, Mike Haggar became a popular figure and was elected the mayor of Metro City. With his city overrun by crime and his daughter kidnapped, Haggar chose to personally take on the Mad Gear gang in his home series, Final Fight. | ||
In UMvC3, Haggar is a high-damage and high-health grappler character. His gameplan revolves around making opponents block out of fear of his invincible Lariat attack or his massive pipe-swinging command normals, then scooping them with his command grabs or regular throws. Typical of characters in his archtype, Haggar is fairly slow compared to the cast as a whole, and can struggle to approach opponents with strong keepaway tools. | '''In UMvC3''', Haggar is a high-damage and high-health grappler character. His gameplan revolves around making opponents block out of fear of his invincible Lariat attack or his massive pipe-swinging command normals, then scooping them with his command grabs or regular throws. Typical of characters in his archtype, Haggar is fairly slow compared to the cast as a whole, and can struggle to approach opponents with strong keepaway tools. | ||
{{ProConTable | {{ProConTable | ||
| pros = | | pros = | ||
* | *'''Mixups:''' Solid solo mix thanks to solid normals and strong command grabs. Haggar has one of the best incoming mixes in the game thanks to his vast variety of options. | ||
* | *'''Scary Normals:''' The inclusion of Air Steel Pipe (2H in the air) and Headbutt (8H in the air) make it a risk to challenge Haggar when he's approaching, the former of which causes the longest ground bounce known to mankind, allowing for followups even when you trade, and the latter causing an immediate stun state if it lands as a counter hit. | ||
*'''Reliable Reversal:''' Lariat (ATK+S) is one of the single best moves in the game. It has full invincibility (even as an assist), lingers, can be used for combos if hit late, and can lead to devastating comebacks with the inclusion of X-Factor. Challenging Haggar at any point is dangerous because he can simply lariat his way through any problem. | |||
*'''Incredible Damage:''' High damage output and meter gain in addition to simplicity of his combo routes, even when improvising, will usually result in a kill whenever he lands a hit. | |||
*'''Can Play Point or Anchor:''' All of these traits combined with a great X-Factor boost make him a great point or anchor character. | |||
| cons = | | cons = | ||
* | *'''Limited Support Value:''' Although his Lariat assist makes his support value welcome, he lacks any safe DHC's and using Lariat assist recklessly will often result in a dead Haggar on incoming due to him losing 100K red health every time he uses Lariat. | ||
* | *'''Awful Mobility:''' With no real mobility options outside of the universal tools, Haggar struggles to approach any character with a decent projectile or overwhelming assist. If he's left on the field, fullscreen, alone, with no assists to back him up, it's the biggest uphill battle in the game. | ||
* | *'''Heavily Reliant on Teammates:''' Haggar can have trouble when doing midscreen combos. He relies on assists to back him up after he uses his OTG 2H, but without assists, his only tool for extensions is his Air Steel Pipe (2H in air). Despite his damage output being incredibly high, he relies so much on a team backing him up for that damage to come into play. | ||
*'''Struggles Approaching:''' Haggar has no reliable way to protect assists other than moving forward. Any character with any kind of long ranged attack will be able to snipe the assists, making it a nightmare for Haggar to get anything started even if backed by a full team. | |||
}} | }} | ||
</div> | |||
<div style="display: flex;flex-direction: column;flex:2;min-width:350px;padding: 10px;">{{UMVC3_Character_Query|reversals=X+S, 236XX, 63214XX}}</div></div> | |||
== Move List == | == Move List == | ||
| Line 45: | Line 28: | ||
{{MoveData | {{MoveData | ||
|image= | |image=UMVC3_Haggar_AssistA.png | ||
|caption= | |caption= | ||
|name=Double Lariat | |name=Double Lariat | ||
| Line 58: | Line 41: | ||
|onhit=- | |onhit=- | ||
|onblock=- | |onblock=- | ||
|properties=Invuln until frame | |properties=Invuln until frame 10, Converts 100,000 of Haggar's health into red health, {{softknockdown}} | ||
|description= | |description= | ||
THC Hyper: Giant Haggar Press. Haggar's obvious assist choice. Comes out quite fast and is one of the few assists with invuln frames. Useful for combo extensions, as a defensive option, or while on rushdown to discourage opponents from mashing against your pressure. | THC Hyper: Giant Haggar Press. Haggar's obvious assist choice. Comes out quite fast and is one of the few assists with invuln frames. Useful for combo extensions, as a defensive option, or while on rushdown to discourage opponents from mashing against your pressure. | ||
| Line 67: | Line 50: | ||
{{MoveData | {{MoveData | ||
|image= | |image=UMVC3_Haggar_236X_2nd.png | ||
|caption= | |caption= | ||
|name=Violent Axe M | |name=Violent Axe M | ||
| Line 87: | Line 70: | ||
{{MoveData | {{MoveData | ||
|image= | |image=UMVC3_Haggar_6H.png | ||
|caption= | |caption= | ||
|name=Steel Pipe | |name=Steel Pipe | ||
| Line 101: | Line 84: | ||
|onblock=- | |onblock=- | ||
|properties={{groundbounce}}, {{hardknockdown}} | |properties={{groundbounce}}, {{hardknockdown}} | ||
|description= | |description= | ||
THC Hyper: Giant Haggar Press. | Can be special cancelled as a Cross-over Counter | ||
* THC Hyper: Giant Haggar Press. | |||
}} | }} | ||
}} | }} | ||
| Line 109: | Line 94: | ||
{{MoveData | {{MoveData | ||
|image= | |image=UMVC3_Haggar_5L.png | ||
|caption= | |caption= | ||
|name=Stand Light | |name=Stand Light | ||
| Line 129: | Line 114: | ||
{{MoveData | {{MoveData | ||
|image= | |image=UMVC3_Haggar_5M.png | ||
|caption= | |caption= | ||
|name=Stand Medium | |name=Stand Medium | ||
| Line 149: | Line 134: | ||
{{MoveData | {{MoveData | ||
|image= | |image=UMVC3_Haggar_5H.png | ||
|caption= | |caption= | ||
|name=Stand Heavy | |name=Stand Heavy | ||
| Line 164: | Line 149: | ||
|properties={{groundbounce}} | |properties={{groundbounce}} | ||
|description= | |description= | ||
Wastes ground bounce, which in most cases can be used more efficiently in combos by another move such as Air Pipe. Generally Haggar will want to skip this button in confirms and go directly from 5M into a launcher or special. | Wastes ground bounce, which in most cases can be used more efficiently in combos by another move such as Air Pipe. Generally Haggar will want to skip this button in confirms and go directly from {{Clr|2|5M}} into a launcher or special. | ||
}} | }} | ||
}} | }} | ||
| Line 170: | Line 155: | ||
{{MoveData | {{MoveData | ||
|image= | |image=UMVC3_Haggar_2L.png | ||
|caption= | |caption= | ||
|name=Crouching Light | |name=Crouching Light | ||
| Line 190: | Line 175: | ||
{{MoveData | {{MoveData | ||
|image= | |image=UMVC3_Haggar_2M.png | ||
|caption= | |caption= | ||
|name=Crouching Medium | |name=Crouching Medium | ||
| Line 210: | Line 195: | ||
{{MoveData | {{MoveData | ||
|image= | |image=UMVC3_Haggar_2H.png | ||
|caption= | |caption= | ||
|name=Crouching Heavy | |name=Crouching Heavy | ||
| Line 225: | Line 210: | ||
|properties={{otg}}, Self-inflicts {{hardknockdown}} on Haggar. Invulnerable from frame 50 onwards, {{nocancel}} except into 6H. | |properties={{otg}}, Self-inflicts {{hardknockdown}} on Haggar. Invulnerable from frame 50 onwards, {{nocancel}} except into 6H. | ||
|description= | |description= | ||
Very unique variant of a 2H sweep with several potential uses. Despite reading as vary disadvantageous on block, Haggar can throw this move out fairly safely as it places him into a | Very unique variant of a {{Clr|3|2H}} sweep with several potential uses. Despite reading as vary disadvantageous on block, Haggar can throw this move out fairly safely as it places him into a Hard Knockdown state, where he can only be hit by OTGs. Afterwards, Haggar performs an invincible tech roll just as he would after any other knockdown, allowing him to safely travel across the ground. | ||
Haggar can cancel this attack into 6H on hit or block, which will prevent him from entering the | Haggar can cancel this attack into {{Clr|3|6H}} on hit or block, which will prevent him from entering the Hard Knockdown state. This allows Haggar to recover much faster, which is very useful in combos even if the pipe attack whiffs. <code>{{Clr|3|2H}} > {{Clr|3|6H}}</code> is a true blockstring when done as early as possible, but can be delayed to frame trap opponents if desired. Additionally, Haggar can kara-cancel {{Clr|3|6H}} in this sequence to add even more layers to his mixup potential. | ||
2H is not subject to hitstun deterioration. | |||
}} | }} | ||
}} | }} | ||
| Line 233: | Line 220: | ||
{{MoveData | {{MoveData | ||
|image= | |image=UMVC3_Haggar_5S.png | ||
|caption= | |caption= | ||
|name=Launcher/Special | |name=Launcher/Special | ||
| Line 248: | Line 235: | ||
|properties={{launch}}, {{nocancel}} | |properties={{launch}}, {{nocancel}} | ||
|description= | |description= | ||
Safe launcher. Horizontal reach is not the best, so consider using 623L instead. | Safe launcher. Horizontal reach is not the best, so consider using {{Clr|1|623L}} instead. | ||
}} | }} | ||
}} | }} | ||
| Line 255: | Line 242: | ||
{{MoveData | {{MoveData | ||
|image= | |image=UMVC3_Haggar_jL.png | ||
|caption= | |caption= | ||
|name=Jumping Light | |name=Jumping Light | ||
| Line 277: | Line 264: | ||
{{MoveData | {{MoveData | ||
|image= | |image=UMVC3_Haggar_jM.png | ||
|caption= | |caption= | ||
|name=Jumping Medium | |name=Jumping Medium | ||
| Line 297: | Line 284: | ||
{{MoveData | {{MoveData | ||
|image= | |image=UMVC3_Haggar_jH.png | ||
|caption= | |caption= | ||
|name=Jumping Heavy | |name=Jumping Heavy | ||
| Line 317: | Line 304: | ||
{{MoveData | {{MoveData | ||
|image= | |image=UMVC3_Haggar_jS.png | ||
|caption= | |caption= | ||
|name=Jumping Special | |name=Jumping Special | ||
| Line 339: | Line 326: | ||
{{MoveData | {{MoveData | ||
|image= | |image=UMVC3_Haggar_6H.png | ||
|caption= | |caption= | ||
|name=Steel Pipe | |name=Steel Pipe | ||
| Line 354: | Line 341: | ||
|properties={{stagger}} versus grounded, {{groundbounce}} into {{hardknockdown}} versus airborne. | |properties={{stagger}} versus grounded, {{groundbounce}} into {{hardknockdown}} versus airborne. | ||
|description= | |description= | ||
Ground throw OS, 2H follow-up, and scary button. Outside of its use as a 2H follow-up, Air Pipe is preferred over the ground version, as it allows Haggar to stay mobile. | Ground throw OS, {{Clr|3|2H}} follow-up, and scary button. Outside of its use as a {{Clr|3|2H}} follow-up, Air Pipe is preferred over the ground version, as it allows Haggar to stay mobile. | ||
Can be kara-canceled into specials. This is mainly useful for canceling into one of Haggar's command grabs in order to punish opponents who are afraid of getting piped. | Can be kara-canceled into specials. This is mainly useful for canceling into one of Haggar's command grabs in order to punish opponents who are afraid of getting piped. | ||
Steel Pipe is not subject to hitstun deterioration. | |||
}} | }} | ||
}} | }} | ||
{{MoveData | {{MoveData | ||
|image= | |image=UMVC3_Haggar_j2H.png | ||
|caption= | |caption= | ||
|name=Air Steel Pipe | |name=Air Steel Pipe | ||
| Line 376: | Line 365: | ||
|properties={{groundbounce}} into {{hardknockdown}} | |properties={{groundbounce}} into {{hardknockdown}} | ||
|description= | |description= | ||
*Throw OS when input as j.3H or j.1H. | *Throw OS when input as {{Clr|3|j.3H}} or {{Clr|3|j.1H}}. | ||
*Always causes a | *Always causes a Ground Bounce on hit. Contrast with ground pipe, which does not groundbounce on hit against grounded opponents. | ||
*In most cases can be chained into j.5S for additional damage and a better knockdown. If j.5S (or another attack) connects before the opponent reaches the ground, the | *In most cases can be chained into {{Clr|4|j.5S}} for additional damage and a better knockdown. If {{Clr|4|j.5S}} (or another attack) connects before the opponent reaches the ground, the Ground Bounce will be preserved. | ||
*Holy shit. | *Holy shit. | ||
Air Steel Pipe is not subject to hitstun deterioration. | |||
}} | }} | ||
}} | }} | ||
| Line 385: | Line 376: | ||
{{MoveData | {{MoveData | ||
|image= | |image=UMVC3_Haggar_j8H.png | ||
|caption= | |caption= | ||
|name=Head Butt | |name=Head Butt | ||
| Line 400: | Line 391: | ||
|properties={{dzzy}} on counterhit versus grounded, Special {{hardknockdown}} on counterhit versus airborne: can {{otg}} with any attack. | |properties={{dzzy}} on counterhit versus grounded, Special {{hardknockdown}} on counterhit versus airborne: can {{otg}} with any attack. | ||
|description= | |description= | ||
Very fast air attack, comparable to light normals. Mainly notable for its special properties on counterhit. | Very fast air attack, comparable to Haggar's light normals. Mainly notable for its special properties on counterhit. | ||
Can be used as an airthrow OS instead of Pipe by inputting as j.9H or j.7H. | Can be used as an airthrow OS instead of Pipe by inputting as {{Clr|3|j.9H}} or {{Clr|3|j.7H}}. | ||
}} | }} | ||
}} | }} | ||
=== Special Moves === | === Special Moves === | ||
{{MoveData | {{MoveData | ||
|image= | |image=UMVC3_Haggar_236X_1st.png | ||
|caption= | |caption=Hit One (Only for M and H Version) | ||
|image2=UMVC3_Haggar_236X_2nd.png | |||
|caption2=Hit Two (all versions) | |||
|image3=UMVC3_Haggar_236X_3rd.png | |||
|caption3=Hit Three (Only for H Version) | |||
|name=Violent Axe | |name=Violent Axe | ||
|input=236X | |input=236X | ||
| Line 450: | Line 444: | ||
|properties={{stagger}} (1st hit), {{strk}} (2nd hit) {{groundbounce}} into {{softknockdown}} (3rd hit). | |properties={{stagger}} (1st hit), {{strk}} (2nd hit) {{groundbounce}} into {{softknockdown}} (3rd hit). | ||
|description= | |description= | ||
Haggar advances forward with a sequence of strikes. Haggar can typically follow up any of these hits with 5L into a full combo. | Haggar advances forward with a sequence of strikes. Haggar can typically follow up any of these hits with {{Clr|1|5L}} into a full combo. | ||
Because it advances forward and has an upward-reaching hitbox, this move can be used as a cross-under. Simply throwing it out on your opponent's incoming character is relatively low-risk and effective. | Because it advances forward and has an upward-reaching hitbox, this move can be used as a cross-under. Simply throwing it out on your opponent's incoming character is relatively low-risk and effective. | ||
| Line 458: | Line 452: | ||
{{MoveData | {{MoveData | ||
|image= | |image=UMVC3_Haggar_623LM.png | ||
|caption= | |caption=L/M Version | ||
|image2=UMVC3_Haggar_623H.png | |||
|caption2=H Version | |||
|name=Hoodlum Throw | |name=Hoodlum Throw | ||
|input=623X | |input=623X | ||
| Line 500: | Line 496: | ||
|description= | |description= | ||
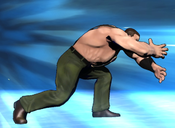
Haggar charges up for a moment and then lunges forward. | Haggar charges up for a moment and then lunges forward. | ||
*{{ | *{{Clr|1|L}} version charges the least amount of time, lunges only a short distance, and is a mid strike. If it connects, it places the opponent into a short hitgrab animation that acts as a Launcher. | ||
*{{ | *{{Clr|2|M}} version charges longer, lunges further forward, and is a Throw rather than an attack. This means it can not be blocked but cannot be comboed into or connect on opponents in blockstun. It launches opponents on a successful grab in a manner identical to the {{Clr|1|L}} version. | ||
*{{ | *{{Clr|3|H}} version charges the longest and lunges airborne at a diagonal angle. It is an Airthrow and works mostly the same as the {{Clr|2|M}} version, except against airborne opponents rather than grounded ones. | ||
The different variations of this move create a simple but effective mixup opportunity as opponents who attempt to escape one option may leave themselves vulnerable to another. | The different variations of this move create a simple but effective mixup opportunity as opponents who attempt to escape one option may leave themselves vulnerable to another. | ||
This special works as a | This special works as a Launcher, interchangeably with his {{Clr|1|5S}} attack, and {{Clr|1|623L}} is often preferred to {{Clr|4|5S}} due to its superior reach. Just like with {{Clr|4|5S}}, Haggar can superjump cancel this move if it connects. However, make sure to superjump ''straight up'' rather than up-forward or up-back, as any other direction will cause Haggar to miss the follow-up air combo. The M and H versions, despite being command throws, do not apply the grab penalty. | ||
All versions of Hoodlum Throw are not subject to hitstun deterioration. | |||
}} | }} | ||
}} | }} | ||
| Line 512: | Line 510: | ||
{{MoveData | {{MoveData | ||
|image= | |image=UMVC3_Haggar_63214X.png | ||
|image2=UMVC3_Haggar_63214X_Grab.png | |||
|caption= | |caption= | ||
|name=Flying Piledriver | |name=Flying Piledriver | ||
| Line 553: | Line 552: | ||
|properties={{hardknockdown}} | |properties={{hardknockdown}} | ||
|description= | |description= | ||
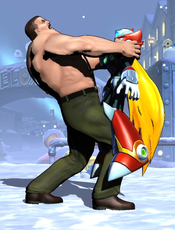
Relatively standard grounded command grab. {{ | Relatively standard grounded command grab. {{Clr|1|L}} version is the slowest but has the longest range. {{Clr|3|H}} version is instant (1 frame) but has the shortest range. All versions deal significant damage, apply throw scaling, and leave the opponent in a Hard Knockdown state next to Haggar, where he can pick up with {{Clr|3|2H}}. | ||
Without assists or X-Factor, Haggar's follow-up options after this grab are limited. If he has access to one of these things, he can pick up with 2H into a full combo. | Without assists or X-Factor, Haggar's follow-up options after this grab are limited. If he has access to one of these things, he can pick up with {{Clr|3|2H}} into a full combo. | ||
}} | }} | ||
}} | }} | ||
{{MoveData | {{MoveData | ||
|image= | |image=UMVC3_Haggar_j63214X.png | ||
|image2=UMVC3_Haggar_j63214X_Grab.png | |||
|caption= | |caption= | ||
|name=Skyhigh Backdrop | |name=Skyhigh Backdrop | ||
| Line 601: | Line 601: | ||
|properties={{hardknockdown}} | |properties={{hardknockdown}} | ||
|description= | |description= | ||
Air version of Haggar's command grab. Works mostly the same, with the {{ | Air version of Haggar's command grab. Works mostly the same, with the {{Clr|1|L}} version having the most range and the {{Clr|3|H}} version having superior startup and damage. Haggar takes longer to recover from a successful air grab than from the ground version, which can make assist-based {{Clr|3|2H}} pickups harder to time (but still possible). | ||
All versions of this special instantly halt Haggar's aerial momentum, which is his only form of aerial "mobility". Haggar can repeatedly whiff this move in order to hover in the air (up to three times, based on the aerial special limit). This is useful if there is an opponent below Haggar has activated something scary, and he would like to stall and avoid confronting it (such as Morrigan in Astral Vision, Vergil in Summoned Swords, or any character in X-Factor). | All versions of this special instantly halt Haggar's aerial momentum, which is his only form of aerial "mobility". Haggar can repeatedly whiff this move in order to hover in the air (up to three times, based on the aerial special limit). This is useful if there is an opponent below Haggar has activated something scary, and he would like to stall and avoid confronting it (such as Morrigan in Astral Vision, Vergil in Summoned Swords, or any character in X-Factor). | ||
| Line 609: | Line 609: | ||
{{MoveData | {{MoveData | ||
|image= | |image=UMVC3_Haggar_XS.png | ||
|caption= | |caption= | ||
|name=Double Lariat | |name=Double Lariat | ||
| Line 624: | Line 624: | ||
|properties=Invuln until frame 40 (!!), Converts 100,000 of Haggar's health to red health, {{hardknockdown}} | |properties=Invuln until frame 40 (!!), Converts 100,000 of Haggar's health to red health, {{hardknockdown}} | ||
|description= | |description= | ||
Haggar | Haggar spins in place with a massive amount of invincibility. Can be used to juke certain projectiles, mash out of an opponent's offense, and generally be a threat any time Haggar is nearby and on the ground. | ||
On hit, Haggar can cancel into Rapid Fire Fist (do not mash) to convert into a basic combo, or use its invincibility to bait attempts at punishing Lariat on block. | On hit, Haggar can cancel into Rapid Fire Fist (do not mash) to convert into a basic combo, or use its invincibility to bait attempts at punishing Lariat on block. | ||
The self-damage from Haggar's assist is not considered a hit and does not award either play meter nor affect damage scaling. Health is deducted on the first frame of startup. Haggar can still use Lariat as normal even if he has less than 100,000 health remaining; it will set his health to 1. | The self-damage from Haggar's assist is not considered a hit and does not award either play meter nor affect damage scaling. Health is deducted on the first frame of startup. Haggar can still use Lariat as normal even if he has less than 100,000 health remaining; it will set his health to 1. Double Lariat is not subject to hitstun deterioration. | ||
}} | }} | ||
}} | }} | ||
{{MoveData | {{MoveData | ||
|image= | |image=UMVC3_Haggar_236S.png | ||
|image2=UMVC3_Haggar_236S_Grab.png | |||
|caption= | |caption= | ||
|name=Wild Swing | |name=Wild Swing | ||
| Line 648: | Line 649: | ||
|properties={{cptr}}, {{hardknockdown}} | |properties={{cptr}}, {{hardknockdown}} | ||
|description= | |description= | ||
Hitgrab that causes the opponent to be spiked back down towards the ground. It is faster than j.5S and j.2H by quite a bit, and thus is a smart choice for an air combo finisher late in combos when hitstun deterioration will make comboing into his other finishers difficult. | Hitgrab that causes the opponent to be spiked back down towards the ground. It is faster than {{Clr|4|j.5S}} and {{Clr|3|j.2H}} by quite a bit, and thus is a smart choice for an air combo finisher late in combos when hitstun deterioration will make comboing into his other finishers difficult. | ||
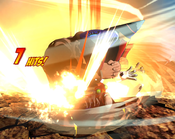
Wild Swing has the special property that the spinning | Wild Swing has the special property that the spinning cinematic part of the attack hits more times the higher Haggar is in the air when it connects - increasing damage and meter gain. There are essentially three "versions" of this move; At low altitudes it will deal 5 hits plus the final slam, at slightly below super jump height it will deal 7 hits plus a final slam that causes higher damage than normal(80,000), at higher altitudes it will deal 11 hits + final slam. | ||
Wild Swing is not subject to hitstun deterioration. | |||
}} | }} | ||
}} | }} | ||
=== Hyper Combos === | === Hyper Combos === | ||
{{MoveData | {{MoveData | ||
|image= | |image2=UMVC3_Haggar_236XX.png | ||
|caption= | |image=UMVC3_Haggar_236XX_Mash.png | ||
|caption=The blue eye glint indicates that the mashed version is being performed. | |||
|name=Rapid Fire Fist | |name=Rapid Fire Fist | ||
|input=236XX (1 bar) | |input=236XX (1 bar) | ||
|data= | |data= | ||
{{AttackData-UMVC3 | {{AttackData-UMVC3 | ||
|damage=50,000+ 20,000 x9- | |damage=50,000+ 20,000 x9-x45 + 50,000 + 100,000 | ||
|guard=Mid | |guard=Mid | ||
|startup=10+5 | |startup=10+5 | ||
| Line 676: | Line 679: | ||
Despite being listed as -1 on block, there is a very large gap between the final two hits where a blocking opponent can recover and mash out a punish, so this hyper is actually very unsafe. | Despite being listed as -1 on block, there is a very large gap between the final two hits where a blocking opponent can recover and mash out a punish, so this hyper is actually very unsafe. | ||
The third-to-last hit of Rapid Fire Fist is subject to hitstun deterioration which causes the opponent to pop out of this hyper when performed in the latter part of a combo when hitstun deterioration is at max or close to max scaling. | |||
}} | }} | ||
}} | }} | ||
| Line 681: | Line 686: | ||
{{MoveData | {{MoveData | ||
|image= | |image=UMVC3_Haggar_623XX.png | ||
|caption= | |caption= | ||
|name=Giant Haggar Press | |name=Giant Haggar Press | ||
| Line 694: | Line 699: | ||
|onhit=- | |onhit=- | ||
|onblock=-53 | |onblock=-53 | ||
|properties={{otg}}. spinout into {{hardknockdown}}, Priority: High, Durability: 10 | |properties={{otg}}. spinout into {{hardknockdown}}, Priority: High, Durability: 10, 7th hit does not scale | ||
|description= | |description= | ||
Haggar leaps into the air and then splashes down on the opponent. The falling portion of the hyper consists of multiple small hits. Under regular circumstances, these hits will rarely connect. Certain DHCs into this hyper will place the opponent airborne such that Haggar will hit them on the way down, drastically increasing this hyper's damage output. | Haggar leaps into the air and then splashes down on the opponent. The falling portion of the hyper consists of multiple small hits. Under regular circumstances, these hits will rarely connect. Certain DHCs into this hyper will place the opponent airborne such that Haggar will hit them on the way down, drastically increasing this hyper's damage output. | ||
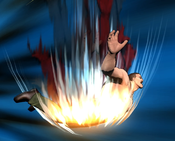
When Haggar reaches the ground, he produces a massive, screen-wide explosion that acts as a high priority projectile, hits | When Haggar reaches the ground, he produces a massive, screen-wide explosion that acts as a high priority projectile, hits OTG and deals great damage even by itself. The explosion spreads out from the point of impact over time, and so it can interfere with an opponent's attempts to punish it. | ||
}} | }} | ||
}} | }} | ||
| Line 704: | Line 709: | ||
{{MoveData | {{MoveData | ||
|image= | |image=UMVC3_Haggar_63214XX.png | ||
|image2=UMVC3_Haggar_63214XX_Cinematic.png | |||
|caption= | |caption= | ||
|name=Final Haggar Buster | |name=Final Haggar Buster | ||
| Line 710: | Line 716: | ||
|data= | |data= | ||
{{AttackData-UMVC3 | {{AttackData-UMVC3 | ||
|damage=450,000 - | |damage=450,000 - 507,000 | ||
|guard=Throw | |guard=Throw | ||
|startup=8+0 | |startup=8+0 | ||
| Line 723: | Line 729: | ||
This hyper can be "mashed" by rapidly spinning the stick during the animation, which increases the total damage slightly. | This hyper can be "mashed" by rapidly spinning the stick during the animation, which increases the total damage slightly. | ||
Ends in a | Ends in a Hard Knockdown similar to Haggar's regular command grabs, which can be followed up with {{Clr|3|2H}} in the usual way. | ||
}} | }} | ||
}} | }} | ||
| Line 730: | Line 736: | ||
{{MoveData | {{MoveData | ||
|image= | |image=UMVC3_Haggar_GroundThrow.png | ||
|caption= | |caption= | ||
|name=Ground Throw | |name=Ground Throw | ||
| Line 736: | Line 742: | ||
|data= | |data= | ||
{{AttackData-UMVC3 | {{AttackData-UMVC3 | ||
|damage= | |damage=20,000 x3~5 | ||
|guard=Throw | |guard=Throw | ||
|startup=1 | |startup=1 | ||
| Line 750: | Line 756: | ||
{{MoveData | {{MoveData | ||
|image= | |image=UMVC3_Haggar_AirThrow.png | ||
|caption= | |caption= | ||
|name=Air Throw | |name=Air Throw | ||
| Line 771: | Line 777: | ||
{{MoveData | {{MoveData | ||
|image= | |image=UMVC3_Haggar_5H.png | ||
|caption= | |caption= | ||
|name=Snap Back | |name=Snap Back | ||
| Line 792: | Line 798: | ||
{{MoveData | {{MoveData | ||
|image= | |image=UMVC3_Haggar_jM.png | ||
|caption= | |caption= | ||
|name=Hard Tag | |name=Hard Tag | ||
| Line 798: | Line 804: | ||
|data= | |data= | ||
{{AttackData-UMVC3 | {{AttackData-UMVC3 | ||
|damage= | |damage=30,000 | ||
|guard=OH | |guard=OH | ||
|startup=- | |startup=- | ||
| Line 810: | Line 816: | ||
}} | }} | ||
}} | }} | ||
== Team Position == | == Team Position == | ||
Haggar has seen major tournament success in all three team positions. As a '''point''' character, he can make liberal use of one or two projectile assists to cover his largest weakness: his trouble approaching. Haggar also has an easy time extending his combos with just about any assist, usually by calling them at some point in his 2H | Haggar has seen major tournament success in all three team positions. As a '''point''' character, he can make liberal use of one or two projectile assists to cover his largest weakness: his trouble approaching. Haggar also has an easy time extending his combos with just about any assist, usually by calling them at some point in his <code>{{Clr|3|2H}} > {{Clr|3|6H}}</code> OTG sequence, so point Haggar can rack up a long, high damage combo quite easily. When in the '''second''' or '''third''' position, Haggar provides a surprisingly large amount of utility. His highly invincible Lariat assist is a huge threat whenever it is available, discouraging an opponent from trying to press buttons out of fear of being stuffed by Haggar. His OTG-capable Giant Haggar Press is always used for THCs and can thus provide some use as a combo-extension tool for others. Haggar also makes a surprisingly strong '''Anchor''', as he can use X-Factor activation to convert a stray hit into an easy kill, and then leverage that momentum through very ambiguous oncoming mixups. | ||
| Line 836: | Line 841: | ||
'''Players to Watch:''' KaneBlueRiver (Hulk/Haggar/Sentinel), JDog (Hulk/Sent/Haggar), Tong (Hulk/Sent/Haggar) | '''Players to Watch:''' KaneBlueRiver (Hulk/Haggar/Sentinel), JDog (Hulk/Sent/Haggar), Tong (Hulk/Sent/Haggar) | ||
'''Other Players to Watch:''' Sacktap (Ghost Rider/Haggar/Arthur), RoachKing (Wesker/Haggar/Phoenix) | '''Other Players to Watch:''' Sacktap (Ghost Rider/Haggar/Arthur), RoachKing (Wesker/Haggar/Phoenix), DNOpls (Haggar/Viewtiful Joe/Arthur) | ||
== Alternate Colors == | == Alternate Colors == | ||
{{Chara-Colors-UMVC3}} | |||
== Hitspheres and Hurtspheres == | |||
{{#ev:youtube|8vBOEVY1nhk}} | |||
{{Content Box|content= | {{Content Box|content= | ||
{{Navbox-UMVC3}} | {{Navbox-UMVC3}} | ||
}} | }} | ||
Latest revision as of 09:21, 15 January 2025
Introduction
A former professional wrestler, Mike Haggar became a popular figure and was elected the mayor of Metro City. With his city overrun by crime and his daughter kidnapped, Haggar chose to personally take on the Mad Gear gang in his home series, Final Fight.
In UMvC3, Haggar is a high-damage and high-health grappler character. His gameplan revolves around making opponents block out of fear of his invincible Lariat attack or his massive pipe-swinging command normals, then scooping them with his command grabs or regular throws. Typical of characters in his archtype, Haggar is fairly slow compared to the cast as a whole, and can struggle to approach opponents with strong keepaway tools.
| Strengths | Weaknesses |
|---|---|
|
|
Move List
Assists
| Damage | Startup | Active | Recovery |
|---|---|---|---|
| 40,000 x3 | 32 | 45 | 121, 91 |
| On Hit | On Block | Guard | Properties |
| - | - | Mid | Invuln until frame 10, Converts 100,000 of Haggar's health into red health, |
|
THC Hyper: Giant Haggar Press. Haggar's obvious assist choice. Comes out quite fast and is one of the few assists with invuln frames. Useful for combo extensions, as a defensive option, or while on rushdown to discourage opponents from mashing against your pressure. The self-damage from Haggar's assist is not considered a hit and does not award either play meter nor affect damage scaling. Health is deducted on the first frame of startup. Haggar can still use Lariat as normal even if he has less than 100,000 health remaining; it will set his health to 1. | |||
| Damage | Startup | Active | Recovery |
|---|---|---|---|
| 50,000 + 80,000 | 42 | 5(12)4 | 110, 80 |
| On Hit | On Block | Guard | Properties |
| - | - | Mid | |
|
THC Hyper: Giant Haggar Press. | |||
| Damage | Startup | Active | Recovery |
|---|---|---|---|
| 110,000 | 43 | 3 | 117, 87 |
| On Hit | On Block | Guard | Properties |
| - | - | Mid | |
|
Can be special cancelled as a Cross-over Counter
| |||
Ground Normals
| Damage | Startup | Active | Recovery |
|---|---|---|---|
| 65,000 | 7 | 3 | 16 |
| On Hit | On Block | Guard | Properties |
| -2 | -3 | Mid | - |
|
- | |||
| Damage | Startup | Active | Recovery |
|---|---|---|---|
| 83,000 | 11 | 3 | 20 |
| On Hit | On Block | Guard | Properties |
| -1 | -2 | Mid | - |
|
- | |||
| Damage | Startup | Active | Recovery |
|---|---|---|---|
| 100,000 | 14 | 4 | 21 |
| On Hit | On Block | Guard | Properties |
| - | +1 | Mid | |
|
Wastes ground bounce, which in most cases can be used more efficiently in combos by another move such as Air Pipe. Generally Haggar will want to skip this button in confirms and go directly from 5M into a launcher or special. | |||
| Damage | Startup | Active | Recovery |
|---|---|---|---|
| 62,000 | 8 | 3 | 14 |
| On Hit | On Block | Guard | Properties |
| 0 | -1 | Low | - |
|
- | |||
| Damage | Startup | Active | Recovery |
|---|---|---|---|
| 80,000 | 12 | 3 | 21 |
| On Hit | On Block | Guard | Properties |
| -2 | -3 | Low | - |
|
- | |||
| Damage | Startup | Active | Recovery |
|---|---|---|---|
| 97,000 | 16 | 6 | 49 |
| On Hit | On Block | Guard | Properties |
| - | -29 | Low | |
|
Very unique variant of a 2H sweep with several potential uses. Despite reading as vary disadvantageous on block, Haggar can throw this move out fairly safely as it places him into a Hard Knockdown state, where he can only be hit by OTGs. Afterwards, Haggar performs an invincible tech roll just as he would after any other knockdown, allowing him to safely travel across the ground. Haggar can cancel this attack into 6H on hit or block, which will prevent him from entering the Hard Knockdown state. This allows Haggar to recover much faster, which is very useful in combos even if the pipe attack whiffs. 2H is not subject to hitstun deterioration. | |||
| Damage | Startup | Active | Recovery |
|---|---|---|---|
| 100,000 | 11 | 3 | 23 |
| On Hit | On Block | Guard | Properties |
| Launch | 0 | Mid | |
|
Safe launcher. Horizontal reach is not the best, so consider using 623L instead. | |||
Aerial Normals
| Damage | Startup | Active | Recovery |
|---|---|---|---|
| 58,000 | 7 | Until grounded | 1 |
| On Hit | On Block | Guard | Properties |
| +7 | +6 | OH | - |
|
Has infinite active frames until Haggar returns to the ground, at which point he recovers almost instantly. Hitbox does not completely cover Haggar but is quite large and tends to trade with other physical attacks. Can set up air resets when canceled into Backdrop (j.63214X) due to the very low hitstun late in combos. | |||
| Damage | Startup | Active | Recovery |
|---|---|---|---|
| 75,000 | 13 | Until grounded | 1 |
| On Hit | On Block | Guard | Properties |
| +19 | +18 | OH | - |
|
Has infinite active frames until Haggar returns to the ground, at which point he recovers almost instantly. Can cross-up. | |||
| Damage | Startup | Active | Recovery |
|---|---|---|---|
| 100,000 | 16 | Until grounded | 1 |
| On Hit | On Block | Guard | Properties |
| +14 | +13 | OH | - |
|
Has infinite active frames until Haggar returns to the ground, at which point he recovers almost instantly. | |||
| Damage | Startup | Active | Recovery |
|---|---|---|---|
| 110,000 | 14 | 4 | 23 |
| On Hit | On Block | Guard | Properties |
| +19 | +18 | OH | |
|
- | |||
Command Normals
| Damage | Startup | Active | Recovery |
|---|---|---|---|
| 110,000 | 19 | 3 | 24 |
| On Hit | On Block | Guard | Properties |
| +10 | +9 | Mid | |
|
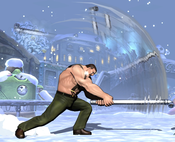
Ground throw OS, 2H follow-up, and scary button. Outside of its use as a 2H follow-up, Air Pipe is preferred over the ground version, as it allows Haggar to stay mobile. Can be kara-canceled into specials. This is mainly useful for canceling into one of Haggar's command grabs in order to punish opponents who are afraid of getting piped. Steel Pipe is not subject to hitstun deterioration. | |||
| Damage | Startup | Active | Recovery |
|---|---|---|---|
| 120,000 | 14 | 3 | 29 |
| On Hit | On Block | Guard | Properties |
| - | +18 | OH | |
Air Steel Pipe is not subject to hitstun deterioration. | |||
| Damage | Startup | Active | Recovery |
|---|---|---|---|
| 100,000 | 8 | 4 | 19 |
| On Hit | On Block | Guard | Properties |
| +16 | +15 | OH | |
|
Very fast air attack, comparable to Haggar's light normals. Mainly notable for its special properties on counterhit. Can be used as an airthrow OS instead of Pipe by inputting as j.9H or j.7H. | |||
Special Moves
| L |
Damage | Startup | Active | Recovery |
|---|---|---|---|---|
| 110,000 | 15 | 4 | 22 | |
| On Hit | On Block | Guard | Properties | |
| +10 | 0 | Mid | ||
| M |
Damage | Startup | Active | Recovery |
| 50,000 + 80,000 | 18 | 5(12)4 | 17 | |
| On Hit | On Block | Guard | Properties | |
| +16 | +5 | Mid | ||
| H |
Damage | Startup | Active | Recovery |
| 50,000 + 60,000 + 70,000 | 20 | 5(11)4(14)3 | 19 | |
| On Hit | On Block | Guard | Properties | |
| - | +5 | Mid | ||
|
Haggar advances forward with a sequence of strikes. Haggar can typically follow up any of these hits with 5L into a full combo. Because it advances forward and has an upward-reaching hitbox, this move can be used as a cross-under. Simply throwing it out on your opponent's incoming character is relatively low-risk and effective. | ||||
| L |
Damage | Startup | Active | Recovery |
|---|---|---|---|---|
| 50,000 + 100,000 | 14 | 6 | 16 | |
| On Hit | On Block | Guard | Properties | |
| Launch | +4 | Mid | ||
| M |
Damage | Startup | Active | Recovery |
| 50,000 + 100,000 | 26 | 8 | 32 | |
| On Hit | On Block | Guard | Properties | |
| Launch | - | Throw | ||
| H |
Damage | Startup | Active | Recovery |
| 50,000 + 100,000 | 30 | 14 | 43 | |
| On Hit | On Block | Guard | Properties | |
| Launch | - | Airthrow | ||
|
Haggar charges up for a moment and then lunges forward.
The different variations of this move create a simple but effective mixup opportunity as opponents who attempt to escape one option may leave themselves vulnerable to another. This special works as a Launcher, interchangeably with his 5S attack, and 623L is often preferred to 5S due to its superior reach. Just like with 5S, Haggar can superjump cancel this move if it connects. However, make sure to superjump straight up rather than up-forward or up-back, as any other direction will cause Haggar to miss the follow-up air combo. The M and H versions, despite being command throws, do not apply the grab penalty. All versions of Hoodlum Throw are not subject to hitstun deterioration. | ||||
| L |
Damage | Startup | Active | Recovery |
|---|---|---|---|---|
| 160,000 | 5 | 1 | 30 | |
| On Hit | On Block | Guard | Properties | |
| - | - | Throw | ||
| M |
Damage | Startup | Active | Recovery |
| 190,000 | 3 | 1 | 32 | |
| On Hit | On Block | Guard | Properties | |
| - | - | Throw | ||
| H |
Damage | Startup | Active | Recovery |
| 220,000 | 1 | 1 | 33 | |
| On Hit | On Block | Guard | Properties | |
| - | - | Throw | ||
|
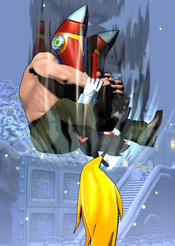
Relatively standard grounded command grab. L version is the slowest but has the longest range. H version is instant (1 frame) but has the shortest range. All versions deal significant damage, apply throw scaling, and leave the opponent in a Hard Knockdown state next to Haggar, where he can pick up with 2H. Without assists or X-Factor, Haggar's follow-up options after this grab are limited. If he has access to one of these things, he can pick up with 2H into a full combo. | ||||
| L (in air) |
Damage | Startup | Active | Recovery |
|---|---|---|---|---|
| 160,000 | 5 | 1 | 35 | |
| On Hit | On Block | Guard | Properties | |
| - | - | Airthrow | ||
| M (in air) |
Damage | Startup | Active | Recovery |
| 190,000 | 3 | - | 37 | |
| On Hit | On Block | Guard | Properties | |
| - | - | Airthrow | ||
| H (in air) |
Damage | Startup | Active | Recovery |
| 220,000 | 1 | 2 | 38 | |
| On Hit | On Block | Guard | Properties | |
| - | - | Airthrow | ||
|
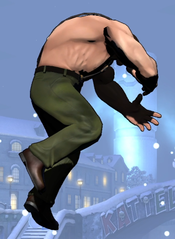
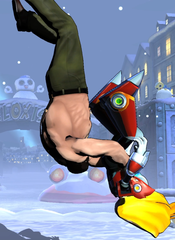
Air version of Haggar's command grab. Works mostly the same, with the L version having the most range and the H version having superior startup and damage. Haggar takes longer to recover from a successful air grab than from the ground version, which can make assist-based 2H pickups harder to time (but still possible). All versions of this special instantly halt Haggar's aerial momentum, which is his only form of aerial "mobility". Haggar can repeatedly whiff this move in order to hover in the air (up to three times, based on the aerial special limit). This is useful if there is an opponent below Haggar has activated something scary, and he would like to stall and avoid confronting it (such as Morrigan in Astral Vision, Vergil in Summoned Swords, or any character in X-Factor). | ||||
| Damage | Startup | Active | Recovery |
|---|---|---|---|
| 40,000 x3 | 8 | 45 | 28 |
| On Hit | On Block | Guard | Properties |
| - | -31 | Mid | Invuln until frame 40 (!!), Converts 100,000 of Haggar's health to red health, |
|
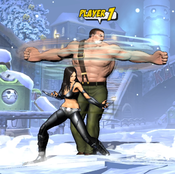
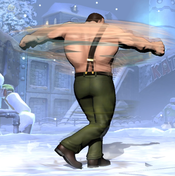
Haggar spins in place with a massive amount of invincibility. Can be used to juke certain projectiles, mash out of an opponent's offense, and generally be a threat any time Haggar is nearby and on the ground. On hit, Haggar can cancel into Rapid Fire Fist (do not mash) to convert into a basic combo, or use its invincibility to bait attempts at punishing Lariat on block. The self-damage from Haggar's assist is not considered a hit and does not award either play meter nor affect damage scaling. Health is deducted on the first frame of startup. Haggar can still use Lariat as normal even if he has less than 100,000 health remaining; it will set his health to 1. Double Lariat is not subject to hitstun deterioration. | |||
| Damage | Startup | Active | Recovery |
|---|---|---|---|
| 30,000 x5 - x11 + 50,000 | 8 | 45 | 28 |
| On Hit | On Block | Guard | Properties |
| - | -31 | Mid | |
|
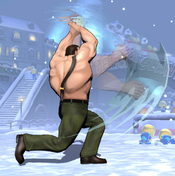
Hitgrab that causes the opponent to be spiked back down towards the ground. It is faster than j.5S and j.2H by quite a bit, and thus is a smart choice for an air combo finisher late in combos when hitstun deterioration will make comboing into his other finishers difficult. Wild Swing has the special property that the spinning cinematic part of the attack hits more times the higher Haggar is in the air when it connects - increasing damage and meter gain. There are essentially three "versions" of this move; At low altitudes it will deal 5 hits plus the final slam, at slightly below super jump height it will deal 7 hits plus a final slam that causes higher damage than normal(80,000), at higher altitudes it will deal 11 hits + final slam. Wild Swing is not subject to hitstun deterioration. | |||
Hyper Combos
| Damage | Startup | Active | Recovery |
|---|---|---|---|
| 50,000+ 20,000 x9-x45 + 50,000 + 100,000 | 10+5 | 3(21)4(35)5 | 22 |
| On Hit | On Block | Guard | Properties |
| - | -1 | Mid | Invuln until frame 20, |
|
Reversal hyper that starts a combo on hit. If this hyper is mashed during the initial hit, Haggar's eye will gleam and he will perform significantly more attacks than normal. However, these extra hits can cause the hyper combo to drop, especially if the opponent is airborne, and so it is often omitted. Despite being listed as -1 on block, there is a very large gap between the final two hits where a blocking opponent can recover and mash out a punish, so this hyper is actually very unsafe. The third-to-last hit of Rapid Fire Fist is subject to hitstun deterioration which causes the opponent to pop out of this hyper when performed in the latter part of a combo when hitstun deterioration is at max or close to max scaling. | |||
| Damage | Startup | Active | Recovery |
|---|---|---|---|
| 30,000 x7 + 200,000 | 5+15 | 16(4)44 | 30 |
| On Hit | On Block | Guard | Properties |
| - | -53 | Mid | |
|
Haggar leaps into the air and then splashes down on the opponent. The falling portion of the hyper consists of multiple small hits. Under regular circumstances, these hits will rarely connect. Certain DHCs into this hyper will place the opponent airborne such that Haggar will hit them on the way down, drastically increasing this hyper's damage output. When Haggar reaches the ground, he produces a massive, screen-wide explosion that acts as a high priority projectile, hits OTG and deals great damage even by itself. The explosion spreads out from the point of impact over time, and so it can interfere with an opponent's attempts to punish it. | |||
| Damage | Startup | Active | Recovery |
|---|---|---|---|
| 450,000 - 507,000 | 8+0 | 1 | 34 |
| On Hit | On Block | Guard | Properties |
| - | - | Throw | Invuln until frame 10, |
|
Cinematic command grab hyper. Invulnerable until active which allows it to be used as a reversal, and completely inescapable after the flash. This hyper can be "mashed" by rapidly spinning the stick during the animation, which increases the total damage slightly. Ends in a Hard Knockdown similar to Haggar's regular command grabs, which can be followed up with 2H in the usual way. | |||
Universal Mechanics
| Damage | Startup | Active | Recovery |
|---|---|---|---|
| 20,000 x3~5 | 1 | 1 | - |
| On Hit | On Block | Guard | Properties |
| - | - | Throw | |
|
Can be mashed to raise the total hit count from 3 to 5. Unmashed it deals less damage than a regular throw, fully mashed it deals slightly more. | |||
| Damage | Startup | Active | Recovery |
|---|---|---|---|
| 80,000 | 1 | 1 | - |
| On Hit | On Block | Guard | Properties |
| - | - | Airthrow |
| Damage | Startup | Active | Recovery |
|---|---|---|---|
| 50,000 | 2 | 3 | 22 |
| On Hit | On Block | Guard | Properties |
| - | +5 | Mid | Snapback |
|
Animation and hitbox based on 5H | |||
| Damage | Startup | Active | Recovery |
|---|---|---|---|
| 30,000 | - | 20 | 31 |
| On Hit | On Block | Guard | Properties |
| - | -11 | OH | |
|
- | |||
Team Position
Haggar has seen major tournament success in all three team positions. As a point character, he can make liberal use of one or two projectile assists to cover his largest weakness: his trouble approaching. Haggar also has an easy time extending his combos with just about any assist, usually by calling them at some point in his 2H > 6H OTG sequence, so point Haggar can rack up a long, high damage combo quite easily. When in the second or third position, Haggar provides a surprisingly large amount of utility. His highly invincible Lariat assist is a huge threat whenever it is available, discouraging an opponent from trying to press buttons out of fear of being stuffed by Haggar. His OTG-capable Giant Haggar Press is always used for THCs and can thus provide some use as a combo-extension tool for others. Haggar also makes a surprisingly strong Anchor, as he can use X-Factor activation to convert a stray hit into an easy kill, and then leverage that momentum through very ambiguous oncoming mixups.
Notable Synergies
Rocket Raccoon: As Rocket's Log Trap assist causes a wall bounce on hit, it is most useful for characters like Haggar, who do not have any wall-bounce moves of their own. These characters do not have to worry about a "wasted" wall bounce, and can freely use Log Trap as a neutral assist or combo extension. Also, as Haggar's Giant Press hyper has very low total duration, it has nice synergy with long-duration hypers such as Rocket's Rock 'n' Roll hyper. If Haggar performs a THC with Rocket behind him, he will recover while the minigun is still juggling the opponent, and can follow up.
Players to Watch: Paradigm (Haggar/Rocket/Arthur)
Dormammu: Dark Hole assist has a huge amount of duration and projectile durability, which can help Haggar get in on keepaway style characters. Additionally, Dorm's Stalking Flare hyper provides a lot of synergy potential. Haggar can DHC to it if a reversal Lariat or 236XX attempt fails in order to avoid punishment. Also, Dorm can call out Stalking Flare and Flame Carpet (3H) then tag in Haggar. The opponent, especially on incoming, will have to block both of Dorm's attacks, giving Haggar time to attack.
Players to Watch: Paradigm (Haggar/Dorm/Doom), Ranmasama (Haggar/Dorm/Magneto)
Hulk: Lariat assist provides a huge buff to Hulk's hit/throw mixup game, especially when called during an oncoming mixup. Lariat underneath Hulk will catch opponents trying to press buttons or dash to safety, leaving the opponent with few options. Haggar's assist can also be used to pick up after a Gamma Wave OTG. Having an easy pickup like this gives Hulk a lot of extra damage potential off airthrows, command grabs, and Gamma Charges.
Players to Watch: KaneBlueRiver (Hulk/Haggar/Sentinel), Jan (Hulk/Haggar/Shuma), JDog (Hulk/Sent/Haggar), Tong (Hulk/Sent/Haggar), Fooblat (Hulk/Haggar/Doom)
Sentinel: Sentinel Force (Charge) is one of Haggar's favorite assists. It is on screen for a very long time and has respectable durability spread over three drones, making it useful to cover his approach. Although Haggar can pick up and extend combos with most assists, the high total hitstun of Sentinel Force makes it particularly easy to do so. Also, Hyper Sentinel Force represents a safe DHC option if Haggar attempts a reversal Lariat or 236XX which fails.
Players to Watch: KaneBlueRiver (Hulk/Haggar/Sentinel), JDog (Hulk/Sent/Haggar), Tong (Hulk/Sent/Haggar)
Other Players to Watch: Sacktap (Ghost Rider/Haggar/Arthur), RoachKing (Wesker/Haggar/Phoenix), DNOpls (Haggar/Viewtiful Joe/Arthur)
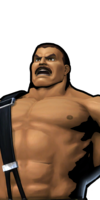
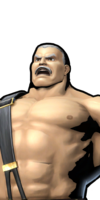
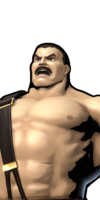
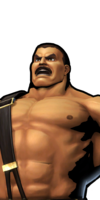
Alternate Colors
| Color 1 | Color 2 | Color 3 | Color 4 | Color 5 | Color 6 | Alt Color |
|---|---|---|---|---|---|---|

|
|

|
|
|
|

|
Hitspheres and Hurtspheres

