| (45 intermediate revisions by 11 users not shown) | |||
| Line 1: | Line 1: | ||
{{ | <div style="display: flex; flex-wrap:wrap-reverse;"> | ||
<div style="display: flex;flex-direction: column;flex:5;min-width:300px;padding: 10px;"> | |||
{{Character Subnav UMVC3|name=Spencer}} | |||
==Introduction== | |||
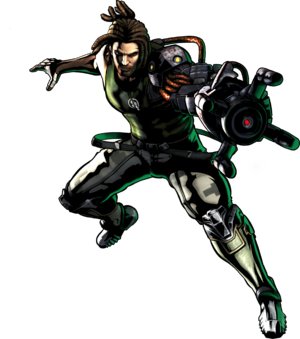
Nathan Spencer was a prototype for a program of bionics-enhanced soldiers ran by the fictional Federation, most noticeably in the form of the "Bionic Arm", a mechanical appendage that replaces Spencer's left arm and a portion of his chest. The Spencer seen in Marvel vs Capcom is based on his appearance in ''Bionic Commando (2009)'', the final game chronologically in his series. In this game, Spencer is embittered after being betrayed by his government and spending five years in prison awaiting execution. | |||
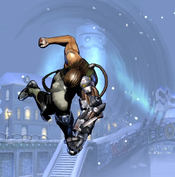
'''In UMvC3,''' Spencer has a variety of unique moves focused around the detachable grappling hook on his arm. He can use his arm to traverse the stage by swinging through the air (8X+S), or by pulling himself towards a specific direction (any other direction with X+S). He can also grab opponents and reel them in for powerful combo attacks or resets. He can even use the grappling hook as a durable projectile to plow through opponent's zoning and close the distance. Although slightly unconventional, especially in his movement, Spencer is a strong all-arounder with no glaring weaknesses. He is notable as a character for his very high damage (enabled by his "Up Grapple" attack, which does not feature damage scaling and always hits for 80,000 damage), as well as his iconic Bionic Lancer 214XX hyper. His Wire Grapple M (Slant Shot) assist uniquely provides a way for characters to restand airborne opponents, leading to many combo extensions and resets that are only possible with Spencer. | |||
=== | {{ProConTable | ||
| pros = | |||
*'''Heavy Hitter:''' Enormous damage potential through multiple combo extension options. Spencer's "Up Grapple" (236H > L) deals an flat 80,000 damage every time it is used in a combo, ignoring damage scaling. Spencer can also combo after both of his hypers, allowing him to double hyper for higher damage, or add especially powerful extensions to his teammates' combos via DHC. | |||
*'''Aggressive Play:''' Oppressive aerial normals allow Spencer to bully opponents with close-range offense. | |||
*'''Great Mobility:''' Incredible grounded dash speed and Spencer's unique Swing Wire (X+S) movement tool give him very good mobility. | |||
*'''"BIONIC... ARM!!!":''' Powerful reversal hyper in Bionic Lancer (214XX) that can punish assist calls and grounded attacks on reaction for huge damage. Will almost always cancel or counter any super in the game. | |||
*'''Good Anti-Air Assist:''' Supports teammates with his unique "Slant Shot" assist, which restands aerial opponents on hit. This gives Spencer's teammates access to combos and resets not possible with any other character. | |||
| cons = | |||
*'''Stiff Aerial Movement:''' Swing Wire can not be canceled into attacks midway the way that standard airdashes can be. This makes Spencer's aerial movement more committal than other characters. He is infamously vulnerable to being thrown when trying to approach without assist coverage. | |||
*'''Weak Zoning:''' Projectile options have mediocre durability and hold Spencer in place for the duration. Spencer is vulnerable to being zoned out by characters that can throw projectiles from the air. | |||
*'''Somewhat Niche Assist:''' Slant Shot assist is primarily used for combos and mixups and even then only works especially well for a few characters, it doesn't have any real function in neutral. | |||
}} | |||
=== Unique Movement === | |||
Spencer has a unique alternative to a traditional airdash with Swing Wire (X+S) which is more commonly called "Zip". Zip has distinct strengths and weaknesses when compared to a traditional airdash, it is more committal but goes further, has a hitbox where the zip contacts but is often minus on block. As such it is typically paired with a long range horizontal assist to cover for these weaknesses. Regardless, when combined with Spencer's unusually fast grounded movement and fast buttons, Zip makes Spencer a slippery opponent to fight. | |||
</div> | |||
<div style="display: flex;flex-direction: column;flex:2;min-width:350px;padding: 10px;">{{UMVC3_Character_Query|reversals=214XX}}</div></div> | |||
== Move List == | |||
=== Assists === | |||
{{ | {{MoveData | ||
|image=UMVC3_Spencer_AssistA.png | |||
|image2=UMVC3_Spencer_AssistA_2nd.png | |||
|caption= | |||
|name=Wire Grapple (H. Shot) | |||
|input=Assist A | |||
|data= | |||
{{AttackData-UMVC3 | |||
|damage=20,000 | |||
|guard=Mid | |||
|startup=34 | |||
|active=17 | |||
|recovery=117, 87 | |||
|onhit=- | |||
|onblock=- | |||
|properties={{cptr}}, {{hardknockdown}}, Priority: Low, Durability: 1 | |||
|description= | |||
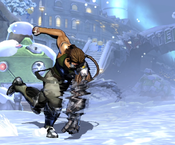
THC Hyper: Bionic Lancer. Spencer shoots his grappling hook directly forward. If it hits an opponent, they are reeled in and placed on the ground in front of Spencer, in a Hard Knockdown state. | |||
}} | |||
}} | }} | ||
== | {{MoveData | ||
|image=UMVC3_Spencer_236M.png | |||
|caption= | |||
|name=Wire Grapple (Slant Shot) | |||
|input=Assist B | |||
|data= | |||
{{AttackData-UMVC3 | |||
|damage=20,000 | |||
|guard=Mid | |||
|startup=34 | |||
|active=17 | |||
|recovery=117, 87 | |||
|onhit=- | |||
|onblock=- | |||
|properties={{cptr}}, Restand, Priority: Low, Durability: 1 | |||
|description= | |||
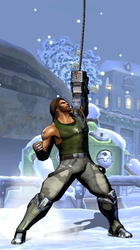
THC Hyper: Bionic Lancer. Recommended assist. Spencer shoots his grappling hook at an up-forward angle. If it hits an opponent, they are reeled in and placed standing directly in front of Spencer. | |||
This attack is one of the only attacks in the game that restands - meaning it forces an airborne opponent back to a grounded state mid-combo. This means Slant Shot provides combo and reset opportunities which no other assist in the game can offer. Many attacks in UMvC3 have special properties if they hit a grounded opponent, but not an airborne one. For example, Nova's Nova Strike (214H) and Dr. Strange's Impact Palm (6H) cause a Crumple state if they hit a grounded opponent. Slant Shot gives these characters reliable, consistent ways to convert most hits into their Crumple attacks. | |||
Most of the cast can set up a simple left/right oncoming mixup by calling Slant Shot assist and dashing underneath the opponent as they enter the stage. On hit, Spencer will automatically pull the opponent down for an easy follow-up with the point character. | |||
}} | |||
}} | |||
=== | {{MoveData | ||
|image=UMVC3_Spencer_236S.png | |||
|caption= | |||
|name=Armor Piercer | |||
|input=Assist Y | |||
|data= | |||
{{AttackData-UMVC3 | |||
|damage=130,000 | |||
|guard=Mid | |||
|startup=45 | |||
|active=4 | |||
|recovery=134, 104 | |||
|onhit=- | |||
|onblock=- | |||
|properties={{wallbounce}} | |||
|description= | |||
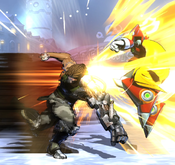
THC Hyper: Bionic Lancer. Spencer performs a slow, close-range strike. The attack causes a Wall Bounce on hit. Unlike the point character version, Armor Piercer assist does not have a "proximity" version, it always uses the slower, less damaging variant. | |||
Despite the name, Armor Piercer does not have any special properties against armored attacks, and in fact is particularly bad at dealing with them due to hitting only once. | |||
}} | |||
}} | |||
== | === Ground Normals === | ||
{{MoveData | |||
|image=UMVC3_Spencer_5L.png | |||
|caption= | |||
|name=Stand Light | |||
|input=5L | |||
|data= | |||
{{AttackData-UMVC3 | |||
|damage=48,000 | |||
|guard=Mid | |||
|startup=6 | |||
|active=3 | |||
|recovery=11 | |||
|onhit=0 | |||
|onblock=-1 | |||
|properties={{rpdfire}} | |||
|description= | |||
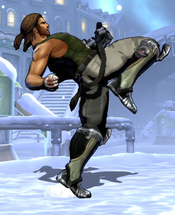
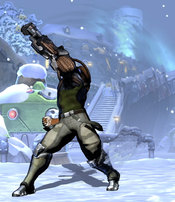
Quick jab, and Spencer's fastest normal (236S Armor Piercer is faster if at very close range). | |||
Can work as a situational anti-air using its Rapid Fire property, similar to other high-angled jabs like Magneto, Nova, and Captain America. Mashing 5L can catch an opponent near jump height, or help catch after an awkward air-to-air hit. Spencer can chain 5L several times into a row, giving himself time to confirm into a 5S launcher. | |||
}} | |||
}} | |||
{{MoveData | |||
|image=UMVC3_Spencer_5M.png | |||
|caption= | |||
|name=Stand Medium | |||
|input=5M | |||
|data= | |||
{{AttackData-UMVC3 | |||
|damage=67,000 | |||
|guard=Mid | |||
|startup=9 | |||
|active=3 | |||
|recovery=22 | |||
|onhit=-6 | |||
|onblock=-7 | |||
|properties=- | |||
|description= | |||
- | |||
}} | |||
}} | |||
{{MoveData | |||
|image=UMVC3_Spencer_5H.png | |||
|caption= | |||
|name=Stand Heavy | |||
|input=5H | |||
|data= | |||
{{AttackData-UMVC3 | |||
|damage=88,000 | |||
|guard=Mid | |||
|startup=12 | |||
|active=3 | |||
|recovery=21 | |||
|onhit=0 | |||
|onblock=-1 | |||
|properties=- | |||
|description= | |||
- | |||
}} | |||
}} | |||
{{MoveData | |||
|image=UMVC3_Spencer_2L.png | |||
|caption= | |||
|name=Crouching Light | |||
|input=2L | |||
|data= | |||
{{AttackData-UMVC3 | |||
|damage=45,000 | |||
|guard=Low | |||
|startup=7 | |||
|active=3 | |||
|recovery=10 | |||
|onhit=+1 | |||
|onblock=- | |||
|properties=- | |||
|description= | |||
Slower than 5L, but hits low. Basic offensive tool for catching opponents trying to Chicken Block out of your pressure, and to form simple High/Low mixups alongside Spencer's 6H overhead attack. | |||
}} | |||
}} | |||
{{MoveData | |||
|image=UMVC3_Spencer_2M.png | |||
|caption= | |||
|name=Crouching Medium | |||
|input=2M | |||
|data= | |||
{{AttackData-UMVC3 | |||
|damage=70,000 | |||
|guard=Mid | |||
|startup=8 | |||
|active=3 | |||
|recovery=21 | |||
|onhit=-5 | |||
|onblock=-6 | |||
|properties= | |||
|description= | |||
Note: not a low. Spencer punches upwards with an anti-air angle. | |||
}} | |||
}} | |||
{{MoveData | |||
|image=UMVC3_Spencer_2H.png | |||
|caption= | |||
|name=Crouching Heavy | |||
|input=2H | |||
|data= | |||
{{AttackData-UMVC3 | |||
|damage=80,000 | |||
|guard=Low | |||
|startup=13 | |||
|active=4 | |||
|recovery=19 | |||
|onhit=- | |||
|onblock=0 | |||
|properties={{strk}}, {{softknockdown}} | |||
|description= | |||
Spencer advances forward approximately half a character length while sweeping the ground in front of him. Has a very good total range when combined with the distance it moves Spencer forward, helping to make hitconfirms more consistent. Also gets grounded opponents into the air, which is a requirement for most of Spencer's zip loops. | |||
}} | |||
}} | |||
{{MoveData | |||
|image=UMVC3_Spencer_5S.png | |||
|caption= | |||
|name=Launcher/Special | |||
|input=S | |||
|data= | |||
{{AttackData-UMVC3 | |||
|damage=90,000 | |||
|guard=Mid | |||
|startup=10 | |||
|active=4 | |||
|recovery=26 | |||
|onhit=Launch | |||
|onblock=-7 | |||
|properties={{launch}}, {{nocancel}} | |||
|description= | |||
- | |||
}} | |||
}} | |||
=== Aerial Normals === | |||
{{MoveData | |||
|image=UMVC3_Spencer_jL.png | |||
|caption= | |||
|name=Jumping Light | |||
|input=j.5L | |||
|data= | |||
{{AttackData-UMVC3 | |||
|damage=45,000 | |||
|guard=OH | |||
|startup=6 | |||
|active=3 | |||
|recovery=15 | |||
|onhit=+8 | |||
|onblock=+6 | |||
|properties=- | |||
|description= | |||
- | |||
}} | |||
}} | |||
{{MoveData | |||
|image=UMVC3_Spencer_jM.png | |||
|caption= | |||
|name=Jumping Medium | |||
|input=j.5M | |||
|data= | |||
{{AttackData-UMVC3 | |||
|damage=63,000 | |||
|guard=OH | |||
|startup=8 | |||
|active=5 | |||
|recovery=20 | |||
|onhit=+11 | |||
|onblock=+10 | |||
|properties= | |||
|description= | |||
- | |||
}} | |||
}} | |||
=== | {{MoveData | ||
|image=UMVC3_Spencer_jH.png | |||
|caption= | |||
|name=Jumping Heavy | |||
|input=j.5H | |||
|data= | |||
{{AttackData-UMVC3 | |||
|damage=83,000 | |||
|guard=OH | |||
|startup=10 | |||
|active=5 | |||
|recovery=21 | |||
|onhit=+16 | |||
|onblock=+17 | |||
|properties= | |||
|description= | |||
Upward angled swipe, very good air to air button due to it's massive hitbox and can be converted off of quite consistently through the use of jS and Zips (X+S) | |||
}} | |||
}} | |||
{{ | {{MoveData | ||
|image=UMVC3_Spencer_jS.png | |||
|caption= | |||
|name=Jumping Special | |||
|input=j.5S | |||
|data= | |||
{{AttackData-UMVC3 | |||
|damage=88,000 | |||
|guard=OH | |||
|startup=10 | |||
|active=5 | |||
|recovery=21 | |||
|onhit=+16 | |||
|onblock=+14 | |||
|properties={{aircombofinisher}} | |||
|description= | |||
Downward angled punch. Good choice to attack an opponent when approaching with Swing Wire (X+S) off the ground. Can hit fairly easily as a cross-up. | |||
}} | |||
}} | }} | ||
=== | === Command Normals === | ||
{{MoveData | |||
|image=UMVC3_Spencer_6H.png | |||
|caption= | |||
|name=Right Hook | |||
|input=6H | |||
|data= | |||
{{AttackData-UMVC3 | |||
|damage=90,000 | |||
|guard=OH | |||
|startup=21 | |||
|active=3 | |||
|recovery=22 | |||
|onhit=+4 | |||
|onblock=-2 | |||
|properties={{nocancel}} | |||
|description= | |||
Spencer delivers a large, overhead haymaker punch. He advances forward about 1.5 character lengths during the startup, and another full character length during the actual punch, moving him very far forward in total. | |||
6H is not special or hyper cancelable, and although it is plus on hit, it is not advantageous enough for Spencer to link normal attacks afterwards. However, it almost always leaves Spencer close enough to activate the quickest proximity version of Armor Piercer (236S), which ''is'' fast enough to link afterwards. <code><nowiki>6H, 236S</nowiki></code> is a simple string that converts into a solid combo via Armor Piercer's Wall Bounce if the opponent does not react to the overhead. It is a decent tool to throw out, especially in X-Factor, where the 21f startup will be shortened and harder to react to. | |||
}} | |||
}} | |||
=== Special Moves === | === Special Moves === | ||
===Hyper | {{MoveData | ||
|image=UMVC3_Spencer_236L.png | |||
|caption=L Version | |||
|image2=UMVC3_Spencer_236M.png | |||
|caption2=M Version | |||
|image3=UMVC3_Spencer_236H.png | |||
|caption3=H Version | |||
|name=Wire Grapple | |||
|input=236X | |||
|data= | |||
{{AttackData-UMVC3 | |||
|damage=30,000 | |||
|guard=Mid | |||
|startup=10 | |||
|active=22 | |||
|recovery=51 | |||
|onhit=-33 | |||
|onblock=-13 | |||
|properties=Priority: Low, Durability: 5 | |||
|description= | |||
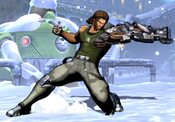
Spencer fires his grappling hook as a projectile, with average durability. Button strength determines the angle of the grapple: | |||
*L version is shot directly horizontally forwards. | |||
*M version is shot at an up-forwards, anti-air angle. | |||
*H version is shot directly upwards into the air. | |||
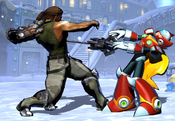
If Wire Grapple hits an opponent, the grappling hook will cling to their body for a short period. During this time, Spencer can perform one of three special follow-up attacks by pressing L, M or H (detailed below). These follow-up attacks are what elevate Wire Grapple from a mediocre projectile to a very powerful combo starter and/or extender. | |||
}} | |||
}} | |||
{{MoveData | |||
|image=UMVC3_Spencer_236XL.png | |||
|caption= | |||
|name=Reel-In Punch | |||
|input=(on hit) 236X > L | |||
|data= | |||
{{AttackData-UMVC3 | |||
|damage=80,000 | |||
|guard=- | |||
|startup=- | |||
|active=- | |||
|recovery=- | |||
|onhit=- | |||
|onblock=- | |||
|properties={{hardknockdown}} | |||
|description= | |||
Spencer forcefully drags the opponent to the space directly in front of himself, regardless of where they were beforehand, and delivers a large punch which causes a Hard Knockdown. This is the most common follow-up and a primary combo tool, since Spencer can follow up the Hard Knockdown from almost any range with (dash up) Air Wire Grapple OTG. | |||
'''[Important]''' When done from Spencer's H "Up Grapple" specifically, Reel-In Punch ignores damage scaling, and always hits for a full 80,000 damage. This is usually referred to as "Spencer Up-Grapple" or just "80k". 236H > L is therefore a massive contributor to Spencer's damage output, and most of his optimized combos are routed to use this attack as many times as possible, dealing unscaled damage each time. | |||
}} | |||
}} | |||
{{MoveData | |||
|image=UMVC3_Spencer_236XM.png | |||
|caption= | |||
|name=Zip Kick | |||
|input=(on hit) 236X > M | |||
|data= | |||
{{AttackData-UMVC3 | |||
|damage=100,000 | |||
|guard=- | |||
|startup=- | |||
|active=- | |||
|recovery=- | |||
|onhit=- | |||
|onblock=- | |||
|properties={{wallbounce}} | |||
|description= | |||
Spencer pulls both the opponent and himself towards each other. When they collide, Spencer delivers a kick which causes a Wall Bounce. | |||
The Wall Bounce may be tempting to use for combo extensions, but keep in mind that Air Wire Grapple automatically follows up with Zip Kick, whereas the grounded grapple gives you a choice of follow-up. Therefore, it is usually better to choose the L follow-up off grounded grapple, and save your one Wall Bounce for later in the combo when you have no other choice. <code><nowiki> 236X > L, short dash, j.2369M </nowiki></code> is basically the same effect as chaining directly into Zip Kick off the initial grapple, but with some extra damage and much more corner carry. | |||
}} | |||
}} | |||
{{MoveData | |||
|image=UMVC3_Spencer_236XH.png | |||
|caption= | |||
|name=Come 'ere! | |||
|input=(on hit) 236X > H | |||
|data= | |||
{{AttackData-UMVC3 | |||
|damage=- | |||
|guard=- | |||
|startup=- | |||
|active=- | |||
|recovery=- | |||
|onhit=+2 | |||
|onblock=- | |||
|properties=Restand | |||
|description= | |||
Spencer pulls the enemy towards him, similarly to the L follow-up, but does not deliver the finishing punch. Instead, he leaves the standing on the ground immediately in front of him, with Spencer being at a slight frame advantage. Notably, this move restands opponents who were previously airborne, and is one of the only attacks in the game which can do this. | |||
H follow-up is primarily a reset tool, especially against opponents who are expecting to sit through a long Spencer combo. You can fake out using another extension, then throw the opponent with Jaw Breaker (623X) or otherwise attack them to reset and start another full combo instead. | |||
It is also possible to use H follow-up in combos when paired with certain longer-lasting assists. If an assist is called before Spencer uses Wire Grapple, he can pull them into the path of the assist, the recover and continue the combo afterwards. Doctor Strange's Eye of Agamotto and Bolts of Balthakk assists are examples of assists which can work for this type of extension, since they last a fairly long time and deal a good amount of hitstun on standing opponents. | |||
}} | |||
}} | |||
{{MoveData | |||
|image=UMVC3_Spencer_j236L.png | |||
|image2=UMVC3_Spencer_j236M.png | |||
|image3=UMVC3_Spencer_j236H.png | |||
|caption=L Version | |||
|caption2=M Version | |||
|caption3=H Version | |||
|name=Air Wire Grapple | |||
|input=j.236X | |||
|data= | |||
{{AttackData-UMVC3 | |||
|damage=30,000 + 100,000 | |||
|guard=Mid | |||
|startup=13 | |||
|active=16 | |||
|recovery=Until grounded | |||
|onhit=- | |||
|onblock=- | |||
|properties={{otg}}, {{wallbounce}}, Priority: Low, Durability: 5 | |||
|description= | |||
Spencer fires his grappling hook as a projectile, with average durability. Button strength determines the angle of the grapple, mirroring the grounded version vertically: | |||
*L version is fired directly horizontally forwards. | |||
*M version is fired at a down-forward angle, and can be used as a fast OTG midscreen. | |||
*H version is fired directly downwards toward the ground, and works well as a fast OTG in the corner. | |||
Unlike the grounded version of Wire Grapple, Spencer does not get a choice of follow-ups upon hitting the opponent. Instead, Spencer will automatically use the Zip Kick follow-up on hit, causing a Wall Bounce. | |||
If Wall Bounce has already been used earlier in the combo, the opponent will simply fall down for a Soft Knockdown. This prevents any additional combo extensions, but does have good oki potential in the corner. Cornered j.236H Air Grapple causes Spencer to fall on the recovering opponent with an auto-timed safejump using j.5M. [https://youtu.be/p3MnQ0ZZzHg?t=29 You can see it at this video timestamp.] Alternatively, Spencer can simply land and catch the opponent with a kara-Jaw Breaker (5H~623L) to reset them that way. | |||
}} | |||
}} | |||
{{MoveData | |||
|image=UMVC3_Spencer_623L.png | |||
|caption=L/M Version (Ground Throw) | |||
|image2=UMVC3_Spencer_623H.png | |||
|caption2=H Version (Anti-Air Throw) | |||
|image3=UMVC3_Spencer_623X_Grab.png | |||
|name=Jaw Breaker | |||
|input=623X | |||
|data= | |||
{{AttackData-UMVC3 | |||
|damage=35,000 | |||
|guard=Throw / Airthrow | |||
|startup=5 | |||
|active=1 | |||
|recovery=31 | |||
|onhit=- | |||
|onblock=- | |||
|properties={{hardknockdown}} | |||
|description= | |||
Command grab special. L and M versions are basically identical, working as grounded throws against close-range opponents. H version is an anti-air throw that catches airborne opponents. | |||
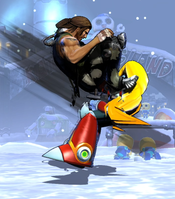
On a successful grab with any version, Spencer knocks the opponent upwards into the air, and they then begin to fall back down for a Hard Knockdown directly in front of him. Spencer can catch the opponent before they reach the ground with 5L or 5M to start a combo. Spencer also has a special follow-up attack to Jaw Breaker - Smash Kick / Critical Smash - done by pressing H after landing the attack (see below). However, Smash Kick consumes Spencer's Wall Bounce, and so it is usually better to manually follow up with a normal attack. | |||
Jaw Breaker can be kara-canceled with 5H to greatly extend its otherwise poor range: 5H~623X. This makes it much more practical to use for resets. You can see some examples of how to utilize the extra range in [https://youtu.be/h47KzmeI_ck this video]. | |||
}} | |||
}} | |||
{{MoveData | |||
|image=UMVC3_Spencer_623XH.png | |||
|caption= | |||
|name=Smash Kick / Critical Smash | |||
|input=623X > H | |||
|data= | |||
{{AttackData-UMVC3 | |||
|damage=150,000 / 250,000 | |||
|guard=- | |||
|startup=- | |||
|active=- | |||
|recovery=- | |||
|onhit=- | |||
|onblock=- | |||
|properties={{wallbounce}} | |||
|description= | |||
Spencer leaps up in pursuit of the opponent he tossed with Jaw Breaker, then delivers a kick which Wall Bounces the opponent. Although this causes a cinematic camera-zooming effect, this pursuit attack is not a fixed animation the way that throws are, and Spencer can be hit out of the attack by assists or other delayed projectiles on the way up. | |||
There are two windows to follow-up with {{clr|H|H}} after Jaw Breaker. The later window results in Smash Kick and the earlier, tighter window results in Critical Smash. Critical Smash deals more damage and causes a larger Wall Bounce which is easier to follow up, but functions otherwise the exact same way. | |||
Neither Critical Smash nor Smash Kick are commonly used, firstly since Jaw Breaker is not much better than Spencer's regular throws, and because he can combo after Jaw Breaker with normal attacks anyway, preserving Wall Bounce for later in the combo. | |||
* Smash Kick Window: Frames 22-26 after Jaw Breaker connects | |||
* Critical Smash Window: Frame 27 after Jaw Breaker connects | |||
* Smash Kick Window: Frames 28-41 after Jaw Breaker connects | |||
}} | |||
}} | |||
{{MoveData | |||
|image=UMVC3_Spencer_236S_Startup.png | |||
|caption=While in this stance, Spencer has a "trigger" hitbox expand in front of him. | |||
|image2=UMVC3_Spencer_236S.png | |||
|caption2="So long, sucker!" | |||
|name=Armor Piercer | |||
|input=236S | |||
|data= | |||
{{AttackData-UMVC3 | |||
|damage=180,000 / 150,000 / 130,000 | |||
|guard=Mid | |||
|startup=3 ~ 8 / 21 | |||
|active=6(12)4 | |||
|recovery=41 | |||
|onhit=- | |||
|onblock=-22 | |||
|properties={{projnull}}, {{wallbounce}} | |||
|description= | |||
Short range, high-damage single punch with a unique startup property. Causes a Wall Bounce on hit. Armor Piercer will destroy low Priority projectiles that its active frames touch, but this is impractical to do. Despite the name, this move does not break Armored attacks, and in fact is quite bad at dealing with them. | |||
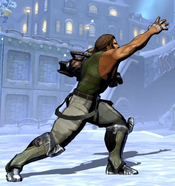
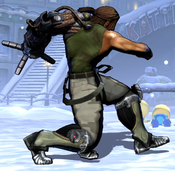
Starting on frame three, this move creates an invisible "proximity" hitbox in front of Spencer. If an opponent is within this hitbox at any point, Spencer performs the actual attack on the very next frame. Consequently, the fastest this move can hit is on frame 4. | |||
Every frame that an opponent is not within proximity, the detection hitbox grows slightly larger, up until frame 8. Armor Piercer also deals progressively less damage as these frames progress, dropping down one damage stage every two frames until it "only" does 130,000. After frame 8, if proximity is still not triggered, Armor Piercer changes into the "slow" version. Slow Armor Piercer is a standard attack that becomes active on frame 21 and hits for 130,000. | |||
Armor Piercer is mainly notable for being Spencer's fastest single attack, even beating out his Light normals. This gives Spencer a handful of combo options that would not otherwise be possible, provided he is close enough to the opponent to activate the fastest version of Piercer. The most standard use of this move is to link after Spencer's 6H overhead, which has no follow-up options other than a close range 236S. | |||
If Spencer performs his Up Grapple (236H > L) in the corner, Armor Piercer is also fast enough to link afterwards for a little bit of extra damage before canceling into a hyper. This works on the following characters: | |||
'''Morrigan, Felicia, Hsien-Ko, Firebrand, Arthur, Zero, Tron, Frank West, Akuma, Phoenix Wright, Vergil, Viewtiful Joe, Amaterasu, Rocket Raccoon, Shuma, Wolverine, X-23, & MODOK''' | |||
[https://www.reddit.com/r/MvC3/comments/2k57zb/armor_piercer_after_up_grapple/ Discussed here at r/MVC3] | |||
}} | |||
}} | |||
{{MoveData | |||
|image=UMVC3_Spencer_j236S.png | |||
|image2=UMVC3_Spencer_j236S_2nd.png | |||
|caption= | |||
|name=Bionic Bomber | |||
|input=j.236S | |||
|data= | |||
{{AttackData-UMVC3 | |||
|damage=70,000 + 80,000 | |||
|guard=Mid | |||
|startup=35 | |||
|active=Until grounded | |||
|recovery=22 | |||
|onhit=- | |||
|onblock=+3 | |||
|properties={{otg}} (both hits), {{strk}}(both hits), {{groundbounce}} (first hit); Priority: Low, Durability: 10 (second hit) | |||
|description= | |||
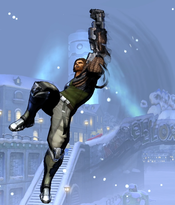
Spencer pauses in the air, then starts crashing straight down as an active hitbox. When Spencer reaches the ground, he creates a shockwave which destroys nearby projectiles, Both the falling knee drop and the shockwave upon landing can hit OTG. As long as hitstun deterioration has not progressed too far, Spencer can link 5M after the OTG to solo relaunch. Otherwise, he can hyper cancel upon landing. | |||
Against the majority of the cast, the standard Bomber relaunch is: <code><nowiki> j.236S, land, 5M > 5H > 5S sjc. 2369H > L, etc. </nowiki></code>. This does not work on Wolverine and Rocket Raccoon. To modify the relaunch on those characters, perform the combo normally, but skip 5H. You can also just skip 5H against everyone if you do not want to remember this. | |||
Bionic Bomber is useful as an alternate OTG tool for Spencer. It is slower and more awkward to combo into than Air Wire Grapple, but does not need Wall Bounce to relaunch, allowing Spencer to save it for later in the combo. Outside of its use in combos, Bomber is very slow, which makes it difficult to use. The first hit of Bomber use Ground Bounce for the launch, however if spaced properly only the second hit will connect, still launching while saving ground bounce. | |||
}} | |||
}} | |||
{{MoveData | |||
|image=UMVC3_Spencer_XS.png | |||
|caption=By default, Spencer zips directly forward. | |||
|image2=UMVC3_Spencer_1XS.png | |||
|caption2=Swing Wire can be aimed in any direction. | |||
|name=Swing Wire | |||
|input=X+S | |||
|data= | |||
{{AttackData-UMVC3 | |||
|damage=10,000 | |||
|guard=Mid | |||
|startup=11 | |||
|active=Until contact | |||
|recovery=- | |||
|onhit=-2 (ground) / +9 (air) | |||
|onblock=-3 (ground) / +8 (air) | |||
|properties={{airok}}, aimable, Priority: Low, Durability: 5? | |||
|description= | |||
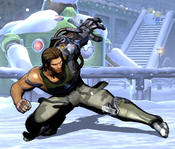
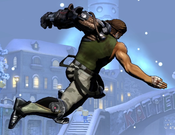
Spencer shoots his arm as a grappling hook, similarly to 236X. This attack can be aimed by holding the stick in a direction while inputting the move. | |||
*On the ground, Swing Wire can be aimed in any non-downward direction, so Back, Up-Back, Up, Up-Forward, and Forward. 5X+S will default to aiming forward. | |||
*In the air, Swing Wire can be aimed in any non-upward direction (upward directions will perform Swing Grapple instead), so Back, Down-Back, Down, Down-Forward, and Forward. j.5X+S will default to aiming forward. | |||
When the grappling hook makes contact with the ground, the wall, the "ceiling" (above the camera) or an opponent, Spencer will pull himself towards his target. This means Swing Wire is Spencer's primary mobility tool, especially in the air. When Spencer nears his approach target, he retracts his grappling hook and is free to act normally, but he can not attack or block while zipping. | |||
A standard approach option for Spencer is to call an assist with good horizontal reach - such as a beam or Akuma's tatsu assist - then jump and perform forward Swing Wire to zip across the stage. As the assist concludes, Spencer can finish his zip and attack with a falling j.5S to start his offense. | |||
Air Swing Wire is has surprisingly good frame advantage and can also be used in combo extensions. <code><nowiki>j.5M > j.5M > j.5H xx 6X+S, 6X+S, j.5S</nowiki></code> is a simple extension to the basic air chain that gives a little bit of additional corner carry and meter build at the expense of some damage scaling. Air Swing Wire is also commonly used in extensions near the corner, such as after using Air Wire Grapple's wall bounce to bring Spencer and his opponent back down to the ground. | |||
}} | |||
}} | |||
{{MoveData | |||
|image=UMVC3_Spencer_j8XS.png | |||
|caption= | |||
|name=Swing Grapple | |||
|input=j.8X+S | |||
|data= | |||
{{AttackData-UMVC3 | |||
|damage=- | |||
|guard=- | |||
|startup=- | |||
|active=- | |||
|recovery=- | |||
|onhit=- | |||
|onblock=- | |||
|properties= | |||
|description= | |||
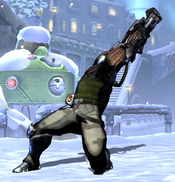
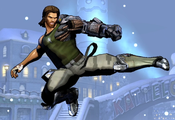
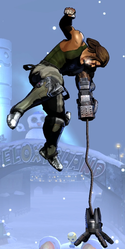
Spencer shoots his grapple into the air, clinging to some invisible ceiling, then uses it to swing across the stage. This functions like an airdash, and is very similar to Spider-Man's regular airdash. He can cancel the swing into normal attacks and j.5S mid-way through the animation, unlike Swing Wire. Can also be input as j.7X+S or j.9X+S. | |||
Spencer can only swing forwards with Swing Grapple, not backwards. Even inputting as j.7X+S will still cause a forward swing. | |||
}} | |||
}} | |||
=== Hyper Combos === | |||
{{MoveData | |||
|image=UMVC3_Spencer_236XX.png | |||
|image2=UMVC3_Spencer_236XX_Cinematic.png | |||
|caption= | |||
|name=Bionic Maneuvers | |||
|input=236XX (1 bar) | |||
|data= | |||
{{AttackData-UMVC3 | |||
|damage=20,000 (unscaled) + 30,000 + 43,000 + 60,000 + 80,000 + 130,000 (304,500 total) | |||
|guard=Mid | |||
|startup=18+2 | |||
|active=22 | |||
|recovery=23 | |||
|onhit=- | |||
|onblock=-22 | |||
|properties={{hardknockdown}}, Priority: High, Durability: 5(?) | |||
|description= | |||
Cinematic Level 1 hyper. Spencer fires his grappling hook directly forward, similar to L Wire Grapple. If it hits the opponent's point character, they are pulled into a cinematic where Spencer repeatedly beats them up, ending in a large punch that causes a Hard Knockdown. | |||
This hyper is particularly powerful for DHCs in either direction, as its cinematic nature means that it standardizes the opponent's height so long as the initial projectile connects. Maneuvers can be easily DHC'd into almost any hyper either just before or during the final hit, and any hyper that causes a Soft or Hard Knockdown (and several that don't) can DHC into this hyper quite easily as well. | |||
Spencer recovers from this hyper quickly enough that, if done near the corner, he can follow up with a Tiger Knee Air Wire Grapple (j.2369M or j.2369H). This is a big part of what allows Spencer to act as a damage engine for other characters. The point character can land a short combo that carries to the corner, hyper and DHC to Spencer. Spencer can then OTG, use the Wall Bounce of Air Wire Grapple to go into his own combo, use Up Grapples to circumvent damage scaling, and eventually finish with a third hyper if needed. This is especially powerful for allowing many point characters to kill off a throw. Throws apply very heavy damage scaling to the throwing character, but not to their teammates, so Spencer can easily secure the kill once brought in. | |||
Unlike most Hypers, the first hit of this move actually builds a very small amount of meter. | |||
}} | |||
}} | |||
{{MoveData | |||
|image=UMVC3_Spencer_214XX.png | |||
|caption= | |||
|name=Bionic Lancer | |||
|subtitle=Bionic ARRRRRRRRRRRRRRRRRM | |||
|input=214XX (1 bar) | |||
|data= | |||
{{AttackData-UMVC3 | |||
|damage=250,000 | |||
|guard=Mid | |||
|startup=4+3 | |||
|active=10 | |||
|recovery=50 | |||
|onhit=- | |||
|onblock=-37 | |||
|properties=Invuln until frame 11, spinout into {{hardknockdown}} | |||
|description= | |||
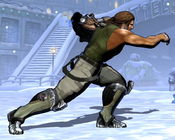
Spencer's most iconic move. He dashes forward with a massive, screen-traveling haymaker that causes a single, heavy hit the sends any opponents flying into the air. | |||
While Lancer is not necessarily the most invincible hyper in the game, it has extremely fast startup and quickly covers a large chunk of the stage, making it a very terrifying reversal that Spencer's opponents must respect if he is on the ground and has meter. Spencer can easily react to assist calls or slower attacks from the point character with Lancer to catch them, even from far away. If Spencer has X-Factor available, then Lancer > X-Factor > Bionic Bomber > Lancer is enough damage to delete most assist characters, which is expensive but can completely dismantle an opponent's team composition by sniping an important character. | |||
If Spencer throws out a Wire Grapple or Jaw Breaker and whiffs, the threat of canceling into Lancer can be enough to discourage opponents from trying to punish him. | |||
Spencer can follow up Bionic Lancer with a Tiger Knee Air Wire Grapple, in basically the same way that he can after Bionic Maneuvers. | |||
Because of Lancer's relatively short total duration, it can be useful for THC synergies. With Spencer on point and a longer THC hyper in the backline (such as Dante's Million Dollars or Ammy's Okami Shuffle), Spencer will recover while the opponent is still being assaulted by the Team Hyper, and be free to continue to attack the opponent. | |||
}} | |||
}} | |||
=== | === Universal Mechanics === | ||
{{MoveData | |||
|image=UMVC3_Spencer_GroundThrow.png | |||
|caption= | |||
|name=Ground Throw | |||
|input=6H, 4H | |||
|data= | |||
{{AttackData-UMVC3 | |||
|damage=80,000 | |||
|guard=Throw | |||
|startup=1 | |||
|active=1 | |||
|recovery=- | |||
|onhit=- | |||
|onblock=- | |||
|properties={{hardknockdown}} | |||
|description= | |||
Spencer headbutts the opponent and then tosses them a short distance away. If Spencer throws into the corner, he can follow up with a Tiger Knee Air Wire Grapple H. Midscreen, similar conversions are not possible due to the extra distance. | |||
}} | |||
}} | |||
=== | {{MoveData | ||
|image=UMVC3_Spencer_AirThrow.png | |||
|caption= | |||
|name=Air Throw | |||
|input=j.6H, j.4H | |||
|data= | |||
{{AttackData-UMVC3 | |||
|damage=80,000 | |||
|guard=Airthrow | |||
|startup=1 | |||
|active=1 | |||
|recovery=- | |||
|onhit=- | |||
|onblock=- | |||
|properties={{hardknockdown}} | |||
|description= | |||
Standard airthrow that spikes the opponent straight down. Can be converted at basically any height or spacing with Air Wire Grapple or Bionic Bomber. | |||
}} | |||
}} | |||
== | {{MoveData | ||
|image=UMVC3_Spencer_5H.png | |||
|caption= | |||
|name=Snap Back | |||
|input={{qcf}}+[[File:A1.png]]/[[File:A2.png]] | |||
|data= | |||
{{AttackData-UMVC3 | |||
|damage=50,000 | |||
|guard=Mid | |||
|startup=2 | |||
|active=2 | |||
|recovery=21 | |||
|onhit=- | |||
|onblock=-1 | |||
|properties=Snapback | |||
|description= | |||
Animation and hitbox based on 5H. | |||
}} | |||
}} | |||
[[ | |||
{{MoveData | |||
|image=UMVC3_Spencer_HardTag.png | |||
|caption= | |||
|name=Hard Tag | |||
|input=Hold 14f [[File:A1.png]]/[[File:A2.png]] | |||
|data= | |||
{{AttackData-UMVC3 | |||
|damage=30,000 | |||
|guard=OH | |||
|startup=- | |||
|active=20 | |||
|recovery=33 | |||
|onhit=- | |||
|onblock=-15 | |||
|properties={{softknockdown}} | |||
|description= | |||
- | |||
}} | |||
}} | |||
== Team Position == | |||
Spencer is most commonly played in the '''Second''' position. He is commonly used as a "damage engine" for point characters with better neutral but underwhelming solo damage. Not only does a DHC to Bionic Maneuvers (236XX) deal great damage on its own, Spencer can combo after this hyper to deal significant extra damage and even build back some of the meter spent. | |||
=== Notable Synergies === | |||
'''Nova:''' The Nova/Spencer shell is the most common team on which either of these characters appear in tournament play. Spencer's Slant Shot assist causes a restand, taking advantage of Nova's especially strong ability to solo relaunch after a knockdown with 6H or 623L. By using an OTG attack and then chaining into 5S while calling Spencer, Nova can convert any early knockdown into a restand. Then, using jump-cancel 214H, he can convert that restand into a crumple, opening several combo routes. Spencer also makes a great DHC option for the end of Nova's combos, as he has many ways to circumvent Hitstun Deterioration and Damage scaling, so he can usually secure the kill. | |||
'''Players to Watch:''' Coach Steve/Insaynne (Nova/Spencer/Doom), Nemo (Nova/Spencer/Strange), Yipes (Nova/Spencer/Strange), Mundank (Nova/Spencer/Magneto), Infrit (Nova/Spencer/Sentinel), Randomfiend (Nova/Spencer/Doom), LiberalTerminator (Nova/Spencer/Doom), Darryn (Nova/Spencer/Hawkeye) | |||
'''Doctor Strange:''' Doctor Strange's Impact Palm 6H command normal causes a crumple state versus grounded opponents (similar to Nova's 214H, above). Thus, Spencer's Slant Shot assist, which causes a restand versus airborne opponents, is especially effective as a combo extension tool for Strange. Strange can also use the significant hitstun from Spencer's assist to set up an Eye of Agamotto. Spencer is also a good character to set up Strange combos himself, as he can bring his teammate in using his 236S wallbounce, or by DHCing Bionic Lancer 214XX into Seven Rings. Bolts of Balthakk assist is also a great tool to cover Spencer while he approaches with Zip Line. | |||
'''Players to Watch:''' Miniboss (Strange/Spencer/Doom), Nemo (Nova/Strange/Spencer), Combofiend (Nova/Spencer/Strange), Yipes (Nova/Spencer/Strange), LiberalTerminator (Nova/Strange/Spencer) | |||
'''Doctor Doom:''' Doom is Spencer's best partner for a variety of reasons. He gives Spencer his beloved beam assist to help him traverse the screen and cover his approaches with his zips, and due to his 236HL not receiving damage scaling and his loopable, high damage supers he can still do good damage if the assists starts the combo. Beam also gives him good extensions to squeeze out extra 80ks and meter build. While not as good beam overall for Spencer, missiles provides a high damage, easy to slot in/perform combo extension giving him multiple 236HLs. However, it is SEVERELY lacking as a neutral assists for Spencer due to his inability to protect it and should only be used if you have another beam or horizontal projectile assist. Spencer also benefits from the Doom hard tag in which he does 236HL in or near the corner and has enough time to tag in doom to continue the combo. This is especially strong when Spencer needs the extra meter to access his high damage supers. | |||
'''Players to Watch:''' Coach Steve/Insaynne (Nova/Spencer/Doom), Randomfiend (Nova/Spencer/Doom), Miniboss (Strange/Spencer/Doom), Danke (Spencer/Iron Man/Doom), LiberalTerminator (Nova/Spencer/Doom), KyleP (Spencer/Doom/Vergil), Aonien (Spencer/Phoenix Wright/Doom) | |||
Phoenix Wright: While not seeming special at first, there is a lot of synergy going both ways between these two. Spencer benefits from Wrights Missile (Dog) assist giving him better conversions off of starters such as 6H, 236S in addition to giving him and extra 80K off almost any 80K you do. The biggest upside to Missile is the ability to setup unbockables using j236H when wall bounce is already spent, this move forces the opponent to neutral tech which makes the setup unavoidable, and allows enough time for you to setup a high (jM), low (Missile assist) unblockable for guaranteed resets. For Wright, he gains the obvious benefits of Spencer's damage on DHC, but also gains the ability to setup unblockables himself with his 236XX super final hit (Low) and 6M (Overhead) using Spencer's slant shot assist to gain easy conversions into full combos. This assist also gives Wright access to very easy 6H Objections in order to enter Turnabout mode much more easily. | |||
'''Players to Watch:''' Aonien (Spencer/Phoenix Wright/Doom), Raid (Spencer/Phoenix Wright/Akuma) | |||
'''Other Players to Watch:''' Bee/BeeBall (Spencer/Frank West/Dante), Knives (Spencer/Sentinel/Akuma), Senor Taxi (Chris/Spencer/Dante), GcYoshi (Chris/Spencer/Sentinel), MickeyFTW (Chris/Spencer/Sentinel), FireInThePiercer (Chris/Spencer/Dante) | |||
== Alternate Colors == | |||
{{Chara-Colors-UMVC3}} | |||
== Hitspheres and Hurtspheres == | |||
{{#ev:youtube|CG5Rxcb8MSw}} | |||
{{Content Box|content= | |||
{{Navbox-UMVC3}} | |||
}} | |||
Latest revision as of 09:19, 15 January 2025
Introduction
Nathan Spencer was a prototype for a program of bionics-enhanced soldiers ran by the fictional Federation, most noticeably in the form of the "Bionic Arm", a mechanical appendage that replaces Spencer's left arm and a portion of his chest. The Spencer seen in Marvel vs Capcom is based on his appearance in Bionic Commando (2009), the final game chronologically in his series. In this game, Spencer is embittered after being betrayed by his government and spending five years in prison awaiting execution.
In UMvC3, Spencer has a variety of unique moves focused around the detachable grappling hook on his arm. He can use his arm to traverse the stage by swinging through the air (8X+S), or by pulling himself towards a specific direction (any other direction with X+S). He can also grab opponents and reel them in for powerful combo attacks or resets. He can even use the grappling hook as a durable projectile to plow through opponent's zoning and close the distance. Although slightly unconventional, especially in his movement, Spencer is a strong all-arounder with no glaring weaknesses. He is notable as a character for his very high damage (enabled by his "Up Grapple" attack, which does not feature damage scaling and always hits for 80,000 damage), as well as his iconic Bionic Lancer 214XX hyper. His Wire Grapple M (Slant Shot) assist uniquely provides a way for characters to restand airborne opponents, leading to many combo extensions and resets that are only possible with Spencer.
| Strengths | Weaknesses |
|---|---|
|
|
Unique Movement
Spencer has a unique alternative to a traditional airdash with Swing Wire (X+S) which is more commonly called "Zip". Zip has distinct strengths and weaknesses when compared to a traditional airdash, it is more committal but goes further, has a hitbox where the zip contacts but is often minus on block. As such it is typically paired with a long range horizontal assist to cover for these weaknesses. Regardless, when combined with Spencer's unusually fast grounded movement and fast buttons, Zip makes Spencer a slippery opponent to fight.
Move List
Assists
| Damage | Startup | Active | Recovery |
|---|---|---|---|
| 20,000 | 34 | 17 | 117, 87 |
| On Hit | On Block | Guard | Properties |
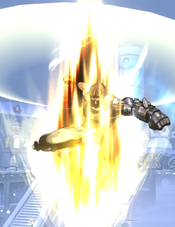
| - | - | Mid | |
|
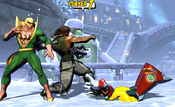
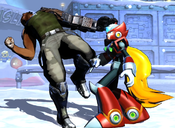
THC Hyper: Bionic Lancer. Spencer shoots his grappling hook directly forward. If it hits an opponent, they are reeled in and placed on the ground in front of Spencer, in a Hard Knockdown state. | |||
| Damage | Startup | Active | Recovery |
|---|---|---|---|
| 20,000 | 34 | 17 | 117, 87 |
| On Hit | On Block | Guard | Properties |
| - | - | Mid | |
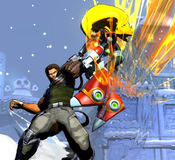
|
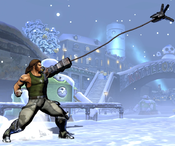
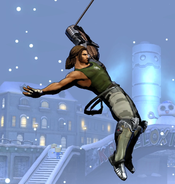
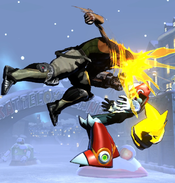
THC Hyper: Bionic Lancer. Recommended assist. Spencer shoots his grappling hook at an up-forward angle. If it hits an opponent, they are reeled in and placed standing directly in front of Spencer. This attack is one of the only attacks in the game that restands - meaning it forces an airborne opponent back to a grounded state mid-combo. This means Slant Shot provides combo and reset opportunities which no other assist in the game can offer. Many attacks in UMvC3 have special properties if they hit a grounded opponent, but not an airborne one. For example, Nova's Nova Strike (214H) and Dr. Strange's Impact Palm (6H) cause a Crumple state if they hit a grounded opponent. Slant Shot gives these characters reliable, consistent ways to convert most hits into their Crumple attacks. Most of the cast can set up a simple left/right oncoming mixup by calling Slant Shot assist and dashing underneath the opponent as they enter the stage. On hit, Spencer will automatically pull the opponent down for an easy follow-up with the point character. | |||
| Damage | Startup | Active | Recovery |
|---|---|---|---|
| 130,000 | 45 | 4 | 134, 104 |
| On Hit | On Block | Guard | Properties |
| - | - | Mid | |
|
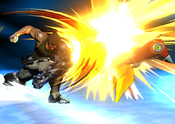
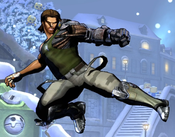
THC Hyper: Bionic Lancer. Spencer performs a slow, close-range strike. The attack causes a Wall Bounce on hit. Unlike the point character version, Armor Piercer assist does not have a "proximity" version, it always uses the slower, less damaging variant. Despite the name, Armor Piercer does not have any special properties against armored attacks, and in fact is particularly bad at dealing with them due to hitting only once. | |||
Ground Normals
| Damage | Startup | Active | Recovery |
|---|---|---|---|
| 48,000 | 6 | 3 | 11 |
| On Hit | On Block | Guard | Properties |
| 0 | -1 | Mid | |
|
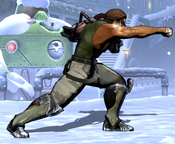
Quick jab, and Spencer's fastest normal (236S Armor Piercer is faster if at very close range). Can work as a situational anti-air using its Rapid Fire property, similar to other high-angled jabs like Magneto, Nova, and Captain America. Mashing 5L can catch an opponent near jump height, or help catch after an awkward air-to-air hit. Spencer can chain 5L several times into a row, giving himself time to confirm into a 5S launcher. | |||
| Damage | Startup | Active | Recovery |
|---|---|---|---|
| 67,000 | 9 | 3 | 22 |
| On Hit | On Block | Guard | Properties |
| -6 | -7 | Mid | - |
|
- | |||
| Damage | Startup | Active | Recovery |
|---|---|---|---|
| 88,000 | 12 | 3 | 21 |
| On Hit | On Block | Guard | Properties |
| 0 | -1 | Mid | - |
|
- | |||
| Damage | Startup | Active | Recovery |
|---|---|---|---|
| 45,000 | 7 | 3 | 10 |
| On Hit | On Block | Guard | Properties |
| +1 | - | Low | - |
|
Slower than 5L, but hits low. Basic offensive tool for catching opponents trying to Chicken Block out of your pressure, and to form simple High/Low mixups alongside Spencer's 6H overhead attack. | |||
| Damage | Startup | Active | Recovery |
|---|---|---|---|
| 70,000 | 8 | 3 | 21 |
| On Hit | On Block | Guard | Properties |
| -5 | -6 | Mid | - |
|
Note: not a low. Spencer punches upwards with an anti-air angle. | |||
| Damage | Startup | Active | Recovery |
|---|---|---|---|
| 80,000 | 13 | 4 | 19 |
| On Hit | On Block | Guard | Properties |
| - | 0 | Low | |
|
Spencer advances forward approximately half a character length while sweeping the ground in front of him. Has a very good total range when combined with the distance it moves Spencer forward, helping to make hitconfirms more consistent. Also gets grounded opponents into the air, which is a requirement for most of Spencer's zip loops. | |||
| Damage | Startup | Active | Recovery |
|---|---|---|---|
| 90,000 | 10 | 4 | 26 |
| On Hit | On Block | Guard | Properties |
| Launch | -7 | Mid | |
|
- | |||
Aerial Normals
| Damage | Startup | Active | Recovery |
|---|---|---|---|
| 45,000 | 6 | 3 | 15 |
| On Hit | On Block | Guard | Properties |
| +8 | +6 | OH | - |
|
- | |||
| Damage | Startup | Active | Recovery |
|---|---|---|---|
| 63,000 | 8 | 5 | 20 |
| On Hit | On Block | Guard | Properties |
| +11 | +10 | OH | - |
|
- | |||
| Damage | Startup | Active | Recovery |
|---|---|---|---|
| 83,000 | 10 | 5 | 21 |
| On Hit | On Block | Guard | Properties |
| +16 | +17 | OH | - |
|
Upward angled swipe, very good air to air button due to it's massive hitbox and can be converted off of quite consistently through the use of jS and Zips (X+S) | |||
| Damage | Startup | Active | Recovery |
|---|---|---|---|
| 88,000 | 10 | 5 | 21 |
| On Hit | On Block | Guard | Properties |
| +16 | +14 | OH | |
|
Downward angled punch. Good choice to attack an opponent when approaching with Swing Wire (X+S) off the ground. Can hit fairly easily as a cross-up. | |||
Command Normals
| Damage | Startup | Active | Recovery |
|---|---|---|---|
| 90,000 | 21 | 3 | 22 |
| On Hit | On Block | Guard | Properties |
| +4 | -2 | OH | |
|
Spencer delivers a large, overhead haymaker punch. He advances forward about 1.5 character lengths during the startup, and another full character length during the actual punch, moving him very far forward in total. 6H is not special or hyper cancelable, and although it is plus on hit, it is not advantageous enough for Spencer to link normal attacks afterwards. However, it almost always leaves Spencer close enough to activate the quickest proximity version of Armor Piercer (236S), which is fast enough to link afterwards. | |||
Special Moves
| Damage | Startup | Active | Recovery |
|---|---|---|---|
| 30,000 | 10 | 22 | 51 |
| On Hit | On Block | Guard | Properties |
| -33 | -13 | Mid | Priority: Low, Durability: 5 |
|
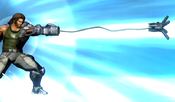
Spencer fires his grappling hook as a projectile, with average durability. Button strength determines the angle of the grapple:
If Wire Grapple hits an opponent, the grappling hook will cling to their body for a short period. During this time, Spencer can perform one of three special follow-up attacks by pressing L, M or H (detailed below). These follow-up attacks are what elevate Wire Grapple from a mediocre projectile to a very powerful combo starter and/or extender. | |||
| Damage | Startup | Active | Recovery |
|---|---|---|---|
| 80,000 | - | - | - |
| On Hit | On Block | Guard | Properties |
| - | - | - | |
|
Spencer forcefully drags the opponent to the space directly in front of himself, regardless of where they were beforehand, and delivers a large punch which causes a Hard Knockdown. This is the most common follow-up and a primary combo tool, since Spencer can follow up the Hard Knockdown from almost any range with (dash up) Air Wire Grapple OTG. [Important] When done from Spencer's H "Up Grapple" specifically, Reel-In Punch ignores damage scaling, and always hits for a full 80,000 damage. This is usually referred to as "Spencer Up-Grapple" or just "80k". 236H > L is therefore a massive contributor to Spencer's damage output, and most of his optimized combos are routed to use this attack as many times as possible, dealing unscaled damage each time. | |||
| Damage | Startup | Active | Recovery |
|---|---|---|---|
| 100,000 | - | - | - |
| On Hit | On Block | Guard | Properties |
| - | - | - | |
|
Spencer pulls both the opponent and himself towards each other. When they collide, Spencer delivers a kick which causes a Wall Bounce. The Wall Bounce may be tempting to use for combo extensions, but keep in mind that Air Wire Grapple automatically follows up with Zip Kick, whereas the grounded grapple gives you a choice of follow-up. Therefore, it is usually better to choose the L follow-up off grounded grapple, and save your one Wall Bounce for later in the combo when you have no other choice. | |||
| Damage | Startup | Active | Recovery |
|---|---|---|---|
| - | - | - | - |
| On Hit | On Block | Guard | Properties |
| +2 | - | - | Restand |
|
Spencer pulls the enemy towards him, similarly to the L follow-up, but does not deliver the finishing punch. Instead, he leaves the standing on the ground immediately in front of him, with Spencer being at a slight frame advantage. Notably, this move restands opponents who were previously airborne, and is one of the only attacks in the game which can do this. H follow-up is primarily a reset tool, especially against opponents who are expecting to sit through a long Spencer combo. You can fake out using another extension, then throw the opponent with Jaw Breaker (623X) or otherwise attack them to reset and start another full combo instead. It is also possible to use H follow-up in combos when paired with certain longer-lasting assists. If an assist is called before Spencer uses Wire Grapple, he can pull them into the path of the assist, the recover and continue the combo afterwards. Doctor Strange's Eye of Agamotto and Bolts of Balthakk assists are examples of assists which can work for this type of extension, since they last a fairly long time and deal a good amount of hitstun on standing opponents. | |||
| Damage | Startup | Active | Recovery |
|---|---|---|---|
| 30,000 + 100,000 | 13 | 16 | Until grounded |
| On Hit | On Block | Guard | Properties |
| - | - | Mid | |
|
Spencer fires his grappling hook as a projectile, with average durability. Button strength determines the angle of the grapple, mirroring the grounded version vertically:
Unlike the grounded version of Wire Grapple, Spencer does not get a choice of follow-ups upon hitting the opponent. Instead, Spencer will automatically use the Zip Kick follow-up on hit, causing a Wall Bounce. If Wall Bounce has already been used earlier in the combo, the opponent will simply fall down for a Soft Knockdown. This prevents any additional combo extensions, but does have good oki potential in the corner. Cornered j.236H Air Grapple causes Spencer to fall on the recovering opponent with an auto-timed safejump using j.5M. You can see it at this video timestamp. Alternatively, Spencer can simply land and catch the opponent with a kara-Jaw Breaker (5H~623L) to reset them that way. | |||
| Damage | Startup | Active | Recovery |
|---|---|---|---|
| 35,000 | 5 | 1 | 31 |
| On Hit | On Block | Guard | Properties |
| - | - | Throw / Airthrow | |
|
Command grab special. L and M versions are basically identical, working as grounded throws against close-range opponents. H version is an anti-air throw that catches airborne opponents. On a successful grab with any version, Spencer knocks the opponent upwards into the air, and they then begin to fall back down for a Hard Knockdown directly in front of him. Spencer can catch the opponent before they reach the ground with 5L or 5M to start a combo. Spencer also has a special follow-up attack to Jaw Breaker - Smash Kick / Critical Smash - done by pressing H after landing the attack (see below). However, Smash Kick consumes Spencer's Wall Bounce, and so it is usually better to manually follow up with a normal attack. Jaw Breaker can be kara-canceled with 5H to greatly extend its otherwise poor range: 5H~623X. This makes it much more practical to use for resets. You can see some examples of how to utilize the extra range in this video. | |||
| Damage | Startup | Active | Recovery |
|---|---|---|---|
| 150,000 / 250,000 | - | - | - |
| On Hit | On Block | Guard | Properties |
| - | - | - | |
|
Spencer leaps up in pursuit of the opponent he tossed with Jaw Breaker, then delivers a kick which Wall Bounces the opponent. Although this causes a cinematic camera-zooming effect, this pursuit attack is not a fixed animation the way that throws are, and Spencer can be hit out of the attack by assists or other delayed projectiles on the way up. There are two windows to follow-up with H after Jaw Breaker. The later window results in Smash Kick and the earlier, tighter window results in Critical Smash. Critical Smash deals more damage and causes a larger Wall Bounce which is easier to follow up, but functions otherwise the exact same way. Neither Critical Smash nor Smash Kick are commonly used, firstly since Jaw Breaker is not much better than Spencer's regular throws, and because he can combo after Jaw Breaker with normal attacks anyway, preserving Wall Bounce for later in the combo.
| |||
| Damage | Startup | Active | Recovery |
|---|---|---|---|
| 180,000 / 150,000 / 130,000 | 3 ~ 8 / 21 | 6(12)4 | 41 |
| On Hit | On Block | Guard | Properties |
| - | -22 | Mid | |
|
Short range, high-damage single punch with a unique startup property. Causes a Wall Bounce on hit. Armor Piercer will destroy low Priority projectiles that its active frames touch, but this is impractical to do. Despite the name, this move does not break Armored attacks, and in fact is quite bad at dealing with them. Starting on frame three, this move creates an invisible "proximity" hitbox in front of Spencer. If an opponent is within this hitbox at any point, Spencer performs the actual attack on the very next frame. Consequently, the fastest this move can hit is on frame 4. Every frame that an opponent is not within proximity, the detection hitbox grows slightly larger, up until frame 8. Armor Piercer also deals progressively less damage as these frames progress, dropping down one damage stage every two frames until it "only" does 130,000. After frame 8, if proximity is still not triggered, Armor Piercer changes into the "slow" version. Slow Armor Piercer is a standard attack that becomes active on frame 21 and hits for 130,000. Armor Piercer is mainly notable for being Spencer's fastest single attack, even beating out his Light normals. This gives Spencer a handful of combo options that would not otherwise be possible, provided he is close enough to the opponent to activate the fastest version of Piercer. The most standard use of this move is to link after Spencer's 6H overhead, which has no follow-up options other than a close range 236S. If Spencer performs his Up Grapple (236H > L) in the corner, Armor Piercer is also fast enough to link afterwards for a little bit of extra damage before canceling into a hyper. This works on the following characters: Morrigan, Felicia, Hsien-Ko, Firebrand, Arthur, Zero, Tron, Frank West, Akuma, Phoenix Wright, Vergil, Viewtiful Joe, Amaterasu, Rocket Raccoon, Shuma, Wolverine, X-23, & MODOK | |||
| Damage | Startup | Active | Recovery |
|---|---|---|---|
| 70,000 + 80,000 | 35 | Until grounded | 22 |
| On Hit | On Block | Guard | Properties |
| - | +3 | Mid | |
|
Spencer pauses in the air, then starts crashing straight down as an active hitbox. When Spencer reaches the ground, he creates a shockwave which destroys nearby projectiles, Both the falling knee drop and the shockwave upon landing can hit OTG. As long as hitstun deterioration has not progressed too far, Spencer can link 5M after the OTG to solo relaunch. Otherwise, he can hyper cancel upon landing. Against the majority of the cast, the standard Bomber relaunch is: Bionic Bomber is useful as an alternate OTG tool for Spencer. It is slower and more awkward to combo into than Air Wire Grapple, but does not need Wall Bounce to relaunch, allowing Spencer to save it for later in the combo. Outside of its use in combos, Bomber is very slow, which makes it difficult to use. The first hit of Bomber use Ground Bounce for the launch, however if spaced properly only the second hit will connect, still launching while saving ground bounce. | |||
| Damage | Startup | Active | Recovery |
|---|---|---|---|
| 10,000 | 11 | Until contact | - |
| On Hit | On Block | Guard | Properties |
| -2 (ground) / +9 (air) | -3 (ground) / +8 (air) | Mid | |
|
Spencer shoots his arm as a grappling hook, similarly to 236X. This attack can be aimed by holding the stick in a direction while inputting the move.
When the grappling hook makes contact with the ground, the wall, the "ceiling" (above the camera) or an opponent, Spencer will pull himself towards his target. This means Swing Wire is Spencer's primary mobility tool, especially in the air. When Spencer nears his approach target, he retracts his grappling hook and is free to act normally, but he can not attack or block while zipping. A standard approach option for Spencer is to call an assist with good horizontal reach - such as a beam or Akuma's tatsu assist - then jump and perform forward Swing Wire to zip across the stage. As the assist concludes, Spencer can finish his zip and attack with a falling j.5S to start his offense. Air Swing Wire is has surprisingly good frame advantage and can also be used in combo extensions. | |||
| Damage | Startup | Active | Recovery |
|---|---|---|---|
| - | - | - | - |
| On Hit | On Block | Guard | Properties |
| - | - | - | - |
|
Spencer shoots his grapple into the air, clinging to some invisible ceiling, then uses it to swing across the stage. This functions like an airdash, and is very similar to Spider-Man's regular airdash. He can cancel the swing into normal attacks and j.5S mid-way through the animation, unlike Swing Wire. Can also be input as j.7X+S or j.9X+S. Spencer can only swing forwards with Swing Grapple, not backwards. Even inputting as j.7X+S will still cause a forward swing. | |||
Hyper Combos
| Damage | Startup | Active | Recovery |
|---|---|---|---|
| 20,000 (unscaled) + 30,000 + 43,000 + 60,000 + 80,000 + 130,000 (304,500 total) | 18+2 | 22 | 23 |
| On Hit | On Block | Guard | Properties |
| - | -22 | Mid | |
|
Cinematic Level 1 hyper. Spencer fires his grappling hook directly forward, similar to L Wire Grapple. If it hits the opponent's point character, they are pulled into a cinematic where Spencer repeatedly beats them up, ending in a large punch that causes a Hard Knockdown. This hyper is particularly powerful for DHCs in either direction, as its cinematic nature means that it standardizes the opponent's height so long as the initial projectile connects. Maneuvers can be easily DHC'd into almost any hyper either just before or during the final hit, and any hyper that causes a Soft or Hard Knockdown (and several that don't) can DHC into this hyper quite easily as well. Spencer recovers from this hyper quickly enough that, if done near the corner, he can follow up with a Tiger Knee Air Wire Grapple (j.2369M or j.2369H). This is a big part of what allows Spencer to act as a damage engine for other characters. The point character can land a short combo that carries to the corner, hyper and DHC to Spencer. Spencer can then OTG, use the Wall Bounce of Air Wire Grapple to go into his own combo, use Up Grapples to circumvent damage scaling, and eventually finish with a third hyper if needed. This is especially powerful for allowing many point characters to kill off a throw. Throws apply very heavy damage scaling to the throwing character, but not to their teammates, so Spencer can easily secure the kill once brought in. Unlike most Hypers, the first hit of this move actually builds a very small amount of meter. | |||
| Damage | Startup | Active | Recovery |
|---|---|---|---|
| 250,000 | 4+3 | 10 | 50 |
| On Hit | On Block | Guard | Properties |
| - | -37 | Mid | Invuln until frame 11, spinout into |
|
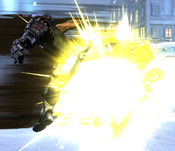
Spencer's most iconic move. He dashes forward with a massive, screen-traveling haymaker that causes a single, heavy hit the sends any opponents flying into the air. While Lancer is not necessarily the most invincible hyper in the game, it has extremely fast startup and quickly covers a large chunk of the stage, making it a very terrifying reversal that Spencer's opponents must respect if he is on the ground and has meter. Spencer can easily react to assist calls or slower attacks from the point character with Lancer to catch them, even from far away. If Spencer has X-Factor available, then Lancer > X-Factor > Bionic Bomber > Lancer is enough damage to delete most assist characters, which is expensive but can completely dismantle an opponent's team composition by sniping an important character. If Spencer throws out a Wire Grapple or Jaw Breaker and whiffs, the threat of canceling into Lancer can be enough to discourage opponents from trying to punish him. Spencer can follow up Bionic Lancer with a Tiger Knee Air Wire Grapple, in basically the same way that he can after Bionic Maneuvers. Because of Lancer's relatively short total duration, it can be useful for THC synergies. With Spencer on point and a longer THC hyper in the backline (such as Dante's Million Dollars or Ammy's Okami Shuffle), Spencer will recover while the opponent is still being assaulted by the Team Hyper, and be free to continue to attack the opponent. | |||
Universal Mechanics
| Damage | Startup | Active | Recovery |
|---|---|---|---|
| 80,000 | 1 | 1 | - |
| On Hit | On Block | Guard | Properties |
| - | - | Throw | |
|
Spencer headbutts the opponent and then tosses them a short distance away. If Spencer throws into the corner, he can follow up with a Tiger Knee Air Wire Grapple H. Midscreen, similar conversions are not possible due to the extra distance. | |||
| Damage | Startup | Active | Recovery |
|---|---|---|---|
| 80,000 | 1 | 1 | - |
| On Hit | On Block | Guard | Properties |
| - | - | Airthrow | |
|
Standard airthrow that spikes the opponent straight down. Can be converted at basically any height or spacing with Air Wire Grapple or Bionic Bomber. | |||
| Damage | Startup | Active | Recovery |
|---|---|---|---|
| 50,000 | 2 | 2 | 21 |
| On Hit | On Block | Guard | Properties |
| - | -1 | Mid | Snapback |
|
Animation and hitbox based on 5H. | |||
| Damage | Startup | Active | Recovery |
|---|---|---|---|
| 30,000 | - | 20 | 33 |
| On Hit | On Block | Guard | Properties |
| - | -15 | OH | |
|
- | |||
Team Position
Spencer is most commonly played in the Second position. He is commonly used as a "damage engine" for point characters with better neutral but underwhelming solo damage. Not only does a DHC to Bionic Maneuvers (236XX) deal great damage on its own, Spencer can combo after this hyper to deal significant extra damage and even build back some of the meter spent.
Notable Synergies
Nova: The Nova/Spencer shell is the most common team on which either of these characters appear in tournament play. Spencer's Slant Shot assist causes a restand, taking advantage of Nova's especially strong ability to solo relaunch after a knockdown with 6H or 623L. By using an OTG attack and then chaining into 5S while calling Spencer, Nova can convert any early knockdown into a restand. Then, using jump-cancel 214H, he can convert that restand into a crumple, opening several combo routes. Spencer also makes a great DHC option for the end of Nova's combos, as he has many ways to circumvent Hitstun Deterioration and Damage scaling, so he can usually secure the kill.
Players to Watch: Coach Steve/Insaynne (Nova/Spencer/Doom), Nemo (Nova/Spencer/Strange), Yipes (Nova/Spencer/Strange), Mundank (Nova/Spencer/Magneto), Infrit (Nova/Spencer/Sentinel), Randomfiend (Nova/Spencer/Doom), LiberalTerminator (Nova/Spencer/Doom), Darryn (Nova/Spencer/Hawkeye)
Doctor Strange: Doctor Strange's Impact Palm 6H command normal causes a crumple state versus grounded opponents (similar to Nova's 214H, above). Thus, Spencer's Slant Shot assist, which causes a restand versus airborne opponents, is especially effective as a combo extension tool for Strange. Strange can also use the significant hitstun from Spencer's assist to set up an Eye of Agamotto. Spencer is also a good character to set up Strange combos himself, as he can bring his teammate in using his 236S wallbounce, or by DHCing Bionic Lancer 214XX into Seven Rings. Bolts of Balthakk assist is also a great tool to cover Spencer while he approaches with Zip Line.
Players to Watch: Miniboss (Strange/Spencer/Doom), Nemo (Nova/Strange/Spencer), Combofiend (Nova/Spencer/Strange), Yipes (Nova/Spencer/Strange), LiberalTerminator (Nova/Strange/Spencer)
Doctor Doom: Doom is Spencer's best partner for a variety of reasons. He gives Spencer his beloved beam assist to help him traverse the screen and cover his approaches with his zips, and due to his 236HL not receiving damage scaling and his loopable, high damage supers he can still do good damage if the assists starts the combo. Beam also gives him good extensions to squeeze out extra 80ks and meter build. While not as good beam overall for Spencer, missiles provides a high damage, easy to slot in/perform combo extension giving him multiple 236HLs. However, it is SEVERELY lacking as a neutral assists for Spencer due to his inability to protect it and should only be used if you have another beam or horizontal projectile assist. Spencer also benefits from the Doom hard tag in which he does 236HL in or near the corner and has enough time to tag in doom to continue the combo. This is especially strong when Spencer needs the extra meter to access his high damage supers.
Players to Watch: Coach Steve/Insaynne (Nova/Spencer/Doom), Randomfiend (Nova/Spencer/Doom), Miniboss (Strange/Spencer/Doom), Danke (Spencer/Iron Man/Doom), LiberalTerminator (Nova/Spencer/Doom), KyleP (Spencer/Doom/Vergil), Aonien (Spencer/Phoenix Wright/Doom)
Phoenix Wright: While not seeming special at first, there is a lot of synergy going both ways between these two. Spencer benefits from Wrights Missile (Dog) assist giving him better conversions off of starters such as 6H, 236S in addition to giving him and extra 80K off almost any 80K you do. The biggest upside to Missile is the ability to setup unbockables using j236H when wall bounce is already spent, this move forces the opponent to neutral tech which makes the setup unavoidable, and allows enough time for you to setup a high (jM), low (Missile assist) unblockable for guaranteed resets. For Wright, he gains the obvious benefits of Spencer's damage on DHC, but also gains the ability to setup unblockables himself with his 236XX super final hit (Low) and 6M (Overhead) using Spencer's slant shot assist to gain easy conversions into full combos. This assist also gives Wright access to very easy 6H Objections in order to enter Turnabout mode much more easily.
Players to Watch: Aonien (Spencer/Phoenix Wright/Doom), Raid (Spencer/Phoenix Wright/Akuma)
Other Players to Watch: Bee/BeeBall (Spencer/Frank West/Dante), Knives (Spencer/Sentinel/Akuma), Senor Taxi (Chris/Spencer/Dante), GcYoshi (Chris/Spencer/Sentinel), MickeyFTW (Chris/Spencer/Sentinel), FireInThePiercer (Chris/Spencer/Dante)
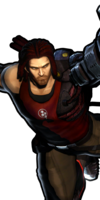
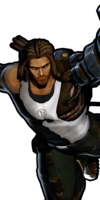
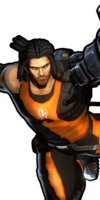
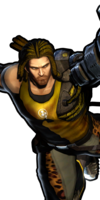
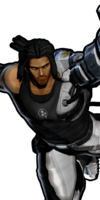
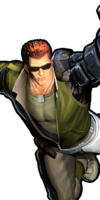
Alternate Colors
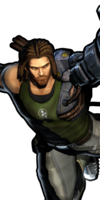
| Color 1 | Color 2 | Color 3 | Color 4 | Color 5 | Color 6 | Alt Color |
|---|---|---|---|---|---|---|
|
|
|
|
|
|
|
Hitspheres and Hurtspheres

