| (32 intermediate revisions by 12 users not shown) | |||
| Line 1: | Line 1: | ||
{{ | <div style="display: flex; flex-wrap:wrap-reverse;"> | ||
<div style="display: flex;flex-direction: column;flex:5;min-width:300px;padding: 10px;"> | |||
{{Character Subnav UMVC3|name=Amaterasu}} | |||
==Introduction== | |||
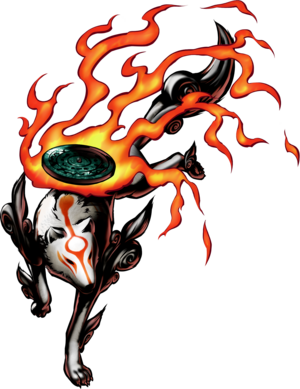
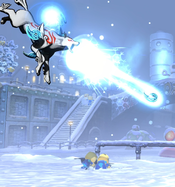
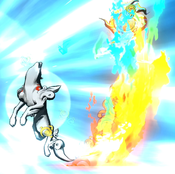
A sun goddess, Amaterasu is one of the three offspring of Izanaki, and one of the most important deities in Shinto. In ''Okami'', Amaterasu loses her physical form after a battle with the serpent Orochi, and is later reincarnated as a wolf. She gathers up celestial armaments in order to take on the demonic forces that overran Japan in her absence. | |||
'''In UMvC3,''' Ammy is a unique character with a stance mechanic. By switching between three different weapons, she changes what attacks she can access. This gives her a surprising amount of versatility, but also a large technical requirement as effective use requires learning three different movesets. | |||
{{ProConTable | |||
| pros = | |||
*'''Great Team Support:''' Ammy's Cold Star assist provides unparalleled lockdown against opponents close to the ground. Her time-slow Hyper can be used to give her teammates a sizeable speed advantage, or simply as a safe DHC for them to escape. Her Okami Shuffle Hyper is one of the longest Level 1 Hypers in the game, and has excellent THC potential. | |||
*'''Positioning:''' Ammy's naturally low profile allows her to evade many attacks and projectiles even while standing, and some combos drop on her small frame, or require separate adjustment by the opponent. | |||
*'''Unique Attacks:''' Ammy has several disjointed attacks with large hitboxes for fighting a midrange neutral game. | |||
*'''Good Aerial Mobility:''' Between her Three way Air Dash, Air OK specials like Weapon Change, Head Charge, the Glaive Command Normal Thunder Stab, and the weird quirk of gaining an Air Dash after an Air Okami Shuffle, she has a good amount of movement options in the air. | |||
| cons = | |||
*'''Relatively Low Damage:''' Somewhat poor damage potential outside of X-Factor. | |||
*'''High Execution:''' Requires extensive practice and knowledge of her entire moveset to make use of the best of all 3 Weapon Stances. However, note that utilizing every stance in gameplay is not required to be successful with her. | |||
*'''Predictable Approach:''' Approach options are linear and sometimes limited. | |||
}} | |||
=== Unique Mechanics === | |||
Amaterasu has three different weapons, with only one being "equipped" at a time. Ammy can switch weapons at any time she can perform a special move, by using her 22X Weapon Change Special. Ammy always starts the match with Solar Flare equipped. A brief overview of each weapon is detailed below: | |||
Amaterasu | |||
*Solar Flare (22L) - A flaming shield. Has (relatively) short range but good speed. Solar Flare special moves are counters, which can deflect physical hits or projectiles | |||
*Thunder Edge (22M) - A sword charged with electricity. Ammy can charge up many of her attacks with this weapon by holding down the button. Thunder Edge specials are aggressive and move her forward while attacking. | |||
*Devout Beads (22H) - A long chain of prayer ornaments that can fire projectiles. Has the longest range of all weapons, and attacks with the beads are multi-hitting. Devout Beads' special move is Cold Star, which fires icy projectiles. | |||
</div> | |||
<div style="display: flex;flex-direction: column;flex:2;min-width:350px;padding: 10px;">{{UMVC3_Character_Query|reversals=623XX}}</div></div> | |||
== Move List == | |||
=== Assists === | |||
{{MoveData | |||
|image=UMVC3_Ammy_AssistA.png | |||
|caption= | |||
|name=Solar Flare | |||
|input=Assist A | |||
|data= | |||
{{AttackData-UMVC3 | |||
|damage=- | |||
|guard=- | |||
|startup=31 | |||
|active=24 | |||
|recovery=96, 66 | |||
|onhit=- | |||
|onblock=- | |||
|properties=Reflects non-beam low priority projectiles. Absorbs low-priority beams | |||
|description= | |||
THC Hyper: Okami Shuffle. Okami creates a barrier that reflects or nullifies projectiles in front of her. This is less useful than it sounds, as many beams can also hit behind the barrier, simultaneously attacking the point character. | |||
}} | |||
}} | |||
=== | {{MoveData | ||
|image=UMVC3_Ammy_AssistB.png | |||
|caption= | |||
|name=Cold Star | |||
|input=Assist B | |||
|data= | |||
{{AttackData-UMVC3 | |||
|damage=20,000 x8 | |||
|guard=Mid | |||
|startup=42 | |||
|active=8(9)43 | |||
|recovery=125, 95 | |||
|onhit=- | |||
|onblock=- | |||
|properties=Priority: Low, Durability: 1 per shot | |||
|description= | |||
THC Hyper: Okami Shuffle. Recommended assist. Ammy hops into the air and fires eight ice shots at a down-forward angle. Horizontal range is deceptively strong; can tag an opponent's feet from up to 80% of fullscreen distance, but has almost no vertical coverage except at point-blank range. | |||
Has extremely oppressive lockdown potential on block, giving the point character time to set up deadly mixups or even unblockables without fear of being pushblocked. It is especially dangerous when used for an incoming mixup, or as an opponent wakes up from a knockdown. | |||
}} | |||
}} | |||
{{MoveData | |||
, | |image=UMVC3_Ammy_AssistY.png | ||
|caption= | |||
, | |name=Bloom | ||
, | |input=Assist Y | ||
|data= | |||
{{AttackData-UMVC3 | |||
|damage=- | |||
|guard=- | |||
|startup=25 | |||
|active=- | |||
|recovery=180, 150 | |||
|onhit=- | |||
|onblock=- | |||
|properties=Builds 30% of a hyper meter bar | |||
|description= | |||
THC Hyper: Okami Shuffle. Assist-exclusive move that Ammy cannot perform on point. When Ammy uses this assist successfully, your team is given 30% of a hyper meter bar. This assist has no other effect. One of three meter-building assists in the game, along with Frank West's "Pick Me Up" and Morrigan's Dark Harmonizer. They all have identical startup, but Morrigan's assist has the fastest recovery by far, and is thus the only practical choice. | |||
}} | |||
}} | |||
=== Ground Normals === | |||
{{ | {{MoveData | ||
|image=UMVC3_Ammy_5L.png | |||
|caption= | |||
|name=Stand Light | |||
|input=5L | |||
|data= | |||
{{AttackData-UMVC3 | |||
|damage=30,000 | |||
|guard=Mid | |||
|startup=3 | |||
|active=2 | |||
|recovery=11 | |||
|onhit=-1 | |||
|onblock=-1 | |||
|properties=- | |||
|description= | |||
At 3f startup, Ammy {{Clr|1|5L}} is the fastest normal attack in the game, with only Dark Phoenix's 2L having comparable speed. In theory, this can be mashed defensively to escape certain gaps in pressure. | |||
In practice, 5L is close to useless. It has very poor range, especially compared to Ammy's great {{Clr|1|2L}}. It does not hit Low, and can not be Rapid Fire mashed like {{Clr|1|2L}} The hitbox is very small, and it doesn't hit low. It has 1 frame less startup than crouching l, but it isn't rapid fire. | |||
}} | |||
}} | }} | ||
== | {{MoveData | ||
|image=UMVC3_Ammy_5M.png | |||
|caption= | |||
|name=Stand Medium | |||
|input=5M | |||
|data= | |||
{{AttackData-UMVC3 | |||
|damage=50,000 | |||
|guard=Mid | |||
|startup=6 | |||
|active=6 | |||
|recovery=12 | |||
|onhit=-1 | |||
|onblock=-1 | |||
|properties=- | |||
|description= | |||
Moves Ammy forward while attacking, making it situationally useful as an approach and pressure tool. Useful for combos, and has better frame data than the crouching variant, but does not hit Low. <code>{{Clr|2|5M}} > Cold Star</code> covered by an assist is a low-risk pressure tool. | |||
}} | |||
}} | |||
{{ | {{MoveData | ||
|image=UMVC3_Ammy_5H.png | |||
|caption= | |||
|name=Stand Heavy (Solar Flare) | |||
|input=5H (with Solar Flare equipped) | |||
|data= | |||
{{AttackData-UMVC3 | |||
|damage=60,000 | |||
|guard=Mid | |||
|startup=8 | |||
|active=4 | |||
|recovery=16 | |||
|onhit=+2 | |||
|onblock=+2 | |||
|properties={{jcancel}} | |||
|description= | |||
This is probably the strongest anti-air button in reflector stance, but that's not saying a whole lot considering its competition. Very strong for Crossup setups as well and a good back throw option select. Jump cancel property allows Ammy to maintain an offensive on block or go into a jump loop combo on hit. | |||
}} | |||
}} | |||
{{ | {{MoveData | ||
|image=UMVC3_Ammy_5H_Thunder.png | |||
|caption= | |||
{{ | |name=Stand Heavy (Thunder Edge) | ||
|input=5H (with Thunder Edge equipped) | |||
|data= | |||
{{AttackData-UMVC3 | |||
|damage=80,000 | |||
|guard=Mid | |||
|startup=13 | |||
{{ | |active=4 | ||
{{ | |recovery=17 | ||
|onhit=+1 | |||
|onblock=+1 | |||
|properties=- | |||
|description= | |||
Very strange normal. Despite the impressive-looking hit effect, it has a tendency to whiff against airborne opponents and is inconsistent against them. Still, Thunder {{Clr|3|5H}} a good space control tool and {{Clr|3|5H}} cancelled into Power Slash (214X) is good against predictable characters like Haggar. | |||
}} | |||
}} | |||
{{MoveData | |||
|image=UMVC3_Ammy_5H_Divine.png | |||
|image2=Finalbeads.gif | |||
|caption2=Bead stance normals can go through projectiles and hit the opponent behind them. | |||
|name=Stand Heavy (Devout Beads) | |||
|input=5H (with Devout Beads equipped) | |||
|data= | |||
{{AttackData-UMVC3 | |||
|damage=25,000 x4 | |||
|guard=Mid | |||
|startup=8 | |||
|active=4 | |||
|recovery=16 | |||
|onhit=+2 | |||
|onblock=+2 | |||
|properties=Not cancelable | |||
|description= | |||
Very disjointed, and can be used to reach past projectiles and hit behind them. Somewhat useful as a poke, especially if called alongside an assist. It unfortunately cannot be cancelled, even into hypers, meaning that hit confirms are not possible. Not very useful. Has some anti air use. | |||
}} | |||
}} | |||
= | {{MoveData | ||
|image=UMVC3_Ammy_2L.png | |||
|image2=Crouchingl2.gif | |||
|caption=Very long range for a fast low. | |||
|name=Crouching Light | |||
|input=2L | |||
|data= | |||
{{AttackData-UMVC3 | |||
|damage=28,000 | |||
|guard=Low | |||
|startup=4 | |||
|active=2 | |||
|recovery=12 | |||
|onhit=-2 | |||
|onblock=-2 | |||
|properties={{rpdfire}} | |||
|description= | |||
Very strong normal. 4f startup is among the best for any normal in the game, and it is Rapid Fire. This is a very good normal for mashing, especially in sword/bead stance, which lack good up-close options. This is the main Low threat from Ammy. | |||
}} | |||
}} | |||
{{MoveData | |||
|image=UMVC3_Ammy_2M.png | |||
|caption= | |||
|name=Crouching Medium | |||
|input=2M | |||
|data= | |||
{{AttackData-UMVC3 | |||
|damage=50,000 | |||
|guard=Low | |||
|startup=7 | |||
|active=6 | |||
|recovery=12 | |||
|onhit=-1 | |||
|onblock=-1 | |||
|properties= | |||
|description= | |||
This isn't a very useful normal outside of combos. It is similar to {{Clr|2|5M}} but her hurtbox is slightly lower, and this one hits Low. It can be sometimes used to clip an opponent out of their movement when they think Ammy is out of range. Primary hit confirm tool, especially in Divine Bead stance, off a {{Clr|1|2L}}. For example, <code>{{Clr|1|5L}} {{Clr|2|5M}} > {{Clr|2|22M}}, {{Clr|1|2L}} {{Clr|2|2M}}, etc.</code> | |||
}} | |||
}} | |||
=== | {{MoveData | ||
|image=UMVC3_Ammy_2H.png | |||
|caption= | |||
|name=Crouching Heavy (Solar Flare) | |||
|input=2H (with Solar Flare equipped) | |||
|data= | |||
{{AttackData-UMVC3 | |||
|damage=60,000 | |||
|guard=Low | |||
|startup=9 | |||
|active=4 | |||
|recovery=16 | |||
|onhit=- | |||
|onblock=+2 | |||
|properties={{strk}}, {{softknockdown}}, {{jcancel}} | |||
|description= | |||
Poor range, but jump-cancelable similar to {{Clr|3|5H}}, which has combo utility. Mainly used to help hit confirm from stronger normals like {{Clr|2|2M}}. | |||
}} | |||
}} | |||
=== | {{MoveData | ||
|image=UMVC3_Ammy_2H_Thunder.png | |||
|image2=Finalsword2_(2).gif | |||
|caption2=Can hit confirm even from the outer edge of its range. | |||
|name=Crouching Heavy (Thunder Edge) | |||
|input=2H (with Thunder Edge equipped) | |||
|data= | |||
{{AttackData-UMVC3 | |||
|damage=80,000 | |||
|guard=Low | |||
|startup=13 | |||
|active=4 | |||
|recovery=19 | |||
|onhit=- | |||
|onblock=-1 | |||
|properties={{strk}}, {{softknockdown}} | |||
|description= | |||
VERY VERY good button. It has a ridiculous hitbox and can always be hit confirmed into {{Clr|1|236L}} (add dash after if necessary). Use this button as a main poke as many many people will get thrown off by it. It is easily one of the best crouching pokes in the entire game. Can be cancelled on whiff. | |||
}} | |||
}} | |||
{{MoveData | |||
|image=UMVC3_Ammy_2H_Divine.png | |||
|image2=Beadscrouchh2.gif | |||
|caption2=Shutting down Stalking Flare. | |||
|name=Crouching Heavy (Devout Beads) | |||
|input=2H (with Devout Beads equipped) | |||
|data= | |||
{{AttackData-UMVC3 | |||
|damage=25,000 x4 | |||
|guard=Low | |||
|startup=13 | |||
|active=4 | |||
|recovery=26 | |||
|onhit=- | |||
|onblock=-5 | |||
|properties={{strk}}, {{softknockdown}} | |||
|description= | |||
Very similar to Bead {{Clr|3|5H}}. Same strengths and weaknesses, except not a good anti air. If 3/4 or less of the hitbox length is used, can be xfactor hit confirmed into a combo. Like with Bead {{Clr|3|5H}}, can be used to punish or negate slow projectiles like Strange's Eye of Agamotto, or Dormammu's Stalking Flare. | |||
}} | |||
}} | |||
{{ | {{MoveData | ||
{{ | |image=UMVC3_Ammy_5S.png | ||
|caption= | |||
{{ | |name=Launcher/Special | ||
|input=S | |||
|data= | |||
{{AttackData-UMVC3 | |||
|damage=70,000 | |||
|guard=Mid | |||
|startup=7 | |||
|active=6 | |||
|recovery=18 | |||
|onhit=Launch | |||
|onblock=-2 | |||
|properties={{launch}}, {{nocancel}} | |||
|description= | |||
Mediocre hitbox, but useful for combos and crossups. <code>{{Clr|4|5S}} jc. 2369XX</code> is one of the main ways to actually combo into Okami Shuffle. | |||
}} | |||
}} | |||
=== Aerial Normals === | |||
=== | {{MoveData | ||
|image=UMVC3_Ammy_jL.png | |||
|caption= | |||
|name=Jumping Light | |||
|input=j.5L | |||
|data= | |||
{{AttackData-UMVC3 | |||
|damage=35,000 | |||
|guard=OH | |||
|startup=4 | |||
|active=4 | |||
|recovery=14 | |||
|onhit=+8 | |||
|onblock=+8 | |||
|properties=- | |||
|description= | |||
Very useful normal for mixups. Can be used for fuzzy guard instant overheads, and can hit many characters crouching. This normal is also very good for mashing on the way down and can be used to escape oncoming mixups that are not airtight. | |||
}} | |||
}} | |||
{{ | {{MoveData | ||
|image=UMVC3_Ammy_jM.png | |||
{{ | |caption= | ||
|name=Jumping Medium | |||
|input=j.5M | |||
|data= | |||
{{AttackData-UMVC3 | |||
|damage=48,000 | |||
|guard=OH | |||
|startup=7 | |||
|active=3 | |||
|recovery=20 | |||
|onhit=+13 | |||
|onblock=+13 | |||
|properties= | |||
|description= | |||
Mostly used at super jump height when in close proximity with someone while in bead/sword stance as those stances lack quick buttons with good coverage. This button is also the easiest to use for guard breaks using Stance Cancels: | |||
Making an oncoming character block {{Clr|2|j.M}} (or any attack) will forfeit the throw immunity they usually have until landing. {{Clr|2|j.M}} also recovers fast enough that Ammy can throw an opponent after they recover from blockstun but before they reach the ground. Set-ups like these usually lose to pushblock. However, if Ammy activates stance switch as she is being pushblocked, the "hop" of her weapon change animation will override and negate the pushblock, keeping Ammy close for a free throw. | |||
}} | |||
}} | |||
{{ | {{MoveData | ||
{{ | |image=UMVC3_Ammy_jH.png | ||
|caption= | |||
|name=Jumping Heavy (Solar Flare) | |||
|input=j.5H (with Solar Flare Equipped) | |||
|data= | |||
{{AttackData-UMVC3 | |||
|damage=60,000 | |||
|guard=OH | |||
|startup=9 | |||
|active=5 | |||
|recovery=20 | |||
|onhit=+17 | |||
|onblock=+17 | |||
|properties= | |||
|description= | |||
Good button with a hitbox which covers Ammy from several angles. Very useful against big characters and one of her strongest tools when used in conjunction with a lockdown assist. Extremely powerful as an Throw OS in the corner, which will get you a significant amount of hits, especially in X-Factor. Causes massive amounts of hitstun. Recovery can be mitigated by canceling into stance change. | |||
}} | |||
}} | |||
{{ | {{MoveData | ||
|image=UMVC3_Ammy_j5H_Thunder.png | |||
{{ | |image2=Swordjumph2.gif | ||
|caption2=Ammy gains a burst of momentum when canceling her airdash into Sword j.5H. | |||
{{ | |name=Jumping Heavy (Thunder Edge) | ||
|input=j.5H (with Thunder Edge Equipped) | |||
|data= | |||
{{AttackData-UMVC3 | |||
|damage=90,000 - 110,000 | |||
|guard=OH | |||
|startup=17 - 36 | |||
|active=4 | |||
|recovery=17 | |||
|onhit=+17 | |||
|onblock=+17 | |||
|properties=Chargeable, {{forcedgroundbounce}} when charged, cannot be special-canceled when uncharged | |||
|description= | |||
Insanely good normal when combined with an air dash. Ammy gains a slight boost forward if you cancel an airdash into this move, making it easy to cross-up. The hitbox on this normal is disjointed and difficult to contend with. Strong when used while falling toward the opponent on either side. | |||
This attack can be charged when holding down the button. 19 additional frames are required to fully charge the attack, but Ammy can also release it early to throw off an opponent's timing. The fully charged version deals extra damage, gains the ability to be special canceled, and forces a ground bounce on hit. This ground bounce will occur even on grounded opponents, and even if a ground bounce has already been used in the combo. | |||
}} | |||
}} | |||
== | {{MoveData | ||
|image=UMVC3_Ammy_jH_Divine.png | |||
=== | |image2=Finalrush.gif | ||
|caption2=Bead j.5H is excellent for superjump confirms. | |||
|name=Jumping Heavy (Devout Beads) | |||
|input=j.5H (with Devout Beads Equipped) | |||
|data= | |||
{{AttackData-UMVC3 | |||
|damage=25,000 x4 | |||
|guard=OH | |||
|startup=18 | |||
|active=5 | |||
|recovery=18 | |||
|onhit=+17 | |||
|onblock=+17 | |||
|properties= | |||
|description= | |||
Ammy's best neutral tool in Bead Stance, and maybe her strongest overall normal. Does not reach quite as far as the animation may suggest, but still has incredible range and is entirely disjointed. Can be followed up with {{Clr|2|22M}} Stance Change -> {{Clr|3|3H}} Glaive Dive to confirm a hit from any height. Strong space-control tool that can be used to keep opponents out or cover an approach. As a bonus, it is a multi-hitting attack that will break through most instances of Super Armor. This is also her best falling normal as few buttons can challenge this. <code>Bead {{Clr|3|j.H}} > {{Clr|2|22M}}, Sword {{Clr|3|jH}}</code> is a sequence for controlling space with limited risk.. Airdash Bead {{Clr|3|j.H}} is somewhat outclassed by the sword variant, but it has the benefit of being less obvious since you can special cancel it. Long startup is vulnerable to being airthrown or stuffed at close range. | |||
}} | |||
}} | |||
{{MoveData | |||
|image=UMVC3_Ammy_jS.png | |||
|caption= | |||
|name=Jumping Special | |||
|input=j.5S | |||
|data= | |||
{{AttackData-UMVC3 | |||
|damage=70,000 | |||
|guard=OH | |||
|startup=11 | |||
|active=3 | |||
|recovery=22 | |||
|onhit=+14 | |||
|onblock=+14 | |||
|properties={{aircombofinisher}}, {{softknockdown}} when used outside of air combos, | |||
|description= | |||
Pretty severely outclassed by Ammy's other air normals. It even pushes opponents away, so you can't hit confirm off it or use it for hit confirms,except grounded opponents. | |||
}} | |||
}} | |||
=== Command Normals === | |||
{{MoveData | |||
4 | |image=UMVC3_Ammy_6H_Solar.png | ||
|caption= | |||
|name=Reflector Chain Combo Ichi | |||
|input=(With Solar Flare Equipped) 6H | |||
|data= | |||
{{AttackData-UMVC3 | |||
|damage=60,000 | |||
|guard=Mid | |||
|startup=12 | |||
|active=4 | |||
|recovery=18 | |||
|onhit=0 | |||
|onblock=0 | |||
|properties=Special-cancelable | |||
|description= | |||
Ammy's {{Clr|3|6H}} chain is her main combo tool in Reflector stance. Also works as a strong throw OS that moves Ammy forwards. Along with all of the follow-ups, it can be canceled into special moves or {{Clr|4|5S}}. | |||
}} | |||
}} | |||
{{MoveData | |||
|image= | |||
|caption= | |||
|name=Reflector Chain Combo Ni | |||
|input=(during Chain Combo Ichi) 6H | |||
|data= | |||
{{AttackData-UMVC3 | |||
|damage=60,000 | |||
|guard=Mid | |||
|startup=12 | |||
|active=4 | |||
|recovery=19 | |||
|onhit=-1 | |||
|onblock=-1 | |||
|properties=Special-cancelable | |||
|description= | |||
Bark. | |||
}} | |||
}} | |||
{{MoveData | |||
|image= | |||
|caption= | |||
|name=Reflector Chain Combo San | |||
|input=(during Chain Combo Ni) 6H | |||
|data= | |||
{{AttackData-UMVC3 | |||
|damage=60,000 | |||
|guard=Mid | |||
|startup=12 | |||
|active=4 | |||
|recovery=19 | |||
|onhit=-1 | |||
|onblock=-1 | |||
|properties=Special-cancelable | |||
|description= | |||
Bark bark. | |||
}} | |||
}} | |||
{{MoveData | |||
|image= | |||
|caption= | |||
|name=Reflector Chain Combo Shi | |||
|input=(during Chain Combo San) 6H | |||
|data= | |||
{{AttackData-UMVC3 | |||
|damage=60,000 | |||
|guard=Mid | |||
|startup=12 | |||
|active=4 | |||
|recovery=20 | |||
|onhit=-2 | |||
|onblock=-2 | |||
|properties=Special-cancelable | |||
|description= | |||
Bark bark bark. | |||
}} | |||
}} | |||
{{MoveData | |||
|image= | |||
|caption= | |||
|name=Solar Flare Attack | |||
|input=(during Chain Combo Shi) 6H | |||
|data= | |||
{{AttackData-UMVC3 | |||
|damage=60,000 | |||
|guard=Mid | |||
|startup=12 | |||
|active=4 | |||
|recovery=21 | |||
|onhit=-3 | |||
|onblock=-3 | |||
|properties=Special-cancelable | |||
|description= | |||
Bark bark bark bark. | |||
}} | |||
}} | |||
{{MoveData | |||
|image=UMVC3_Ammy_6H_Thunder.png | |||
|caption= | |||
|name=Glaive Chain Combo Ichi | |||
|input=(With Thunder Edge equipped) 6H | |||
|data= | |||
{{AttackData-UMVC3 | |||
|damage=80,000 / 100,000 | |||
|guard=Mid | |||
|startup=14/47 | |||
|active=5 | |||
|recovery=18/17 | |||
|onhit=-1/+28 | |||
|onblock=-1/0 | |||
|properties=Chargeable, staggers on hit when fully charged | |||
|description= | |||
Glaive chain is notable for enabling an and quick ToD in level 3 X-Factor, as it loops into itself. Outside of X-Factor, this chain is rarely used. | |||
}} | |||
}} | |||
{{MoveData | |||
|image= | |||
|caption= | |||
|name=Glaive Chain Combo Ni | |||
|input=(during Glaive Chain Combo Ichi) 6H | |||
|data= | |||
{{AttackData-UMVC3 | |||
|damage=80,000 / 100,000 | |||
|guard=Mid | |||
|startup=15/47 | |||
|active=5 | |||
|recovery=17 | |||
|onhit=0/+25 | |||
|onblock=0 | |||
|properties=Chargeable, staggers on hit when fully charged | |||
|description= | |||
Bark. | |||
}} | |||
}} | |||
{{MoveData | |||
|image= | |||
|caption= | |||
|name=Glaive Chain Combo San | |||
|input=(during Glaive Chain Combo Ni) 6H | |||
|data= | |||
{{AttackData-UMVC3 | |||
|damage=80,000 / 100,000 | |||
|guard=Mid | |||
|startup=15/47 | |||
|active=5 | |||
|recovery=17 | |||
|onhit=0/+25 | |||
|onblock=0 | |||
|properties=Chargeable, staggers on hit when fully charged | |||
|description= | |||
Bark bark. | |||
}} | |||
}} | |||
=== | {{MoveData | ||
|image= | |||
|caption= | |||
|name=Thunder Edge Slash | |||
|input=(during Glaive Chain Combo San) 6H | |||
|data= | |||
{{AttackData-UMVC3 | |||
|damage=80,000 / 100,000 | |||
|guard=Mid | |||
|startup=15/47 | |||
|active=5 | |||
|recovery=18 | |||
|onhit=- | |||
|onblock=-1 | |||
|properties=Chargeable, staggers on hit when fully charged vs grounded, forced {{groundbounce}} vs airborne | |||
|description= | |||
Causes a forced ground bounce against airborne opponents, which is what enables the loop in X-factor. | |||
}} | |||
}} | |||
{{MoveData | |||
|image=UMVC3_Ammy_6H_Divine.png | |||
|caption= | |||
|name=Rosary Chain Combo Ichi | |||
|input=(with Devout Beads equipped) 6H | |||
|data= | |||
{{AttackData-UMVC3 | |||
|damage=25,000 x4 | |||
|guard=Mid | |||
|startup=17 | |||
|active=5 | |||
|recovery=27 | |||
|onhit=-4 | |||
|onblock=-11 | |||
|properties=- | |||
|description= | |||
Functions similarly to Bead Stance {{Clr|3|5H}} and {{Clr|3|2H}}. Good range and disjoint. Like Bead {{Clr|3|5H}}, it is not special-canceleable, but at least it can be followed up with its {{Clr|3|6H}} chain for some extra damage. | |||
}} | |||
}} | |||
{{MoveData | |||
|image= | |||
|caption= | |||
|name=Rosary Chain Combo Ni | |||
|input=(during Rosary Chain Combo Ichi) 6H | |||
|data= | |||
{{AttackData-UMVC3 | |||
|damage=25,000 x4 | |||
|guard=Mid | |||
|startup=17 | |||
|active=5 | |||
|recovery=21 | |||
|onhit=+2 | |||
|onblock=-5 | |||
|properties=- | |||
|description= | |||
Bark. | |||
}} | |||
}} | |||
{{MoveData | |||
|image= | |||
|caption= | |||
|name=Rosary Chain Combo San | |||
|input=(during Rosary Chain Combo Ni) 6H | |||
|data= | |||
{{AttackData-UMVC3 | |||
|damage=25,000 x4 | |||
|guard=Mid | |||
|startup=17 | |||
|active=5 | |||
|recovery=21 | |||
|onhit=+2 | |||
|onblock=-5 | |||
|properties=- | |||
|description= | |||
Bark Bark. | |||
}} | |||
}} | |||
{{MoveData | |||
|image= | |||
|caption= | |||
|name=Rosary Chain Combo Shi | |||
|input=(during Rosary Chain Combo San) 6H | |||
|data= | |||
{{AttackData-UMVC3 | |||
|damage=25,000 x4 | |||
|guard=Mid | |||
|startup=17 | |||
|active=5 | |||
|recovery=21 | |||
|onhit=+2 | |||
|onblock=-5 | |||
|properties=- | |||
|description= | |||
Bark Bark Bark. | |||
}} | |||
}} | |||
{{MoveData | |||
|image= | |||
|caption= | |||
|name=Devout Beads Whip | |||
|input=(during Rosary Chain Combo Shi) 6H | |||
|data= | |||
{{AttackData-UMVC3 | |||
|damage=25,000 x4 | |||
|guard=Mid | |||
|startup=17 | |||
|active=5 | |||
|recovery=23 | |||
|onhit=- | |||
|onblock=-7 | |||
|properties={{softknockdown}} | |||
|description= | |||
Bark Bark Bark Bark. | |||
}} | |||
}} | |||
{{MoveData | |||
|image=UMVC3_Ammy_j3H_Thunder_Charge.png | |||
|image2=UMVC3_Ammy_j3H_Thunder.png | |||
|caption= | |||
|name=Thunder Edge Stab | |||
|input=(with Thunder Edge equipped) j.3H | |||
|data= | |||
{{AttackData-UMVC3 | |||
|damage=90,000 / 120,000 | |||
|guard=Mid | |||
|startup=11/43 | |||
|active=Until grounded | |||
|recovery=43 | |||
|onhit=-22/+6 | |||
|onblock=-22 | |||
|properties=Chargeable, special-cancelable, {{otg}}, {{stagger}} vs grounded, {{groundbounce}} vs airborne, scales by 0.8 | |||
|description= | |||
Aerial confirm tool, as it is very fast and brings both Ammy and her opponents back down to the ground at the cost of her ground bounce. Can be charged for more damage and better advantage on hit. | |||
}} | |||
}} | |||
=== Special Moves === | |||
{{MoveData | |||
|image=UMVC3_Ammy_j236L.png | |||
|caption=L Version | |||
|image2=UMVC3_Ammy_j236M.png | |||
|caption2=M Version | |||
|image3=UMVC3_Ammy_j236H.png | |||
|caption3=H Version | |||
|name=Head Charge | |||
|input=j.236X | |||
|data= | |||
{{AttackData-UMVC3 | |||
|version=L | |||
|subtitle=(Air) {{qcf}} + {{l}} | |||
|damage=70,000 | |||
|guard=Mid | |||
|startup=13 | |||
|active=15 | |||
|recovery=13 | |||
|onhit=-6 | |||
|onblock=-6 | |||
|properties=- | |||
}} | |||
{{AttackData-UMVC3 | |||
|version=M | |||
|subtitle=(Air) {{qcf}} + {{m}} | |||
|damage=70,000 | |||
|guard=Mid | |||
|startup=13 | |||
|active=15 | |||
|recovery=13 | |||
|onhit=-6 | |||
|onblock=-6 | |||
|properties=- | |||
}} | |||
{{AttackData-UMVC3 | |||
|version=H | |||
|subtitle=(Air) {{qcf}} + {{h}} | |||
|damage=70,000 | |||
|guard=Mid | |||
|startup=18 | |||
|active=Until contact | |||
|recovery=50 | |||
|onhit=- | |||
|onblock=-7 | |||
|properties={{groundbounce}} | |||
|description= | |||
Ammy pauses in the air and then lunges in a specific direction based on button strength. {{Clr|1|L}} goes up-forward, {{Clr|2|M}} goes horizontally straight forward, and {{Clr|3|H}} plummets straight down. | |||
{{Clr|1|L}} and {{Clr|2|M}} versions are dubiously useful, as they have almost no combo utility. However, {{Clr|3|H}} Head Charge causes a Ground Bounce on hit, easily combos from Ammy's air normals, and is one of her main extension tools. | |||
}} | |||
}} | |||
{{MoveData | |||
|image=UMVC3_Ammy_214L.png | |||
|caption=L Version | |||
|image2=UMVC3_Ammy_214M.png | |||
|caption2=M Version | |||
|image3=UMVC3_Ammy_214H.png | |||
|caption3=H Version | |||
|name=Power Slash | |||
|input=214X | |||
|data= | |||
{{AttackData-UMVC3 | |||
|damage=80,000 | |||
|guard=Mid | |||
|startup=10 | |||
|active=- | |||
|recovery=25 | |||
|onhit=+6 | |||
|onblock=+6 | |||
|properties=Priority: Low, Durability: 4 | |||
|description= | |||
Ammy produces a floating paper, which is an active projectile that slowly floats toward the ground. | |||
*{{Clr|1|L}} version places the paper directly ahead of Ammy, about two character lengths away | |||
*{{Clr|2|M}} version places the paper above and ahead of Ammy. At roughly jump height one character length away. | |||
*{{Clr|3|H}} version places the paper directly above Ammy. | |||
Ammy can use this move as a meaty projectile to force an oncoming or waking up opponent to block while setting up her offense. Its also fairly fast and useful as a defensive tool that is available in all three stances. | |||
}} | |||
}} | |||
{{MoveData | |||
|image= | |||
|caption= | |||
|name=Weapon Change | |||
|input=22X | |||
|data= | |||
{{AttackData-UMVC3 | |||
|damage=- | |||
|guard=- | |||
|startup=10 | |||
|active=- | |||
|recovery=- | |||
|onhit=- | |||
|onblock=- | |||
|properties={{airok}} | |||
|description= | |||
Ammy switches to one of her three weapons, depending on button strength. This will replace some of her special moves, as well as her {{Clr|3|H}} normals and command normals. | |||
*Solar Flare ({{Clr|1|22L}}) - A flaming shield. Has (relatively) short range but good speed. Solar Flare special moves are counters, which can deflect physical hits or projectiles | |||
*Thunder Edge ({{Clr|2|22M}}) - A sword charged with electricity. Ammy can charge up many of her attacks with this weapon by holding down the button. Thunder Edge specials are aggressive and move her forward while attacking. | |||
*Devout Beads ({{Clr|3|22H}}) - A long chain of prayer ornaments that can fire projectiles. Has the longest range of all weapons, and attacks with the beads are multi-hitting. Devout Beads' special move is Cold Star, which fires icy projectiles. | |||
Weapon Change is very fast at only 10 total frames. Virtually all of Ammy's special-cancelable normals benefit from faster recovery if canceled into Weapon Change, and Ammy can quickly switch weapons mid combo, or even use the weapon switch itself to enable combo routes. However, Ammy can not "change" to the weapon she currently has equipped, so this advantage most be balanced against having to juggle multiple distinct movesets. | |||
' | If weapon change is done in the air, Ammy does a slight hop forward. This is notable because the hop will negate pushblock if one of Ammy's air attacks is pushblocked and she responds by canceling into Weapon Switch. | ||
}} | |||
}} | |||
{{MoveData | |||
|image=UMVC3_Ammy_623L_Solar.png | |||
|caption=L Version | |||
|image2=UMVC3_Ammy_623M_Solar.png | |||
|caption2=M Version | |||
|name=Fireworks | |||
|input=(With Solar Flare equipped) 623L or 623M | |||
|data= | |||
{{AttackData-UMVC3 | |||
|damage=150,000 | |||
|guard=Counter | |||
|startup=6 | |||
|active=15 | |||
|recovery=7 | |||
|onhit=- | |||
|onblock=- | |||
|properties= | |||
|description= | |||
Counter special. Ammy places a barrier in front of herself, which can be maintained indefinitely by holding down the button. While maintaining the shield, the {{Clr|1|L}} version will counter overhead and mid-hitting physical attacks; the {{Clr|2|M}} version will counter low-hitting physical attacks. Ammy can not counter projectiles, assist calls (regardless of type) or hypers with this move. | |||
On a successful counter, Ammy pulls the opponent into a hitgrab animation, where she izuna drops them. This counter deals heavy damage and causes the opponent to spin out through the air, which Ammy can use to start a full combo. The counter is considered a command throw, and will apply the grab penalty accordingly. | |||
}} | |||
}} | |||
{{MoveData | |||
|image=UMVC3_Ammy_623H_Solar.png | |||
|caption= | |||
|name=Solar Flare | |||
|input=(With Solar Flare equipped) 623H | |||
|data= | |||
{{AttackData-UMVC3 | |||
|damage=- | |||
|guard=- | |||
|startup=4 | |||
|active=17 | |||
|recovery=7 | |||
|onhit=- | |||
|onblock=- | |||
|properties=Nullifies beams, reflects low priority projectiles | |||
|description= | |||
Ammy creates a barrier similar to her other 623X specials, except green colored. This barrier is a projectile counter that can be maintained indefinitely by holding {{Clr|3|H}}. Standard projectiles that contact the barrier will be reflected back towards the opponent. Standard beams that contact the barrier will be negated. | |||
Unlike the physical counters, this move does not go into the izuna drop animation if it successfully counters a projectile, only negating or reflecting them. | |||
}} | |||
}} | |||
{{MoveData | |||
|image=UMVC3_Ammy_236L_Thunder.png | |||
|caption=L Version | |||
|image2=UMVC3_Ammy_236M_Thunder.png | |||
|caption2-M Version | |||
|image3=UMVC3_Ammy_236H_Thunder.png | |||
|caption3=H Version | |||
|name=Thunder Edge | |||
|input=(With Thunder Edge equipped) 236X | |||
|data= | |||
{{AttackData-UMVC3 | |||
|damage=100,000 / 150,000 | |||
|guard=Mid | |||
|startup=12/33 | |||
|active=6/11 | |||
|recovery=20/16 | |||
|onhit=+1/- | |||
|onblock=-1/+1 | |||
|properties=Chargeable, {{strk}} when fully charged | |||
|description= | |||
Ammy rushes forward while attacking with her glaive. Its fairly safe to use as an approach tool, and has some combo utility. Button strength determines the angle of attack and has no other effects: {{Clr|1|L}} charges directly ahead, {{Clr|2|M}} attacks at an up-forward angle, and {{Clr|3|H}} charges directly upwards above Ammy. | |||
This attack is slightly plus on hit even point blank, and has better advantage if it is spaced correctly. When used against an airborne opponent, Ammy can juggle afterwards fairly consistently, making it useful in combos. | |||
Thunder Edge can be charged by holding down the button. Charging for an additional 21 frames gives Thunder Edge additional damage and hitstun. | |||
}} | |||
}} | |||
{{MoveData | |||
|image=UMVC3_Ammy_j236S_Thunder.png | |||
|caption= | |||
|name=Glaive Chop | |||
|input=(in air, with Thunder Edge equipped) 236S | |||
|data= | |||
{{AttackData-UMVC3 | |||
|damage=10,000 x3~5 + 30,000 x3 | |||
|guard=Mid | |||
|startup=21 | |||
|active=Until contact +8 | |||
|recovery=31 | |||
|onhit=+8 | |||
|onblock=-14 | |||
|properties={{groundbounce}} | |||
|description= | |||
Ammy falls down while slicing with her glaive, dealing multiple hits. Upon reaching the ground, a burst of lightning appears which pops opponents back up into the air. | |||
Very useful in combos, usually as a follow-up to her {{Clr|3|j.3H}} Glaive OTG, but risky to use in neutral due to limited range and long recovery. | |||
This attack can get additional hits based on the height. | |||
}} | |||
}} | |||
{{MoveData | |||
|image=UMVC3_Ammy_236L_Divine.png | |||
|caption=L Version | |||
|image2=UMVC3_Ammy_236M_Divine.png | |||
|caption2=M Version | |||
|image3=UMVC3_Ammy_236H_Divine.png | |||
|caption3=H Version | |||
|name=Cold Star | |||
|input=(With Devout Beads equipped) 236X | |||
|data= | |||
{{AttackData-UMVC3 | |||
|version=L | |||
|subtitle={{qcf}} + {{l}} | |||
|damage=20,000 x1 - x8 | |||
|guard=Mid | |||
|startup=13 | |||
|active=1~101 | |||
|recovery=22~32 | |||
|onhit=-1 ~ -11 | |||
|onblock=-1 ~ -11 | |||
|properties=mashble, Priority: Low, Durability: 1 per shot | |||
}} | |||
{{AttackData-UMVC3 | |||
|version=M | |||
|subtitle={{qcf}} + {{m}} | |||
|damage=20,000 x1 - x8 | |||
|guard=Mid | |||
|startup=13 | |||
|active=1~96 | |||
|recovery=22~35 | |||
|onhit=-1 ~ -14 | |||
|onblock=-1 ~ -14 | |||
|properties=mashable, Priority: Low, Durability: 1 per shot | |||
}} | |||
{{AttackData-UMVC3 | |||
|version=H | |||
|subtitle={{qcf}} + {{h}} | |||
|damage=20,000 x1 - x8 | |||
|guard=Mid | |||
|startup=18 | |||
|active=1~92 | |||
|recovery=33 | |||
|onhit=-12 | |||
|onblock=-12 | |||
|properties=mashable, Priority: Low, Durability: 1 per shot | |||
|description= | |||
Ammy fires a projectile on a trajectory determined by button strength. | |||
*{{Clr|1|L}} version fires straight ahead | |||
*{{Clr|2|M}} version fires upwards and ahead at a 45 degree angle | |||
*{{Clr|3|H}} version causes Ammy to hop into the air and fire down-forward at a 45 degree angle. | |||
Additionally, this move can be mashed to fire additional projectiles in a barrage after the first shot, up to eight total projectiles in total. This is Ammy's only "normal" projectile, but is unfortunately fairly slow and risky to use in fireball wars compared to simply using her normals and Solar Flare reflector. | |||
}} | |||
}} | |||
=== Hyper Combos === | |||
{{MoveData | |||
|image=UMVC3_Ammy_236XX.png | |||
|caption= | |||
|name=Okami Shuffle | |||
|input=236XX (1 bar) | |||
|data= | |||
{{AttackData-UMVC3 | |||
|damage=70,000 (fire) + 10,000 x35 (ice) + 7,000 x 18 (lightning) + 80,000 (big lightning) | |||
|guard=Mid | |||
|startup=18+4 | |||
|active=184 | |||
|recovery=4 | |||
|onhit=- | |||
|onblock=+1 | |||
|properties={{airok}}, {{softknockdown}} (first hit), {{otg}} (all other hits), {{hardknockdown}} (all other hits), Priority: High, Durability: a lot, scales by 0.98 | |||
|description= | |||
Ammy conjures a series of nearly-fullscreen elemental barrages. It is her standard combo ender and can also be used as a chipout tool or a way to snipe assists and projectiles. Be aware when using this hyper for chip damage that the opponent has a gap between each attack to maneuver and possibly even hit Ammy. | |||
The attacks from this hyper are positioned based on the screen's location, not Ammy's location. This means that - for example - if an opponent is at superjump height and Ammy is on the ground, Ammy can still hit them with this super, as the camera follows the opponent up into the air. | |||
This hyper is one of the best THC synergy enablers in the game due to its extrmely long duration. A point character that calls in Ammy as part of a Team Hyper will almost certainly recover before Ammy finishes casting. This gives the point character several free seconds to attack the opponent while they are being oppressed by the hyper. The gap between attacks is even long enough for you to throw a character who is trying to block the assault. As a bonus, the massive screen-wide effects act as a visual smokescreen and make it difficult for the opponent to see what you are doing during this time. | |||
}} | |||
}} | |||
{{MoveData | |||
|image=UMVC3_Ammy_214XX.png | |||
|caption= | |||
|name=Vale of Mist | |||
|subtitle=Awoooooooo~ | |||
|input=214XX (1 bar) | |||
|data= | |||
{{AttackData-UMVC3 | |||
|damage=- | |||
|guard=- | |||
|startup=20+1 | |||
|active=300 | |||
|recovery=27 | |||
|onhit=- | |||
|onblock=- | |||
|properties=33% slowdown for all opponents, {{airok}} | |||
|description= | |||
Ammy casts a stage-wide "time slow" effect, reducing the speed of all actions by any of the opponent's characters. Ammy and her teammates are unaffected by this, and move at regular speed, giving them a sizeable speed advantage over their opponents for the duration. This debuff also causes opponents to recover from hitstun 33% slower, meaning that certain otherwise impossible combos can be performed. | |||
This hyper even slows down an opponent's throw tech animation, allowing you to throw them ''out of the recovery of them teching your previous throw''. | |||
Vale lasts 300 frames (5 seconds) and can not be extended by tagging Ammy out the way that install hypers often can, although using this hyper as part of a DHC to bring in a more mixup-heavy character is still valuable. | |||
You can not gain hyper meter from any source while Vale of Mist is active. | |||
}} | |||
}} | |||
=== | {{MoveData | ||
|image=UMVC3_Ammy_623XX.png | |||
|image2=UMVC3_Ammy_623XX_Cinematic.png | |||
|caption= | |||
|name=Divine Instruments | |||
|input=623XX (3 bars) | |||
|data= | |||
{{AttackData-UMVC3 | |||
|damage=400,000 ~ 456,00 | |||
|guard=Mid | |||
|startup=8+2 | |||
|active=15 | |||
|recovery=35 | |||
|onhit=- | |||
|onblock=-28 | |||
|properties=Invuln until frame 19, {{hardknockdown}}, Mashable, ignores damage scaling | |||
|description= | |||
Standard cinematic level 3 hyper. Has a large amount of invincibility that can be used as a reversal or in response to an opponent's hyper. On contact, starts a cinematic where Ammy barrages the opponent with attacks, dealing heavy unscaled damage. | |||
Ammy switches to Thunder Edge stance during the cinematic for this move, and she will always end the move in Thunder Edge stance, regardless of which weapon was equipped when she used it. | |||
}} | |||
}} | |||
== | === Universal Mechanics === | ||
{{MoveData | |||
|image=UMVC3_Ammy_GroundThrow.png | |||
|caption= | |||
|name=Ground Throw | |||
|input=6H, 4H | |||
|data= | |||
{{AttackData-UMVC3 | |||
|damage=80,000 | |||
|guard=Throw | |||
|startup=1 | |||
|active=1 | |||
|recovery=- | |||
|onhit=- | |||
|onblock=- | |||
|properties={{hardknockdown}} | |||
|description= | |||
One of the few ground throws that does not immediately spike the opponent down for a hard knockdown (although it does still end in one if left alone). The opponent is popped up into the air in a lengthy spinout animation, allowing Ammy to follow up with almost any attack she chooses. | |||
}} | |||
}} | |||
{{MoveData | |||
|image=UMVC3_Ammy_AirThrow.png | |||
|caption= | |||
|name=Air Throw | |||
|input=j.6H, j.4H | |||
|data= | |||
{{AttackData-UMVC3 | |||
|damage=80,000 | |||
|guard=Airthrow | |||
|startup=1 | |||
|active=1 | |||
|recovery=- | |||
|onhit=- | |||
|onblock=- | |||
|properties={{hardknockdown}} | |||
|description= | |||
One of the few airthrows that does not immediately spike the opponent down for a hard knockdown (although it does still end in one if left alone). The opponent is popped up into the air in a lengthy spinout animation, allowing Ammy to follow up with almost any attack she chooses. | |||
}} | |||
}} | |||
{{MoveData | |||
|image=UMVC3_Ammy_5M.png | |||
|caption= | |||
|name=Snap Back | |||
|input={{qcf}}+[[File:A1.png]]/[[File:A2.png]] | |||
|data= | |||
{{AttackData-UMVC3 | |||
|damage=50,000 | |||
|guard=Mid | |||
|startup=2 | |||
|active=6 | |||
|recovery=12 | |||
|onhit=- | |||
|onblock=+4 | |||
|properties=Snapback | |||
|description= | |||
Animation and hitbox based on {{Clr|2|5M}}. | |||
}} | |||
}} | |||
{{MoveData | |||
|image=UMVC3_Ammy_HardTag.png | |||
|caption= | |||
|name=Hard Tag | |||
|input=Hold 14f [[File:A1.png]]/[[File:A2.png]] | |||
|data= | |||
{{AttackData-UMVC3 | |||
|damage=30,000 | |||
|guard=OH | |||
|startup=- | |||
|active=20 | |||
|recovery=32 | |||
|onhit=- | |||
|onblock=-13 | |||
|properties={{softknockdown}} | |||
|description= | |||
- | |||
}} | |||
}} | |||
== Team Position == | |||
Ammy is almost always chosen as an '''Anchor''' character. One of the biggest assets she brings to a team is her extremely long duration Cold Star assist. Placing her in the third slot maximizes the amount of time that other characters will have access to that assist, giving them additional chances to open up the opponent. Additionally, Ammy's Level 3 X-Factor provides one of the largest speed boosts in the game, and has above-average duration. The speed boost helps smooth out many of her awkward combo routes, giving her much higher damage output, including some easily confirmable infinites. | |||
=== Notable Synergies === | |||
'''Doctor Doom:''' Dr. Doom's level 1 hypers have extremely short duration. Meanwhile, Ammy's level 1 "Okami Shuffle" hyper is one of the longest in the game. This leads to a uniquely powerful synergy when both characters are used in a Team Hyper Combo. When Doom calls a THC with Ammy behind him, he recovers from his hyper very quickly, and can freely act while the opponent remains locked down by Ammy's hyper for several more seconds. In this time, Doom can cross-up the opponent, go for high/low mixups, or even throw them. If Doom opens up the opponent during this time, he can easily build enough meter to THC again. | |||
'''Players to Watch:''' FullSchedule (Viper/Doom/Ammy), MarlinPie (Viper/Doom/Ammy), Rok (Morrigan/Doom/Ammy), Udaterasu (Magneto/Doom/Ammy), Dr. Salt (Felicia/Doom/Ammy), X-Ray (Magneto/Doom/Ammy) | |||
'''C.Viper/Firebrand:''' Although many characters can mount a strong offense with Cold Star assist locking down the opponent, Viper and Firebrand are notable in that they have genuinely Unblockable attacks in Focus Attack and Demon Missile respectively. These attacks are balanced by their long charge time, but Ammy's assist provides so much blockstun that these attacks can be charged fully if the opponent gets caught in them. This makes Ammy an excellent choice for teams built around either of these two characters. | |||
'''Players to Watch:''' FullSchedule (Viper/Doom/Ammy), MarlinPie (Viper/Doom/Ammy), Udaterasu (Firebrand/Vergil/Ammy), Zak Bennet (Firebrand/Dormammu/Ammy) | |||
'''Other Players to Watch:''' TA Moons (Nova/MODOK/Ammy, Nova/Taskmaster/Ammy), LLND (Chris/Hsien-Ko/Ammy), Rusty Shackleford (Ammy/Morrigan/Phoenix) | |||
== Alternate Colors == | |||
{{Chara-Colors-UMVC3}} | |||
{{Content Box|content= | |||
{| | {{Navbox-UMVC3}} | ||
}} | |||
Latest revision as of 12:55, 15 June 2024
Introduction
A sun goddess, Amaterasu is one of the three offspring of Izanaki, and one of the most important deities in Shinto. In Okami, Amaterasu loses her physical form after a battle with the serpent Orochi, and is later reincarnated as a wolf. She gathers up celestial armaments in order to take on the demonic forces that overran Japan in her absence.
In UMvC3, Ammy is a unique character with a stance mechanic. By switching between three different weapons, she changes what attacks she can access. This gives her a surprising amount of versatility, but also a large technical requirement as effective use requires learning three different movesets.
| Strengths | Weaknesses |
|---|---|
|
|
Unique Mechanics
Amaterasu has three different weapons, with only one being "equipped" at a time. Ammy can switch weapons at any time she can perform a special move, by using her 22X Weapon Change Special. Ammy always starts the match with Solar Flare equipped. A brief overview of each weapon is detailed below:
- Solar Flare (22L) - A flaming shield. Has (relatively) short range but good speed. Solar Flare special moves are counters, which can deflect physical hits or projectiles
- Thunder Edge (22M) - A sword charged with electricity. Ammy can charge up many of her attacks with this weapon by holding down the button. Thunder Edge specials are aggressive and move her forward while attacking.
- Devout Beads (22H) - A long chain of prayer ornaments that can fire projectiles. Has the longest range of all weapons, and attacks with the beads are multi-hitting. Devout Beads' special move is Cold Star, which fires icy projectiles.
Move List
Assists
| Damage | Startup | Active | Recovery |
|---|---|---|---|
| - | 31 | 24 | 96, 66 |
| On Hit | On Block | Guard | Properties |
| - | - | - | Reflects non-beam low priority projectiles. Absorbs low-priority beams |
|
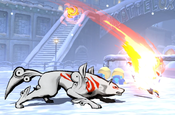
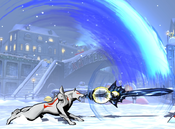
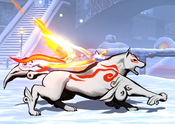
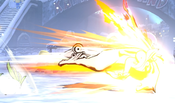
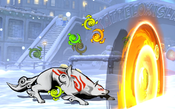
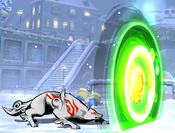
THC Hyper: Okami Shuffle. Okami creates a barrier that reflects or nullifies projectiles in front of her. This is less useful than it sounds, as many beams can also hit behind the barrier, simultaneously attacking the point character. | |||
| Damage | Startup | Active | Recovery |
|---|---|---|---|
| 20,000 x8 | 42 | 8(9)43 | 125, 95 |
| On Hit | On Block | Guard | Properties |
| - | - | Mid | Priority: Low, Durability: 1 per shot |
|
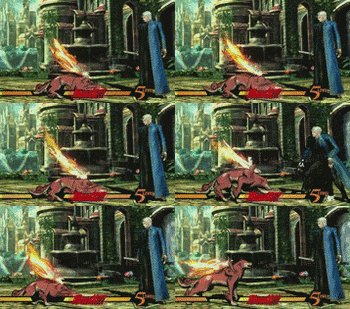
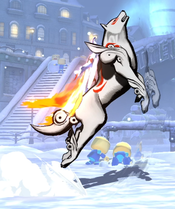
THC Hyper: Okami Shuffle. Recommended assist. Ammy hops into the air and fires eight ice shots at a down-forward angle. Horizontal range is deceptively strong; can tag an opponent's feet from up to 80% of fullscreen distance, but has almost no vertical coverage except at point-blank range. Has extremely oppressive lockdown potential on block, giving the point character time to set up deadly mixups or even unblockables without fear of being pushblocked. It is especially dangerous when used for an incoming mixup, or as an opponent wakes up from a knockdown. | |||
| Damage | Startup | Active | Recovery |
|---|---|---|---|
| - | 25 | - | 180, 150 |
| On Hit | On Block | Guard | Properties |
| - | - | - | Builds 30% of a hyper meter bar |
|
THC Hyper: Okami Shuffle. Assist-exclusive move that Ammy cannot perform on point. When Ammy uses this assist successfully, your team is given 30% of a hyper meter bar. This assist has no other effect. One of three meter-building assists in the game, along with Frank West's "Pick Me Up" and Morrigan's Dark Harmonizer. They all have identical startup, but Morrigan's assist has the fastest recovery by far, and is thus the only practical choice. | |||
Ground Normals
| Damage | Startup | Active | Recovery |
|---|---|---|---|
| 30,000 | 3 | 2 | 11 |
| On Hit | On Block | Guard | Properties |
| -1 | -1 | Mid | - |
|
At 3f startup, Ammy 5L is the fastest normal attack in the game, with only Dark Phoenix's 2L having comparable speed. In theory, this can be mashed defensively to escape certain gaps in pressure. In practice, 5L is close to useless. It has very poor range, especially compared to Ammy's great 2L. It does not hit Low, and can not be Rapid Fire mashed like 2L The hitbox is very small, and it doesn't hit low. It has 1 frame less startup than crouching l, but it isn't rapid fire. | |||
| Damage | Startup | Active | Recovery |
|---|---|---|---|
| 50,000 | 6 | 6 | 12 |
| On Hit | On Block | Guard | Properties |
| -1 | -1 | Mid | - |
|
Moves Ammy forward while attacking, making it situationally useful as an approach and pressure tool. Useful for combos, and has better frame data than the crouching variant, but does not hit Low. | |||
| Damage | Startup | Active | Recovery |
|---|---|---|---|
| 60,000 | 8 | 4 | 16 |
| On Hit | On Block | Guard | Properties |
| +2 | +2 | Mid | |
|
This is probably the strongest anti-air button in reflector stance, but that's not saying a whole lot considering its competition. Very strong for Crossup setups as well and a good back throw option select. Jump cancel property allows Ammy to maintain an offensive on block or go into a jump loop combo on hit. | |||
| Damage | Startup | Active | Recovery |
|---|---|---|---|
| 80,000 | 13 | 4 | 17 |
| On Hit | On Block | Guard | Properties |
| +1 | +1 | Mid | - |
|
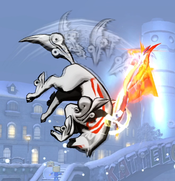
Very strange normal. Despite the impressive-looking hit effect, it has a tendency to whiff against airborne opponents and is inconsistent against them. Still, Thunder 5H a good space control tool and 5H cancelled into Power Slash (214X) is good against predictable characters like Haggar. | |||
| Damage | Startup | Active | Recovery |
|---|---|---|---|
| 25,000 x4 | 8 | 4 | 16 |
| On Hit | On Block | Guard | Properties |
| +2 | +2 | Mid | Not cancelable |
|
Very disjointed, and can be used to reach past projectiles and hit behind them. Somewhat useful as a poke, especially if called alongside an assist. It unfortunately cannot be cancelled, even into hypers, meaning that hit confirms are not possible. Not very useful. Has some anti air use. | |||
| Damage | Startup | Active | Recovery |
|---|---|---|---|
| 28,000 | 4 | 2 | 12 |
| On Hit | On Block | Guard | Properties |
| -2 | -2 | Low | |
|
Very strong normal. 4f startup is among the best for any normal in the game, and it is Rapid Fire. This is a very good normal for mashing, especially in sword/bead stance, which lack good up-close options. This is the main Low threat from Ammy. | |||
| Damage | Startup | Active | Recovery |
|---|---|---|---|
| 50,000 | 7 | 6 | 12 |
| On Hit | On Block | Guard | Properties |
| -1 | -1 | Low | - |
|
This isn't a very useful normal outside of combos. It is similar to 5M but her hurtbox is slightly lower, and this one hits Low. It can be sometimes used to clip an opponent out of their movement when they think Ammy is out of range. Primary hit confirm tool, especially in Divine Bead stance, off a 2L. For example, | |||
| Damage | Startup | Active | Recovery |
|---|---|---|---|
| 60,000 | 9 | 4 | 16 |
| On Hit | On Block | Guard | Properties |
| - | +2 | Low | |
|
Poor range, but jump-cancelable similar to 5H, which has combo utility. Mainly used to help hit confirm from stronger normals like 2M. | |||
| Damage | Startup | Active | Recovery |
|---|---|---|---|
| 80,000 | 13 | 4 | 19 |
| On Hit | On Block | Guard | Properties |
| - | -1 | Low | |
|
VERY VERY good button. It has a ridiculous hitbox and can always be hit confirmed into 236L (add dash after if necessary). Use this button as a main poke as many many people will get thrown off by it. It is easily one of the best crouching pokes in the entire game. Can be cancelled on whiff. | |||
| Damage | Startup | Active | Recovery |
|---|---|---|---|
| 25,000 x4 | 13 | 4 | 26 |
| On Hit | On Block | Guard | Properties |
| - | -5 | Low | |
|
Very similar to Bead 5H. Same strengths and weaknesses, except not a good anti air. If 3/4 or less of the hitbox length is used, can be xfactor hit confirmed into a combo. Like with Bead 5H, can be used to punish or negate slow projectiles like Strange's Eye of Agamotto, or Dormammu's Stalking Flare. | |||
| Damage | Startup | Active | Recovery |
|---|---|---|---|
| 70,000 | 7 | 6 | 18 |
| On Hit | On Block | Guard | Properties |
| Launch | -2 | Mid | |
|
Mediocre hitbox, but useful for combos and crossups. | |||
Aerial Normals
| Damage | Startup | Active | Recovery |
|---|---|---|---|
| 35,000 | 4 | 4 | 14 |
| On Hit | On Block | Guard | Properties |
| +8 | +8 | OH | - |
|
Very useful normal for mixups. Can be used for fuzzy guard instant overheads, and can hit many characters crouching. This normal is also very good for mashing on the way down and can be used to escape oncoming mixups that are not airtight. | |||
| Damage | Startup | Active | Recovery |
|---|---|---|---|
| 48,000 | 7 | 3 | 20 |
| On Hit | On Block | Guard | Properties |
| +13 | +13 | OH | - |
|
Mostly used at super jump height when in close proximity with someone while in bead/sword stance as those stances lack quick buttons with good coverage. This button is also the easiest to use for guard breaks using Stance Cancels: Making an oncoming character block j.M (or any attack) will forfeit the throw immunity they usually have until landing. j.M also recovers fast enough that Ammy can throw an opponent after they recover from blockstun but before they reach the ground. Set-ups like these usually lose to pushblock. However, if Ammy activates stance switch as she is being pushblocked, the "hop" of her weapon change animation will override and negate the pushblock, keeping Ammy close for a free throw. | |||
| Damage | Startup | Active | Recovery |
|---|---|---|---|
| 60,000 | 9 | 5 | 20 |
| On Hit | On Block | Guard | Properties |
| +17 | +17 | OH | - |
|
Good button with a hitbox which covers Ammy from several angles. Very useful against big characters and one of her strongest tools when used in conjunction with a lockdown assist. Extremely powerful as an Throw OS in the corner, which will get you a significant amount of hits, especially in X-Factor. Causes massive amounts of hitstun. Recovery can be mitigated by canceling into stance change. | |||
| Damage | Startup | Active | Recovery |
|---|---|---|---|
| 90,000 - 110,000 | 17 - 36 | 4 | 17 |
| On Hit | On Block | Guard | Properties |
| +17 | +17 | OH | Chargeable, |
|
Insanely good normal when combined with an air dash. Ammy gains a slight boost forward if you cancel an airdash into this move, making it easy to cross-up. The hitbox on this normal is disjointed and difficult to contend with. Strong when used while falling toward the opponent on either side. This attack can be charged when holding down the button. 19 additional frames are required to fully charge the attack, but Ammy can also release it early to throw off an opponent's timing. The fully charged version deals extra damage, gains the ability to be special canceled, and forces a ground bounce on hit. This ground bounce will occur even on grounded opponents, and even if a ground bounce has already been used in the combo. | |||
| Damage | Startup | Active | Recovery |
|---|---|---|---|
| 25,000 x4 | 18 | 5 | 18 |
| On Hit | On Block | Guard | Properties |
| +17 | +17 | OH | - |
|
Ammy's best neutral tool in Bead Stance, and maybe her strongest overall normal. Does not reach quite as far as the animation may suggest, but still has incredible range and is entirely disjointed. Can be followed up with 22M Stance Change -> 3H Glaive Dive to confirm a hit from any height. Strong space-control tool that can be used to keep opponents out or cover an approach. As a bonus, it is a multi-hitting attack that will break through most instances of Super Armor. This is also her best falling normal as few buttons can challenge this. | |||
| Damage | Startup | Active | Recovery |
|---|---|---|---|
| 70,000 | 11 | 3 | 22 |
| On Hit | On Block | Guard | Properties |
| +14 | +14 | OH | |
|
Pretty severely outclassed by Ammy's other air normals. It even pushes opponents away, so you can't hit confirm off it or use it for hit confirms,except grounded opponents. | |||
Command Normals
| Damage | Startup | Active | Recovery |
|---|---|---|---|
| 60,000 | 12 | 4 | 18 |
| On Hit | On Block | Guard | Properties |
| 0 | 0 | Mid | Special-cancelable |
|
Ammy's 6H chain is her main combo tool in Reflector stance. Also works as a strong throw OS that moves Ammy forwards. Along with all of the follow-ups, it can be canceled into special moves or 5S. | |||
| Damage | Startup | Active | Recovery |
|---|---|---|---|
| 60,000 | 12 | 4 | 19 |
| On Hit | On Block | Guard | Properties |
| -1 | -1 | Mid | Special-cancelable |
|
Bark. | |||
| Damage | Startup | Active | Recovery |
|---|---|---|---|
| 60,000 | 12 | 4 | 19 |
| On Hit | On Block | Guard | Properties |
| -1 | -1 | Mid | Special-cancelable |
|
Bark bark. | |||
| Damage | Startup | Active | Recovery |
|---|---|---|---|
| 60,000 | 12 | 4 | 20 |
| On Hit | On Block | Guard | Properties |
| -2 | -2 | Mid | Special-cancelable |
|
Bark bark bark. | |||
| Damage | Startup | Active | Recovery |
|---|---|---|---|
| 60,000 | 12 | 4 | 21 |
| On Hit | On Block | Guard | Properties |
| -3 | -3 | Mid | Special-cancelable |
|
Bark bark bark bark. | |||
| Damage | Startup | Active | Recovery |
|---|---|---|---|
| 80,000 / 100,000 | 14/47 | 5 | 18/17 |
| On Hit | On Block | Guard | Properties |
| -1/+28 | -1/0 | Mid | Chargeable, staggers on hit when fully charged |
|
Glaive chain is notable for enabling an and quick ToD in level 3 X-Factor, as it loops into itself. Outside of X-Factor, this chain is rarely used. | |||
| Damage | Startup | Active | Recovery |
|---|---|---|---|
| 80,000 / 100,000 | 15/47 | 5 | 17 |
| On Hit | On Block | Guard | Properties |
| 0/+25 | 0 | Mid | Chargeable, staggers on hit when fully charged |
|
Bark. | |||
| Damage | Startup | Active | Recovery |
|---|---|---|---|
| 80,000 / 100,000 | 15/47 | 5 | 17 |
| On Hit | On Block | Guard | Properties |
| 0/+25 | 0 | Mid | Chargeable, staggers on hit when fully charged |
|
Bark bark. | |||
| Damage | Startup | Active | Recovery |
|---|---|---|---|
| 80,000 / 100,000 | 15/47 | 5 | 18 |
| On Hit | On Block | Guard | Properties |
| - | -1 | Mid | Chargeable, staggers on hit when fully charged vs grounded, forced |
|
Causes a forced ground bounce against airborne opponents, which is what enables the loop in X-factor. | |||
| Damage | Startup | Active | Recovery |
|---|---|---|---|
| 25,000 x4 | 17 | 5 | 27 |
| On Hit | On Block | Guard | Properties |
| -4 | -11 | Mid | - |
|
Functions similarly to Bead Stance 5H and 2H. Good range and disjoint. Like Bead 5H, it is not special-canceleable, but at least it can be followed up with its 6H chain for some extra damage. | |||
| Damage | Startup | Active | Recovery |
|---|---|---|---|
| 25,000 x4 | 17 | 5 | 21 |
| On Hit | On Block | Guard | Properties |
| +2 | -5 | Mid | - |
|
Bark. | |||
| Damage | Startup | Active | Recovery |
|---|---|---|---|
| 25,000 x4 | 17 | 5 | 21 |
| On Hit | On Block | Guard | Properties |
| +2 | -5 | Mid | - |
|
Bark Bark. | |||
| Damage | Startup | Active | Recovery |
|---|---|---|---|
| 25,000 x4 | 17 | 5 | 21 |
| On Hit | On Block | Guard | Properties |
| +2 | -5 | Mid | - |
|
Bark Bark Bark. | |||
| Damage | Startup | Active | Recovery |
|---|---|---|---|
| 25,000 x4 | 17 | 5 | 23 |
| On Hit | On Block | Guard | Properties |
| - | -7 | Mid | |
|
Bark Bark Bark Bark. | |||
| Damage | Startup | Active | Recovery |
|---|---|---|---|
| 90,000 / 120,000 | 11/43 | Until grounded | 43 |
| On Hit | On Block | Guard | Properties |
| -22/+6 | -22 | Mid | Chargeable, special-cancelable, |
|
Aerial confirm tool, as it is very fast and brings both Ammy and her opponents back down to the ground at the cost of her ground bounce. Can be charged for more damage and better advantage on hit. | |||
Special Moves
| L (Air) |
Damage | Startup | Active | Recovery |
|---|---|---|---|---|
| 70,000 | 13 | 15 | 13 | |
| On Hit | On Block | Guard | Properties | |
| -6 | -6 | Mid | - | |
| M (Air) |
Damage | Startup | Active | Recovery |
| 70,000 | 13 | 15 | 13 | |
| On Hit | On Block | Guard | Properties | |
| -6 | -6 | Mid | - | |
| H (Air) |
Damage | Startup | Active | Recovery |
| 70,000 | 18 | Until contact | 50 | |
| On Hit | On Block | Guard | Properties | |
| - | -7 | Mid | ||
|
Ammy pauses in the air and then lunges in a specific direction based on button strength. L goes up-forward, M goes horizontally straight forward, and H plummets straight down. L and M versions are dubiously useful, as they have almost no combo utility. However, H Head Charge causes a Ground Bounce on hit, easily combos from Ammy's air normals, and is one of her main extension tools. | ||||
| Damage | Startup | Active | Recovery |
|---|---|---|---|
| 80,000 | 10 | - | 25 |
| On Hit | On Block | Guard | Properties |
| +6 | +6 | Mid | Priority: Low, Durability: 4 |
|
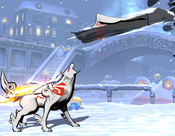
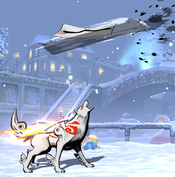
Ammy produces a floating paper, which is an active projectile that slowly floats toward the ground.
Ammy can use this move as a meaty projectile to force an oncoming or waking up opponent to block while setting up her offense. Its also fairly fast and useful as a defensive tool that is available in all three stances. | |||
| Damage | Startup | Active | Recovery |
|---|---|---|---|
| - | 10 | - | - |
| On Hit | On Block | Guard | Properties |
| - | - | - | |
|
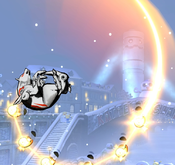
Ammy switches to one of her three weapons, depending on button strength. This will replace some of her special moves, as well as her H normals and command normals.
Weapon Change is very fast at only 10 total frames. Virtually all of Ammy's special-cancelable normals benefit from faster recovery if canceled into Weapon Change, and Ammy can quickly switch weapons mid combo, or even use the weapon switch itself to enable combo routes. However, Ammy can not "change" to the weapon she currently has equipped, so this advantage most be balanced against having to juggle multiple distinct movesets. If weapon change is done in the air, Ammy does a slight hop forward. This is notable because the hop will negate pushblock if one of Ammy's air attacks is pushblocked and she responds by canceling into Weapon Switch. | |||
| Damage | Startup | Active | Recovery |
|---|---|---|---|
| 150,000 | 6 | 15 | 7 |
| On Hit | On Block | Guard | Properties |
| - | - | Counter | - |
|
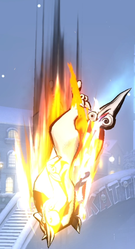
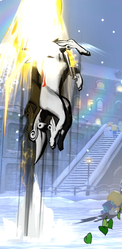
Counter special. Ammy places a barrier in front of herself, which can be maintained indefinitely by holding down the button. While maintaining the shield, the L version will counter overhead and mid-hitting physical attacks; the M version will counter low-hitting physical attacks. Ammy can not counter projectiles, assist calls (regardless of type) or hypers with this move. On a successful counter, Ammy pulls the opponent into a hitgrab animation, where she izuna drops them. This counter deals heavy damage and causes the opponent to spin out through the air, which Ammy can use to start a full combo. The counter is considered a command throw, and will apply the grab penalty accordingly. | |||
| Damage | Startup | Active | Recovery |
|---|---|---|---|
| - | 4 | 17 | 7 |
| On Hit | On Block | Guard | Properties |
| - | - | - | Nullifies beams, reflects low priority projectiles |
|
Ammy creates a barrier similar to her other 623X specials, except green colored. This barrier is a projectile counter that can be maintained indefinitely by holding H. Standard projectiles that contact the barrier will be reflected back towards the opponent. Standard beams that contact the barrier will be negated. Unlike the physical counters, this move does not go into the izuna drop animation if it successfully counters a projectile, only negating or reflecting them. | |||
| Damage | Startup | Active | Recovery |
|---|---|---|---|
| 100,000 / 150,000 | 12/33 | 6/11 | 20/16 |
| On Hit | On Block | Guard | Properties |
| +1/- | -1/+1 | Mid | Chargeable, |
|
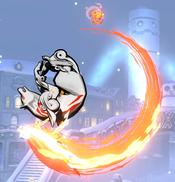
Ammy rushes forward while attacking with her glaive. Its fairly safe to use as an approach tool, and has some combo utility. Button strength determines the angle of attack and has no other effects: L charges directly ahead, M attacks at an up-forward angle, and H charges directly upwards above Ammy. This attack is slightly plus on hit even point blank, and has better advantage if it is spaced correctly. When used against an airborne opponent, Ammy can juggle afterwards fairly consistently, making it useful in combos. Thunder Edge can be charged by holding down the button. Charging for an additional 21 frames gives Thunder Edge additional damage and hitstun. | |||
| Damage | Startup | Active | Recovery |
|---|---|---|---|
| 10,000 x3~5 + 30,000 x3 | 21 | Until contact +8 | 31 |
| On Hit | On Block | Guard | Properties |
| +8 | -14 | Mid | |
|
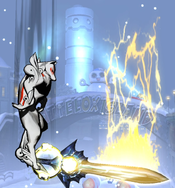
Ammy falls down while slicing with her glaive, dealing multiple hits. Upon reaching the ground, a burst of lightning appears which pops opponents back up into the air. Very useful in combos, usually as a follow-up to her j.3H Glaive OTG, but risky to use in neutral due to limited range and long recovery. This attack can get additional hits based on the height. | |||
| L |
Damage | Startup | Active | Recovery |
|---|---|---|---|---|
| 20,000 x1 - x8 | 13 | 1~101 | 22~32 | |
| On Hit | On Block | Guard | Properties | |
| -1 ~ -11 | -1 ~ -11 | Mid | mashble, Priority: Low, Durability: 1 per shot | |
| M |
Damage | Startup | Active | Recovery |
| 20,000 x1 - x8 | 13 | 1~96 | 22~35 | |
| On Hit | On Block | Guard | Properties | |
| -1 ~ -14 | -1 ~ -14 | Mid | mashable, Priority: Low, Durability: 1 per shot | |
| H |
Damage | Startup | Active | Recovery |
| 20,000 x1 - x8 | 18 | 1~92 | 33 | |
| On Hit | On Block | Guard | Properties | |
| -12 | -12 | Mid | mashable, Priority: Low, Durability: 1 per shot | |
|
Ammy fires a projectile on a trajectory determined by button strength.
Additionally, this move can be mashed to fire additional projectiles in a barrage after the first shot, up to eight total projectiles in total. This is Ammy's only "normal" projectile, but is unfortunately fairly slow and risky to use in fireball wars compared to simply using her normals and Solar Flare reflector. | ||||
Hyper Combos
| Damage | Startup | Active | Recovery |
|---|---|---|---|
| 70,000 (fire) + 10,000 x35 (ice) + 7,000 x 18 (lightning) + 80,000 (big lightning) | 18+4 | 184 | 4 |
| On Hit | On Block | Guard | Properties |
| - | +1 | Mid | |
|
Ammy conjures a series of nearly-fullscreen elemental barrages. It is her standard combo ender and can also be used as a chipout tool or a way to snipe assists and projectiles. Be aware when using this hyper for chip damage that the opponent has a gap between each attack to maneuver and possibly even hit Ammy. The attacks from this hyper are positioned based on the screen's location, not Ammy's location. This means that - for example - if an opponent is at superjump height and Ammy is on the ground, Ammy can still hit them with this super, as the camera follows the opponent up into the air. This hyper is one of the best THC synergy enablers in the game due to its extrmely long duration. A point character that calls in Ammy as part of a Team Hyper will almost certainly recover before Ammy finishes casting. This gives the point character several free seconds to attack the opponent while they are being oppressed by the hyper. The gap between attacks is even long enough for you to throw a character who is trying to block the assault. As a bonus, the massive screen-wide effects act as a visual smokescreen and make it difficult for the opponent to see what you are doing during this time. | |||
| Damage | Startup | Active | Recovery |
|---|---|---|---|
| - | 20+1 | 300 | 27 |
| On Hit | On Block | Guard | Properties |
| - | - | - | 33% slowdown for all opponents, |
|
Ammy casts a stage-wide "time slow" effect, reducing the speed of all actions by any of the opponent's characters. Ammy and her teammates are unaffected by this, and move at regular speed, giving them a sizeable speed advantage over their opponents for the duration. This debuff also causes opponents to recover from hitstun 33% slower, meaning that certain otherwise impossible combos can be performed. This hyper even slows down an opponent's throw tech animation, allowing you to throw them out of the recovery of them teching your previous throw. Vale lasts 300 frames (5 seconds) and can not be extended by tagging Ammy out the way that install hypers often can, although using this hyper as part of a DHC to bring in a more mixup-heavy character is still valuable. You can not gain hyper meter from any source while Vale of Mist is active. | |||
| Damage | Startup | Active | Recovery |
|---|---|---|---|
| 400,000 ~ 456,00 | 8+2 | 15 | 35 |
| On Hit | On Block | Guard | Properties |
| - | -28 | Mid | Invuln until frame 19, |
|
Standard cinematic level 3 hyper. Has a large amount of invincibility that can be used as a reversal or in response to an opponent's hyper. On contact, starts a cinematic where Ammy barrages the opponent with attacks, dealing heavy unscaled damage. Ammy switches to Thunder Edge stance during the cinematic for this move, and she will always end the move in Thunder Edge stance, regardless of which weapon was equipped when she used it. | |||
Universal Mechanics
| Damage | Startup | Active | Recovery |
|---|---|---|---|
| 80,000 | 1 | 1 | - |
| On Hit | On Block | Guard | Properties |
| - | - | Throw | |
|
One of the few ground throws that does not immediately spike the opponent down for a hard knockdown (although it does still end in one if left alone). The opponent is popped up into the air in a lengthy spinout animation, allowing Ammy to follow up with almost any attack she chooses. | |||
| Damage | Startup | Active | Recovery |
|---|---|---|---|
| 80,000 | 1 | 1 | - |
| On Hit | On Block | Guard | Properties |
| - | - | Airthrow | |
|
One of the few airthrows that does not immediately spike the opponent down for a hard knockdown (although it does still end in one if left alone). The opponent is popped up into the air in a lengthy spinout animation, allowing Ammy to follow up with almost any attack she chooses. | |||
| Damage | Startup | Active | Recovery |
|---|---|---|---|
| 50,000 | 2 | 6 | 12 |
| On Hit | On Block | Guard | Properties |
| - | +4 | Mid | Snapback |
|
Animation and hitbox based on 5M. | |||
| Damage | Startup | Active | Recovery |
|---|---|---|---|
| 30,000 | - | 20 | 32 |
| On Hit | On Block | Guard | Properties |
| - | -13 | OH | |
|
- | |||
Team Position
Ammy is almost always chosen as an Anchor character. One of the biggest assets she brings to a team is her extremely long duration Cold Star assist. Placing her in the third slot maximizes the amount of time that other characters will have access to that assist, giving them additional chances to open up the opponent. Additionally, Ammy's Level 3 X-Factor provides one of the largest speed boosts in the game, and has above-average duration. The speed boost helps smooth out many of her awkward combo routes, giving her much higher damage output, including some easily confirmable infinites.
Notable Synergies
Doctor Doom: Dr. Doom's level 1 hypers have extremely short duration. Meanwhile, Ammy's level 1 "Okami Shuffle" hyper is one of the longest in the game. This leads to a uniquely powerful synergy when both characters are used in a Team Hyper Combo. When Doom calls a THC with Ammy behind him, he recovers from his hyper very quickly, and can freely act while the opponent remains locked down by Ammy's hyper for several more seconds. In this time, Doom can cross-up the opponent, go for high/low mixups, or even throw them. If Doom opens up the opponent during this time, he can easily build enough meter to THC again.
Players to Watch: FullSchedule (Viper/Doom/Ammy), MarlinPie (Viper/Doom/Ammy), Rok (Morrigan/Doom/Ammy), Udaterasu (Magneto/Doom/Ammy), Dr. Salt (Felicia/Doom/Ammy), X-Ray (Magneto/Doom/Ammy)
C.Viper/Firebrand: Although many characters can mount a strong offense with Cold Star assist locking down the opponent, Viper and Firebrand are notable in that they have genuinely Unblockable attacks in Focus Attack and Demon Missile respectively. These attacks are balanced by their long charge time, but Ammy's assist provides so much blockstun that these attacks can be charged fully if the opponent gets caught in them. This makes Ammy an excellent choice for teams built around either of these two characters.
Players to Watch: FullSchedule (Viper/Doom/Ammy), MarlinPie (Viper/Doom/Ammy), Udaterasu (Firebrand/Vergil/Ammy), Zak Bennet (Firebrand/Dormammu/Ammy)
Other Players to Watch: TA Moons (Nova/MODOK/Ammy, Nova/Taskmaster/Ammy), LLND (Chris/Hsien-Ko/Ammy), Rusty Shackleford (Ammy/Morrigan/Phoenix)
Alternate Colors
| Color 1 | Color 2 | Color 3 | Color 4 | Color 5 | Color 6 | Alt Color |
|---|---|---|---|---|---|---|

|

|

|

|

|

|
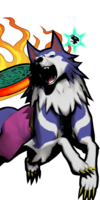
|

