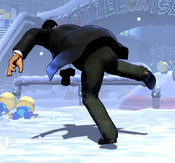
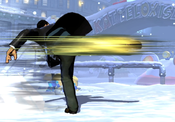
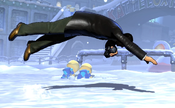
| (18 intermediate revisions by 6 users not shown) | |||
| Line 1: | Line 1: | ||
{{ | <div style="display: flex; flex-wrap:wrap-reverse;"> | ||
|name=Frank West | <div style="display: flex;flex-direction: column;flex:5;min-width:300px;padding: 10px;"> | ||
{{Character Subnav UMVC3|name=Frank West}} | |||
==Introduction== | ==Introduction== | ||
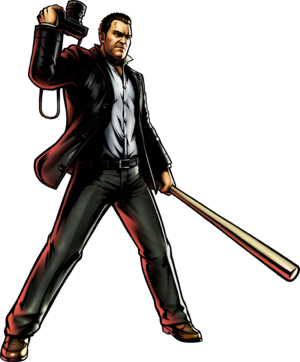
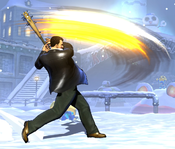
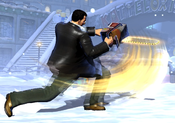
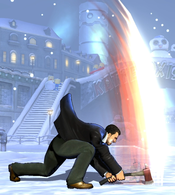
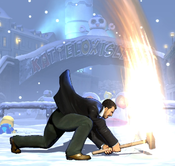
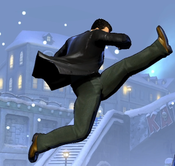
A freelance investigative journalist debuting in ''Dead Rising'', Frank quickly became a fan favorite by embodying his home game's unique mix of gory zombie horror and slapstick humor. Although he knows how to handle a gun, Frank is most famous for fighting with a mix of pro wrestling moves and scavenged, makeshift weaponry. | A freelance investigative journalist debuting in ''Dead Rising'', Frank quickly became a fan favorite by embodying his home game's unique mix of gory zombie horror and slapstick humor. Although he knows how to handle a gun, Frank is most famous for fighting with a mix of pro wrestling moves and scavenged, makeshift weaponry. | ||
'''In UMvC3''', Frank sports a mechanic exclusive to him that is loosely based on his original game. Frank starts at level 1, where he is a very underwhelming character. By using his 236S Camera special to take photos, he can level up. Higher levels improve the range, damage and chip damage potential of his attacks, while also unlocking entirely new moves. Teams featuring Frank are usually focused on quickly getting him to a high level, allowing him to perform very nasty incoming mixups with assists while also KOing the victim and more. | '''In UMvC3''', Frank sports a mechanic exclusive to him that is loosely based on his original game. Frank starts at level 1, where he is a very underwhelming character. By using his {{Clr|4|236S}} Camera special to take photos, he can level up. Higher levels improve the range, damage and chip damage potential of his attacks, while also unlocking entirely new moves. Teams featuring Frank are usually focused on quickly getting him to a high level, allowing him to perform very nasty incoming mixups with assists while also KOing the victim and more. | ||
{{ProConTable | {{ProConTable | ||
| pros = | | pros = | ||
*'''Great | *'''Great Assist:''' Frank's Shopping Cart assist is solid. While awkward to use in combos, it provides great mid range lockdown and keeps the target standing, which is useful for confirms. | ||
*'''Big Payoff:''' When Frank reaches higher levels, he gets access to tools | |||
*'''Anti-anchor:''' Starting from Level 4, Frank becomes a huge threat to teams with an anchor due to his absurd incoming, inescapable guard break setup, and even hard counter setups against the likes of characters such as Phoenix. | *'''Big Payoff:''' When Frank reaches higher levels, he gets access to very powerful tools. Higher level Frank has access to tons of invincibility, great range, easy confirms off almost any hit, great chip damage, high damage, and even solo guard break setups. | ||
*'''Anti-anchor:''' Starting from Level 4, Frank becomes a huge threat to teams with an anchor due to his absurd incoming mixups, especially with certain assists such as Jam Session, nigh inescapable guard break setup, and even hard counter setups against the likes of characters such as Phoenix. | |||
| cons = | | cons = | ||
*'''Slow Start:''' Level 1 | *'''Slow Start:''' Frank West at Level 1, (aka "Frank Whack"), starts off with essentially an incomplete moveset, limited mixup potential, linear game plan and underwhelming damage. This makes him vulnerable when snapped in or is the last character remaining. | ||
*'''No Air Mobility:''' Frank has buttons that give him air presence but his lack of an air dash or double jump makes it very difficult to catch characters that stall or runaway at the top of the screen, even when levelled up. | |||
*'''Opportunity Cost:''' Frank West | *'''No Air Mobility:''' Frank has buttons that give him air presence at all levels, but his lack of an air dash or double jump makes it very difficult to catch characters that stall or runaway at the top of the screen, even when levelled up. | ||
*'''Opportunity Cost:''' Frank West focused teams have to be built in specific ways in order to have match starting combos that level up AND kill the target, often through Hard Tags, DHC, or very risky TAC setups. While many characters are capable of helping Frank level up, only some can do so in a way that does not compromise damage, synergy or combo stability. | |||
}} | }} | ||
| Line 42: | Line 26: | ||
Frank West has an "experience" value that is tracked throughout the match. The exact experience Frank currently holds is not displayed, but his "level" is displayed next to his icon on the health bar. Frank starts every match at level 1 with 0 experience, but can gain experience throughout the match. Experience is gained by taking pictures using Frank's 236S special, which has a large range and also hits | Frank West has an "experience" value that is tracked throughout the match. The exact experience Frank currently holds is not displayed, but his "level" is displayed next to his icon on the health bar. Frank starts every match at level 1 with 0 experience, but can gain experience throughout the match. Experience is gained by taking pictures using Frank's {{Clr|4|236S}} special, which has a large range and also hits OTG. If Frank's Snapshot hits an opponent, he gains experience equal to the number of hits in the current combo. A "raw" {{Clr|4|236S}}, with no combo leading up to it, awards one experience point. Frank's levels, the experience needed to reach them, and a broad overview of their benefits are listed below: | ||
*Level 2 - 5 total experience needed. Frank unlocks his Barrel Roll (X+S) and Roundhouse Kick (623X) special moves. | *Level 2 - 5 total experience needed. Frank unlocks his Barrel Roll (X+S) and Roundhouse Kick (623X) special moves. | ||
| Line 49: | Line 33: | ||
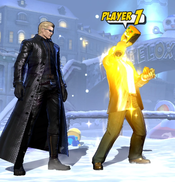
*Level 5 - 100 total experience needed. Does not add or improve any moves, but Frank gets an across-the-board 10% increase to damage dealt, as well as a 10% reduction to damage taken. While level 5, Frank has a glowing aura. | *Level 5 - 100 total experience needed. Does not add or improve any moves, but Frank gets an across-the-board 10% increase to damage dealt, as well as a 10% reduction to damage taken. While level 5, Frank has a glowing aura. | ||
Frank does not need to | Frank does not need to incrementally achieve each level and could, for example, go directly from level 1 to level 5 by taking a picture at the end of a 100-hit combo. | ||
</div> | |||
}} | <div style="display: flex;flex-direction: column;flex:2;min-width:350px;padding: 10px;">{{UMVC3_Character_Query|reversals=X+S (Lvl.2+), 214XX, 623XX}}</div></div> | ||
== Move List == | == Move List == | ||
| Line 58: | Line 42: | ||
{{MoveData | {{MoveData | ||
|image= | |image=UMVC3_FrankWest_AssistA.png | ||
|caption= | |caption= | ||
|name=Shopping Cart | |name=Shopping Cart | ||
| Line 80: | Line 64: | ||
{{MoveData | {{MoveData | ||
|image= | |image=UMVC3_FrankWest_236L_Lvl1.png | ||
|image2=UMVC3_FrankWest_236L_Lvl3.png | |||
|image3=UMVC3_FrankWest_236L_Lvl4.png | |||
|caption= | |caption= | ||
|name=Tools of Survival L | |name=Tools of Survival L | ||
| Line 95: | Line 81: | ||
|properties=- | |properties=- | ||
|description= | |description= | ||
THC Hyper: Blue Light Special. This assist improves as Frank gains levels in the same way that the point version of 236L does. Even at max level, it is still worse than Shopping Cart. | THC Hyper: Blue Light Special. This assist improves as Frank gains levels in the same way that the point version of {{Clr|1|236L}} does. Even at max level, it is still worse than Shopping Cart. | ||
}} | }} | ||
}} | }} | ||
{{MoveData | {{MoveData | ||
|image= | |image=UMVC3_FrankWest_AssistY.png | ||
|caption= | |caption= | ||
|name=Pick Me Up | |name=Pick Me Up | ||
| Line 116: | Line 102: | ||
|description= | |description= | ||
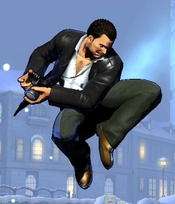
THC Hyper: Blue Light Special. Assist-exclusive move that Frank cannot perform on point, although it looks very similar to his "Bottom's Up" special. When Frank uses this assist successfully, your team is given 30% of a hyper meter bar. This assist has no other effect. One of three meter-building assists in the game, along with Amaterasu's Bloom and Morrigan's Dark Harmonizer. They all have identical startup, but Morrigan's assist has the fastest recovery by far, and is thus the only practical choice. | THC Hyper: Blue Light Special. Assist-exclusive move that Frank cannot perform on point, although it looks very similar to his "Bottom's Up" special. When Frank uses this assist successfully, your team is given 30% of a hyper meter bar. This assist has no other effect. One of three meter-building assists in the game, along with Amaterasu's Bloom and Morrigan's Dark Harmonizer. They all have identical startup, but Morrigan's assist has the fastest recovery by far, and is thus the only practical choice. | ||
However, Pick Me Up can be a decent alternative option in certain matchups such as against MODOK, Trish, or Morrigan where they will almost never be in a space where Shopping Cart can hit. | |||
}} | }} | ||
}} | }} | ||
| Line 122: | Line 110: | ||
{{MoveData | {{MoveData | ||
|image= | |image=UMVC3_FrankWest_5L.png | ||
|caption= | |caption= | ||
|name=Stand Light | |name=Stand Light | ||
| Line 142: | Line 130: | ||
{{MoveData | {{MoveData | ||
|image= | |image=UMVC3_FrankWest_5M_Lvl1.png | ||
|image2=UMVC3_FrankWest_5M_Lvl3.png | |||
|image3=UMVC3_FrankWest_5M_Lvl4.png | |||
|caption= | |caption= | ||
|name=Standing Medium | |name=Standing Medium | ||
| Line 180: | Line 170: | ||
|properties={{chipdamage}} | |properties={{chipdamage}} | ||
|description= | |description= | ||
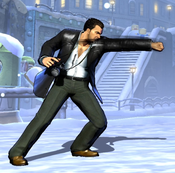
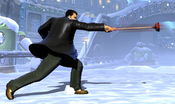
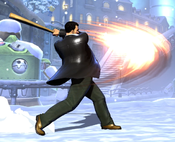
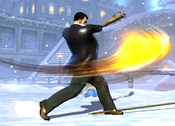
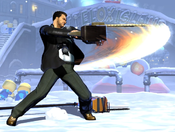
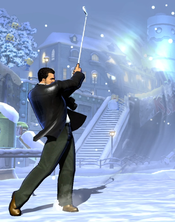
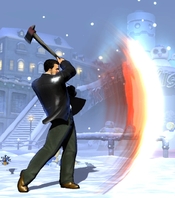
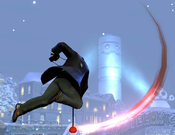
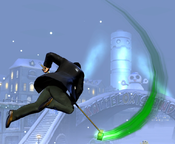
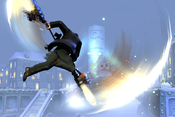
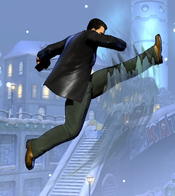
Level 1 version has very respectable horizontal range, which further improves with levels. 2H is the only button that consistently confirms from this attack, as 5H and 5S will whiff at the outer edges of 5M range. | Level 1 version has very respectable horizontal range, which further improves with levels. {{Clr|3|2H}} is the only button that consistently confirms from this attack, as {{Clr|3|5H}} and {{Clr|4|5S}} will whiff at the outer edges of 5M range. | ||
Level 3 version is almost identical to basic 5M, but with slightly more damage and even longer range. The extra range is difficult to capitalize on, as even 2H will not confirm from that far out. | Level 3 version is almost identical to basic {{Clr|2|5M}}, but with slightly more damage and even longer range. The extra range is difficult to capitalize on, as even {{Clr|3|2H}} will not confirm from that far out. | ||
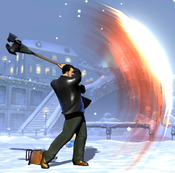
Level 4/5 version has incredible range and deals chip damage, and is an excellent poke. It also causes additional hitstun and blockstun, making it safer and more spammable. | Level 4/5 version has incredible range and deals chip damage, and is an excellent poke. It also causes additional hitstun and blockstun, making it safer and more spammable. | ||
| Line 189: | Line 179: | ||
{{MoveData | {{MoveData | ||
|image= | |image=UMVC3_FrankWest_5H_Lvl1.png | ||
|image2=UMVC3_FrankWest_5H_Lvl3.png | |||
|image3=UMVC3_FrankWest_5H_Lvl4.png | |||
|caption= | |caption= | ||
|name=Standing Heavy | |name=Standing Heavy | ||
| Line 235: | Line 227: | ||
{{MoveData | {{MoveData | ||
|image= | |image=UMVC3_FrankWest_2L.png | ||
|caption= | |caption= | ||
|name=Crouching Light | |name=Crouching Light | ||
| Line 252: | Line 244: | ||
Note: not a low attack. Decent for mashing out of pressure. | Note: not a low attack. Decent for mashing out of pressure. | ||
Frank's standard crouching hurtbox has a low profile and can naturally duck under beams or similar attacks. However, 2L raises Frank's profile slightly, causing him to be hit by these attacks. | Frank's standard crouching hurtbox has a low profile and can naturally duck under beams or similar attacks. However, {{Clr|1|2L}} raises Frank's profile slightly, causing him to be hit by these attacks. | ||
}} | }} | ||
}} | }} | ||
{{MoveData | {{MoveData | ||
|image= | |image=UMVC3_FrankWest_2M_Lvl1.png | ||
|image2=UMVC3_FrankWest_2M_Lvl3.png | |||
|image3=UMVC3_FrankWest_2M_Lvl4.png | |||
|caption= | |caption= | ||
|name=Crouching Medium | |name=Crouching Medium | ||
| Line 295: | Line 289: | ||
|properties={{chipdamage}} | |properties={{chipdamage}} | ||
|description= | |description= | ||
Note: not a low. As with standing medium, 2M gets slightly improved range at level 3 and is otherwise very similar. At level 4, it becomes a chainsaw attack with excellent range, multiple hits, and chip damage. Good for juggling airborne opponents before they reach the ground, such as after 236M. | Note: not a low. As with standing medium, {{Clr|2|2M}} gets slightly improved range at level 3 and is otherwise very similar. At level 4, it becomes a chainsaw attack with excellent range, multiple hits, and chip damage. Good for juggling airborne opponents before they reach the ground, such as after {{Clr|2|236M}}. | ||
Frank's standard crouching hurtbox has a low profile and can naturally duck under beams or similar attacks. However, 2M raises Frank's profile slightly, causing him to be hit by these attacks. | Frank's standard crouching hurtbox has a low profile and can naturally duck under beams or similar attacks. However, {{Clr|2|2M}} raises Frank's profile slightly, causing him to be hit by these attacks. | ||
}} | }} | ||
}} | }} | ||
{{MoveData | {{MoveData | ||
|image= | |image=UMVC3_FrankWest_2H.png | ||
|caption= | |caption= | ||
|name=Crouching Heavy | |name=Crouching Heavy | ||
| Line 317: | Line 311: | ||
|properties={{strk}}, {{softknockdown}} | |properties={{strk}}, {{softknockdown}} | ||
|description= | |description= | ||
Frank slides along the ground, attacking while moving forward. Lowers Frank's crouching hurtbox even further, allowing him to safely traverse underneath many attacks, especially when combined with Barrel Roll (X+S). 2H advances Frank about 1/4 of fullscreen length. As a sliding attack, it hits later if Frank is spaced farther away from the opponent, and thus is safer on block at long range. | Frank slides along the ground, attacking while moving forward. Lowers Frank's crouching hurtbox even further, allowing him to safely traverse underneath many attacks, especially when combined with Barrel Roll (X+S). {{Clr|3|2H}} advances Frank about 1/4 of fullscreen length. As a sliding attack, it hits later if Frank is spaced farther away from the opponent, and thus is safer on block at long range. | ||
Very useful for confirming from Frank's longer-ranged pokes, and a generally great neutral tool. This is Frank's only normal low attack, and the only low attack he has access to at Level 1. | Very useful for confirming from Frank's longer-ranged pokes, and a generally great neutral tool. This is Frank's only normal low attack, and the only low attack he has access to at Level 1. | ||
| Line 325: | Line 319: | ||
{{MoveData | {{MoveData | ||
|image= | |image=UMVC3_FrankWest_5S_Lvl1.png | ||
|image2=UMVC3_FrankWest_5S_Lvl3.png | |||
|image3=UMVC3_FrankWest_5S_Lvl4.png | |||
|caption= | |caption= | ||
|name=Launcher/Special | |name=Launcher/Special | ||
| Line 354: | Line 350: | ||
{{AttackData-UMVC3 | {{AttackData-UMVC3 | ||
|version=Level 4/5 | |version=Level 4/5 | ||
|damage=100,000 | |damage=100,000 | ||
|guard=Mid | |guard=Mid | ||
|startup=9 | |startup=9 | ||
| Line 370: | Line 366: | ||
{{MoveData | {{MoveData | ||
|image= | |image=UMVC3_FrankWest_jL.png | ||
|caption= | |caption= | ||
|name=Jumping Light | |name=Jumping Light | ||
| Line 390: | Line 386: | ||
{{MoveData | {{MoveData | ||
|image= | |image=UMVC3_FrankWest_jM_Lvl1.png | ||
|image2=UMVC3_FrankWest_jM_Lvl3.png | |||
|image3=UMVC3_FrankWest_jM_Lvl4.png | |||
|caption= | |caption= | ||
|name=Jumping Medium | |name=Jumping Medium | ||
| Line 398: | Line 396: | ||
|version=Level 1/2 | |version=Level 1/2 | ||
|damage=63,000 | |damage=63,000 | ||
|guard= | |guard=OH | ||
|startup=7 | |startup=7 | ||
|active=3 | |active=3 | ||
| Line 409: | Line 407: | ||
|version=Level 3 | |version=Level 3 | ||
|damage=70,000 | |damage=70,000 | ||
|guard= | |guard=OH | ||
|startup=7 | |startup=7 | ||
|active=3 | |active=3 | ||
| Line 420: | Line 418: | ||
|version=Level 4/5 | |version=Level 4/5 | ||
|damage=45,000 x3 | |damage=45,000 x3 | ||
|guard= | |guard=OH | ||
|startup=7 | |startup=7 | ||
|active=12 | |active=12 | ||
| Line 428: | Line 426: | ||
|properties={{chipdamage}} | |properties={{chipdamage}} | ||
|description= | |description= | ||
Works naturally as an instant overhead against normal sized characters, even at level 1, although the timing and spacing requirements at level 1 are very precise. If used as an instant overhead, Frank can cancel into j.2H Knee Drop to combo into a hard knockdown and continue the combo from there. | Works naturally as an instant overhead against normal sized characters, even at level 1, although the timing and spacing requirements at level 1 are very precise. If used as an instant overhead, Frank can cancel into {{Clr|3|j.2H}} Knee Drop to combo into a hard knockdown and continue the combo from there. | ||
Leveling up improves the range of this attack greatly, especially the vertical range. This makes the instant overhead timing much easier, and allows for better confirms. At level 4, Frank can chain into another j.5M instead of j.2H to confirm without having to use a | Leveling up improves the range of this attack greatly, especially the vertical range. This makes the instant overhead timing much easier, and allows for better confirms. At level 4, Frank can chain into another {{Clr|2|j.5M}} instead of {{Clr|3|j.2H}} to confirm without having to use a Hard Knockdown -> OTG setup. | ||
Besides its use as an instant overhead, this is a great general purpose neutral tool, especially at level 4+ where it can be spammed for low-risk harassment and chip damage. | Besides its use as an instant overhead, this is a great general purpose neutral tool, especially at level 4+ where it can be spammed for low-risk harassment and chip damage. | ||
| Line 437: | Line 435: | ||
{{MoveData | {{MoveData | ||
|image= | |image=UMVC3_FrankWest_jH.png | ||
|caption= | |caption= | ||
|name=Jumping Heavy | |name=Jumping Heavy | ||
| Line 458: | Line 456: | ||
{{MoveData | {{MoveData | ||
|image= | |image=UMVC3_FrankWest_jS_Lvl1.png | ||
|image2=UMVC3_FrankWest_jS_Lvl3.png | |||
|image3=UMVC3_FrankWest_jS_Lvl4.png | |||
|caption= | |caption= | ||
|name=Jumping Special | |name=Jumping Special | ||
| Line 496: | Line 496: | ||
|properties={{chipdamage}}, {{aircombofinisher}}, otherwise {{groundbounce}} | |properties={{chipdamage}}, {{aircombofinisher}}, otherwise {{groundbounce}} | ||
|description= | |description= | ||
Useful even outside its property as an | Useful even outside its property as an Air Combo Finisher for its solid hitbox and large amounts of hitstun, enabling jump loops in certain circumstances. From level 3 onwards, this attack gains the Ground Bounce property when not used as an Air Combo Finisher. This drastically improves Frank's air-to-air game as he can now confirm almost any stray aerial hit into a {{Clr|4|j.5S}} to start a full combo. | ||
}} | }} | ||
}} | }} | ||
=== Command Normals === | === Command Normals === | ||
{{MoveData | {{MoveData | ||
|image= | |image=UMVC3_FrankWest_6H_Lvl1.png | ||
|image2=UMVC3_FrankWest_6H_Lvl3.png | |||
|image3=UMVC3_FrankWest_6H_Lvl4.png | |||
|caption= | |caption= | ||
|name=Object Throw | |name=Object Throw | ||
| Line 552: | Line 553: | ||
{{MoveData | {{MoveData | ||
|image= | |image=UMVC3_FrankWest_j2H.png | ||
|caption= | |caption= | ||
|name=Knee Drop | |name=Knee Drop | ||
| Line 569: | Line 570: | ||
Frank immediately halts and aerial momentum he previously had, and plummets straight down towards the ground. The attack is aimed below him, and can hit as a cross-up. | Frank immediately halts and aerial momentum he previously had, and plummets straight down towards the ground. The attack is aimed below him, and can hit as a cross-up. | ||
Works as an airthrow OS when input as 3H or 1H. Frank's forward airthrow has better conversion potential, and so 3H is preferred at the cost of not also covering a block input. This is also a great defensive tool against an opponent's throw game, as an early input will attack the opponent jumping up for a throw, while a later input will tech the throw. | Works as an airthrow OS when input as {{Clr|3|j.3H}} or {{Clr|3|j.1H}}. Frank's forward airthrow has better conversion potential, and so {{Clr|3|3H}} is preferred at the cost of not also covering a block input. This is also a great defensive tool against an opponent's throw game, as an early input will attack the opponent jumping up for a throw, while a later input will tech the throw. | ||
Can be thrown out very safely as it is almost impossible to punish if blocked. In the event of a whiffed air normal or failed throw attempt, Frank can cancel into this move to escape back down to the ground. This move always causes a | Can be thrown out very safely as it is almost impossible to punish if blocked. In the event of a whiffed air normal or failed throw attempt, Frank can cancel into this move to escape back down to the ground. This move always causes a Hard Knockdown on hit, versus grounded or airborne, and is a major threat in situations where Frank can relaunch off an OTG hit. It also works as an alternative to {{Clr|4|j.5S}} to end air combos or to confirm stray air-to-airs. | ||
}} | }} | ||
}} | }} | ||
| Line 579: | Line 580: | ||
{{MoveData | {{MoveData | ||
|image= | |image=UMVC3_FrankWest_236L_Lvl1.png | ||
|image2=UMVC3_FrankWest_236L_Lvl3.png | |||
|image3=UMVC3_FrankWest_236L_Lvl4.png | |||
|caption= | |caption= | ||
|name=Tools of Survival L | |name=Tools of Survival L | ||
| Line 597: | Line 600: | ||
{{AttackData-UMVC3 | {{AttackData-UMVC3 | ||
|version=Level 3 | |version=Level 3 | ||
|damage= | |damage=23,000 x8 | ||
|guard=Mid | |guard=Mid | ||
|startup=15 | |startup=15 | ||
| Line 621: | Line 624: | ||
The level 1 version has a "suction" effect, pulling the opponent slightly closer on hit, which helps to compensate for its lower range and ensure all hits connect. | The level 1 version has a "suction" effect, pulling the opponent slightly closer on hit, which helps to compensate for its lower range and ensure all hits connect. | ||
Level 3 version (and ONLY the level 3 version) has the | Level 3 version (and ONLY the level 3 version) has the Strike property, causing a knockdown on hit even against grounded opponents. | ||
The level 4+ Chainsaw version is advantageous on block and deals heavy chip, but opponents can simply pushblock this attack's lengthy animation to avoid most of the danger. | The level 4+ Chainsaw version is advantageous on block and deals heavy chip, but opponents can simply pushblock this attack's lengthy animation to avoid most of the danger. | ||
| Line 629: | Line 632: | ||
{{MoveData | {{MoveData | ||
|image= | |image=UMVC3_FrankWest_236M_Lvl1.png | ||
|image2=UMVC3_FrankWest_236M_Lvl3.png | |||
|image3=UMVC3_FrankWest_236M_Lvl4.png | |||
|caption= | |caption= | ||
|name=Tools of Survival M | |name=Tools of Survival M | ||
| Line 667: | Line 672: | ||
|properties={{airok}}, {{wallbounce}} | |properties={{airok}}, {{wallbounce}} | ||
|description= | |description= | ||
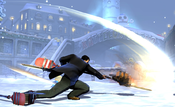
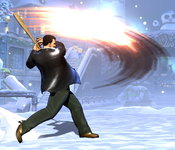
Forward swinging attack with a very similar animation and range to Frank's 5H. This special is mainly notable as an easy-to-use | Forward swinging attack with a very similar animation and range to Frank's {{Clr|3|5H}}. This special is mainly notable as an easy-to-use Wall Bounce for combo extensions. When used midscreen, it can be difficult for Frank to catch the opponent after the wallbounce - this can be alleviated slightly by performing {{Clr|2|236M}} in the air, which will bounce the opponent higher and give Frank more time to reposition. | ||
Higher level versions deal additional damage and cause a larger | Higher level versions deal additional damage and cause a larger Wall Bounce, making it easier for Frank to pick up afterwards. | ||
}} | }} | ||
}} | }} | ||
| Line 675: | Line 680: | ||
{{MoveData | {{MoveData | ||
|image= | |image=UMVC3_FrankWest_236H_Lvl1.png | ||
|image2=UMVC3_FrankWest_236H_Lvl3.png | |||
|image3=UMVC3_FrankWest_236H_Lvl4.png | |||
|caption= | |caption= | ||
|name=Tools of Survival H | |name=Tools of Survival H | ||
| Line 713: | Line 720: | ||
|properties={{airok}}, {{otg}}, very large {{groundbounce}} | |properties={{airok}}, {{otg}}, very large {{groundbounce}} | ||
|description= | |description= | ||
Overhead attack. Mainly useful for combos due to its slow speed. Higher levels improve the damage output and size of the | Overhead attack. Mainly useful for combos due to its slow speed. Higher levels improve the damage output and size of the Ground Bounce, making follow-ups easier, or more damaging follow-ups possible. | ||
Level 1 236H causes a groundbounce so small that Frank can not meaningfully combo after the grounded version. He can work around this limitation by using the aerial version instead. After using the air version, Frank can land-cancel the recovery and thus act in time to connect a 2M, 2H or even 5S. | Level 1 {{Clr|3|236H}} causes a groundbounce so small that Frank can not meaningfully combo after the grounded version. He can work around this limitation by using the aerial version instead. After using the air version, Frank can land-cancel the recovery and thus act in time to connect a {{Clr|2|2M}}, {{Clr|3|2H}} or even {{Clr|4|5S}}. | ||
Once Frank hits level 3, this move bounces high enough for him to follow-up the grounded version. This improves the threat of his offense by allowing him to solo pick up after airthrows, Knee Drops, and other hard knockdowns. | Once Frank hits level 3, this move bounces high enough for him to follow-up the grounded version. This improves the threat of his offense by allowing him to solo pick up after airthrows, Knee Drops, and other hard knockdowns. | ||
| Line 723: | Line 730: | ||
{{MoveData | {{MoveData | ||
|image= | |image=UMVC3_FrankWest_236S.png | ||
|caption= | |caption= | ||
|name=Snapshot | |name=Snapshot | ||
| Line 738: | Line 745: | ||
|properties={{airok}}, {{otg}} | |properties={{airok}}, {{otg}} | ||
|description= | |description= | ||
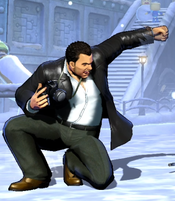
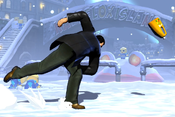
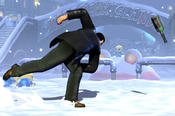
Core move for Frank, as this move is used to gain experience points and level him up. When Frank successfully lands a Snapshot, he gains experience points equal to the number of hits in his current combo (including the Snapshot itself), and can level up if he reaches a certain total experience. As a fast | Core move for Frank, as this move is used to gain experience points and level him up. When Frank successfully lands a Snapshot, he gains experience points equal to the number of hits in his current combo (including the Snapshot itself), and can level up if he reaches a certain total experience. As a fast OTG, it is also one of Frank's main ways to end combos - by cancelling an OTG Snapshot into a hyper. | ||
The camera creates a large, invisible hitsphere that reaches a good distance above, below, and in front of Frank. It is not a projectile, but can use its massive | The camera creates a large, invisible hitsphere that reaches a good distance above, below, and in front of Frank. It is not a projectile, but can use its massive reach to hit opponents from behind their own projectiles. Famously, it was once used against Dormammu's Stalking Flare hyper in tournament. The flare disappears if Dormammu is hit, which can allow Frank to avoid chip death against that hyper or other similar ones. | ||
}} | }} | ||
}} | }} | ||
| Line 746: | Line 753: | ||
{{MoveData | {{MoveData | ||
|image= | |image=UMVC3_FrankWest_22S.png | ||
|caption= | |caption="There's a party in my mouth!" | ||
|image2=UMVC3_FrankWest_22S_Effect.png | |||
|name=Bottoms Up | |name=Bottoms Up | ||
|input=22S | |input=22S | ||
| Line 769: | Line 777: | ||
{{MoveData | {{MoveData | ||
|image= | |image=UMVC3_FrankWest_214X.png | ||
|image2=UMVC3_FrankWest_214X_Shot.png | |||
|caption= | |caption= | ||
|name=Giant Swing | |name=Giant Swing | ||
| Line 820: | Line 829: | ||
{{MoveData | {{MoveData | ||
|image= | |image=UMVC3_FrankWest_46X.png | ||
|image2=UMVC3_FrankWest_46X_Grab.png | |||
|caption= | |caption= | ||
|name=Hammer Throw | |name=Hammer Throw | ||
| Line 859: | Line 869: | ||
|onhit=+101 | |onhit=+101 | ||
|onblock=+15 | |onblock=+15 | ||
|properties=Priority: Low, Durability: 1, {{cptr}} | |properties=Priority: Low, Durability: 1*, {{cptr}} | ||
|description= | |description= | ||
Frank tosses a zombie, which walks (or runs) along the ground. The {{ | Frank tosses a zombie, which walks (or runs) along the ground. The {{Clr|1|L}} version moves slowly, and the {{Clr|2|M}} version moves quickly}}. The {{Clr|3|H}} version travels at the same speed as the {{Clr|2|M}} version, with an added bonus: if it hits a grounded opponent, they will be put into a Capture state for 111 frames, making it very easy to follow up. | ||
Has several unique properties. First, despite having Priority and Durability, it is not a projectile, and will not trigger projectile counters on contact. If the zombie comes in to contact with any single low-priority projectile, they will cancel each other out. No matter how much durability the other projectile has, both will be fully negated. This does not work on beams, which will only lose 1 durability to destroy the zombie. | Has several unique properties. First, despite having Priority and Durability, it is not a projectile, and will not trigger projectile counters on contact. If the zombie comes in to contact with any single low-priority projectile, they will cancel each other out. No matter how much durability the other projectile has, both will be fully negated. This does not work on beams, which will only lose 1 durability to destroy the zombie. | ||
| Line 868: | Line 878: | ||
This is a charge move, which requires Frank to be holding back for a certain amount of time in order to perform it. If Frank wants to move forward without losing his back charge, he has a few options: | This is a charge move, which requires Frank to be holding back for a certain amount of time in order to perform it. If Frank wants to move forward without losing his back charge, he has a few options: | ||
*Use Barrel Roll (X+S), which advances him forward and can be input even while holding back or down-back. As a bonus, Barrel Roll can be canceled directly into | *Use Barrel Roll (X+S), which advances him forward and can be input even while holding back or down-back. As a bonus, Barrel Roll can be canceled directly into Hammer Throw or any other special. | ||
*Use | *Use [[UMVC3/Strategy#Block_Dashing|Block Dashing]]. | ||
}} | }} | ||
| Line 875: | Line 885: | ||
{{MoveData | {{MoveData | ||
|image= | |image=UMVC3_FrankWest_623L.png | ||
|caption= | |image2=UMVC3_FrankWest_623M.png | ||
|image3=UMVC3_FrankWest_623H.png | |||
|caption=L Version | |||
|caption2=M Version | |||
|caption3=H Version | |||
|name=Roundhouse Kick | |name=Roundhouse Kick | ||
|subtitle=Requires Level 2+ | |subtitle=Requires Level 2+ | ||
| Line 918: | Line 932: | ||
|description= | |description= | ||
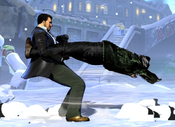
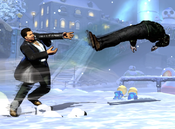
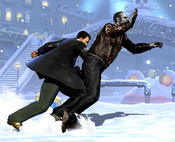
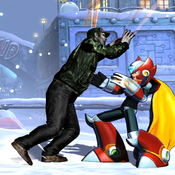
Frank spins around and performs a short-range kick, with properties that change based on button strength. Can only be used once Frank reaches level 2. | Frank spins around and performs a short-range kick, with properties that change based on button strength. Can only be used once Frank reaches level 2. | ||
*{{ | *{{Clr|1|L}} version is a fakeout with no attack. With 25 total frames of animation, it can be used to cancel {{Clr|3|5H}} and recover slightly faster. | ||
*{{ | *{{Clr|2|M}} version is a mid-hitting kick that causes a Hard Knockdown. | ||
*{{ | *{{Clr|3|H}} version is an OTG-capable Low attack. It is useful as an alternative to Snapshot once Frank is leveled, as it deals much more damage. | ||
}} | }} | ||
}} | }} | ||
| Line 926: | Line 940: | ||
{{MoveData | {{MoveData | ||
|image= | |image=UMVC3_FrankWest_XS.png | ||
|caption= | |caption= | ||
|name=Barrel Roll | |name=Barrel Roll | ||
| Line 940: | Line 954: | ||
|onhit=- | |onhit=- | ||
|onblock=- | |onblock=- | ||
|properties=Invuln | |properties=Invuln frames 1-22, Passthrough | ||
|description= | |description= | ||
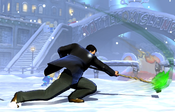
Frank performs a forward roll that can pass through opponents. It has some invulnerability (15 frames?) starting from frame 1, but the exact amount is currently not known. One of Frank's only mobility tools, he can use it to advance through projectiles and other attacks, potentially even punishing them. By utilizing the low profile of 2H, canceling into Barrel Roll, then cancelling that into an invulnerable hyper, Frank can cross nearly the entire screen while avoiding danger. | Frank performs a forward roll that can pass through opponents. It has some invulnerability (15 frames?) starting from frame 1, but the exact amount is currently not known. One of Frank's only mobility tools, he can use it to advance through projectiles and other attacks, potentially even punishing them. By utilizing the low profile of {{Clr|3|2H}}, canceling into Barrel Roll, then cancelling that into an invulnerable hyper, Frank can cross nearly the entire screen while avoiding danger. | ||
Barrel Roll can be canceled into other specials during its recovery, in addition to being able to be hyper-canceled as normal. | Barrel Roll can be canceled into other specials during its recovery, in addition to being able to be hyper-canceled as normal. | ||
| Line 951: | Line 965: | ||
{{MoveData | {{MoveData | ||
|image= | |image=UMVC3_FrankWest_236XX.png | ||
|caption= | |caption= | ||
|name=Blue Light Special | |name=Blue Light Special | ||
| Line 968: | Line 982: | ||
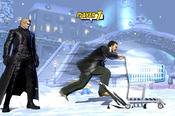
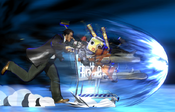
Frank charges forward with a shopping cart full of weapons. This hyper is not invincible, but has a great hitbox and nullifies projectiles. | Frank charges forward with a shopping cart full of weapons. This hyper is not invincible, but has a great hitbox and nullifies projectiles. | ||
Having the | Having the OTG property greatly enhances this hyper's effectiveness in THCs. Any character that scores a hard knockdown can call a THC with Frank backing them up, and Blue Light will pick the opponent up (along with any assists) to be hit by the rest of the team's hypers. Frank himself can make good use of this property. Pair Frank up with a character with a long-duration THC hyper, such as Dante, then score a knockdown using {{Clr|3|j.2H}} or airthrow. A THC will pick the opponent up into your teammate's hyper, allowing Frank to take several pictures and rack up EXP before finally finishing the combo. | ||
Frank can not normally utilize the | Frank can not normally utilize the Wall Bounce caused by this hyper, but by using X-Factor or a DHC to a fast hyper such as an install, it can make the following combo very easy. | ||
}} | }} | ||
}} | }} | ||
| Line 977: | Line 991: | ||
{{MoveData | {{MoveData | ||
|image= | |image=UMVC3_FrankWest_214XX.png | ||
| | |image2=UMVC3_FrankWest_214XX_Cinematic.png | ||
|caption2="Goodbye!" | |||
|name=Survival Techniques | |name=Survival Techniques | ||
|input=214XX (1 bar) | |input=214XX (1 bar) | ||
| Line 984: | Line 999: | ||
{{AttackData-UMVC3 | {{AttackData-UMVC3 | ||
|version=Level 1/2 | |version=Level 1/2 | ||
|damage=253,100 | |damage=20,000 + 40,000 x2 + 50,000 x4(253,100) | ||
|guard=Mid | |guard=Mid | ||
|startup=8+4 | |startup=8+4 | ||
| Line 995: | Line 1,010: | ||
{{AttackData-UMVC3 | {{AttackData-UMVC3 | ||
|version=Level 3 | |version=Level 3 | ||
|damage=312,000 | |damage=30,000 + 40,000 x2 + 50,000 x4 + 70,000(312,000) | ||
|guard=Mid | |guard=Mid | ||
|startup=8+4 | |startup=8+4 | ||
| Line 1,006: | Line 1,021: | ||
{{AttackData-UMVC3 | {{AttackData-UMVC3 | ||
|version=Level 4/5 | |version=Level 4/5 | ||
|damage=356,100 | |damage=35,000 + 20,000 x6 + 40,000 x4 + 70,000 + 50,000 x3(356,100) | ||
|guard=Mid | |guard=Mid | ||
|startup=8+4 | |startup=8+4 | ||
| Line 1,015: | Line 1,030: | ||
|properties=Invuln until frame 25, {{softknockdown}} | |properties=Invuln until frame 25, {{softknockdown}} | ||
|description= | |description= | ||
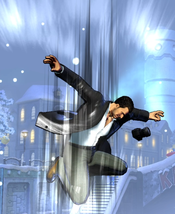
Frank lunges forward. If he touches the opponent's point character, they are pulled into a cinematic where Frank deals heavy damage, ending in a | Frank lunges forward. If he touches the opponent's point character, they are pulled into a cinematic where Frank deals heavy damage, ending in a Soft Knockdown. An early DHC instead causes a lengthy spinout where the opponent flies high into the air before landing. | ||
At level 1, this hyper is dubiously useful. It deals less damage than Blue Light Special (when mashed), and is more difficult to land. This hyper starts to shine from Level 3 onward. It gains invulnerability, allowing it to be used as a reversal. It can even be combined with the invulnerability from Barrel Roll to quickly travel across the screen while avoiding enemy attacks. Additionally, it deals more damage than Blue Light starting at Level 3, and deals enormous damage at Level 4+. | At level 1, this hyper is dubiously useful. It deals less damage than Blue Light Special (when mashed), and is more difficult to land. This hyper starts to shine from Level 3 onward. It gains invulnerability, allowing it to be used as a reversal. It can even be combined with the invulnerability from Barrel Roll to quickly travel across the screen while avoiding enemy attacks. Additionally, it deals more damage than Blue Light starting at Level 3, and deals enormous damage at Level 4+. | ||
| Line 1,023: | Line 1,038: | ||
{{MoveData | {{MoveData | ||
|image= | |image=UMVC3_FrankWest_623XX.png | ||
|image2=UMVC3_FrankWest_623XX_Grab.png | |||
|caption= | |caption= | ||
|name=Funny Face Crusher | |name=Funny Face Crusher | ||
| Line 1,039: | Line 1,055: | ||
|properties=Invuln until frame 12, mashable, {{hardknockdown}} | |properties=Invuln until frame 12, mashable, {{hardknockdown}} | ||
|description= | |description= | ||
Anti-air command grab hyper. Requires Frank to be Level 3 or higher to activate. If it connects, it pulls the opponent into a cinematic that ends with the opponent in a | Anti-air command grab hyper. Requires Frank to be Level 3 or higher to activate. If it connects, it pulls the opponent into a cinematic that ends with the opponent in a Hard Knockdown state next to Frank. This knockdown lasts long enough for Frank to pick up with one of his OTG attacks and start a combo, so it is very devastating to land. | ||
Can be used for resets, Guard Break setups (by making an oncoming opponent block an attack to forfeit their throw immunity), and anti-Dark Phoenix setups (using its invincibility to blow through the shockwave of her activation hyper | Can be used for resets, Guard Break setups (by making an oncoming opponent block an attack to forfeit their throw immunity), and anti-Dark Phoenix setups (using its invincibility to blow through the shockwave of her activation hyper; Dark Phoenix is always considered airborne during her resurrection). DHCing into it from another hyper can potentially give any character access to an invincible, unblockable anti-air. | ||
This hyper can be "mashed" by spinning the stick during the cinematic portion. Although this does add a small amount of damage, it also increases the number of hits in the hyper. This will apply more damage scaling to the follow-up combo, and thus cause lower damage overall. It is not recommended to mash this hyper. | This hyper can be "mashed" by spinning the stick during the cinematic portion. Although this does add a small amount of damage, it also increases the number of hits in the hyper. This will apply more damage scaling to the follow-up combo, and thus cause lower damage overall. It is not recommended to mash this hyper. | ||
}} | }} | ||
}} | }} | ||
=== Universal Mechanics === | === Universal Mechanics === | ||
{{MoveData | {{MoveData | ||
|image= | |image=UMVC3_FrankWest_GroundThrow.png | ||
|image2=UMVC3_FrankWest_GroundBackThrow.png | |||
|caption= | |caption= | ||
|name=Ground Throw | |name=Ground Throw | ||
| Line 1,066: | Line 1,082: | ||
|properties={{hardknockdown}} | |properties={{hardknockdown}} | ||
|description= | |description= | ||
Standard ground throw that places the opponent next to Frank on the ground. Forward throw allows Frank to act slightly faster, although follow-ups are the same in either direction. Frank can pick up afterwards with 236S, 623H, or his 236XX hyper (either done normally or as part of a THC). | Standard ground throw that places the opponent next to Frank on the ground. Forward throw allows Frank to act slightly faster, although follow-ups are the same in either direction. Frank can pick up afterwards with {{Clr|4|236S}}, {{Clr|3|623H}}, or his 236XX hyper (either done normally or as part of a THC). | ||
}} | }} | ||
}} | }} | ||
{{MoveData | {{MoveData | ||
|image= | |image=UMVC3_FrankWest_AirThrow.png | ||
|image2=UMVC3_FrankWest_AirBackThrow.png | |||
|caption= | |caption= | ||
|name=Air Throw | |name=Air Throw | ||
| Line 1,086: | Line 1,103: | ||
|properties={{hardknockdown}} | |properties={{hardknockdown}} | ||
|description= | |description= | ||
Standard airthrow that results in a hard knockdown. Forward airthrow allows Frank to act noticeably faster than backthrow. Can follow up with all the same OTG attacks as the ground throw. Additionally, Frank can connect a 236H after a forward airthrow, allowing him to solo relaunch if he is Level 3 or higher. | Standard airthrow that results in a hard knockdown. Forward airthrow allows Frank to act noticeably faster than backthrow. Can follow up with all the same OTG attacks as the ground throw. Additionally, Frank can connect a {{Clr|3|236H}} after a forward airthrow, allowing him to solo relaunch if he is Level 3 or higher. | ||
}} | }} | ||
}} | }} | ||
| Line 1,092: | Line 1,109: | ||
{{MoveData | {{MoveData | ||
|image= | |image=UMVC3_FrankWest_5H_Lvl1.png | ||
|caption= | |caption= | ||
|name=Snap Back | |name=Snap Back | ||
| Line 1,107: | Line 1,124: | ||
|properties=Snapback | |properties=Snapback | ||
|description= | |description= | ||
Animation and hitbox based on 5H. | Animation and hitbox based on {{Clr|3|5H}}. | ||
}} | }} | ||
}} | }} | ||
| Line 1,113: | Line 1,130: | ||
{{MoveData | {{MoveData | ||
|image= | |image=UMVC3_FrankWest_HardTag.png | ||
|caption= | |caption= | ||
|name=Hard Tag | |name=Hard Tag | ||
| Line 1,119: | Line 1,136: | ||
|data= | |data= | ||
{{AttackData-UMVC3 | {{AttackData-UMVC3 | ||
|damage= | |damage=30,000 | ||
|guard=OH | |guard=OH | ||
|startup=- | |startup=- | ||
| Line 1,131: | Line 1,148: | ||
}} | }} | ||
}} | }} | ||
== Team Position == | == Team Position == | ||
| Line 1,161: | Line 1,177: | ||
'''Other Players to Watch:''' Kusoru Ageojoe (Joe/Frank/Raccoon), Vairos (Skrull/Frank/Haggar), Apologyman (Skrull/Frank/Doom, but only a long time ago), Zansam (Nova/Frank/Raccoon) | '''Other Players to Watch:''' Kusoru Ageojoe (Joe/Frank/Raccoon), Vairos (Skrull/Frank/Haggar), Apologyman (Skrull/Frank/Doom, but only a long time ago), Zansam (Nova/Frank/Raccoon) | ||
== Alternate Colors == | == Alternate Colors == | ||
{{Chara-Colors-UMVC3}} | |||
== Videos and External Resources == | == Videos and External Resources == | ||
=== Combo and Setup Videos === | === Combo and Setup Videos === | ||
| Line 1,285: | Line 1,189: | ||
[http://youtu.be/yU0SFzNhf1o Optimized combos by The Cape] <br> | [http://youtu.be/yU0SFzNhf1o Optimized combos by The Cape] <br> | ||
[https://youtu.be/rW1EbjBVLJc Updated Trials by Readman] <br> | [https://youtu.be/rW1EbjBVLJc Updated Trials by Readman] <br> | ||
=== Tips and Tricks === | === Tips and Tricks === | ||
* When you OTG with Snapshot, either cancel into a hyper or dash away from the target before you do it. Snapshot is unsafe on hit if not cancelled into hyper and can be punished by either a throw, a 3 frame normal, or a Snapback. | * When you OTG with Snapshot, either cancel into a hyper or dash away from the target before you do it. Snapshot is unsafe on hit if not cancelled into hyper and can be punished by either a throw, a 3 frame normal, or a Snapback. | ||
| Line 1,302: | Line 1,196: | ||
* A simple incoming Frank can do is to meaty with the Zombies. IF you KO the target with Survival Techniques, dash back and hold back to charge Hammer Throw M. Then immediately use Giant Swing L. The two zombies will meaty and hit in a way that makes it possible to confirm into a combo if they don't block. | * A simple incoming Frank can do is to meaty with the Zombies. IF you KO the target with Survival Techniques, dash back and hold back to charge Hammer Throw M. Then immediately use Giant Swing L. The two zombies will meaty and hit in a way that makes it possible to confirm into a combo if they don't block. | ||
* Knee Drop is an overhead. | * Knee Drop is an overhead. Also. j.3H will option select an air throw and Knee Drop. | ||
* If you THC with Dante behind you and the foe is in the corner, try to dash into the corner. If you are close enough you can preserve your wall bounce that would otherwise be depleted by Blue Light Special. | * If you plan to THC with Dante behind you and the foe is in the corner during a combo, try to dash into the corner before you THC. If you are close enough you can preserve your wall bounce that would otherwise be depleted by Blue Light Special. | ||
* Zombies thrown by Giant Swing ignore all projectiles and can be a good option to stop or curb horizontal zoning if there's a gap large enough to throw. Viable across the whole screen. | * Zombies thrown by Giant Swing ignore all projectiles and can be a good option to stop or curb horizontal zoning if there's a gap large enough to throw. Viable across the whole screen. | ||
* Frank's Dodge Roll can be used for very nasty incoming mixups when combined with assists such as Jam Session. Be mindful of the fact that others can throw Frank out of the last half of the Dodge Roll action despite the lower profile. | |||
* If level 1 Frank is by himself with XF3 available, you can confirm from a j.L overhead hits by quickly cancelling that j.L into j.S and then X Factor Cancel, then j.S and land into a grounded BNB for level 3 and massive damage. | * If level 1 Frank is by himself with XF3 available, you can confirm from a j.L overhead hits by quickly cancelling that j.L into j.S and then X Factor Cancel, then j.S and land into a grounded BNB for level 3 and massive damage. | ||
* While Snapshot is unsafe on hit when not cancelled into Hyper, it has utilty aganist characters whose projectiles disappear when getting hit, such as Dr. Strange's Eye of Agamotto and Dormammu's Stalking Flare. Make sure you are not within range of their normals when doing this. | |||
{{Content Box|content= | {{Content Box|content= | ||
{{Navbox-UMVC3}} | {{Navbox-UMVC3}} | ||
}} | }} | ||
Revision as of 09:01, 29 May 2024
Introduction
A freelance investigative journalist debuting in Dead Rising, Frank quickly became a fan favorite by embodying his home game's unique mix of gory zombie horror and slapstick humor. Although he knows how to handle a gun, Frank is most famous for fighting with a mix of pro wrestling moves and scavenged, makeshift weaponry.
In UMvC3, Frank sports a mechanic exclusive to him that is loosely based on his original game. Frank starts at level 1, where he is a very underwhelming character. By using his 236S Camera special to take photos, he can level up. Higher levels improve the range, damage and chip damage potential of his attacks, while also unlocking entirely new moves. Teams featuring Frank are usually focused on quickly getting him to a high level, allowing him to perform very nasty incoming mixups with assists while also KOing the victim and more.
| Strengths | Weaknesses |
|---|---|
|
|
Unique Mechanics
Frank West has an "experience" value that is tracked throughout the match. The exact experience Frank currently holds is not displayed, but his "level" is displayed next to his icon on the health bar. Frank starts every match at level 1 with 0 experience, but can gain experience throughout the match. Experience is gained by taking pictures using Frank's 236S special, which has a large range and also hits OTG. If Frank's Snapshot hits an opponent, he gains experience equal to the number of hits in the current combo. A "raw" 236S, with no combo leading up to it, awards one experience point. Frank's levels, the experience needed to reach them, and a broad overview of their benefits are listed below:
- Level 2 - 5 total experience needed. Frank unlocks his Barrel Roll (X+S) and Roundhouse Kick (623X) special moves.
- Level 3 - 20 total experience needed. Some of Frank's normals, his 236X specials, and his 214XX hyper are replaced with upgraded versions that have improved damage and properties. Also unlocks his 623XX anti-air command grab hyper.
- Level 4 - 50 total experience needed. Franks normals, 236X specials and 214XX hyper are replaced again. Their range and damage are increased even further, and Frank's normals now deal chip damage on block.
- Level 5 - 100 total experience needed. Does not add or improve any moves, but Frank gets an across-the-board 10% increase to damage dealt, as well as a 10% reduction to damage taken. While level 5, Frank has a glowing aura.
Frank does not need to incrementally achieve each level and could, for example, go directly from level 1 to level 5 by taking a picture at the end of a 100-hit combo.
Move List
Assists
| Damage | Startup | Active | Recovery |
|---|---|---|---|
| 20,000 x7 | 31 | 35 | 104, 74 |
| On Hit | On Block | Guard | Properties |
| - | - | Mid | - |
|
THC Hyper: Blue Light Special. This is an assist-only attack, that acts like a powered-down version of Frank's 236XX hyper. Frank charges forward while pushing a shopping cart. This assist covers most of the stage at ground level, comparable to a beam assist. It causes a very significant amount of blockstun due to its high duration, and is a generally powerful lockdown tool. This is a physical hit, and has no projectile element. Has a much higher hit count than similar assists such as Akuma's tatsu or most beams. As a result, combos that follow from this assist will be more heavily affected by damage scaling. | |||
| Damage | Startup | Active | Recovery |
|---|---|---|---|
| 30,000 x4 (level 1-2), 35,000 x8 (level 3), 25,000 x10 (level 4-5) | 39 | 2(5)3(4)3(4)3 | 134, 104 |
| On Hit | On Block | Guard | Properties |
| - | - | Mid | - |
|
THC Hyper: Blue Light Special. This assist improves as Frank gains levels in the same way that the point version of 236L does. Even at max level, it is still worse than Shopping Cart. | |||
| Damage | Startup | Active | Recovery |
|---|---|---|---|
| - | 25 | - | 177, 147 |
| On Hit | On Block | Guard | Properties |
| - | - | - | - |
|
THC Hyper: Blue Light Special. Assist-exclusive move that Frank cannot perform on point, although it looks very similar to his "Bottom's Up" special. When Frank uses this assist successfully, your team is given 30% of a hyper meter bar. This assist has no other effect. One of three meter-building assists in the game, along with Amaterasu's Bloom and Morrigan's Dark Harmonizer. They all have identical startup, but Morrigan's assist has the fastest recovery by far, and is thus the only practical choice. However, Pick Me Up can be a decent alternative option in certain matchups such as against MODOK, Trish, or Morrigan where they will almost never be in a space where Shopping Cart can hit. | |||
Ground Normals
| Damage | Startup | Active | Recovery |
|---|---|---|---|
| 48,000 | 6 | 3 | 12 |
| On Hit | On Block | Guard | Properties |
| +1 | -1 | Mid | - |
|
- | |||
| Level 1/2 | Damage | Startup | Active | Recovery |
|---|---|---|---|---|
| 60,000 | 10 | 3 | 22 | |
| On Hit | On Block | Guard | Properties | |
| -4 | -7 | Mid | - | |
| Level 3 | Damage | Startup | Active | Recovery |
| 68,000 | 10 | 3 | 22 | |
| On Hit | On Block | Guard | Properties | |
| -4 | -7 | Mid | - | |
| Level 4/5 | Damage | Startup | Active | Recovery |
| 45,000 x3 | 10 | 5 | 22 | |
| On Hit | On Block | Guard | Properties | |
| -2 | -5 | Mid | ||
|
Level 1 version has very respectable horizontal range, which further improves with levels. 2H is the only button that consistently confirms from this attack, as 5H and 5S will whiff at the outer edges of 5M range. Level 3 version is almost identical to basic 5M, but with slightly more damage and even longer range. The extra range is difficult to capitalize on, as even 2H will not confirm from that far out. Level 4/5 version has incredible range and deals chip damage, and is an excellent poke. It also causes additional hitstun and blockstun, making it safer and more spammable. | ||||
| Level 1/2 | Damage | Startup | Active | Recovery |
|---|---|---|---|---|
| 70,000 | 14 | 4 | 28 | |
| On Hit | On Block | Guard | Properties | |
| -6 | -9 | Mid | - | |
| Level 3 | Damage | Startup | Active | Recovery |
| 90,000 | 14 | 3 | 29 | |
| On Hit | On Block | Guard | Properties | |
| -6 | -9 | Mid | - | |
| Level 4/5 | Damage | Startup | Active | Recovery |
| 45,000 x5 | 14 | 7 | 30 | |
| On Hit | On Block | Guard | Properties | |
| -7 | -10 | Mid | ||
|
Level 1, 2 and 3 versions are mostly identical, although this move does gain a nice damage boost at level 3. Level 4 plus version turns into a multi-hitting chainsaw attack that causes almost no pushback. | ||||
| Damage | Startup | Active | Recovery |
|---|---|---|---|
| 45,000 | 6 | 2 | 15 |
| On Hit | On Block | Guard | Properties |
| -1 | -3 | Mid | - |
|
Note: not a low attack. Decent for mashing out of pressure. Frank's standard crouching hurtbox has a low profile and can naturally duck under beams or similar attacks. However, 2L raises Frank's profile slightly, causing him to be hit by these attacks. | |||
| Level 1/2 | Damage | Startup | Active | Recovery |
|---|---|---|---|---|
| 58,000 | 9 | 3 | 22 | |
| On Hit | On Block | Guard | Properties | |
| -4 | -7 | Mid | - | |
| Level 3 | Damage | Startup | Active | Recovery |
| 63,000 | 9 | 3 | 22 | |
| On Hit | On Block | Guard | Properties | |
| -4 | -7 | Mid | - | |
| Level 4/5 | Damage | Startup | Active | Recovery |
| 43,000 x3 | 9 | 7 | 20 | |
| On Hit | On Block | Guard | Properties | |
| -2 | -5 | Mid | ||
|
Note: not a low. As with standing medium, 2M gets slightly improved range at level 3 and is otherwise very similar. At level 4, it becomes a chainsaw attack with excellent range, multiple hits, and chip damage. Good for juggling airborne opponents before they reach the ground, such as after 236M. Frank's standard crouching hurtbox has a low profile and can naturally duck under beams or similar attacks. However, 2M raises Frank's profile slightly, causing him to be hit by these attacks. | ||||
| Damage | Startup | Active | Recovery |
|---|---|---|---|
| 63,000 | 10 | 12 | 19 |
| On Hit | On Block | Guard | Properties |
| - | -8 | Low | |
|
Frank slides along the ground, attacking while moving forward. Lowers Frank's crouching hurtbox even further, allowing him to safely traverse underneath many attacks, especially when combined with Barrel Roll (X+S). 2H advances Frank about 1/4 of fullscreen length. As a sliding attack, it hits later if Frank is spaced farther away from the opponent, and thus is safer on block at long range. Very useful for confirming from Frank's longer-ranged pokes, and a generally great neutral tool. This is Frank's only normal low attack, and the only low attack he has access to at Level 1. | |||
| Level 1/2 | Damage | Startup | Active | Recovery |
|---|---|---|---|---|
| 80,000 | 9 | 5 | 25 | |
| On Hit | On Block | Guard | Properties | |
| - | -7 | Mid | ||
| Level 3 | Damage | Startup | Active | Recovery |
| 90,000 | 9 | 5 | 25 | |
| On Hit | On Block | Guard | Properties | |
| - | -7 | Mid | ||
| Level 4/5 | Damage | Startup | Active | Recovery |
| 100,000 | 9 | 5 | 25 | |
| On Hit | On Block | Guard | Properties | |
| - | -7 | Mid | ||
|
Fairly standard launcher with solid range. Does not deal chip at level 4+ the way many of Frank's other enhanced attacks do. | ||||
Aerial Normals
| Damage | Startup | Active | Recovery |
|---|---|---|---|
| 50,000 | 5 | 8 | 13 |
| On Hit | On Block | Guard | Properties |
| +13 | +11 | OH | - |
|
Works naturally as an instant overhead even against normal-sized characters, although Frank struggles to confirm this hit into anything without assists or X-Factor. | |||
| Level 1/2 | Damage | Startup | Active | Recovery |
|---|---|---|---|---|
| 63,000 | 7 | 3 | 22 | |
| On Hit | On Block | Guard | Properties | |
| +19 | +16 | OH | - | |
| Level 3 | Damage | Startup | Active | Recovery |
| 70,000 | 7 | 3 | 22 | |
| On Hit | On Block | Guard | Properties | |
| +19 | +16 | OH | - | |
| Level 4/5 | Damage | Startup | Active | Recovery |
| 45,000 x3 | 7 | 12 | 22 | |
| On Hit | On Block | Guard | Properties | |
| +18 | +15 | OH | ||
|
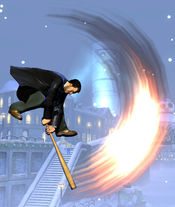
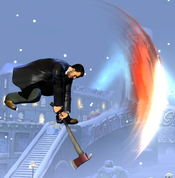
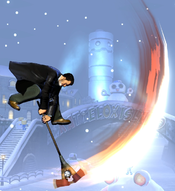
Works naturally as an instant overhead against normal sized characters, even at level 1, although the timing and spacing requirements at level 1 are very precise. If used as an instant overhead, Frank can cancel into j.2H Knee Drop to combo into a hard knockdown and continue the combo from there. Leveling up improves the range of this attack greatly, especially the vertical range. This makes the instant overhead timing much easier, and allows for better confirms. At level 4, Frank can chain into another j.5M instead of j.2H to confirm without having to use a Hard Knockdown -> OTG setup. Besides its use as an instant overhead, this is a great general purpose neutral tool, especially at level 4+ where it can be spammed for low-risk harassment and chip damage. | ||||
| Damage | Startup | Active | Recovery |
|---|---|---|---|
| 65,000 | 11 | 5 | 20 |
| On Hit | On Block | Guard | Properties |
| +21 | +18 | OH | - |
|
Standard jumping heavy attack. | |||
| Level 1/2 | Damage | Startup | Active | Recovery |
|---|---|---|---|---|
| 70,000 | 13 | 3 | 23 | |
| On Hit | On Block | Guard | Properties | |
| +16 | +13 | OH | ||
| Level 3 | Damage | Startup | Active | Recovery |
| 90,000 | 13 | 4 | 22 | |
| On Hit | On Block | Guard | Properties | |
| - | +18 | OH | ||
| Level 4/5 | Damage | Startup | Active | Recovery |
| 110,000 | 13 | 4 | 22 | |
| On Hit | On Block | Guard | Properties | |
| - | +17 | OH | ||
|
Useful even outside its property as an Air Combo Finisher for its solid hitbox and large amounts of hitstun, enabling jump loops in certain circumstances. From level 3 onwards, this attack gains the Ground Bounce property when not used as an Air Combo Finisher. This drastically improves Frank's air-to-air game as he can now confirm almost any stray aerial hit into a j.5S to start a full combo. | ||||
Command Normals
| Level 1/2 Pie |
Damage | Startup | Active | Recovery |
|---|---|---|---|---|
| 50,000 | 12 | - | 35 | |
| On Hit | On Block | Guard | Properties | |
| -10 | -13 | Mid | ||
| Level 3 Juice |
Damage | Startup | Active | Recovery |
| 80,000 | 12 | - | 35 | |
| On Hit | On Block | Guard | Properties | |
| -7 | -10 | Mid | ||
| Level 4/5 Bottle |
Damage | Startup | Active | Recovery |
| 100,000 | 12 | - | 35 | |
| On Hit | On Block | Guard | Properties | |
| -5 | -8 | OH | ||
|
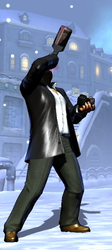
Standard and fairly quick projectile that travels horizontally across the screen. Level-ups improve the projectile's damage, hitstun/blockstun, and durability. | ||||
| Damage | Startup | Active | Recovery |
|---|---|---|---|
| 70,000 | 13 | Until Grounded | 13 |
| On Hit | On Block | Guard | Properties |
| - | +4 | OH | |
|
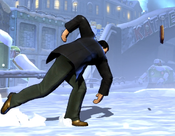
Frank immediately halts and aerial momentum he previously had, and plummets straight down towards the ground. The attack is aimed below him, and can hit as a cross-up. Works as an airthrow OS when input as j.3H or j.1H. Frank's forward airthrow has better conversion potential, and so 3H is preferred at the cost of not also covering a block input. This is also a great defensive tool against an opponent's throw game, as an early input will attack the opponent jumping up for a throw, while a later input will tech the throw. Can be thrown out very safely as it is almost impossible to punish if blocked. In the event of a whiffed air normal or failed throw attempt, Frank can cancel into this move to escape back down to the ground. This move always causes a Hard Knockdown on hit, versus grounded or airborne, and is a major threat in situations where Frank can relaunch off an OTG hit. It also works as an alternative to j.5S to end air combos or to confirm stray air-to-airs. | |||
Special Moves
| Level 1/2 | Damage | Startup | Active | Recovery |
|---|---|---|---|---|
| 30,000 x4 | 15 | 2(5)3(4)3(4)3 | 22 (in air: 7) | |
| On Hit | On Block | Guard | Properties | |
| +1 | -2 | Mid | ||
| Level 3 | Damage | Startup | Active | Recovery |
| 23,000 x8 | 15 | 2(6)3(3)3(4)3 | 20 (in air: 7) | |
| On Hit | On Block | Guard | Properties | |
| - | - | Mid | ||
| Level 4+ | Damage | Startup | Active | Recovery |
| 25,000 x10 | 15 | 25 | 11 (in air: 8) | |
| On Hit | On Block | Guard | Properties | |
| +8 | +5 | Mid | ||
|
Multi-hitting forward attack. This special is mainly useful in the air as a combo tool. When used in the air, it halts Frank's aerial momentum, and recovers much faster than normal. This allows Frank to link normals after the attack, extending his air combos and padding the combo count for gaining additional experience points. The level 1 version has a "suction" effect, pulling the opponent slightly closer on hit, which helps to compensate for its lower range and ensure all hits connect. Level 3 version (and ONLY the level 3 version) has the Strike property, causing a knockdown on hit even against grounded opponents. The level 4+ Chainsaw version is advantageous on block and deals heavy chip, but opponents can simply pushblock this attack's lengthy animation to avoid most of the danger. | ||||
| Level 1/2 | Damage | Startup | Active | Recovery |
|---|---|---|---|---|
| 90,000 | 20 | 3 | 33 | |
| On Hit | On Block | Guard | Properties | |
| - | -13 | Mid | ||
| Level 3 | Damage | Startup | Active | Recovery |
| 120,000 | 20 | 3 | 33 | |
| On Hit | On Block | Guard | Properties | |
| - | -13 | Mid | ||
| Level 4+ | Damage | Startup | Active | Recovery |
| 30,000 x8 | 20 | 11(1)2 | 22 | |
| On Hit | On Block | Guard | Properties | |
| - | -7 | Mid | ||
|
Forward swinging attack with a very similar animation and range to Frank's 5H. This special is mainly notable as an easy-to-use Wall Bounce for combo extensions. When used midscreen, it can be difficult for Frank to catch the opponent after the wallbounce - this can be alleviated slightly by performing 236M in the air, which will bounce the opponent higher and give Frank more time to reposition. Higher level versions deal additional damage and cause a larger Wall Bounce, making it easier for Frank to pick up afterwards. | ||||
| Level 1/2 | Damage | Startup | Active | Recovery |
|---|---|---|---|---|
| 80,000 | 27 | 3 | 31 | |
| On Hit | On Block | Guard | Properties | |
| - | -11 | OH | ||
| Level 3 | Damage | Startup | Active | Recovery |
| 110,000 | 27 | 4 | 30 | |
| On Hit | On Block | Guard | Properties | |
| - | -11 | OH | ||
| Level 4+ | Damage | Startup | Active | Recovery |
| 150,000 | 20 | 11(1)2 | 22 | |
| On Hit | On Block | Guard | Properties | |
| - | -7 | OH | ||
|
Overhead attack. Mainly useful for combos due to its slow speed. Higher levels improve the damage output and size of the Ground Bounce, making follow-ups easier, or more damaging follow-ups possible. Level 1 236H causes a groundbounce so small that Frank can not meaningfully combo after the grounded version. He can work around this limitation by using the aerial version instead. After using the air version, Frank can land-cancel the recovery and thus act in time to connect a 2M, 2H or even 5S. Once Frank hits level 3, this move bounces high enough for him to follow-up the grounded version. This improves the threat of his offense by allowing him to solo pick up after airthrows, Knee Drops, and other hard knockdowns. | ||||
| Damage | Startup | Active | Recovery |
|---|---|---|---|
| 10,000 | 15 | 10 | 31 |
| On Hit | On Block | Guard | Properties |
| -25 | -27 | Mid | |
|
Core move for Frank, as this move is used to gain experience points and level him up. When Frank successfully lands a Snapshot, he gains experience points equal to the number of hits in his current combo (including the Snapshot itself), and can level up if he reaches a certain total experience. As a fast OTG, it is also one of Frank's main ways to end combos - by cancelling an OTG Snapshot into a hyper. The camera creates a large, invisible hitsphere that reaches a good distance above, below, and in front of Frank. It is not a projectile, but can use its massive reach to hit opponents from behind their own projectiles. Famously, it was once used against Dormammu's Stalking Flare hyper in tournament. The flare disappears if Dormammu is hit, which can allow Frank to avoid chip death against that hyper or other similar ones. | |||
| Damage | Startup | Active | Recovery |
|---|---|---|---|
| - | 60 | - | 145 |
| On Hit | On Block | Guard | Properties |
| - | - | - | - |
|
Frank takes a drink, which requires a full second to complete, making it very difficult to use safely. If he successfully completes his drink, Frank gains a buff which doubles experience gained from photos for 10 seconds. At the end of the 10-second duration, Frank is forced into a 145-frame vomiting animation which can not be canceled except via X-Factor, effectively giving the opponent a free hit. Tagging Frank out by any method cancels the buff, disabling the double EXP gain and preventing Frank from vomiting. | |||
| L |
Damage | Startup | Active | Recovery |
|---|---|---|---|---|
| 50,000 + 80,000 | 28 | 21 | 8 | |
| On Hit | On Block | Guard | Properties | |
| - | +17 | Mid | ||
| M |
Damage | Startup | Active | Recovery |
| 50,000 x2 + 80,000 | 38 | 21 | 8 | |
| On Hit | On Block | Guard | Properties | |
| - | +17 | Mid | ||
| H |
Damage | Startup | Active | Recovery |
| 50,000 x3 + 80,000 | 48 | 31 | 8 | |
| On Hit | On Block | Guard | Properties | |
| - | +17 | Mid | ||
|
Frank spins a zombie around, using it as a weapon to attack enemies. He spins 1, 2, or 3 times depending on button strength used. Afterwards, he releases the zombie, causing it to fly forward in an arc for the final hit. This move is not considered a projectile, even the final portion where the zombie is thrown. It does not interact with projectiles and does not trigger projectile counters. However, it is also not a physical hit, and will not trigger that type of counter either, even during the initial melee portion of the move. This move has substantial blockstun and is very advantageous on hit or block, but has lengthy startup. The long startup can be covered using an assist, or by using it as a meaty attack against an oncoming opponent. | ||||
| L |
Damage | Startup | Active | Recovery |
|---|---|---|---|---|
| 80,000 | 30 | - | 10 | |
| On Hit | On Block | Guard | Properties | |
| +15 | +15 | Mid | Priority: Low, Durability: 1 | |
| M |
Damage | Startup | Active | Recovery |
| 80,000 | 30 | - | 10 | |
| On Hit | On Block | Guard | Properties | |
| +15 | +15 | Mid | Priority: Low, Durability: 1 | |
| H |
Damage | Startup | Active | Recovery |
| 80,000 | 30 | - | 10 | |
| On Hit | On Block | Guard | Properties | |
| +101 | +15 | Mid | Priority: Low, Durability: 1*, | |
|
Frank tosses a zombie, which walks (or runs) along the ground. The L version moves slowly, and the M version moves quickly. The H version travels at the same speed as the M version, with an added bonus: if it hits a grounded opponent, they will be put into a Capture state for 111 frames, making it very easy to follow up. Has several unique properties. First, despite having Priority and Durability, it is not a projectile, and will not trigger projectile counters on contact. If the zombie comes in to contact with any single low-priority projectile, they will cancel each other out. No matter how much durability the other projectile has, both will be fully negated. This does not work on beams, which will only lose 1 durability to destroy the zombie. The zombie is considered to be a separate character from Frank (like an assist call). Thus, pushblocking the zombie will not cause Frank to be moved. He can use this to safely cover his advance. This is a charge move, which requires Frank to be holding back for a certain amount of time in order to perform it. If Frank wants to move forward without losing his back charge, he has a few options:
| ||||
| L |
Damage | Startup | Active | Recovery |
|---|---|---|---|---|
| - | 25 | - | - | |
| On Hit | On Block | Guard | Properties | |
| - | - | - | - | |
| M |
Damage | Startup | Active | Recovery |
| 70,000 | 16 | 5 | 24 | |
| On Hit | On Block | Guard | Properties | |
| - | -6 | Mid | ||
| H |
Damage | Startup | Active | Recovery |
| 70,000 | 18 | 5 | 32 | |
| On Hit | On Block | Guard | Properties | |
| - | -14 | Low | ||
|
Frank spins around and performs a short-range kick, with properties that change based on button strength. Can only be used once Frank reaches level 2.
| ||||
| Damage | Startup | Active | Recovery |
|---|---|---|---|
| - | 15(?) | - | 15(?, total duration is 30 frames) |
| On Hit | On Block | Guard | Properties |
| - | - | - | Invuln frames 1-22, Passthrough |
|
Frank performs a forward roll that can pass through opponents. It has some invulnerability (15 frames?) starting from frame 1, but the exact amount is currently not known. One of Frank's only mobility tools, he can use it to advance through projectiles and other attacks, potentially even punishing them. By utilizing the low profile of 2H, canceling into Barrel Roll, then cancelling that into an invulnerable hyper, Frank can cross nearly the entire screen while avoiding danger. Barrel Roll can be canceled into other specials during its recovery, in addition to being able to be hyper-canceled as normal. | |||
Hyper Combos
| Damage | Startup | Active | Recovery |
|---|---|---|---|
| 30,000 x8 - x17 + 70,000 | 12+2 | 62 | 45 |
| On Hit | On Block | Guard | Properties |
| - | -35 | Mid | |
|
Frank charges forward with a shopping cart full of weapons. This hyper is not invincible, but has a great hitbox and nullifies projectiles. Having the OTG property greatly enhances this hyper's effectiveness in THCs. Any character that scores a hard knockdown can call a THC with Frank backing them up, and Blue Light will pick the opponent up (along with any assists) to be hit by the rest of the team's hypers. Frank himself can make good use of this property. Pair Frank up with a character with a long-duration THC hyper, such as Dante, then score a knockdown using j.2H or airthrow. A THC will pick the opponent up into your teammate's hyper, allowing Frank to take several pictures and rack up EXP before finally finishing the combo. Frank can not normally utilize the Wall Bounce caused by this hyper, but by using X-Factor or a DHC to a fast hyper such as an install, it can make the following combo very easy. | |||
| Level 1/2 | Damage | Startup | Active | Recovery |
|---|---|---|---|---|
| 20,000 + 40,000 x2 + 50,000 x4(253,100) | 8+4 | 15 | 21 | |
| On Hit | On Block | Guard | Properties | |
| - | -13 | Mid | ||
| Level 3 | Damage | Startup | Active | Recovery |
| 30,000 + 40,000 x2 + 50,000 x4 + 70,000(312,000) | 8+4 | 15 | 21 | |
| On Hit | On Block | Guard | Properties | |
| - | -13 | Mid | Invuln until frame 17, | |
| Level 4/5 | Damage | Startup | Active | Recovery |
| 35,000 + 20,000 x6 + 40,000 x4 + 70,000 + 50,000 x3(356,100) | 8+4 | 15 | 21 | |
| On Hit | On Block | Guard | Properties | |
| - | -13 | Mid | Invuln until frame 25, | |
|
Frank lunges forward. If he touches the opponent's point character, they are pulled into a cinematic where Frank deals heavy damage, ending in a Soft Knockdown. An early DHC instead causes a lengthy spinout where the opponent flies high into the air before landing. At level 1, this hyper is dubiously useful. It deals less damage than Blue Light Special (when mashed), and is more difficult to land. This hyper starts to shine from Level 3 onward. It gains invulnerability, allowing it to be used as a reversal. It can even be combined with the invulnerability from Barrel Roll to quickly travel across the screen while avoiding enemy attacks. Additionally, it deals more damage than Blue Light starting at Level 3, and deals enormous damage at Level 4+. | ||||
| Damage | Startup | Active | Recovery |
|---|---|---|---|
| 260,000* | 6+4 | 5 | 21 |
| On Hit | On Block | Guard | Properties |
| - | - | Airthrow | Invuln until frame 12, mashable, |
|
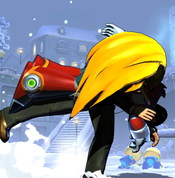
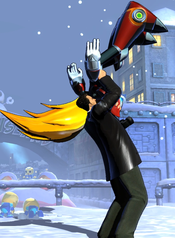
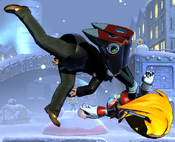
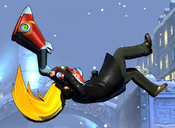
Anti-air command grab hyper. Requires Frank to be Level 3 or higher to activate. If it connects, it pulls the opponent into a cinematic that ends with the opponent in a Hard Knockdown state next to Frank. This knockdown lasts long enough for Frank to pick up with one of his OTG attacks and start a combo, so it is very devastating to land. Can be used for resets, Guard Break setups (by making an oncoming opponent block an attack to forfeit their throw immunity), and anti-Dark Phoenix setups (using its invincibility to blow through the shockwave of her activation hyper; Dark Phoenix is always considered airborne during her resurrection). DHCing into it from another hyper can potentially give any character access to an invincible, unblockable anti-air. This hyper can be "mashed" by spinning the stick during the cinematic portion. Although this does add a small amount of damage, it also increases the number of hits in the hyper. This will apply more damage scaling to the follow-up combo, and thus cause lower damage overall. It is not recommended to mash this hyper. | |||
Universal Mechanics
| Damage | Startup | Active | Recovery |
|---|---|---|---|
| 80,000 | 1 | 1 | - |
| On Hit | On Block | Guard | Properties |
| - | - | Throw | |
|
Standard ground throw that places the opponent next to Frank on the ground. Forward throw allows Frank to act slightly faster, although follow-ups are the same in either direction. Frank can pick up afterwards with 236S, 623H, or his 236XX hyper (either done normally or as part of a THC). | |||
| Damage | Startup | Active | Recovery |
|---|---|---|---|
| 80,000 | 1 | 1 | - |
| On Hit | On Block | Guard | Properties |
| - | - | Airthrow | |
|
Standard airthrow that results in a hard knockdown. Forward airthrow allows Frank to act noticeably faster than backthrow. Can follow up with all the same OTG attacks as the ground throw. Additionally, Frank can connect a 236H after a forward airthrow, allowing him to solo relaunch if he is Level 3 or higher. | |||
| Damage | Startup | Active | Recovery |
|---|---|---|---|
| 50,000 | 2 | 4 | 25 |
| On Hit | On Block | Guard | Properties |
| - | -6 | Mid | Snapback |
|
Animation and hitbox based on 5H. | |||
| Damage | Startup | Active | Recovery |
|---|---|---|---|
| 30,000 | - | 21 | 33 |
| On Hit | On Block | Guard | Properties |
| - | -12 | OH | |
|
- | |||
Team Position
Due to his unique mechanic, Frank is almost always played in the Second or Anchor positions. Frank players want to avoid having to actually fight with him at level 1, and ideally he will be brought in via a combo that also raises him to level 4 or 5. The most common strategies for leveling Frank involve DHCing multi-hitting hypers into a whiffed Survival Techniques 214XX, which is easiest to do when Frank is in the Second spot. Alternatively, you can put him in the Anchor position and have your Point character combo enough to build a full bar of meter without using Wall or Ground Bounces. Then hard tag Frank during a hard knockdown or an air dash cancel into Jumping S so Frank can THC with the character in the Second slot, preferrably Dante. Frank can then use the bounces to continue the combo while levelled up. It helps that Frank's Shopping Cart assist is very strong, so he is not exactly dead weight while waiting in the back line.
Notable Synergies
Magneto: Magneto is a strong point character that can build over a full bar of meter without using bounces and can easily setup a hard tag to Frank for a THC with Dante. This allows for combos that both level Frank and do massive damage that can KO the entire cast off of one touch. Disruptor is also a great beam assist for Frank since it's fast, doesn't scale combos since it hits once, and really good for neutral and pokes. In a pinch, Gravity Squeeze, if done in the corner or near it, can allow for a hard tag to Frank's Snapshot.
Players to Watch: FizzyKups/Readman (Magneto/Dante/Frank, Spencer/Dante/Frank), Noble (Magneto/Frank/Dante)
Zero: Zero is arguably the best point character in the game that can deal massive damage and level Frank at the same time. Zero can use his Lightning Loops to hard tag into Frank toward the end and thus level him up. If paired with Dante you have the Zero/Dante shell which is one of the strongest and self sufficient shells in the game and can result in matches where Zero and Jam Session plays everything and Frank is just there, which cause some to argue that Frank would be redundant on the team.
Players to Watch: EMP_Obama (Zero/Frank/Dante), Cless (Zero/Dante/Frank)
Vergil: Vergil is notable because while he starts off as the point character, the idea is to use Vergil's BnB & a Spiral Sword Loop to hard tag into Frank, thus putting Vergil into the anchor position while levelling up Frank to at least level 4. Rapid Slash assist is decent for incoming mixups if Frank meaties the target properly.
Dante: Dante's plethora of specials give him many ways to pull of an extended combo that, even if it is not the most damaging, can easily reach a high hit count for leveling Frank. His Million Dollars hyper alone scores 27 hits (not counting the final shot), with the second-to-last bullet causing a lengthy spinout animation that gives Frank time to take his picture. Frank can make use of this via DHC like the other common synergies, or he can make use of its potential as a THC, taking advantage of how Million Dollars has much longer duration than Blue Light Special. Dante has an unprecedented amount of options to support a leveled Frank using his popular Jam Session assist. Jam Session can be used to lock down the opponent for a significant amount of time, allows for double snapshots, extended combos, strong for incoming mixups, can be useful for esoteric frame traps, and more. These days it's heavily recommended that you play Frank with Dante because of how powerful Jam Session is for Frank as well as the Million Dollars THC option.
Players to Watch: FizzyKups/Readman (Magneto/Dante/Frank, Spencer/Dante/Frank), Noble (Magneto/Dante/Frank)
Nova: Besides wanting a good horizontal coverage assist (which Frank provides with Shopping Cart), Nova is a very self-sufficient point character who can be counted on to survive neutral and score a hit. After landing any hit or throw, he can combo into Super Nova (623XX), a mashable multi-hit hyper that deals as many as *80* hits when fully mashed. If Super Nova is DHC canceled on any hit before the last one, it causes a hard knockdown, making it easy for Frank to whiff his 214XX hyper, recover, and take a picture. Once Frank is leveled and takes over as the point character, Nova can support him with his overhead-hitting Centurion Rush assist, leading to easy unblockable setups.
Players to Watch: SolidAbyss (Nova/Frank/Dante), BestXbox (Nova/Frank/Dante), EMP_Obama (Nova/Frank/Dante, pre 2021)
Most Notable Players to Watch: FizzyKups/Readman (Magneto/Dante/Frank, Spencer/Dante/Frank), Noble (Magneto/Dante/Frank), EMP_Obama (Zero, Nova, Vergil/Frank/Dante), Cless (Zero/Dante/Frank), Bee (Spencer/Frank/Dante)
Other Players to Watch: Kusoru Ageojoe (Joe/Frank/Raccoon), Vairos (Skrull/Frank/Haggar), Apologyman (Skrull/Frank/Doom, but only a long time ago), Zansam (Nova/Frank/Raccoon)
Alternate Colors
| Color 1 | Color 2 | Color 3 | Color 4 | Color 5 | Color 6 | Alt Color |
|---|---|---|---|---|---|---|

|
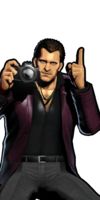
|

|
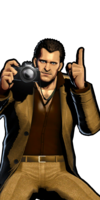
|

|
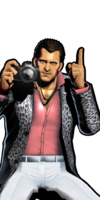
|
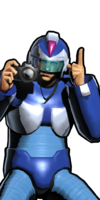
|
Videos and External Resources
Combo and Setup Videos
Combos by HonzoGonzo
Optimized combos by The Cape
Updated Trials by Readman
Tips and Tricks
- When you OTG with Snapshot, either cancel into a hyper or dash away from the target before you do it. Snapshot is unsafe on hit if not cancelled into hyper and can be punished by either a throw, a 3 frame normal, or a Snapback.
- A simple incoming Frank can do is to meaty with the Zombies. IF you KO the target with Survival Techniques, dash back and hold back to charge Hammer Throw M. Then immediately use Giant Swing L. The two zombies will meaty and hit in a way that makes it possible to confirm into a combo if they don't block.
- Knee Drop is an overhead. Also. j.3H will option select an air throw and Knee Drop.
- If you plan to THC with Dante behind you and the foe is in the corner during a combo, try to dash into the corner before you THC. If you are close enough you can preserve your wall bounce that would otherwise be depleted by Blue Light Special.
- Zombies thrown by Giant Swing ignore all projectiles and can be a good option to stop or curb horizontal zoning if there's a gap large enough to throw. Viable across the whole screen.
- Frank's Dodge Roll can be used for very nasty incoming mixups when combined with assists such as Jam Session. Be mindful of the fact that others can throw Frank out of the last half of the Dodge Roll action despite the lower profile.
- If level 1 Frank is by himself with XF3 available, you can confirm from a j.L overhead hits by quickly cancelling that j.L into j.S and then X Factor Cancel, then j.S and land into a grounded BNB for level 3 and massive damage.
- While Snapshot is unsafe on hit when not cancelled into Hyper, it has utilty aganist characters whose projectiles disappear when getting hit, such as Dr. Strange's Eye of Agamotto and Dormammu's Stalking Flare. Make sure you are not within range of their normals when doing this.

