(Created page with "{| class="wikitable" style="float:right; margin-left: 10px;" |- ! align="center" colspan="2" | Rokurouta |- | align="center" colspan="2" |File:AB_Rokurouta.png|frameless|cen...") |
(→Combos) |
||
| (43 intermediate revisions by 4 users not shown) | |||
| Line 1: | Line 1: | ||
{| | {{Infobox-ABEW | ||
|name=AB_Name_Rokurouta | |||
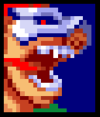
|image=AB_Rokurouta | |||
|playstyle=Rushdown | |||
|dash=Stepdash | |||
|backdash=Grounded | |||
|defmod=1.0625 | |||
|airopts=Walljump | |||
|meter=80 | |||
}} | |||
== Normals == | |||
=== Standing normals === | |||
{{MoveData | |||
|image=AB_Rokurouta_5a.png | |||
|caption= | |||
|input=5A | |||
|data= | |||
{{AttackData-AB | |||
|guard=M | |||
|cancel=normals | |||
|startup=6 | |||
|advHit=1 | |||
|advBlock=0 | |||
|description=Quick chop.<br>Can be used as an abare tool. | |||
}} | |||
}} | |||
<br> | |||
{{MoveData | |||
|image=AB_Rokurouta_5B.png | |||
|caption= | |||
|input=5B | |||
|data= | |||
{{AttackData-AB | |||
|guard=M | |||
|cancel=normals | |||
|startup=7 / 11 | |||
|advHit=3 | |||
|advBlock=2 | |||
|description= fast jumping kick<br>fast, long and damaging<br>can be combo'd into launcher if done close enough<br>can be used to combo into his specials | |||
}} | |||
}} | |||
<br> | |||
{{MoveData | |||
|image=AB_Rokurouta_5c1.png | |||
|image2=AB_Rokurouta_5c2.png | |||
|caption= | |||
|input=5C | |||
|data= | |||
{{AttackData-AB | |||
|guard=M | |||
|cancel=O | |||
|startup=12 | |||
|advHit=-9 | |||
|advBlock=-10 | |||
|description= Rokurouta does a sideflip, kicking upwards twice<br>'''great anti-air''', has a long vertical hitbox and puts you in a jumping state<br>second hit is air launcher cancelable<br>punishable on block<br>most commonly used at the end of ground combos since the air launcher cancel basically connects itself<br>can be canceled into super | |||
}} | |||
}} | |||
=== Crouching normals === | |||
{{MoveData | |||
|image=AB_Rokurouta_2a.png | |||
|caption= | |||
|input=2A | |||
|data= | |||
{{AttackData-AB | |||
|guard=L | |||
|cancel=normals | |||
|startup=6 | |||
|advHit=3 | |||
|advBlock=2 | |||
|description= Quick low kick | |||
}} | |||
}} | |||
<br> | |||
{{MoveData | |||
|image=AB_Rokurouta_2B.png | |||
|caption= | |||
|input=2B | |||
|data= | |||
{{AttackData-AB | |||
|guard=L | |||
|cancel=normals | |||
|startup=8 | |||
|advHit=0 | |||
|advBlock=-1 | |||
|description= Low elbow strike<br>decent ground combo filler | |||
}} | |||
}} | |||
<br> | |||
{{MoveData | |||
|image=AB_Rokurouta_2c.png | |||
|caption2= Leg sweeps are overrated | |||
|input=2C | |||
|data= | |||
{{AttackData-AB | |||
|guard=H | |||
|cancel=O | |||
|startup=11 | |||
|advHit= | |||
|advBlock=-17 | |||
|description= a strong low punch<br>causes a HKD and deals absurd damage<br>can catch a lot of off guard opponents | |||
}} | |||
}} | |||
=== Jumping normals === | |||
{{MoveData | |||
|image=AB_Rokurouta_j.a.png | |||
|caption=that's not cake that's just his knee | |||
|input=j.A | |||
|data= | |||
{{AttackData-AB | |||
|guard=H | |||
|cancel=special | |||
|startup=4 | |||
|advHit=O | |||
|advBlock=O | |||
|description=Rokurouta does a quick elbow strike<br>fast but ''extremely short'' combo starter<br>comboes easily into itself but it's harder to combo into other air normals | |||
}} | |||
}} | |||
<br> | |||
{{MoveData | |||
|image=AB_Rokurouta_j.B.png | |||
|caption= | |||
|input=j.B | |||
|data= | |||
{{AttackData-AB | |||
|guard=H | |||
|cancel=special | |||
|startup=6 | |||
|advHit=O | |||
|advBlock=O | |||
|description= fast side kick<br>best option for air combos or against aerial opponents<br>easily comboes into air launcher | |||
}} | |||
}} | |||
<br> | |||
{{MoveData | |||
|image=AB_Rokurouta_j.c.png | |||
|caption= | |||
|input=j.C | |||
|data= | |||
{{AttackData-AB | |||
|guard=H | |||
|cancel=O | |||
|startup=6 | |||
|advHit=O | |||
|advBlock=O | |||
|description= heavy two-handed hammer strike<br>deals great damage but has mediocre range<br>quite fast for a jumping heavy normal<br>''very punishable on block'' so be careful about spamming this<br>mainly used as a combo ender | |||
}} | |||
}} | |||
=== Command normals === | |||
{{MoveData | |||
|image=AB_Rokurouta_2B.png | |||
|caption= | |||
|input=6b | |||
|data= | |||
{{AttackData-AB | |||
|guard=H | |||
|cancel=special | |||
|startup=17 | |||
|advHit=-3 | |||
|advBlock=-4 | |||
|description= Rokurouta does a short hop and does a 2B<br>we are still unsure what the purpose of this move is, for now it's an unconventional mixup | |||
* will completely miss and crossup both Alices ''when attacking from the right side'' but works normally on the left (don't question it) | |||
}} | |||
}} | |||
<br> | |||
{{MoveData | |||
|image=AB_Rokurouta_j.c.png | |||
|caption= | |||
|input=6c | |||
|data= | |||
{{AttackData-AB | |||
|guard=H | |||
|cancel=special | |||
|startup=17 | |||
|advHit=-3 | |||
|advBlock=-4 | |||
|description= Rokurouta does a big leap and does a j.C<br>hits overhead<br>quite slow and has bad range<br>launches on hit, allowing for combos | |||
}} | |||
}} | |||
=== Universal mechanics === | |||
{{MoveData | |||
|name=Launcher | |||
|image=AB_Rokurouta_AB.png | |||
|caption= | |||
|input=any 2 buttons | |||
|data= | |||
{{AttackData-AB | |||
|guard=M | |||
|cancel=O | |||
|startup=7 | |||
|advHit= Launches | |||
|advBlock= inconsistent | |||
|description=on hit, Causes a big wall bounce and puts the opponent on indefinite hitstun until they hit the ground or use meter to tech it<br>can be combo'd universally with A>B>C or A>B>Launcher combos.<br>most characters can add an air special or delay the launcher and do a ground special<br>if you hit an opponent with 3 launchers in the same combo they become completely invincible until waking up from the knockdown state<br>a lot of EX moves (Rose's 214EX), few meterless specials (Taros j.236x) and very rarely normals (Rokurouta's 6C) have last hits with the properties of a launcher. these hits count towards the 3 launcher cap. | |||
}} | |||
}} | |||
{{MoveData | |||
|name=Air launcher | |||
|image=AB_Rokurouta_jAB.png | |||
|caption= | |||
|input=any 2 buttons | |||
|data= | |||
{{AttackData-AB | |||
|guard=M | |||
|cancel=O | |||
|startup= 7 | |||
|advHit= Launches | |||
|advBlock=inconsistent | |||
|description= No difference from the ground version, but some characters have air launchers with slightly less recovery frames | |||
}} | |||
}} | |||
<br> | |||
{{MoveData | |||
|name=Guard break | |||
|image=AB_Rokurouta_GB.png | |||
|caption= | |||
|input=22C | |||
|data= | |||
{{AttackData-AB | |||
|guard= don't | |||
|cancel=O | |||
|startup= 6 | |||
|advHit= Stun | |||
|advBlock=O | |||
|description=This replaces grab, a quick attack that stuns blocking opponents.<br>common followups are combos, launchers, knockdowns and some supers<br>countered by not blocking, jumping or attacking back | |||
}} | |||
}} | |||
== Special moves == | |||
{{MoveData | |||
|name=Wind shuriken - 風の手裏剣 | |||
|image=AB_Rokurouta_236a.png | |||
|image2=AB_Rokurouta_236a_proj.png | |||
|image3=AB_Rokurouta_236a_ex.png | |||
|caption2=The projectile | |||
|caption3=EX projectile | |||
|input=236A/B/C | |||
|data= | |||
{{AttackData-AB | |||
|guard=M | |||
|cancel=O | |||
|startup=24 / 26 / 28 | |||
|advHit= | |||
|advBlock=4 / 3 / 2 | |||
|description=Rokurouta throws a shuriken.<br>actually a decent projectile, is pretty great at zoning players who aren't comfortable with their jump-ins<br>Button determines startup and speed<br>EX version makes him throw a barrage of shuriken. they are ''not multiple projectile'', just a massive multi-hit projectile | |||
}} | |||
}} | |||
<br> | |||
{{MoveData | |||
|name=Banner wave - バナーの波 | |||
|image=AB_Rokurouta_623.png | |||
|image2=AB_Rokurouta_623_ex.png | |||
|caption=A/B/C versions | |||
|caption2=EX version | |||
|input=623A/B/C | |||
|data= | |||
{{AttackData-AB | |||
|guard=M | |||
|cancel=O | |||
|startup=6 / 4 / 4 | |||
|advHit= | |||
|advBlock=inconsistent | |||
|description=Waves a banner<br>'''effectively a reversal''', it doesn't have iframes but who needs those when half the screen is a hitbox?<br>very good as a combo ender and can even be used to stall in "Last stand"<br>EX version uses triple banners for triple the pain, now it has way more hits, dealing way more damage | |||
}} | |||
}} | |||
<br> | |||
{{MoveData | |||
|name= Squirrel glide- リス・グライド | |||
|image=AB_Rokurouta_j214.png | |||
|image2=AB_Rokurouta_63214_ex.png | |||
|caption=A / B / C version | |||
|caption2= EX version | |||
|input=j.214A/B/C | |||
|data= | |||
{{AttackData-AB | |||
|guard=H | |||
|cancel=O | |||
|startup=29 / 29 / 29 | |||
|advHit= | |||
|advBlock= | |||
|description= Rokurouta uses a cape to glide around the stage<br>button determines startup and trajectory | |||
* A : glides back until you hit the wall | |||
* B : glides forward until you hit the wall | |||
* C : glides forward going down until you crossup the opponent, has a lot of recovery | |||
* EX : '''SIKE''', this is an attack now because why not? mecahnically similar to 63214 EX but hits overhead | |||
}} | |||
}} | |||
<br> | |||
{{MoveData | |||
|name= Squirrel dive - リス・ダイブ | |||
|image=AB_Rokurouta_63214_ex.png | |||
|image2=AB_Rokurouta_63214.png | |||
|caption=A / EX version | |||
|caption2=B / C version | |||
|input=63214A/B/C | |||
|data= | |||
{{AttackData-AB | |||
|guard=H | |||
|cancel=O | |||
|startup=29 / 29 / 29 | |||
|advHit= | |||
|advBlock= | |||
|description= Rokurouta glides offscreen then does a divekick<br>button determines startup and angle | |||
* A : from halway of the back wall to the down right corner | |||
* B : glides high until reaching the opponent then dives | |||
* C : similar to B version but instead of gliding to the opponent it glides between them and the back wall. this version's potential is still unexplored | |||
* EX : emerges from the back wall and slides across the ground. becomes a multi-hit and last hit is a launcher. deals great damages | |||
}} | |||
}} | |||
== Supers == | |||
{{MoveData | |||
|name=Magic Break's New Currents - マジックブレイクの百花繚乱 | |||
|image=AB_Rokurouta_236236a.png | |||
|input=j.360X | |||
|data= | |||
{{AttackData-AB | |||
|guard=M | |||
|cancel=O | |||
|startup=58(53+5) | |||
|advHit=HKD | |||
|advBlock=inconsistent | |||
|description= Rokurouta hovers in the air and shoots a ton of tiny rings around him.<br>Invulnerable throughout the entirety of active frames. Extremely strong tool in Last Stand. | |||
}} | |||
}} | |||
== Boost Mode (22+ABC) == | |||
Doppelganger : | |||
a clone appears on the other side of the opponent and increases the number of hits | |||
if you played Morrigan before you already know it | |||
== Combos == | |||
{| border="1em" cellpadding="3" cellspacing="0" | |||
| align="center" style="background:#858585;color:black;"|'''Combos''' | |||
| align="center" style="background:#858585;color:black;"|'''Dmg''' | |||
| align="center" style="background:#858585;color:black;"|'''Notes''' | |||
|- | |||
|5A > 5B > 5AB > j.A > j.B > j.AB > j.A > j.B > j.C | |||
|35 | |||
|Universal combo. | |||
|- | |||
|2A > 5B > 5AB > j.A > j.Ax2 > j.B > j.Ax3 > j.Bx2 > j.A > j.B > j.C | |||
|40 | |||
|Meterless bnb 1. Video -> https://youtu.be/Y-3pqZrH7L0 | |||
|- | |- | ||
|2A > 5B > 5AB > j.Ax2 > j.B > j.A > j.B > j.C > j.AB > j.Ax2 > j.A > j.B > j.C > j.AB | |||
|45 | |||
|Meterless bnb 2. Video -> https://youtu.be/l3e7LIRKTsA | |||
|- | |- | ||
| | |66 > 5A > 5B > 236A > 5B > 236A... (5B > 236A can be repeated 4 times) | ||
|47 | |||
|Corner loop. Has 3 routes. Video -> https://youtu.be/ysRZWOHCebk | |||
|- | |- | ||
| | |2A > 5B > 5AB > j.Bx2 > j.B > j.C > j.AB > j.Bx2 > j.Ax3 > j.B > j.C | ||
|52 | |||
|Meterless bnb 3. By Molli. Video -> https://youtu.be/aUhaQlN3Erg | |||
|- | |- | ||
| | |j.214AB > j.Bx2 > j.A > j.B > j.AB > j.Ax2 > j.B > j.Ax3 > j.Bx2 > 623AB | ||
|65 | |||
|Corner combo. Uses all meter. Video -> https://youtu.be/XmvLaEHbdf4 | |||
|- | |- | ||
| | |2A(blocked) > 6C > j.A > j.Bx2 > j.Ax3 > j.B > j.Ax3 > j.B > 623AB | ||
|70 | |||
|Corner Combo. Video -> https://youtu.be/Rk-roJ4-fA4 | |||
|- | |- | ||
|2B > 5C > j.AB > j.Bx2 > j.C > j.A > j.Bx2 > j.C > 5AB > j.Ax3 > j.Bx2 > j.Ax3 > j.Bx2 > j.Ax3 > j.Bx2 > j.A > j.B > j.AB | |||
|74 | |||
|Meterless Combo. The last AB can be replaced by the super(95 dmg). | |||
Video -> https://youtu.be/QABzWaxnhsQ | |||
<br> | |||
Video(super) -> https://youtu.be/m3_cJ06W9Tw | |||
|- | |||
|63214B > j.Bx2 > j.C > j.A > j.Bx2 > j.C > 5AB > j.A > j.Bx2 > j.C > j.A > j.B > j.AB > j.Bx2 > j.B > j.AB | |||
|81 | |||
|63214B only lands if you are in the left corner. Video -> https://youtu.be/3BNsEuQ5TVE | |||
|- | |||
|} | |||
===Color Palettes=== | |||
<br> | |||
[[File:AB_Palettes_Rokurouta.png|none|350px]] | |||
<br> | <br> | ||
{{Asura Buster}} | |||
[[Category: Asura Buster: Eternal Warriors]] | [[Category: Asura Buster: Eternal Warriors]] | ||
[[Category: Rokurouta]] | |||
Latest revision as of 04:38, 15 May 2024
Rokurouta comes from a distant oriental country and is ordered by his emperor to investigate the mystery of the lost continent with the help of his young sister Nanami and Zinsuke. He is a self-proclaimed "ninja of justice" who uses shurikens, scrolls, crystals, and acrobatic skills and techniques.
In the world of Asura Buster, where there are many agile characters, the speed of his movements still outshines others. Rokurouta relies on his speed and versatile tools to get in and rake in a lot of damage thanks to his great combo game.
Overview |
|
| Pros | Cons |
|
|
 | |
| Play Style | Rushdown |
| Dash Type | Stepdash |
| Backdash Type | Grounded |
| Defense Modifier | 1.0625 |
| Air Options | Walljump |
| Meter Gauge | 80 |
Normals
Standing normals

| Damage | Startup | Active | Recovery | Guard | Cancel | Adv. Hit | Adv. Block | |
|---|---|---|---|---|---|---|---|---|
| - | 6 | - | - | M | normals | 1 | 0 | |
|
Quick chop. | ||||||||

| Damage | Startup | Active | Recovery | Guard | Cancel | Adv. Hit | Adv. Block | |
|---|---|---|---|---|---|---|---|---|
| - | 7 / 11 | - | - | M | normals | 3 | 2 | |
|
fast jumping kick | ||||||||


| Damage | Startup | Active | Recovery | Guard | Cancel | Adv. Hit | Adv. Block | |
|---|---|---|---|---|---|---|---|---|
| - | 12 | - | - | M | O | -9 | -10 | |
|
Rokurouta does a sideflip, kicking upwards twice | ||||||||
Crouching normals

| Damage | Startup | Active | Recovery | Guard | Cancel | Adv. Hit | Adv. Block | |
|---|---|---|---|---|---|---|---|---|
| - | 6 | - | - | L | normals | 3 | 2 | |
|
Quick low kick | ||||||||

| Damage | Startup | Active | Recovery | Guard | Cancel | Adv. Hit | Adv. Block | |
|---|---|---|---|---|---|---|---|---|
| - | 8 | - | - | L | normals | 0 | -1 | |
|
Low elbow strike | ||||||||

| Damage | Startup | Active | Recovery | Guard | Cancel | Adv. Hit | Adv. Block | |
|---|---|---|---|---|---|---|---|---|
| - | 11 | - | - | H | O | - | -17 | |
|
a strong low punch | ||||||||
Jumping normals

| Damage | Startup | Active | Recovery | Guard | Cancel | Adv. Hit | Adv. Block | |
|---|---|---|---|---|---|---|---|---|
| - | 4 | - | - | H | special | O | O | |
|
Rokurouta does a quick elbow strike | ||||||||

| Damage | Startup | Active | Recovery | Guard | Cancel | Adv. Hit | Adv. Block | |
|---|---|---|---|---|---|---|---|---|
| - | 6 | - | - | H | special | O | O | |
|
fast side kick | ||||||||

| Damage | Startup | Active | Recovery | Guard | Cancel | Adv. Hit | Adv. Block | |
|---|---|---|---|---|---|---|---|---|
| - | 6 | - | - | H | O | O | O | |
|
heavy two-handed hammer strike | ||||||||
Command normals
| Damage | Startup | Active | Recovery | Guard | Cancel | Adv. Hit | Adv. Block | |
|---|---|---|---|---|---|---|---|---|
| - | 17 | - | - | H | special | -3 | -4 | |
|
Rokurouta does a short hop and does a 2B
| ||||||||
| Damage | Startup | Active | Recovery | Guard | Cancel | Adv. Hit | Adv. Block | |
|---|---|---|---|---|---|---|---|---|
| - | 17 | - | - | H | special | -3 | -4 | |
|
Rokurouta does a big leap and does a j.C | ||||||||
Universal mechanics
any 2 buttons

| Damage | Startup | Active | Recovery | Guard | Cancel | Adv. Hit | Adv. Block | |
|---|---|---|---|---|---|---|---|---|
| - | 7 | - | - | M | O | Launches | inconsistent | |
|
on hit, Causes a big wall bounce and puts the opponent on indefinite hitstun until they hit the ground or use meter to tech it | ||||||||
any 2 buttons

| Damage | Startup | Active | Recovery | Guard | Cancel | Adv. Hit | Adv. Block | |
|---|---|---|---|---|---|---|---|---|
| - | 7 | - | - | M | O | Launches | inconsistent | |
|
No difference from the ground version, but some characters have air launchers with slightly less recovery frames | ||||||||
22C

| Damage | Startup | Active | Recovery | Guard | Cancel | Adv. Hit | Adv. Block | |
|---|---|---|---|---|---|---|---|---|
| - | 6 | - | - | don't | O | Stun | O | |
|
This replaces grab, a quick attack that stuns blocking opponents. | ||||||||
Special moves
236A/B/C


| Damage | Startup | Active | Recovery | Guard | Cancel | Adv. Hit | Adv. Block | |
|---|---|---|---|---|---|---|---|---|
| - | 24 / 26 / 28 | - | - | M | O | - | 4 / 3 / 2 | |
|
Rokurouta throws a shuriken. | ||||||||
623A/B/C


| Damage | Startup | Active | Recovery | Guard | Cancel | Adv. Hit | Adv. Block | |
|---|---|---|---|---|---|---|---|---|
| - | 6 / 4 / 4 | - | - | M | O | - | inconsistent | |
|
Waves a banner | ||||||||
j.214A/B/C


| Damage | Startup | Active | Recovery | Guard | Cancel | Adv. Hit | Adv. Block | |
|---|---|---|---|---|---|---|---|---|
| - | 29 / 29 / 29 | - | - | H | O | - | - | |
|
Rokurouta uses a cape to glide around the stage
| ||||||||
63214A/B/C

| Damage | Startup | Active | Recovery | Guard | Cancel | Adv. Hit | Adv. Block | |
|---|---|---|---|---|---|---|---|---|
| - | 29 / 29 / 29 | - | - | H | O | - | - | |
|
Rokurouta glides offscreen then does a divekick
| ||||||||
Supers
j.360X

| Damage | Startup | Active | Recovery | Guard | Cancel | Adv. Hit | Adv. Block | |
|---|---|---|---|---|---|---|---|---|
| - | 58(53+5) | - | - | M | O | HKD | inconsistent | |
|
Rokurouta hovers in the air and shoots a ton of tiny rings around him. | ||||||||
Boost Mode (22+ABC)
Doppelganger :
a clone appears on the other side of the opponent and increases the number of hits
if you played Morrigan before you already know it
Combos
| Combos | Dmg | Notes |
| 5A > 5B > 5AB > j.A > j.B > j.AB > j.A > j.B > j.C | 35 | Universal combo. |
| 2A > 5B > 5AB > j.A > j.Ax2 > j.B > j.Ax3 > j.Bx2 > j.A > j.B > j.C | 40 | Meterless bnb 1. Video -> https://youtu.be/Y-3pqZrH7L0 |
| 2A > 5B > 5AB > j.Ax2 > j.B > j.A > j.B > j.C > j.AB > j.Ax2 > j.A > j.B > j.C > j.AB | 45 | Meterless bnb 2. Video -> https://youtu.be/l3e7LIRKTsA |
| 66 > 5A > 5B > 236A > 5B > 236A... (5B > 236A can be repeated 4 times) | 47 | Corner loop. Has 3 routes. Video -> https://youtu.be/ysRZWOHCebk |
| 2A > 5B > 5AB > j.Bx2 > j.B > j.C > j.AB > j.Bx2 > j.Ax3 > j.B > j.C | 52 | Meterless bnb 3. By Molli. Video -> https://youtu.be/aUhaQlN3Erg |
| j.214AB > j.Bx2 > j.A > j.B > j.AB > j.Ax2 > j.B > j.Ax3 > j.Bx2 > 623AB | 65 | Corner combo. Uses all meter. Video -> https://youtu.be/XmvLaEHbdf4 |
| 2A(blocked) > 6C > j.A > j.Bx2 > j.Ax3 > j.B > j.Ax3 > j.B > 623AB | 70 | Corner Combo. Video -> https://youtu.be/Rk-roJ4-fA4 |
| 2B > 5C > j.AB > j.Bx2 > j.C > j.A > j.Bx2 > j.C > 5AB > j.Ax3 > j.Bx2 > j.Ax3 > j.Bx2 > j.Ax3 > j.Bx2 > j.A > j.B > j.AB | 74 | Meterless Combo. The last AB can be replaced by the super(95 dmg).
Video -> https://youtu.be/QABzWaxnhsQ
|
| 63214B > j.Bx2 > j.C > j.A > j.Bx2 > j.C > 5AB > j.A > j.Bx2 > j.C > j.A > j.B > j.AB > j.Bx2 > j.B > j.AB | 81 | 63214B only lands if you are in the left corner. Video -> https://youtu.be/3BNsEuQ5TVE |
Color Palettes