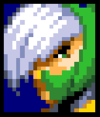
(Created page with "{| class="wikitable" style="float:right; margin-left: 10px;" |- ! align="center" colspan="2" | Yashaou |- | align="center" colspan="2" |File:AB_yashaou.png|frameless|center|...") |
No edit summary |
||
| (29 intermediate revisions by 3 users not shown) | |||
| Line 1: | Line 1: | ||
{| | {{Infobox-ABEW | ||
|name=AB_Name_Yashaou | |||
|image=AB_yashaou | |||
|playstyle=Shoto / Rushdown | |||
|dash=Run | |||
|backdash=Airborne | |||
|defmod=1.0 | |||
|airopts=None | |||
|meter=96 | |||
}} | |||
== Normals == | |||
=== Standing normals === | |||
{{MoveData | |||
|image=AB_Yashaou_5a.png | |||
|caption= | |||
|input=5A | |||
|data= | |||
{{AttackData-AB | |||
|guard=M | |||
|cancel=normals | |||
|startup=6 | |||
|advHit=1 | |||
|advBlock=0 | |||
|description= fast stab<br>can be used as an abare | |||
}} | |||
}} | |||
<br> | |||
{{MoveData | |||
|image=AB_Yashaou_5B.png | |||
|caption= | |||
|input=5B | |||
|data= | |||
{{AttackData-AB | |||
|guard=M | |||
|cancel=normals | |||
|startup=7 / 11 | |||
|advHit=3 | |||
|advBlock=2 | |||
|description= combo filler with short range<br>can be combo'd into launcher if done close enough<br>used to combo into his specials | |||
}} | |||
}} | |||
<br> | |||
{{MoveData | |||
|image=AB_Yashaou_5c.png | |||
|caption= | |||
|input=5C | |||
|data= | |||
{{AttackData-AB | |||
|guard=M | |||
|cancel=O | |||
|startup=12 | |||
|advHit=-9 | |||
|advBlock=-10 | |||
|description= Yashaou's main defensive normal<br>laggy but damaging and big attack<br>punishable on block | |||
}} | |||
}} | |||
=== Crouching normals === | |||
{{MoveData | |||
|image=AB_Yashaou_2a.png | |||
|caption= | |||
|input=2A | |||
|data= | |||
{{AttackData-AB | |||
|guard=L | |||
|cancel=normals | |||
|startup=6 | |||
|advHit=3 | |||
|advBlock=2 | |||
|description= fast low stab | |||
}} | |||
}} | |||
<br> | |||
{{MoveData | |||
|image=AB_Yashaou_2B.png | |||
|caption= | |||
|input=2B | |||
|data= | |||
{{AttackData-AB | |||
|guard=L | |||
|cancel=normals | |||
|startup=8 | |||
|advHit=0 | |||
|advBlock=-1 | |||
|description= Yash pokes with his sword<br>range and speed are similar to his 5a | |||
}} | |||
}} | |||
<br> | |||
{{MoveData | |||
|image=AB_Yashaou_2c.png | |||
|caption=the ankle slicer | |||
|input=2C | |||
|data= | |||
{{AttackData-AB | |||
|guard=H | |||
|cancel=O | |||
|startup=11 | |||
|advHit=Knocks down | |||
|advBlock=-17 | |||
|description= a long slice that knocks down<br>can catch a lot of off guard opponents | |||
}} | |||
}} | |||
=== Jumping normals === | |||
{{MoveData | |||
|image=AB_Yashaou_j.a.png | |||
|caption= | |||
|input=j.A | |||
|data= | |||
{{AttackData-AB | |||
|guard=H | |||
|cancel=special | |||
|startup=4 | |||
|advHit=O | |||
|advBlock=O | |||
|description= fast but very short combo starter<br>comboes easily into itself but it's harder to combo into other air normals | |||
}} | |||
}} | |||
<br> | |||
{{MoveData | |||
|image=AB_Yashaou_j.B.png | |||
|caption= | |||
|input=j.B | |||
|data= | |||
{{AttackData-AB | |||
|guard=H | |||
|cancel=special | |||
|startup=6 | |||
|advHit=O | |||
|advBlock=O | |||
|description= slice with wide hitbox and ok damage<br>best option against aerialopponents who are higher<br>'''The sword in the back has a hitbox''', which means it's also intended to be used in crossup mixups | |||
}} | |||
}} | |||
<br> | |||
{{MoveData | |||
|image=AB_Yashaou_j.c.png | |||
|caption= | |||
|input=j.C | |||
|data= | |||
{{AttackData-AB | |||
|guard=H | |||
|cancel=O | |||
|startup=6 | |||
|advHit=O | |||
|advBlock=O | |||
|description= one of Yashaou's greatest normals<br>very fast, great range and deals a lot of damage<br>has higher priority than other normals<br>''very punishable on block'' so be careful about spamming this | |||
}} | |||
}} | |||
=== Command normals === | |||
{{MoveData | |||
|image=AB_Yashaou_6b.png | |||
|caption= | |||
|input=6b | |||
|data= | |||
{{AttackData-AB | |||
|guard=H | |||
|cancel=special | |||
|startup=17 | |||
|advHit=-3 | |||
|advBlock=-4 | |||
|description=slow but long overhead kick | |||
}} | |||
}} | |||
=== Universal mechanics === | |||
{{MoveData | |||
|name=Launcher | |||
|image=AB_Yashaou_AB.png | |||
|caption= | |||
|input=any 2 buttons | |||
|data= | |||
{{AttackData-AB | |||
|guard=M | |||
|cancel=O | |||
|startup=7 | |||
|advHit= Launches | |||
|advBlock= 3 | |||
|description=on hit, Causes a big wall bounce and puts the opponent on indefinite hitstun until they hit the ground or use meter to tech it<br>can be combo'd universally with A>B>C or A>B>Launcher combos.<br>most characters can add an air special or delay the launcher and do a ground special<br>if you hit an opponent with 3 launchers in the same combo they become completely invincible until waking up from the knockdown state<br>a lot of EX moves (Rose's 214EX), few meterless specials (Taros j.236x) and very rarely normals (Rokurouta's 6C) have last hits with the properties of a launcher. these hits count towards the 3 launcher cap. | |||
}} | |||
}} | |||
{{MoveData | |||
|name=Air launcher | |||
|image=AB_Yashaou_jAB.png | |||
|caption= | |||
|input=any 2 buttons | |||
|data= | |||
{{AttackData-AB | |||
|guard=M | |||
|cancel=O | |||
|startup= 7 | |||
|advHit= Launches | |||
|advBlock=inconsistent | |||
|description= No difference from the ground version, but some characters have air launchers with slightly less recovery frames | |||
}} | |||
}} | |||
<br> | |||
{{MoveData | |||
|name=Guard break | |||
|image=AB_Yashaou_GB.png | |||
|caption= | |||
|input=22C | |||
|data= | |||
{{AttackData-AB | |||
|guard= don't | |||
|cancel=O | |||
|startup= 6 | |||
|advHit= Stun | |||
|advBlock=O | |||
|description=This replaces grab, a quick attack that stuns blocking opponents.<br>common followups are combos, launchers, knockdowns and some supers<br>countered by not blocking, jumping or attacking back | |||
}} | |||
}} | |||
== Special moves == | |||
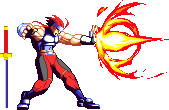
{{MoveData | |||
|name=Disaster Blast - ディザスター・ブラスト | |||
|image=AB_Yashaou_dab.png | |||
|image2=AB_Yashaou_236a.png | |||
|image3=AB_Yashaou_236ex.png | |||
|caption=The dab | |||
|caption2=The projectile | |||
|caption3=EX projectiles | |||
|input=214A/B/C | |||
|data= | |||
{{AttackData-AB | |||
|guard=M | |||
|cancel=O | |||
|startup=24 / 26 / 28 | |||
|advHit=Knocks down | |||
|advBlock=4 / 3 / 2 | |||
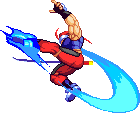
|description=Yashaou channels fire in his sword and shoots a short ember.<br>Button determines distance<br>EX version shoots a moving wall of projectiles, covering the entire screen | |||
}} | |||
}} | |||
<br> | |||
{{MoveData | |||
|name=Hell's Gate - ヘルズゲート | |||
|image=AB_Yashaou_623a.png | |||
|image2=AB_Yashaou_623ex.png | |||
|caption1=A/B/C version | |||
|caption2=EX Finisher | |||
|input=623A/B/C | |||
|data= | |||
{{AttackData-AB | |||
|guard=M | |||
|cancel=O | |||
|startup=6 / 4 / 4 | |||
|advHit=Knocks down | |||
|advBlock=inconsistent | |||
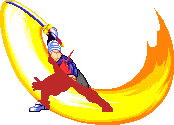
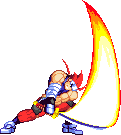
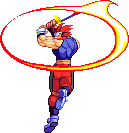
|description=Yashaou jumps in the air and spins around, engulfing his sword in fire<br>'''a DP''' with short startup but slow recovery, so you can use this on reaction<br>EX version is longera and adds an extra hit at the end that send the opponent sliding fullscreen<br>A version is strangely the slowest of the three in startup | |||
}} | |||
}} | |||
<br> | |||
{{MoveData | |||
|name=Extreme Polar Dynamic Misfortune - 極限状態での不幸 | |||
|image=AB_Yashaou_214a.png | |||
|caption=get used to seeing this attack | |||
|input=214A/B/C | |||
|data= | |||
{{AttackData-AB | |||
|guard=H | |||
|cancel=O | |||
|startup=29 / 29 / 29 | |||
|advHit=Knocks down | |||
|advBlock=has no recovery, +5~+10 | |||
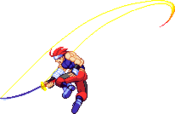
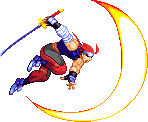
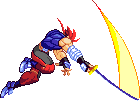
|description= Arguably, '''one of the best moves''' in the game.<br>Yashaou jumps back, then divekicks towards the opponent.<br>This move strangely is '''very plus on block'''(has no recovery) and if not predicted will always lead to Yashaou right besides the opponent starting his pressure<br>your opponent must switch sides to block or punish it, which is incredibly difficult at the speed the hit come in.<br>EX version makes Yashaou bounce back when it hits the opponent. | |||
* throwing this out in neutral is almost risk free | |||
}} | |||
}} | |||
<br> | |||
{{MoveData | |||
|name=Bee's sting - 蜂の刺し傷 | |||
|image=AB_Yashaou_j.214a.png | |||
|caption= | |||
|input=j.214A/B/C | |||
|data= | |||
{{AttackData-AB | |||
|guard=H | |||
|cancel=O | |||
|startup=28 / 30 / 32 | |||
|advHit=very inconsistent | |||
|advBlock=very inconsistent | |||
|description= Arguably, '''one of the worst moves''' in the game.<br>Yashaou stops midair, then bounces forward towards the opponent, sticking out his sword downward.<br>This move strangely is '''very minus on block''' and even if not predicted will almost always lead to Yashaou getting beat up<br>your opponent must waddle back a little or punish it, which is incredibly easy at the speed the hit come in.<br>EX version is an insult to the concept of EX moves<br> | |||
* sometimes it hits once, sometimes it hits four times, but either way it deals abysmal damage for the risk you take for it | |||
}} | |||
}} | |||
== Supers == | |||
{{MoveData | |||
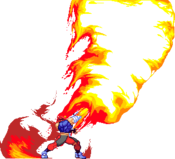
|name=Conquering Blast - 征服の爆発 | |||
|image=AB_Yashaou_236236a.png | |||
|caption=Sprite so big, it doesn't fit the arcade screen | |||
|input=236-236A/B/C | |||
|data= | |||
{{AttackData-AB | |||
|guard=M | |||
|cancel=O | |||
|startup=61(53+8) | |||
|advHit=HKD | |||
|advBlock=-4 | |||
|description= the easiest super to combo into<br>very big hitbox and stuffs all aerial approaches | |||
}} | |||
}} | |||
<br> | |||
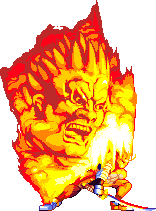
{{MoveData | |||
|name=Asura blade - 阿修羅の刃 | |||
|image=AB_Yashaou_623623a.png | |||
|caption=the face is Yashaou reacting to the startup time | |||
|input=623-623A/B/C | |||
|data= | |||
{{AttackData-AB | |||
|guard=Unblockable in short range | |||
|cancel=O | |||
|startup=79(53+26) | |||
|advHit=HKD | |||
|advBlock=Unblockable / -38 | |||
|description= while taking 2 years to come out, the attack is one of the most damaging attacks in the game, dealing more than a full bar of health<br>Unblockable in close range, we don't know if this is intended or not lol, but definetely an upside<br>while setups that combo into it exist, they are a bit difficult to achieve | |||
}} | |||
}} | |||
<br> | |||
{{MoveData | |||
|name=Inferno barrage - ドラゴンボール | |||
|image=AB_Yashaou_214214a.png | |||
|caption=Dragon ball Z | |||
|input=214-214A/B/C | |||
|data= | |||
{{AttackData-AB | |||
|guard=M | |||
|cancel=O | |||
|startup=65(53+12) | |||
|advHit=incosistent | |||
|advBlock=inconsistent | |||
|description= Yashaou literally becomes a Dragon Ball character and shoots a barrage of fireballs at the enemy<br>the safest of the supers, but also the least damaging if used in combos<br>'''excellent''' for stalling time in last stand | |||
}} | |||
}} | |||
== Boost mode (22+ABC) == | |||
Illusion Ballad : Custom Combo Style | |||
Yashaou gets a shadow that mirrors his attacks, allowing for nutty air combos. Moves will generally deal less damage, but, because of the shadow, he'll get more damage overall. | |||
If the mirror image hits with a bash or other launcher, the hit has the launcher effect but doesn't count towards the 3 launcher limit. By timing it so that your attack misses but the mirror image's attack hits, it's possible to do many more than 3 launchers in a combo. | |||
== Combos == | |||
{| border="1em" cellpadding="3" cellspacing="0" | |||
| align="center" style="background:#858585;color:black;"|'''Combos''' | |||
| align="center" style="background:#858585;color:black;"|'''Dmg''' | |||
| align="center" style="background:#858585;color:black;"|'''Notes''' | |||
|- | |- | ||
|2A > 2B > 5AB, j.A > j.B, j.C | |||
|43 | |||
|Basic Yashaou BnB. To maximize damage, hit both hits of j.B and link j.C afterwards. | |||
|- | |- | ||
| | |2A > 2B > 5AB > 66 > j.A > j.Bx2 > j.A > j.Bx2 > 623A > 66 > j.A > j.Bx2 > j.A > j.Bx2 > 623C | ||
| | |62 | ||
| | |Meterless BnB. Video -> https://streamable.com/dz3oip | ||
|- | |- | ||
|} | |||
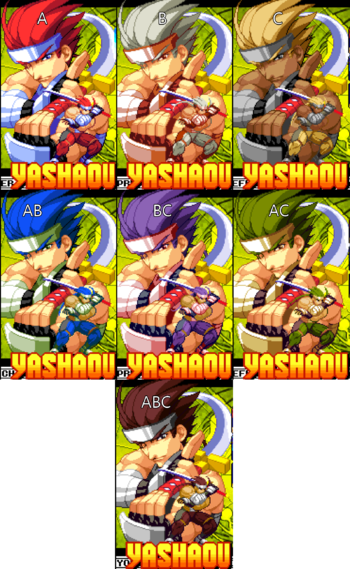
==Color Palettes== | |||
<br> | |||
[[File:AB_Palettes_Yashaou.png|none|350px]] | |||
<br> | <br> | ||
{{Asura Buster}} | |||
[[Category: Asura Buster: Eternal Warriors]] | [[Category: Asura Buster: Eternal Warriors]] | ||
[[Category: Yashaou]] | |||
Latest revision as of 16:40, 14 May 2024
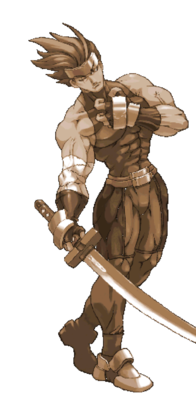
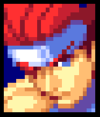
Yashaou is the main protagonist of the series, a hot-blooded swordsman who wields a katana and possesses mastery over the element of fire.
Even though he was successful in defeating both S. Geist and Curfue during the Asura Blade incident three years prior, Yashaou's hard-fought victory came at a tough price. He had suffered a large wound to his right arm, increasing the instability of his own fiery power. Despite this, Yashaou continues to live his own life as a traveling mercenary and decides to investigate the mystery of the lost continent for both money and curiosity.
Yashaou was good in Asura Blade, but here he's an absolute powerhouse. He hasn't changed so much besides the loss of his weapon throw, so Yashaou players should feel right at home. Yashaou is a strong all-around character with excellent combos and tools for every situation.
OverviewYashaou is an overwhelming, aggressive character with tools for any situation. |
|
| Pros | Cons |
|
|
| Play Style | Shoto / Rushdown |
| Dash Type | Run |
| Backdash Type | Airborne |
| Defense Modifier | 1.0 |
| Air Options | None |
| Meter Gauge | 96 |
Normals
Standing normals
| Damage | Startup | Active | Recovery | Guard | Cancel | Adv. Hit | Adv. Block | |
|---|---|---|---|---|---|---|---|---|
| - | 6 | - | - | M | normals | 1 | 0 | |
|
fast stab | ||||||||
| Damage | Startup | Active | Recovery | Guard | Cancel | Adv. Hit | Adv. Block | |
|---|---|---|---|---|---|---|---|---|
| - | 7 / 11 | - | - | M | normals | 3 | 2 | |
|
combo filler with short range | ||||||||
| Damage | Startup | Active | Recovery | Guard | Cancel | Adv. Hit | Adv. Block | |
|---|---|---|---|---|---|---|---|---|
| - | 12 | - | - | M | O | -9 | -10 | |
|
Yashaou's main defensive normal | ||||||||
Crouching normals
| Damage | Startup | Active | Recovery | Guard | Cancel | Adv. Hit | Adv. Block | |
|---|---|---|---|---|---|---|---|---|
| - | 6 | - | - | L | normals | 3 | 2 | |
|
fast low stab | ||||||||
| Damage | Startup | Active | Recovery | Guard | Cancel | Adv. Hit | Adv. Block | |
|---|---|---|---|---|---|---|---|---|
| - | 8 | - | - | L | normals | 0 | -1 | |
|
Yash pokes with his sword | ||||||||
| Damage | Startup | Active | Recovery | Guard | Cancel | Adv. Hit | Adv. Block | |
|---|---|---|---|---|---|---|---|---|
| - | 11 | - | - | H | O | Knocks down | -17 | |
|
a long slice that knocks down | ||||||||
Jumping normals
| Damage | Startup | Active | Recovery | Guard | Cancel | Adv. Hit | Adv. Block | |
|---|---|---|---|---|---|---|---|---|
| - | 4 | - | - | H | special | O | O | |
|
fast but very short combo starter | ||||||||
| Damage | Startup | Active | Recovery | Guard | Cancel | Adv. Hit | Adv. Block | |
|---|---|---|---|---|---|---|---|---|
| - | 6 | - | - | H | special | O | O | |
|
slice with wide hitbox and ok damage | ||||||||
| Damage | Startup | Active | Recovery | Guard | Cancel | Adv. Hit | Adv. Block | |
|---|---|---|---|---|---|---|---|---|
| - | 6 | - | - | H | O | O | O | |
|
one of Yashaou's greatest normals | ||||||||
Command normals
| Damage | Startup | Active | Recovery | Guard | Cancel | Adv. Hit | Adv. Block | |
|---|---|---|---|---|---|---|---|---|
| - | 17 | - | - | H | special | -3 | -4 | |
|
slow but long overhead kick | ||||||||
Universal mechanics
| Damage | Startup | Active | Recovery | Guard | Cancel | Adv. Hit | Adv. Block | |
|---|---|---|---|---|---|---|---|---|
| - | 7 | - | - | M | O | Launches | 3 | |
|
on hit, Causes a big wall bounce and puts the opponent on indefinite hitstun until they hit the ground or use meter to tech it | ||||||||
| Damage | Startup | Active | Recovery | Guard | Cancel | Adv. Hit | Adv. Block | |
|---|---|---|---|---|---|---|---|---|
| - | 7 | - | - | M | O | Launches | inconsistent | |
|
No difference from the ground version, but some characters have air launchers with slightly less recovery frames | ||||||||
| Damage | Startup | Active | Recovery | Guard | Cancel | Adv. Hit | Adv. Block | |
|---|---|---|---|---|---|---|---|---|
| - | 6 | - | - | don't | O | Stun | O | |
|
This replaces grab, a quick attack that stuns blocking opponents. | ||||||||
Special moves
| Damage | Startup | Active | Recovery | Guard | Cancel | Adv. Hit | Adv. Block | |
|---|---|---|---|---|---|---|---|---|
| - | 24 / 26 / 28 | - | - | M | O | Knocks down | 4 / 3 / 2 | |
|
Yashaou channels fire in his sword and shoots a short ember. | ||||||||
| Damage | Startup | Active | Recovery | Guard | Cancel | Adv. Hit | Adv. Block | |
|---|---|---|---|---|---|---|---|---|
| - | 6 / 4 / 4 | - | - | M | O | Knocks down | inconsistent | |
|
Yashaou jumps in the air and spins around, engulfing his sword in fire | ||||||||
| Damage | Startup | Active | Recovery | Guard | Cancel | Adv. Hit | Adv. Block | |
|---|---|---|---|---|---|---|---|---|
| - | 29 / 29 / 29 | - | - | H | O | Knocks down | has no recovery, +5~+10 | |
|
Arguably, one of the best moves in the game.
| ||||||||
| Damage | Startup | Active | Recovery | Guard | Cancel | Adv. Hit | Adv. Block | |
|---|---|---|---|---|---|---|---|---|
| - | 28 / 30 / 32 | - | - | H | O | very inconsistent | very inconsistent | |
|
Arguably, one of the worst moves in the game.
| ||||||||
Supers
| Damage | Startup | Active | Recovery | Guard | Cancel | Adv. Hit | Adv. Block | |
|---|---|---|---|---|---|---|---|---|
| - | 61(53+8) | - | - | M | O | HKD | -4 | |
|
the easiest super to combo into | ||||||||
| Damage | Startup | Active | Recovery | Guard | Cancel | Adv. Hit | Adv. Block | |
|---|---|---|---|---|---|---|---|---|
| - | 79(53+26) | - | - | Unblockable in short range | O | HKD | Unblockable / -38 | |
|
while taking 2 years to come out, the attack is one of the most damaging attacks in the game, dealing more than a full bar of health | ||||||||
| Damage | Startup | Active | Recovery | Guard | Cancel | Adv. Hit | Adv. Block | |
|---|---|---|---|---|---|---|---|---|
| - | 65(53+12) | - | - | M | O | incosistent | inconsistent | |
|
Yashaou literally becomes a Dragon Ball character and shoots a barrage of fireballs at the enemy | ||||||||
Boost mode (22+ABC)
Illusion Ballad : Custom Combo Style Yashaou gets a shadow that mirrors his attacks, allowing for nutty air combos. Moves will generally deal less damage, but, because of the shadow, he'll get more damage overall. If the mirror image hits with a bash or other launcher, the hit has the launcher effect but doesn't count towards the 3 launcher limit. By timing it so that your attack misses but the mirror image's attack hits, it's possible to do many more than 3 launchers in a combo.
Combos
| Combos | Dmg | Notes |
| 2A > 2B > 5AB, j.A > j.B, j.C | 43 | Basic Yashaou BnB. To maximize damage, hit both hits of j.B and link j.C afterwards. |
| 2A > 2B > 5AB > 66 > j.A > j.Bx2 > j.A > j.Bx2 > 623A > 66 > j.A > j.Bx2 > j.A > j.Bx2 > 623C | 62 | Meterless BnB. Video -> https://streamable.com/dz3oip |
Color Palettes

