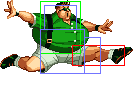
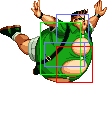
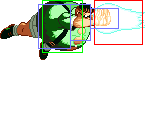
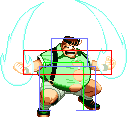
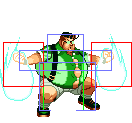
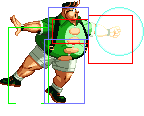
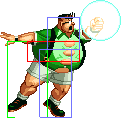
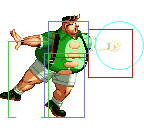
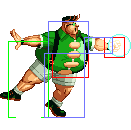
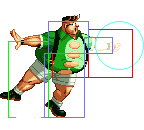
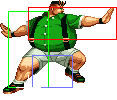
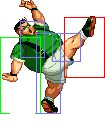
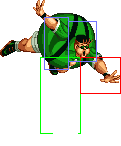
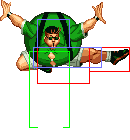
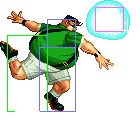
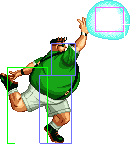
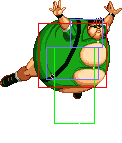
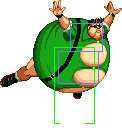
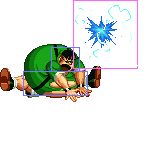
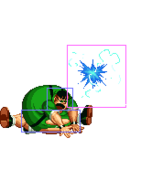
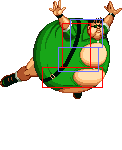
This has a special chain into 5C, which gives you plenty of time to charge for Avalanche Crunch, but unfortunately it doesn't hit the smaller crouchers. Has a small window in the recovery to chain into itself.
m (StoneGreninja moved page Cheng Sinzan(RBFFS) to Real Bout Fatal Fury Special/Cheng Sinzan without leaving a redirect: keeping consistent with new character pages) |
No edit summary |
||
| Line 1: | Line 1: | ||
[[File:rbffschen.png|right]] | [[File:rbffschen.png|right]] | ||
==Introduction== | |||
Cheng Sinzan is a serious contender for one of the worst characters in the game, and a lot of it has to do with a lack of power and reach. Not only are his normals ineffective as pokes, but his arced fireball is sluggish and fails to reach fullscreen. Rushdown is a problem, too; though competent, his air normals are shallow and will often lose to air-to-airs from other characters rather easily. Plane abuse is a key part of RBS; in this regard, Cheng's stubby plane checks also come up short. Most characters can turn the tables with one or two good supers to threaten damage, but both of Cheng's are borderline unusable — the damage you do at the start of the game is the damage you're stuck with throughout. For these reasons, Cheng finds himself on the backfoot frequently, and his counter move being so dysfunctional does not help him in the slightest. | |||
Cheng simply cannot compete with the threats around him, so what does he do? He runs. | |||
For a portly businessman, Cheng is quite evasive; his backdash is good, while his short height makes him deceptively hard to hit at times. Though certainly not winning any zoning wars, Cheng's fireball shines when used to poke at midrange, where he can freely chuck high fireballs to not only catch jumpers-in, but also cover his tracks while making escapes. The lynchpin in his kit, however, is his ground roll; not only is it fast and low to the ground, but it's also relatively safe on block. It works wonders on defense, too; his roll works not only as a punish tool, but as a highly effective Break Shot with its speed and reach. Cheng's supers are useless, but his quick meter build from rolling and tossing fireballs all day supports his penchant for guard cancels rather nicely. Hit-and-run is Cheng's game; while far from solid, he is well-equipped to roll circles around his foes — or at least annoy the shit out of them until he drops. | |||
==Colors== | |||
== | {| | ||
{ | ! [[image:snka.gif]] | ||
! [[image:snkd.gif]] | |||
| | |||
! | |||
! | |||
|- | |- | ||
| [[image:RBS_Cheng_ColorA.png]] | |||
| [[image:RBS_Cheng_ColorD.png]] | |||
|} | |} | ||
== | ==Movelist== | ||
{| class=" | ====Command Normals==== | ||
|- | {{f}}[[File:Snka.gif]] - Double Orb Attack | ||
[[File:Snka.gif]][[File:Snkb.gif]] - Glowing Orb | |||
====Special Moves==== | |||
|- | {{qcf}}[[File:Snka.gif]] - Kiten Hinzan | ||
| f/ | {{dp}}[[File:Snka.gif]] - High Kiten Hinzan | ||
| | |||
| | {{d}},{{u}}[[File:Snka.gif]] ~ [[File:Snka.gif]][[File:Snka.gif]] - Belly Drum Blast ~ Delay | ||
|- | |||
! | {{b}},{{f}}[[File:Snkb.gif]]/[[File:Snkc.gif]] - Avalanche Crunch [[File:RBS_Breakshot.png|80px]] | ||
| | |||
| | {{hcb}}[[File:Snkb.gif]] - Full Reverse Pellet | ||
| | |||
|- | ====S.Power==== | ||
|} | {{db}},{{qcf}}[[File:Snkb.gif]][[File:Snkc.gif]] - Bursting Heavens | ||
====P.Power==== | |||
{{hcb}}[[File:Snkc.gif]] - Collapse Of Creation | |||
===Normals=== | |||
====Close Normals==== | |||
{{MoveData | |||
|image=RBS_Cheng_clA.png | |||
|imageSize= | |||
|subtitle= | |||
|caption= | |||
|name=cl.[[File:Snka.gif]] | |||
|data= | |||
{{AttackData-RBFFS | |||
|Damage=6 | |||
|Guard=Mid | |||
|Meter=3 | |||
|Cancel=Chain, Special | |||
|Startup=6 | |||
|Active=7 | |||
|Recovery=5 | |||
|Total=17 | |||
|Hit Adv=+2 | |||
|Block Adv=0 | |||
|Properties= | |||
|Invulnerability= | |||
|description=This has a special chain into 5C, which gives you plenty of time to charge for Avalanche Crunch, but unfortunately it doesn't hit the smaller crouchers. Has a small window in the recovery to chain into itself. | |||
|phases= | |||
<gallery mode=packed> | |||
</gallery> | |||
}} | |||
}} | |||
===== <span class="invisible-header"></span> ===== | |||
<font style="visibility:hidden" size="0"></font> | |||
{{MoveData | |||
|image=RBS_Cheng_clB.png | |||
|imageSize= | |||
|subtitle= | |||
|caption= | |||
|name=cl.[[File:Snkb.gif]] | |||
|data= | |||
{{AttackData-RBFFS | |||
|Damage=8 | |||
|Guard=Mid | |||
|Meter=3 | |||
|Cancel=Chain, Special | |||
|Startup=7 | |||
|Active=10 | |||
|Recovery=6 | |||
|Total=22 | |||
|Hit Adv=-2 | |||
|Block Adv=-4 | |||
|Properties=- | |||
|Invulnerability= | |||
|description=Combo filler. Essential for going into the 5C 236C chain, but otherwise 2B is better. Plenty of active frames, but not very safe as a meaty given how close you have to be. | |||
|phases= | |||
<gallery mode=packed> | |||
</gallery> | |||
}} | |||
}} | |||
===== <span class="invisible-header"></span> ===== | |||
<font style="visibility:hidden" size="0"></font> | |||
{{MoveData | |||
|image=RBS_Cheng_clC.png | |||
|imageSize= | |||
|subtitle= | |||
|caption= | |||
|name=cl.[[File:Snkc.gif]] | |||
|data= | |||
{{AttackData-RBFFS | |||
|Damage=30(16+16) | |||
|Guard=Mid | |||
|Meter=3+3 | |||
|Cancel=Chain, Special | |||
|Startup=10 | |||
|Active=3+(7)+7 | |||
|Recovery=13 | |||
|Total=39 | |||
|Hit Adv=+4 | |||
|Block Adv=+2 | |||
|Properties= | |||
|Invulnerability= | |||
|description=A two-hitter like most close C's in the game, giving you plenty of time to charge Avalanche Crunch. The second hit kicks pretty high, but this is not a reactive anti-air by any means. | |||
|phases= | |||
<gallery mode=packed> | |||
File:RBS_Cheng_clC-1.png | |||
File:RBS_Cheng_clC-2.png | |||
</gallery> | |||
}} | |||
}} | |||
===== <span class="invisible-header"></span> ===== | |||
<font style="visibility:hidden" size="0"></font> | |||
====Standing Normals==== | |||
{{MoveData | |||
|image=RBS_Cheng_stA.png | |||
|imageSize= | |||
|subtitle= | |||
|caption= | |||
|name=st.[[File:Snka.gif]] | |||
|data= | |||
{{AttackData-RBFFS | |||
|Damage=6 | |||
|Guard=Mid | |||
|Meter=3 | |||
|Cancel=Chain, Special | |||
|Startup=5 | |||
|Active=1+5 | |||
|Recovery=12 | |||
|Total=22 | |||
|Hit Adv=-4 | |||
|Block Adv=-6 | |||
|Properties= | |||
|Invulnerability= | |||
|description=Like the close version, this also misses small crouchers, but it goes into 5C as well. Chaining into 5B will always give you the near version, but if you're at range to get far A in the first place, it's probably going to miss. | |||
|phases= | |||
<gallery mode=packed> | |||
File:RBS_Cheng_stA-1.png | |||
File:RBS_Cheng_stA-2.png | |||
</gallery> | |||
}} | |||
}} | |||
===== <span class="invisible-header"></span> ===== | |||
<font style="visibility:hidden" size="0"></font> | |||
{{MoveData | |||
|image=RBS_Cheng_stB.png | |||
|imageSize= | |||
|subtitle= | |||
|caption= | |||
|name=st.[[File:Snkb.gif]] | |||
|data= | |||
{{AttackData-RBFFS | |||
|Damage=8 | |||
|Guard=Mid | |||
|Meter=3 | |||
|Cancel= | |||
|Startup=7 | |||
|Active=6 | |||
|Recovery=23 | |||
|Total=35 | |||
|Hit Adv=-15 | |||
|Block Adv=-17 | |||
|Properties= | |||
|Invulnerability=Lower: 5-26 | |||
|description=The hit advantage says "avoid this move." It goes over some lows but won't necessarily hit them because the hitbox is too shallow, and they'll probably recover in time to punish you. The only other conceivable use is as a really far anti-air wherein the air reset at least means you won't get punished on hit, but the priority makes doing so tricky, and for only eight points of damage as a reward. | |||
|phases= | |||
<gallery mode=packed> | |||
</gallery> | |||
}} | |||
}} | |||
===== <span class="invisible-header"></span> ===== | |||
<font style="visibility:hidden" size="0"></font> | |||
{{MoveData | |||
|image=RBS_Cheng_stC.png | |||
|imageSize= | |||
|subtitle= | |||
|caption= | |||
|name=st.[[File:Snkc.gif]] | |||
|data= | |||
{{AttackData-RBFFS | |||
|Damage=30 | |||
|Guard=Mid | |||
|Meter=5 | |||
|Cancel= | |||
|Startup=9 | |||
|Active=7 | |||
|Recovery=24 | |||
|Total=39 | |||
|Hit Adv=-7 | |||
|Block Adv=-9 | |||
|Properties= | |||
|Invulnerability= | |||
|description=Poking with normals isn't really Cheng's thing, and this move is stubby as far as 5C's go. | |||
|phases= | |||
<gallery mode=packed> | |||
</gallery> | |||
}} | |||
}} | |||
===== <span class="invisible-header"></span> ===== | |||
<font style="visibility:hidden" size="0"></font> | |||
====Crouching Normals==== | |||
{{MoveData | |||
|image=RBS_Cheng_crA.png | |||
|imageSize= | |||
|subtitle= | |||
|caption= | |||
|name=cr.[[File:Snka.gif]] | |||
|data= | |||
{{AttackData-RBFFS | |||
|Damage=6 | |||
|Guard=Mid | |||
|Meter=3 | |||
|Cancel=Chain, Special | |||
|Startup=6 | |||
|Active=4 | |||
|Recovery=8 | |||
|Total=17 | |||
|Hit Adv=+2 | |||
|Block Adv=0 | |||
|Properties= | |||
|Invulnerability= | |||
|description=Cheng's most reliable chain starter, with a hitbox low to the ground and the ability to chain into itself before going into other stuff. | |||
|phases= | |||
<gallery mode=packed> | |||
</gallery> | |||
}} | |||
}} | |||
===== <span class="invisible-header"></span> ===== | |||
<font style="visibility:hidden" size="0"></font> | |||
{{MoveData | |||
|image=RBS_Cheng_crB.png | |||
|imageSize= | |||
|subtitle= | |||
|caption= | |||
|name=cr.[[File:Snkb.gif]] | |||
|data= | |||
{{AttackData-RBFFS | |||
|Damage=8 | |||
|Guard=Low | |||
|Meter=3 | |||
|Cancel=Chain, Special | |||
|Startup=7 | |||
|Active=7 | |||
|Recovery=9 | |||
|Total=22 | |||
|Hit Adv=-2 | |||
|Block Adv=-4 | |||
|Properties= | |||
|Invulnerability= | |||
|description=This is a combo starter which hits low, so it's quite a decent mixup option for Cheng. It can chain into sweep or confirm into Avalanche Crunch, although the latter requires spacing and you can only chain cr.B twice. | |||
|phases= | |||
<gallery mode=packed> | |||
</gallery> | |||
}} | |||
}} | |||
===== <span class="invisible-header"></span> ===== | |||
<font style="visibility:hidden" size="0"></font> | |||
{{MoveData | |||
|image=RBS_Cheng_crC.png | |||
|imageSize= | |||
|subtitle= | |||
|caption= | |||
|name=cr.[[File:Snkc.gif]] | |||
|data= | |||
{{AttackData-RBFFS | |||
|Damage=30 | |||
|Guard=Low | |||
|Meter=5 | |||
|Cancel=Special | |||
|Startup=9 | |||
|Active=23 | |||
|Recovery=20 | |||
|Total=51 | |||
|Hit Adv=KD | |||
|Block Adv=-11 | |||
|Properties=SKD | |||
|Invulnerability= | |||
|description=A fairly active sweep which will make you eat dirt if you miss. Cancelling it is an option, but Cheng doesn't have Flexible Geezer like he does in RB2, nor can you cancel into feints in this game. 623A is a good cancel option on hit for some setplay. | |||
|phases= | |||
<gallery mode=packed> | |||
</gallery> | |||
}} | |||
}} | |||
===== <span class="invisible-header"></span> ===== | |||
<font style="visibility:hidden" size="0"></font> | |||
====Line Attacks==== | |||
{{MoveData | |||
|image=RBS_Cheng_linebgA.png | |||
|imageSize= | |||
|subtitle= | |||
|caption= | |||
|name=line.[[File:Snka.gif]] | |||
|data= | |||
{{AttackData-RBFFS | |||
|Damage=8 | |||
|Guard=Mid | |||
|Meter=3 | |||
|Cancel= | |||
|Startup=5 | |||
|Active=16 | |||
|Recovery=12 | |||
|Total=32 | |||
|Hit Adv=-1 | |||
|Block Adv=-3 | |||
|Properties= | |||
|Invulnerability= | |||
|description=Filler. It's a little faster than the B version, but neither are great moves in their own right. | |||
|phases= | |||
<gallery mode=packed> | |||
File:RBS_Cheng_linebgA.png | |||
File:RBS_Cheng_linefgA.png | |||
</gallery> | |||
}} | |||
}} | |||
===== <span class="invisible-header"></span> ===== | |||
<font style="visibility:hidden" size="0"></font> | |||
{{MoveData | |||
|image=RBS_Cheng_linebgB.png | |||
|imageSize= | |||
|subtitle= | |||
|caption= | |||
|name=line.[[File:Snkb.gif]] | |||
|data= | |||
{{AttackData-RBFFS | |||
|Damage=20 | |||
|Guard=Mid | |||
|Meter=5 | |||
|Cancel= | |||
|Startup=7 | |||
|Active=16 | |||
|Recovery=18 | |||
|Total= | |||
|Hit Adv=-2 | |||
|Block Adv=-4 | |||
|Properties= | |||
|Invulnerability= | |||
|description=Has only slightly worse frame advantage than its A-button counterpart in exchange for more damage. | |||
|phases= | |||
<gallery mode=packed> | |||
File:RBS_Cheng_linebgB.png | |||
File:RBS_Cheng_linefgB.png | |||
</gallery> | |||
}} | |||
}} | |||
===== <span class="invisible-header"></span> ===== | |||
<font style="visibility:hidden" size="0"></font> | |||
{{MoveData | |||
|image=RBS_Cheng_linebgC.png | |||
|imageSize= | |||
|subtitle= | |||
|caption= | |||
|name=line.[[File:Snkc.gif]] | |||
|data= | |||
{{AttackData-RBFFS | |||
|Damage=20 | |||
|Guard=Mid | |||
|Meter=5 | |||
|Cancel=Special | |||
|Startup=7 | |||
|Active=2+2 | |||
|Recovery=20 | |||
|Total=30 | |||
|Hit Adv=+2 | |||
|Block Adv=0 | |||
|Properties= | |||
|Invulnerability= | |||
|description=Definitely not amazing range for moves of this type, but you're guaranteed to get a combo into Avalanche Crunch at any range this lands. | |||
|phases= | |||
<gallery mode=packed> | |||
File:RBS_Cheng_linebgC.png | |||
File:RBS_Cheng_linefgC.png | |||
</gallery> | |||
}} | |||
}} | |||
{{MoveData | |||
|image=RBS_Cheng_linebgcrC.png | |||
|imageSize= | |||
|subtitle= | |||
|caption= | |||
|name=linecr.[[File:Snkc.gif]] | |||
|data= | |||
{{AttackData-RBFFS | |||
|Damage=20 | |||
|Guard=Mid | |||
|Meter=5 | |||
|Cancel=Special | |||
|Startup=9 | |||
|Active=6 | |||
|Recovery=20 | |||
|Total=34 | |||
|Hit Adv=KD | |||
|Block Adv=-4 | |||
|Properties=SKD | |||
|Invulnerability= | |||
|description=Moves forward a bit to give him rage comparable to his actual sweep. | |||
|phases= | |||
<gallery mode=packed> | |||
File:RBS_Cheng_linebgcrC.png | |||
File:RBS_Cheng_linefgcrC.png | |||
</gallery> | |||
}} | |||
}} | |||
===== <span class="invisible-header"></span> ===== | |||
<font style="visibility:hidden" size="0"></font> | |||
====Jumping Attacks==== | |||
{{MoveData | |||
|image=RBS_Cheng_jA.png | |||
|imageSize= | |||
|subtitle= | |||
|caption= | |||
|name=j.[[File:Snka.gif]] | |||
|data= | |||
{{AttackData-RBFFS | |||
|Damage=6 | |||
|Guard=High | |||
|Meter=3 | |||
|Cancel=Chain | |||
|Startup=6 | |||
|Active=9 | |||
|Recovery= | |||
|Total= | |||
|Hit Adv= | |||
|Block Adv= | |||
|Properties= | |||
|Invulnerability= | |||
|description=An air-to-air angled lower. Not the greatest at its job, but with Cheng you have to work with what you have. | |||
|phases= | |||
<gallery mode=packed> | |||
</gallery> | |||
}} | |||
}} | |||
===== <span class="invisible-header"></span> ===== | |||
<font style="visibility:hidden" size="0"></font> | |||
{{MoveData | |||
|image=RBS_Cheng_jB.png | |||
|imageSize= | |||
|subtitle= | |||
|caption= | |||
|name=j.[[File:Snkb.gif]] | |||
|data= | |||
{{AttackData-RBFFS | |||
|Damage=8 | |||
|Guard=High | |||
|Meter=3 | |||
|Cancel=Chain | |||
|Startup=7 | |||
|Active=7 | |||
|Recovery= | |||
|Total= | |||
|Hit Adv= | |||
|Block Adv= | |||
|Properties= | |||
|Invulnerability= | |||
|description=An alternative to j.A which hits higher. | |||
|phases= | |||
<gallery mode=packed> | |||
</gallery> | |||
}} | |||
}} | |||
===== <span class="invisible-header"></span> ===== | |||
<font style="visibility:hidden" size="0"></font> | |||
{{MoveData | |||
|image=RBS_Cheng_jC.png | |||
|imageSize= | |||
|subtitle= | |||
|caption= | |||
|name=j.[[File:Snkc.gif]] | |||
|data= | |||
{{AttackData-RBFFS | |||
|Damage=30 | |||
|Guard=High | |||
|Meter=5 | |||
|Cancel= | |||
|Startup=9 | |||
|Active=8 | |||
|Recovery= | |||
|Total= | |||
|Hit Adv= | |||
|Block Adv= | |||
|Properties= | |||
|Invulnerability= | |||
|description=This is Cheng's jump-in and the main button you'll be mashing when you go on the offensive. Its lacking priority and shallow hitbox are marks against it, but if he had better options he would use them. | |||
|phases= | |||
<gallery mode=packed> | |||
</gallery> | |||
}} | |||
}} | |||
===== <span class="invisible-header"></span> ===== | |||
<font style="visibility:hidden" size="0"></font> | |||
{{MoveData | |||
|image=RBS_Cheng_njC.png | |||
|imageSize= | |||
|subtitle= | |||
|caption= | |||
|name=nj.[[File:Snkc.gif]] | |||
|data= | |||
{{AttackData-RBFFS | |||
|Damage=30 | |||
|Guard=High | |||
|Meter=5 | |||
|Cancel= | |||
|Startup=9 | |||
|Active=7 | |||
|Recovery= | |||
|Total= | |||
|Hit Adv= | |||
|Block Adv= | |||
|Properties= | |||
|Invulnerability= | |||
|description=Slightly less range than 5C, but still a good air-to-air, and an effective normal to use to stand your ground. | |||
|phases= | |||
<gallery mode=packed> | |||
</gallery> | |||
}} | |||
}} | |||
{{MoveData | |||
|image=RBS_Cheng_jA.png | |||
|imageSize= | |||
|subtitle= | |||
|caption= | |||
|name=hop.[[File:Snka.gif]] | |||
|data= | |||
{{AttackData-RBFFS | |||
|Damage=6 | |||
|Guard=High | |||
|Meter=3 | |||
|Cancel= | |||
|Startup=6 | |||
|Active=∞ | |||
|Recovery= | |||
|Total= | |||
|Hit Adv= | |||
|Block Adv= | |||
|Properties= | |||
|Invulnerability= | |||
|description= | |||
|phases= | |||
<gallery mode=packed> | |||
</gallery> | |||
}} | |||
}} | |||
===== <span class="invisible-header"></span> ===== | |||
<font style="visibility:hidden" size="0"></font> | |||
{{MoveData | |||
|image=RBS_Cheng_jB.png | |||
|imageSize= | |||
|subtitle= | |||
|caption= | |||
|name=hop.[[File:Snkb.gif]] | |||
|data= | |||
{{AttackData-RBFFS | |||
|Damage=8 | |||
|Guard=High | |||
|Meter=3 | |||
|Cancel= | |||
|Startup=7 | |||
|Active=∞ | |||
|Recovery= | |||
|Total= | |||
|Hit Adv= | |||
|Block Adv= | |||
|Properties= | |||
|Invulnerability= | |||
|description= | |||
|phases= | |||
<gallery mode=packed> | |||
</gallery> | |||
}} | |||
}} | |||
===== <span class="invisible-header"></span> ===== | |||
<font style="visibility:hidden" size="0"></font> | |||
{{MoveData | |||
|image=RBS_Cheng_jC.png | |||
|imageSize= | |||
|subtitle= | |||
|caption= | |||
|name=hop.[[File:Snkc.gif]] | |||
|data= | |||
{{AttackData-RBFFS | |||
|Damage=30 | |||
|Guard=High | |||
|Meter= | |||
|Cancel= | |||
|Startup=9 | |||
|Active=9 | |||
|Recovery= | |||
|Total= | |||
|Hit Adv= | |||
|Block Adv= | |||
|Properties= | |||
|Invulnerability= | |||
|description= | |||
|phases= | |||
<gallery mode=packed> | |||
</gallery> | |||
}} | |||
}} | |||
===== <span class="invisible-header"></span> ===== | |||
<font style="visibility:hidden" size="0"></font> | |||
{{MoveData | |||
|image=RBS_Cheng_njC.png | |||
|imageSize= | |||
|subtitle= | |||
|caption= | |||
|name=nhop.[[File:Snkc.gif]] | |||
|data= | |||
{{AttackData-RBFFS | |||
|Damage=30 | |||
|Guard=High | |||
|Meter= | |||
|Cancel= | |||
|Startup=9 | |||
|Active=7 | |||
|Recovery= | |||
|Total= | |||
|Hit Adv= | |||
|Block Adv= | |||
|Properties= | |||
|Invulnerability= | |||
|description= | |||
|phases= | |||
<gallery mode=packed> | |||
</gallery> | |||
}} | |||
}} | |||
===== <span class="invisible-header"></span> ===== | |||
<font style="visibility:hidden" size="0"></font> | |||
====Command Normals==== | |||
{{MoveData | |||
|image=RBS_Cheng_6A.png | |||
|imageSize= | |||
|subtitle=Double Orb Attack | |||
|caption= | |||
|name=6[[File:Snka.gif]] | |||
|data= | |||
{{AttackData-RBFFS | |||
|Damage=30(16+16) | |||
|Guard=High | |||
|Meter=3+3 | |||
|Cancel= | |||
|Startup=22 | |||
|Active=3+2 | |||
|Recovery=25 | |||
|Total=51 | |||
|Hit Adv=-3 | |||
|Block Adv=-5 | |||
|Properties= | |||
|Invulnerability= | |||
|description=Cheng's overhead is slow and a little minus on hit, but the spacing it leaves you at is safe. Unlike RB2, you can't cancel this early into a crawl, so it's something you'll have to fully commit to (e.g. you can't bait DPs with it). The damage is decent, but whether or not it's worth it is up to you. Also, there is indeed a hitbox behind Cheng as well, but when on Earth are you ever going to land that? | |||
|phases= | |||
<gallery mode=packed> | |||
File:RBS_Cheng_6A-1.png | |||
File:RBS_Cheng_6A-2.png | |||
</gallery> | |||
}} | |||
}} | |||
===== <span class="invisible-header"></span> ===== | |||
<font style="visibility:hidden" size="0"></font> | |||
{{MoveData | |||
|image=RBS_Cheng_AB.png | |||
|imageSize= | |||
|subtitle=Glowing Orb | |||
|caption= | |||
|name=5[[File:Snka.gif]][[File:Snkb.gif]] | |||
|data= | |||
{{AttackData-RBFFS | |||
|Damage=20 | |||
|Guard=Mid | |||
|Meter=5 | |||
|Cancel= | |||
|Startup=12 | |||
|Active=8 | |||
|Recovery=20 | |||
|Total=39 | |||
|Hit Adv=-4 | |||
|Block Adv=-6 | |||
|Properties= | |||
|Invulnerability= | |||
|description=Cheng's CD from Fatal Fury 2/Special. On block it's nothing special, but on hit it will send the opponent over to the other plane. Unlike in RB2, there is no chain into plane check, so the reward on hit isn't much. This is designed as a far anti-air which it can do, but trading will make you take more damage from their jump C than they take from this move. The hitbox flickers constantly in this pattern: 1 2 3 4 3 4 3 4 (refer to the phases section). | |||
|phases= | |||
<gallery mode=packed> | |||
File:RBS_Cheng_AB-1.png | |||
File:RBS_Cheng_AB-2.png | |||
File:RBS_Cheng_AB-3.png | |||
File:RBS_Cheng_AB-4.png | |||
</gallery> | |||
}} | |||
}} | |||
===== <span class="invisible-header"></span> ===== | |||
<font style="visibility:hidden" size="0"></font> | |||
{{MoveData | |||
|image=RBS_Cheng_guard6A.png | |||
|imageSize= | |||
|subtitle=While blocking {{f}}[[File:Snka.gif]] | |||
|caption= | |||
|name=46[[File:Snka.gif]] | |||
|data= | |||
{{AttackData-RBFFS | |||
|Damage=20 | |||
|Guard=Mid | |||
|Meter=5 | |||
|Cancel=Special | |||
|Startup=9 | |||
|Active=7 | |||
|Recovery=20 | |||
|Total=35 | |||
|Hit Adv=-3 | |||
|Block Adv=-5 | |||
|Properties= | |||
|Invulnerability=Upper | |||
|description=Cheng's defensive attack. The move's input may seem hostile for his combos, but you can just keep holding forward and press B to get a combo into Avalanche Crunch. | |||
|phases= | |||
<gallery mode=packed> | |||
</gallery> | |||
}} | |||
}} | |||
===== <span class="invisible-header"></span> ===== | |||
<font style="visibility:hidden" size="0"></font> | |||
{{MoveData | |||
|image=RBS_Cheng_6AB.png | |||
|imageSize= | |||
|subtitle=Feint Avalanche Crunch | |||
|caption= | |||
|name=6[[File:Snka.gif]][[File:Snkb.gif]] | |||
|data= | |||
{{AttackData-RBFFS | |||
|Damage= | |||
|Guard= | |||
|Meter= | |||
|Cancel= | |||
|Startup=1 | |||
|Active= | |||
|Recovery=23 | |||
|Total=23 | |||
|Hit Adv= | |||
|Block Adv= | |||
|Properties= | |||
|Invulnerability= | |||
|description=Mimics C Avalance Crunch's hefty startup and backward reel. You can actually use this to dodge stuff in neutral, but it is a commitment! | |||
|phases= | |||
<gallery mode=packed> | |||
</gallery> | |||
}} | |||
}} | |||
===== <span class="invisible-header"></span> ===== | |||
<font style="visibility:hidden" size="0"></font> | |||
{{MoveData | |||
|image=RBS_Cheng_2AB.png | |||
|imageSize= | |||
|subtitle=Feint Kiten Hinzan | |||
|caption= | |||
|name=2[[File:Snka.gif]][[File:Snkb.gif]] | |||
|data= | |||
{{AttackData-RBFFS | |||
|Damage= | |||
|Guard= | |||
|Meter= | |||
|Cancel= | |||
|Startup=1 | |||
|Active= | |||
|Recovery=20 | |||
|Total=20 | |||
|Hit Adv= | |||
|Block Adv= | |||
|Properties= | |||
|Invulnerability= | |||
|description=A fireball feint, but without any vocals to make it convincing. | |||
|phases= | |||
<gallery mode=packed> | |||
</gallery> | |||
}} | |||
}} | |||
===== <span class="invisible-header"></span> ===== | |||
<font style="visibility:hidden" size="0"></font> | |||
====Chain Normals==== | |||
{{MoveData | |||
|image=RBS_Cheng_chain2C.png | |||
|imageSize= | |||
|subtitle= | |||
|caption= | |||
|name=(1) (2) 2[[File:Snkc.gif]] | |||
|data= | |||
{{AttackData-RBFFS | |||
|Damage=40 | |||
|Guard=Low | |||
|Meter=5 | |||
|Cancel= | |||
|Startup=9 | |||
|Active=23 | |||
|Recovery=20 | |||
|Total=51 | |||
|Hit Adv=KD | |||
|Block Adv=-21 | |||
|Properties=SKD | |||
|Invulnerability= | |||
|description=This is a reliable way of getting good damage from your main confirms, such as from 2B. Unlike his real sweep, however, it cannot be cancelled. | |||
|phases= | |||
<gallery mode=packed> | |||
</gallery> | |||
}} | |||
}} | |||
===== <span class="invisible-header"></span> ===== | |||
<font style="visibility:hidden" size="0"></font> | |||
{{MoveData | |||
|image=RBS_Cheng_chain3C.png | |||
|imageSize= | |||
|subtitle= | |||
|caption= | |||
|name=(1) (2) 3[[File:Snkc.gif]] | |||
|data= | |||
{{AttackData-RBFFS | |||
|Damage=27 | |||
|Guard=Mid | |||
|Meter=3 | |||
|Cancel= | |||
|Startup=9 | |||
|Active=7 | |||
|Recovery=20 | |||
|Total=35 | |||
|Hit Adv=KD | |||
|Block Adv=-5 | |||
|Properties=SKD | |||
|Invulnerability= | |||
|description=This move, however, can; it's Cheng's launcher. However, the only combo he gets is into 623A, which is okay damage but doesn't leave him at too great of an advantage. Furthermore, this move's collision detection is spotty; on thinner characters, this has the tendency to miss if done too close. Overall, Cheng has more useful combos. | |||
|phases= | |||
<gallery mode=packed> | |||
</gallery> | |||
}} | |||
}} | |||
===== <span class="invisible-header"></span> ===== | |||
<font style="visibility:hidden" size="0"></font> | |||
{{MoveData | |||
|image=RBS_Cheng_chain5C.png | |||
|imageSize= | |||
|subtitle= | |||
|caption= | |||
|name=(1) 5[[File:Snkb.gif]]5[[File:Snkc.gif]] | |||
|data= | |||
{{AttackData-RBFFS | |||
|Damage=27 | |||
|Guard=Mid | |||
|Meter=3 | |||
|Cancel=Chain | |||
|Startup=9 | |||
|Active=7 | |||
|Recovery=20 | |||
|Total=35 | |||
|Hit Adv=KD | |||
|Block Adv=-5 | |||
|Properties=HKD | |||
|Invulnerability= | |||
|description=Note how you're forced to use 5B as the middle hit; this means the chain is only really effective up close. | |||
|phases= | |||
<gallery mode=packed> | |||
</gallery> | |||
}} | |||
}} | |||
===== <span class="invisible-header"></span> ===== | |||
<font style="visibility:hidden" size="0"></font> | |||
{{MoveData | |||
|image=RBS_Cheng_chain5C_236C.png | |||
|imageSize= | |||
|subtitle= | |||
|caption= | |||
|name=[[File:Snka.gif]]5[[File:Snkb.gif]]5[[File:Snkc.gif]]{{qcf}}[[File:Snkc.gif]] | |||
|data= | |||
{{AttackData-RBFFS | |||
|Damage=25 | |||
|Guard= | |||
|Meter=5 | |||
|Cancel= | |||
|Startup=9 | |||
|Active=48 | |||
|Recovery=35 | |||
|Total=91 | |||
|Hit Adv=KD | |||
|Block Adv= | |||
|Properties=HKD | |||
|Invulnerability= | |||
|description=This move is a pursuit. Although it is designed strictly to combo from (1) 5B 5C, it can theoretically hit as a pursuit elsewhere, e.g. if the opponent gets hit by the tail end of Bursting Heavens and you whiff the rest of the chain into this. However, that is as situational as it sounds, and the move's slow nature means it has virtually no utility outside of this string. | |||
|phases= | |||
<gallery mode=packed> | |||
</gallery> | |||
}} | |||
}} | |||
===== <span class="invisible-header"></span> ===== | |||
<font style="visibility:hidden" size="0"></font> | |||
{{MoveData | |||
|image=RBS_Cheng_chain5A_5C.png | |||
|imageSize= | |||
|subtitle= | |||
|caption= | |||
|name=5[[File:Snka.gif]]5[[File:Snkc.gif]] | |||
|data= | |||
{{AttackData-RBFFS | |||
|Damage=23 | |||
|Guard=Mid | |||
|Meter=5 | |||
|Cancel=Special | |||
|Startup=9 | |||
|Active=7 | |||
|Recovery=20 | |||
|Total=35 | |||
|Hit Adv=-3 | |||
|Block Adv=-5 | |||
|Properties= | |||
|Invulnerability= | |||
|description=This is a cosy way of confirming into Avalanche Crunch and might remind you of the string Cheng uses in RB2 to do the same, although here you're allowed to charge before the combo starts. However, this is neutered by either version of 5A going over low crouchers. Moves forward a little. | |||
|phases= | |||
<gallery mode=packed> | |||
</gallery> | |||
}} | |||
}} | |||
===== <span class="invisible-header"></span> ===== | |||
<font style="visibility:hidden" size="0"></font> | |||
{{MoveData | |||
|image=RBS_Cheng_chain5C_5C.png | |||
|imageSize= | |||
|subtitle= | |||
|caption= | |||
|name=n5[[File:Snkc.gif]]n5[[File:Snkc.gif]] | |||
|data= | |||
{{AttackData-RBFFS | |||
|Damage=10 | |||
|Guard=Mid | |||
|Meter=3 | |||
|Cancel=Chain, Special | |||
|Startup=9 | |||
|Active=3+(1)+3 | |||
|Recovery=20 | |||
|Total=35 | |||
|Hit Adv=-3 | |||
|Block Adv=-5 | |||
|Properties= | |||
|Invulnerability= | |||
|description=Cancel the first hit of n5C into this if you're close enough and Cheng starts flying. Despite its airborne looks, you can cancel from this into a grounded special. | |||
|phases= | |||
<gallery mode=packed> | |||
</gallery> | |||
}} | |||
}} | |||
===== <span class="invisible-header"></span> ===== | |||
<font style="visibility:hidden" size="0"></font> | |||
{{MoveData | |||
|image=RBS_Cheng_chain5C_5C_6C.png | |||
|imageSize= | |||
|subtitle= | |||
|caption= | |||
|name=n5[[File:Snkc.gif]]n5[[File:Snkc.gif]]6[[File:Snkc.gif]] | |||
|data= | |||
{{AttackData-RBFFS | |||
|Damage=11 | |||
|Guard=Mid | |||
|Meter=3 | |||
|Cancel=Chain | |||
|Startup=9 | |||
|Active=7 | |||
|Recovery=20 | |||
|Total=35 | |||
|Hit Adv=KD | |||
|Block Adv=-5 | |||
|Properties=SKD | |||
|Invulnerability= | |||
|description=This is punishable on block, but not as much as 46C afterwards. You should only be using this if you've confirmed into it, anyway. | |||
|phases= | |||
<gallery mode=packed> | |||
</gallery> | |||
}} | |||
}} | |||
===== <span class="invisible-header"></span> ===== | |||
<font style="visibility:hidden" size="0"></font> | |||
{{MoveData | |||
|image=RBS_Cheng_chain5C_5C_6C_46C.png | |||
|imageSize= | |||
|subtitle= | |||
|caption= | |||
|name=n5[[File:Snkc.gif]]n5[[File:Snkc.gif]]6[[File:Snkc.gif]]46[[File:Snkc.gif]] | |||
|data= | |||
{{AttackData-RBFFS | |||
|Damage=40 | |||
|Guard=Mid | |||
|Meter=5 | |||
|Cancel= | |||
|Startup=19 | |||
|Active=16 | |||
|Recovery=21 | |||
|Total=55 | |||
|Hit Adv=KD | |||
|Block Adv=-14 | |||
|Properties=SKD | |||
|Invulnerability= | |||
|description=Beeg damage from Cheng's special ender. This chain alone builds 14 pixels of meter for you, which is of note given how salient Break Shots are to his game. | |||
|phases= | |||
<gallery mode=packed> | |||
</gallery> | |||
}} | |||
}} | |||
===== <span class="invisible-header"></span> ===== | |||
<font style="visibility:hidden" size="0"></font> | |||
== | ====Normal Throws==== | ||
{| | {{MoveData | ||
| | |image=RBS_Cheng_throw.png | ||
|imageSize= | |||
|subtitle= | |||
|caption= | |||
|name=6/4[[File:Snkc.gif]] | |||
| | |data= | ||
{{AttackData-RBFFS | |||
| | |Damage=28 | ||
| | |Guard= | ||
| | |Meter= | ||
| | |Cancel= | ||
|Startup=1 | |||
| | |Active=1 | ||
|Recovery= | |||
|Total=1 | |||
|Hit Adv=KD | |||
|Block Adv= | |||
| | |Properties=HKD | ||
| | |Invulnerability= | ||
| | |description=A simple back throw for good damage. Chuck a high fireball afterwards for some setplay, or simply move in if you prefer. | ||
|- | |phases= | ||
<gallery mode=packed> | |||
| | </gallery> | ||
| | }} | ||
| | }} | ||
| | ===== <span class="invisible-header"></span> ===== | ||
<font style="visibility:hidden" size="0"></font> | |||
| | {{MoveData | ||
| | |image=RBS_Cheng_throw3C.png | ||
| | |imageSize= | ||
| | |subtitle= | ||
|} | |caption= | ||
|name=3[[File:Snkc.gif]] | |||
|data= | |||
{{AttackData-RBFFS | |||
|Damage=35(7+7+7+7+7) | |||
|Guard= | |||
|Meter= | |||
|Cancel= | |||
|Startup=1 | |||
|Active=1 | |||
|Recovery= | |||
|Total=1 | |||
|Hit Adv= | |||
|Block Adv= | |||
|Properties=HKD | |||
|Invulnerability= | |||
|description=A forward throw which deals more damage than the regular throw. However, it leaves you too far out for a high fireball to hit — that is, of course, unless they're close enough to the corner, which is where this move shines. This restricts you to either running and jumping in to take advantage of the knockdown or just throwing a normal fireball to be safe. | |||
|phases= | |||
<gallery mode=packed> | |||
</gallery> | |||
}} | |||
}} | |||
===== <span class="invisible-header"></span> ===== | |||
<font style="visibility:hidden" size="0"></font> | |||
== | ====Special Moves==== | ||
{| class=" | {{MoveData | ||
|- | |image=RBS_Cheng_236A.png | ||
|imageSize= | |||
|subtitle={{qcf}}[[File:Snka.gif]] | |||
|caption=Kiten Hinzan | |||
|name=236[[File:Snka.gif]] | |||
|- | |data= | ||
{{AttackData-RBFFS | |||
| | |Damage=16 | ||
| | |Guard=Mid | ||
| | |Meter=5 | ||
|- | |Cancel= | ||
|} | |Startup=21 | ||
|Active=25+1+(2)+6 | |||
|Recovery=42 | |||
|Total=62 | |||
|Hit Adv=-8 | |||
|Block Adv=-10 | |||
|Properties=Projectile | |||
|Invulnerability= | |||
|description=Good luck winning fireball wars with this thing. Not only does it travel in an arc, but it reaches quite short of fullscreen, and the startup being as hefty as it is does nothing to make up for this. It's not even a safe pressure tool, either; if done too close, Cheng can be punished even on hit, which means he's not in a good spot after using this to end a string. Regardless, as far as zoning goes, this is the best Cheng has, and he can still use it competently as a poke. Both fireballs have little splashes after they hit the ground, but timing these as meaties wouldn't be worth it given how long the move takes to recover. | |||
|phases= | |||
<gallery mode=packed> | |||
</gallery> | |||
}} | |||
}} | |||
===== <span class="invisible-header"></span> ===== | |||
<font style="visibility:hidden" size="0"></font> | |||
{{MoveData | |||
|image=RBS_Cheng_623A.png | |||
|imageSize= | |||
|subtitle={{dp}}[[File:Snka.gif]] | |||
|caption=High Kiten Hinzan | |||
|name=623[[File:Snka.gif]] | |||
|data= | |||
{{AttackData-RBFFS | |||
|Damage=16 | |||
|Guard=Mid | |||
|Meter=5 | |||
|Cancel= | |||
|Startup=21 | |||
|Active=50+1+(2)+6 | |||
|Recovery=42 | |||
|Total=62 | |||
|Hit Adv=-8 | |||
|Block Adv=-10 | |||
|Properties=Projectile | |||
|Invulnerability= | |||
|description=This fireball is angled upward and will miss on most standing opponents up close, but that's not necessarily a problem for Cheng. Not only can this function as a decent anti-air at bay, tying into Cheng's hit-and-run playstyle quite nicely, but its arc also makes it function well as a setplay tool. Cheng isn't a mixup machine by any means, but he has the tools to do it, and he can also use the safety provided by this move to run away. Unlike 236A, this move also has juggle properties, meaning you can use this after his launcher for a combo. | |||
|phases= | |||
<gallery mode=packed> | |||
</gallery> | |||
}} | |||
}} | |||
===== <span class="invisible-header"></span> ===== | |||
<font style="visibility:hidden" size="0"></font> | |||
{{MoveData | |||
|image=RBS_Cheng_2,8A.png | |||
|imageSize= | |||
|subtitle={{d}},{{u}}[[File:Snka.gif]] | |||
|caption=Belly Drum Blast | |||
|name=[2]8[[File:Snka.gif]] | |||
|data= | |||
{{AttackData-RBFFS | |||
|Damage=40 | |||
|Guard=High | |||
|Meter=7 | |||
|Cancel= | |||
|Startup=15 | |||
|Active=25 | |||
|Recovery=29 | |||
|Total=68 | |||
|Hit Adv=KD | |||
|Block Adv=-23 | |||
|Properties=SKD | |||
|Invulnerability= | |||
|description=A gutsy way of winning neutral in more ways than one. Cheng leaps high and tracks towards the opponent's current position, punishing them with a high-damage belly flop which hits overhead. You can manoeuvre yourself with 4/6 after the move makes contact, but not mid-flight like in RB2. Either way, he's not in a great spot if this gets blocked. If Cheng hits the floor (e.g. if the opponent backdashes to get out of the way), he actually recovers rather quickly. | |||
|phases= | |||
<gallery mode=packed> | |||
</gallery> | |||
}} | |||
}} | |||
===== <span class="invisible-header"></span> ===== | |||
<font style="visibility:hidden" size="0"></font> | |||
{{MoveData | |||
|image=RBS_Cheng_2,8A_AA.png | |||
|imageSize= | |||
|subtitle={{d}},{{u}}[[File:Snka.gif]], [[File:Snka.gif]][[File:Snka.gif]] | |||
|caption=Delay | |||
|name=[2]8[[File:Snka.gif]], [[File:Snka.gif]][[File:Snka.gif]] | |||
|data= | |||
{{AttackData-RBFFS | |||
|Damage= | |||
|Guard= | |||
|Meter= | |||
|Cancel= | |||
|Startup=1 | |||
|Active= | |||
|Recovery=30 | |||
|Total=30 | |||
|Hit Adv= | |||
|Block Adv= | |||
|Properties= | |||
|Invulnerability= | |||
|description=You can delay Belly Drum Blast a little by mashing A during its ascent. You can use this to punish pre-emptive attempts at stuffing your air approach or simply to stay out of danger for a little longer. Interrupts frame 22 of Belly Drum Blast. | |||
|phases= | |||
<gallery mode=packed> | |||
</gallery> | |||
}} | |||
}} | |||
===== <span class="invisible-header"></span> ===== | |||
<font style="visibility:hidden" size="0"></font> | |||
{{MoveData | |||
|image=RBS_Cheng_4,6B.png | |||
|imageSize= | |||
|subtitle={{b}},{{f}}[[File:Snkb.gif]] | |||
|caption=Avalanche Crunch | |||
|name=[4]6[[File:Snkb.gif]] | |||
|data= | |||
{{AttackData-RBFFS | |||
|Damage=34 | |||
|Guard=Mid | |||
|Meter=7 | |||
|Cancel= | |||
|Startup=7 | |||
|Active=12 | |||
|Recovery=12 | |||
|Total=30 | |||
|Hit Adv=+2 | |||
|Block Adv=-10 | |||
|Properties=[[File:RBS_Breakshot.png|80px]] | |||
|Invulnerability= | |||
|description=A zippy ground roll which travels a bit over half screen. It's basically Cheng's best move. In exchange for hitting mid rather than low, this is MUCH safer than it is in RB2, where it is already annoying to punish. The move causes an air reset on hit, usually putting Cheng a good distance away in the process. It's great for punishing, and for generally being a nuisance. Additionally, this is Cheng's Break Shot, where its speed and forward movement make it very capable for the job. Although Break Shot timing in RBS is rather tight, this is still a great way for Cheng to get himself out of tight spots. Add how Cheng adopts a low profile during the move and its dependability as a combo tool and you have quite the move. | |||
|phases= | |||
<gallery mode=packed> | |||
</gallery> | |||
}} | |||
}} | |||
===== <span class="invisible-header"></span> ===== | |||
<font style="visibility:hidden" size="0"></font> | |||
{{MoveData | |||
|image=RBS_Cheng_4,6C.png | |||
|imageSize= | |||
|subtitle={{b}},{{f}}[[File:Snkc.gif]] | |||
|caption=Avalanche Crunch | |||
|name=[4]6[[File:Snkc.gif]] | |||
|data= | |||
{{AttackData-RBFFS | |||
|Damage=42 | |||
|Guard=Mid | |||
|Meter=7 | |||
|Cancel= | |||
|Startup=23 | |||
|Active=18 | |||
|Recovery=18 | |||
|Total=58 | |||
|Hit Adv=KD | |||
|Block Adv=-22 | |||
|Properties=[[File:RBS_Breakshot.png|80px]], SKD | |||
|Invulnerability= | |||
|description=This move travels fullscreen, deals more damage and scores a knockdown, but the slow startup makes it much more situational in comparison. Cheng reels back during the startup, letting him avoid some attacks, but he rolls extremely fast out of his spot, so using it like a reversal is not very wise. Also a Break Shot, this move is handy for punishing moves with heavy endlag on block, but naturally the B version is more dependable overall. You can also use this for fullscreen punishes and also to YOLO your way in — the latter of which obviously isn't so wise, but it is an option, given this move also has less recovery than it does in RB2. No difference in priority between versions. | |||
|phases= | |||
<gallery mode=packed> | |||
</gallery> | |||
}} | |||
}} | |||
===== <span class="invisible-header"></span> ===== | |||
<font style="visibility:hidden" size="0"></font> | |||
{{MoveData | |||
|image=RBS_Cheng_63214B.png | |||
|imageSize= | |||
|subtitle={{hcb}}[[File:Snkb.gif]] | |||
|caption=Full Reverse Pellet | |||
|name=63214[[File:Snkb.gif]] | |||
|data= | |||
{{AttackData-RBFFS | |||
|Damage=35 | |||
|Guard=Mid | |||
|Meter=0 | |||
|Cancel= | |||
|Startup=12 | |||
|Active=33 | |||
|Recovery=27 | |||
|Total=71 | |||
|Hit Adv=KD | |||
|Block Adv=-24 | |||
|Properties=SKD | |||
|Invulnerability= | |||
|description=A 12f counter (!!) which triggers when hit by highs, mids and special moves. Lows, fireballs and throws will beat it. However, this is not just NOT a catch counter, but its startup post-activation depends on Cheng's position. After getting hit, Cheng will rebound to the wall behind him and spring off. In effect, this move will counter many things (at least grounded) successfully if Cheng is cornered, but it won't counter much of anything if he's away from it. Given the hefty recovery, Cheng will probably eat more damage in these scenarios than if he simply hadn't bothered to counter. At least it can help Cheng escape the corner — right? Use sparingly if at all. | |||
|phases= | |||
<gallery mode=packed> | |||
</gallery> | |||
}} | |||
}} | |||
===== <span class="invisible-header"></span> ===== | |||
<font style="visibility:hidden" size="0"></font> | |||
= | ===S.Power=== | ||
{{MoveData | |||
|image=RBS_Cheng_1,236BC.png | |||
|imageSize= | |||
|subtitle={{db}},{{qcf}}[[File:Snkb.gif]][[File:Snkc.gif]] | |||
|caption=Bursting Heavens | |||
|name=[1]236[[File:Snkb.gif]][[File:Snkc.gif]] | |||
|data= | |||
{{AttackData-RBFFS | |||
|Damage=96 | |||
|Guard=Mid | |||
|Meter= | |||
|Cancel= | |||
|Startup=43 | |||
|Active=29+27+(8)+5 | |||
|Recovery=36 | |||
|Total=78 | |||
|Hit Adv=KD | |||
|Block Adv=+5 | |||
|Properties=HKD, Projectile | |||
|Invulnerability= | |||
|description=This move sucks in RB2 and it sucks here too. The advantage is nice in theory, and it can theoretically win fireball wars given how it as a super fireball destroys regular ones. However, the startup is SO bad, and being forced to stay put for so long is a tall order for Cheng, who needs his space to succeed. The move has an aftershock if it hits the floor which can be a knowledge check, but neither the fireball itself nor its impact will hit opponents on the opposite plane. Save your meter for Break Shots. | |||
|phases= | |||
<gallery mode=packed> | |||
File:RBS_Cheng_1,236BC-1.png | |||
File:RBS_Cheng_1,236BC-2.png | |||
File:RBS_Cheng_1,236BC-3.png | |||
</gallery> | |||
}} | |||
}} | |||
===== <span class="invisible-header"></span> ===== | |||
<font style="visibility:hidden" size="0"></font> | |||
--- | ===P.Power=== | ||
{{MoveData | |||
|image=RBS_Cheng_63214C.png | |||
|imageSize= | |||
|subtitle={{hcb}}[[File:Snkc.gif]] | |||
|caption=Collapse Of Creation | |||
|name=63214[[File:Snkc.gif]] | |||
|data= | |||
{{AttackData-RBFFS | |||
|Damage=112(12+10*10+25) | |||
|Guard=Mid | |||
|Meter= | |||
|Cancel= | |||
|Startup=79 | |||
|Active=7 | |||
|Recovery=28 | |||
|Total=113 | |||
|Hit Adv=KD | |||
|Block Adv=-23 | |||
|Properties=HKD | |||
|Invulnerability=Full: 1-73 | |||
|description=Cheng's P.Power in RB2 is okay, but this one just stinks. Essentially an 'enhanced' Belly Drum Blast, Cheng leaps high into the air, takes ages to fall and then, on contact, assaults the opponent with a barrage of fireballs before a belly drop to finish them off. Cheng can manoeuvre himself with 4/6 to go for ambiguous crossups, but the kicker is how he has no way of targeting opponents who switch to the opposite plane. The move's excessive startup means you have so much time to simply press the D button, and when Cheng (finally) falls down, he will have lost all his meter he could've used for Break Shots and with nothing to show for it. You might even get to punish him. The move's only saving grace is its ability to timer scam, especially given its invincibility to start; in fact, this trait means Cheng can theoretically use it to escape the corner, although this is exploitable. Besides that, avoid this move. | |||
|phases= | |||
<gallery mode=packed> | |||
</gallery> | |||
}} | |||
}} | |||
===== <span class="invisible-header"></span> ===== | |||
<font style="visibility:hidden" size="0"></font> | |||
==Chains== | |||
'''(0)''' - n5A, 2A | |||
- | '''(1)''' - n5A, 5A, 2A, n5B, 2B | ||
'''(2)''' - n5B, 2B ''(NOTE: You will always get n5B regardless of distance)'' | |||
'''(3)''' - 2C, 3C | |||
- | '''Special''' - (1) 5B 5C 236C, n5A/5A 5C, n5C n5C 6C 46C, jA/jB jC | ||
[ | ==Combos== | ||
'''(1) (2) [4]6B''' (41 damage) - A simple confirm — usually from two 2Bs — which you can do up close. | |||
'''(1) (2) 2C''' (46 damage) - More damage and leaves you close. You have enough time to hop in afterwards, although it won't be a safejump. | |||
'''(1) (2) 3C, 623A''' (48 damage) - Leaves you 0 on hit. Make sure to only use 623A because 236A doesn't have juggle properties. | |||
'''n5A/5A 5C [4]6B''' (51 damage) - Cheng's ideal combo to land, but it misses on short crouchers such as Andy. | |||
'''623A, [4]6B''' (45 damage) - This sequence is useful for harassment, but you will be surprised how much this combo actually hits. | |||
'''623A, 236A''' (30 damage, corner) - Obviously not worth going for, but it's a novelty. | |||
'''623A, h.C, (1) (2) 3C, 623A''' (88 damage, corner) - Hop C will link after 623A hits. However, 623A is a mid and itself won't probably it; it's simply there to keep your opponent stuck for your pressure. This combo shows the highest damage possible from this situation. | |||
{{Navbox-RBFFS}} | {{Navbox-RBFFS}} | ||
[[Category:Real Bout Fatal Fury Special]] | [[Category:Real Bout Fatal Fury Special]] | ||
[[Category: | [[Category:Cheng Sinzan]] | ||
Revision as of 12:17, 14 January 2024
Introduction
Cheng Sinzan is a serious contender for one of the worst characters in the game, and a lot of it has to do with a lack of power and reach. Not only are his normals ineffective as pokes, but his arced fireball is sluggish and fails to reach fullscreen. Rushdown is a problem, too; though competent, his air normals are shallow and will often lose to air-to-airs from other characters rather easily. Plane abuse is a key part of RBS; in this regard, Cheng's stubby plane checks also come up short. Most characters can turn the tables with one or two good supers to threaten damage, but both of Cheng's are borderline unusable — the damage you do at the start of the game is the damage you're stuck with throughout. For these reasons, Cheng finds himself on the backfoot frequently, and his counter move being so dysfunctional does not help him in the slightest.
Cheng simply cannot compete with the threats around him, so what does he do? He runs.
For a portly businessman, Cheng is quite evasive; his backdash is good, while his short height makes him deceptively hard to hit at times. Though certainly not winning any zoning wars, Cheng's fireball shines when used to poke at midrange, where he can freely chuck high fireballs to not only catch jumpers-in, but also cover his tracks while making escapes. The lynchpin in his kit, however, is his ground roll; not only is it fast and low to the ground, but it's also relatively safe on block. It works wonders on defense, too; his roll works not only as a punish tool, but as a highly effective Break Shot with its speed and reach. Cheng's supers are useless, but his quick meter build from rolling and tossing fireballs all day supports his penchant for guard cancels rather nicely. Hit-and-run is Cheng's game; while far from solid, he is well-equipped to roll circles around his foes — or at least annoy the shit out of them until he drops.
Colors

|

|
Movelist
Command Normals
Special Moves
![]() ,
,![]()
![]() ~
~ ![]()
![]() - Belly Drum Blast ~ Delay
- Belly Drum Blast ~ Delay
S.Power
P.Power
Normals
Close Normals
| Damage | Guard | Meter | Cancel | Startup | Active | Recovery | Total | Hit Adv | Block Adv | Properties | Invulnerability | |||
|---|---|---|---|---|---|---|---|---|---|---|---|---|---|---|
| 6 | Mid | 3 | Chain, Special | 6 | 7 | 5 | 17 | +2 | 0 | - | - | |||
|
| ||||||||||||||
| Damage | Guard | Meter | Cancel | Startup | Active | Recovery | Total | Hit Adv | Block Adv | Properties | Invulnerability | |||
|---|---|---|---|---|---|---|---|---|---|---|---|---|---|---|
| 8 | Mid | 3 | Chain, Special | 7 | 10 | 6 | 22 | -2 | -4 | - | - | |||
|
Combo filler. Essential for going into the 5C 236C chain, but otherwise 2B is better. Plenty of active frames, but not very safe as a meaty given how close you have to be. | ||||||||||||||
| Damage | Guard | Meter | Cancel | Startup | Active | Recovery | Total | Hit Adv | Block Adv | Properties | Invulnerability | |||
|---|---|---|---|---|---|---|---|---|---|---|---|---|---|---|
| 30(16+16) | Mid | 3+3 | Chain, Special | 10 | 3+(7)+7 | 13 | 39 | +4 | +2 | - | - | |||
Standing Normals
| Damage | Guard | Meter | Cancel | Startup | Active | Recovery | Total | Hit Adv | Block Adv | Properties | Invulnerability | |||
|---|---|---|---|---|---|---|---|---|---|---|---|---|---|---|
| 6 | Mid | 3 | Chain, Special | 5 | 1+5 | 12 | 22 | -4 | -6 | - | - | |||
| Damage | Guard | Meter | Cancel | Startup | Active | Recovery | Total | Hit Adv | Block Adv | Properties | Invulnerability | |||
|---|---|---|---|---|---|---|---|---|---|---|---|---|---|---|
| 8 | Mid | 3 | - | 7 | 6 | 23 | 35 | -15 | -17 | - | Lower: 5-26 | |||
|
The hit advantage says "avoid this move." It goes over some lows but won't necessarily hit them because the hitbox is too shallow, and they'll probably recover in time to punish you. The only other conceivable use is as a really far anti-air wherein the air reset at least means you won't get punished on hit, but the priority makes doing so tricky, and for only eight points of damage as a reward. | ||||||||||||||
| Damage | Guard | Meter | Cancel | Startup | Active | Recovery | Total | Hit Adv | Block Adv | Properties | Invulnerability | |||
|---|---|---|---|---|---|---|---|---|---|---|---|---|---|---|
| 30 | Mid | 5 | - | 9 | 7 | 24 | 39 | -7 | -9 | - | - | |||
|
Poking with normals isn't really Cheng's thing, and this move is stubby as far as 5C's go. | ||||||||||||||
Crouching Normals
| Damage | Guard | Meter | Cancel | Startup | Active | Recovery | Total | Hit Adv | Block Adv | Properties | Invulnerability | |||
|---|---|---|---|---|---|---|---|---|---|---|---|---|---|---|
| 6 | Mid | 3 | Chain, Special | 6 | 4 | 8 | 17 | +2 | 0 | - | - | |||
|
Cheng's most reliable chain starter, with a hitbox low to the ground and the ability to chain into itself before going into other stuff. | ||||||||||||||
| Damage | Guard | Meter | Cancel | Startup | Active | Recovery | Total | Hit Adv | Block Adv | Properties | Invulnerability | |||
|---|---|---|---|---|---|---|---|---|---|---|---|---|---|---|
| 8 | Low | 3 | Chain, Special | 7 | 7 | 9 | 22 | -2 | -4 | - | - | |||
|
This is a combo starter which hits low, so it's quite a decent mixup option for Cheng. It can chain into sweep or confirm into Avalanche Crunch, although the latter requires spacing and you can only chain cr.B twice. | ||||||||||||||
| Damage | Guard | Meter | Cancel | Startup | Active | Recovery | Total | Hit Adv | Block Adv | Properties | Invulnerability | |||
|---|---|---|---|---|---|---|---|---|---|---|---|---|---|---|
| 30 | Low | 5 | Special | 9 | 23 | 20 | 51 | KD | -11 | SKD | - | |||
|
A fairly active sweep which will make you eat dirt if you miss. Cancelling it is an option, but Cheng doesn't have Flexible Geezer like he does in RB2, nor can you cancel into feints in this game. 623A is a good cancel option on hit for some setplay. | ||||||||||||||
Line Attacks
Jumping Attacks
| Damage | Guard | Meter | Cancel | Startup | Active | Recovery | Total | Hit Adv | Block Adv | Properties | Invulnerability | |||
|---|---|---|---|---|---|---|---|---|---|---|---|---|---|---|
| 6 | High | 3 | Chain | 6 | 9 | - | - | - | - | - | - | |||
|
An air-to-air angled lower. Not the greatest at its job, but with Cheng you have to work with what you have. | ||||||||||||||
| Damage | Guard | Meter | Cancel | Startup | Active | Recovery | Total | Hit Adv | Block Adv | Properties | Invulnerability | |||
|---|---|---|---|---|---|---|---|---|---|---|---|---|---|---|
| 8 | High | 3 | Chain | 7 | 7 | - | - | - | - | - | - | |||
|
An alternative to j.A which hits higher. | ||||||||||||||
| Damage | Guard | Meter | Cancel | Startup | Active | Recovery | Total | Hit Adv | Block Adv | Properties | Invulnerability | |||
|---|---|---|---|---|---|---|---|---|---|---|---|---|---|---|
| 30 | High | 5 | - | 9 | 8 | - | - | - | - | - | - | |||
|
This is Cheng's jump-in and the main button you'll be mashing when you go on the offensive. Its lacking priority and shallow hitbox are marks against it, but if he had better options he would use them. | ||||||||||||||
| Damage | Guard | Meter | Cancel | Startup | Active | Recovery | Total | Hit Adv | Block Adv | Properties | Invulnerability | |||
|---|---|---|---|---|---|---|---|---|---|---|---|---|---|---|
| 30 | High | 5 | - | 9 | 7 | - | - | - | - | - | - | |||
|
Slightly less range than 5C, but still a good air-to-air, and an effective normal to use to stand your ground. | ||||||||||||||
| Damage | Guard | Meter | Cancel | Startup | Active | Recovery | Total | Hit Adv | Block Adv | Properties | Invulnerability |
|---|---|---|---|---|---|---|---|---|---|---|---|
| 6 | High | 3 | - | 6 | ∞ | - | - | - | - | - | - |
| Damage | Guard | Meter | Cancel | Startup | Active | Recovery | Total | Hit Adv | Block Adv | Properties | Invulnerability |
|---|---|---|---|---|---|---|---|---|---|---|---|
| 8 | High | 3 | - | 7 | ∞ | - | - | - | - | - | - |
| Damage | Guard | Meter | Cancel | Startup | Active | Recovery | Total | Hit Adv | Block Adv | Properties | Invulnerability |
|---|---|---|---|---|---|---|---|---|---|---|---|
| 30 | High | - | - | 9 | 9 | - | - | - | - | - | - |
| Damage | Guard | Meter | Cancel | Startup | Active | Recovery | Total | Hit Adv | Block Adv | Properties | Invulnerability |
|---|---|---|---|---|---|---|---|---|---|---|---|
| 30 | High | - | - | 9 | 7 | - | - | - | - | - | - |
Command Normals
| Damage | Guard | Meter | Cancel | Startup | Active | Recovery | Total | Hit Adv | Block Adv | Properties | Invulnerability | |||
|---|---|---|---|---|---|---|---|---|---|---|---|---|---|---|
| 30(16+16) | High | 3+3 | - | 22 | 3+2 | 25 | 51 | -3 | -5 | - | - | |||
|
Cheng's overhead is slow and a little minus on hit, but the spacing it leaves you at is safe. Unlike RB2, you can't cancel this early into a crawl, so it's something you'll have to fully commit to (e.g. you can't bait DPs with it). The damage is decent, but whether or not it's worth it is up to you. Also, there is indeed a hitbox behind Cheng as well, but when on Earth are you ever going to land that? | ||||||||||||||
| Damage | Guard | Meter | Cancel | Startup | Active | Recovery | Total | Hit Adv | Block Adv | Properties | Invulnerability | |||
|---|---|---|---|---|---|---|---|---|---|---|---|---|---|---|
| 20 | Mid | 5 | - | 12 | 8 | 20 | 39 | -4 | -6 | - | - | |||
|
Cheng's CD from Fatal Fury 2/Special. On block it's nothing special, but on hit it will send the opponent over to the other plane. Unlike in RB2, there is no chain into plane check, so the reward on hit isn't much. This is designed as a far anti-air which it can do, but trading will make you take more damage from their jump C than they take from this move. The hitbox flickers constantly in this pattern: 1 2 3 4 3 4 3 4 (refer to the phases section). | ||||||||||||||
| Damage | Guard | Meter | Cancel | Startup | Active | Recovery | Total | Hit Adv | Block Adv | Properties | Invulnerability | |||
|---|---|---|---|---|---|---|---|---|---|---|---|---|---|---|
| 20 | Mid | 5 | Special | 9 | 7 | 20 | 35 | -3 | -5 | - | Upper | |||
|
Cheng's defensive attack. The move's input may seem hostile for his combos, but you can just keep holding forward and press B to get a combo into Avalanche Crunch. | ||||||||||||||
| Damage | Guard | Meter | Cancel | Startup | Active | Recovery | Total | Hit Adv | Block Adv | Properties | Invulnerability | |||
|---|---|---|---|---|---|---|---|---|---|---|---|---|---|---|
| - | - | - | - | 1 | - | 23 | 23 | - | - | - | - | |||
|
Mimics C Avalance Crunch's hefty startup and backward reel. You can actually use this to dodge stuff in neutral, but it is a commitment! | ||||||||||||||
| Damage | Guard | Meter | Cancel | Startup | Active | Recovery | Total | Hit Adv | Block Adv | Properties | Invulnerability | |||
|---|---|---|---|---|---|---|---|---|---|---|---|---|---|---|
| - | - | - | - | 1 | - | 20 | 20 | - | - | - | - | |||
|
A fireball feint, but without any vocals to make it convincing. | ||||||||||||||
Chain Normals
| Damage | Guard | Meter | Cancel | Startup | Active | Recovery | Total | Hit Adv | Block Adv | Properties | Invulnerability | |||
|---|---|---|---|---|---|---|---|---|---|---|---|---|---|---|
| 40 | Low | 5 | - | 9 | 23 | 20 | 51 | KD | -21 | SKD | - | |||
|
This is a reliable way of getting good damage from your main confirms, such as from 2B. Unlike his real sweep, however, it cannot be cancelled. | ||||||||||||||
| Damage | Guard | Meter | Cancel | Startup | Active | Recovery | Total | Hit Adv | Block Adv | Properties | Invulnerability | |||
|---|---|---|---|---|---|---|---|---|---|---|---|---|---|---|
| 27 | Mid | 3 | - | 9 | 7 | 20 | 35 | KD | -5 | SKD | - | |||
|
This move, however, can; it's Cheng's launcher. However, the only combo he gets is into 623A, which is okay damage but doesn't leave him at too great of an advantage. Furthermore, this move's collision detection is spotty; on thinner characters, this has the tendency to miss if done too close. Overall, Cheng has more useful combos. | ||||||||||||||
| Damage | Guard | Meter | Cancel | Startup | Active | Recovery | Total | Hit Adv | Block Adv | Properties | Invulnerability | |||
|---|---|---|---|---|---|---|---|---|---|---|---|---|---|---|
| 27 | Mid | 3 | Chain | 9 | 7 | 20 | 35 | KD | -5 | HKD | - | |||
|
Note how you're forced to use 5B as the middle hit; this means the chain is only really effective up close. | ||||||||||||||
| Damage | Guard | Meter | Cancel | Startup | Active | Recovery | Total | Hit Adv | Block Adv | Properties | Invulnerability | |||
|---|---|---|---|---|---|---|---|---|---|---|---|---|---|---|
| 25 | - | 5 | - | 9 | 48 | 35 | 91 | KD | - | HKD | - | |||
|
This move is a pursuit. Although it is designed strictly to combo from (1) 5B 5C, it can theoretically hit as a pursuit elsewhere, e.g. if the opponent gets hit by the tail end of Bursting Heavens and you whiff the rest of the chain into this. However, that is as situational as it sounds, and the move's slow nature means it has virtually no utility outside of this string. | ||||||||||||||
| Damage | Guard | Meter | Cancel | Startup | Active | Recovery | Total | Hit Adv | Block Adv | Properties | Invulnerability | |||
|---|---|---|---|---|---|---|---|---|---|---|---|---|---|---|
| 23 | Mid | 5 | Special | 9 | 7 | 20 | 35 | -3 | -5 | - | - | |||
|
This is a cosy way of confirming into Avalanche Crunch and might remind you of the string Cheng uses in RB2 to do the same, although here you're allowed to charge before the combo starts. However, this is neutered by either version of 5A going over low crouchers. Moves forward a little. | ||||||||||||||
| Damage | Guard | Meter | Cancel | Startup | Active | Recovery | Total | Hit Adv | Block Adv | Properties | Invulnerability | |||
|---|---|---|---|---|---|---|---|---|---|---|---|---|---|---|
| 10 | Mid | 3 | Chain, Special | 9 | 3+(1)+3 | 20 | 35 | -3 | -5 | - | - | |||
|
Cancel the first hit of n5C into this if you're close enough and Cheng starts flying. Despite its airborne looks, you can cancel from this into a grounded special. | ||||||||||||||
| Damage | Guard | Meter | Cancel | Startup | Active | Recovery | Total | Hit Adv | Block Adv | Properties | Invulnerability | |||
|---|---|---|---|---|---|---|---|---|---|---|---|---|---|---|
| 11 | Mid | 3 | Chain | 9 | 7 | 20 | 35 | KD | -5 | SKD | - | |||
|
This is punishable on block, but not as much as 46C afterwards. You should only be using this if you've confirmed into it, anyway. | ||||||||||||||
| Damage | Guard | Meter | Cancel | Startup | Active | Recovery | Total | Hit Adv | Block Adv | Properties | Invulnerability | |||
|---|---|---|---|---|---|---|---|---|---|---|---|---|---|---|
| 40 | Mid | 5 | - | 19 | 16 | 21 | 55 | KD | -14 | SKD | - | |||
|
Beeg damage from Cheng's special ender. This chain alone builds 14 pixels of meter for you, which is of note given how salient Break Shots are to his game. | ||||||||||||||
Normal Throws
| Damage | Guard | Meter | Cancel | Startup | Active | Recovery | Total | Hit Adv | Block Adv | Properties | Invulnerability | |||
|---|---|---|---|---|---|---|---|---|---|---|---|---|---|---|
| 28 | - | - | - | 1 | 1 | - | 1 | KD | - | HKD | - | |||
|
A simple back throw for good damage. Chuck a high fireball afterwards for some setplay, or simply move in if you prefer. | ||||||||||||||
| Damage | Guard | Meter | Cancel | Startup | Active | Recovery | Total | Hit Adv | Block Adv | Properties | Invulnerability | |||
|---|---|---|---|---|---|---|---|---|---|---|---|---|---|---|
| 35(7+7+7+7+7) | - | - | - | 1 | 1 | - | 1 | - | - | HKD | - | |||
|
A forward throw which deals more damage than the regular throw. However, it leaves you too far out for a high fireball to hit — that is, of course, unless they're close enough to the corner, which is where this move shines. This restricts you to either running and jumping in to take advantage of the knockdown or just throwing a normal fireball to be safe. | ||||||||||||||
Special Moves
| Damage | Guard | Meter | Cancel | Startup | Active | Recovery | Total | Hit Adv | Block Adv | Properties | Invulnerability | |||
|---|---|---|---|---|---|---|---|---|---|---|---|---|---|---|
| 16 | Mid | 5 | - | 21 | 25+1+(2)+6 | 42 | 62 | -8 | -10 | Projectile | - | |||
|
Good luck winning fireball wars with this thing. Not only does it travel in an arc, but it reaches quite short of fullscreen, and the startup being as hefty as it is does nothing to make up for this. It's not even a safe pressure tool, either; if done too close, Cheng can be punished even on hit, which means he's not in a good spot after using this to end a string. Regardless, as far as zoning goes, this is the best Cheng has, and he can still use it competently as a poke. Both fireballs have little splashes after they hit the ground, but timing these as meaties wouldn't be worth it given how long the move takes to recover. | ||||||||||||||
| Damage | Guard | Meter | Cancel | Startup | Active | Recovery | Total | Hit Adv | Block Adv | Properties | Invulnerability | |||
|---|---|---|---|---|---|---|---|---|---|---|---|---|---|---|
| 16 | Mid | 5 | - | 21 | 50+1+(2)+6 | 42 | 62 | -8 | -10 | Projectile | - | |||
|
This fireball is angled upward and will miss on most standing opponents up close, but that's not necessarily a problem for Cheng. Not only can this function as a decent anti-air at bay, tying into Cheng's hit-and-run playstyle quite nicely, but its arc also makes it function well as a setplay tool. Cheng isn't a mixup machine by any means, but he has the tools to do it, and he can also use the safety provided by this move to run away. Unlike 236A, this move also has juggle properties, meaning you can use this after his launcher for a combo. | ||||||||||||||
| Damage | Guard | Meter | Cancel | Startup | Active | Recovery | Total | Hit Adv | Block Adv | Properties | Invulnerability | |||
|---|---|---|---|---|---|---|---|---|---|---|---|---|---|---|
| 40 | High | 7 | - | 15 | 25 | 29 | 68 | KD | -23 | SKD | - | |||
|
A gutsy way of winning neutral in more ways than one. Cheng leaps high and tracks towards the opponent's current position, punishing them with a high-damage belly flop which hits overhead. You can manoeuvre yourself with 4/6 after the move makes contact, but not mid-flight like in RB2. Either way, he's not in a great spot if this gets blocked. If Cheng hits the floor (e.g. if the opponent backdashes to get out of the way), he actually recovers rather quickly. | ||||||||||||||
| Damage | Guard | Meter | Cancel | Startup | Active | Recovery | Total | Hit Adv | Block Adv | Properties | Invulnerability | |||
|---|---|---|---|---|---|---|---|---|---|---|---|---|---|---|
| - | - | - | - | 1 | - | 30 | 30 | - | - | - | - | |||
|
You can delay Belly Drum Blast a little by mashing A during its ascent. You can use this to punish pre-emptive attempts at stuffing your air approach or simply to stay out of danger for a little longer. Interrupts frame 22 of Belly Drum Blast. | ||||||||||||||
| Damage | Guard | Meter | Cancel | Startup | Active | Recovery | Total | Hit Adv | Block Adv | Properties | Invulnerability | |||
|---|---|---|---|---|---|---|---|---|---|---|---|---|---|---|
| 35 | Mid | 0 | - | 12 | 33 | 27 | 71 | KD | -24 | SKD | - | |||
|
A 12f counter (!!) which triggers when hit by highs, mids and special moves. Lows, fireballs and throws will beat it. However, this is not just NOT a catch counter, but its startup post-activation depends on Cheng's position. After getting hit, Cheng will rebound to the wall behind him and spring off. In effect, this move will counter many things (at least grounded) successfully if Cheng is cornered, but it won't counter much of anything if he's away from it. Given the hefty recovery, Cheng will probably eat more damage in these scenarios than if he simply hadn't bothered to counter. At least it can help Cheng escape the corner — right? Use sparingly if at all. | ||||||||||||||
S.Power
| Damage | Guard | Meter | Cancel | Startup | Active | Recovery | Total | Hit Adv | Block Adv | Properties | Invulnerability | |||
|---|---|---|---|---|---|---|---|---|---|---|---|---|---|---|
| 96 | Mid | - | - | 43 | 29+27+(8)+5 | 36 | 78 | KD | +5 | HKD, Projectile | - | |||
|
This move sucks in RB2 and it sucks here too. The advantage is nice in theory, and it can theoretically win fireball wars given how it as a super fireball destroys regular ones. However, the startup is SO bad, and being forced to stay put for so long is a tall order for Cheng, who needs his space to succeed. The move has an aftershock if it hits the floor which can be a knowledge check, but neither the fireball itself nor its impact will hit opponents on the opposite plane. Save your meter for Break Shots. | ||||||||||||||
P.Power
| Damage | Guard | Meter | Cancel | Startup | Active | Recovery | Total | Hit Adv | Block Adv | Properties | Invulnerability | |||
|---|---|---|---|---|---|---|---|---|---|---|---|---|---|---|
| 112(12+10*10+25) | Mid | - | - | 79 | 7 | 28 | 113 | KD | -23 | HKD | Full: 1-73 | |||
|
Cheng's P.Power in RB2 is okay, but this one just stinks. Essentially an 'enhanced' Belly Drum Blast, Cheng leaps high into the air, takes ages to fall and then, on contact, assaults the opponent with a barrage of fireballs before a belly drop to finish them off. Cheng can manoeuvre himself with 4/6 to go for ambiguous crossups, but the kicker is how he has no way of targeting opponents who switch to the opposite plane. The move's excessive startup means you have so much time to simply press the D button, and when Cheng (finally) falls down, he will have lost all his meter he could've used for Break Shots and with nothing to show for it. You might even get to punish him. The move's only saving grace is its ability to timer scam, especially given its invincibility to start; in fact, this trait means Cheng can theoretically use it to escape the corner, although this is exploitable. Besides that, avoid this move. | ||||||||||||||
Chains
(0) - n5A, 2A
(1) - n5A, 5A, 2A, n5B, 2B
(2) - n5B, 2B (NOTE: You will always get n5B regardless of distance)
(3) - 2C, 3C
Special - (1) 5B 5C 236C, n5A/5A 5C, n5C n5C 6C 46C, jA/jB jC
Combos
(1) (2) [4]6B (41 damage) - A simple confirm — usually from two 2Bs — which you can do up close.
(1) (2) 2C (46 damage) - More damage and leaves you close. You have enough time to hop in afterwards, although it won't be a safejump.
(1) (2) 3C, 623A (48 damage) - Leaves you 0 on hit. Make sure to only use 623A because 236A doesn't have juggle properties.
n5A/5A 5C [4]6B (51 damage) - Cheng's ideal combo to land, but it misses on short crouchers such as Andy.
623A, [4]6B (45 damage) - This sequence is useful for harassment, but you will be surprised how much this combo actually hits.
623A, 236A (30 damage, corner) - Obviously not worth going for, but it's a novelty.
623A, h.C, (1) (2) 3C, 623A (88 damage, corner) - Hop C will link after 623A hits. However, 623A is a mid and itself won't probably it; it's simply there to keep your opponent stuck for your pressure. This combo shows the highest damage possible from this situation.
