| Line 140: | Line 140: | ||
|property=[[File:Knockdown.png]] | |property=[[File:Knockdown.png]] | ||
|stance= | |stance= | ||
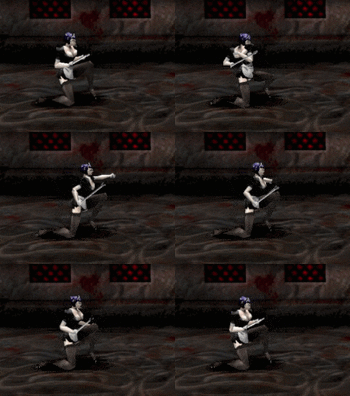
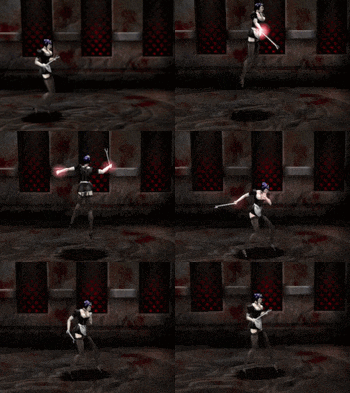
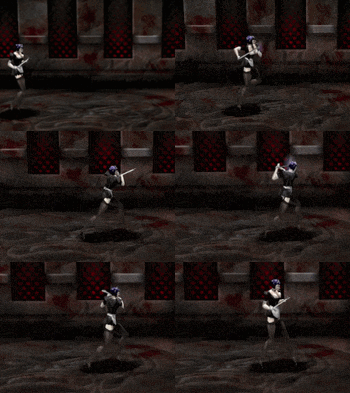
|description=Belladonna becomes a shining hitbox for over a full second, zapping anyone who gets near. You cannot charge an additional ''Self Body Shock'' while you're already performing one.}} | |description=After charging {{TKin|i=2}} for 32<sup>f</sup>, Belladonna becomes a shining hitbox for over a full second, zapping anyone who gets near. You cannot charge an additional ''Self Body Shock'' while you're already performing one.}} | ||
}} | }} | ||
</div> | </div> | ||
Revision as of 21:50, 2 May 2023
Overview
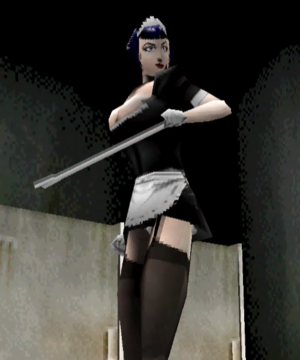
Belladonna is an excellent choice to learn Thrill Kill with. She has everything you need to plays the main meta perfectly: a string that attacks and launches a crouching player, safe strings to counter-hit with, and a few mix-up strings to get around blocks. Belladonna can reliably 3-touch her opponents with her high-damage mid-stage BnB juggles, and her damage in the corner is only rivaled by Dr. Faustus. With her long-reaching dash, she can utilize r-canceling to fly in at moment's notice with a string and convert it into a launcher for tons of damage.
Where Belladonna struggles the most is her very poor wake-up game. Both her Rising Cattle Prod and Splits Kick wake-up attacks have extremely poor recovery, neither hard knockdown allowing you space to breathe, and neither lead to much damage. If you get on the ropes, it can be a nightmare to get back into the game against a skilled opponent.
| At a glance: | |
| Pros | Cons |
|
|
Move List
 Front Punch
 Back Punch
 Front Kick
| Hit | Startup | Active | Recovery | Adv. (Block / Hit) | Damage | Range | Property | Stance | |
|---|---|---|---|---|---|---|---|---|---|
| File:.png | - | - | - | - | - | - | - | - | |
|
| |||||||||
| Hit | Startup | Active | Recovery | Adv. (Block / Hit) | Damage | Range | Property | Stance | |
|---|---|---|---|---|---|---|---|---|---|
| File:.png | - | - | - | - | - | - | - | - | |
|
| |||||||||
| Hit | Startup | Active | Recovery | Adv. (Block / Hit) | Damage | Range | Property | Stance | |
|---|---|---|---|---|---|---|---|---|---|
| File:.png | - | - | - | - | - | - | - | - | |
|
| |||||||||
| Hit | Startup | Active | Recovery | Adv. (Block / Hit) | Damage | Range | Property | Stance | |
|---|---|---|---|---|---|---|---|---|---|
| File:.png | - | - | - | - | - | - | - | - | |
|
| |||||||||
| Hit | Startup | Active | Recovery | Adv. (Block / Hit) | Damage | Range | Property | Stance | |
|---|---|---|---|---|---|---|---|---|---|
| File:.png | - | - | - | - | - | - | - | - | |
|
| |||||||||
| Hit | Startup | Active | Recovery | Adv. (Block / Hit) | Damage | Range | Property | Stance | |
|---|---|---|---|---|---|---|---|---|---|
| File:.png | - | - | - | - | - | - | - | - | |
|
| |||||||||
 Back Kick
| Hit | Startup | Active | Recovery | Adv. (Block / Hit) | Damage | Range | Property | Stance | |
|---|---|---|---|---|---|---|---|---|---|
| File:.png | - | - | - | - | - | - | - | - | |
|
| |||||||||
| Hit | Startup | Active | Recovery | Adv. (Block / Hit) | Damage | Range | Property | Stance | |
|---|---|---|---|---|---|---|---|---|---|
| File:.png | - | - | - | - | - | - | - | - | |
|
| |||||||||
| Hit | Startup | Active | Recovery | Adv. (Block / Hit) | Damage | Range | Property | Stance | |
|---|---|---|---|---|---|---|---|---|---|
| File:.png | - | - | - | - | - | - | - | - | |
|
| |||||||||
| Hit | Startup | Active | Recovery | Adv. (Block / Hit) | Damage | Range | Property | Stance | |
|---|---|---|---|---|---|---|---|---|---|
| File:.png | - | - | - | - | - | - | - | - | |
|
| |||||||||
| Hit | Startup | Active | Recovery | Adv. (Block / Hit) | Damage | Range | Property | Stance | |
|---|---|---|---|---|---|---|---|---|---|
| File:.png | - | - | - | - | - | - | - | - | |
|
| |||||||||
| Hit | Startup | Active | Recovery | Adv. (Block / Hit) | Damage | Range | Property | Stance | |
|---|---|---|---|---|---|---|---|---|---|
| File:.png | - | - | - | - | - | - | - | - | |
|
| |||||||||
| Hit | Startup | Active | Recovery | Adv. (Block / Hit) | Damage | Range | Property | Stance | |
|---|---|---|---|---|---|---|---|---|---|
| File:.png | - | - | - | - | - | - | - | - | |
|
| |||||||||
Grabs / Misc Moves
| Hit | Startup | Active | Recovery | Adv. (Block / Hit) | Damage | Range | Property | Stance | |
|---|---|---|---|---|---|---|---|---|---|
| File:.png | - | - | - | - | - | - | - | - | |
|
| |||||||||
| Hit | Startup | Active | Recovery | Adv. (Block / Hit) | Damage | Range | Property | Stance | |
|---|---|---|---|---|---|---|---|---|---|
| File:.png | - | - | - | - | - | - | - | - | |
|
| |||||||||
| Hit | Startup | Active | Recovery | Adv. (Block / Hit) | Damage | Range | Property | Stance | |
|---|---|---|---|---|---|---|---|---|---|
| File:.png | - | - | - | - | - | - | - | - | |
|
| |||||||||
| Hit | Startup | Active | Recovery | Adv. (Block / Hit) | Damage | Range | Property | Stance | |
|---|---|---|---|---|---|---|---|---|---|
| File:.png | - | - | - | - | - | - | - | - | |
|
| |||||||||
| Hit | Startup | Active | Recovery | Adv. (Block / Hit) | Damage | Range | Property | Stance | |
|---|---|---|---|---|---|---|---|---|---|
| File:.png | - | - | - | - | - | - | - | - | |
|
| |||||||||
