Lichmassacre (talk | contribs) m (Old Navbox removed for new Navbox.) |
|||
| (29 intermediate revisions by 3 users not shown) | |||
| Line 1: | Line 1: | ||
{{Infobox Character BreakersR | |||
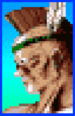
|name=Maherl | |||
= | |filename=Maherl | ||
|defense=130 | |||
|stun=3136 | |||
}} | |||
== | ==Move List== | ||
===Normals=== | |||
<big>'''Standing'''</big> | |||
------ | |||
{{MoveData | |||
|image=BreakersR_Maherl_5A.png | |||
|caption= | |||
|name= | |||
|input=5A | |||
|data= | |||
{{AttackData-BreakersR | |||
|Damage= 390 | |||
|Guard= {{Mid}} | |||
|Stun= | |||
|Properties={{Specialcancel}}{{Supercancel}} | |||
|Startup=- | |||
|Active= | |||
|Recovery= | |||
|Adv. Hit= | |||
|Adv. Guard= | |||
|description=Solid far standing poke. | |||
}} | |||
}} | |||
== | {{MoveData | ||
|image=BreakersR_Maherl_5B.png | |||
|caption= | |||
|name= | |||
|input=5B | |||
|data= | |||
{{AttackData-BreakersR | |||
|Damage= 420 | |||
|Guard= {{Mid}} | |||
|Stun= | |||
|Properties={{Specialcancel}}{{Supercancel}} | |||
|Startup= | |||
|Active= | |||
|Recovery= | |||
|Adv. Hit= | |||
|Adv. Guard= | |||
|description=Far anti-air move. | |||
}} | |||
}} | |||
{{MoveData | |||
|image=BreakersR_Maherl_5C.png | |||
|caption= | |||
|name= | |||
|input=5C | |||
|data= | |||
{{AttackData-BreakersR | |||
|Damage= 845 | |||
|Guard= {{Mid}} | |||
|Stun= | |||
|Properties= | |||
|Startup= | |||
|Active= | |||
|Recovery= | |||
|Adv. Hit= | |||
|Adv. Guard= | |||
|description=The stop sign. This move moves Maherl forward and has huge range and good priority. Great all-around poke but not cancellable. | |||
}} | |||
}} | |||
{{MoveData | |||
|image=BreakersR_Maherl_5D.png | |||
|caption= | |||
|name= | |||
|input=5D | |||
|data= | |||
{{AttackData-BreakersR | |||
|Damage= 715 | |||
|Guard= {{Mid}} | |||
|Stun= | |||
|Properties= | |||
|Startup= | |||
|Active= | |||
|Recovery= | |||
|Adv. Hit= | |||
|Adv. Guard= | |||
|description=This move moves Maherl forward. It has good priority and range but slow startup. | |||
}} | |||
}} | |||
=Advanced Strategy= | <big>'''Crouching'''</big> | ||
==How does Maherl play?== | ------ | ||
{{MoveData | |||
|image=BreakersR_Maherl_2A.png | |||
|caption= | |||
|name= | |||
|input=2A | |||
|data= | |||
{{AttackData-BreakersR | |||
|Damage= 195 | |||
|Guard={{Mid}} | |||
|Stun= | |||
|Properties={{Rpdfire}}{{Specialcancel}}{{Supercancel}} | |||
|Startup= | |||
|Active= | |||
|Recovery= | |||
|Adv. Hit= | |||
|Adv. Guard= | |||
|description=Useful mainly for rapid fire covering space. | |||
}} | |||
}} | |||
{{MoveData | |||
|image=BreakersR_Maherl_2B.png | |||
|caption= | |||
|name= | |||
|input=2B | |||
|data= | |||
{{AttackData-BreakersR | |||
|Damage= 195 | |||
|Guard={{Low}} | |||
|Stun= | |||
|Properties={{Rpdfire}}{{Specialcancel}}{{Supercancel}} | |||
|Startup= | |||
|Active= | |||
|Recovery= | |||
|Adv. Hit= | |||
|Adv. Guard= | |||
|description=Your only fast, low button. | |||
}} | |||
}} | |||
{{MoveData | |||
|image=BreakersR_Maherl_2C.png | |||
|caption= | |||
|name= | |||
|input=2C | |||
|data= | |||
{{AttackData-BreakersR | |||
|Damage= 780 | |||
|Guard={{Mid}} | |||
|Stun= | |||
|Properties={{Specialcancel}}{{Supercancel}} | |||
|Startup= | |||
|Active= | |||
|Recovery= | |||
|Adv. Hit= | |||
|Adv. Guard= | |||
|description=This move moves Maherl forward. Less range than 5C/D but will beat lower pokes and is your best combo tool from far range. | |||
}} | |||
}} | |||
{{MoveData | |||
|image=BreakersR_Maherl_2D.png | |||
|caption= | |||
|name= | |||
|input=2D | |||
|data= | |||
{{AttackData-BreakersR | |||
|Damage= 650 | |||
|Guard={{Low}} | |||
|Stun= | |||
|Properties={{Knockdown}} | |||
|Startup= | |||
|Active= | |||
|Recovery= | |||
|Adv. Hit= | |||
|Adv. Guard= | |||
|description=Sweep. | |||
}} | |||
}} | |||
<big>'''Close'''</big> | |||
------ | |||
{{MoveData | |||
|image=BreakersR_Maherl_cl5A.png | |||
|caption= | |||
|name= | |||
|input=5A | |||
|data= | |||
{{AttackData-BreakersR | |||
|Damage= 455 | |||
|Guard={{Mid}} | |||
|Stun= | |||
|Properties={{Specialcancel}}{{Supercancel}} | |||
|Startup= | |||
|Active= | |||
|Recovery= | |||
|Adv. Hit= | |||
|Adv. Guard= | |||
|description=Just a close mid, no real reason to use this. | |||
}} | |||
}} | |||
{{MoveData | |||
|image=BreakersR_Maherl_cl5B.png | |||
|caption= | |||
|name= | |||
|input=5B | |||
|data= | |||
{{AttackData-BreakersR | |||
|Damage= 520 | |||
|Guard={{Mid}} | |||
|Stun= | |||
|Properties={{Specialcancel}}{{Supercancel}} | |||
|Startup= | |||
|Active= | |||
|Recovery= | |||
|Adv. Hit= | |||
|Adv. Guard= | |||
|description=Can link into far B. | |||
}} | |||
}} | |||
{{MoveData | |||
|image=BreakersR_Maherl_cl5C.png | |||
|caption= | |||
|name= | |||
|input=5C | |||
|data= | |||
{{AttackData-BreakersR | |||
|Damage= 1032 (650+520) | |||
|Guard={{Mid}} | |||
|Stun= | |||
|Properties={{Specialcancel}}{{Supercancel}} | |||
|Startup= | |||
|Active= | |||
|Recovery= | |||
|Adv. Hit= | |||
|Adv. Guard= | |||
|description=2 hits, second hit is not cancellable. Almost always breakerable when cancelled from. Anti crossup anti-air. | |||
}} | |||
}} | |||
{{MoveData | |||
|image=BreakersR_Maherl_cl5D.png | |||
|caption= | |||
|name= | |||
|input=5D | |||
|data= | |||
{{AttackData-BreakersR | |||
|Damage= 910 | |||
|Guard= {{Mid}} | |||
|Stun= | |||
|Properties={{Specialcancel}}{{Supercancel}} | |||
|Startup= | |||
|Active= | |||
|Recovery= | |||
|Adv. Hit= | |||
|Adv. Guard= | |||
|description=This move has good priority and moves Maherl backwards, allowing him to dodge some reversal wakeup moves while your opponent is rising. Good move to combo from. | |||
}} | |||
}} | |||
<big>'''Neutral Jumping'''</big> | |||
------ | |||
{{MoveData | |||
|image=BreakersR_Maherl_njA.png | |||
|caption= | |||
|name= | |||
|input=nj.A | |||
|data= | |||
{{AttackData-BreakersR | |||
|Damage= 520 | |||
|Guard= {{High}} | |||
|Stun= | |||
|Properties= | |||
|Startup= | |||
|Active= | |||
|Recovery= | |||
|Adv. Hit= | |||
|Adv. Guard= | |||
|description=Maherl's most active air normal. | |||
}} | |||
}} | |||
{{MoveData | |||
|image=BreakersR_Maherl_njB.png | |||
|caption= | |||
|name= | |||
|input=nj.B | |||
|data= | |||
{{AttackData-BreakersR | |||
|Damage= 520 | |||
|Guard= {{High}} | |||
|Stun= | |||
|Properties= | |||
|Startup= | |||
|Active= | |||
|Recovery= | |||
|Adv. Hit= | |||
|Adv. Guard= | |||
|description=Fast air to air poke. | |||
}} | |||
}} | |||
{{MoveData | |||
|image=BreakersR_Maherl_njC.png | |||
|caption= | |||
|name= | |||
|input=nj.C | |||
|data= | |||
{{AttackData-BreakersR | |||
|Damage= 910 | |||
|Guard= {{High}} | |||
|Stun= | |||
|Properties= | |||
|Startup= | |||
|Active= | |||
|Recovery= | |||
|Adv. Hit= | |||
|Adv. Guard= | |||
|description=Good air to air that hits above Maherl while moving forward. Small range and short active frames. | |||
}} | |||
}} | |||
{{MoveData | |||
|image=BreakersR_Maherl_njD.png | |||
|caption= | |||
|name= | |||
|input=nj.D | |||
|data= | |||
{{AttackData-BreakersR | |||
|Damage= 715 | |||
|Guard= {{High}} | |||
|Stun= | |||
|Properties= | |||
|Startup= | |||
|Active= | |||
|Recovery= | |||
|Adv. Hit= | |||
|Adv. Guard= | |||
|description=Kicks straight out, but slower than nj.B. | |||
}} | |||
}} | |||
<big>'''Diagonal Jumping'''</big> | |||
------ | |||
{{MoveData | |||
|image=BreakersR_Maherl_djA.png | |||
|caption= | |||
|name= | |||
|input=dj.A | |||
|data= | |||
{{AttackData-BreakersR | |||
|Damage= 520 | |||
|Guard= {{High}} | |||
|Stun= | |||
|Properties= | |||
|Startup= | |||
|Active= | |||
|Recovery= | |||
|Adv. Hit= | |||
|Adv. Guard= | |||
|description=See nj.A | |||
}} | |||
}} | |||
{{MoveData | |||
|image=BreakersR_Maherl_djB.png | |||
|caption= | |||
|name= | |||
|input=dj.B | |||
|data= | |||
{{AttackData-BreakersR | |||
|Damage= 520 | |||
|Guard= {{High}} | |||
|Stun= | |||
|Properties= | |||
|Startup= | |||
|Active= | |||
|Recovery= | |||
|Adv. Hit= | |||
|Adv. Guard= | |||
|description=Kicks down below Maherl, can crossup. Instant overhead. | |||
}} | |||
}} | |||
{{MoveData | |||
|image=BreakersR_Maherl_djC.png | |||
|caption= | |||
|name= | |||
|input=dj.C | |||
|data= | |||
{{AttackData-BreakersR | |||
|Damage= 780 | |||
|Guard= {{High}} | |||
|Stun= | |||
|Properties= | |||
|Startup= | |||
|Active= | |||
|Recovery= | |||
|Adv. Hit= | |||
|Adv. Guard= | |||
|description=Maherl does a flaming punch, okay for air to air. | |||
}} | |||
}} | |||
{{MoveData | |||
|image=BreakersR_Maherl_djD.png | |||
|caption= | |||
|name= | |||
|input=dj.D | |||
|data= | |||
{{AttackData-BreakersR | |||
|Damage= 650 | |||
|Guard= {{High}} | |||
|Stun= | |||
|Properties= | |||
|Startup= | |||
|Active= | |||
|Recovery= | |||
|Adv. Hit= | |||
|Adv. Guard= | |||
|description=Kicks far out below him. Best for jump ins. Can do a fuzzy jump after a jump in. | |||
}} | |||
}} | |||
===Command Normals=== | |||
{{MoveData | |||
|image=BreakersR_Maherl_5AC.png | |||
|caption= | |||
|name=Abdomen Step | |||
|input=5AC | |||
|data= | |||
{{AttackData-BreakersR | |||
|Damage= 780 | |||
|Guard= {{Mid}} | |||
|Stun= | |||
|Properties= | |||
|Startup= | |||
|Active= | |||
|Recovery= | |||
|Adv. Hit= | |||
|Adv. Guard= | |||
|description=Maherl uses his big belly and hops forward. Dodges some lows, can be comboed after and typically breakerable. Gives Maherl some much needed mobility and throw tricks. | |||
}} | |||
}} | |||
{{MoveData | |||
|image=BreakersR_Maherl_2jC.png | |||
|caption= | |||
|name=Abdomen Press | |||
|input=Jump, 1~3C | |||
|data= | |||
{{AttackData-BreakersR | |||
|Damage= 585 | |||
|Guard= {{High}} | |||
|Stun= | |||
|Properties= | |||
|Startup= | |||
|Active= | |||
|Recovery= | |||
|Adv. Hit= | |||
|Adv. Guard= | |||
|description=Maherl does a standard body splash attack. Great move, great for crossups. | |||
}} | |||
}} | |||
{{MoveData | |||
|image=BreakersR_Maherl_2jB.png | |||
|caption= | |||
|name=Hip Attack | |||
|input=Jump, 1~3B | |||
|data= | |||
{{AttackData-BreakersR | |||
|Damage= 455 | |||
|Guard= {{High}} | |||
|Stun= | |||
|Properties= | |||
|Startup= | |||
|Active= | |||
|Recovery= | |||
|Adv. Hit= | |||
|Adv. Guard= | |||
|description=Maherl uses his big butt to attack the enemy. Great hitbox below him and Maherl tucks himself upwards while doing it. | |||
}} | |||
}} | |||
===Throws=== | |||
{{MoveData | |||
|image=BreakersR_Maherl_Throw.png | |||
|caption= | |||
|name=Hard Toss | |||
|input=4/6C | |||
|data= | |||
{{AttackData-BreakersR | |||
|Damage= | |||
|Guard={{Unblockable}} | |||
|Stun= | |||
|Properties={{Throw}}{{Knockdown}} | |||
|Startup= | |||
|Active= | |||
|Recovery= | |||
|Adv. Hit= | |||
|Adv. Guard= | |||
}} | |||
}} | |||
{{MoveData | |||
|image=BreakersR_Maherl_Throw6D.png | |||
|caption= | |||
|name=Slaps | |||
|input=4/6D | |||
|data= | |||
{{AttackData-BreakersR | |||
|Damage= | |||
|Guard={{Unblockable}} | |||
|Stun= | |||
|Properties={{Throw}}{{Knockdown}} | |||
|Startup= | |||
|Active= | |||
|Recovery= | |||
|Adv. Hit= | |||
|Adv. Guard= | |||
|description=Mash throw with 10 hits. Opponent can counter mash to reduce hits. | |||
}} | |||
}} | |||
===Specials=== | |||
{{MoveData | |||
|image=maherlswordpunch.gif | |||
|caption= | |||
|name=Slash Sword | |||
|input=214P | |||
|data= | |||
{{AttackData-BreakersR | |||
|version=A | |||
|Damage= | |||
|Guard= {{Mid}} | |||
|Stun= | |||
|Properties={{Knockdown}} | |||
|Startup= | |||
|Recovery= | |||
|Adv. Hit= | |||
|Adv. Guard= | |||
|description=Maherl swings his sword forward, travelling about half screen and is pretty hard to punish, so use this in blockstrings. | |||
}} | |||
{{AttackData-BreakersR | |||
|version=B | |||
|Damage= | |||
|Guard= {{Mid}} | |||
|Stun= | |||
|Properties={{Knockdown}} | |||
|Startup= | |||
|Recovery= | |||
|Adv. Hit= | |||
|Adv. Guard= | |||
|description=Maherl swings his sword forward, travelling almost full screen, use this one in combos or punishes. | |||
}} | |||
}} | |||
{{MoveData | |||
|image=maherlswordkick.gif | |||
|caption= | |||
|name=Punish Sword | |||
|input=214K | |||
|data= | |||
{{AttackData-BreakersR | |||
|version=B | |||
|Damage= | |||
|Guard= {{Mid}} | |||
|Stun= | |||
|Properties={{Knockdown}} | |||
|Startup= | |||
|Recovery= | |||
|Adv. Hit= | |||
|Adv. Guard= | |||
|description=Maherl swings his sword high, travels about a third of the screen and is pretty hard to punish. Catches opponents out of the air. Use this in blockstrings. | |||
}} | |||
{{AttackData-BreakersR | |||
|version=D | |||
|Damage= | |||
|Guard= {{Mid}} | |||
|Stun= | |||
|Properties={{Knockdown}} | |||
|Startup= | |||
|Recovery= | |||
|Adv. Hit= | |||
|Adv. Guard= | |||
|description=Maherl swings his sword high, travels about 2 thirds of the screen. Catches opponents out of the air. Use this one in combos or punishes. | |||
}} | |||
}} | |||
{{MoveData | |||
|image=maherlfireweak.gif | |||
|image2=maherlfirestrong.gif | |||
|caption= | |||
|caption2=FIIYAH! | |||
|name=Fire Breath | |||
|input=41236P | |||
|data= | |||
{{AttackData-BreakersR | |||
|version=A | |||
|Damage= | |||
|Guard= {{Mid}} | |||
|Stun= | |||
|Properties={{Projectileabsorb}} | |||
|Startup= | |||
|Recovery= | |||
|Adv. Hit= | |||
|Adv. Guard= | |||
|description=moves slightly forward and spits fire and doesn't knock down. | |||
}} | |||
{{AttackData-BreakersR | |||
|version=C | |||
|Damage= | |||
|Guard= {{Mid}} | |||
|Stun= | |||
|Properties={{Projectileabsorb}}{{Knockdown}} | |||
|Startup= | |||
|Recovery= | |||
|Adv. Hit= | |||
|Adv. Guard= | |||
|description=Spins around spitting fire. Use only in combos. | |||
}} | |||
}} | |||
{{MoveData | |||
|image=maherlballon.gif | |||
|caption=BALLOONO! | |||
|name=Balloon Bomb | |||
|input=4/5/6 + Any 3 buttons | |||
|data= | |||
{{AttackData-BreakersR | |||
|Damage= | |||
|Guard= {{High}} | |||
|Stun= | |||
|Properties={{Knockdown}} | |||
|Startup= | |||
|Recovery= | |||
|Adv. Hit= | |||
|Adv. Guard= | |||
|description=Using his genie-granted powers, Maherl inflates and attempts to squash his enemy. This move can cross up. You can direct the Balloon left or right. | |||
}} | |||
}} | |||
===Supers=== | |||
{{MoveData | |||
|image=MaherlGenie.gif | |||
|caption=KADABUURA!「ハッハァ!」 | |||
|name=Cadabra Bomber | |||
|input=236236P | |||
|data= | |||
{{AttackData-BreakersR | |||
|Damage= | |||
|Guard={{Mid}} | |||
|Stun= | |||
|Properties={{Startupinv}}{{Hardknockdown}} | |||
|Startup= | |||
|Recovery= | |||
|Adv. Hit= | |||
|Adv. Guard= | |||
|description=Although it is sometimes hard to punish, it is still punishable on block. Full invulnerability on the startup, making it one of Maherl's best breaker options. | |||
Maherl is fully vulnerable while the genie is out, on trade the Genie can still continue attacking. | |||
}} | |||
}} | |||
{{MoveData | |||
|image=MaherlRushSword.gif | |||
|caption= | |||
|name=Shiva Dance | |||
|input=214214P | |||
|data= | |||
{{AttackData-BreakersR | |||
|Damage= | |||
|Guard={{Mid}} | |||
|Stun= | |||
|Properties={{Projectileinvincible}}{{Hardknockdown}} | |||
|Startup= | |||
|Recovery= | |||
|Adv. Hit= | |||
|Adv. Guard= | |||
|description=This is a decent super with invulnerability after the super flash but not on startup. It has massive range and great comboability. Maherl can go through fireballs with this move. | |||
}} | |||
}} | |||
{{MoveData | |||
|image=Maherl360.gif | |||
|caption= | |||
|name=Rolling Press | |||
|input=360+K | |||
|data= | |||
{{AttackData-BreakersR | |||
|Damage= | |||
|Guard={{Unblockable}} | |||
|Stun= | |||
|Properties={{Throw}}{{Hardknockdown}} | |||
|Startup= | |||
|Recovery= | |||
|Adv. Hit= | |||
|Adv. Guard= | |||
|description=Maherl grabs the enemy and turns into a balloon causing great damage! Another good breaker move of Maherl's. | |||
}} | |||
}} | |||
==Combos== | |||
*'''Meterless Combos''' | |||
**5B xx 214B | |||
**2C xx 214P/K - Use 214A if not sure if it will hit. Use 214D for best damage. | |||
**2C xx 41236C - This combo will randomly whiff on crouchers for the final hit. | |||
**Anti-Air 5B xx 214B | |||
**Anti-air cl.5C xx 214B | |||
**2C xx AC, 5B xx AC, 5B xx AC... - Maherl's midscreen infinite. Very breakerable. Use 2C when you are too close for far B. | |||
*'''Combos with meter''' | |||
**2C xx 214214P - most basic super punish for a bit extra damage and hard knockdown on top of regular sword combo. | |||
**Anti air 5B/cl.5C xx Super - Use Shiva Dance midscreen, Genie in the corner | |||
**Anti-air cl.5C xx 214D (one hit), 2A xx 214214P (use 236236P in corner) - can do 2A~2B to help execution, make sure to cancel into 214D quickly | |||
==Advanced Strategy== | |||
===How does Maherl play?=== | |||
Maherl is not a combo character, he is a poking character. As such, he has great pokes and low comboability. He doesn't have a fireball and has an abhorrent dash, making it difficult for him to move across the screen. Using the threat of st.C, cr.C, st.D and cr.D he can move across the screen and hopefully do a little bit of damage. Once he does score a knockdown his only real mixup is his weak crossup game which he cant set up well from most of his knockdowns. | Maherl is not a combo character, he is a poking character. As such, he has great pokes and low comboability. He doesn't have a fireball and has an abhorrent dash, making it difficult for him to move across the screen. Using the threat of st.C, cr.C, st.D and cr.D he can move across the screen and hopefully do a little bit of damage. Once he does score a knockdown his only real mixup is his weak crossup game which he cant set up well from most of his knockdowns. | ||
==Breakering== | ===Breakering=== | ||
Maherl has great breaker attacks with his Genie Super and his Balloon Throw. Both of them do great damage and allow Maherl to start his pressure. | Maherl has great breaker attacks with his Genie Super and his Balloon Throw. Both of them do great damage and allow Maherl to start his pressure. | ||
He can be easily breakered against if you try to do pressure with his Fat Attack (LP+HP). It is not recommended to do this very often or fall into predictable pressure with Fat Attack because you will probably eat a combo or a super. | He can be easily breakered against if you try to do pressure with his Fat Attack (LP+HP). It is not recommended to do this very often or fall into predictable pressure with Fat Attack because you will probably eat a combo or a super. | ||
== | ===Throw Setups=== | ||
Maherl doesn't have any overheads for mix, so he has to rely on sneaky throw tricks. | |||
* | |||
* | *4/6C Throw OS - cl.5C provides a good anti-jump button, buffer into 214B/D for a anti air conversion. | ||
*Balloon Throw OS - 6/4+C/D~A+B. Useful for beating some reversals or jumps. | |||
*Genie Throw OS - 23623[6]D~A. | |||
*Genie/Rolling Press OS - 236, 412369+AB. | |||
*2B, 2B, 2B [xx AC (whiff), Throw] - insert throw option of your choice. Super Throw OS is a good choice here. Use 2D to frame trap opponent. | |||
*2C, 2C xx [AC(whiff), Throw] - alternate string to set up spacing. | |||
*Forward Roll, Throw - On the gimmickier side but it can work, especially if you caught the opponent whiffing something. Works best if you roll through them. | |||
*Whiff AC, Throw - Manually setting up the distance | |||
*Empty jump, Throw - The classic. | |||
== | ===Magic Carpet Bug=== | ||
AC~214P/K - this is a kara cancel bug. Must be done on frame 3 of AC, no leniency. The sword attack will take flight and launch Maherl to the top of the screen, if nothing is pressed he will teleport back to his original spot. You can cancel into an attack, j.2C is the most useful, and he will do that attack instead of teleporting. | |||
== | ===Random Tips=== | ||
*Maherl needs to milk all the damage he can at all times. It is very important to always land absolutely every super possible and not ever have a super blocked. Using the Genie Super as a reversal (outside of breakering) is tempting, but meter is more than likely better spent on comboing into sword super or landing a Balloon Grab. | |||
*Maherl has the worst dash in the entire game. It cannot be stopped by blocking or jumping or attack. It can go under some fireballs and through the other player. Use it carefully, and mainly just to cover ground after a knockdown. | |||
*Sometimes, Maherl can benefit more from not knocking down and instead spamming repeated normals that move him forward. These frame traps are risky, so be careful! The reward can be great, however, and spamming cr.C is a lot of fun! | |||
==Matchups== | |||
===Matchup Table=== | |||
{| class="wikitable" | |||
|+ Advantage | |||
|- | |||
| Great || | |||
|- | |||
| Good || Pielle | |||
|- | |||
| Even || Alsion III | |||
|- | |||
| Weak || Condor, Rila | |||
|- | |||
| Bad || Saizo, Sho, Tia, Dao-Long | |||
|} | |||
== | ===Character Specific Tips=== | ||
-------- | |||
'''Alsion III'''<br> | |||
Patient play is a must here, you can trade hits as you have more health but this is a match that needs to be played slow in neutral. Focus on counterpoking Alsion's normals and pushing him to the corner. Pay extra attention to meter, when Alsion has no meter you can be more aggressive, especially with AC hop strings | |||
*Whiff Punish Poison and Anubis super with Balloon Bomb | |||
*Your swords are not as good, Alsion can interrupt them well and punish at most ranges. | |||
*j.A and 5C are great for beating Alsion 5D | |||
*5A/C are generally important pokes | |||
*2D is good against Alsion's air attacks and 2C (2C beats your 5A/C) | |||
-------- | |||
'''Condor'''<br> | |||
-------- | |||
'''Dao-Long'''<br> | |||
-------- | |||
'''Maherl'''<br> | |||
-------- | |||
'''Condor'''<br> | |||
-------- | |||
'''Condor'''<br> | |||
-------- | |||
'''Condor'''<br> | |||
-------- | |||
'''Sho'''<br> | |||
-------- | |||
'''Condor'''<br> | |||
{{Navbox-BreakersR}} | {{Navbox-BreakersR}} | ||
[[Category:Breakers Revenge]] | |||
Latest revision as of 01:57, 25 March 2023
Introduction
Sheik Maherl discovered a magical lamp containing a genie. He was given 3 wishes and he used them very wisely. For his first wish, he wished to be able to turn into a giant balloon. For his second wish, he wished to be able to spit fire. For his third wish, he wished that the genie would be enslaved for eternity to Maherl to fight for him. Now Maherl travels the globe with only his lamp and sword to battle the world's strongest challengers.
Overview
Maherl is a slow, poking character. His sword provides strong damage and harassment that is usually safe on block. Has some tricky command throw setups.

| Strengths | Weaknesses |
|---|---|
|
|
| Maherl | |
|---|---|
 | |
| Defense | 130 |
| Stun | 3136 |
Move List
Normals
Standing
| Damage | Guard | Stun | Properties | ||
|---|---|---|---|---|---|
| 390 | - | ||||
| Startup | Active | Recovery | Adv. Hit | Adv. Guard | |
| - | - | - | - | - | |
|
Solid far standing poke. | |||||
| Damage | Guard | Stun | Properties | ||
|---|---|---|---|---|---|
| 420 | - | ||||
| Startup | Active | Recovery | Adv. Hit | Adv. Guard | |
| - | - | - | - | - | |
|
Far anti-air move. | |||||
| Damage | Guard | Stun | Properties | ||
|---|---|---|---|---|---|
| 845 | - | - | |||
| Startup | Active | Recovery | Adv. Hit | Adv. Guard | |
| - | - | - | - | - | |
|
The stop sign. This move moves Maherl forward and has huge range and good priority. Great all-around poke but not cancellable. | |||||
| Damage | Guard | Stun | Properties | ||
|---|---|---|---|---|---|
| 715 | - | - | |||
| Startup | Active | Recovery | Adv. Hit | Adv. Guard | |
| - | - | - | - | - | |
|
This move moves Maherl forward. It has good priority and range but slow startup. | |||||
Crouching
| Damage | Guard | Stun | Properties | ||
|---|---|---|---|---|---|
| 195 | - | ||||
| Startup | Active | Recovery | Adv. Hit | Adv. Guard | |
| - | - | - | - | - | |
|
Useful mainly for rapid fire covering space. | |||||
| Damage | Guard | Stun | Properties | ||
|---|---|---|---|---|---|
| 195 | - | ||||
| Startup | Active | Recovery | Adv. Hit | Adv. Guard | |
| - | - | - | - | - | |
|
Your only fast, low button. | |||||
| Damage | Guard | Stun | Properties | ||
|---|---|---|---|---|---|
| 780 | - | ||||
| Startup | Active | Recovery | Adv. Hit | Adv. Guard | |
| - | - | - | - | - | |
|
This move moves Maherl forward. Less range than 5C/D but will beat lower pokes and is your best combo tool from far range. | |||||
| Damage | Guard | Stun | Properties | ||
|---|---|---|---|---|---|
| 650 | - | ||||
| Startup | Active | Recovery | Adv. Hit | Adv. Guard | |
| - | - | - | - | - | |
|
Sweep. | |||||
Close
| Damage | Guard | Stun | Properties | ||
|---|---|---|---|---|---|
| 455 | - | ||||
| Startup | Active | Recovery | Adv. Hit | Adv. Guard | |
| - | - | - | - | - | |
|
Just a close mid, no real reason to use this. | |||||
| Damage | Guard | Stun | Properties | ||
|---|---|---|---|---|---|
| 520 | - | ||||
| Startup | Active | Recovery | Adv. Hit | Adv. Guard | |
| - | - | - | - | - | |
|
Can link into far B. | |||||
| Damage | Guard | Stun | Properties | ||
|---|---|---|---|---|---|
| 1032 (650+520) | - | ||||
| Startup | Active | Recovery | Adv. Hit | Adv. Guard | |
| - | - | - | - | - | |
|
2 hits, second hit is not cancellable. Almost always breakerable when cancelled from. Anti crossup anti-air. | |||||
| Damage | Guard | Stun | Properties | ||
|---|---|---|---|---|---|
| 910 | - | ||||
| Startup | Active | Recovery | Adv. Hit | Adv. Guard | |
| - | - | - | - | - | |
|
This move has good priority and moves Maherl backwards, allowing him to dodge some reversal wakeup moves while your opponent is rising. Good move to combo from. | |||||
Neutral Jumping
| Damage | Guard | Stun | Properties | ||
|---|---|---|---|---|---|
| 520 | - | - | |||
| Startup | Active | Recovery | Adv. Hit | Adv. Guard | |
| - | - | - | - | - | |
|
Maherl's most active air normal. | |||||
| Damage | Guard | Stun | Properties | ||
|---|---|---|---|---|---|
| 520 | - | - | |||
| Startup | Active | Recovery | Adv. Hit | Adv. Guard | |
| - | - | - | - | - | |
|
Fast air to air poke. | |||||
| Damage | Guard | Stun | Properties | ||
|---|---|---|---|---|---|
| 910 | - | - | |||
| Startup | Active | Recovery | Adv. Hit | Adv. Guard | |
| - | - | - | - | - | |
|
Good air to air that hits above Maherl while moving forward. Small range and short active frames. | |||||
| Damage | Guard | Stun | Properties | ||
|---|---|---|---|---|---|
| 715 | - | - | |||
| Startup | Active | Recovery | Adv. Hit | Adv. Guard | |
| - | - | - | - | - | |
|
Kicks straight out, but slower than nj.B. | |||||
Diagonal Jumping
| Damage | Guard | Stun | Properties | ||
|---|---|---|---|---|---|
| 520 | - | - | |||
| Startup | Active | Recovery | Adv. Hit | Adv. Guard | |
| - | - | - | - | - | |
|
See nj.A | |||||
| Damage | Guard | Stun | Properties | ||
|---|---|---|---|---|---|
| 520 | - | - | |||
| Startup | Active | Recovery | Adv. Hit | Adv. Guard | |
| - | - | - | - | - | |
|
Kicks down below Maherl, can crossup. Instant overhead. | |||||
| Damage | Guard | Stun | Properties | ||
|---|---|---|---|---|---|
| 780 | - | - | |||
| Startup | Active | Recovery | Adv. Hit | Adv. Guard | |
| - | - | - | - | - | |
|
Maherl does a flaming punch, okay for air to air. | |||||
| Damage | Guard | Stun | Properties | ||
|---|---|---|---|---|---|
| 650 | - | - | |||
| Startup | Active | Recovery | Adv. Hit | Adv. Guard | |
| - | - | - | - | - | |
|
Kicks far out below him. Best for jump ins. Can do a fuzzy jump after a jump in. | |||||
Command Normals
| Damage | Guard | Stun | Properties | ||
|---|---|---|---|---|---|
| 780 | - | - | |||
| Startup | Active | Recovery | Adv. Hit | Adv. Guard | |
| - | - | - | - | - | |
|
Maherl uses his big belly and hops forward. Dodges some lows, can be comboed after and typically breakerable. Gives Maherl some much needed mobility and throw tricks. | |||||
| Damage | Guard | Stun | Properties | ||
|---|---|---|---|---|---|
| 585 | - | - | |||
| Startup | Active | Recovery | Adv. Hit | Adv. Guard | |
| - | - | - | - | - | |
|
Maherl does a standard body splash attack. Great move, great for crossups. | |||||
| Damage | Guard | Stun | Properties | ||
|---|---|---|---|---|---|
| 455 | - | - | |||
| Startup | Active | Recovery | Adv. Hit | Adv. Guard | |
| - | - | - | - | - | |
|
Maherl uses his big butt to attack the enemy. Great hitbox below him and Maherl tucks himself upwards while doing it. | |||||
Throws
| Damage | Guard | Stun | Properties | |
|---|---|---|---|---|
| - | - | |||
| Startup | Active | Recovery | Adv. Hit | Adv. Guard |
| - | - | - | - | - |
| Damage | Guard | Stun | Properties | ||
|---|---|---|---|---|---|
| - | - | ||||
| Startup | Active | Recovery | Adv. Hit | Adv. Guard | |
| - | - | - | - | - | |
|
Mash throw with 10 hits. Opponent can counter mash to reduce hits. | |||||
Specials
214P

| A | Damage | Guard | Stun | Properties | ||
|---|---|---|---|---|---|---|
| - | - | |||||
| Startup | Active | Recovery | Adv. Hit | Adv. Guard | ||
| - | - | - | - | - | ||
|
Maherl swings his sword forward, travelling about half screen and is pretty hard to punish, so use this in blockstrings. | ||||||
| B | Damage | Guard | Stun | Properties | ||
| - | - | |||||
| Startup | Active | Recovery | Adv. Hit | Adv. Guard | ||
| - | - | - | - | - | ||
|
Maherl swings his sword forward, travelling almost full screen, use this one in combos or punishes. | ||||||
214K

| B | Damage | Guard | Stun | Properties | ||
|---|---|---|---|---|---|---|
| - | - | |||||
| Startup | Active | Recovery | Adv. Hit | Adv. Guard | ||
| - | - | - | - | - | ||
|
Maherl swings his sword high, travels about a third of the screen and is pretty hard to punish. Catches opponents out of the air. Use this in blockstrings. | ||||||
| D | Damage | Guard | Stun | Properties | ||
| - | - | |||||
| Startup | Active | Recovery | Adv. Hit | Adv. Guard | ||
| - | - | - | - | - | ||
|
Maherl swings his sword high, travels about 2 thirds of the screen. Catches opponents out of the air. Use this one in combos or punishes. | ||||||
41236P


| A | Damage | Guard | Stun | Properties | ||
|---|---|---|---|---|---|---|
| - | - | |||||
| Startup | Active | Recovery | Adv. Hit | Adv. Guard | ||
| - | - | - | - | - | ||
|
moves slightly forward and spits fire and doesn't knock down. | ||||||
| C | Damage | Guard | Stun | Properties | ||
| - | - | |||||
| Startup | Active | Recovery | Adv. Hit | Adv. Guard | ||
| - | - | - | - | - | ||
|
Spins around spitting fire. Use only in combos. | ||||||
4/5/6 + Any 3 buttons

| Damage | Guard | Stun | Properties | ||
|---|---|---|---|---|---|
| - | - | ||||
| Startup | Active | Recovery | Adv. Hit | Adv. Guard | |
| - | - | - | - | - | |
|
Using his genie-granted powers, Maherl inflates and attempts to squash his enemy. This move can cross up. You can direct the Balloon left or right. | |||||
Supers
236236P

| Damage | Guard | Stun | Properties | ||
|---|---|---|---|---|---|
| - | - | ||||
| Startup | Active | Recovery | Adv. Hit | Adv. Guard | |
| - | - | - | - | - | |
|
Although it is sometimes hard to punish, it is still punishable on block. Full invulnerability on the startup, making it one of Maherl's best breaker options. Maherl is fully vulnerable while the genie is out, on trade the Genie can still continue attacking. | |||||
214214P

| Damage | Guard | Stun | Properties | ||
|---|---|---|---|---|---|
| - | - | ||||
| Startup | Active | Recovery | Adv. Hit | Adv. Guard | |
| - | - | - | - | - | |
|
This is a decent super with invulnerability after the super flash but not on startup. It has massive range and great comboability. Maherl can go through fireballs with this move. | |||||
360+K

| Damage | Guard | Stun | Properties | ||
|---|---|---|---|---|---|
| - | - | ||||
| Startup | Active | Recovery | Adv. Hit | Adv. Guard | |
| - | - | - | - | - | |
|
Maherl grabs the enemy and turns into a balloon causing great damage! Another good breaker move of Maherl's. | |||||
Combos
- Meterless Combos
- 5B xx 214B
- 2C xx 214P/K - Use 214A if not sure if it will hit. Use 214D for best damage.
- 2C xx 41236C - This combo will randomly whiff on crouchers for the final hit.
- Anti-Air 5B xx 214B
- Anti-air cl.5C xx 214B
- 2C xx AC, 5B xx AC, 5B xx AC... - Maherl's midscreen infinite. Very breakerable. Use 2C when you are too close for far B.
- Combos with meter
- 2C xx 214214P - most basic super punish for a bit extra damage and hard knockdown on top of regular sword combo.
- Anti air 5B/cl.5C xx Super - Use Shiva Dance midscreen, Genie in the corner
- Anti-air cl.5C xx 214D (one hit), 2A xx 214214P (use 236236P in corner) - can do 2A~2B to help execution, make sure to cancel into 214D quickly
Advanced Strategy
How does Maherl play?
Maherl is not a combo character, he is a poking character. As such, he has great pokes and low comboability. He doesn't have a fireball and has an abhorrent dash, making it difficult for him to move across the screen. Using the threat of st.C, cr.C, st.D and cr.D he can move across the screen and hopefully do a little bit of damage. Once he does score a knockdown his only real mixup is his weak crossup game which he cant set up well from most of his knockdowns.
Breakering
Maherl has great breaker attacks with his Genie Super and his Balloon Throw. Both of them do great damage and allow Maherl to start his pressure.
He can be easily breakered against if you try to do pressure with his Fat Attack (LP+HP). It is not recommended to do this very often or fall into predictable pressure with Fat Attack because you will probably eat a combo or a super.
Throw Setups
Maherl doesn't have any overheads for mix, so he has to rely on sneaky throw tricks.
- 4/6C Throw OS - cl.5C provides a good anti-jump button, buffer into 214B/D for a anti air conversion.
- Balloon Throw OS - 6/4+C/D~A+B. Useful for beating some reversals or jumps.
- Genie Throw OS - 23623[6]D~A.
- Genie/Rolling Press OS - 236, 412369+AB.
- 2B, 2B, 2B [xx AC (whiff), Throw] - insert throw option of your choice. Super Throw OS is a good choice here. Use 2D to frame trap opponent.
- 2C, 2C xx [AC(whiff), Throw] - alternate string to set up spacing.
- Forward Roll, Throw - On the gimmickier side but it can work, especially if you caught the opponent whiffing something. Works best if you roll through them.
- Whiff AC, Throw - Manually setting up the distance
- Empty jump, Throw - The classic.
Magic Carpet Bug
AC~214P/K - this is a kara cancel bug. Must be done on frame 3 of AC, no leniency. The sword attack will take flight and launch Maherl to the top of the screen, if nothing is pressed he will teleport back to his original spot. You can cancel into an attack, j.2C is the most useful, and he will do that attack instead of teleporting.
Random Tips
- Maherl needs to milk all the damage he can at all times. It is very important to always land absolutely every super possible and not ever have a super blocked. Using the Genie Super as a reversal (outside of breakering) is tempting, but meter is more than likely better spent on comboing into sword super or landing a Balloon Grab.
- Maherl has the worst dash in the entire game. It cannot be stopped by blocking or jumping or attack. It can go under some fireballs and through the other player. Use it carefully, and mainly just to cover ground after a knockdown.
- Sometimes, Maherl can benefit more from not knocking down and instead spamming repeated normals that move him forward. These frame traps are risky, so be careful! The reward can be great, however, and spamming cr.C is a lot of fun!
Matchups
Matchup Table
| Great | |
| Good | Pielle |
| Even | Alsion III |
| Weak | Condor, Rila |
| Bad | Saizo, Sho, Tia, Dao-Long |
Character Specific Tips
Alsion III
Patient play is a must here, you can trade hits as you have more health but this is a match that needs to be played slow in neutral. Focus on counterpoking Alsion's normals and pushing him to the corner. Pay extra attention to meter, when Alsion has no meter you can be more aggressive, especially with AC hop strings
- Whiff Punish Poison and Anubis super with Balloon Bomb
- Your swords are not as good, Alsion can interrupt them well and punish at most ranges.
- j.A and 5C are great for beating Alsion 5D
- 5A/C are generally important pokes
- 2D is good against Alsion's air attacks and 2C (2C beats your 5A/C)
Condor
Dao-Long
Maherl
Condor
Condor
Condor
Sho
Condor


