(→Supers) |
|||
| (31 intermediate revisions by 4 users not shown) | |||
| Line 1: | Line 1: | ||
= | {{Infobox Character BreakersR | ||
|name=Alsion III | |||
|filename=Alsion | |||
|defense=118 | |||
|stun=2976 | |||
}} | |||
= | ==Move List== | ||
===Normals=== | |||
<big>'''Standing'''</big> | |||
------ | |||
{{MoveData | |||
|image=BreakersR_Alsion_5A.png | |||
|caption= | |||
|name= | |||
|input=5A | |||
|data= | |||
{{AttackData-BreakersR | |||
|Damage= | |||
|Guard= {{Mid}} | |||
|Stun= | |||
|Properties={{Specialcancel}}{{Supercancel}} | |||
|Startup=- | |||
|Active= | |||
|Recovery= | |||
|Adv. Hit= | |||
|Adv. Guard= | |||
|description= | |||
}} | |||
}} | |||
== | {{MoveData | ||
|image=BreakersR_Alsion_5B.png | |||
|caption= | |||
|name= | |||
|input=5B | |||
|data= | |||
{{AttackData-BreakersR | |||
|Damage= | |||
|Guard= {{Mid}} | |||
|Stun= | |||
|Properties= | |||
|Startup= | |||
|Active= | |||
|Recovery= | |||
|Adv. Hit= | |||
|Adv. Guard= | |||
|description=This is a very far reaching, very fast poke. It has no combo options and doesn't do much damage but it has high priority and will stuff a lot of moves. | |||
}} | |||
}} | |||
= | {{MoveData | ||
|image=BreakersR_Alsion_5C.png | |||
|caption= | |||
|name= | |||
|input=5C | |||
|data= | |||
{{AttackData-BreakersR | |||
|Damage= | |||
|Guard= {{Mid}} | |||
|Stun= | |||
|Properties= | |||
|Startup= | |||
|Active= | |||
|Recovery= | |||
|Adv. Hit= | |||
|Adv. Guard= | |||
|description=Two-armed slap. More damage than st.B but slower. Has a bigger vertical hitbox. | |||
}} | |||
}} | |||
*Meterless Combos | {{MoveData | ||
|image=BreakersR_Alsion_5D.png | |||
|caption= | |||
|name= | |||
|input=5D | |||
|data= | |||
{{AttackData-BreakersR | |||
|Damage= | |||
|Guard= {{Mid}} | |||
|Stun= | |||
|Properties= | |||
|Startup= | |||
|Active= | |||
|Recovery= | |||
|Adv. Hit= | |||
|Adv. Guard= | |||
|description=A big kick with a glowing foot. This is an excellent move for destroying jump-ins when used fairly early. Hits high enough that crouching opponents will not get hit (except Condor). | |||
}} | |||
}} | |||
<big>'''Crouching'''</big> | |||
------ | |||
{{MoveData | |||
|image=BreakersR_Alsion_2A.png | |||
|caption= | |||
|name= | |||
|input=2A | |||
|data= | |||
{{AttackData-BreakersR | |||
|Damage= | |||
|Guard={{Mid}} | |||
|Stun= | |||
|Properties={{Specialcancel}}{{Supercancel}} | |||
|Startup= | |||
|Active= | |||
|Recovery= | |||
|Adv. Hit= | |||
|Adv. Guard= | |||
|description= | |||
}} | |||
}} | |||
{{MoveData | |||
|image=BreakersR_Alsion_2B.png | |||
|caption= | |||
|name= | |||
|input=2B | |||
|data= | |||
{{AttackData-BreakersR | |||
|Damage= | |||
|Guard={{Low}} | |||
|Stun= | |||
|Properties={{Specialcancel}}{{Supercancel}} | |||
|Startup= | |||
|Active= | |||
|Recovery= | |||
|Adv. Hit= | |||
|Adv. Guard= | |||
|description= | |||
}} | |||
}} | |||
{{MoveData | |||
|image=BreakersR_Alsion_2C.png | |||
|caption= | |||
|name= | |||
|input=2C | |||
|data= | |||
{{AttackData-BreakersR | |||
|Damage= | |||
|Guard={{Low}} | |||
|Stun= | |||
|Properties= | |||
|Startup= | |||
|Active= | |||
|Recovery= | |||
|Adv. Hit= | |||
|Adv. Guard= | |||
|description=This move must be blocked low and pushes the opponent very far away on hit. Can go under some fireballs to strike the opponent. | |||
}} | |||
}} | |||
{{MoveData | |||
|image=BreakersR_Alsion_2D.png | |||
|caption= | |||
|name= | |||
|input=2D | |||
|data= | |||
{{AttackData-BreakersR | |||
|Damage= | |||
|Guard={{Mid}} | |||
|Stun= | |||
|Properties= | |||
|Startup= | |||
|Active= | |||
|Recovery= | |||
|Adv. Hit= | |||
|Adv. Guard= | |||
|description= | |||
}} | |||
}} | |||
<big>'''Neutral Jumping'''</big> | |||
------ | |||
{{MoveData | |||
|image=BreakersR_Alsion_njA.png | |||
|caption= | |||
|name= | |||
|input=nj.A | |||
|data= | |||
{{AttackData-BreakersR | |||
|Damage= | |||
|Guard= {{High}} | |||
|Stun= | |||
|Properties={{Specialcancel}} | |||
|Startup= | |||
|Active= | |||
|Recovery= | |||
|Adv. Hit= | |||
|Adv. Guard= | |||
|description= | |||
}} | |||
}} | |||
{{MoveData | |||
|image=BreakersR_Alsion_njB.png | |||
|caption= | |||
|name= | |||
|input=nj.B | |||
|data= | |||
{{AttackData-BreakersR | |||
|Damage= | |||
|Guard= {{High}} | |||
|Stun= | |||
|Properties= | |||
|Startup= | |||
|Active= | |||
|Recovery= | |||
|Adv. Hit= | |||
|Adv. Guard= | |||
|description= | |||
}} | |||
}} | |||
{{MoveData | |||
|image=BreakersR_Alsion_njC.png | |||
|caption= | |||
|name= | |||
|input=nj.C | |||
|data= | |||
{{AttackData-BreakersR | |||
|Damage= | |||
|Guard= {{High}} | |||
|Stun= | |||
|Properties= | |||
|Startup= | |||
|Active= | |||
|Recovery= | |||
|Adv. Hit= | |||
|Adv. Guard= | |||
|description= | |||
}} | |||
}} | |||
{{MoveData | |||
|image=BreakersR_Alsion_njD.png | |||
|caption= | |||
|name= | |||
|input=nj.D | |||
|data= | |||
{{AttackData-BreakersR | |||
|Damage= | |||
|Guard= {{High}} | |||
|Stun= | |||
|Properties= | |||
|Startup= | |||
|Active= | |||
|Recovery= | |||
|Adv. Hit= | |||
|Adv. Guard= | |||
|description= | |||
}} | |||
}} | |||
<big>'''Diagonal Jumping'''</big> | |||
------ | |||
{{MoveData | |||
|image=BreakersR_Alsion_djA.png | |||
|caption= | |||
|name= | |||
|input=dj.A | |||
|data= | |||
{{AttackData-BreakersR | |||
|Damage= | |||
|Guard= {{High}} | |||
|Stun= | |||
|Properties={{Specialcancel}} | |||
|Startup= | |||
|Active= | |||
|Recovery= | |||
|Adv. Hit= | |||
|Adv. Guard= | |||
|description= | |||
}} | |||
}} | |||
{{MoveData | |||
|image=BreakersR_Alsion_djB.png | |||
|caption= | |||
|name= | |||
|input=dj.B | |||
|data= | |||
{{AttackData-BreakersR | |||
|Damage= | |||
|Guard= {{High}} | |||
|Stun= | |||
|Properties= | |||
|Startup= | |||
|Active= | |||
|Recovery= | |||
|Adv. Hit= | |||
|Adv. Guard= | |||
|description= | |||
}} | |||
}} | |||
{{MoveData | |||
|image=BreakersR_Alsion_djC.png | |||
|caption= | |||
|name= | |||
|input=dj.C | |||
|data= | |||
{{AttackData-BreakersR | |||
|Damage= | |||
|Guard= {{High}} | |||
|Stun= | |||
|Properties= | |||
|Startup= | |||
|Active= | |||
|Recovery= | |||
|Adv. Hit= | |||
|Adv. Guard= | |||
|description= | |||
}} | |||
}} | |||
{{MoveData | |||
|image=BreakersR_Alsion_djD.png | |||
|caption= | |||
|name= | |||
|input=dj.D | |||
|data= | |||
{{AttackData-BreakersR | |||
|Damage= | |||
|Guard= {{High}} | |||
|Stun= | |||
|Properties= | |||
|Startup= | |||
|Active= | |||
|Recovery= | |||
|Adv. Hit= | |||
|Adv. Guard= | |||
|description= | |||
}} | |||
}} | |||
===Command Normals=== | |||
{{MoveData | |||
|image=BreakersR_Alsion_5AC.png | |||
|caption= | |||
|name= | |||
|input=5AC | |||
|data= | |||
{{AttackData-BreakersR | |||
|Damage= | |||
|Guard= {{High}} | |||
|Stun= | |||
|Properties={{Ovrhd}} | |||
|Startup= | |||
|Active= | |||
|Recovery= | |||
|Adv. Hit= | |||
|Adv. Guard= | |||
|description= | |||
}} | |||
}} | |||
{{MoveData | |||
|image=BreakersR_Alsion_5BD.png | |||
|caption= | |||
|name= | |||
|input=5BD | |||
|data= | |||
{{AttackData-BreakersR | |||
|Damage= | |||
|Guard= {{High}} | |||
|Stun= | |||
|Properties={{Ovrhd}} | |||
|Startup= | |||
|Active= | |||
|Recovery= | |||
|Adv. Hit= | |||
|Adv. Guard= | |||
|description=Only the second hit is an overhead. | |||
}} | |||
}} | |||
{{MoveData | |||
|image=BreakersR_Alsion_4A.png | |||
|caption= | |||
|name= | |||
|input=4A | |||
|data= | |||
{{AttackData-BreakersR | |||
|Damage= | |||
|Guard= {{Mid}} | |||
|Stun= | |||
|Properties={{Specialcancel}}{{Supercancel}} | |||
|Startup= | |||
|Active= | |||
|Recovery= | |||
|Adv. Hit= | |||
|Adv. Guard= | |||
|description= | |||
}} | |||
}} | |||
{{MoveData | |||
|image=BreakersR_Alsion_4B.png | |||
|caption= | |||
|name= | |||
|input=4A | |||
|data= | |||
{{AttackData-BreakersR | |||
|Damage= | |||
|Guard= {{Low}} | |||
|Stun= | |||
|Properties={{Specialcancel}}{{Supercancel}} | |||
|Startup= | |||
|Active= | |||
|Recovery= | |||
|Adv. Hit= | |||
|Adv. Guard= | |||
|description= | |||
}} | |||
}} | |||
{{MoveData | |||
|image=BreakersR_Alsion_4C.png | |||
|caption= | |||
|name= | |||
|input=4C | |||
|data= | |||
{{AttackData-BreakersR | |||
|Damage= | |||
|Guard= {{Mid}} | |||
|Stun= | |||
|Properties={{Specialcancel}}{{Supercancel}} | |||
|Startup= | |||
|Active= | |||
|Recovery= | |||
|Adv. Hit= | |||
|Adv. Guard= | |||
|description= | |||
}} | |||
}} | |||
{{MoveData | |||
|image=BreakersR_Alsion_4D.png | |||
|caption= | |||
|name= | |||
|input=4D | |||
|data= | |||
{{AttackData-BreakersR | |||
|Damage= | |||
|Guard= {{Low}} | |||
|Stun= | |||
|Properties= | |||
|Startup= | |||
|Active= | |||
|Recovery= | |||
|Adv. Hit= | |||
|Adv. Guard= | |||
|description=Leaves you actionable in the air afterwards. | |||
}} | |||
}} | |||
{{MoveData | |||
|image=BreakersR_Alsion_2jA.png | |||
|caption= | |||
|name= | |||
|input=Jump, 1~3A | |||
|data= | |||
{{AttackData-BreakersR | |||
|Damage= | |||
|Guard= {{High}} | |||
|Stun= | |||
|Properties={{Specialcancel}} | |||
|Startup= | |||
|Active= | |||
|Recovery= | |||
|Adv. Hit= | |||
|Adv. Guard= | |||
|description= | |||
}} | |||
}} | |||
{{MoveData | |||
|image=BreakersR_Alsion_2jB.png | |||
|caption= | |||
|name= | |||
|input=Jump, 1~3B | |||
|data= | |||
{{AttackData-BreakersR | |||
|Damage= | |||
|Guard= {{High}} | |||
|Stun= | |||
|Properties={{Specialcancel}} | |||
|Startup= | |||
|Active= | |||
|Recovery= | |||
|Adv. Hit= | |||
|Adv. Guard= | |||
|description= | |||
}} | |||
}} | |||
{{MoveData | |||
|image=BreakersR_Alsion_2jC.png | |||
|caption= | |||
|name= | |||
|input=Jump, 1~3C | |||
|data= | |||
{{AttackData-BreakersR | |||
|Damage= | |||
|Guard= {{High}} | |||
|Stun= | |||
|Properties= | |||
|Startup= | |||
|Active= | |||
|Recovery= | |||
|Adv. Hit= | |||
|Adv. Guard= | |||
|description= | |||
}} | |||
}} | |||
{{MoveData | |||
|image=BreakersR_Alsion_2jD.png | |||
|caption= | |||
|name= | |||
|input=Jump, 1~3D | |||
|data= | |||
{{AttackData-BreakersR | |||
|Damage= | |||
|Guard= {{High}} | |||
|Stun= | |||
|Properties= | |||
|Startup= | |||
|Active= | |||
|Recovery= | |||
|Adv. Hit= | |||
|Adv. Guard= | |||
|description= | |||
}} | |||
}} | |||
===Throws=== | |||
{{MoveData | |||
|image=BreakersR_Alsion_Throw.png | |||
|caption= | |||
|name= | |||
|input=4/6C | |||
|data= | |||
{{AttackData-BreakersR | |||
|Damage= | |||
|Guard={{Unblockable}} | |||
|Stun= | |||
|Properties={{Throw}}{{Knockdown}} | |||
|Startup= | |||
|Active= | |||
|Recovery= | |||
|Adv. Hit= | |||
|Adv. Guard= | |||
}} | |||
}} | |||
{{MoveData | |||
|image=BreakersR_Alsion_Airthrow.png | |||
|caption= | |||
|name= | |||
|input=Jump, Any direction+C/D | |||
|data= | |||
{{AttackData-BreakersR | |||
|Damage= | |||
|Guard={{Unblockable}} | |||
|Stun= | |||
|Properties={{Airthrow}}{{Knockdown}} | |||
|Startup= | |||
|Active= | |||
|Recovery= | |||
|Adv. Hit= | |||
|Adv. Guard= | |||
|description= | |||
}} | |||
}} | |||
===Specials=== | |||
{{MoveData | |||
|image=alsionknee.gif | |||
|caption= | |||
|name= | |||
|input=236K | |||
|data= | |||
{{AttackData-BreakersR | |||
|version=A | |||
|Damage= | |||
|Guard= {{Mid}} | |||
|Stun= | |||
|Properties={{Airok}} | |||
|Startup= | |||
|Recovery= | |||
|Adv. Hit= | |||
|Adv. Guard= | |||
|description= | |||
}} | |||
{{AttackData-BreakersR | |||
|version=D | |||
|Damage= | |||
|Guard= {{Mid}} | |||
|Stun= | |||
|Properties={{Airok}}{{Knockdown}} | |||
|Startup= | |||
|Recovery= | |||
|Adv. Hit= | |||
|Adv. Guard= | |||
|description= | |||
}} | |||
}} | |||
{{MoveData | |||
|image=alsionteleport.gif | |||
|caption= | |||
|name= | |||
|input=214K | |||
|data= | |||
{{AttackData-BreakersR | |||
|version=B | |||
|Damage= | |||
|Guard= {{High}} | |||
|Stun= | |||
|Properties={{Airok}}{{Knockdown}} | |||
|Startup= | |||
|Recovery= | |||
|Adv. Hit= | |||
|Adv. Guard= | |||
|description=The LK version of this move will cause Alsion to teleport directly above himself. It very low priority and is simple to beat or even block and punish. It does however allow for comboability via super if it hits. It has an invulnerable start up, like Alsion's dash, but using it like a dragon punch can be risky. | |||
}} | |||
{{AttackData-BreakersR | |||
|version=D | |||
|Damage= | |||
|Guard= {{High}} | |||
|Stun= | |||
|Properties={{Airok}}{{Knockdown}} | |||
|Startup= | |||
|Recovery= | |||
|Adv. Hit= | |||
|Adv. Guard= | |||
|description=HK version will make him move a little bit forward and can even cross up | |||
}} | |||
}} | |||
{{MoveData | |||
|image=alsionpoison.gif | |||
|caption= | |||
|name= | |||
|input=41236P | |||
|data= | |||
{{AttackData-BreakersR | |||
|version=A | |||
|Damage= | |||
|Guard= {{Mid}} | |||
|Stun= | |||
|Properties={{Proj}} | |||
|Startup= | |||
|Recovery= | |||
|Adv. Hit= | |||
|Adv. Guard= | |||
|description=This cloud is a projectile that causes the opponent to go flying backwards if it hits. The LP version stays out for a shorter time and is almost stationary. Alsion recovers from this move when the cloud disappears, even if it is destroyed by another fireball. If this hits in the corner, Alsion can combo a super from it. | |||
}} | |||
{{AttackData-BreakersR | |||
|version=C | |||
|Damage= | |||
|Guard= {{Mid}} | |||
|Stun= | |||
|Properties={{Proj}} | |||
|Startup= | |||
|Recovery= | |||
|Adv. Hit= | |||
|Adv. Guard= | |||
|description=The HP version stays out for quite a long time and travels forward slowly, about half a screen length | |||
}} | |||
}} | |||
===Supers=== | |||
{{MoveData | |||
|image=alsionanubis.gif | |||
|caption= | |||
|name= | |||
|input=236236P | |||
|data= | |||
{{AttackData-BreakersR | |||
|Damage= | |||
|Guard={{Mid}} | |||
|Stun= | |||
|Properties={{Proj}}{{Hardknockdown}} | |||
|Startup= | |||
|Recovery= | |||
|Adv. Hit= | |||
|Adv. Guard= | |||
|description=Alsion summons Anubis to grab the opponent. If the projectile hits it becomes a mashable attack with a max of 12 hits, opponent can counter mash. He can combo this from a few moves including j.LK, j.d+LK, and Teleport Drop. | |||
}} | |||
}} | |||
{{MoveData | |||
|image=alsioncombosuper.gif | |||
|caption= | |||
|name= | |||
|input=214214P | |||
|data= | |||
{{AttackData-BreakersR | |||
|Damage= | |||
|Guard={{Mid}} | |||
|Stun= | |||
|Properties={{Startupinv}}{{Hardknockdown}} | |||
|Startup= | |||
|Recovery= | |||
|Adv. Hit= | |||
|Adv. Guard= | |||
|description=Alsion does a quick combo on the opponent. Alsion's breaker attack with starting invulnerability. Not quite safe on block, but almost. Can be comboed into from a few moves including b+LK, cr.LK, and Overhead Punch. | |||
}} | |||
}} | |||
==Combos== | |||
*'''Meterless Combos''' | |||
**cr.LK/b+LK xx Knee Attack (LK version) - Standard combo. | **cr.LK/b+LK xx Knee Attack (LK version) - Standard combo. | ||
**Overhead Punch (LP+HP), cr.LK xx Knee Attack (LK version) - Standard combo done from overhead punch. | **Overhead Punch (LP+HP), cr.LK xx Knee Attack (LK version) - Standard combo done from overhead punch. | ||
**5AC, 4A, 4C xx 236D OR Poison (41236P) - use 4C~B for an alternate version that is easier | |||
**back + HP xx Poison/Knee Attack (LK version) - This combo is useless, but it is here! If you land a back + HP without meter, do this. | **back + HP xx Poison/Knee Attack (LK version) - This combo is useless, but it is here! If you land a back + HP without meter, do this. | ||
**Jumping LK anywhere,/Jumping down+LK in corner, land, back+C xx Knee Attack (LK version) - Jumping LK and jumping down+LK both float the opponent on hit, making this combo possible. | **Jumping LK anywhere,/Jumping down+LK in corner, land, back+C xx Knee Attack (LK version) - Jumping LK and jumping down+LK both float the opponent on hit, making this combo possible. | ||
*Combos with | *'''Combos with meter''' | ||
**Teleport Drop, either super - When you land a Teleport Drop, the opponent goes flying. You can combo into either of his supers this way. All hits of his combo super WILL hit, and it is easier to land than Anubis. Since Anubis does more damage, try to combo into Anubis if the opponent is in the corner or you hit the opponent while they are airborne midscreen. Otherwise, do the combo super. | **Teleport Drop, either super - When you land a Teleport Drop, the opponent goes flying. You can combo into either of his supers this way. All hits of his combo super WILL hit, and it is easier to land than Anubis. Since Anubis does more damage, try to combo into Anubis if the opponent is in the corner or you hit the opponent while they are airborne midscreen. Otherwise, do the combo super. | ||
**back+B/cr.B xx either super - Optional LP+HP Overhead Punch or jump-in attack before this, not really his best way to use super bar but this combo is here if you'll kill with it. | **back+B/cr.B xx either super - Optional LP+HP Overhead Punch or jump-in attack before this, not really his best way to use super bar but this combo is here if you'll kill with it. | ||
**Jumping LK anywhere/Jumping down+LK in corner, land, back+C xx Knee Attack (HK version), Anubis/Combo Super. - Same deal as the combo in the previous section, just with a super at the end. Anubis will hit fat characters at midscreen but not regular sized characters. Combo super will hit all characters anywhere on the screen. Do Anubis if you can for more damage. | **Jumping LK anywhere/Jumping down+LK in corner, land, back+C xx Knee Attack (HK version), Anubis/Combo Super. - Same deal as the combo in the previous section, just with a super at the end. Anubis will hit fat characters at midscreen but not regular sized characters. Combo super will hit all characters anywhere on the screen. Do Anubis if you can for more damage. | ||
**In corner, Poison, either super - Combo off a poison in the corner! Decent since poison is a safe meaty in the corner and easy to hit-confirm into super. | **In corner, Poison, either super - Combo off a poison in the corner! Decent since poison is a safe meaty in the corner and easy to hit-confirm into super. | ||
**Anti-Air 4A > B+D (1Hit) > Anubis | |||
=Advanced Strategy= | ==Advanced Strategy== | ||
==How does Alsion III play?== | ===How does Alsion III play?=== | ||
Alsion III is a zoning and gimmick. You should try to keep your opponent out when you want them out, and bait them into getting hit when they come in. Alsion has to be extremely careful because once an opponent gets in on him he has next to nothing to deal with them outside of his Combo Super as a breaker. He excels in gimmicks with his Teleport Drop and dash. Dashing around a downed opponent and hitting them with an unexpected crossup Teleport Drop can be a great mixup when used sparingly. Using Teleport Drop in the air to bait anti-airs is also super-gimmicky but can lead to great damage as well! He has more gimmicks than this, more will be listed in "Random Tips." | Alsion III is a zoning and gimmick character. You should try to keep your opponent out when you want them out, and bait them into getting hit when they come in. Alsion has to be extremely careful because once an opponent gets in on him he has next to nothing to deal with them outside of his Combo Super as a breaker. He excels in gimmicks with his Teleport Drop and dash. Dashing around a downed opponent and hitting them with an unexpected crossup Teleport Drop can be a great mixup when used sparingly. Using Teleport Drop in the air to bait anti-airs is also super-gimmicky but can lead to great damage as well! He has more gimmicks than this, more will be listed in "Random Tips." | ||
==Breakering== | ===Breakering=== | ||
Combo Super is Alsion's best breaker move. It has invuln for the startup and hits extremely fast and combos all the way on airborne opponents. Teleport Drop can be an excellent breaker when used extremely sparingly, as it can be very confusing. It also combos into super easily so it is great damage. | Combo Super is Alsion's best breaker move. It has invuln for the startup and hits extremely fast and combos all the way on airborne opponents. Teleport Drop can be an excellent breaker when used extremely sparingly, as it can be very confusing. It also combos into super easily so it is great damage. | ||
= | Alsion's dash cannot be used as a backdash breaker. This does mean that without meter opponents can open up new unbreakerable combos. You can still just jump as a breaker at least. Forward/Back dash will work still on standing up as a reversal. | ||
===Corner Guide=== | |||
<youtube>https://youtu.be/KrDX0Hmqh9E</youtube> | |||
==Matchups== | |||
===Matchup Table=== | |||
{| class="wikitable" | |||
|+ Advantage | |||
|- | |||
| Great || | |||
|- | |||
| Good || | |||
|- | |||
| Even || Maherl | |||
|- | |||
| Weak || Condor, Pielle, Rila | |||
|- | |||
| Bad || Saizo, Sho, Tia, Dao-Long | |||
|} | |||
== | ===Character Specific Tips=== | ||
-------- | |||
'''Alsion III'''<br> | |||
-------- | |||
'''Condor'''<br> | |||
-------- | |||
'''Dao-Long'''<br> | |||
-------- | |||
'''Alsion'''<br> | |||
-------- | |||
'''Condor'''<br> | |||
-------- | |||
'''Condor'''<br> | |||
-------- | |||
'''Condor'''<br> | |||
-------- | |||
'''Sho'''<br> | |||
-------- | |||
'''Condor'''<br> | |||
{{ | {{Navbox-BreakersR}} | ||
[[Category:Breakers Revenge]] | |||
Latest revision as of 17:53, 10 January 2023
Introduction
An undead ancient Egyptian with rubber-like limbs.
Overview
Alsion III is a long-range fighter. He is at his best when he can use his high/low mixups at a mid range.
He is also the worst character in the game, he has a ton of long range tools but not the best priority. His fireball isn't suitable for zoning. Once under pressure without meter he has no real breaker, opening him up to combos and strings that are normally breakerable.

| Strengths | Weaknesses |
|---|---|
|
|
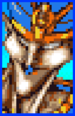
| Alsion III | |
|---|---|
 | |
| Defense | 118 |
| Stun | 2976 |
Move List
Normals
Standing
| Damage | Guard | Stun | Properties | |
|---|---|---|---|---|
| - | - | |||
| Startup | Active | Recovery | Adv. Hit | Adv. Guard |
| - | - | - | - | - |
| Damage | Guard | Stun | Properties | ||
|---|---|---|---|---|---|
| - | - | - | |||
| Startup | Active | Recovery | Adv. Hit | Adv. Guard | |
| - | - | - | - | - | |
|
This is a very far reaching, very fast poke. It has no combo options and doesn't do much damage but it has high priority and will stuff a lot of moves. | |||||
| Damage | Guard | Stun | Properties | ||
|---|---|---|---|---|---|
| - | - | - | |||
| Startup | Active | Recovery | Adv. Hit | Adv. Guard | |
| - | - | - | - | - | |
|
Two-armed slap. More damage than st.B but slower. Has a bigger vertical hitbox. | |||||
| Damage | Guard | Stun | Properties | ||
|---|---|---|---|---|---|
| - | - | - | |||
| Startup | Active | Recovery | Adv. Hit | Adv. Guard | |
| - | - | - | - | - | |
|
A big kick with a glowing foot. This is an excellent move for destroying jump-ins when used fairly early. Hits high enough that crouching opponents will not get hit (except Condor). | |||||
Crouching
| Damage | Guard | Stun | Properties | |
|---|---|---|---|---|
| - | - | |||
| Startup | Active | Recovery | Adv. Hit | Adv. Guard |
| - | - | - | - | - |
| Damage | Guard | Stun | Properties | |
|---|---|---|---|---|
| - | - | |||
| Startup | Active | Recovery | Adv. Hit | Adv. Guard |
| - | - | - | - | - |
| Damage | Guard | Stun | Properties | ||
|---|---|---|---|---|---|
| - | - | - | |||
| Startup | Active | Recovery | Adv. Hit | Adv. Guard | |
| - | - | - | - | - | |
|
This move must be blocked low and pushes the opponent very far away on hit. Can go under some fireballs to strike the opponent. | |||||
| Damage | Guard | Stun | Properties | |
|---|---|---|---|---|
| - | - | - | ||
| Startup | Active | Recovery | Adv. Hit | Adv. Guard |
| - | - | - | - | - |
Neutral Jumping
| Damage | Guard | Stun | Properties | |
|---|---|---|---|---|
| - | - | |||
| Startup | Active | Recovery | Adv. Hit | Adv. Guard |
| - | - | - | - | - |
| Damage | Guard | Stun | Properties | |
|---|---|---|---|---|
| - | - | - | ||
| Startup | Active | Recovery | Adv. Hit | Adv. Guard |
| - | - | - | - | - |
| Damage | Guard | Stun | Properties | |
|---|---|---|---|---|
| - | - | - | ||
| Startup | Active | Recovery | Adv. Hit | Adv. Guard |
| - | - | - | - | - |
| Damage | Guard | Stun | Properties | |
|---|---|---|---|---|
| - | - | - | ||
| Startup | Active | Recovery | Adv. Hit | Adv. Guard |
| - | - | - | - | - |
Diagonal Jumping
| Damage | Guard | Stun | Properties | |
|---|---|---|---|---|
| - | - | |||
| Startup | Active | Recovery | Adv. Hit | Adv. Guard |
| - | - | - | - | - |
| Damage | Guard | Stun | Properties | |
|---|---|---|---|---|
| - | - | - | ||
| Startup | Active | Recovery | Adv. Hit | Adv. Guard |
| - | - | - | - | - |
| Damage | Guard | Stun | Properties | |
|---|---|---|---|---|
| - | - | - | ||
| Startup | Active | Recovery | Adv. Hit | Adv. Guard |
| - | - | - | - | - |
| Damage | Guard | Stun | Properties | |
|---|---|---|---|---|
| - | - | - | ||
| Startup | Active | Recovery | Adv. Hit | Adv. Guard |
| - | - | - | - | - |
Command Normals
| Damage | Guard | Stun | Properties | |
|---|---|---|---|---|
| - | - | |||
| Startup | Active | Recovery | Adv. Hit | Adv. Guard |
| - | - | - | - | - |
| Damage | Guard | Stun | Properties | ||
|---|---|---|---|---|---|
| - | - | ||||
| Startup | Active | Recovery | Adv. Hit | Adv. Guard | |
| - | - | - | - | - | |
|
Only the second hit is an overhead. | |||||
| Damage | Guard | Stun | Properties | |
|---|---|---|---|---|
| - | - | |||
| Startup | Active | Recovery | Adv. Hit | Adv. Guard |
| - | - | - | - | - |
| Damage | Guard | Stun | Properties | |
|---|---|---|---|---|
| - | - | |||
| Startup | Active | Recovery | Adv. Hit | Adv. Guard |
| - | - | - | - | - |
| Damage | Guard | Stun | Properties | |
|---|---|---|---|---|
| - | - | |||
| Startup | Active | Recovery | Adv. Hit | Adv. Guard |
| - | - | - | - | - |
| Damage | Guard | Stun | Properties | ||
|---|---|---|---|---|---|
| - | - | - | |||
| Startup | Active | Recovery | Adv. Hit | Adv. Guard | |
| - | - | - | - | - | |
|
Leaves you actionable in the air afterwards. | |||||
| Damage | Guard | Stun | Properties | |
|---|---|---|---|---|
| - | - | |||
| Startup | Active | Recovery | Adv. Hit | Adv. Guard |
| - | - | - | - | - |
| Damage | Guard | Stun | Properties | |
|---|---|---|---|---|
| - | - | |||
| Startup | Active | Recovery | Adv. Hit | Adv. Guard |
| - | - | - | - | - |
| Damage | Guard | Stun | Properties | |
|---|---|---|---|---|
| - | - | - | ||
| Startup | Active | Recovery | Adv. Hit | Adv. Guard |
| - | - | - | - | - |
| Damage | Guard | Stun | Properties | |
|---|---|---|---|---|
| - | - | - | ||
| Startup | Active | Recovery | Adv. Hit | Adv. Guard |
| - | - | - | - | - |
Throws
| Damage | Guard | Stun | Properties | |
|---|---|---|---|---|
| - | - | |||
| Startup | Active | Recovery | Adv. Hit | Adv. Guard |
| - | - | - | - | - |
| Damage | Guard | Stun | Properties | |
|---|---|---|---|---|
| - | - | |||
| Startup | Active | Recovery | Adv. Hit | Adv. Guard |
| - | - | - | - | - |
Specials

| A | Damage | Guard | Stun | Properties | |
|---|---|---|---|---|---|
| - | - | ||||
| Startup | Active | Recovery | Adv. Hit | Adv. Guard | |
| - | - | - | - | - | |
| D | Damage | Guard | Stun | Properties | |
| - | - | ||||
| Startup | Active | Recovery | Adv. Hit | Adv. Guard | |
| - | - | - | - | - | |

| B | Damage | Guard | Stun | Properties | ||
|---|---|---|---|---|---|---|
| - | - | |||||
| Startup | Active | Recovery | Adv. Hit | Adv. Guard | ||
| - | - | - | - | - | ||
|
The LK version of this move will cause Alsion to teleport directly above himself. It very low priority and is simple to beat or even block and punish. It does however allow for comboability via super if it hits. It has an invulnerable start up, like Alsion's dash, but using it like a dragon punch can be risky. | ||||||
| D | Damage | Guard | Stun | Properties | ||
| - | - | |||||
| Startup | Active | Recovery | Adv. Hit | Adv. Guard | ||
| - | - | - | - | - | ||
|
HK version will make him move a little bit forward and can even cross up | ||||||

| A | Damage | Guard | Stun | Properties | ||
|---|---|---|---|---|---|---|
| - | - | |||||
| Startup | Active | Recovery | Adv. Hit | Adv. Guard | ||
| - | - | - | - | - | ||
|
This cloud is a projectile that causes the opponent to go flying backwards if it hits. The LP version stays out for a shorter time and is almost stationary. Alsion recovers from this move when the cloud disappears, even if it is destroyed by another fireball. If this hits in the corner, Alsion can combo a super from it. | ||||||
| C | Damage | Guard | Stun | Properties | ||
| - | - | |||||
| Startup | Active | Recovery | Adv. Hit | Adv. Guard | ||
| - | - | - | - | - | ||
|
The HP version stays out for quite a long time and travels forward slowly, about half a screen length | ||||||
Supers

| Damage | Guard | Stun | Properties | ||
|---|---|---|---|---|---|
| - | - | ||||
| Startup | Active | Recovery | Adv. Hit | Adv. Guard | |
| - | - | - | - | - | |
|
Alsion summons Anubis to grab the opponent. If the projectile hits it becomes a mashable attack with a max of 12 hits, opponent can counter mash. He can combo this from a few moves including j.LK, j.d+LK, and Teleport Drop. | |||||

| Damage | Guard | Stun | Properties | ||
|---|---|---|---|---|---|
| - | - | ||||
| Startup | Active | Recovery | Adv. Hit | Adv. Guard | |
| - | - | - | - | - | |
|
Alsion does a quick combo on the opponent. Alsion's breaker attack with starting invulnerability. Not quite safe on block, but almost. Can be comboed into from a few moves including b+LK, cr.LK, and Overhead Punch. | |||||
Combos
- Meterless Combos
- cr.LK/b+LK xx Knee Attack (LK version) - Standard combo.
- Overhead Punch (LP+HP), cr.LK xx Knee Attack (LK version) - Standard combo done from overhead punch.
- 5AC, 4A, 4C xx 236D OR Poison (41236P) - use 4C~B for an alternate version that is easier
- back + HP xx Poison/Knee Attack (LK version) - This combo is useless, but it is here! If you land a back + HP without meter, do this.
- Jumping LK anywhere,/Jumping down+LK in corner, land, back+C xx Knee Attack (LK version) - Jumping LK and jumping down+LK both float the opponent on hit, making this combo possible.
- Combos with meter
- Teleport Drop, either super - When you land a Teleport Drop, the opponent goes flying. You can combo into either of his supers this way. All hits of his combo super WILL hit, and it is easier to land than Anubis. Since Anubis does more damage, try to combo into Anubis if the opponent is in the corner or you hit the opponent while they are airborne midscreen. Otherwise, do the combo super.
- back+B/cr.B xx either super - Optional LP+HP Overhead Punch or jump-in attack before this, not really his best way to use super bar but this combo is here if you'll kill with it.
- Jumping LK anywhere/Jumping down+LK in corner, land, back+C xx Knee Attack (HK version), Anubis/Combo Super. - Same deal as the combo in the previous section, just with a super at the end. Anubis will hit fat characters at midscreen but not regular sized characters. Combo super will hit all characters anywhere on the screen. Do Anubis if you can for more damage.
- In corner, Poison, either super - Combo off a poison in the corner! Decent since poison is a safe meaty in the corner and easy to hit-confirm into super.
- Anti-Air 4A > B+D (1Hit) > Anubis
Advanced Strategy
How does Alsion III play?
Alsion III is a zoning and gimmick character. You should try to keep your opponent out when you want them out, and bait them into getting hit when they come in. Alsion has to be extremely careful because once an opponent gets in on him he has next to nothing to deal with them outside of his Combo Super as a breaker. He excels in gimmicks with his Teleport Drop and dash. Dashing around a downed opponent and hitting them with an unexpected crossup Teleport Drop can be a great mixup when used sparingly. Using Teleport Drop in the air to bait anti-airs is also super-gimmicky but can lead to great damage as well! He has more gimmicks than this, more will be listed in "Random Tips."
Breakering
Combo Super is Alsion's best breaker move. It has invuln for the startup and hits extremely fast and combos all the way on airborne opponents. Teleport Drop can be an excellent breaker when used extremely sparingly, as it can be very confusing. It also combos into super easily so it is great damage.
Alsion's dash cannot be used as a backdash breaker. This does mean that without meter opponents can open up new unbreakerable combos. You can still just jump as a breaker at least. Forward/Back dash will work still on standing up as a reversal.
Corner Guide
Matchups
Matchup Table
| Great | |
| Good | |
| Even | Maherl |
| Weak | Condor, Pielle, Rila |
| Bad | Saizo, Sho, Tia, Dao-Long |
Character Specific Tips
Alsion III
Condor
Dao-Long
Alsion
Condor
Condor
Condor
Sho
Condor


