Lou Minaudi (talk | contribs) |
EclipticEve (talk | contribs) No edit summary |
||
| (28 intermediate revisions by 3 users not shown) | |||
| Line 1: | Line 1: | ||
{{Infobox Character HNK | |||
|name=Rei | |||
}} | |||
{{TOClimit|2}} | |||
Before diving right into the combos be sure to familiarize yourself with Rei's special/super moves and important normals. | Before diving right into the combos be sure to familiarize yourself with Rei's special/super moves and important normals. | ||
==Normal Moves== | ==Normal Moves== | ||
== | ===Close=== | ||
=== | ===== <span class="invisible-header">cl.A</span> ===== | ||
{{MoveData | |||
|image=Rei-c.A.png | |||
|name=cl.A | |||
Tied for one of Rei's fastest buttons. It is mainly used as used as an anti air against low airdashes and combo filler in midscreen combo routes. | |linkname=cl.A | ||
|subtitle= | |||
|caption= | |||
|data= | |||
{{AttackData-HNK | |||
|Damage= | |||
|Guard=Mid | |||
|Startup=5 | |||
|Active=3 | |||
|Recovery= | |||
|Hit Adv= | |||
|Block Adv=+2 | |||
|description= | |||
* Jump cancelable. | |||
Tied for one of Rei's fastest buttons. It is mainly used as used as an anti air against low airdashes and combo filler in midscreen combo routes. | |||
}} | |||
}} | |||
=== | ===== <span class="invisible-header">cl.B</span> ===== | ||
{{MoveData | |||
|image=Rei-c.B.png | |||
|name=cl.B | |||
|linkname=cl.B | |||
|subtitle= | |||
|caption= | |||
|data= | |||
{{AttackData-HNK | |||
|Damage= | |||
|Guard=Mid | |||
|Startup=8 | |||
|Active=4 | |||
|Recovery= | |||
|Hit Adv= | |||
|Block Adv=+3 | |||
|description= | |||
* Jump cancelable. | |||
Low kick that is a mid. Not much usage from this button due to it's lack of hitstun. | |||
}} | |||
}} | |||
=== | ===== <span class="invisible-header">cl.C</span> ===== | ||
{{MoveData | |||
|image=Rei-c.C.png | |||
|name=cl.C | |||
|linkname=cl.C | |||
|subtitle= | |||
|caption= | |||
|data= | |||
{{AttackData-HNK | |||
|Damage= | |||
|Guard=Mid | |||
|Startup=7 | |||
|Active=6 | |||
|Recovery= | |||
|Hit Adv=Launch | |||
|Block Adv=-3 | |||
|description= | |||
* Jump cancelable. | |||
Excellent anti air. Whiffs on crouching characters. | |||
}} | |||
}} | |||
=== | ===== <span class="invisible-header">cl.D</span> ===== | ||
{{MoveData | |||
|image=Rei-c.D.png | |||
|name=cl.D | |||
Excellent | |linkname=cl.D | ||
|subtitle= | |||
|caption= | |||
|data= | |||
{{AttackData-HNK | |||
|Damage= | |||
|Guard=Mid | |||
|Startup=9 | |||
|Active=4 | |||
|Recovery= | |||
|Hit Adv= | |||
|Block Adv=-3 | |||
|description= | |||
* Jump cancelable. | |||
Excellent button for pressure with a lot of blockstun. Can go into instant airdash or 2D. Combos into banishing attack except on crouching Jagi where you would use 2D. Also combos into IAD j.B. | |||
}} | |||
}} | |||
=== | ===Far=== | ||
===== <span class="invisible-header">f.A</span> ===== | |||
{{MoveData | |||
|image=Rei-A.png | |||
|name=f.A | |||
|linkname=f.A | |||
|subtitle= | |||
|caption= | |||
|data= | |||
{{AttackData-HNK | |||
|Damage= | |||
|Guard=Mid | |||
|Startup=5 | |||
|Active=3 | |||
|Recovery= | |||
|Hit Adv= | |||
|Block Adv=+4 | |||
|description= | |||
* Jump cancelable. | |||
The other 5F normal. Same usage as close A but is smaller vertically. Whiffs on Mamiya, Rei, Shin, and Jagi crouch blocking. Whiffs on Souther and Toki neutral crouching. | |||
}} | |||
}} | |||
=== | ===== <span class="invisible-header">f.B</span> ===== | ||
{{MoveData | |||
|image=Rei-B.png | |||
|name=f.B | |||
|linkname=f.B | |||
|subtitle= | |||
|caption= | |||
|data= | |||
{{AttackData-HNK | |||
|Damage= | |||
|Guard=Mid | |||
|Startup=7 | |||
|Active=4 | |||
|Recovery= | |||
|Hit Adv= | |||
|Block Adv=+4 | |||
|description= | |||
* Jump cancelable. | |||
Excellent midrange poke. Confirms into 2D except on crouching Jagi. | |||
}} | |||
}} | |||
=== | ===== <span class="invisible-header">f.C</span> ===== | ||
{{MoveData | |||
|image=Rei-C.png | |||
|name=f.C | |||
|linkname=f.C | |||
|subtitle= | |||
|caption= | |||
|data= | |||
{{AttackData-HNK | |||
|Damage= | |||
|Guard=Mid | |||
|Startup=12 | |||
|Active=4 | |||
|Recovery= | |||
|Hit Adv= | |||
|Block Adv=-2 | |||
|description= | |||
* Jump cancelable. | |||
Not really used as a poke. Mainly combo filler. | |||
}} | |||
}} | |||
=== | ===== <span class="invisible-header">f.D</span> ===== | ||
{{MoveData | |||
|image=Rei-D.png | |||
|name=f.D | |||
Low invulnerable button. Can confirm into banishing strike by kara canceling 2D into CD as 2D~2C. Also confirms into Grave Shoot. Surprisingly not jump cancelable | |linkname=f.D | ||
|subtitle= | |||
|caption= | |||
|data= | |||
{{AttackData-HNK | |||
|Damage= | |||
|Guard=Mid | |||
|Startup=14 | |||
|Active=3 | |||
|Recovery= | |||
|Hit Adv= | |||
|Block Adv=0 | |||
|description= | |||
Low invulnerable button. Can confirm into banishing strike by kara canceling 2D into CD as 2D~2C. Also confirms into Grave Shoot. Surprisingly not jump cancelable. | |||
}} | |||
}} | |||
==Crouching== | ===Crouching=== | ||
=== | ===== <span class="invisible-header">2A</span> ===== | ||
{{MoveData | |||
|image=Rei-2A.png | |||
|name=2A | |||
Faster crouching normal. | |linkname=2A | ||
|subtitle= | |||
|caption= | |||
|data= | |||
{{AttackData-HNK | |||
|Damage= | |||
|Guard=Mid | |||
|Startup=6 | |||
|Active=3 | |||
|Recovery= | |||
|Hit Adv= | |||
|Block Adv=+1 | |||
|description= | |||
* Jump cancelable. | |||
Faster crouching normal. | |||
}} | |||
}} | |||
=== | ===== <span class="invisible-header">2B</span> ===== | ||
{{MoveData | |||
|image=Rei-2B.png | |||
|name=2B | |||
A good low that is jump cancelable and plus. Confirms into 5D and 2D. 2B 2D doesn't work on crouching Jagi | |linkname=2B | ||
|subtitle= | |||
|caption= | |||
|data= | |||
{{AttackData-HNK | |||
|Damage= | |||
|Guard=Low | |||
|Startup=7 | |||
|Active=3 | |||
|Recovery= | |||
|Hit Adv= | |||
|Block Adv=+6 | |||
|description= | |||
* Jump cancelable. | |||
A good low that is jump cancelable and plus. Confirms into 5D and 2D. 2B 2D doesn't work on crouching Jagi. | |||
}} | |||
}} | |||
=== | ===== <span class="invisible-header">2C</span> ===== | ||
{{MoveData | |||
|image=Rei-2C.png | |||
|name=2C | |||
Cancels into itself. Combo filler | |linkname=2C | ||
|subtitle= | |||
|caption= | |||
|data= | |||
{{AttackData-HNK | |||
|Damage= | |||
|Guard=Mid | |||
|Startup=12 | |||
|Active=4 | |||
|Recovery= | |||
|Hit Adv= | |||
|Block Adv=-2 | |||
|description= | |||
* Cancels into itself. | |||
Combo filler. | |||
}} | |||
}} | |||
=== | ===== <span class="invisible-header">2D</span> ===== | ||
{{MoveData | |||
|image=Rei-2D.png | |||
|name=2D | |||
Rei's furthest reaching low. | |linkname=2D | ||
|subtitle= | |||
|caption= | |||
|data= | |||
{{AttackData-HNK | |||
|Damage= | |||
|Guard=Low | |||
|Startup=14 | |||
|Active=5 | |||
|Recovery= | |||
|Hit Adv=Launch | |||
|Block Adv=-5 | |||
|description= | |||
* Jump cancelable. | |||
Rei's furthest reaching low. | |||
}} | |||
}} | |||
==Air== | ===Air=== | ||
===A=== | ===== <span class="invisible-header">j.A</span> ===== | ||
{{MoveData | |||
|image=Rei-j.A.png | |||
|name=j.A | |||
Rei's Fastest air normal. Good as an air to air. | |linkname=j.A | ||
|subtitle= | |||
|caption= | |||
|data= | |||
{{AttackData-HNK | |||
|Damage= | |||
|Guard=High | |||
|Startup=4 | |||
|Active=16 | |||
|Recovery= | |||
|Hit Adv= | |||
|Block Adv= | |||
|description= | |||
Rei's Fastest air normal. Good as an air to air. | |||
}} | |||
}} | |||
===B=== | ===== <span class="invisible-header">j.B</span> ===== | ||
{{MoveData | |||
|image=Rei-j.B.png | |||
|name=j.B | |||
A very active air normal that is great for air to airs and the fastest button that will hit a crouching character from an instant air dash. | |linkname=j.B | ||
|subtitle= | |||
|caption= | |||
|data= | |||
{{AttackData-HNK | |||
|Damage= | |||
|Guard=High | |||
|Startup=5 | |||
|Active=20 | |||
|Recovery= | |||
|Hit Adv= | |||
|Block Adv= | |||
|description= | |||
A very active air normal that is great for air to airs and the fastest button that will hit a crouching character from an instant air dash. | |||
}} | |||
}} | |||
===C=== | ===== <span class="invisible-header">j.C</span> ===== | ||
{{MoveData | |||
|image=Rei-j.C.png | |||
|name=j.C | |||
|linkname=j.C | |||
|subtitle= | |||
|caption=You whiffed your air throw | |||
|data= | |||
{{AttackData-HNK | |||
|Damage= | |||
|Guard=High | |||
|Startup=9 | |||
|Active=6 | |||
|Recovery= | |||
|Hit Adv=Launch | |||
|Block Adv= | |||
|description= | |||
Hits above Rei. Mainly used to hitconfirm from 2D. | |||
}} | |||
}} | |||
===D=== | ===== <span class="invisible-header">j.D</span> ===== | ||
{{MoveData | |||
|image=Rei-j.D.png | |||
|name=j.D | |||
Air to ground button that has a lot of blockstun and hitstun | |linkname=j.D | ||
|subtitle= | |||
|caption= | |||
|data= | |||
{{AttackData-HNK | |||
|Damage= | |||
|Guard=High | |||
|Startup=11 | |||
|Active=5 | |||
|Recovery= | |||
|Hit Adv= | |||
|Block Adv= | |||
|description= | |||
Air to ground button that has a lot of blockstun and hitstun. | |||
}} | |||
}} | |||
== | ==Command Normals== | ||
===6A=== | ===== <span class="invisible-header">6A</span> ===== | ||
{{MoveData | |||
|image=Rei-6A.png | |||
|name=6A | |||
No real reason to use this but it's there if you want to. | |linkname=6A | ||
|subtitle= | |||
|caption= | |||
|data= | |||
{{AttackData-HNK | |||
|Damage= | |||
|Guard=High | |||
|Startup=24 | |||
|Active=4 | |||
|Recovery= | |||
|Hit Adv= | |||
|Block Adv=-4 | |||
|description= | |||
No real reason to use this but it's there if you want to. | |||
}} | |||
}} | |||
===Throw=== | ==Universal Mechanics== | ||
===== <span class="invisible-header">Throw</span> ===== | |||
{{MoveData | |||
|image=Rei-Throw.png | |||
Jump | |name=Throw | ||
|linkname=Throw | |||
|subtitle= | |||
|caption= | |||
|data= | |||
{{AttackData-HNK | |||
|Damage= | |||
|Guard=Throw | |||
|Startup=4 | |||
|Active= | |||
|Recovery= | |||
|Hit Adv= | |||
|Block Adv= | |||
|description= | |||
* Jump cancelable. | |||
}} | |||
}} | |||
===BD Throw=== | ===== <span class="invisible-header">BD Throw</span> ===== | ||
{{MoveData | |||
|image=Rei-BD.png | |||
|name=BD Throw | |||
|linkname=BD Throw | |||
|subtitle= | |||
|caption= | |||
|data= | |||
{{AttackData-HNK | |||
|Damage= | |||
|Guard=Throw (whiffs vs. crouch) | |||
|Startup=9 | |||
|Active=4 | |||
|Recovery= | |||
|Hit Adv= | |||
|Block Adv= | |||
|description= | |||
* Jump cancelable. | |||
}} | |||
}} | |||
===Grave Shoot=== | ===== <span class="invisible-header">Grave Shoot</span> ===== | ||
{{MoveData | |||
|image=Rei-Grave.png | |||
|name=Grave Shoot | |||
|linkname=Grave Shoot | |||
|subtitle= | |||
|caption= | |||
|data= | |||
{{AttackData-HNK | |||
|Damage= | |||
|Guard=Mid | |||
|Startup=16 | |||
|Active=7 | |||
|Recovery= | |||
|Hit Adv=Grave Launch | |||
|Block Adv=-4 | |||
|description= | |||
Good hitbox that also reflects projectiles. Also moves slightly forward. | Good hitbox that also reflects projectiles. Also moves slightly forward. | ||
}} | |||
}} | |||
===Heavy Strike=== | ===== <span class="invisible-header">Heavy Strike</span> ===== | ||
{{MoveData | |||
|image=Rei-Heavy.png | |||
|name=Heavy Strike | |||
|linkname=Heavy Strike | |||
|subtitle= | |||
|caption= | |||
|data= | |||
{{AttackData-HNK | |||
|Damage= | |||
|Guard=Unblockable | |||
|Startup=41 | |||
|Active=4 | |||
|Recovery= | |||
|Hit Adv= | |||
|Block Adv= | |||
|description= | |||
Pretty standard heavy attack unblockable. | |||
}} | |||
}} | |||
===Banishing Strike=== | ===== <span class="invisible-header">Banishing Strike</span> ===== | ||
{{MoveData | |||
18- | |image=Rei-Bani.png | ||
|name=Banishing Strike | |||
Charged | |linkname=Banishing Strike | ||
|subtitle= | |||
|caption= | |||
|data= | |||
{{AttackData-HNK | |||
|version=Uncharged | |||
|Damage= | |||
|Guard=Mid | |||
|Startup=18-33 | |||
|Active=4 | |||
|Recovery= | |||
|Hit Adv=Banish Launch | |||
|Block Adv=-8 | |||
|description= | |||
}} | |||
{{AttackData-HNK | |||
|version=Charged | |||
|Damage= | |||
|Guard=Mid | |||
|Startup=34-38 | |||
|Active=4 | |||
|Recovery= | |||
|Hit Adv=Banish Launch | |||
|Block Adv=-8 | |||
|description= | |||
}} | |||
}} | |||
==Special Moves== | ==Special Moves== | ||
=== | ===== <span class="invisible-header">Hien Ryubu</span> ===== | ||
{{MoveData | |||
|image=Rei-Hien.png | |||
|name=Hien Ryubu | |||
|linkname=236P | |||
|subtitle=j.236A/B | |||
|caption= | |||
|data= | |||
= | {{AttackData-HNK | ||
|version=j.236A | |||
|Damage= | |||
|Guard=All | |||
|Startup=11 | |||
|Active=Until ground, 25 (after reflection) | |||
|Recovery= | |||
|Hit Adv= | |||
|Block Adv= | |||
|description= | |||
}} | |||
{{AttackData-HNK | |||
|version=j.236B | |||
|Damage= | |||
|Guard=All | |||
|Startup=11 | |||
|Active=Until ground, 90 (after reflection) | |||
|Recovery= | |||
|Hit Adv= | |||
|Block Adv= | |||
|description= | |||
* A version bounces upwards off the ground. | |||
* B version glides across the floor. | |||
Excellent air to ground projecctile with utility in: stalling in the air to mess up anti air timing, having an active projectile to follow behind in order force a response from the opponentand start pressure, and being a mixup tool with boost. | |||
}} | |||
}} | |||
| | |||
| | |||
| | |||
| | |||
{ | |||
{ | |||
| | |||
| | |||
| | |||
( | |||
| | |||
| | |||
{ | |||
{ | |||
| | |||
| | |||
| | |||
| | |||
= | |||
| | |||
| | |||
=== | ===== <span class="invisible-header">Nanto Gekisei Kakubu</span> ===== | ||
{{MoveData | |||
|image=Rei-Gekisei.png | |||
|name=Nanto Gekisei Kakubu | |||
|linkname=623P | |||
|subtitle=623A/C (Air OK) | |||
|caption= | |||
|data= | |||
{{AttackData-HNK | |||
|version=Ground 623A | |||
|Damage= | |||
|Guard=Mid | |||
|Startup=8 | |||
|Active=14 | |||
|Recovery= | |||
|Hit Adv=Launch | |||
|Block Adv= | |||
|description= | |||
* Cancels into air special moves. | |||
* No invincibility. | |||
}} | |||
{{AttackData-HNK | |||
|version=Ground 623C | |||
|Damage= | |||
|Guard=Mid | |||
|Startup=5 | |||
|Active=22 | |||
|Recovery= | |||
|Hit Adv=Launch | |||
|Block Adv= | |||
|description= | |||
* Rei's invincible reversal. | |||
Often used in basket combos. | |||
}} | |||
{{AttackData-HNK | |||
|version=Air 623A | |||
|Damage= | |||
|Guard=Mid | |||
|Startup=8 | |||
|Active=14 | |||
|Recovery= | |||
|Hit Adv=Launch | |||
|Block Adv= | |||
|description= | |||
Not commonly used. | |||
}} | |||
{{AttackData-HNK | |||
|version=Air 623C | |||
|Damage= | |||
|Guard=Mid | |||
|Startup=9 | |||
|Active=25 | |||
|Recovery= | |||
|Hit Adv=Launch | |||
|Block Adv= | |||
|description= | |||
* Has some invincibility. | |||
Mainly used as a reaction to the universal guard cancel while still in the air. | |||
}} | |||
}} | |||
=== | ===== <span class="invisible-header">Nanto Jinshu Suizan</span> ===== | ||
{{MoveData | |||
|image=Rei-Jinshu.png | |||
|name=Nanto Jinshu Suizan | |||
|linkname=j.236D/j.214D | |||
|subtitle=j.236D/j.214D | |||
|caption= | |||
|data= | |||
{{AttackData-HNK | |||
|Damage= | |||
|Guard=High | |||
|Startup=15 | |||
|Active=Until landing | |||
|Recovery= | |||
|Hit Adv=Launch | |||
|Block Adv= | |||
|description= | |||
Used as combo filler and an overhead option. Is airdash cancelable if at jump height. Wall bouncess on counter hit. | |||
}} | |||
}} | |||
===Rei=== | ===== <span class="invisible-header">Nanto Kyoukaku Shoubu</span> ===== | ||
{{MoveData | |||
|image=Rei-Kyoukaku.png | |||
|name=Nanto Kyoukaku Shoubu | |||
|linkname=j.214C | |||
|subtitle=j.214C | |||
|caption= | |||
|data= | |||
{{AttackData-HNK | |||
|Damage= | |||
|Guard=Mid | |||
|Startup=26 | |||
|Active=Until landing | |||
|Recovery= | |||
|Hit Adv= | |||
|Block Adv= | |||
|description= | |||
Rei creates a shield around himself with a hitbox that disappears when Rei lands on the ground, it hits, or is blocked. It eats some projectiles such as Souther's 623A. | |||
}} | |||
}} | |||
=== | ===== <span class="invisible-header">Nanto Kakuyokujinzan</span> ===== | ||
{{MoveData | |||
|image=Rei-Kakuyokujinzan.png | |||
|name=Nanto Kakuyokujinzan | |||
|linkname=j.236C | |||
|subtitle=j.236C | |||
|caption= | |||
|data= | |||
{{AttackData-HNK | |||
|Damage= | |||
|Guard=Mid | |||
|Startup=19 | |||
|Active=20 | |||
|Recovery= | |||
|Hit Adv=Launch | |||
|Block Adv= | |||
|description= | |||
* Jump cancelable. | |||
* Wallbounces on counter hit. | |||
A rushing mid attack done in the air that knocks up on normal hit and wallbounce on counter hit. Integral in all of Rei's combos by airdash canceling or jump canceling with a button and itself. | |||
}} | |||
}} | |||
=== | ===== <span class="invisible-header">Nanto Koharyu</span> ===== | ||
{{MoveData | |||
|image=Rei-Koharyu.png | |||
|name=Nanto Koharyu | |||
|linkname=214C214C | |||
|subtitle=214C~214C | |||
|caption= | |||
|data= | |||
{{AttackData-HNK | |||
|version=214C | |||
|Damage= | |||
|Guard=Mid | |||
|Startup=20 | |||
|Active=12 | |||
|Recovery= | |||
|Hit Adv= | |||
|Block Adv=-9 | |||
|description= | |||
}} | |||
{{AttackData-HNK | |||
|version=214C~214C | |||
|Damage= | |||
|Guard=Mid | |||
|Startup=12 | |||
|Active=5 | |||
|Recovery= | |||
|Hit Adv=Grave Launch | |||
|Block Adv=-11 | |||
|description= | |||
A two part move mainly used to beat guard cancels. 1st portion of the move has armor. 2nd input launches the opponent in a grave shoot state. | |||
}} | |||
}} | |||
=== | ==Super Moves== | ||
===== <span class="invisible-header">Nanto Seiki Mouha</span> ===== | |||
{{MoveData | |||
|image=Rei-Seiki.png | |||
|name=Nanto Seiki Mouha | |||
|linkname=236236A | |||
|subtitle=236236A | |||
|caption= | |||
|data= | |||
{{AttackData-HNK | |||
|Damage= | |||
|Guard=Mid | |||
|Startup=38 | |||
|Active=27 | |||
|Recovery= | |||
|Hit Adv=Launch | |||
|Block Adv= | |||
|description= | |||
* Uses 1 bar of Aura. | |||
Reversal super with some invulnerability, great damage, and good hykuretsu combo potential. Attacks in the super can also beat projectiles. | |||
}} | |||
}} | |||
=== | ===== <span class="invisible-header">Danko Sousaiken</span> ===== | ||
{{MoveData | |||
|image=Rei-Danko.png | |||
|name=Danko Sousaiken | |||
|linkname=236236C | |||
|subtitle=236236C | |||
|caption= | |||
|data= | |||
{{AttackData-HNK | |||
|Damage= | |||
|Guard=Mid | |||
|Startup=30-143 | |||
|Active=50-200 | |||
|Recovery= | |||
|Hit Adv= | |||
|Block Adv= | |||
|description= | |||
* Uses 1 bar of Aura. | |||
Rei charges up the attack with one hit of armor, flies up with invincibility, and then throws 3 projectiles that bounce around the screen. Charging the super increased the damage and the duration of the projectiles on the screen. | |||
}} | |||
}} | |||
=== | ===== <span class="invisible-header">Kubuenrizan</span> ===== | ||
{{MoveData | |||
|image=Rei-Kubuenrizan.png | |||
|name=Kubuenrizan | |||
|linkname=j.2363214D | |||
|subtitle=j.2363214D | |||
|caption= | |||
|data= | |||
{{AttackData-HNK | |||
|Damage= | |||
|Guard=Mid | |||
|Startup=37 | |||
|Active=4-24 | |||
|Recovery= | |||
|Hit Adv=Launch | |||
|Block Adv= | |||
|description= | |||
* Uses 1 bar of Aura. | |||
A super mainly used to take as many stars as possible after A+C or 214C 214C at the end of a round. Has a little bit of invul that can go through guard cacncele but it isn't generally used in this manner. | |||
}} | |||
}} | |||
==Fatal KO== | |||
===== <span class="invisible-header">Hishou Hakurei</span> ===== | |||
{{MoveData | |||
|image=Rei-FKO.png | |||
|name=Hishou Hakurei | |||
|linkname=236CD | |||
|subtitle=236CD | |||
|caption= | |||
|data= | |||
{{AttackData-HNK | |||
|Damage=FATAL KO | |||
|Guard=Mid | |||
|Startup=13 | |||
|Active=30 | |||
|Recovery= | |||
|Hit Adv=Launch | |||
|Block Adv= | |||
|description= | |||
* Requires the opponent to have 0 stars. | |||
* Cannot hit OTG. | |||
If used too late outside of a banishing strike combo the gravity may be too severe for the 2nd hit too connect. | |||
}} | |||
}} | |||
{{Navbox-HNK}} | {{Navbox-HNK}} | ||
[[Category:Hokuto no Ken]] | [[Category:Hokuto no Ken]] | ||
Latest revision as of 16:50, 3 November 2021
Introduction
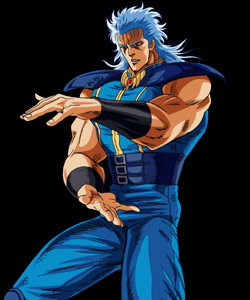
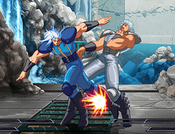
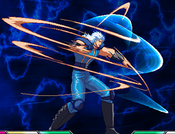
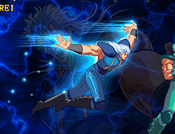
Rei is a speedy, movement-based character, having access to a wide array of air moves and the ability to triple jump. He has very powerful normals, many being jump-cancelable, which allow him to keep up the pressure without the use of gauge. He has a strong defense as well, with a great uppercut reversal move as well as his Danko super, which essentially works to deny the opponent the chance to do a wakeup mixup on you. His star-taking ability is quite good, but he also has very practical 100% combos. While using Rei to his full potential requires a great deal of player skill and ad lib, he is also the perfect beginner character, with an easy to understand offense as well as relatively simple and damaging combos.
That being said, let us start this section off by listing Rei's main strengths and weaknesses.
| Pros | Cons |
|
|
Before diving right into the combos be sure to familiarize yourself with Rei's special/super moves and important normals.
Normal Moves
Close
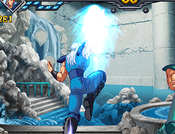
cl.A
| Damage | Guard | Startup | Active | Recovery | Hit Adv | Block Adv | |||||
|---|---|---|---|---|---|---|---|---|---|---|---|
| - | Mid | 5 | 3 | - | - | +2 | |||||
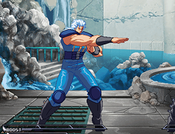
Tied for one of Rei's fastest buttons. It is mainly used as used as an anti air against low airdashes and combo filler in midscreen combo routes. | |||||||||||
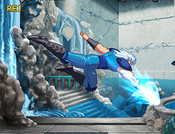
cl.B
| Damage | Guard | Startup | Active | Recovery | Hit Adv | Block Adv | |||||
|---|---|---|---|---|---|---|---|---|---|---|---|
| - | Mid | 8 | 4 | - | - | +3 | |||||
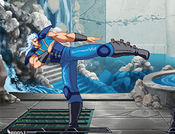
Low kick that is a mid. Not much usage from this button due to it's lack of hitstun. | |||||||||||
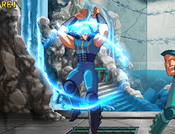
cl.C
| Damage | Guard | Startup | Active | Recovery | Hit Adv | Block Adv | |||||
|---|---|---|---|---|---|---|---|---|---|---|---|
| - | Mid | 7 | 6 | - | Launch | -3 | |||||
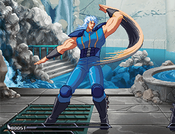
Excellent anti air. Whiffs on crouching characters. | |||||||||||
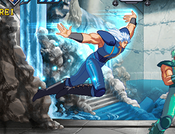
cl.D
| Damage | Guard | Startup | Active | Recovery | Hit Adv | Block Adv | |||||
|---|---|---|---|---|---|---|---|---|---|---|---|
| - | Mid | 9 | 4 | - | - | -3 | |||||
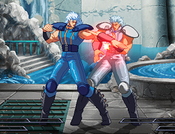
Excellent button for pressure with a lot of blockstun. Can go into instant airdash or 2D. Combos into banishing attack except on crouching Jagi where you would use 2D. Also combos into IAD j.B. | |||||||||||
Far
f.A
| Damage | Guard | Startup | Active | Recovery | Hit Adv | Block Adv | |||||
|---|---|---|---|---|---|---|---|---|---|---|---|
| - | Mid | 5 | 3 | - | - | +4 | |||||
The other 5F normal. Same usage as close A but is smaller vertically. Whiffs on Mamiya, Rei, Shin, and Jagi crouch blocking. Whiffs on Souther and Toki neutral crouching. | |||||||||||
f.B
| Damage | Guard | Startup | Active | Recovery | Hit Adv | Block Adv | |||||
|---|---|---|---|---|---|---|---|---|---|---|---|
| - | Mid | 7 | 4 | - | - | +4 | |||||
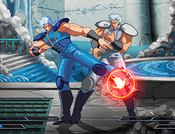
Excellent midrange poke. Confirms into 2D except on crouching Jagi. | |||||||||||
f.C
| Damage | Guard | Startup | Active | Recovery | Hit Adv | Block Adv | |||||
|---|---|---|---|---|---|---|---|---|---|---|---|
| - | Mid | 12 | 4 | - | - | -2 | |||||
Not really used as a poke. Mainly combo filler. | |||||||||||
f.D
| Damage | Guard | Startup | Active | Recovery | Hit Adv | Block Adv | |||||
|---|---|---|---|---|---|---|---|---|---|---|---|
| - | Mid | 14 | 3 | - | - | 0 | |||||
|
Low invulnerable button. Can confirm into banishing strike by kara canceling 2D into CD as 2D~2C. Also confirms into Grave Shoot. Surprisingly not jump cancelable. | |||||||||||
Crouching
2A
| Damage | Guard | Startup | Active | Recovery | Hit Adv | Block Adv | |||||
|---|---|---|---|---|---|---|---|---|---|---|---|
| - | Mid | 6 | 3 | - | - | +1 | |||||
Faster crouching normal. | |||||||||||
2B
| Damage | Guard | Startup | Active | Recovery | Hit Adv | Block Adv | |||||
|---|---|---|---|---|---|---|---|---|---|---|---|
| - | Low | 7 | 3 | - | - | +6 | |||||
A good low that is jump cancelable and plus. Confirms into 5D and 2D. 2B 2D doesn't work on crouching Jagi. | |||||||||||
2C
| Damage | Guard | Startup | Active | Recovery | Hit Adv | Block Adv | |||||
|---|---|---|---|---|---|---|---|---|---|---|---|
| - | Mid | 12 | 4 | - | - | -2 | |||||
Combo filler. | |||||||||||
2D
| Damage | Guard | Startup | Active | Recovery | Hit Adv | Block Adv | |||||
|---|---|---|---|---|---|---|---|---|---|---|---|
| - | Low | 14 | 5 | - | Launch | -5 | |||||
Rei's furthest reaching low. | |||||||||||
Air
j.A
| Damage | Guard | Startup | Active | Recovery | Hit Adv | Block Adv | |||||
|---|---|---|---|---|---|---|---|---|---|---|---|
| - | High | 4 | 16 | - | - | - | |||||
|
Rei's Fastest air normal. Good as an air to air. | |||||||||||
j.B
| Damage | Guard | Startup | Active | Recovery | Hit Adv | Block Adv | |||||
|---|---|---|---|---|---|---|---|---|---|---|---|
| - | High | 5 | 20 | - | - | - | |||||
|
A very active air normal that is great for air to airs and the fastest button that will hit a crouching character from an instant air dash. | |||||||||||
j.C
| Damage | Guard | Startup | Active | Recovery | Hit Adv | Block Adv | |||||
|---|---|---|---|---|---|---|---|---|---|---|---|
| - | High | 9 | 6 | - | Launch | - | |||||
|
Hits above Rei. Mainly used to hitconfirm from 2D. | |||||||||||
j.D
| Damage | Guard | Startup | Active | Recovery | Hit Adv | Block Adv | |||||
|---|---|---|---|---|---|---|---|---|---|---|---|
| - | High | 11 | 5 | - | - | - | |||||
|
Air to ground button that has a lot of blockstun and hitstun. | |||||||||||
Command Normals
6A
| Damage | Guard | Startup | Active | Recovery | Hit Adv | Block Adv | |||||
|---|---|---|---|---|---|---|---|---|---|---|---|
| - | High | 24 | 4 | - | - | -4 | |||||
|
No real reason to use this but it's there if you want to. | |||||||||||
Universal Mechanics
Throw
| Damage | Guard | Startup | Active | Recovery | Hit Adv | Block Adv | |||||
|---|---|---|---|---|---|---|---|---|---|---|---|
| - | Throw | 4 | - | - | - | - | |||||
| |||||||||||
BD Throw
| Damage | Guard | Startup | Active | Recovery | Hit Adv | Block Adv | |||||
|---|---|---|---|---|---|---|---|---|---|---|---|
| - | Throw (whiffs vs. crouch) | 9 | 4 | - | - | - | |||||
| |||||||||||
Grave Shoot
| Damage | Guard | Startup | Active | Recovery | Hit Adv | Block Adv | |||||
|---|---|---|---|---|---|---|---|---|---|---|---|
| - | Mid | 16 | 7 | - | Grave Launch | -4 | |||||
|
Good hitbox that also reflects projectiles. Also moves slightly forward. | |||||||||||
Heavy Strike
| Damage | Guard | Startup | Active | Recovery | Hit Adv | Block Adv | |||||
|---|---|---|---|---|---|---|---|---|---|---|---|
| - | Unblockable | 41 | 4 | - | - | - | |||||
|
Pretty standard heavy attack unblockable. | |||||||||||
Banishing Strike
| Version | Damage | Guard | Startup | Active | Recovery | Hit Adv | Block Adv |
|---|---|---|---|---|---|---|---|
| Uncharged | - | Mid | 18-33 | 4 | - | Banish Launch | -8 |
| Version | Damage | Guard | Startup | Active | Recovery | Hit Adv | Block Adv |
| Charged | - | Mid | 34-38 | 4 | - | Banish Launch | -8 |
Special Moves
Hien Ryubu
| Version | Damage | Guard | Startup | Active | Recovery | Hit Adv | Block Adv | |||||
|---|---|---|---|---|---|---|---|---|---|---|---|---|
| j.236A | - | All | 11 | Until ground, 25 (after reflection) | - | - | - | |||||
| Version | Damage | Guard | Startup | Active | Recovery | Hit Adv | Block Adv | |||||
| j.236B | - | All | 11 | Until ground, 90 (after reflection) | - | - | - | |||||
Excellent air to ground projecctile with utility in: stalling in the air to mess up anti air timing, having an active projectile to follow behind in order force a response from the opponentand start pressure, and being a mixup tool with boost. | ||||||||||||
Nanto Gekisei Kakubu
| Version | Damage | Guard | Startup | Active | Recovery | Hit Adv | Block Adv | |||||
|---|---|---|---|---|---|---|---|---|---|---|---|---|
| Ground 623A | - | Mid | 8 | 14 | - | Launch | - | |||||
| ||||||||||||
| Version | Damage | Guard | Startup | Active | Recovery | Hit Adv | Block Adv | |||||
| Ground 623C | - | Mid | 5 | 22 | - | Launch | - | |||||
Often used in basket combos. | ||||||||||||
| Version | Damage | Guard | Startup | Active | Recovery | Hit Adv | Block Adv | |||||
| Air 623A | - | Mid | 8 | 14 | - | Launch | - | |||||
|
Not commonly used. | ||||||||||||
| Version | Damage | Guard | Startup | Active | Recovery | Hit Adv | Block Adv | |||||
| Air 623C | - | Mid | 9 | 25 | - | Launch | - | |||||
Mainly used as a reaction to the universal guard cancel while still in the air. | ||||||||||||
Nanto Jinshu Suizan
| Damage | Guard | Startup | Active | Recovery | Hit Adv | Block Adv | |||||
|---|---|---|---|---|---|---|---|---|---|---|---|
| - | High | 15 | Until landing | - | Launch | - | |||||
|
Used as combo filler and an overhead option. Is airdash cancelable if at jump height. Wall bouncess on counter hit. | |||||||||||
Nanto Kyoukaku Shoubu
| Damage | Guard | Startup | Active | Recovery | Hit Adv | Block Adv | |||||
|---|---|---|---|---|---|---|---|---|---|---|---|
| - | Mid | 26 | Until landing | - | - | - | |||||
|
Rei creates a shield around himself with a hitbox that disappears when Rei lands on the ground, it hits, or is blocked. It eats some projectiles such as Souther's 623A. | |||||||||||
Nanto Kakuyokujinzan
| Damage | Guard | Startup | Active | Recovery | Hit Adv | Block Adv | |||||
|---|---|---|---|---|---|---|---|---|---|---|---|
| - | Mid | 19 | 20 | - | Launch | - | |||||
A rushing mid attack done in the air that knocks up on normal hit and wallbounce on counter hit. Integral in all of Rei's combos by airdash canceling or jump canceling with a button and itself. | |||||||||||
Nanto Koharyu
| Version | Damage | Guard | Startup | Active | Recovery | Hit Adv | Block Adv | |||||
|---|---|---|---|---|---|---|---|---|---|---|---|---|
| 214C | - | Mid | 20 | 12 | - | - | -9 | |||||
| Version | Damage | Guard | Startup | Active | Recovery | Hit Adv | Block Adv | |||||
| 214C~214C | - | Mid | 12 | 5 | - | Grave Launch | -11 | |||||
|
A two part move mainly used to beat guard cancels. 1st portion of the move has armor. 2nd input launches the opponent in a grave shoot state. | ||||||||||||
Super Moves
Nanto Seiki Mouha
| Damage | Guard | Startup | Active | Recovery | Hit Adv | Block Adv | |||||
|---|---|---|---|---|---|---|---|---|---|---|---|
| - | Mid | 38 | 27 | - | Launch | - | |||||
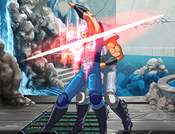
Reversal super with some invulnerability, great damage, and good hykuretsu combo potential. Attacks in the super can also beat projectiles. | |||||||||||
Danko Sousaiken
| Damage | Guard | Startup | Active | Recovery | Hit Adv | Block Adv | |||||
|---|---|---|---|---|---|---|---|---|---|---|---|
| - | Mid | 30-143 | 50-200 | - | - | - | |||||
Rei charges up the attack with one hit of armor, flies up with invincibility, and then throws 3 projectiles that bounce around the screen. Charging the super increased the damage and the duration of the projectiles on the screen. | |||||||||||
Kubuenrizan
| Damage | Guard | Startup | Active | Recovery | Hit Adv | Block Adv | |||||
|---|---|---|---|---|---|---|---|---|---|---|---|
| - | Mid | 37 | 4-24 | - | Launch | - | |||||
A super mainly used to take as many stars as possible after A+C or 214C 214C at the end of a round. Has a little bit of invul that can go through guard cacncele but it isn't generally used in this manner. | |||||||||||
Fatal KO
Hishou Hakurei
| Damage | Guard | Startup | Active | Recovery | Hit Adv | Block Adv | |||||
|---|---|---|---|---|---|---|---|---|---|---|---|
| FATAL KO | Mid | 13 | 30 | - | Launch | - | |||||
If used too late outside of a banishing strike combo the gravity may be too severe for the 2nd hit too connect. | |||||||||||
