Leot buddy (talk | contribs) No edit summary |
Leot buddy (talk | contribs) m (→The Characters) |
||
| Line 140: | Line 140: | ||
rect 64 0 128 64 [[Liu Feilin (FHD)|Liu Feilin]] | rect 64 0 128 64 [[Liu Feilin (FHD)|Liu Feilin]] | ||
rect 128 0 192 64 [[Ryoko Kano (FHD)|Ryoko Kano]] | rect 128 0 192 64 [[Ryoko Kano (FHD)|Ryoko Kano]] | ||
rect 192 0 256 64 [[Ox (FHD)|Ox!?]] | |||
rect 256 0 320 64 [[Matlok Jade (FHD)|Matlok Jade]] | rect 256 0 320 64 [[Matlok Jade (FHD)|Matlok Jade]] | ||
rect 320 0 384 64 [[Samchay Tomyamgun (FHD)|Samchay Tomyamgun]] | rect 320 0 384 64 [[Samchay Tomyamgun (FHD)|Samchay Tomyamgun]] | ||
| Line 164: | Line 165: | ||
* [[Image:80%.gif]] [[Clown (FHD)|Clown]] | * [[Image:80%.gif]] [[Clown (FHD)|Clown]] | ||
* [[Image:80%.gif]] [[Jean Pierre (FHD)|Jean Pierre]] | * [[Image:80%.gif]] [[Jean Pierre (FHD)|Jean Pierre]] | ||
* [[Image:40%.gif]] [[Karnov (FHD)|Karnov]] | * [[Image:40%.gif]] [[Karnov (FHD)|Karnov]] | ||
* [[Image:40%.gif]] [[Lee Diendo (FHD)|Lee Diendo]] | * [[Image:40%.gif]] [[Lee Diendo (FHD)|Lee Diendo]] | ||
* [[Image:20%.gif]] [[Liu Feilin (FHD)|Liu Feilin]] | * [[Image:20%.gif]] [[Liu Feilin (FHD)|Liu Feilin]] | ||
* [[Image:80%.gif]] [[Liu Yungmie (FHD)|Liu Yungmie]] | * [[Image:80%.gif]] [[Liu Yungmie (FHD)|Liu Yungmie]] | ||
* [[Image:20%.gif]] [[Makoto Mizoguchi (FHD)|Makoto Mizoguchi]] | |||
* [[Image:80%.gif]] [[Marstorius (FHD)|Marstorius]] | * [[Image:80%.gif]] [[Marstorius (FHD)|Marstorius]] | ||
* [[Image:50%.gif]] [[Matlok Jade (FHD)|Matlok Jade]] | * [[Image:50%.gif]] [[Matlok Jade (FHD)|Matlok Jade]] | ||
* [[Image:20%.gif]] [[ | * [[Image:20%.gif]] [[Ox (FHD)|Ox]] | ||
* [[Image:80%.gif]] [[Ray McDougal (FHD)|Ray McDougal]] | * [[Image:80%.gif]] [[Ray McDougal (FHD)|Ray McDougal]] | ||
* [[Image:100%.gif]] [[Ryoko Kano (FHD)|Ryoko Kano]] | |||
* [[Image:80%.gif]] [[Samchay Tomyamgun (FHD)|Samchay Tomyamgun]] | * [[Image:80%.gif]] [[Samchay Tomyamgun (FHD)|Samchay Tomyamgun]] | ||
* [[Image:40%.gif]] [[Zazie Muhaba (FHD)|Zazie Muhaba]] | * [[Image:40%.gif]] [[Zazie Muhaba (FHD)|Zazie Muhaba]] | ||
Revision as of 07:42, 20 June 2020
 |
 |
Introduction

Fighter's History Dynamite (also known as Karnov's Revenge) is a fighting game created by the now-defunct company Data East and released in March 1994. It is the second in the Fighter's History series (and the last that hit arcades), which famously drew the legal wrath of Capcom during the mid-90s. While the original Fighter's History was nothing special outside of its ripoff character designs and hilariously misquoted voices, Fighter's History Dynamite added two new characters and two playable bosses, as well as a complete re-tweaking of the engine to make it more combo-friendly. Although the game never achieved mainstream success, it maintains a bit of a cult following to this day.
Game versions
- Arcade (MVS)
- Neo Geo (AES)
- Neo Geo CD
- Sega Saturn
- PS4,XBO,NS (via Arcade Archives)
Notation
Joystick Notation
Single inputs
 - Forward
 - Backward
 - Up
- Up - Down
Quarter circle motions
 - Quarter circle forward
 - Quarter circle back
 - Quarter circle back-to-down
Half circle motions
 - Half circle forward
 - Half circle back
 - Upper half circle forward
 - Upper half circle backward
Uniqe motions
 - Pseudo "Dragon Punch"
- - Double tap forward
- And some character exclusive ones...
Button Layout
Being on the NeoGeo, this game only has 4 buttons, but doesn't follow traditional SNK fighting game layout.
 - LP - Light Punch
 - HP - Hard Punch
 - LK - Light Kick
 - HK - Hard Kick
Game Mechanics
Basic Mechanics
Back Step
Tap ![]()
![]() to perform a fairly quick hop backwards to retreat.
to perform a fairly quick hop backwards to retreat.
Throws
Throws are performed pressing ![]() /
/![]() +
+ ![]() (some characters also have additional throws with
(some characters also have additional throws with ![]() or
or ![]() /
/![]() ). Regular throws can not be softened or escaped in any way. As in the old SF2's, throws can be performed on reversal frame on wakeup if the opponent is close enough. Throwboxes in this game are all the same for all characters and they are ridiculously big. They're even extends to the characters' backs and this allows to do throws from your spine (actually CPUs in this game using it constantly).
). Regular throws can not be softened or escaped in any way. As in the old SF2's, throws can be performed on reversal frame on wakeup if the opponent is close enough. Throwboxes in this game are all the same for all characters and they are ridiculously big. They're even extends to the characters' backs and this allows to do throws from your spine (actually CPUs in this game using it constantly).
Clown and Samchay have "hold" throws in which you can do more damage during the grab by mashing the joystick/buttons. The opponent can also counter-mash and break out faster. Clown can do over 25% damage with enough mashing, giving him the best normal throw in the game.
Ray, Jean, and Ryoko have air throws. Air throws do slightly more damage than regular throws, but generally aren't seen too often in play. Unlike normal ground throws, aerial ones have different throwboxes and so different ranges.
Marstorius and Ryoko have command throws. Some can be done with ![]() /
/![]() and some can be done with
and some can be done with ![]() /
/![]() . The last one looks odd at first glance, but it's doable. Unlike regular throws, special throws can actually be can be comboed out of regular attack if you're in range. Special throws have no whiff animation - if you buffer into a special throw off a blocked normal attack, you will instantly interrupt the animation of the previous normal attack with another normal attack (the button you just hit). You can continually repeat this as long as your attacks are in range, creating a blocked hit string to keep the pressure on the opponent. For this reason it's usually best to stick to performing Marstorius' and Ryoko's special throws with Light Punch, so you don't cancel into a Hard Punch that might whiff and put you in danger.
. The last one looks odd at first glance, but it's doable. Unlike regular throws, special throws can actually be can be comboed out of regular attack if you're in range. Special throws have no whiff animation - if you buffer into a special throw off a blocked normal attack, you will instantly interrupt the animation of the previous normal attack with another normal attack (the button you just hit). You can continually repeat this as long as your attacks are in range, creating a blocked hit string to keep the pressure on the opponent. For this reason it's usually best to stick to performing Marstorius' and Ryoko's special throws with Light Punch, so you don't cancel into a Hard Punch that might whiff and put you in danger.
Dizzies
Dizzies work differently from most other games. Each character has a unique piece of clothing on their body, which is damaged when hit, indicated by the object flashing. Once the object takes three hits it will fall off and the character will become dizzy. You can only lose the item once per round, so there's no fear of multiple dizzies or redizzies. Clothing is positioned in different places depending on the character, so some characters (depending on their attacks) will have an easier time dizzying certain other characters.
After a character has been dizzied, any further attacks to that character's weak spot will deal 1.5x damage for the rest of the round. Doing a simple combo on a dizzied opponent consisting of attacks that hit their weak spot can result in huge damage.
Each character's weak point will be listed in their individual section.
Charge Motion Tricks
Charge time for the majority of charge-based special moves are very short - roughly two-thirds of a second. Some moves require double the charge time, however. They are:
- Ray's Thunder Dynamite Tackle
- Marstorius' Dash Lariat
- Marstorius' Kneel Kick
- Jean's Rondato
"Charge buffering" exists in this game too. Instead of doing a move as just charge Back, Forward + button, you can instead do it as charge Back, Forward, Back + button. This allows you to immediately start charging immediately after the move is performed. You can also substitute the last press of Back with Down-Back as well. You can even charge immediately after a flash-kick type move by going Down, Up, Down + button, but you have to be fast!
The input system shows some leniency for the last motion of charge moves - Back, Forward + button moves can be finished with Down-Forward or Up-Forward, and Up, Down + button moves can be finished with Up-Back or Up-Forward. Since you can also charge by holding Down-Back, this makes some charge moves even easier to do - you can perform the ones that require a Back charge by simply starting the charge in Down-Back, and then slide the joystick to Down-Forward and hit the button.
Hidden Moves
A popular misconception is that there are super moves in the game, which is not true. Some characters DO have secret moves which can be performed at any time, but they're only considered secret in the sense that they did not show up on movelists distributed with the game and CPUs doesn't use them. The secret moves tend to have input motions that aren't as "obvious" to discover as other moves.
Advanced Mechanics
Fuzzy Guard
After blocking an attack, you're automatically able to block every following attack automatically as long as you're still in the original blockstun. So you can hold Back to block a jumping attack, and if they do any low attacks afterward you can automatically block them even if you remain in high block. Once blockstun has ended, you must then block the next move in the correct direction.
Stand/Crouch Shifting
When in either blockstun or hitstun, it's possible to switch from a standing to crouching position (and vice versa) between hits of your opponent's combo or block string. You might think it would be better to always go into crouching position once you are being hit, as going into crouch could make some high attacks whiff. But there is a very important additional factor in play in this game - when you go into a crouching position, it changes the hitbox for your weak spot too. Attacks that might not have hit your weak spot when you were standing could very well register when you're crouching instead!
Example - if Ray does his Thunder Dynamite Tackle against a crouching Karnov, three hits will register on his weak point and dizzy him instantly! But, if Karnov remains standing, none of the hits will connect against his weak point and he will not be dizzied. It's very important to learn how your character's hitbox changes in crouch - don't assume it's always a good idea to hold Down-Back once a combo starts!
Damage Scaling
All characters in this game have the same 120 health points. There is no damage bonus for counter hits, only the 1.5x modifier when a character's exposed weak point is hit. While damage is usually consistent throughout the round, there is one notable exception - when a character is down to a little less than 25% health (not the same time the music speeds up, but a little after that), all damage from normal attacks is reduced by 50%. Damage from special moves and throws are unaffected. This makes it harder to kill with a chain combo that isn't cancelled into a special move near the end of the round. Unfortunately there's no visual clue to see when you're taking reduced damage from normal attacks.
Hitstun, Blockstun, Impact Freeze
| Impact freeze | Hit | Block | |
| Light attacks | 13 | 12 | 13 |
| Hard attacks | 21 | 16 | |
| Special moves |
Strategy
Combos
A very loose ground combo system is in place. Every character has at least one light attack that can be chained into itself or other light attacks, or you can chain into a hard attack. Most combos consist of an optional jumping attack followed by a couple light attacks, chained into a hard attack, buffered into a special move. Nearly every normal move is bufferable into special moves too, with the exception of some command normals (such as Samchay's f.HP or f.HK). There is no juggle system.
The Characters

| Ray | Feilin | Ryoko | Matlok | Samchay | Lee |
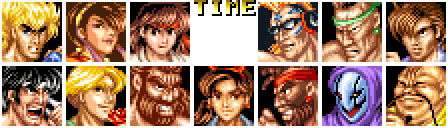
| Mizoguchi | Jean | Marstorius | Yungmie | Zazie | Clown | Karnov |
 Clown
Clown- Jean Pierre
 Karnov
- Lee Diendo
 Liu Feilin
- Liu Yungmie
- Makoto Mizoguchi
- Marstorius
 Matlok Jade
- Ox
- Ray McDougal
 Ryoko Kano
- Samchay Tomyamgun
- Zazie Muhaba
Tier list
A universally-agreed upon tier list for this game is impossible to come up with, since it seems as if every player has differing opinions on where the characters fall in the tiers.
Here's one example:
| Top | Ray, Lee, Zazie, Karnov |
| Upper-Mid | Jean |
| Mid | Mizoguchi, Samchay, Yungmie |
| Lower-Mid | Matlok, Clown, Feilin |
| Low | Marstorius, Ryoko |
The placement of Marstorius in the tiers is one that there are rarely agreements on - some think he could be as high as Upper-Mid, others think he's much lower (one Japanese tier listing had him ranked as dead last). He has some very tough matchups and it can be hard for him to get in on characters with projectiles, but once he gets in he has a nasty mixup game that can easily win him the round. So he's a bit of a wildcard since a lot of his matches can go either way.
Don't treat any tier list as gospel, as practically every character has something going for them and can be competitive against most of the rest of the cast. This is also due in part to the game's dizzy system, since they can happen in an instant and turn the match around.
Here's some other examples:
2004 list
1. Ray
2. Zazie
3. Jean
4. Karnov
5. Lee
6. Samchay
7. Yungmie
8. Mizoguchi
9. Feilin
10. Matlok
11. Marstorius
12. Clown
13. Ryoko
Source: https://game6.5ch.net/test/read.cgi/arc/1088152300/
Matchups

2003 matchup chart
This one is really debatable but here it is:
| Ray | Lee | Zaz | Yun | Kar | Sam | Miz | Clo | Jea | Mat | Fei | Ox | Ryo | Mar | SCORE | |
| Ray | - | 5 | 5 | 5 | 6 | 6 | 6 | 6 | 6 | 6 | 6 | 8 | 7 | 9 | 81 (+16) |
| Lee | 5 | - | 5 | 5 | 6 | 6 | 6 | 6 | 6 | 6 | 6 | 7 | 6 | 4 | 74 (+9) |
| Zazie | 5 | 5 | - | 5 | 6 | 6 | 6 | 4 | 6 | 6 | 5 | 7 | 6 | 4 | 71 (+6) |
| Yungmie | 5 | 5 | 5 | - | 5 | 5 | 5 | 5 | 6 | 6 | 5 | 6 | 6 | 7 | 71 (+6) |
| Karnov | 4 | 4 | 4 | 5 | - | 5 | 6 | 6 | 5 | 5 | 6 | 6 | 7 | 6 | 69 (+4) |
| Samchay | 4 | 4 | 4 | 5 | 5 | - | 6 | 5 | 6 | 5 | 6 | 5 | 6 | 7 | 68 (+3) |
| Mizoguchi | 4 | 4 | 4 | 5 | 4 | 4 | - | 5 | 6 | 6 | 6 | 5 | 6 | 6 | 65 (0) |
| Clown | 4 | 4 | 6 | 5 | 4 | 5 | 5 | - | 5 | 5 | 4 | 4 | 6 | 8 | 65 (0) |
| Jean | 4 | 4 | 4 | 4 | 5 | 4 | 4 | 5 | - | 6 | 5 | 6 | 5 | 8 | 64 (-1) |
| Matlok | 4 | 4 | 4 | 4 | 5 | 5 | 4 | 5 | 4 | - | 6 | 5 | 6 | 7 | 63 (-2) |
| Feilin | 4 | 4 | 5 | 5 | 4 | 4 | 4 | 6 | 5 | 4 | - | 4 | 4 | 7 | 60 (-5) |
| Ox | 2 | 3 | 3 | 4 | 4 | 5 | 5 | 6 | 4 | 5 | 4 | - | 7 | 4 | 58 (-7) |
| Ryoko | 3 | 4 | 4 | 4 | 3 | 4 | 4 | 4 | 5 | 4 | 6 | 3 | - | 3 | 51 (-14) |
| Marstorius | 1 | 6 | 6 | 3 | 4 | 3 | 4 | 2 | 2 | 3 | 3 | 6 | 7 | - | 50 (-15) |
Source : FHD Maniax
Links
http://www.geocities.jp/konseimaoh_fhd/FHDlink.html
http://www.geocities.jp/pcbrgb/FHDindex.html
http://bossd.web.fc2.com/game/text-dynamite.html


