| Line 848: | Line 848: | ||
====Vs. T. Hawk | ====Vs. T. Hawk:==== | ||
====Vs. O. T. Hawk:==== | ====Vs. O. T. Hawk:==== | ||
Revision as of 19:07, 7 March 2019
Introduction
T. Hawk is a grappler character added in Super Street Fighter II: The New Challengers (SSF2), and returns in Super Street Fighter II Turbo. The differences from CPS-2 Zangief are that his special throw, the typhoon, does not have a whiff animation or a grab window; he was given a special anti-air move that is similar to the shotos' Shoryuken and an air dash attack like E. Honda's headbutt or Blanka's rolling attack. Also, his arsenal of normal moves is different from Zangief's, making both very different characters which are often weak where the other is strong. Say, Zangief has no dash-like special and his sweep is fast but does not reach very far; T. Hawk has a dash-like attack and his sweep is very slow, but with long reach. The most important difference in high-level play, however, is the lack of a whiff animation. While it is harder to do a tight tick into special throw with T. Hawk, they can be made safe with the use of negative-edge.
Old Hawk is the version from SSF2: he has no super nor he can soften throws. On the other hand, he has better normals across the board.
Picking Old T.Hawk
To select O.T.Hawk, choose T.Hawk and then press → → ← ← Jab/Fierce, pressing Short simultaneously with the punch button for the alternate color.
| Normal | Secondary |
 |

|
--Born2SPD
New & Old Versions Comparison
Here is the list of differences:
- Obvious stuff: O.T.Hawk can not tech throws and does not have a Super;
- O.T.Hawk has a slightly smaller and thinner body hitbox than N.T.Hawk, it's unknown if it has any relevance. N.T.Hawk's hitbox goes from his feet to his nose, O.T.Hawk's goes from the feet but only to his jaw. Also note that this affects most standing normals as well so it will not be listed on the normal moves differences list;
- O.T.Hawk has almost every normal with something better. Here is a list with differences worth mentioning:
- Crouching Jab has a much fatter and slightly longer hitbox;
- Far Standing Strong has the active hitbox a bit larger upwards and downwards;
- Crouching Strong does not has the stray hurtbox during the recovery frames;
- Close Standing Fierce does more damage on both hits;
- Far Standing Fierce has better priority and range by some pixels and does more damage;
- Crouching Fierce has the second active hitbox a lot taller than N.T.Hawk's version, but it has less horizontal range and does more damage on both hits but doesn't have to be crouch blocked;
- Close Standing Short has a bigger hitbox;
- Far Standing Short has a bigger hitbox downwards and can be special canceled;
- Far Standing Forward has a bigger active hitbox upwards;
- Crouching Forward has a larger hitbox, it has more priority and reach;
- Close Standing Roundhouse does more damage and has a fatter hitbox, it doesn't misses crouching Blanka and Cammy;
- Far Standing Roundhouse has less range and does more damage;
- Crouching Roundhouse is faster and does more damage;
- Both Jumping Strongs have much bigger hitbox;
- Neutral Jumping Fierce has a larger hitbox and does more damage;
- Diagonal Jumping Fierce has a much bigger hitbox on both active parts and does more damage;
- Neutral Jumping Short and Forward both have larger hitbox, exactly like Diagonal Jumping Short;
- Diagonal Jumping Short can be special canceled;
- Neutral Jumping Roundhouse has a bigger hitbox and does more damage;
- Diagonal Jumping Roundhouse has a bigger hitbox and does more damage;
- His aerial command normals are also different:
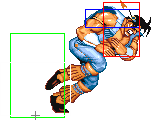
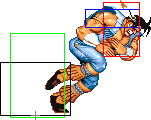
- O.T.Hawk's Elbow Drop has a fatter hitbox and hits lower;
- O.T.Hawk's Body Slam can crossup against all characters and does more damage;
- O.T.Hawk's Strong Tomahawk Buster second active part do more damage, Fierce version do less damage on the first active part and more damage on the second active part and both versions have better invincibility just like the Jab version;
O.T.Hawk is straight better. Why bother learning the complicated N.T.Hawk's tick into super setups if you'll not be able to land then enough because of the poor normals N.T.Hawk has? Most T.Hawk players usually learn both versions though.
--Born2SPD
Moves Analysis
Disclaimer: To better understand the diagrams, read this.
Normal Moves
Ground Normals
- Close/Far Standing Jab:
| Damage | 4[1] |  |
 |

|
| Stun | 0~5 | |||
| Stun Timer | 40 | |||
| Chain Cancel | No | |||
| Special Cancel | Yes | |||
| Frame Advantage | +5 | |||
| Frame Count | 3 | 4 | 4 | |
| Simplified | 1 + 3 | 4 | 4 | |
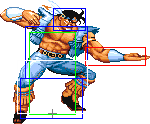
A short stab which is the same for any distance. It does low damage, but has good priority and recovery. It's a very important ticking move since it's indispensable for the sako tick technique, which is key to stand a chance with T.Hawk on high level play. It's also useful on hit-confirm combos: if the opponent is blocking the combo then go for a sako tick, else cancel it into Tomahawk Buster.
Even if you aren't good enough to Sako tick (it's one of the games' hardest techniques) or consistently safe jump, this move acts as an excellent safe meaty against most of the cast since it typically hits mid. Not many characters get one of these so use it to your advantage. Crouching jab (viewed below) can also act as a safe meaty but you get a few more pixels of length on the standing jab. -x64
- Crouching Jab:
| Damage | 4[1] |  |
 |
 |

|
| Stun | 0~5 | ||||
| Stun Timer | 40 | ||||
| Chain Cancel | Yes | ||||
| Special Cancel | Yes | ||||
| Frame Advantage | +5 | ||||
| Frame Count | 2 | 1 | 4 | 4 | |
| Simplified | 1 + 3 | 4 | 4 | ||
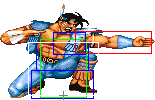
A low stab with chain cancel properties, so it can be used as a rapid fire move. It does the same low damage as the standing version and also has very good priority and recovery. This is T.Hawk's most important ticking move: you can do 1 or 2 jabs and then go for the Typhoon or you can do 1, 2 or 3 jabs and then a standing jab and go for a Typhoon, using the sako tick technique. Because it can be used as a rapid fire move and has very good horizontal priority, it can also be used to beat torpedo like moves like E.Honda's Headbutt or Blanka's Beast Rolls. N.T.Hawk's version of this move received some considerable nerfs: the hitbox was nerfed vertically by 7px (both upwards and downwards) and horizontally by 5px. The horizontal priority difference doesn't mean much, it just means that with N.T.Hawk this move has less range so you'll have to mash a little faster when using it as a rapid fire move. The vertical priority difference is a bigger loss, but that depends on the matchup. For example, N.T.Hawk's version doesn't hit shoto's Tatsumakis while they're spinning since the hitbox was nerfed a few pixels upwards. Also, it's not possible to beat Blanka's slide by mashing this move because the hitbox was also nerfed a few pixels downwards, missing the slide entirelly.
- Close Standing Strong: (Base max activation range: 48)
| Damage | 24[1] |  |
 |
 |

|
| Stun | 5~11 | ||||
| Stun Timer | 60 | ||||
| Chain Cancel | No | ||||
| Special Cancel | Yes / No | ||||
| Frame Advantage | +4 / +7 | ||||
| Frame Count | 3 | 3 | 6 | 5 | |
| Simplified | 1 + 3 | 9 | 5 | ||
A quick hook punch. The main purpose of this move is to serve as a close anti-air if the opponent is too high on the air, since a Tomahawk Buster may be beat or simply whiff on that kind of situation. For example, that move can prevent shotos from escaping the corner with aerial Tatsumakis, or can hit characters with floaty jumps out of the air, back to the corner, where you want them. This move can be considered good, since it does its job quite well on these very specific situations, but is by no means considered an universal anti-air, for most of your anti-air needs you're better with your Tomahawk Buster. The first active part has special cancel properties, so it can be used to combo into a Tomahawk Buster, but it doesn't has much range and also whiff's against crouching Blanka and Cammy, so this is not a suitable move for combos.
- Far Standing Strong:
| Damage | 24[1] | 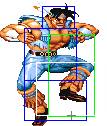 |
 |
 |

|
| Stun | 5~11 | ||||
| Stun Timer | 60 | ||||
| Chain Cancel | No | ||||
| Special Cancel | No | ||||
| Frame Advantage | +4 | ||||
| Frame Count | 3 | 2 | 7 | 7 | |
| Simplified | 1 + 5 | 7 | 7 | ||
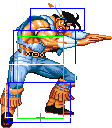
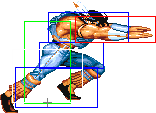
A two-handed stab. This move is a little underused but it has its value as a poke. It actually works well as an antecipation move against shoto's hadoukens, for example. Also note that N.T.Hawk's version has its hitbox nerfed vertically, upwards and downwards. Only the downward priority nerf is a real loss though, because of it this move whiffs against all crouching characters, while with O.T.Hawk it only whiffs against Blanka, Cammy, Dictator, Chun Li and Guile. With O.T.Hawk this also works well against Boxer's Ground Rushes, somewhat like Zangief's Standing Jab, with no rapid fire ability but with more damage potential and a little longer range.
- Crouching Strong:
| Damage | 24[1] |  |
 |

|
| Stun | 5~11 | |||
| Stun Timer | 60 | |||
| Chain Cancel | No | |||
| Special Cancel | No | |||
| Frame Advantage | +3 | |||
| Frame Count | 6 | 8 | 7 | |
| Simplified | 1 + 6 | 8 | 7 | |
T.Hawk brings out both hands. As can be seen, the hitbox only exists on one side. It works decently as an anti-air and can be used to beat random stuff like shoto's Tatsumakis or E.Honda's Headbutt, for example. From point-blank it works really well as a tick into Typhoon, since it will leave T.Hawk inside the Typhoon range, but outside most characters grab range. The only exceptions to this are Zangief and another T.Hawk(of course). The Typhoon attempt may miss against E.Honda though, but after a crossup this basically will not happen, leaving E.Honda with no option other than eating your Typhoon, since he won't have enough charge to escape. With N.T.Hawk this is also a excellent move to use as a tick into Super, since it stays active for a long time, so it's very confortable to buffer the 720 while the move is active. Due to a weird bug, with N.T.Hawk the move has a stray vulnerable hitbox during its recovery, which allows it to be punished from far away, basically nullifying any use this move could have as a poke.
- Close Standing Fierce: (Base max activation range: 40)
| Damage | 20[2] + 20[2] |  |
 |
 |
 |
|
| Stun | 1~7 + 1~7 | |||||
| Stun Timer | 70 + 70 | |||||
| Chain Cancel | No | |||||
| Special Cancel | No | |||||
| Frame Advantage | +1 / +7(+6) | |||||
| Frame Count | 4 | 4 | 6 | 6 | 9 | |
| Simplified | 1 + 8 | 6 | 6 | 9 | ||
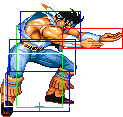
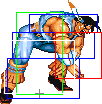
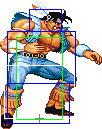
A two handed chop. The move comboes into itself, for decent damage if up close, but does mediocre dizzy for a Fierce move. Against certain characters it's simply impossible for the 2 hits to connect, depending if the opponent is standing or crouching, even if on point-blank. By the way this move is straight out prioritized by Crouching Fierce since that move can always hit twice as long that T.Hawk is close enough, does more damage and dizzy and with N.T.Hawk the second hit actually has to be blocked low. Anyway, for most punishment situations you are better suited by using a cancelable close attack into Tomahawk Buster, or simply using the Typhoon. With O.T.Hawk this move has a little more random damage potential, but the difference is basically unnoticeable. This move is seen most often on messed up walk in Typhoon attempts, from up close, which only shows how bad this move actually is.
- Far Standing Fierce:
| Damage | 30[2] |  |
 |
 |
 |
 |
|
| Stun | 10~16 | ||||||
| Stun Timer | 80 | ||||||
| Chain Cancel | No | ||||||
| Special Cancel | No | ||||||
| Frame Advantage | +1 | ||||||
| Frame Count | 5 | 5 | 8 | 4 | 4 | 5 | |
| Simplified | 1 + 10 | 8 | 13 | ||||
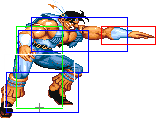
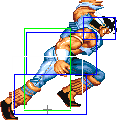
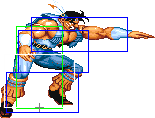
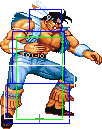
A far knife-hand strike. It has OK reach, but both start-up and recovery are long. Though not that long for a Fierce attack, the recovery is vulnerable to sweeps from mid and close range. O.T.Hawk's version is a bit better: does more damage and the size of the active hitbox is the same, but it's positioned some pixels forward, giving it better priority and range. It can hit certain characters even if they're crouching, so this can be used as a poke of sorts, if you know that the opponent is 1 heavy hit away from falling dizzy then this may actually work. The characters that can be hit from this move even while crouching are Boxer, Dee Jay, Dhalsim, O.Fei Long, Sagat, another T.Hawk and Zangief. If you're using O.T.Hawk then you're better suited by using Far Standing Roundhouse though, it's a little slower but has more range and misses against fewer crouching characters. This move is most seen on out of range or messed up walk in Typhoon attempts though.
- Crouching Fierce:
| Damage | 30[2] + 20[2] |  |
 |
 |
 |
 |

|
| Stun | 10~16 + 2~8 | ||||||
| Stun Timer | 80 + 90 | ||||||
| Chain Cancel | No | ||||||
| Special Cancel | No | ||||||
| Frame Advantage | -3 / +4(+3) | ||||||
| Frame Count | 4 | 4 | 6 | 8 | 3 | 7 | |
| Simplified | 1 + 8 | 6 | 8 | 10 | |||
A strong chop. Hits twice, has good reach and fine close-to-the-ground priority but is an overall slow normal. It can combo after an aerial cross up for a 3 hit combo, but the timing is quite strict. The first active part makes this move T.Hawk's best anti-air normal, it can beat most aerial attacks from the game as long that T.Hawk is right under the opponent. It also works well against certain cross up attempts like ambiguous Tatsumakis or just low priority normals like N.Cammy's Diagonal Jumping Short. The second active part can beat slides cleanly (with some luck) and can be decent on footsies but it is not quite reliable due to the start-up and recovery of the move and the previous active part that does not cover that area. Also, O.T.Hawk and N.T.Hawk have different hitboxes on the second part: O.T.Hawk's has less horizontal range but has more vertical range, leaving O.T.Hawk less vulnerable than N.T.Hawk to medium level normals while using this move. On the other hand, with N.T.Hawk the additional horizontal range makes it more reliable on beating slides and low normals in general, since it has good range and excellent priority. As a plus, with N.T.Hawk the second active part hits low against everyone but Boxer, while with O.T.Hawk it only hit as a low normal against Dee Jay, Dhalsim, Guile, another T.Hawk and Zangief only. If spaced far enough so that only the tip of hitbox touches the opponnents foot hurtbox but not his body hurtbox then it can be made as a low hitting normal as well against Boxer, Cammy, Chun Li, Claw, Dictator, E.Honda, Fei Long and Sagat. This also works with N.T.Hawk to make it hit low against Boxer. Depending on the mathcup, N.T.Hawk's version of this normal is actually better than O.T.Hawk's. O.T.Hawk does more random damage with this move, but this difference is basically unnoticeable.
- Close Standing Short: (Base max activation range: 40)
| Damage | 18[1] |  |
 |

|
| Stun | 0~5 | |||
| Stun Timer | 40 | |||
| Chain Cancel | No | |||
| Special Cancel | Yes | |||
| Frame Advantage | +5 | |||
| Frame Count | 3 | 4 | 4 | |
| Simplified | 1 + 3 | 4 | 4 | |
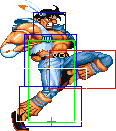
A short knee. OK as tick. The O.Hawk version will never whiff on grounded opponents while the N.Hawk version whiffs because of the nerfed range on the hitbox.
- Far Standing Short:
| Damage | 18[1] |  |
 |
 |

|
| Stun | 0~5 | ||||
| Stun Timer | 40 | ||||
| Chain Cancel | No | ||||
| Special Cancel | Yes* | ||||
| Frame Advantage | +4 | ||||
| Frame Count | 2 | 2 | 5 | 4 | |
| Simplified | 1 + 4 | 5 | 4 | ||
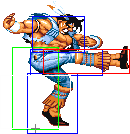
A ranged kick. Does not has any use i can think about.
- Crouching Short:
| Damage | 4[1] |  |
 |
 |

|
| Stun | 0~5 | ||||
| Stun Timer | 40 | ||||
| Chain Cancel | No | ||||
| Special Cancel | Yes | ||||
| Frame Advantage | +4 | ||||
| Frame Count | 2 | 1 | 4 | 5 | |
| Simplified | 1 + 3 | 4 | 5 | ||
A low kick. This has good priority, but short range. It is an OK move to beat some low moves specially if you can position yourself out of reach. It is also a viable option to tick into Typhoon if Jabs are too fast for you.
- Close Standing Forward: (Base max activation range: 40)
| Damage | 24[1] |  |
 |

|
| Stun | 5~11 | |||
| Stun Timer | 60 | |||
| Chain Cancel | No | |||
| Special Cancel | Yes | |||
| Frame Advantage | +3 | |||
| Frame Count | 3 | 8 | 7 | |
| Simplified | 1 + 3 | 8 | 7 | |
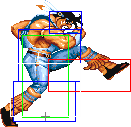
A foot stab. A valuable move for combos since it can be canceled into Tomahawk Buster. It is also the easiest way to tick into Typhoon, but you should avoid using it since it's very easy to reverse it.
- Far Standing Forward:
| Damage | 24[1] | 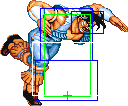 |
 |
 |
 |

|
| Stun | 5~11 | |||||
| Stun Timer | 60 | |||||
| Chain Cancel | No | |||||
| Special Cancel | No | |||||
| Frame Advantage | +7 | |||||
| Frame Count | 4 | 4 | 4 | 3 | 4 | |
| Simplified | 1 + 8 | 4 | 7 | |||
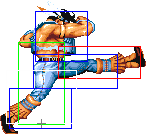
A far kick. OK as a poke. The O.Hawk version has a bigger active hitbox upwards, which makes it a better anti-air, but that is not the purpose of this move. Hits mid against most of the cast. Comes out quicker than a RH kick and has longer range than a neutral standing jab so it has its uses in keeping someone grounded off a knockdown.
- Crouching Forward:
| Damage | 24[1] |  |
 |
 |

|
| Stun | 5~11 | ||||
| Stun Timer | 60 | ||||
| Chain Cancel | No | ||||
| Special Cancel | No | ||||
| Frame Advantage | +7 | ||||
| Frame Count | 3 | 3 | 6 | 5 | |
| Simplified | 1 + 6 | 6 | 5 | ||
A floor kick that has very good range. Kinda like Shoto Cr.Forward. It helps against Guile. Nevertheless one of his better pokes. Great normal to tick throw with as a meaty.
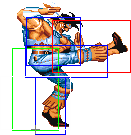
- Close Standing Roundhouse: (Base max activation range: 72)
| Damage | 32[2] |  |
 |
 |
 |
 |
 |

|
| Stun | 10~16 | |||||||
| Stun Timer | 80 | |||||||
| Chain Cancel | No | |||||||
| Special Cancel | No | |||||||
| Frame Advantage | +3 | |||||||
| Frame Count | 2 | 2 | 2 | 2 | 8 | 5 | 6 | |
| Simplified | 1 + 8 | 8 | 11 | |||||
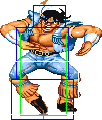
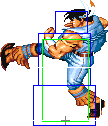
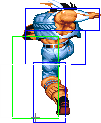
A backwards kick. It will hit all crouching characters except Blanka and Cammy. O.THawk's version does more damage and has a lot better hitbox than N.Hawk's, which makes it a great anti-air if you have the balls to use it. Specifically stuffs Shoto's jumping HK, which not many things do. -x64
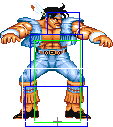
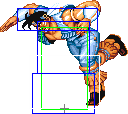
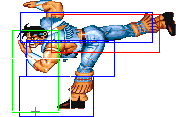
- Far Standing Roundhouse:
| Damage | 32[2] |  |
 |
 |
 |
 |
 |

|
| Stun | 10~16 | |||||||
| Stun Timer | 80 | |||||||
| Chain Cancel | No | |||||||
| Special Cancel | No | |||||||
| Frame Advantage | -3 | |||||||
| Frame Count | 3 | 3 | 5 | 8 | 4 | 6 | 7 | |
| Simplified | 1 + 11 | 8 | 17 | |||||
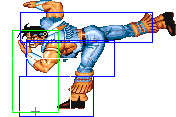
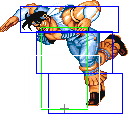
A backwards high kick. Very good reach and damage. It can be used to punish moves from a distance, trade with fireballs and when predicting jumps, if in range. O.T.Hawk's version has a bit less range, but does more damage. It will hit all crouching characters except Blanka, Cammy and M.Bison (Dictator). One of the best pokes in the game since it hits mid against most of the cast. You can use it as a battering ram against fireball chuckers. Even if it trades you usually come out ahead. As a bonus, even if you mistime the kick (because someone jumped at you for instance) and you get a close HK, you still win because it becomes a giant red hitbox that will beat out nearly every jumpin in the game.
- Crouching Roundhouse:
| Damage | 30[2] / 28[2] |  |
 |
 |
 |
 |

|
| Stun | 5~11 | ||||||
| Stun Timer | 130 | ||||||
| Chain Cancel | No | ||||||
| Special Cancel | No | ||||||
| Frame Advantage | -12 / +1 | ||||||
| Frame Count | 6 | 7 | 6 | 8 | 6 | 7 | |
| Simplified | 1 + 6 | 7 | 6 | 8 | 13 | ||
Two sweep kicks in a row. It is one of the best sweeps in the game: it has good priority and the second active part has awesome reach, but it has the downside of having a long recovery in terms of being able to block again. It is very dangerous to spam this move if the enemy has an horizontal super move ready, and it can also be punished if it misses. O.T.Hawk version of this move does more damage.
Aerial Normals
- Neutral Jumping Jab:
| Damage | 20[0] |  |
|
| Stun | 1~7(-2) | ||
| Stun Timer | 40 | ||
| Special Cancel | Yes | ||
| Frame Count | 3 | ∞ | |
- Diagonal Jumping Jab:
| Damage | 20[0] |  |
|
| Stun | 1~7(-2) | ||
| Stun Timer | 40 | ||
| Special Cancel | Yes | ||
| Frame Count | 3 | ∞ | |
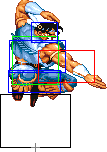
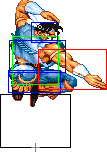
Your main jumpin. If you hit this button early enough, not many things will beat it outright. Be careful about using it on Bison, as he can duck this move and combo you for your trouble. -x64
- Neutral/Diagonal Jumping Strong:
| Damage | 24[1] |  |
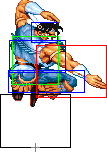 |

|
| Stun | 5~11 | |||
| Stun Timer | 50(+10) | |||
| Special Cancel | No | |||
| Frame Count | 5 | 14 | ∞ | |
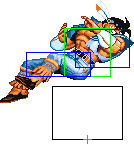
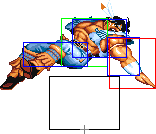
- Neutral Jumping Fierce:
| Damage | 32[2] | 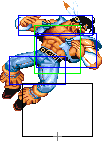 |
 |
 |
 |

|
| Stun | 11~17(-1) | |||||
| Stun Timer | 60(+20) | |||||
| Special Cancel | No | |||||
| Frame Count | 2 | 5 | 12 | 5 | ∞ | |
| Simplified | 7 | 12 | ∞ | |||
O.T.Hawk's version of this move does more damage. Works great as a bait for advance moves like Bison and Honda torpedo. This move will hit them out of their torpedo if landed on.
- Diagonal Jumping Fierce:
| Damage | 32[2] |  |
 |
 |

|
| Stun | 11~17(-1) | ||||
| Stun Timer | 60(+20) | ||||
| Special Cancel | No | ||||
| Frame Count | 5 | 2 | 11 | ∞ | |
| Simplified | 5 | 13 | ∞ | ||
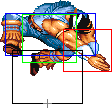
A lot better than the N. version. The first active animation has a good air to air hitbox while the N.T.Hawks version got completely nerfed. But the most important part is in the second active part: it can crossup and hits very low, which allows you to beat Dhalsim's slide (as well as Vega, Deejay, and Blankas' slide), which most characters can not. O.T.Hawk's version of this move does more damage.
- Neutral Jumping Short:
| Damage | 20[0] |  |
 |
|
| Stun | 1~7(-2) | |||
| Stun Timer | 40 | |||
| Special Cancel | No | |||
| Frame Count | 2 | 3 | ∞ | |
| Simplified | 5 | ∞ | ||
- Diagonal Jumping Short:
| Damage | 20[0] |  |
 |

|
| Stun | 1~7(-2) | |||
| Stun Timer | 40 | |||
| Special Cancel | Yes* | |||
| Frame Count | 2 | 2 | ∞ | |
| Simplified | 4 | ∞ | ||
- Neutral Jumping Forward:
| Damage | 24[1] |  |
 |
 |
 |

|
| Stun | 5~11 | |||||
| Stun Timer | 50(+10) | |||||
| Special Cancel | No | |||||
| Frame Count | 2 | 3 | 13 | 3 | ∞ | |
| Simplified | 5 | 13 | ∞ | |||
- Diagonal Jumping Forward:
| Damage | 24[1] |  |
 |
 |
 |

|
| Stun | 5~11 | |||||
| Stun Timer | 50(+10) | |||||
| Special Cancel | No | |||||
| Frame Count | 3 | 2 | 16 | 6 | ∞ | |
| Simplified | 5 | 16 | ∞ | |||
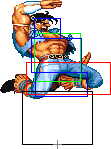
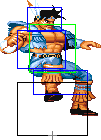
Can cross up, but you're likely using the fierce crossup for the damage. Special note about this move, using it for a jump in and adding a crouching jab after puts you out of the throw range of most of the cast but still in range for your SPD.
- Neutral Jumping Roundhouse:
| Damage | 32[2] |  |
 |
 |
 |

|
| Stun | 11~17(-1) | |||||
| Stun Timer | 60(+20) | |||||
| Special Cancel | No | |||||
| Frame Count | 2 | 5 | 12 | 4 | ∞ | |
| Simplified | 7 | 12 | ∞ | |||
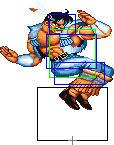
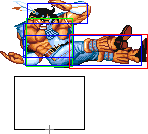
O.T.Hawk's version of this move does more damage.
- Diagonal Jumping Roundhouse:
| Damage | 32[2] |  |
 |
 |
 |

|
| Stun | 11~17(-1) | |||||
| Stun Timer | 60(+20) | |||||
| Special Cancel | No | |||||
| Frame Count | 2 | 4 | 8 | 6 | ∞ | |
| Simplified | 6 | 8 | ∞ | |||
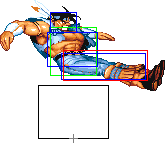
O.T.Hawk's version of this move does more damage. He can also crossup with it.
Command Normals
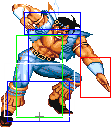
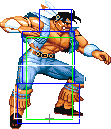
- Downward Jab: (On ground, ←/→ + Jab)
| Damage | 4[1] |  |
 |
|
| Stun | 0~5 | |||
| Stun Timer | 40 | |||
| Chain Cancel | No | |||
| Special Cancel | Yes | |||
| Frame Advantage | +5 | |||
| Frame Count | 3 | 4 | 4 | |
| Simplified | 1 + 3 | 4 | 4 | |
Lower hitting jab, but since Hawk's normal jab hits all crouchers anyway it is only useful for ticking into Mexican Typhoon. It can chain into itself as a link, but not mashable. Usually the move you get when messing up trying to stand neutral jab.
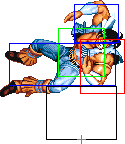
- Elbow Drop: (Jump diagonally, ↙/↓/↘ + Strong)
| Damage | 24[1] |  |
 |
 |

|
| Stun | 5~11 | ||||
| Stun Timer | 50(+10) | ||||
| Special Cancel | No | ||||
| Frame Count | 5 | 30 | 4 | ∞ | |
| Simplified | 5 | 30 | ∞ | ||
This move stays out for quite some time. He has better jump-ins therefore you don't see this often. The Japanese player Inomata uses this move often in safe-jumps.
- Body Slam: (Jump diagonally, ↙/↓/↘ + Fierce)
| Damage | 30[2] |  |
 |

|
| Stun | 11~17(-1) | |||
| Stun Timer | 60(+20) | |||
| Special Cancel | No | |||
| Frame Count | 3 | 4 | ∞ | |
| Simplified | 7 | ∞ | ||
Stays out until Hawk lands. Unlike N.Hawk's version, this one can crossup, leaving opponents in line for some great dizzy/damage combos. One of the main reasons why O.Hawk is better.
--Born2SPD
Normal Throws
T.Hawk can throw with Strong, Fierce and Roundhouse. A important thing to note is that while he has the second biggest throw range in the game with his Command Grab, all his normal throws have a very short range, beating only Fei Long's normal throws, so keep in mind that you will always be vulnerable to be counter thrown when choosing to use the normal throws.
- Normal Grabs Throwboxes:
| Throws | Holds |  |
 |

| |||
| Damage | 32 | Damage | 26 + 4*n | ||||
| Stun | 7~13 | Set amount of hits | 4 / 3 | ||||
| Stun Timer | 100 | Holds do no stun | |||||
| Range | (from axis) | 48 | (from throwable box) | 13 | |||
- Mexican Throw: (←/→ + Strong)
Strong throw is a one handed toss. Not great to use as it puts opponents further away than optimal, but if you're in the corner and you want the opponent cornered then there you go.
- Neck Hanging Tree: (←/→ + Fierce)
Fierce is a two-handed neck choke. Worse T.Hawk normal throw, it does one more hit than the Rh hold but when released the opponent is at a worst position.
- Elbow Stomping: (←/→ + Roundhouse)
Roundhouse throw is an elbow bash. This is T. Hawk's best normal throw, hands down. It does one less hit than Fierce hold, but unlike Fierce, the follow up game here is excellent: T. Hawk drops the opponent right next him, allowing you to mix up, cross over, tick throw again, etc. This is one of T. Hawk's most important moves as it can help set up many other traps and keeps people close where you want them.
This throw is extremelly good because it sets a "built-in" safejump (holding up-forward for Hawk to jump diagonally on the first possible frame will be a safe jump) against almost all the cast. It will be safe even against characters that it's generally advisable to avoid safe jumping, like Sagat's Tiger Uppercuts (3f startup), Chun's Rh UpKicks (2f startup) and even O.Ken's Fierce/All of Akuma's Shoryukens (1f startup). The only characters that can counter it with a reversal are N.Ken, with his Fierce Shoryuken (0f startup - yeah, it's different from O.Ken's, and that tiny difference happens to be just enough for it to not work on N.Ken) and Blanka with his Vertical Beast Rolls (0f startup - results in a trade). Agaisnt Shotos (Ryu, Ken and Akuma) this will be a crossup so jump with Jumping Forward kick (or with Jumping Down+Fierce, if using O.Hawk). Against everyone else it will not crossup so just go for Jumping Jab, or Jumping Forward if you want the medium block stun. If you're a real monster you can hit-confirm the jump in if you follow up with cr.Jab(up to 2 times) -> st.Jab xx Tomahawk Buster. If the opponent blocks the cross-up just do cr.Jab(up to 2 times) -> st.Jab (Sako tick) -> Typhoon or if you can't do that then go for cr.Jab(up to 2 times) -> negative edge Typhoon (or Super, if using N.Hawk).
Mayakon does j.Forward -> cr.Strong -> negative edge Typhoon (or Super). Requires strict timing.
To avoid being too predictable, you can also try to walk-under meaty cr.Strong -> negative edge Typhoon (or Super), but understand that this is not as safe. Also, don't attempt it against Zangief or T.Hawk (and sometimes E.Honda) since they're capable of doing a reversal command throw after or before the cr.Strong.
Special Moves
- Mexican Typhoon: (360 + P)
Detailed Input: (→ [0~6f] ↓ [0~6f] ← [0~6f] ↑ [0~12/9/7/2f] Jab/Strong/Fierce/any P if you are at a jumpable state and the last direction was ↑. The first direction and the side you spin is not fixed. You just need to input the 4 main directions in order)
| Jab | Strong | Fierce | 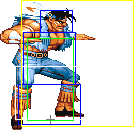 |
| ||
| Damage | 38 | 42 | 46 | |||
| Stun | 7~13 | |||||
| Stun Timer | 100 | |||||
| Range | (from axis) | 83 | ||||
| (from throwable box) | 48 | |||||
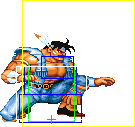
T.Hawk's long range, bread and buter command throw. Grabs the enemy by the face, jumps while spinning them, then smashes their head on the ground for high damage. This is T.Hawk's main attack tool and can be used with a multitude of ticks with Jab being his best. It has better range than any other throw but Zangief's Spinning Pile Driver and can be made safe with the use of negative edge. This is to say, as it does not have a whiff animation, you will obtain a normal if the enemy is not throwable and you press a punch button, but nothing if you use negative-edge.
- Tomahawk Buster a.k.a. Rising Hawk: (→↓↘ + P)
Detailed Input: (→ [0~6f] ↓ [0~6f] ↘ [0~10/9/7f] Jab/Strong/Fierce)
- Startup + Active:
- Recovery:
 |
 |
 |
 |
 |

| |
| Frame Count (Jab) | 2 | 4 | 3 | 4 | 7 | 4 |
| Simplified (Jab) | 24 | |||||
| Frame Count (Strong) | 2 | 4 | 3 | 4 | 10 | 4 |
| Simplified (Strong) | 27 | |||||
| Frame Count (Fierce) | 2 | 4 | 3 | 4 | 13 | 4 |
| Simplified (Fierce) | 30 | |||||
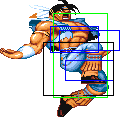
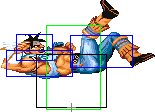
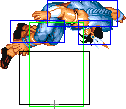
Hawk becomes invulnerable for a split second, crouches, then rises diagonally to the air while hitting the enemy. After that, he falls defenseless to the ground. The Jab and Strong versions hit only once and cause a full knockdown, while the Fierce one hits twice, being that the second active part causes a full knock down. Unlike N.T.Hawk's, all versions can pass though projectiles, if timed really close to them. The Jab and Strong versions have the first active part, when T.Hawk is still invulnerable, doing more damage (20%). If it hits late, the Jab and Strong versions will do just 14% damage. The Fierce version, on the other hand, only does 9% damage if it hits up close, but it comboes into the last active part of the move, which does 20% damage. As it has less recovery, only use the Jab version, unless you have confirmed a combo. If you hit late, it will do less damage than the Fierce version, but you will not be wide open for punishment as you would with the Fierce one otherwise. This is T.Hawk's best anti-air move.
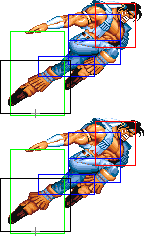
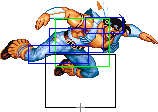
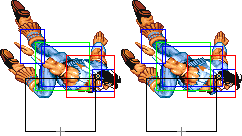
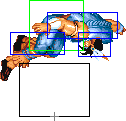
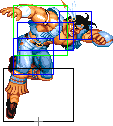
- Condor Dive: (In Air, Jab + Strong + Fierce)
Detailed Input: (Can be done from the 6th till the 25th jumping frame, all buttons must be pressed on the same frame)
| Damage | 32[2] |  |
 |
 |
 |
 |
 |

|
| Stun | 9~15 | |||||||
| Stun Timer | 100 | |||||||
| Frame Count | 10 | 7 | ∞ | 2 | 9 | 10 | 6 | |
| Simplified | 17 | ∞ | 27 | |||||
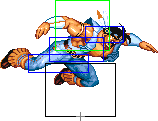
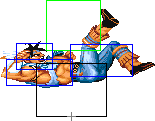
- Bounce:
 |
 |
 |
 |
 |

| |
| Frame Count | 8 | 4 | 4 | 4 | ∞ | 6 |
| Simplified | ∞ | 6 | ||||
T.Hawk hovers in the air for a small period of time, then dives diagonally from where the move was started towards the ground. This move can only be performed on a neutral or diagonal jump on the way up. Once T.Hawk reaches his apex and starts coming down from his jump, the move cannot be performed. Extremely good move for punishing fireballs. Can be done close to the ground for shenanigans and dodging and punishing slow recovering lows like Guile's sweep. Good for closing distance after a mid screen Typhoon. This move does not have great priority and can be punished by some characters.
- Characters not to hit with Condor dives unless your sure they will not be able to block: Dhalsim, Sagat, Guile (any versions).
Dhalsim the most as he can punish easily with multiple normals. Sagat can punish with fireballs, and Guile can either hit Hawk out of the move with a Flash Kick, or block it and then punish with aerial Roundhouse. Remember also that Guile is extremely hard to punish for Sonic Booms as he recovers very quick compared to Sagat, Ryu and Ken.
- Characters not to spam Condor dives against: Ryu, Ken, Cammy, Fei Long, T.Hawk (any versions).
These characters can react with SRK-like special moves or simply normals. Also be careful as if Ryu and Ken manage to block the move as it is about to cross them up, they can jump immediately after blocking and punish with j.RH. Ryu can also use a Fierce Hadouken, of even a Super, if he has bar. If they do it too late and miss it can leave them in a horrible position(good for T.Hawk).
- Characters not to hit with Condor dives unless your sure they will not be able to block or you know they do not have charge: Balrog(Boxer), Blanka, E. Honda and M.Bison(Dictator) (any versions).
All four can punish with charge back->forward + Fierce.
- Characters that cannot punish after blocking a Condor dive: Chun Li, Cammy, Dee Jay, Fei Long, T.Hawk, Vega(Claw), Zangief.
It can be extremely useful but can get a lot of inexperienced players in loads of trouble if used too much/incorrectly. It covers a lot of ground very fast. You can use it to punish fireballs by jumping and Dive over them. Remember though that if you don't connect, or it's blocked, you hit the ground and "slide" a bit. Now you can be punished by sweeps and/or certain combos at this point. But, this can also be a useful tool against a scared/slow opponent. In your slide you can Tomahawk Buster(DP) or Typhoon while sliding at the end. You can deceive a player thinking your going to connect and bounce back and if they don not react to you hitting the ground you can punish. Again be careful with this move. Can be a big help or a big hindrance.
The Basics
O.Hawk has significantly better normals than N.Hawk. This allows him to use more of his normals in footsies, creating more openings for either punishing with normals or walking in for the Typhoon. After Hawk uses a Typhoon, he can close the gap with a Condor Dive relatively close to the ground. After a knockdown, Hawk usually wants to apply great pressure on the enemy's wake-up with either a jumping Forward or Fierce aerial cross-up, safe jump then tick into Typhoons or a ground normal as a tick move. Other than O.Hawks ground game, he can use jumping Jab, as it has very good priority; diagonal jumping Fierce, which hits very low and does high stun, beating moves most characters can not; and Condor Dive, which punishes anti-air sweep attempts and long recovery moves in general, such as a Hadouken.
Advanced Strategy
Option-Select ticks
T. Hawk's main weapon is his Mexican Typhoon throw. Most other tools O.T. Hawk has often find use due to the enemy's (justified) fear of the Mexican Typhoon. Anyway, his strongest strategy is related to the Mexican Typhoon itself, using negative edge so as to avoid whiffed normals.
Say you tick your opponent with any attack, then input a 360 motion and press a punch button for the Typhoon at the exact time he recovers from blockstun. This is a strong strategy, as it forces the enemy to use a reversal attack to avoid the throw. Not any reversal attack, in fact: it must be either a reversal throw, a reversal invulnerable special move or a reversal instantly-airbone move. With the exception of Zangief's Spinning Pile Driver, reversal throws can be dealt with by ticking so as to be outside their throw range. However, if the enemy reversals with an invulnerable move that also attacks, such as a Shoryuken or a Flash Kick, a punch will come out and Hawk will be hit while performing it. If the enemy becomes airbone, he will surely evade the throw and may also evade or even hit Hawk as he punches. Fortunately for T. Hawk, he has a way of not whiffing normals when attempting Typhoons, causing reversal special to whiff or get blocked. As a number of such attacks are unsafe on block, Hawk can throw them afterward and reset the situation.
Negative-edge typhoon
Hawk's most simple option select consists of using a cr.Jab as a tick attack, then quickly pressing the other punch buttons and buffering a 360 motion, ending in defensive crouch. As the enemy recovers from the Jab, release the buttons one-by-one in a quick succession, giving you three chances of obtaining a Typhoon. As you are releasing buttons, no attacks will come out, and eventual reversal attacks will either whiff or get blocked. For instance, Flash Kicks and Shoryukens are unsafe on block, and you can simply do a typhoon or Tomahawk Buster as they recover. Coupling this strategy with safe jumps, it may be very hard or impossible to avoid taking damage for most characters. Even though this is very hard to apply consistently, that's what makes T. Hawk a viable character in high level play.
Walk-up button-release typhoon
Whiff a normal just outside your enemy poke range, and buffer ↑←↓→ (hold) + punches (hold). Continue to hold → and release the punch buttons one by one in a quick succession as you enter the Typhoon range. This allows you to obtain a Typhoon quicker while advancing. Would one try a normal walk-up Typhoon, you could get hit before completing the motion.
Buster-Typhoon option select
Do a negative edge Typhoon, but after reaching down back, move the stick to down towards, and release the buttons. If done right, you will either obtain a Typhoon or a Tomahawk Buster. This is good when dealing with safe-on-block reversal attacks, such as Cammy's Cannon Spike, and moves that may allow the enemy to escape from a corner, such as Ryu's tatsus.
Hit-Confirm cross-up
If T. Hawk scores a knockdown at mid-screen and stays close to his opponent, he has a chance of ending the round right there. In order to do that, he use jumping Forward of Fierce splash to hit the enemy as a cross-up. After that, he can use cr.Jab into st.Jab, which give enough time to check if the combo was blocked or not. If the combo is not blocked, Hawk can cancel the st.Jab into the Tomahawk Buster, for another knockdown and, possibly, a dizzy, leading to another damaging combo. Else, he can use the option-select Typhoon.
Match-ups
Serious Advantage Match-ups
Haha none.
Advantage Match-ups
LOL none.
Fair Match-ups
Vs. Balrog (boxer):
- 4.5 - 5.5
Your going to have a lot of trouble here if you cannot standing SPD or negative edge on wakeup. Once you have him down though Balrog is very easy to pressure with safe jumps as hit Buffalo headbutt takes 13frames (this may be incorrect checking) to hit. This allows you to jump in on wake up fairly easily. Once the tick is out if you can negative edge 360's your almost completely safe from counters in between ticks.
This by large is not a good matchup though for Hawk as it is very hard to get on top of a good Boxer with Hawk.
j.Jab works very well. cr.Jab to stop some rush punches (not very safe) cr.Forward to stop some rush punches (fairly safe) cr.RH is very good at dominating the ground against Boxer. Hits twice, has huge range and is out for a long time (which can be good and bad, if he guesses right or is out of block range your gonna eat a jump in).
--Jedi.10 06:36, 30 August 2007 (UTC)
You basically lose until you get a clean knockdown. Crouching MP, Crouching MK, standing MP, and standing HP are good pokes against Rog. Mainly you're just hoping your opponent messes up and you connect a SRK or hawk dive to start your SPD negative edge loop. Watch out for Rog's standing HP, it will hit you mid so it's a great damaging poke against you. -x64
Vs. Chun-Li:
- 4.5 - 5.5
Your main objective here is to get Chun in a corner and harass her constantly with pressure pokes (standing far HK, meaty standing LP on wakeup, crouching MK, and jumping HK spam) and the threat of SPD. Your jumping LP will usually trade against Chun's jumping LK/MK but will lose against her jumping punches. Some Chuns get cocky and try to walk under your jumping LPs to throw you so watch out for that (nothing stops this like mixing jumping LP and jumping HK). If you can't react to Chun's jumpin LK with a SRK, a crouching HP will beat it clean if she's on top of you (not out in front of you). -x64
Vs. Ken:
- 4.5 - 5.5
Vs. T. Hawk:
Vs. O. T. Hawk:
Vs. Zangief:
- 4.5 - 5.5
Disadvantage Match-ups
Vs. Dhalsim:
- 3.5 - 6.5
Dhalsim has an incredible throw range which can be annoying, however if you're using the correct ticks he can't throw you even when he doesn't block to intentionally throw afterwards. J.forward -> cr.jab is something I've been using instead of j.jab. Make it hit late for the correct spacing.
--Jedi.10 06:36, 30 August 2007 (UTC)
Vs. E. Honda:
- 3.5 - 6.5
Main Strategy
I rate this as the single hardest match in the entire game excluding Akuma matches. There is no tick setup I know that would reliably get you out of Oicho range, but inside the Mexican Typhoon one. The best method is the Sako tick. The way the Sako tick command is entered, it gives your opponent less time to react and reverse.
N.Hawk has a slightly harder time in this painful match-up do to his worse cr.Jab hitbox. All you can do is piano cr.Jab and wait for Honda to come at you. If you can take tiny steps forward and cr.Jab, hopefully you can somehow push him into the corner. While your spamming cr.Jab, honda can not hit you with anything other then stand Roundhouse. Spam cr.Jab as fast as you can, as soon as you see Honda get up from down back position you can immediately jump and use Condor Dive at him for some chip damage or try to jump at him with jab and land into negative-edge Typhoon. The later option will probably get you ochioed. If you get tired of jabbing, you can do the suicide attempt. Walk straight at Honda and hopefully you can land a psychic DP to hit Honda trying to head butt you. If you manage to get a knock down, all you have to do next is safe jump with jab with a DP install, cr.Jab, st.Jab, into Sako 360. After you get the Typhoon, Honda bounces then hits an invisible wall and lands closer to you so you can repeat the safe jump again. However, since Honda is hard to tick due the the range problem I mentioned in the beginning of my post, the chances of you landing the Typhoon are pretty slim. These are the only strategy I can think of that is kind of but not really safe against Honda. You just need to get some damage and run away. Force honda to come to you. You can bait a head butt by walking forward and jumping back to stuff the head butt with jump back Fierce. This is probably the safest way to get decent damage against Honda.
In summary, get life lead and turtle till time runs out. I need help myself with this match. I asked Neoray about this match and his response was "In this match, we do not try to win. We must get first hit and then run away until time runs out."
Vs. Guile:
- 3.5 - 6.5
Vs. O. Ken:
Vs. Ryu:
- 4 - 6
Vs. Sagat:
- 3.5 - 6.5
Serious Disadvantage Match-ups
Vs. Blanka:
- 3 - 7
Vs. Cammy:
- 1.5 - 8.5
Vs. Dee Jay:
- 3 - 7
Vs. Fei Long:
- 3 - 7
Vs. M. Bison (dictator):
- 3 - 7
Vs. O. Sagat:
Vs. Vega (claw):
- 3 - 7
The Claw match is pretty hard but its not unwinnable. The best thing that could happen for the Hawk player is if Claw starts hoping off the walls. If that happens you can jump forward with Jab to knock Claw off the air and land close enough to pressure him with Sako ticks, or if you can not do that yet, just stand Jab and run up to grab him with Hawk's best normal throw, the RH elbow bash. After the bash, immediately jump at Claw as he flips away with jump Jab into cr.Jab into negative-edge Typhoon. Against Claw after the elbow bash when you jump at him you will always land in front of him. Different characters will make you land in different positions, sometimes behind, sometimes in front. You should always know which way you are going to land because the elbow bash can lead to big damage. Anywhere from half life up to 70 percent. The elbow bash should always be a top priority of things to go for because this will help you win matches fast.
A good Claw player that knows this match is going to sit in down back position and turtle, poking with cr.Strong and cr.Forward. In this situation you can stand right outside of the poke range and jump straight up and push Jab or Fierce to try to bait Claw into doing the flip kick. If he whiffs the flip kick you run in to elbow bash into the jump Jab cr.Jab Typhoon. If you can Sako tick, anytime you get a knock down you should be able to end the game by doing safe Sako ticks meaty from max distance into negative-edge Typhoon. If you can not Sako tick the only way to guarantee winning with a knock down is if you get the knock down at the corner with Claw's back up against the wall. If you are not near the corner, after you do the Typhoon walk up next to Claw and crouch. Claw might freak out and flip kick right after getting up and you can repeat the elbow bash routine. If he doesn’t flip, hit him with cr.Jab into Typhoon. This time around you should be close enough to the corner to end it with safe-jump loops. If you get a knock down in the corner, you can safe-jump and repeat the tick into negative-edge Typhoon. There is no need to DP install here because if Claw reverses with the flip kick, you can just run up to elbow bash him. If you get an elbow bash in the corner do not jump at him after Claw shakes out, just walk up and cr.Jab into negative-edge Typhoon instead. This is because after shaking out of the elbow bash, Claw will hit the corner and land later then normal. This is the same with all characters so keep that in mind if you ever get an elbow bash in the corner.
If the Claw player never flip kicks, then your only option is to sit there and wait and watch his poke pattern. Study this for a while and try to guess when he will poke with cr.Strong. When you are sure walk up and DP for the knock down and start doing the safe-jump ticks I mentioned above. If he stops poking with cr.Strong, then the only thing he has to poke you back is cr.Forward or cr.RH. Crouching Roundhouse is bad for you because if you block it, it pushes you back to the corner. This means if you do get a knock down, you probably won’t be able to finish the round with safe-jump loops. But if you have been jumping straight up, you can hit Claw with Fierce or Roundhouse on your way down. This is a way of holding your ground and forcing Claw to jump back away from you, going closer to his corner. If he pokes with Forward, you have to jump and do a really quick dive to knock him down. The dive against Claw is safe on block so you can spam the dive. Spam dives early in the match while you still have lots of life to train Claw to flip kick. As long as you still have 4 slivers of life, once you get that elbow bash, you can safe-jump Typhoon loop 3 or 4 times straight in the corner for the win. When you play hawk, sometimes you have to give away some life to train your opponent to respond a certain way.
PS. During the safe-jump loops Claw is going to try to back flip out, look out for that, when you see it get up and walk towards him. Hawk is fast enough that he can walk up and catch Claw at the end of the flip with a elbow bash throw.
