Introduction
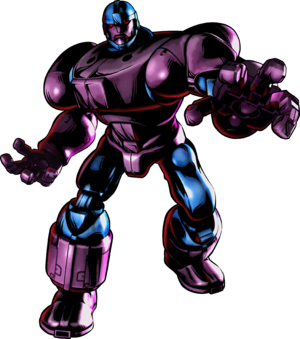
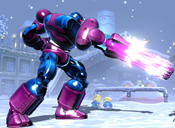
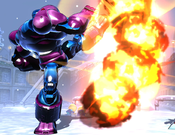
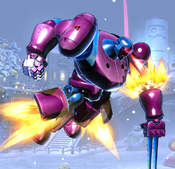
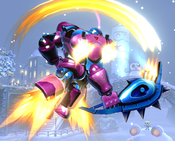
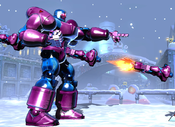
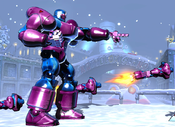
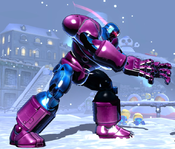
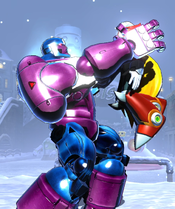
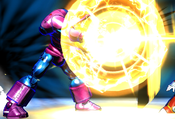
Sentinels are a generic name for a type of mass-produced robots created for the purpose of hunting down and capturing or killing mutants. Although they have shown a variety of designs throughout history, Sentinels are typically massive, humanoid, can fly, and are armed with energy weapons, including a "gene scrambler" designed specifically to incapacitate mutants. The Sentinels of the Marvel vs. Capcom series are likely based on their appearance in X-Men: The Animated Series, where they were recurring antagonists.
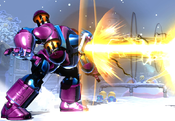
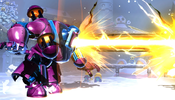
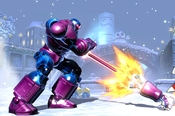
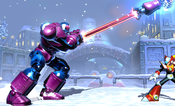
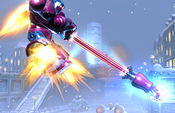
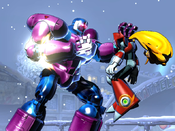
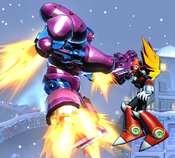
In UMvC3, Sentinel is a "Big Body" archtype with several heavily armored attacks that it can use to force itself in. It pairs this with some solid mobility and very long range attacks. Sentinel can fight from afar with extended-range normals, its nearly full-screen 236X Rocket Punch, and its 5H/2H beam normals. It can also use Sentinel Force (214X) as a type of personal pseudo-assist, using the drones to cover its approach. While lacking an airdash, Sentinel does have a very fast flight mode which it can use to maneuver through the air.
| Strengths | Weaknesses |
|---|---|
|
|
Move List
Assists
| Damage | Startup | Active | Recovery |
|---|---|---|---|
| 50,000 x3 | 45 | - | 146, 116 |
| On Hit | On Block | Guard | Properties |
| - | - | Mid | Priority: Low, Durability: 4 per drone; Fixed Hitstun |
|
THC Hyper: Hyper Sentinel Force. Recommended assist. Sentinel deploys three drones in the same formation as his 214M special. These drones disappear if Sentinel is hit, but once Sentinel's startup completes, he becomes invulnerable and the point character can reap the rewards of this fantastic assist. Drones deal three staggered hits, granting a very large amount of total hitstun or blockstun. Point characters can use this coverage to make their approach, to run away, to perform combo extensions, and to do just about anything. A great assist and one of the primary reasons to add Sentinel to a team. | |||
| Damage | Startup | Active | Recovery |
|---|---|---|---|
| 25,000 per bomb | 80 | - | 111, 81 |
| On Hit | On Block | Guard | Properties |
| - | - | Mid | |
|
THC Hyper: Hyper Sentinel Force. Follows the pattern of Sentinel's 214H special. Three drones ride horizontally along the top of the screen and deploy 5 bombs each, which can hit OTG. Unlike Assist A, this assist does not disappear if Sentinel gets hit. However, it is significantly slower than Charge assist and provides much less lockdown, limiting its usefulness. | |||
| Damage | Startup | Active | Recovery |
|---|---|---|---|
| 130,000 | 42 | 8 | 130, 100 |
| On Hit | On Block | Guard | Properties |
| - | - | Mid | |
|
THC Hyper: Plasma Storm. This is a standard OTG assist intended to use for relaunches after a throw, Air Combo, or other hard knockdown. For most point characters, it makes more sense to pair their own OTG attack with Sentinel Force (Charge) assist instead, giving you a similar extension and a better neutral assist. Thus, this assist is not recommended. | |||
Ground Normals
| Damage | Startup | Active | Recovery |
|---|---|---|---|
| 70,000 | 7 | 3 | 28 |
| On Hit | On Block | Guard | Properties |
| -12 | -15 | Mid | |
|
Sentinel's fastest normal, although it is still slower than most character's light attacks. Has a pretty poor hitbox compared to most of Sentinel's normals. Can be used for tick throw setups into 623X command grab. Also useful as a quick projectile nullify, as it will destroy any low-priority projectile it contacts, including beams. | |||
| Damage | Startup | Active | Recovery |
|---|---|---|---|
| 100,000 | 14 | 3 | 32 |
| On Hit | On Block | Guard | Properties |
| -11 | -15 | Mid | Armored frames 6-15, |
|
Very impressive range for a normal attack. Armor and projectile nullify properties make it difficult to contest when spaced well. | |||
| Damage | Startup | Active | Recovery |
|---|---|---|---|
| 25,000 x5 | 20 | 20 | 16 |
| On Hit | On Block | Guard | Properties |
| +6 | -11 | Mid* | |
|
Fullscreen beam attack. Starts up quite fast by beam standards, making it useful for punishing assist calls or just for general zoning. If it connects, it can be chained into 2H, 5S or special-canceled like any other normal. Sentinel can make use of this move's long startup by kara-canceling it into command grab, faking an attack and instead grabbing an opponent who tries to block it. Most characters can duck underneath this beam, making it fairly risky to use. | |||
| Damage | Startup | Active | Recovery |
|---|---|---|---|
| 70,000 | 9 | 3 | 25 |
| On Hit | On Block | Guard | Properties |
| -9 | -12 | Mid | |
|
Note: does not hit Low. Functionally 2L is very similar to 5L. It has slightly slower startup, but better recovery, can be Rapid Fired, and has superior range. Sentinel can usually chain 3 or 4 of these before he has to hit confirm, but doing so usually causes too much hitstun deterioration and damage scaling to be worthwhile. | |||
| Damage | Startup | Active | Recovery |
|---|---|---|---|
| 40,000 x3 | 13 | 13 | 30 |
| On Hit | On Block | Guard | Properties |
| - | -14 | Low | |
|
13 frames is the earliest this move can connect, at farther ranges it takes up to 17 frames to begin hitting. Because of the significant duration of armor on this attack, opponents have to be careful when approaching Sentinel. This move can even work as a janky anti-air, since the opponent's aerial attack will be eaten by armor, and they will fall into the active frames. | |||
| Damage | Startup | Active | Recovery |
|---|---|---|---|
| 25,000 x5 | 20 | 20 | 16 |
| On Hit | On Block | Guard | Properties |
| +6 | -11 | Mid* | |
|
Almost identical to 5H, but fired from slightly lower to the ground. Fewer characters can duck underneath this beam, although some smaller characters (such as Wolverine) can still do so. | |||
| Damage | Startup | Active | Recovery |
|---|---|---|---|
| 120,000 | 16 | 8 | 26 |
| On Hit | On Block | Guard | Properties |
| Launch | -8 | Mid | |
|
A combination of great range, armor, and relative safety on block make this a very abuseable attack. More experienced players will deliberately stay out of its range in order to punish you for mashing it, but feel free to throw it out repeatedly against opponents who are not respecting your armor. | |||
Aerial Normals
| Damage | Startup | Active | Recovery |
|---|---|---|---|
| 75,000 | 8 | 6 | 22 |
| On Hit | On Block | Guard | Properties |
| +17 | +14 | OH | |
|
- | |||
| Damage | Startup | Active | Recovery |
|---|---|---|---|
| 100,000 | 12 | 4 | 32 |
| On Hit | On Block | Guard | Properties |
| +22 | +18 | OH | |
|
Incredible range makes this Sentinel's best air-to-air option. If performing this move raw, buffer a 214S input, as flight cancel significantly shortens this move's recovery and can make confirming an air hit easier. | |||
| Damage | Startup | Active | Recovery |
|---|---|---|---|
| 110,000 | 17 | 4 | 28 |
| On Hit | On Block | Guard | Properties |
| +25 | +21 | OH | |
|
Unlike j.5M, j.5H has a downward angle that makes it weak as an air-to-air. It supports Sentinel's keepaway pressure as its coverage will discourage opponents from superjumping up towards Sentinel from below, and it option selects a throw break. Like with j.5M, try to buffer a fly/unfly input while performing this move in order to cancel its lengthy recovery. | |||
| Damage | Startup | Active | Recovery |
|---|---|---|---|
| 120,000 | 18 | 5 | 23 |
| On Hit | On Block | Guard | Properties |
| - | +18 | OH | |
|
If not used as an Air Combo Finisher, this move causes a Ground Bounce. This makes Sentinel's air-to-air game very strong, as he can use a combination of double-jump cancels and flight cancels to combo stray aerial hits into j.5S, then land and relaunch for big damage. | |||
Special Moves
| L |
Damage | Startup | Active | Recovery |
|---|---|---|---|---|
| 150,000 | 18 | 8 | 38 | |
| On Hit | On Block | Guard | Properties | |
| -10 | -20 | Mid | ||
| M |
Damage | Startup | Active | Recovery |
| 150,000 | 18 | 8 | 38 | |
| On Hit | On Block | Guard | Properties | |
| -10 | -20 | Mid | ||
| H |
Damage | Startup | Active | Recovery |
| 150,000 | 18 | 8 | 38 | |
| On Hit | On Block | Guard | Properties | |
| -10 | -20 | Mid | ||
|
All three versions of Rocket Punch are mostly identical, with H being aimed diagonally upwards, M aimed straight ahead, and L aimed towards the ground as an OTG hit. Although Rocket Punch has a great hitbox and impressive range, it has very lengthy recovery. Thus, it is mainly used if Sentinel intends to hyper cancel it. For example, 236L xx 236XX is a standard combo ender, and a 5H xx 236M xx 214XX chain is a relatively safe sequence that can be used to fish for assist hits or deal chip damage. | ||||
| L (in air) |
Damage | Startup | Active | Recovery |
|---|---|---|---|---|
| 150,000 | 16 | 8 | 32 | |
| On Hit | On Block | Guard | Properties | |
| -4 | -14 | Mid | ||
| M (in air) |
Damage | Startup | Active | Recovery |
| 150,000 | 16 | 8 | 32 | |
| On Hit | On Block | Guard | Properties | |
| -4 | -14 | Mid | ||
| H (in air) |
Damage | Startup | Active | Recovery |
| 150,000 | 16 | 8 | 38 | |
| On Hit | On Block | Guard | Properties | |
| -4 | -14 | Mid | ||
|
Air Rocket Punch is very similar to its grounded counterpart, but has slightly faster startup and shorter recovery. This makes it safer to use as a neutral tool, although it is still primarily used to set up a hyper cancel. Tiger Knee L Air Rocket Punch (2369L) allows Sentinel to combo an OTG hit into Hard Drive, which is useful because Sentinel can loop that hyper multiple times compared to Plasma Storm. | ||||
| L |
Damage | Startup | Active | Recovery |
|---|---|---|---|---|
| 50,000 x3 | 21 | - | 54 | |
| On Hit | On Block | Guard | Properties | |
| +29 | +26 | Mid | Priority: Low, Durability: 4 per drone | |
| M |
Damage | Startup | Active | Recovery |
| 50,000 x3 | 21 | - | 54 | |
| On Hit | On Block | Guard | Properties | |
| +24 | +23 | Mid | Priority: Low, Durability: 4 per drone | |
|
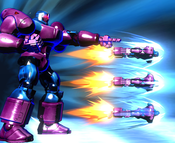
Sentinel points, and three drones appear from behind it, which travel forward in a straight line. The drones are active projectiles, and are just far enough apart that they do not form a true blockstring when striking an opponent, although they do combo on hit. L version drones are aimed slightly downwards, while M version drones aim slightly upwards. Drones disappear instantly if Sentinel is hit. Despite this move's power as an assist, Sentinel struggles to use this move on its own. Aggressive or long-ranged opponents can simply hit Sentinel out of its lengthy startup, making the drones a non-factor. Drones are most useful when Sentinel has a chance to perform an oncoming mixup, as it can deploy them uncontested. | ||||
| Damage | Startup | Active | Recovery |
|---|---|---|---|
| 25,000 per bomb | 56 | - | 29 |
| On Hit | On Block | Guard | Properties |
| +19 | +15 | Mid | |
|
Unlike Drone Charge, Drone Bomb does not disappear if Sentinel is hit, making it slightly easier to call. Three drones are deployed, that drop 5 bombs each. Although this move hits OTG, it is too slow to be useful for that purpose, especially since Sentinel also has access to 236L. In general, this move is too slow and awkward to be really useful. | |||
| Damage | Startup | Active | Recovery |
|---|---|---|---|
| - | 17 | 104 | 0 |
| On Hit | On Block | Guard | Properties |
| - | - | - | |
|
Sentinel enters a flight state for 104 frames. Although Sentinel does not have an airdash to use in this mode, its regular flight movement is quite fast. Sentinel's flight is very useful as a sort of free cancel to its normals; all of Sentinel's normal attacks except 5H and 2H have at least 17f of recovery, and thus can benefit from being flight-canceled. This also allows Sentinel to manipulate its air momentum, since entering flight brings Sentinel to a sudden stop. | |||
| L |
Damage | Startup | Active | Recovery |
|---|---|---|---|---|
| 120,000 | 2 | 1 | 43 | |
| On Hit | On Block | Guard | Properties | |
| - | - | Throw | ||
| M |
Damage | Startup | Active | Recovery |
| 140,000 | 6 | 1 | 39 | |
| On Hit | On Block | Guard | Properties | |
| - | - | Throw | ||
| H |
Damage | Startup | Active | Recovery |
| 160,000 | 10 | 1 | 35 | |
| On Hit | On Block | Guard | Properties | |
| - | - | Throw | ||
|
Sentinel's command grab. Even L, the fastest version, is slower than a standard ground throw. Since Sentinel can already follow up off any normal throw, command grab's usefulness is further diluted. M and H grabs launch the opponent much higher, but L command grab is difficult to pick up outside of the corner. Command grab is mainly useful because, being a special move, it can be canceled into from normals. This allows Sentinel to tick throw with a late-canceled light normal, or kara-cancel into command grab from 5H. | ||||
Hyper Combos
| Damage | Startup | Active | Recovery |
|---|---|---|---|
| 22,000 x19 + 20,000 | 10+1 | 85 | 25 |
| On Hit | On Block | Guard | Properties |
| - | -8 | Mid | mashable, |
|
Standard combo-ending hyper, typically used after an OTG 236L Rocket Punch, or brought in as a DHC after the point character's hyper. | |||
| Damage | Startup | Active | Recovery |
|---|---|---|---|
| 50,000 x9 | 10+1 | - | 84 |
| On Hit | On Block | Guard | Properties |
| - | +15 | Mid | Invuln frames 8-14, |
|
Do not be fooled by the frame data. Although this hyper has the same startup as Plasma Storm, it takes additional time for the drones to actually reach the opponent. This hyper will only combo after Rocket Punch if done very early in a combo, before Hitstun Deterioration has kicked in. For example, Throw -> 236L xx 214XX will combo, but a standard magic series into 236L xx 214XX will not work. Sentinel can combo after Hyper Sentinel Force, if it hits (simply mash 5S to get a launcher), and it is advantageous enough on block to continue pressure with 5H beams. This is an excellent hyper for harassing the opponent's assists, dealing chip damage, or protecting Sentinel and its teammates if they perform something unsafe. If Sentinel cancels this hyper with X-Factor, the drones will continue to fly forward, allowing Sentinel to attack alongside them. | |||
Universal Mechanics
| Damage | Startup | Active | Recovery |
|---|---|---|---|
| 80,000 | 1 | 1 | - |
| On Hit | On Block | Guard | Properties |
| - | - | Throw | |
|
Standard ground throw. It knocks the opponent a decent distance away, but Sentinel can always follow up with an OTG 236L or j.2369L Rocket Punch. | |||
| Damage | Startup | Active | Recovery |
|---|---|---|---|
| 80,000 | 1 | 1 | - |
| On Hit | On Block | Guard | Properties |
| - | - | Airthrow | |
|
Like with Sentinel's ground throw, air throw can be followed up with j.236L into Hard Drive to start a combo. When attempting airthrows, consider buffering a 214S flight command to cancel the j.5H attack that will come out if the throw fails. | |||
| Damage | Startup | Active | Recovery |
|---|---|---|---|
| 50,000 | 2 | 3 | 32 |
| On Hit | On Block | Guard | Properties |
| - | -9 | Mid | Snapback, |
|
Animation and hitbox based on 5M | |||
| Damage | Startup | Active | Recovery |
|---|---|---|---|
| 30,000 | - | 20 | 39 |
| On Hit | On Block | Guard | Properties |
| - | -17 | OH | |
|
- | |||
Team Position
Sentinel is commonly chosen as a Anchor or Second character. Sentinel's large body makes him easy to hit, and so it struggles against the most common point characters. Moreover, playing them on point wastes many of Sentinel's greatest strengths, including its great assist and solid DHC options.
Sentinel's Hard Drive (236XX) hyper is one of the game's few air-OK invincible moves. This is an excellent tool for escaping Oncoming Mixups, as Sentinel can activate as soon as it arrives on screen to freely escape across the stage. This is one of Sentinel's greatest strengths as an Anchor, since it guarantees they will be able to touch the ground and activate X-Factor to start a comeback. Sentinel can also use this to allow other backline characters to enter the match safely, by performing Hard Drive and then DHCing to the next character with a safe hyper.
Notable Synergies
Magneto: Sentinel Force (Charge) is a very powerful assist with a long total duration. It can be used to lock opponents down while the point character performs mixups, to extend combos, or to assist in zoning. Sentinel Force's main weakness as an assist is Sentinel himself - he is very large and prone to getting hit on assist call, which causes the drones to disappear. Magneto is a very fast, oppressive character who can effectively protect Sentinel from the opponent's attempts to hit him, and then reap the benefits of a great assist afterwards.
Players to Watch: RayRay (Magneto/Doom/Sentinel), Joker (Magneto/Sentinel/Iron Man)
Vergil: Vergil is a great example of Sentinel's ability to "escort" characters out of an Oncoming Mixup, since Vergil's own defenses as an oncoming character are notoriously poor. In a Point/Sentinel/Vergil setup, Sentinel can enter the match, Hard Drive to safety, and then immediately DHC to Devil Trigger or Spiral Swords, allowing Vergil to enter the stage uncontested. From there, Vergil can start to attack with access to level 2 X-Factor and one assist, which is more than enough to be a major threat to just about any team.
Players to Watch:
Hulk: The "Big Bodies" pairing is one of Hulk's most well-known shells. Sentinel Force (Charge) can be called immediately before Hulk attempts a Gamma Charge, and it will reach the opponent just as Hulk finishes the follow-up move. This lets Hulk quickly and safely take momentum in almost any situation where he is on the ground, and leads to devastating damage against opponents who do not respect Hulk's armor.
Players to Watch: KaneBlueRiver (Hulk/Sentinel/Haggar), JDog (Nemesis/Hulk/Sentinel)
Other Players to Watch: GCYoshi (Chris/Spencer/Sentinel), Windzero (Chris/Sentinel/Jill), Unkn0wn (Wesker/Sentinel/Viper), DiosX (Storm/Doom/Sentinel)
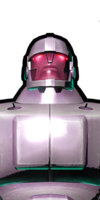
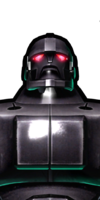
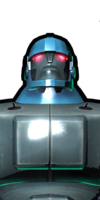
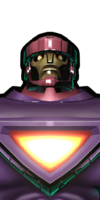
Alternate Colors
| Color 1 | Color 2 | Color 3 | Color 4 | Color 5 | Color 6 | Alt Color |
|---|---|---|---|---|---|---|

|

|
|
|
|

|
|

