Introduction
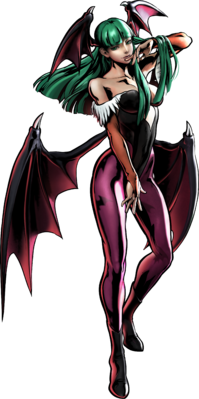
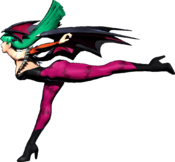
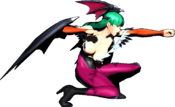
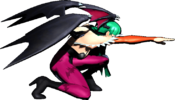
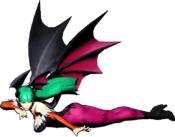
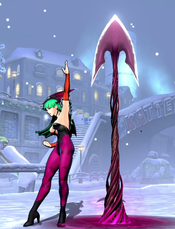
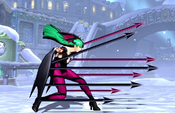
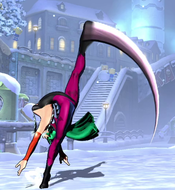
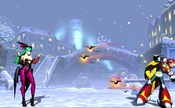
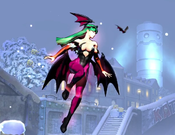
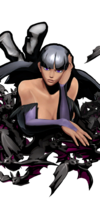
A heir to the ruling clan of the Demon World, Morrigan is a succubus wielding a wide variety of magical abilities. Her most iconic ability is her shapeshifting, mainly in transforming her bat wings into a variety of weapons. She is the main character of the Darkstalkers series, which had heavy influence on the Marvel Vs Capcom series, and has been a mainstay in Capcom's crossover fighting games.
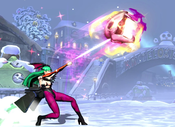
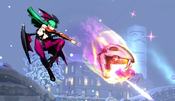
In UMvC3, Morrigan is an oppressive zoning character. Utilizing her uniquely strong fly/unfly cancels, she can fire off both grounded and aerial fireballs with rapid speed, quickly filling the screen. This is further exaggerated by her Astral Vision (22XX) hyper, which creates a clone of Morrigan behind the opponent, using all the same attacks that she does. A well-executed Morrigan fireball pattern can lock down an opponent for a long time, while dealing huge chip damage that puts pressure on the opponent to act hastily.
| Strengths | Weaknesses |
|---|---|
|
|
Unique Mechanic
Morrigan's Flight is uniquely powerful in that she can cancel specials into flight. This allows her to circumvent the recovery of her specials and replace it with the relatively short 11f startup of Flight mode. This is the core of what makes Morrigan's zoning powerful but has a wide variety of other applications, from extending combos to making her command throw safer on whiff. Additionally, Morrigan can cancel the airborne frames on incoming of Cross-over Counter into flight.
Unique Movement
Morrigan's dashes and airdashes work very differently from the standard ones found on other characters:
Her ground dashes, both forward and backward, place Morrigan into an airborne state. She will continue to rise higher into the air for the duration of the dash, ending up just underneath her regular jump height. As a result, Morrigan can not wavedash or plinkdash across the ground the way that most characters can. Instead, Morrigan can access her air normals and air specials relatively quickly, and relatively low to the ground. Morrigan can extend the duration of either dash by holding down the dash input, allowing her to glide fullscreen in a single dash. Her forward ground dash can be canceled from Frame 15 onwards. Her backdash can not be canceled, except with X-Factor.
Morrigan has four valid airdash directions:
- Forward - Travels directly horizontally forward like a standard airdash. Can have its duration extended by continuing to hold forward, similar to her ground dashes.
- Backward - Travels directly horizontally backward like a standard airdash. Can have its duration extended by continuing to hold backward, similar to her ground dashes.
- Down-Forward (Can also be input as Down) - Morrigan swoops forward in a parabolic arc. She initially swoops down, to roughly once character height lower than her initial location. If not canceled, she will then arc and start to fly upwards, eventually ending about one full character height above her initial location. This airdash can not have its duration extended, and will cover roughly fullscreen distance if not canceled early.
- Up-Forward (Can also be input as Up) - Morrigan gives herself a slight upwards boost. This dash has a very short duration that can not be extended by holding the input. If Morrigan cancels this dash with an attack, she will lose all momentum from the dash and begin to fall straight down.
Move List
Assists
| Damage | Startup | Active | Recovery |
|---|---|---|---|
| 25,000 x5 | 27 | 15 | 132, 102 |
| On Hit | On Block | Guard | Properties |
| - | - | Mid | Invuln (as Crossover Counter) frames 1 - ??? |
|
THC Hyper: Shadow Servant. Difficult-to-use anti-air assist with no invincibility and limited horizontal range. Tends to knock opponents too high into the air to be easily used in combos. Shadow Blade has two properties that make it worth considering as an assist choice: First, it is the only of Morrigan's assists to use Shadow Servant as its Team Hyper. Shadow Servant deals comparable damage to Finishing Shower if all enough blades connect, and has the added benefit of hitting OTG. This allows Morrigan (or any teammate) to simply call a THC after any Hard Knockdown to get solid damage. Second, although Shadow Blade has no invincibility as an assist, it does have 4 frames of invincibility when used as a Crossover Counter. Having this assist in the backrow gives any character access to an invincible guard cancel reversal for the cost of 1 bar of meter. As a bonus, Morrigan can freely cancel this attack into Flight once she has entered, to start a combo on hit or protect herself on block/whiff. | |||
| Damage | Startup | Active | Recovery |
|---|---|---|---|
| 70,000 | 39 | - | 128, 98 |
| On Hit | On Block | Guard | Properties |
| - | - | Mid | Priority: Low, Durability: 5 |
|
THC Hyper: Finishing Shower. Morrigan fires a single projectile, that travels at the same speed as the L version of her point fireball. This assist is generally outclassed by other projectile assists, as it will lose to beams or other popular options due to its low durability. | |||
| Damage | Startup | Active | Recovery |
|---|---|---|---|
| - | 25 | - | 110, 80 |
| On Hit | On Block | Guard | Properties |
| - | - | - | - |
|
THC Hyper: Finishing Shower. Assist-exclusive move that Morrigan cannot perform on point. When Morrigan uses this assist successfully, your team is given 30% of a hyper meter bar. This assist has no other effect. One of three meter-building assists in the game, along with Amaterasu's Bloom and Frank West's Pick-Me-Up. This assist is uniquely powerful due to its quick recovery, allowing it to be spammed repeatedly as long as the point character does not require the use of a "real" assist. The window to actually hit Morrigan out of this assist is also very small, further contributing to its spammability. You can also flight cancel or super cancel this move upon using it as a Crossover Counter. You can flight cancel at any point, even if Morrigan hasn't touched the ground. If she doesn't touch the ground however you will not build any meter. | |||
Ground Normals
| Damage | Startup | Active | Recovery |
|---|---|---|---|
| 40,000 | 4 | 3 | 10 |
| On Hit | On Block | Guard | Properties |
| 0 | -2 | Low | - |
|
Standing low attack. Morrigan's 5L is fast even by light attack standards and has solid range. It is an important part of her mixup game, paired with using her unique dash to quickly switch into overhead attacks. You can even air dash j.S to have the j.S whiff into an immediate 5L as an empty low mixup. | |||
| Damage | Startup | Active | Recovery |
|---|---|---|---|
| 55,000 | 8 | 4 | 13 |
| On Hit | On Block | Guard | Properties |
| +1 | -1 | Mid | - |
|
Primarily used to juggle airborne opponents since it reaches higher up than her 2M. | |||
| Damage | Startup | Active | Recovery |
|---|---|---|---|
| 25,000 x4 | 10 | 12 | 9 |
| On Hit | On Block | Guard | Properties |
| +11 | +9 | Mid | - |
|
Multi-hitting attack. Morrigan advances forward very slightly - about half a character length - while kicking around herself. Can protect Morrigan from airborne attacks and even hit behind herself, although its range is not the greatest. This attack is notable for being extremely advantageous on hit or block. It can even link into itself on hit, provided that hitstun deterioration has not progressed to far, and can basically always link into 5L. This gives Morrigan a relatively basic combo extension and allows her to get some free extra damage and meter-build from ground confirms. The move does scale your combos quite a bit, so it's best to avoid if you're going for max damage. However, the decent amount of active frames does allow Morrigan players to possibly confirm the situation for drain loops. | |||
| Damage | Startup | Active | Recovery |
|---|---|---|---|
| 30,000 x2 | 4 | 2(3)2 | 10 |
| On Hit | On Block | Guard | Properties |
| 0 | -2 | Mid | |
|
Note: Not a low. Morrigan does a quick poke with respectable range. If not chained or canceled, she will then perform a second jab with slightly longer range. It is a fantastic move to mash out when trying to challenge your opponent because of its quick startup and she can low profile under so many moves and assists. Things such as teleport character + Doom plasma beam assist can be easily punished since Morrigan will low profile underneath the beam and punish the teleport. | |||
| Damage | Startup | Active | Recovery |
|---|---|---|---|
| 53,000 | 8 | 4 | 16 |
| On Hit | On Block | Guard | Properties |
| -2 | -4 | Low | - |
|
Solid low with decent range. Generally try to go into this button after 5L as some folks will hold up after blocking the 5L and will try to predict fly j.S. Going into this button can check this. Also this button can sometimes hit behind her. | |||
| Damage | Startup | Active | Recovery |
|---|---|---|---|
| 60,000 | 9 | 5 | 23 |
| On Hit | On Block | Guard | Properties |
| - | -7 | Low | |
|
Can hit behind her sometimes. Good button to combo into since it will always cause a soft knockdown. | |||
| Damage | Startup | Active | Recovery |
|---|---|---|---|
| 80,000 | 8 | 4 | 29 |
| On Hit | On Block | Guard | Properties |
| Launch | -12 | Mid | |
|
Morrigan produces a spire in front of her, acting as a disjointed attack that protects Morrigan from the front. Can be used as an anti air given how high it reaches up and away from her. It can be great to punish characters with predictable falling down buttons, even things such as Morrigan j.H. | |||
Aerial Normals
| j.L | Damage | Startup | Active | Recovery |
|---|---|---|---|---|
| 40,000 | 4 | 13 | 10 | |
| On Hit | On Block | Guard | Properties | |
| +6 | +5 | OH | - | |
|
Very fast downward-angled attack. Although it does not work naturally as an instant overhead against normal-sized characters, Morrigan can still use it for dangerous High/Low mixups by performing a quick jump -> down-forward airdash -> j.5L. It is also a very active normal and can lead to easy confirmable air combos when pressing it during a defensive jump back. | ||||
| j.M | Damage | Startup | Active | Recovery |
|---|---|---|---|---|
| 55,000 | 7 | 4 | 26 | |
| On Hit | On Block | Guard | Properties | |
| +12 | +10 | OH | - | |
|
Another fantastic air button from this character. Can hit behind her and can even cross-up opponents when used with her airdash. It has slightly further reach than her j.H while also still being able to hit behind her, so it's a good button that can be used with her when falling down if the opponent is spaced out trying tp punish a falling j.H | ||||
| j.H | Damage | Startup | Active | Recovery |
|---|---|---|---|---|
| 70,000 | 10 | 8 | 20 | |
| On Hit | On Block | Guard | Properties | |
| +14 | +12 | OH | - | |
|
Morrigan surrounds herself in a hitbox, hitting on all sides and protecting herself from anything but highly disjointed attacks or projectiles. Useful against characters with fast grounded movement or teleports, as it can protect Morrigan from being crossed under. Good amount of hit stun also for air to air confirms and Morrigan's staircase combo at super jump heights. | ||||
| j.S | Damage | Startup | Active | Recovery |
|---|---|---|---|---|
| 35,000 x3 | 5 | 23 | 18 | |
| On Hit | On Block | Guard | Properties | |
| +8 | +6 | OH | ||
|
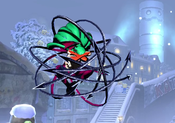
Morrigan's j.S is a uniquely strong offense and neutral tool. She wraps her wings around her legs, forming a "drill" that attacks up to three times while falling. It is extremely fast, making it great to use as a jump-in attack or as a follow-up to her dashes. Due to its multiple hits and large active frame count, it is fairly easy to confirm and can keep an opponent in hitstun for a long time while Morrigan lands to set up her next attack. It also can setup Morrigan's 5L as a mixup when using her Down-Forward airdash if the j.5S is performed low enough so it whiffs and Morrigan lands immediately for her to perform her 5L standing low. All three attacks of the hits act as Air Combo Finishers, and no matter how many of them connect, the last one will spike the opponent downwards for a Hard Knockdown if used after a launcher. If an opponent X-factor guard cancels this move, the other hits will still come out and possibly punish them. Can also crossup the opponent. | ||||
Command Normals
| Damage | Startup | Active | Recovery |
|---|---|---|---|
| 70,000 | 12 | 6 | 22 |
| On Hit | On Block | Guard | Properties |
| +5 | +3 | Mid | |
|
Morrigan thrusts several spikes directly in front of her, creating a large disjointed hitbox. This is Morrigan's only normal that naturally combos into her Soul Drain, though you will only be able to do Shadow Servant super afterwards. | |||
| Damage | Startup | Active | Recovery |
|---|---|---|---|
| 70,000 | 11 | 5 | 29 |
| On Hit | On Block | Guard | Properties |
| -13 | -13 | Mid | |
|
Morrigan performs an arcing, upward kick. This attack knocks opponents upwards on hit, and can be jump-canceled on hit or block. Its primarily useful for setting up certain combo routes, as it allows Morrigan to pursue an opponent up to jump height and perform loops using her aerial normals. Can also option-select into grab if an opponent x-factor guard cancels during a block string of your normals. | |||
Special Moves
| 236L/M /H | Damage | Startup | Active | Recovery |
|---|---|---|---|---|
| 85,000 | 15 | Until Hit | 36 | |
| On Hit | On Block | Guard | Properties | |
| -14 | -16 | Mid | ||
|
Morrigan's most recognizable and important special move. Produces a single projectile that travels across the screen. Its strength lies in the fact that it is fairly fast to fire, can be fired even faster by using Fly/Unfly cancels, and has no restriction on the number of projectiles that can be present on screen at once. L and M Soul Fist are both fired directly forwards, with M version traveling faster than the L version. H Soul Fist is fired upwards at a 45-degree angle. L Soul Fist's slow speed is great at occupying space and trapping the opponent. This strength you will be using the most often as you flood the screen with this slow moving projectile and take control of the screen. M Soul Fist's speed allows it to combo into itself during juggles. This will be the projectile you will be using for juggle combos even from full screen hits from the air H projectile. H Soul Fist upward angle is great at catching opponents trying to jump out of the lockdown and can be great as an anti air if an opponent is being reckless with their approach, easily leading into a confirm or possibly juggles. | ||||
| j.236L/M /H | Damage | Startup | Active | Recovery |
|---|---|---|---|---|
| 85,000 | 10 | - | 42 | |
| On Hit | On Block | Guard | Properties | |
| - | - | Mid | Priority: Low, Durability: 5 | |
|
Air version of Soul Fist. Note that this version has faster startup than the grounded variant. Doing a Tiger Knee'd air fireball (2369H) off the ground actually produces a fireball faster than simply firing a grounded one, although an air Soul Fist done this way can be ducked by most characters. As with the grounded version, it is at its strongest when rapidly fired as part of a Fly/Unfly pattern. L and M versions fire downwards at a 45-degree angle. As with the grounded variants, the M version travels faster but is otherwise identical. H version is a horizontal shot fired directly forwards. Air Soul Fist has a small amount of "recoil" and will push Morrigan backwards about half a character length on use. L slow speed just like the grounded version occupying space and trapping the opponent. You should be jumping at angles and funnel them downwards with this projectile to keep them locked down onto the ground. Also this will be the go to projectile when attempting Morrigan's Drain loops as the Astral Vision clone fireball hitting last during a juggle allows Morrigan to juggle the opponent into multiple Soul Drains. M fast speed allows for faster chip but will of course won't provide as much lockdown given its speed. Can be good for additional hits of damage when you know a fireball juggle can't be extended, though it cannot really create a juggle given its speed. H will be your other projectile to keep the opponent locked down from jumping/dashing out of your zoning game. You can react if an opponent gets hit by this version and then juggle with the grounded M projectile even from full screen. | ||||
| j.236S | Damage | Startup | Active | Recovery |
|---|---|---|---|---|
| 85,000 | 26 | - | 34 | |
| On Hit | On Block | Guard | Properties | |
| -12 | -14 | Mid | ||
|
Special Soul Fist variant. Soul Drain takes noticeably longer to start up than a normal fireball, making it easily recognizable. The fireball produced also has small bats following it, which the regular versions lack. Soul Drain does have faster recovery than her other fireballs, but Fly/Unfly cancels make this a non-factor. Once fired, Soul Drain travels with the same speed and trajectory as Soul Fist L (straight ahead on the ground, down-forward in the air). Soul Drain stands out from Morrigan's other fireballs in that it steals meter from the opponent on hit. Meter will be stolen if the fireball hits either the point character or an assist, but does not steal on block. Soul Drain can be mixed into Morrigan's fireball patterns to occasionally supplement her meter generation, allowing her to use Astral Vision more frequently. Soul drain will only steal meter from your opponent, if it hits an opponent with 0 bar you will not gain any meter. If your opponent has less than 30% of a bar, it will just steal all of it. It also has use as anti-Dark Phoenix tech, since it can be used just before killing her to deny her from having all 5 bars necessary to transform. You can find various ways to combo Soul Drain as well as tag into Morrigan to combo Soul Drain on Phoenix in the Videos section. They are situational however if the Phoenix doesn't have the life to take the hits of the combo before the Soul Drain hitting. Regardless it's still a fantastic tool to have for that matchup as Morrigan is the only character that can reliably steal meter in this game. Due to the move's slow startup, Morrigan can only combo into it with specific situations like on a grounded opponent after 6M, before an OTG Shadow Servant or using X-Factor. With various assists and/or Astral Vision active, she can combo and juggle an opponent with multiple Soul Drains. This can easily steal up to 1.2-3 bars of meter from the opponent leading to more astral visions and depriving your opponent with meter. You can find various setups in the Soul Drain Setups section. | ||||
| L |
Damage | Startup | Active | Recovery |
|---|---|---|---|---|
| 80,000 | 3 | 8 | 32/Until grounded +11 | |
| On Hit | On Block | Guard | Properties | |
| -4 | -19 | Mid | ||
| M |
Damage | Startup | Active | Recovery |
| 35,000 x3 | 3 | 7 | 48/Until grounded +11 | |
| On Hit | On Block | Guard | Properties | |
| -15 | -30 | Mid | ||
| H |
Damage | Startup | Active | Recovery |
| 28,000 x5 | 3 | 15 | 50/Until grounded +11 | |
| On Hit | On Block | Guard | Properties | |
| -21 | -36 | Mid | ||
|
Uppercut special. Although it has no invincibility, it is very fast at 3 frame startup, and the recovery can be flight canceled. Mainly used at the end of combos for slightly more damage before canceling into Finishing Shower or Darkness Illusion. Shadow Blade can not be Unfly canceled despite being able to be Flight canceled, so it is risky to use if already in flight, except in combos. All versions of Shadow Blade are not subject to hitstun deterioration. The H can option select grabs since its final input is 6H. | ||||
| L |
Damage | Startup | Active | Recovery |
|---|---|---|---|---|
| 120,000 | 5 | 2 | 20 | |
| On Hit | On Block | Guard | Properties | |
| - | - | Throw | ||
| M |
Damage | Startup | Active | Recovery |
| 150,000 | 3 | 2 | 22 | |
| On Hit | On Block | Guard | Properties | |
| - | - | Throw | ||
| H |
Damage | Startup | Active | Recovery |
| 170,000 | 1 | 2 | 24 | |
| On Hit | On Block | Guard | Properties | |
| - | - | Throw | ||
|
Grounded command grab. H version is the fastest, at 1 frame of startup, but has shorter range. L version takes longest to startup but has the greatest range. All versions (even H version) have superior range to Morrigan's normal ground throw. On a successful grab, Morrigan pulls the opponent into an animation almost identical to her regular airthrow, ending with a Hard Knockdown a short distance away. Morrigan can follow this up with Shadow Servant (623XX) OTG for some damage, but does not get much else after the throw. Vector Drain is notable as an offense tool because its whiff animation can be flight-canceled. If an opponent jumps out of the grab attempt, Morrigan can seamlessly transition into flight and continue to pressure. Morrigan's command throw allows for an number of frames between the down-back and back inputs. You can input the first 4 component directions of the attack, then do just about anything until you finally hit the back input, upon which you must finish the throw command. You can even cross up your opponent and the input will be stored until you do the back input on that new side | ||||
| Damage | Startup | Active | Recovery |
|---|---|---|---|
| - | 11 | - | 0 |
| On Hit | On Block | Guard | Properties |
| - | - | - | 111 frame flight mode |
|
Morrigan's flight mode is exceptionally strong, even among characters that have access to flight, and forms the core of her gameplan. Although characters with flight can universally cancel normal attacks into Fly/Unfly in order to recover faster, Morrigan is unique in that she can also cancel her special moves into Flight activation. Morrigan primarily uses this by repeatedly canceling her Soul Fist fireball specials with Flight and Unfly commands, letting her shoot them much faster than would otherwise be possible. Unfly is particularly strong as a cancel tool because it takes only a single frame. This means that virtually any of Morrigan's normals or specials (except for Shadow Blade, which cannot be Unfly canceled) can have an effective 1 frame of recovery if Morrigan performs it while flying. Not only is Morrigan able to relentlessly attack the opponent with repeatedly canceled moves, but she does so at extremely low risk. Attempts to blow through Morrigan's offense with invulnerable hypers or beams are ineffective, as Morrigan can always Unfly to return to a neutral state, then block the attack. If Morrigan moves while in flight, then airdashes, her flight's momentum will be partially preserved and added to the airdash, allowing her to move slightly faster than normal. | |||
Hyper Combos
| Damage | Startup | Active | Recovery |
|---|---|---|---|
| - | 10+6 | 590 | 13 |
| On Hit | On Block | Guard | Properties |
| - | - | - | - |
|
Morrigan produces a mirrored copy of herself. The copy is invulnerable, and is always located on the opposite side of the opponent's character from the real Morrigan, an equal distance away. Morrigan's mirror image will copy any movement or attacks (except hypers) that the real Morrigan performs, and the mirrored attacks will hit for an equal amount of damage. This hyper is the core of Morrigan's gameplan and what elevates her zoning from "very good" to "nearly inescapable". Astral Vision effectively doubles the total number of projectiles on screen, further limiting the opponent's movement and chip damage taken. More importantly, even characters who have enough projectile firepower to compete with Morrigan's fireball patterns can not aim those attacks backwards to protect themselves. If someone like Dormammu attempts to use their beam hyper to blow through Morrigan's zoning, they will simply be hit from behind instead. Fireballs/other attacks from Morrigan's clone build the same meter as normal - including Soul Drain's meter-steal effect. This makes it easy for Morrigan to generate enough meter during one Astral Vision for it to pay for itself, allowing her to go directly into another install as soon as it ends. She can even utilize setups that allow her to combo into multiple Soul Drains during Astral, stealing 1~2 bars at once. Astral Vision ends immediately if Morrigan tags out or uses any of her other hypers. If not canceled early by one of these actions, it lasts 590 frames (just under 10 seconds). However with 13 frames of Recovery, it is not safe to activate unprotected vs certain characters. Characters like Akuma or Dormammu can freely punish it full screen with their beam supers. A point blank soul fist hitting the opponent that is canceled into Astral Vision can be punished by a snapback. Try to ensure when getting ready to activate Astral Vision, the opponent is knocked down, pinned down by assists/Soul Fists, or is at a reasonable distance while also not being one of those specific character. | |||
| Damage | Startup | Active | Recovery |
|---|---|---|---|
| 10,000 x35 ~ x70 | 18+2 | 69 | 21 |
| On Hit | On Block | Guard | Properties |
| +13 | +14 | Mid | |
|
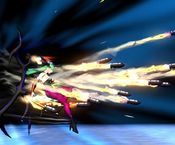
Morrigan floats in the air, while her wings fire a barrage of missiles. The missiles fan out semi-randomly from Morrigan's position, but they can also be steered by the player. Holding up ( If Morrigan is going to end a combo with a hyper, and not simply back off to save meter for Astral Vision, this is her most common ender. In the corner, Morrigan can link a TAC or j.5S into Shadow Servant (623XX) after this hyper. Finishing Shower cannot be push-blocked, with the help of an assist to keep the opponent pinned down, this can setup high/low incoming mixups. You can find a video of this below. | |||
| Damage | Startup | Active | Recovery |
|---|---|---|---|
| 60,000 x5 | 10+10 | 44 | 21 |
| On Hit | On Block | Guard | Properties |
| - | -45 | Mid | Invuln until frame 29, |
|
Morrigan poses, and then 5 blades rise up from the ground, starting immediately in front of Morrigan and appearing progressively further away. This is Morrigan's only OTG, and thus her only way to get additional damage off a throw or other Hard Knockdowns. This hyper is nor particularly damaging, and due to how the blades appear, it will deal significantly less damage if performed close to the corner, or when farther away from the opponent. In many cases, Morrigan players will use a Hard Knockdown to activate Astral Vision instead, as they get more value out of the chip and meter generation than they would from this hyper's raw damage. Shadow Servant is also very invincible, and works as a reversal, especially when used as a countercall to an opponent's hyper. While airborne, Morrigan has access to Unfly -> Block to protect herself from enemy attacks, and Shadow Servant gives her an alternate defensive tool to use on the ground.- | |||
| Damage | Startup | Active | Recovery |
|---|---|---|---|
| 405,000 | 16+0 | 79 | Until grounded |
| On Hit | On Block | Guard | Properties |
| - | -21 | Mid | Invuln until frame 27, |
|
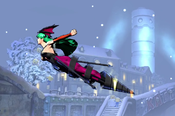
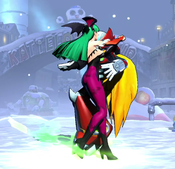
Cinematic level 3 hyper. Morrigan glides across the screen, and pulls the opponent into a cut-scene on contact. As a level 3 hyper, it ignores damage scaling and can be used at the end of combos in place of Finishing Shower to secure a kill. Darkness Illusion is VERY active, and Morrigan can travel almost the entire duration of the screen before it wears off and can no longer hit. It can be performed on the ground or while airborne. The animation for the grounded and airborne versions are different, but the total damage done is the same. Darkness Illusion has zero frames of startup after the flash. At point blank range, if an opponent is not already blocking before the hyper flash occurs, the attack can not be blocked. It also means that opponents can not protect themselves by buffering an X-Factor cancel or DHC during the hyper flash. The hyper ends with the opponent in a Hard Knockdown state, and Morrigan reappears next to them. She will appear on the same side when the super hit for the grounded version, while the air version she will appear on the opposite side when it hit. It is possible to immediately perform a 623XX OTG hyper just as Morrigan recovers to get some extra damage, if needed. | |||
Universal Mechanics
| Damage | Startup | Active | Recovery |
|---|---|---|---|
| 80,000 | 1 | 1 | - |
| On Hit | On Block | Guard | Properties |
| - | - | Throw | |
|
Morrigan performs a hip toss, placing the opponent on the ground about one character length away from her. It is possible with tight timing to connect a 623XX Shadow Servant OTG immediately afterwards. | |||
| Damage | Startup | Active | Recovery |
|---|---|---|---|
| 80,000 | 1 | 1 | - |
| On Hit | On Block | Guard | Properties |
| - | - | Airthrow | |
|
Morrigan Izuna Drops the opponent. Can be followed up with Shadow Servant, but the damage is not great, as the opponent is placed too far away for every blade to connect. | |||
| Damage | Startup | Active | Recovery |
|---|---|---|---|
| 50,000 | 2 | 6 | 26 |
| On Hit | On Block | Guard | Properties |
| - | -11 | Mid | Snapback |
|
Animation and hitbox based on 6M. | |||
| Damage | Startup | Active | Recovery |
|---|---|---|---|
| 30,000 | - | 21 | 34 |
| On Hit | On Block | Guard | Properties |
| - | -18 | OH | |
|
Animation is based off Morrigan's air 5M. Can sometimes combo into Shadow Blade into a full combo if the tag hits an opponent at a certain height/angle. | |||
Team Position
Morrigan's most (in)famous team compositions feature her as the point character. As players start with a bar of meter already available, she can activate Astral Vision very early in the match and shut an opponent down before they ever get a chance to capture momentum. Additionally, having access to two different assists - one to cover the air and one to cover the ground - significantly improves her zoning game and can patch any holes in her fireball pattern that may appear.
Despite being such an effective point character, she is sometimes also played in the second position, especially behind a character that is good at stalling. This allows Morrigan to build meter by repeatedly spamming her Dark Harmonizer assist, which deals no damage but uniquely builds a large amount of meter. This meter can then be used by Morrigan herself or for the other characters on her team. Morrigan has won no shortage of majors as both a point and second character, so neither role is particularly limited in effectiveness.
Notable Synergies
Doctor Doom: The infamous "Morridoom" shell that swept every major tournament for over a year. Doom's "hidden missiles" assist perfectly covers the superjump height that is otherwise a weak point in Morrigan's fireball game. If Doom happens to find himself tagged in, his playstyle aligns exactly with what Morrigan wants. Doom can run away and build meter using Flight and projectile specials, then throw out one of his safe Level 1 Hypers to DHC back to Morrigan with Astral Vision. Also allows Morrigan to kill with Doom's TAC infinites from anywhere on the screen. A well-executed Morrigan/Doom team is borderline impenetrable. Doom is out for a while during hidden missiles, so it is up to the Morrigan player to protect him with either Soul Fists or by crossing over the opponent so Doom is behind them instead.
Players to Watch: ChrisG (Morrigan/Doom/Vergil, active), RF (Morrigan/Doom/Vergil, active), Rok (Morrigan/Doom/Ammy, active), Escalante (Magneto/Morrigan/Doom, active), Cosmos (Morrigan/Doom/Vergil, active), Jason_Gamedev (Morrigan/Doom/Vergil, active), ShadyK (Morrigan/Doom/Vergil, inactive), JRosa (Morrigan/Doom/Strider, inactive), KJMasta (Morrigan/Doom/Vergil, active), Zoolaw (Morrigan/Doom/Vergil, inactive), Buckethead (Zero/Morrigan/Doom, inactive),
Vergil: Even on block, Vergil's Rapid Slash assist will drag the opponent all the way to the far end of the screen. This is especially frustrating when called by a strong keepaway character like Morrigan. Opponents will slowly inch forward against Morrigan's fireball pressure, constantly bleeding chip damage along the way, then block a Rapid Slash and be sent all the way back to the end of the screen. Gives access to one of Morrigan's most easy and consistent Soul Drain loops. In addition, dark harmonizer assist gives Vergil extra meter to use for DT/Swords and putting them into block pressure
Players to Watch: ChrisG (Morrigan/Doom/Vergil, active), ShadyK (Morrigan/Doom/Vergil, inactive), RF (Morrigan/Doom/Vergil, active), Cosmos (Morrigan/Doom/Vergil, active), Zoolaw (Morrigan/Doom/Vergil, inactive), Jason_Gamedev (Morrigan/Doom/Vergil, active), KJMasta (Morrigan/Doom/Vergil, active)
Chun-Li: Chun has a double-jump and triple-jump, as well as multiple aerial specials that keep her airborne or even let her climb higher, like Spinning Bird Kick and Tenshokyaku. These allow her to stall and run away in the air for a long time, even without using a superjump. A point Chun can run away for a long time while Morrigan repeatedly builds meter on the ground with her Dark Harmonizer assist. Additionally, both of these characters have fairly consistent TAC infinites from both midscreen and corner positions. If either of these two get a hit, they can always TAC to the other to secure a kill.
Players to Watch: RyanLV (Chun/Morrigan/Phoenix, inactive), Acentric (Chun/Morrigan/Phoenix, active)
Phoenix: The infamous X/Morrigan/Phoenix team is quite potent, by running Morrigan as a meter building engine through the usage of the quick acting Dark Harmonizer assist, you can quickly build 5 bars to reach the goal of Dark Phoenix nearly every game. Combined with Morrigan's TAC infinite to get meterless kills, few teams have answers once Phoenix reaches 5 bars on top of potentially still having to deal with a full life team. Even playing Phoenix without the 5 bars is still great though can be difficult given her mobility and tools in the event your first character dies. You can also easily tag out your first character for Morrigan with Astral Vision. Even without an assist to support Morrigan, Astral Vision still shuts down many characters.
Players to Watch: RyanLV (Chun/Morrigan/Phoenix, inactive), Alioune (Magneto/Morrigan/Phoenix, inactive), Mothman (MODOK/Morrigan/Phoenix, active), Rusty Shackleford (Morrigan/Ammy/Phoenix, active), Snaketits (VJoe/Morrigan/Phoenix, active), Acentric (Chun/Morrigan/Phoenix, active)
MODOK: Similar to Chun above, MODOK is notable as a character that can stall in the air for a long time without using superjump, thus leaving assists available and allowing him to rapidly build meter with a backline Morrigan. In MODOK's case, he has two different flight modes to work with: one granted by his jump and another through his 214S command. Modok can float above superjump height for a very long time.
Players to Watch: Mothman (MODOK/Morrigan/Dante, MODOK/Morrigan/Phoenix, active)
Other Players to Watch: Terry Bogard (Morrigan/Dante/Strider, inactive), Dieminion (VJoe/Strange/Morrigan, inactive), Whatneutral (Morrigan/Vergil/Dante, active), Busby (C.Viper/Morrigan/Strider, inactive), Wero (VJoe/Raccoon/Morrigan, active)
Alternate Colors
| Color 1 | Color 2 | Color 3 | Color 4 | Color 5 | Color 6 | Alt Color |
|---|---|---|---|---|---|---|
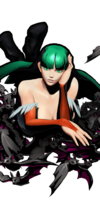
|
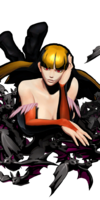
|
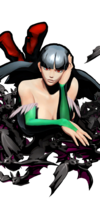
|
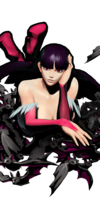
|
|

|

|
Videos and External Resources
0M Anti-Phoenix setups with Vergil+Morrigan
Finishing Shower incoming setup with Missiles assist
Darchon's Morrigan Guide Pt. 1
Morrigan Guide Pt. 2
Morrigan Guide Pt. 3
Rapid Fireball Guide for Pad Users
Fake TAC Reset feat. Felicia
Anti-Pushblock Setups
Vajra Punishes
Double TAC Tech
Players To Watch
| Name | Team | Region | Status | Notes | Matches |
|---|---|---|---|---|---|
| NYChrisG | West Coast | Active | The best Morrigan and arguably the best player in UMVC3 history. more text later. | Link
| |
| RyanLV | West Coast | Inactive | more text later. | Link | |
| RF | Japan | Active | Arguably the strongest Japanese player in UMVC3. More info later | Link
| |
| Escalante | East Coast | Active | more text later. | Link
| |
| Cosmos | East Coast | Active | More info later | Link
| |
| Mothman | West Coast | Active | More info later | Link
| |
| Jason_Gamedev | West/East Coast | Active | One of the late bloomers in UMVC3's competitive history. Most known for getting 2nd place at CEO 2021 and contributions to playing UMVC3 via Parsec during the COVID-19 pandemic. Notable for his utilization of Soul Drain loops with Morrigan to drain up to 2.4 bars of meter from his opponents and one of the few users to use that underused strategy. | Link
| |
| Rok | West Coast | Active | more text later. | Link
| |
| KJMasta | East Coast | Active | More info later | Link
| |
| Zoolaw | Japan | Inactive | More info later | Link
| |
| Terry Bogard | Texas | Inactive | More info later | Link
| |
| Snaketits | West Coast | Active | More info later | Link
| |
| JRosa | East Coast | Inactive | More info later | Link
| |
| Busby | Texas | Inactive | More info later | Link | |
| Dieminion | East Coast | Inactive | One of the original Morrigans. Dieminion was one of the pioneers of Morrigan in the early stages of the game's history even before NYChrisG who was still playing characters such as Ryu and Wesker. With a combination of Viewtiful Joe's strong zoning game backed by Dr Strange's powerful assist and Morrigan's Dark Harmonizer assist, he alongside NYChrisG later on introduced a more defensive zoning type of play during the game's early more rushdown focused meta.
He became less active by 2015 as his main focus was still Street Fighter and hasn't competed in UMVC3 in years, but is still remembered as one of the early pioneers of zoning in UMVC3. |
Link
| |
| Alioune | France | Inactive | More info later | Link
| |
| Rusty Shackleford | West Coast | Active | More info later | Link
| |
| Whatneutral | West Coast | Active | More info later | Link |

